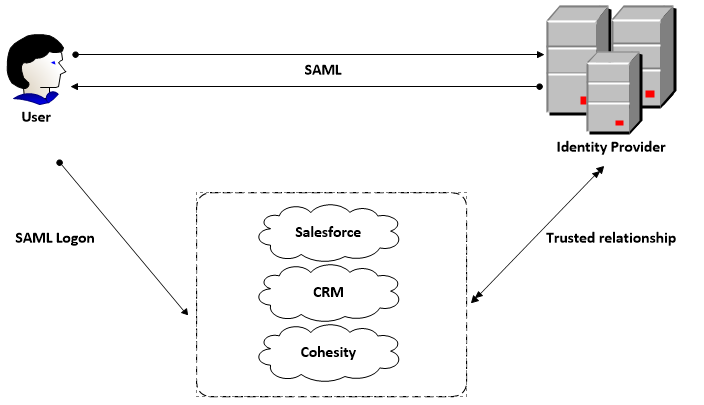
SSO
vSphere 5.1 introduces vCenter Single Sign On as part of the vCenter Server management infrastructure. This change affects vCenter Server installation, upgrading, and operation. Authentication by vCenter Single Sign On makes the VMware cloud infrastructure platform more secure by allowing the vSphere software components to communicate with each other through a secure token exchange mechanism, instead of requiring each component to authenticate a user separately with a directory service like Active Directory
How vCenter Single Sign-On Affects vCenter Server Upgrades
- When you upgrade to vCenter Server 5.1, the upgrade process installs vCenter Single Sign-On first and then upgrades vCenter Server.
- In upgrades to vCenter Server versions earlier than vCenter Server 5.1, both the local operating system users and Active Directory users that are registered with vCenter Server before the upgrade continue to work with the upgraded vCenter Server. This behavior changes in vCenter Server 5.1.
- In vCenter Server 5.1, if vCenter Single Sign-On is running on a virtual machine or physical machine that is joined to an Active Directory domain, Single Sign-On will automatically discover the existing Active Directory domain and add it as an identity source during the Single Sign-On installation process. If Single Sign-On is not running on a virtual machine or physical machine that is in the same domain as Active Directory, you must use the vSphere Web Client to log in to vCenter Server and add the Active Directory domain to Single Sign-On.
- If you install vCenter Single Sign-On and vCenter Server on the same physical machine or virtual machine, Single Sign-On recognizes existing local operating system users. After the upgrade, you can log in to vCenter Server with a registered local operating system user ID.
- If you install vCenter Single Sign-On and vCenter Server on different hosts or virtual machines, the former local operating system users who managed login access to vCenter Server are not available to Single Sign-On.
- When you install vCenter Single Sign-On in multisite mode or clustered high availability mode, all pre-upgrade permissions for local operating system users are lost. In vCenter Server 5.1, the term “local operating system users” refers to those local users in the Single Sign-On host machine instead of the vCenter Server host machine or virtual machine.
- After the upgrade, if no super administrator remains (the administrative user or group for the root folder), you must provide a valid user or group to be used as super administrator during installation. This situation can occur due to changes in user stores from pre-5.1 to 5.1 versions of vSphere.
vCenter Single Sign-On Deployment Modes
vCenter Server provides several ways to deploy vCenter Single Sign-On to best serve your vSphere environment
You can deploy vCenter Single Sign-On in one of three modes.
Basic Mode installs a standalone version of vCenter Single Sign-On. Multiple vCenter Server and Inventory Service instances can point to it. If the Single Sign-On server or the virtual machine hosting the server fails, administrators cannot access vCenter Server, but ESXi hosts continue to function normally. Multiple Active Directory and OpenLDAP instances can be added as identity sources.
- High Availability Cluster
Cluster Mode installs to two or more vCenter Single Sign-On Instances in High Availability mode. All instances use the same database and point to the same identity sources. Single Sign-On administrator users, when connected to vCenter Server through the vSphere Web Client, will see the primary Single Sign-On instance.
Multisite is designed for deployments with multiple physical locations. Installing a Single Sign-On instance at each site allows fast access to local authentication-related services. Each Single Sign-On instance is connected to the local instances of the AD (LDAP) servers and has its own database with local users and groups. In each datacenter, you can install Single Sign-On in standalone or clustered mode, pointing to the identity sources in that location.
Multisite deployment is useful when a single administrator needs to administer vCenter Server instances that are deployed on geographically dispersed sites. To view all vCenter Server instances from a single vSphere Web Client, you must configure the vCenter Server instances in Linked Mode.
vCenter Single Sign On Components
vCenter Single Sign On includes these components: STS (Security Token Service), an administration server, vCenter Lookup Service, and the RSA SSPI service.
When you install vCenter Single Sign-On, the following components are deployed.
- STS (Security Token Service)
The STS service issues Security Assertion Markup Language (SAML) tokens. These security tokens pass information about a system user between an identity provider and a web service. This service enables a user who has logged on through vCenter Single Sign-On to use multiple web-service delivered applications without authenticating to each one.
The Administration Server configures the vCenter Single Sign-On server and manages users and groups.
The Lookup Service contains topology information about the vSphere infrastructure, enabling vSphere components to connect to each other securely.
The Security Support Provider Interface ia a Microsoft Windows based API used to perform authentication against Security Support Providers such as NTLM and Kerberos.
Identity Sources for vCenter Server with vCenter Single Sign On
vCenter Server 5.1 with vCenter Single Sign On adds support for several new types of user repository. vCenter Server versions earlier than version 5.1 supported Active Directory and local operating system users as user repositories. vCenter Server 5.1 supports the following types of user repositories as identity sources.
- Active Directory
- OpenLDAP
- Local operating system
- System
Required vCenter Single Sign-On Database Users
When you use an existing database rather than the database bundled with vCenter Single Sign-On, the installation process requires database users with certain permissions.
When you install Single Sign-On installation using an existing database, the installer requires you to enter the user names and passwords of an existing database administrator and a database user.
When you install Single Sign-On with the bundled Microsoft SQL Server 2008 R2 Express database, the installer creates two users:
- A database administrator user (for example, RSA_DBA) and password, which are used to set up the Single Sign-On database schema.
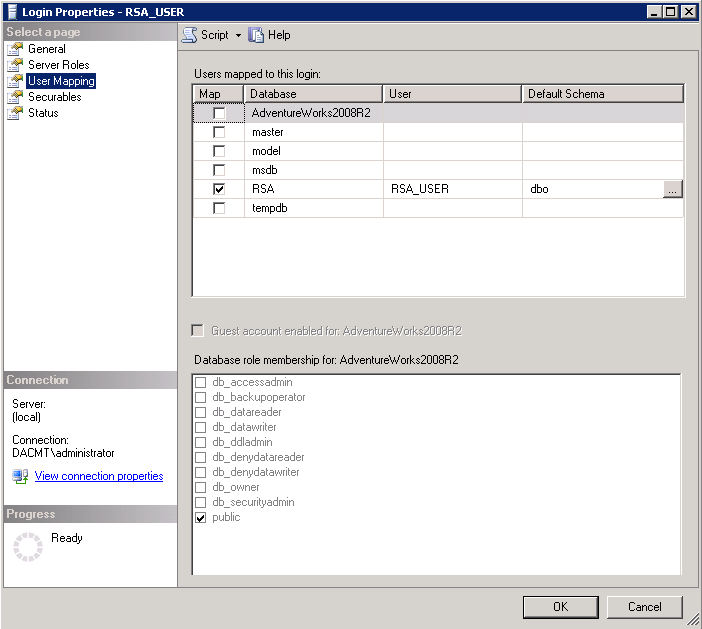
- A database user (for example, RSA_USER) and password, which are used to perform certain steps after the installation. The installer prompts you to enter the passwords for these users.
The RSA_DB is used for creating the schema (DDL) and requires DBO Permissions. RS_USER reads and writes data (Only DML)
Prerequisite for the vCenter Single Sign On Database
- Create a vCenter Single Sign On database, unless you plan to install the bundled database.
- If you are using an existing database with your vCenter Single Sign-On installation or upgrade, make sure that the table spaces are named RSA_DATA and RSA_INDEX. Any other table space names will cause the vCenter Single Sign-On Installation to fail.
- If you are using an existing database for Single Sign On, to ensure that table space is created for the database, run the script rsaIMSLiteDBNameSetupTablespaces.sql. The script is included in the vCenter Server installer download package, at
vCenter Server Installation directory\Single Sign On\DBScripts\SSOServer\Schema\msssql
- You can run the script prior to the vCenter Server upgrade, or during the upgrade, when you are prompted by the Single Sign On installer. You can leave the installer to run the script, and resume the installer after you run the script.
- If you are using an existing database for Single Sign On, you must create a database user (RSA_USER) and database administrator (RSA_DBA) to use for the Single Sign On database installation and setup. To create these users, run the script rsaIMSLiteDBNameSetupUsers.sql. The script is included in the vCenter Server installer download package, at
vCenter Server Installation directory\Single Sign On\DBScripts\SSOServer\Schema\msssql
Procedure
- Log into your SQL Management Server
- Open SQL Management Studio
- Double click on the first script
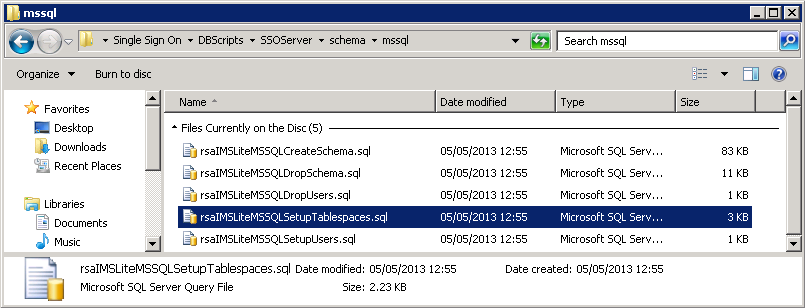
- This will automatically open in SQL Management Studio
- Read the notes at the top of the script
- There are several places you need to change paths according to your environment – see below where it says CHANGE ME
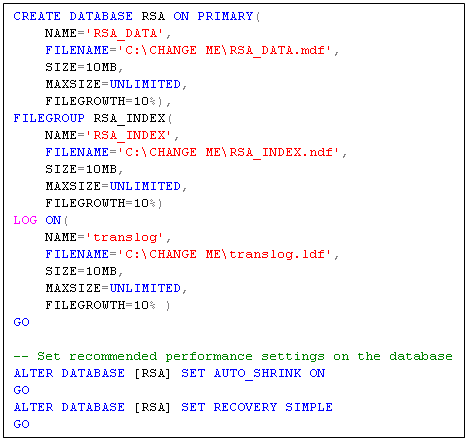
- Next Click Execute on the SQL Management Studio Toolbar
- It should say Command(s) completed successfully and you should see the newly created RSA Database
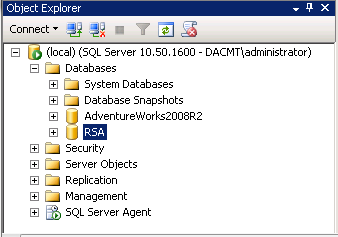
- Next double click on the second script
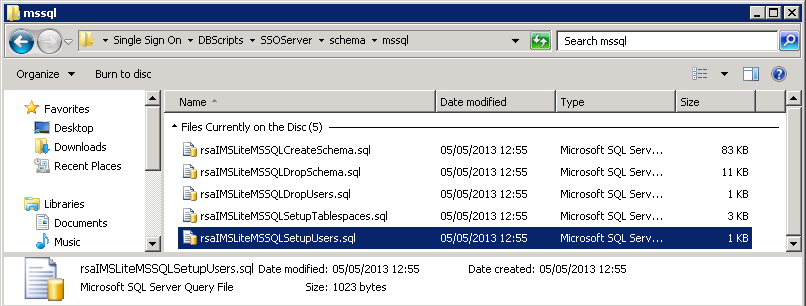
- This will open in SQL Management Studio and you will need to modify the passwords as you require as per below
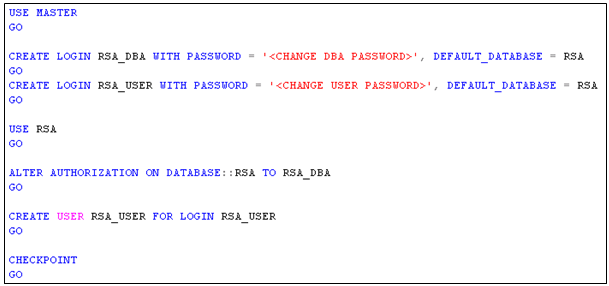
- Click Execute
- It should say Command(s) completed successfully
- You should now see the following permissions set on the RSA Database Properties
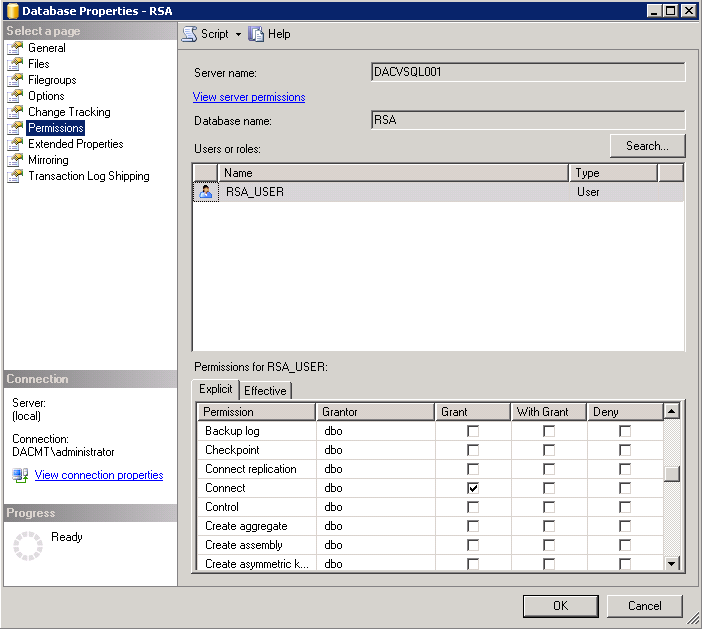
- And check the Default Security in SQL Management Studio to make sure your users have been created
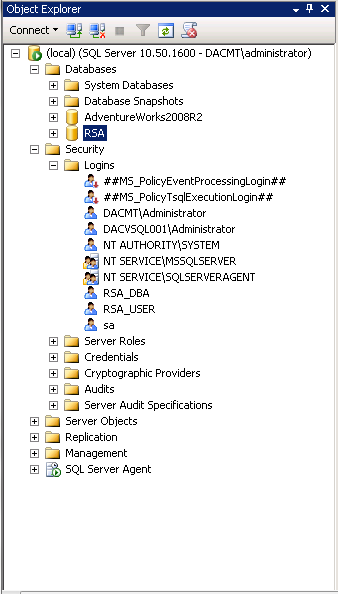
- Check the Properties of the RSA_USER account
- Make sure it is mapped to the RSA Database
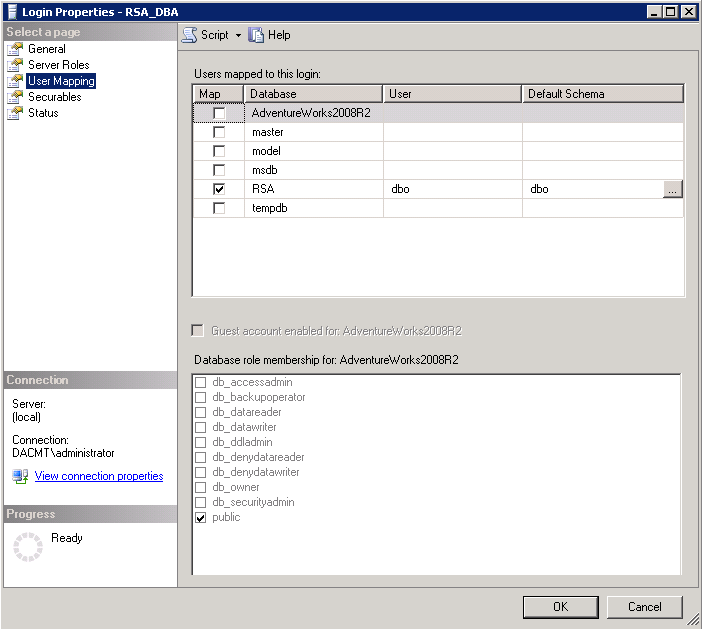
- Check the Properties of the RSA_DBA account
- Make sure it is mapped to the RSA Database
Procedure following the vCenter SQL Scripts
- In the software installer directory, double-click the autorun.exe file to start the installer.
- Select vCenter™Single Sign On and click Install.
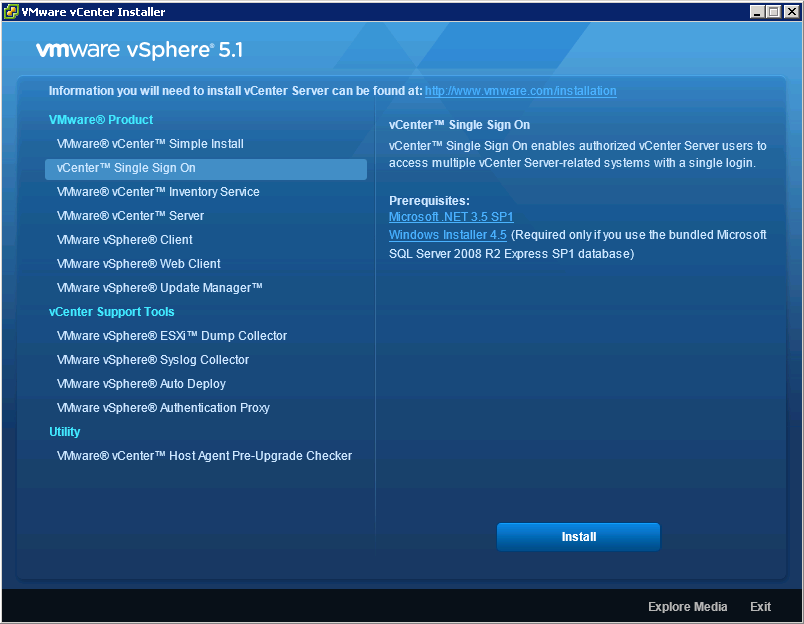
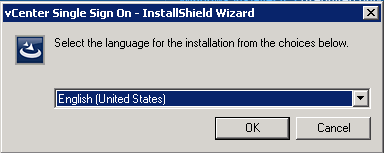
- Follow the prompts in the installation wizard to choose the installer language
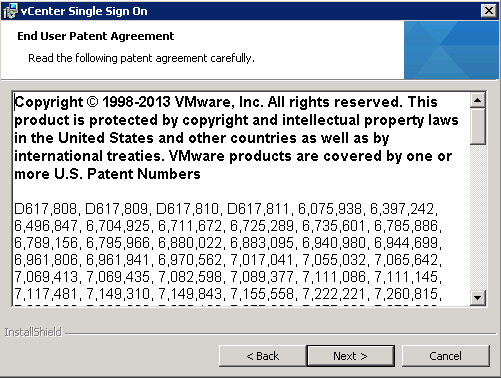
- Agree to the end user patent and license agreements.
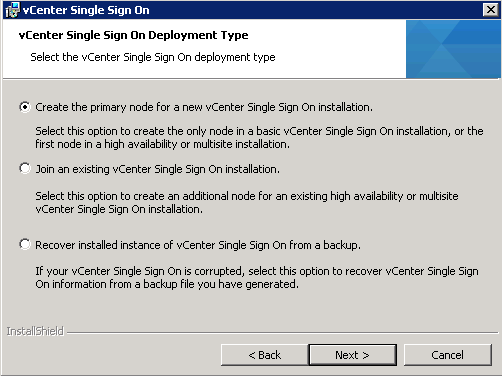
- Select Create the primary node for a new Single Sign On installation.
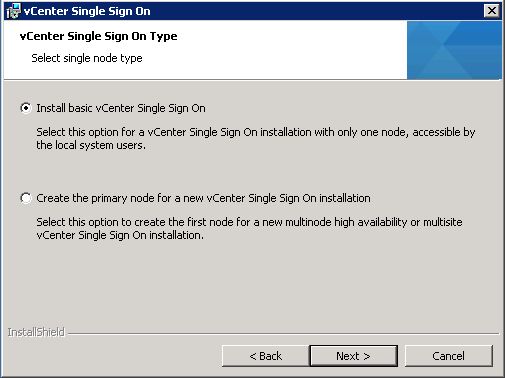
- Select Install basic vCenter Single Sign On. Note: Even if you don’t want multiple instances now, you may want them in the future therefore you can keep your options open by selecting the second option – “Create the primary node for a new vCenter Single Sign-On installation
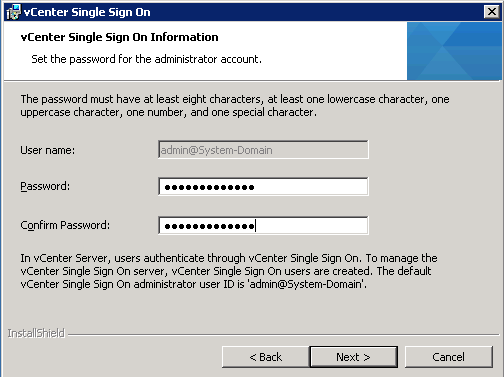
- Set the password for the vCenter Single Sign-On administrator account.
The password must have at least eight characters, at least one lowercase character, one uppercase character, one number, and one special character.
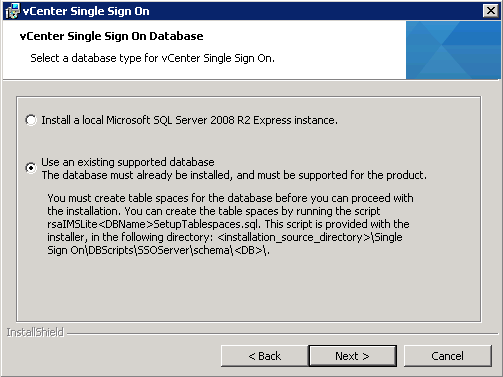
- Select the database type for vCenter Single Sign-On. I am going to use “Use an existing supported database”
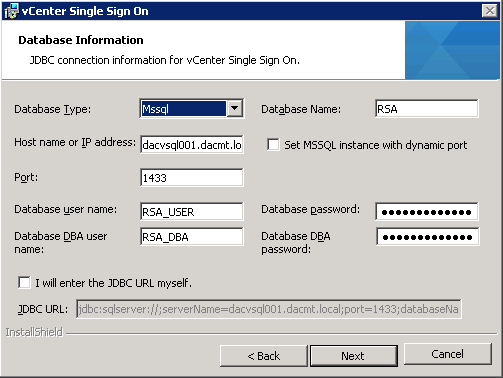
- Enter in the details of your previously created SSO DB and relevant users. If you are using an existing database, enter the JDBC connection information.
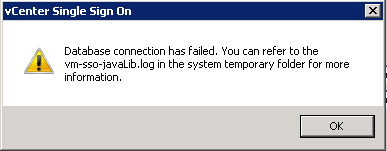
- If you get the following error, do the following
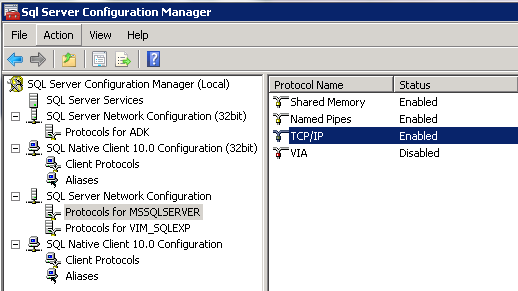
- Go to SQL Server Configuration Manager > SQL Server Network Configuration > Protocols for MSSQLSERVER. Double click on TCP/IP and make sure under IPAll, you have the correct SQL Port number.
- and you will get this box
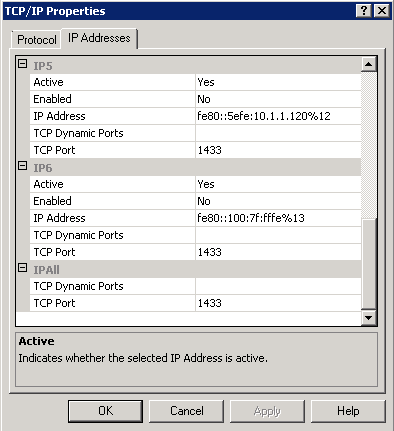
- Note: I had another SQL Instance using 1433 which I had to change to another port number then change my MSSQLSERVER Instance TCP Port to 1433. Note: Restart the relevant services following these changes
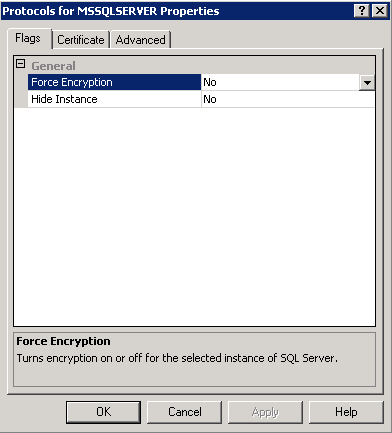
- Also check the following setting. Go to SQL Server Configuration Manager > SQL Server Network Configuration > Right click on Protocols for MSSQLSERVER. Force encryption should be No at the moment
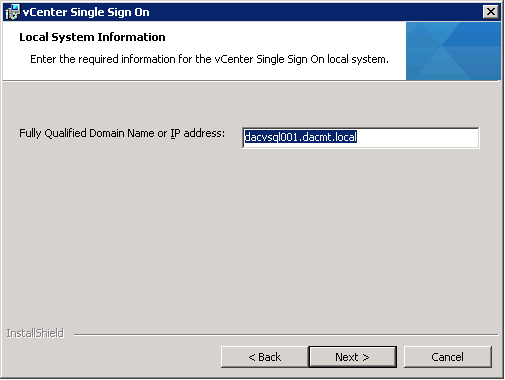
- Enter the FQDN or IP address for the vCenter Single Sign-On host machine.
- (Optional) Enter the SSPI service account information.
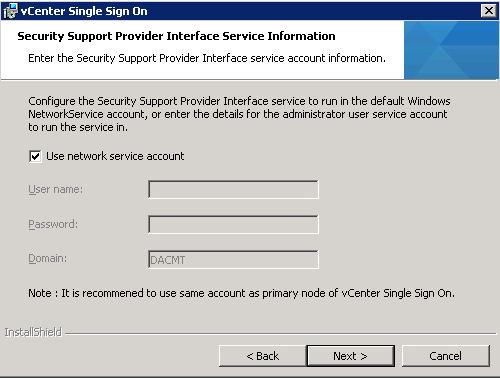
- You can use the default Windows NetworkService account, or enter the account information for a administrator user. This step applies only if you logged in as a domain account user to install Single Sign-On.
- Choose a destination folder for installation
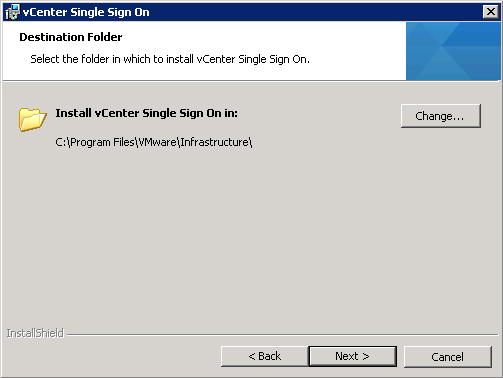
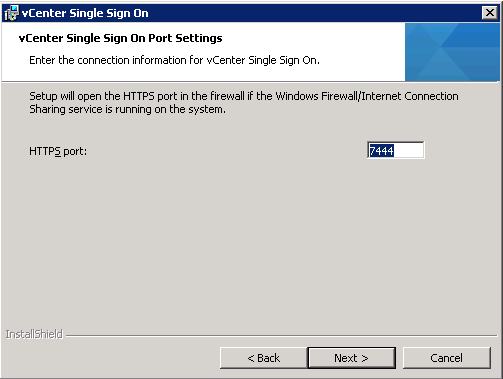
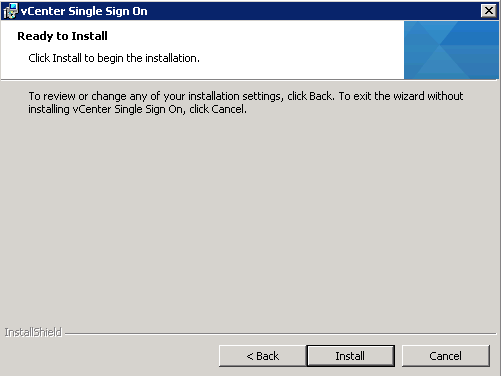
- Ready to Install > Click Install
Useful Video Walkthrough courtesy of Christopher Wahl
http://wahlnetwork.com/2013/02/04/successfully-installing-vcenter-sso-part-1-sql-database/
VMware SSO FAQ
http://kb.vmware.com/selfservice/microsites/search.do?language=en_US&cmd=displayKC&externalId=2034918

