Replacing vROps 6.4 self signed certificates

Replacing vROps 6.4 self signed certificates

Certificate requirements – Click the link

  • File encoded in PEM format
  • Certificate is valid for Server Authentication
  • All certificates in the chain are included
  • The private key is included (2048 bit RSA or higher)
  • The private key is not secured with a password

VMware KB 2046591 Link – Click here

Step 1

  • To create the Certificate Request first download OpenSSL for Windows and install it in the default location – C:\OpenSSL-Win64
  • Note: Path and name may be slightly different depending on the version
  • I used Win64OpenSSL_Light-1_1_0e.exe

Step 2

  • Copy and paste the following into a text file and save as vrops.cfg in a folder called c:\OpenSSL-Win64\Certs. You will need to create the certs folder. You will be able to place other certs, keys and requests in here also

  • Customize the bold fields.

[ req ]

default_md = sha512
default_bits = 4096
default_keyfile = vropsprivate.key
distinguished_name = req_distinguished_name
encrypt_key = no
prompt = no
string_mask = nombstr
req_extensions = v3_req

[ v3_req ]
basicConstraints = CA:FALSE
keyUsage = digitalSignature, keyEncipherment, dataEncipherment
extendedKeyUsage = serverAuth, clientAuth
subjectAltName = DNS: Loadbalancedfqdn, IP: Loadbalancedip, DNS: Loadbalancedshortname, DNS: FirstNodeFQDN, IP: FirstNodeip, DNS: FirstNodeShortname, DNS: SeondNodeFQDN, IP: SecondNodeip, DNS: SecondNodeShortName

[ req_distinguished_name ]
countryName = countryName
stateOrProvinceName = stateOrProvinceName
localityName = localityName
0.organizationName = organizationName
organizationalUnitName = organizationalUnitName
commonName = Loadbalancedfqdn

In my case I don’t have a load balancer. I just have a Master node, a Replica Node and a Remote Collector Node so it looks like this

[ req ]

default_md = sha512
default_bits = 4096
default_keyfile = vropsprivate.key
distinguished_name = req_distinguished_name
encrypt_key = no
prompt = no
string_mask = nombstr
req_extensions = v3_req

[ v3_req ]
basicConstraints = CA:FALSE
keyUsage = digitalSignature, keyEncipherment, dataEncipherment
extendedKeyUsage = serverAuth, clientAuth
subjectAltName = DNS: techlabops001.techlab.local, IP: 192.168.1.160, DNS: techlabops001, DNS: techlabops002.techlab.local, IP: 192.168.1.161, DNS: techlabops002, DNS: techlabops003.techlab.local, IP: 192.168.1.162, DNS: techlabops003

[ req_distinguished_name ]
countryName = UK
stateOrProvinceName = London
localityName = Norfolk
0.organizationName = Techlab
organizationalUnitName = vROps
commonName = techlabops001.techlab.local

Step 3

Open a command prompt and change directory to where OpenSSL is installed.  You need to first generate a new key pair with a 2048 or 4096 key length. Leave this file in the path you specify here for later

openssl genrsa -out key_filename.key 4096

c:\openSSL\bin>openssl.exe genrsa -out c:\openSSL\certs\vropsprivate.key 4096

Step 4

Use the key to generate a certificate signing request by running this command. I have added -sha512 but this is optional

openssl req -new -key key_filename.key -out certificate_request.csr -config config_file.cfg

openssl req -new -key c:\certs\vropsprivate.key -out c:\certs\vropscsr.csr -config C:\OpenSSL\certs\vrops.cfg -sha512

Step 5

  • Click Windows Start > Run, enter certtmpl.msc, and click OK.
  • Follow the below link to create a certificate template (If you haven’t got one already)

vCSA (vCenter Server Appliance) – Part 4 – Deploy CA-signed certificates

Step 6

Submit the CSR file to your Certificate Authority (CA) to obtain a signed certificate

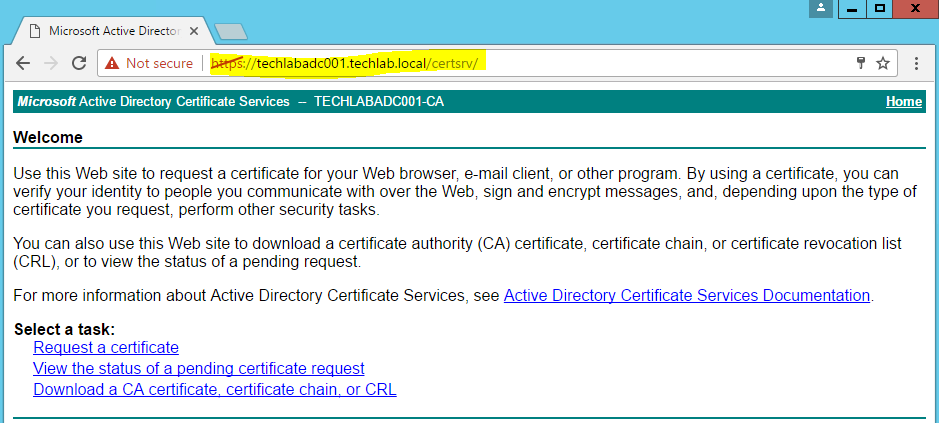
  • Browse to your CA – https://servername/certsrv – Request a certificate. In my case I have a Microsoft CA installed on my Domain Controller
  • Choose Request a Certificate

  • Chose Request a Certificate

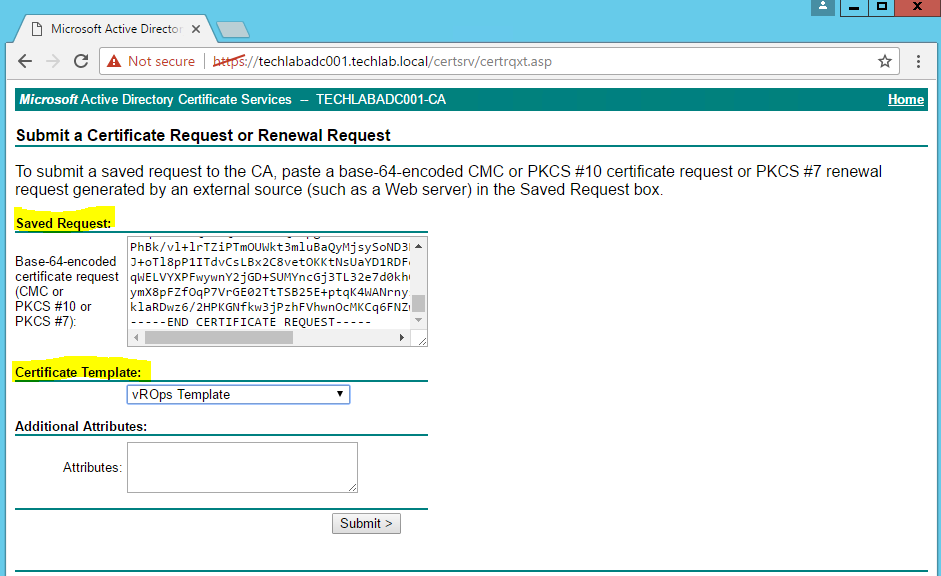
  • Open the request file in a notepad and copy the contents into the request box, In my case this is the vropscsr.csr file.
  • Select a certificate template that meets the requirement. In this case vROps Template

  • Submit the request and download as Base 64 Encoded

  • Download certificate and save it locally to your machine as “certnew.cer”

Step 7

Now we need to download the certificate chain from our CA

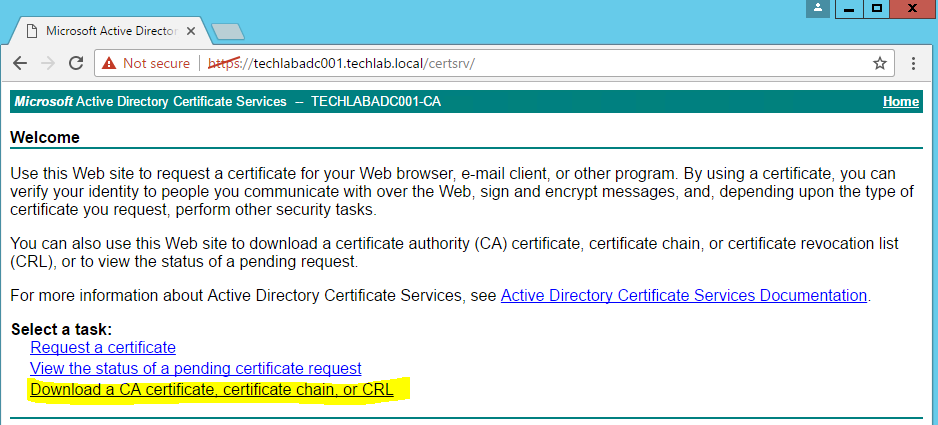
  • Browse to your CA – https://servername/certsrv
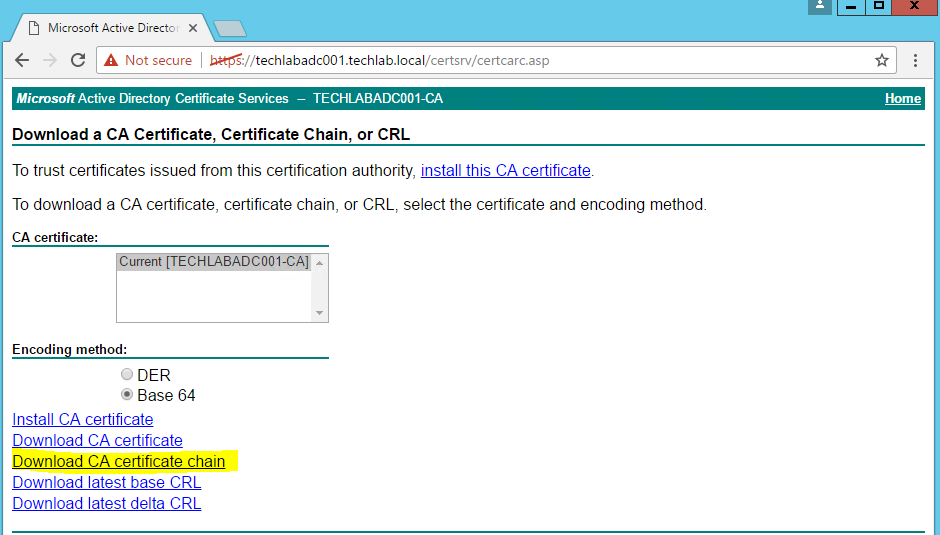
  • Select Download a CA certificate, certificate chain or CRL

  • Click Download CA certificate chain

  • It will download a certnew.p7b file or if it downloads a .cer file then use this
  • Change the name to root64.p7b and Click Open or save it and then open it. The Certificate manager Console will open

  • We now need to extract the certificates for the root and all intermediate authorities in the certificate chain. For each CA, export the certificate to a file.
  • Right click on the root certificate and select Export

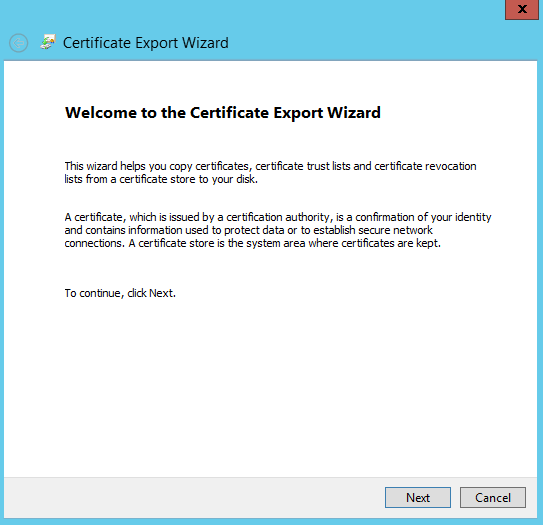
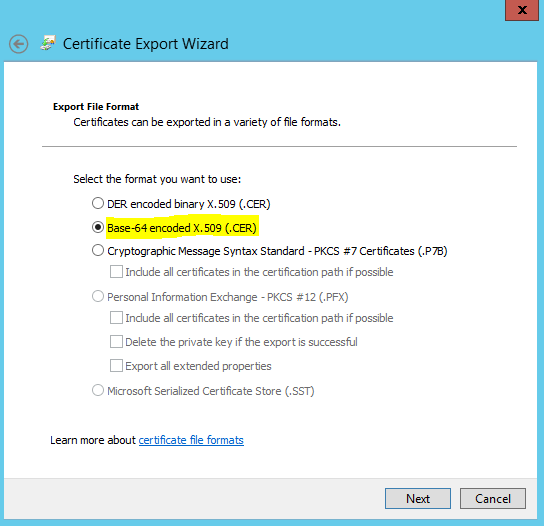
  • In the export wizard, select Base-64 and save the file to the same folder as vrops.cfg. Do that for each authority!

  • Once you receive the certificate you have all the components needed to create the required .pem certificate.

Note: The order of CA’s certs in the .PEM file: Private Key, Cert, Intermediate Cert and then Root Cert which can seen above and described below

  • Private Key = vropsprivate.key
  • Cert = certnew.cer
  • Intermediate Cert – I don’t have one
  • Root CA – root64.cer

Step 8

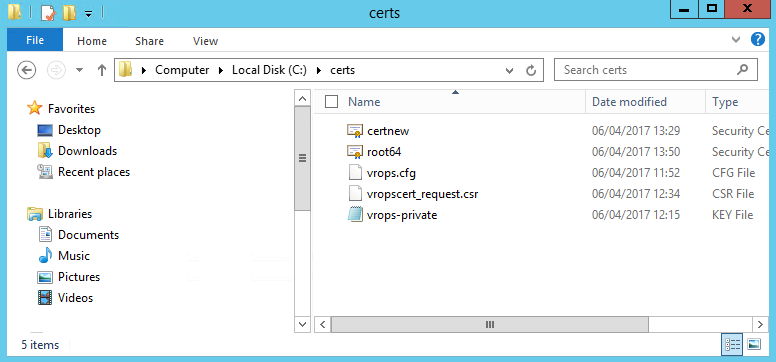
  • Check you have all your certs in C:\OpenSSL\Certs. Note I already have a .pem file from other testing so ignore this as you won’t have one yet.

Step 9

Next go back to SSL and generate the .pem certificate. Example below

type key_filename.key server_cert.cer cacerts.cer > multi_part.pem

  • Change directory to where you saved your certificates
  • Type the following (including the word type!)

type vropsprivate.key certnew.cer root64.cer > vrops.pem

  • You should now see your .pem file which in my case is vrops.pem

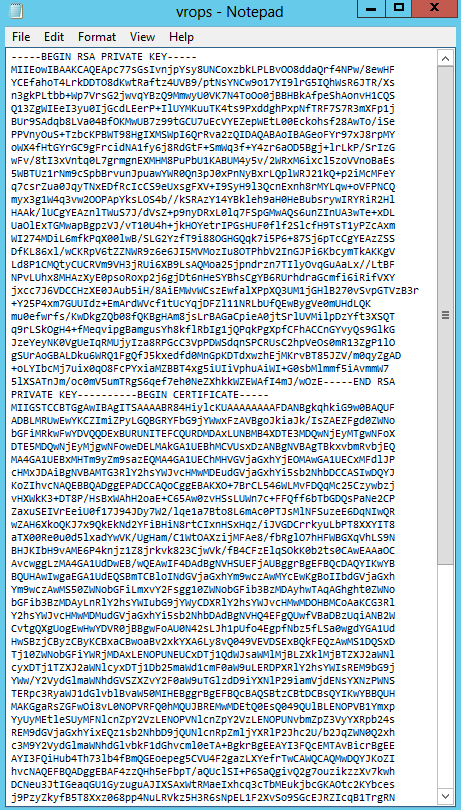
  • If you open it, it will look something like this

Step 10

We can now navigate to the vROps page and upload the .pem file into the system

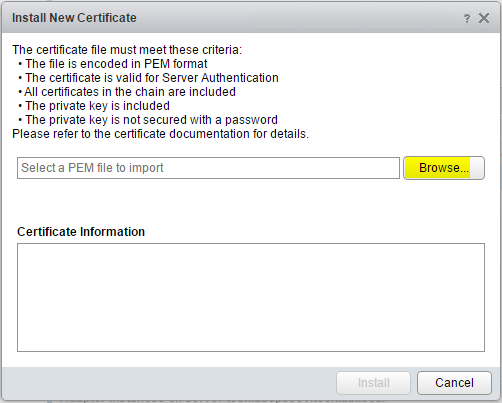
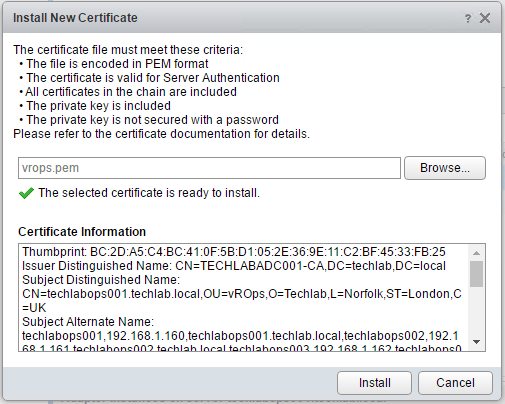
  • You have to log in specifically to the small administration website (https://vrops-server/admin), and click on the small icon on the top right of the screen as seen below. Then you can choose to Install new certificate.

  • When you click Install, you will be disconnected and reconnected. Better close the tab and reopen it to check that the custom certificate has been imported properly.
  • You should be able to open the vROps web pages without any certificate errors 🙂 See the green lock on the Firefox browser.

  • If it is still saying it is insecure then you may have to import the root64.cer into the Firefox browser. Go to Options > Advanced > Certificates > View Certificates and import the root64.cer
  • You can see my Microsoft CA Authority here which is now trusted

  • Note: I couldn’t get this working in Chrome even after importing the root CA certificate. I think Google have locked down their websites for vulnerabilities in the SHA1 algorithm however I haven’t figured out a way to get around this yet

If you do have problems and cannot get into the vROps webpages for any reason, VMware has KB2144949 which will allow you to revert back to the default certificates.

https://kb.vmware.com/selfservice/microsites/search.do?language=en_US&cmd=displayKC&externalId=2144949

Using JXplorer to connect to vSphere PSC Servers

Using JXplorer to connect to vSphere PSC Server

JXplorer is a cross platform LDAP browser and editor. It is a standards compliant general purpose LDAP client that can be used to search, read and edit any standard LDAP directory, or any directory service with an LDAP or DSML interface.

Note: Please take extreme care when connecting to the vmdird database. This is not a recommended way of viewing this data but it can be very useful

JXplorer Download Location

I installed this on a Windows 10 workstation which had connectivity to my PSC Servers

http://jxplorer.org/

Configuration Steps

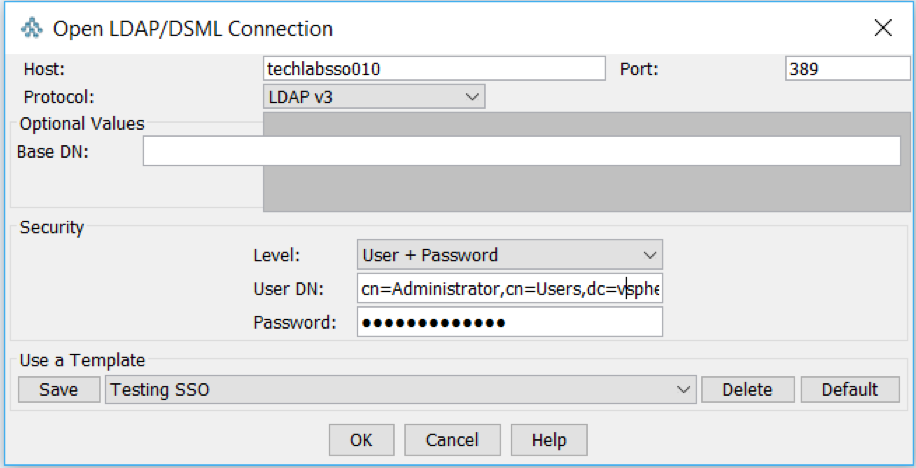
  • Open JXplorer and open a new Connection
  • In the Host field put in the same of your PSC/SSO Server
  • Don’t put anything in Base DN. It will let you connect if you do put a Base DN in but will error when you try and expand the tree
  • In Security Level, choose User + Password
  • In User DN, type CN=Administrator,CN=Users,DC=vsphere,DC=local
  • Put in your PSC/SSO password
  • Save the template

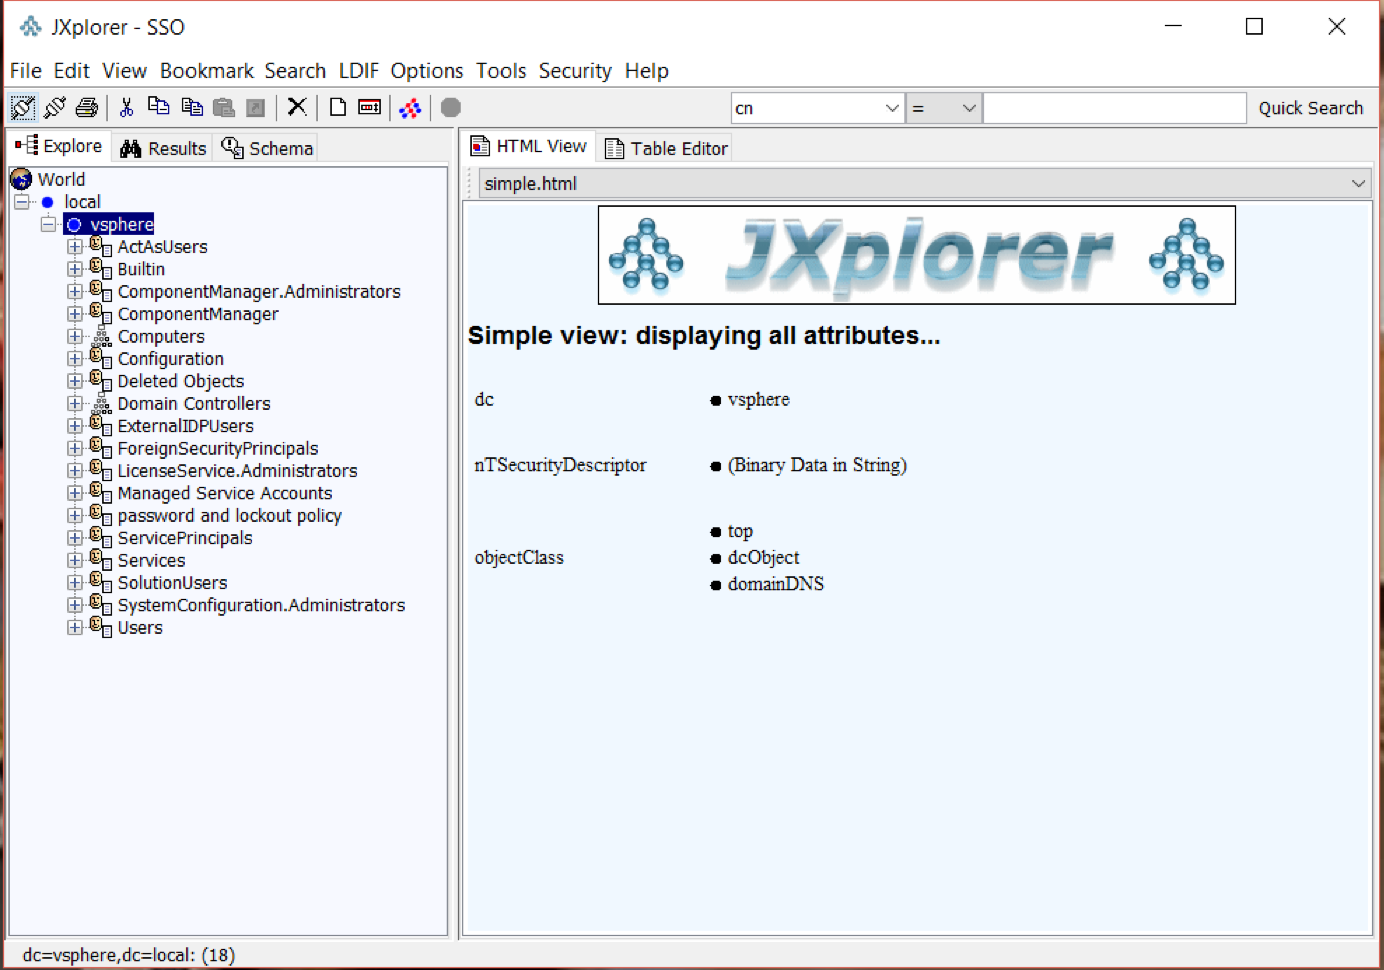
  • You should now see the following screen

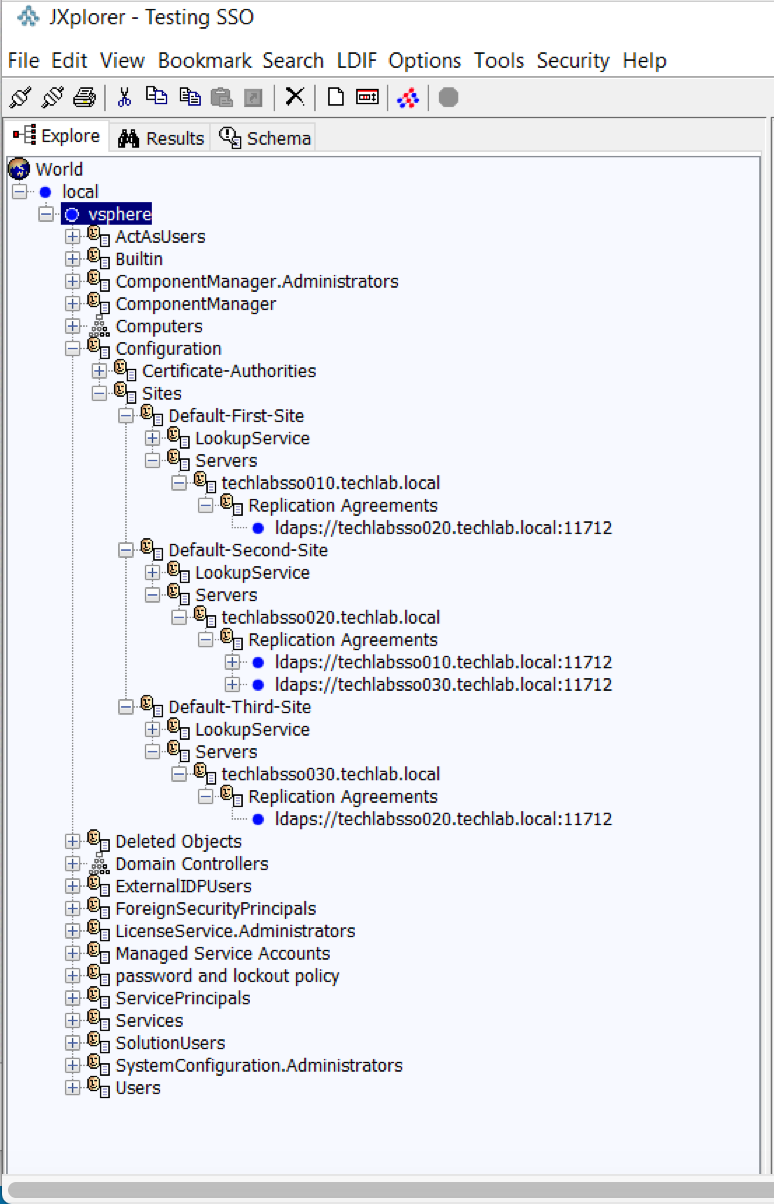
  • Expand vSphere > Configuration > Sites and you should be able to see all the replication agreements.
  • I’ve been playing around with multi-site scenarios which is why you can see Default-First-Site, Default-Second-Site and Default-Third-Site which are my 3 PSCs in a multisite scenario.

Other Observations

Information from Sung Rao (VMware) Thank Q

In 5.5. the only secure LDAP communication between SSO/PSC nodes are via LDAPS.  Thus in automatic replication agreements establishment, LDAPS is used.

In 6.0 and after, we introduced LDAP SASL/SRP binding which go through port 389. LDAP SASL/SRP (or KRB) is the simple and safe to manage between LDAP nodes. This binding mechanism is preferable to LDAPS as the SSL port is difficult to manage/deploy correctly as it depends on PKI. Also, LDAP layer sites below certificate. You need an ID before you can get a cert

Regardless, in 6.0 and after, the server will try SASL/SRP first and fall back to LDAPS if necessary regardless of LDAP/LDAPS in the labeledURI in the replication agreement definition. You also cannot force the replication agreements to use LDAPS in 6.0 and after

IaaS, PaaS and SaaS explained

“IaaS, PaaS and SaaS explained

IaaS, PaaS, SaaS… It can sometimes feel like we are in acronym hell. What are the correct definitions and how does each service differ?

IT organizations have historically been using their own Private Cloud Infrastructure either on premise or inside their own external datacenters to host servers, applications and data etc. Move forward 20 years and we have moved into a service provider era containing Public Cloud Infrastructure and Hybrid Public Cloud Infrastructure. Organizations called service providers exist specifically to provide, manage and maintain the infrastructure on which their client organization’s servers, application or data are hosted. The client organization gets access controls to manage their servers, applications and data hosted on the remote server. This is the basis behind cloud computing so where does IaaS, PaaS, SaaS fit into this scenario?

In an IaaS (Infrastructure as a Service) model sometimes called Hardware as a Service, a third-party service provider hosts hardware, software, servers, storage, networking and other infrastructure components on behalf of an organization; including managing tasks such as system maintenance, upgrading, backup and disaster recovery planning.

Some of the main vendors of IaaS are Amazon Elastic Compute Cloud, Rackspace Cloud Hosting, Microsoft Windows Azure, Google Compute and Openstack Open Source Cloud There are also numerous other IaaS Vendors with their own offerings such as IBM, VMWare, HP, SAP and Oracle and many more.

IaaS Benefits

As a client of cloud service providers, you can focus on your own applications & databases, websites and IT systems without the obligation and capital expenditure of managing your own IT hardware, maintenance, datacentre space and extensive support.

  • Cloud Service Providers have the ability to provide a variety of hardware and technologies such as Linux and Open Source to cater for all organizations requirements
  • Cloud Service Providers offer pricing models which allow for companies to only pay for the storage and hours they need to use servers for. This billing method offers a significant cost saving against having to buy, maintain and then run your own hardware and networks
  • Location independent
  • Cloud Providers have the ability to offer scalability and sustainability. The ability to have an immediate increase in web services or resources in line with end of year financial runs or busy work periods such as Christmas can prove invaluable.
  • Highly automated. Regular task and daily tasks can be automated saving time and increasing productivity in other areas
  • Service Level agreements for standards of service.

IaaS Negatives

  • In regards to company sensitive data, there may be an issue as to who within the Service Provider could potentially have access to or monitor your data.
  • When customer data resides in with external service providers, there is the question of how security compliant the service provider is or can they offer you the type of physical and virtual security required including adhering to external data security regulations required by certain customers. Does the provider have security measures in place to manage communications outages such as denial of service and attacks including authentication issues such as IP spoofing, DNS poisoning, arp poisoning and RIP attacks?
  • The cloud service provider needs to make sure the system is always available for its clients. Companies need to be assured of relying on the high availability and performance of another providers’ systems.
  • Can a service provider verify the security of your data from end to end during transit, at rest or backup?
  • Often you will be sharing space with other organisations on the same infrastructure. The service provider should be able to clearly show secure segregation between customers.
  • If the service provider has a lack of employee processes and procedures such as how it monitors its employees and how access is granted and used, there could be a risk of malicious insiders who having access to client’s infrastructure and data could cause a significant security breach given the level of access and ability to infiltrate organizations and assets. Thus, damage to company brands, financial implications or penalties and productivity issues may cause damage to the service provider and the client’s reputation and business.
  • Different countries have different regulations and security considerations. Certain companies will need data to reside in countries which adhere to their own regulations and know the data is not able to be transferred into countries where data could be at considerable risk of exposure or data loss/leaking.

PaaS

The PaaS (Platform as a Service) model, is a computing platform or environment allows developers to have the complete tools, operating systems, middleware and programming languages to build software or website applications. Everything is then hosted and stored by the PaaS Service Provider. PaaS offers developers a solution that is a complete software development, testing and deployment environment. In addition it has the benefit that the operating system, virtual machines, and infrastructure are hidden and not a concern to the developer. PaaS service models have automatic scalability to allow for increased usage or spikes in activity – therefore making PaaS a really useful way to build high traffic applications.

Some of the main vendors of PaaS include Amazon Web Services, Cloud Foundry (Open Source project run by VMware), AppHarbour and Heroku owned by Salesforce. There are various other vendors such as IBM Smartcloud, Redhat Openshift, openStack, Google App Engines and Engine Yard

A PaaS Service Provider generally offers the following

  • Operating System – Windows, Linux or Open Source
  • Programming Languages – C#, Python, Java, Ruby and Node.js etc.
  • Virtual Machines – Servers to run the applications
  • Databases – SQl or Oracle databases
  • Web Servers – Apache or IIS etc.
  • Distributed Computing – Messaging and Big Data technologies

PaaS Benefits

  • Developers have no concern for the underlying infrastructure. They don’t need to buy, implement, manage and maintain the hardware that the applications run on.
  • Bandwidth and resources are instantly scalable with increased workload and similar to IaaS, pricing models to allow for the peaks and troughs of workloads at certain times of the week, month or year.
  • Databases, VMs and complete environments can be commissioned very quickly reducing build times, developer costs and allowing applications to enter the market quickly.
  • Developers can collaborate worldwide very easily
  • Developers can use their own software on the platform

PaaS Disadvantages

  • Developers responsible for the updating and upgrading of the applications
  • Often you will be sharing space with other organisations on the same infrastructure. The service provider should be able to clearly show secure segregation between customers
  • Not as cost effective as SaaS and not as much control over VM as IaaS.
  • Changing providers may prove difficult
  • Compliance with all applicable regulations concerning security, privacy, and data retention needs the same considerations as IaaS

Software as a Service (SaaS)

The SaaS (Software as a Service) model is the simplest and most straightforward model for clients which is hosted on a Service Providers infrastructure, not a company’s own private network. Users basically log on to an application via a web browser or dedicated desktop icon. CRM, E-mail, Games and almost any application could potentially be hosted by the SaaS Cloud platform including virtual desktops

Advantages

  • Users can log on to the application anytime/anywhere with an internet connection
  • The Cloud provider will monitor, maintain, upgrade and backup the underlying infrastructure and software versions automatically
  • Good pricing models including the ability to scale up and scale down users sometimes on a month by month basis
  • Minimal planning and easy to set up. Solutions can be implemented in weeks rather than months
  • Cloud Providers have an extremely resilient infrastructure tied into service level agreements for quality and uptime of service
  • No license fees to manage, just subscription fees

Disadvantages

  • Little control over deployment, upgrade and testing methodology
  • The SaaS Cloud provider has full access to customers’ data, unless encryption is used
  • It is important to ensure that the application is compliant in terms of the location it is hosted due to certain countries and industries having strict regulations as to where data is stored
  • Currently there are limited applications which are not available on a hosted platform although IBM for example has over 100 SaaS hosted applications
  • Reliant on clients having a stable internet connection
  • Hosted applications can be variable in their features and functionalities compared to being managed and adjusted in-house
  • Currently SaaS applications are seen to be slightly slower than an in-house application however the comparison will be minimal and continually improving.
  • It is important to make sure a proper recovery and backup plan should be in place. The infrastructure hosting the application should be highly available and replicated across potentially multiple locations. In addition, the timeframe to recover from any potential attacks or failures must be clearly stated or part of the service agreement held with the SaaS provider

In this age of “Anything as a Service”, Cloud providers offer clients the pretty picture of unlimited computing, network, and storage capacity. One of the main concerns behind these outsourced cloud models is the location, security and safety of the data being created, transmitted and managed.  It is critical to ensure that there are correct processes and compliance of the internal security procedures, segregation of services, configuration hardening, patching, upgrading, auditing, and logging. The development software including APIs supplied for PaaS needs to be as secure as possible whilst working in injunction with any other software in the environment. Criminals continue to leverage new technologies and ways to penetrate the service providers in order to tamper with data causing loss and theft. IaaS offerings have hosted the Zeus botnet, Infostealer Trojan horses and Adobe PDF exploits. Aside from outside security concerns, it is vital to know who is managing your applications and data internally. Security is not just restricted to IT Processes. People also need to be subject to stringent security policies and procedures to prevent malicious attempts to infiltrate organizations and confidential data. Service providers must be able to stay one step ahead to continually maintain confidentiality, integrity and availability of those services.

These models are all evolving into exciting offerings with the potential to streamline IT, increase the use of automation and create secure highly available controlled environments with minimal disruption and ease of use. Although there are obvious learning curves for Cloud Infrastructure specialists including an understanding of multiple different platforms alongside an understanding of the increasing integration of automated services, these XaaS service models seem to be the way forward into a new era of Public Cloud Computing.


Decommissioning a Windows 2012 vCenter 6 Server and a Windows 2012 PSC 6 Server

Decommissioning a vCenter 6 Server and a PSC 6 Server

After you deploy a vCenter Server with an embedded Platform Services Controller or a vCenter Server with an external Platform Services Controller, if you no longer need any of the appliances or if an appliance stops responding, you can decommission and delete the appliance from vSphere inventory and domain.

Note
: The process for removing a vCenter Server or a Platform Services Controller from the vSphere domain is irreversible. After you remove an appliance from the domain, you cannot rejoin it to the same domain. You must perform a re-install or a re-deploy of  vCenter Server or Platform Services Controller system in order to re-join it to the domain.

Infrastructure

In my scenario I have 2 PSCs in multisite mode and 1 vCenter connected to each PSC. Note: These are Windows Server 2012 servers. The link at the bottom of the page details the process for the VCSA appliance

  • techlabsso002.techlab.local (Windows 2012 PSC)
  • techlabsso003.techlab.local (Windows 2012 PSC)
  • techlabvcs002.techlab.local (Windows 2012 vCenter connected to techlabsso002)
  • techlabvcs003.techlab.local (Windows 2012 vCenter connected to techlabsso003)

I am going to remove 1 vCenter and 1 PSC from this scenario which will be techlabsso003.techlab.local and techlabvcs003.techlab.local.

Step 1 Decommission the vCenter Server

First of all I want to decommission my vCenter Server from the Platform Services Controller

  • Log into the first PSC server; in my case techlabsso003
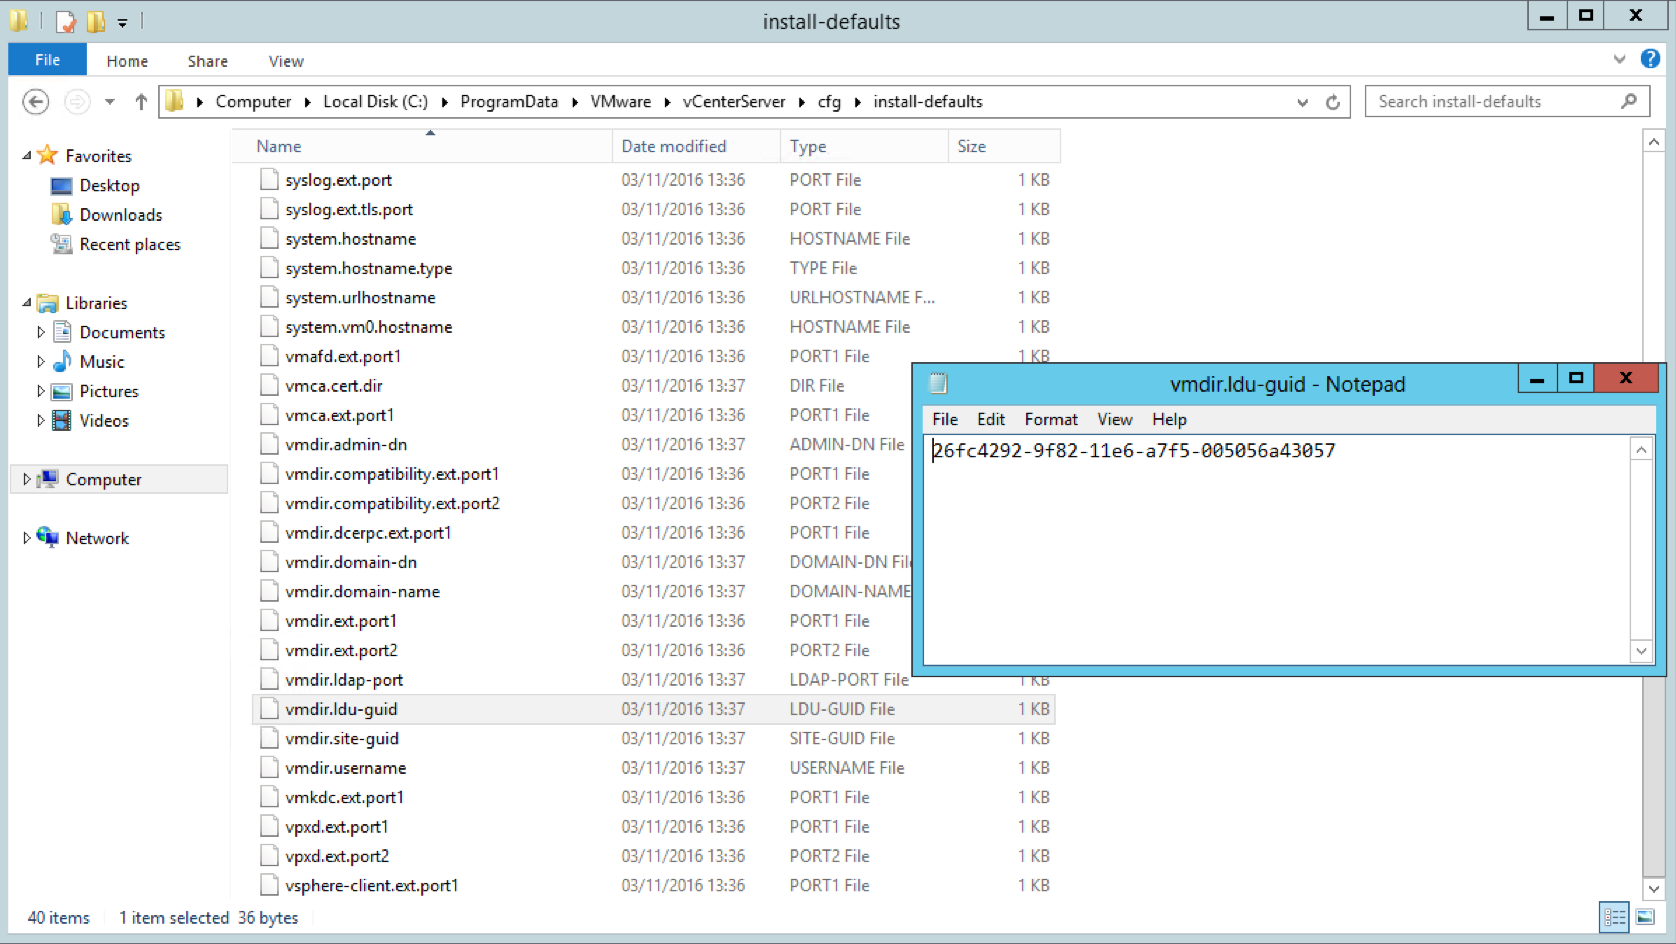
  • Browse to C:\ProgramData\VMware\vCenterServer\cfg\install-defaults.
  • Open the vmdir.ldu-guid file to find the hostid.

  • On the Platform Service Controller, click Start > Run, type cmd.exe, and click OK. The Command Prompt window open.
  • Navigate to C:\Program Files\VMware\vCenter Server\bin
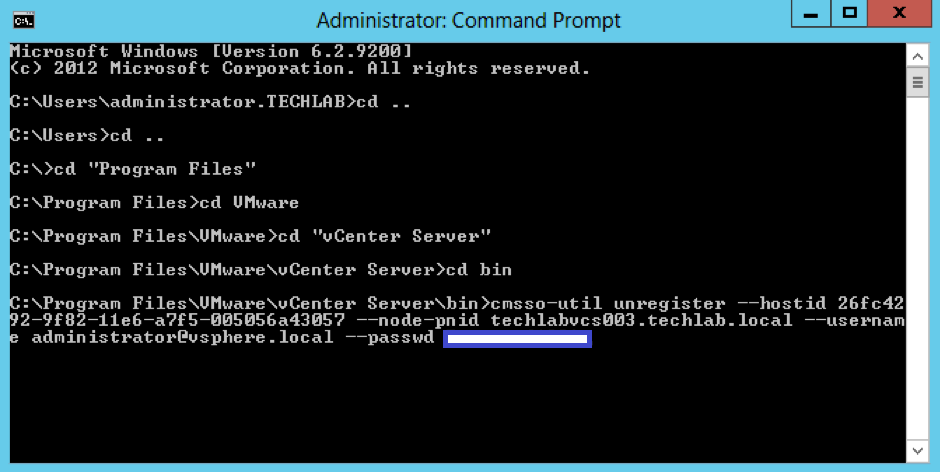
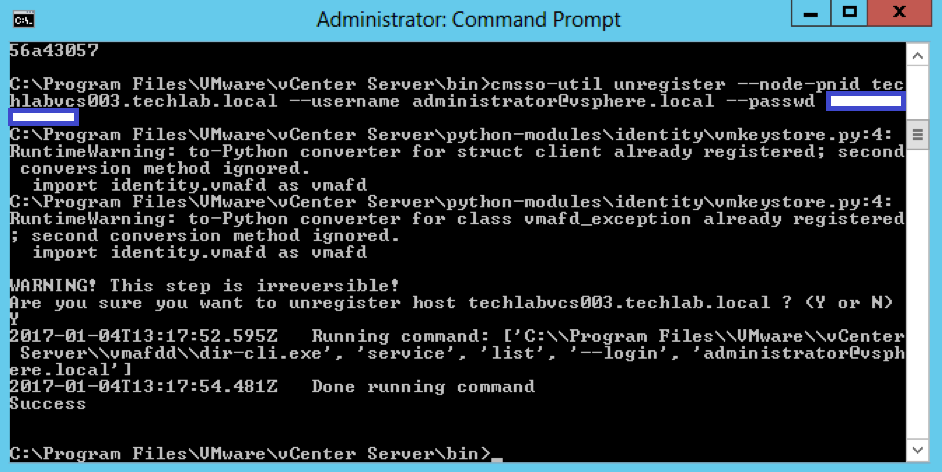
  • Run the cmsso-util unregister command to unregister the vCenter Server. Where, vCenter_Server_System_Name is the FQDN or IP address of vCenter Server that you want to decommission. You must run this command only on the Platform Services Controller which your vCenter Server is registered.

cmsso-util unregister --hostId host_Id --node-pnid vCenter_Server_System_Name --username administrator@your_domain_name --passwd vCenter_Single_Sign_On_password

  • You should see the following asking you to confirm you want to unregister the vCenter Server. Note I had to remove the –hostid argument as the command didn’t recognise it

  • You should then see it say Success

  • Power off the vCenter Server

Step 2 Decommission the PSC Server

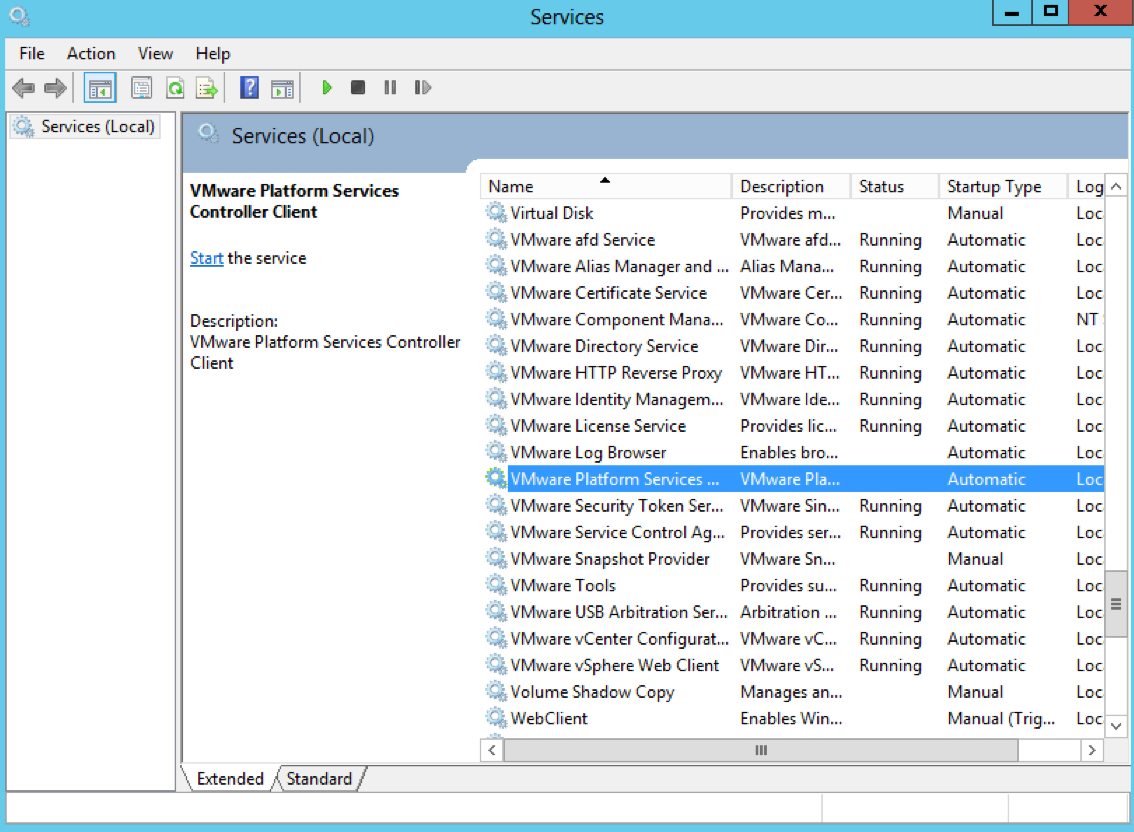
  • Personally I would shut down the PSC or simply stop the Platform Services Controller services. Note below that I’ve only stopped the Platform Service but all services would need stopping

  • On the PSC to be decommissioned, browse to C:\ProgramData\VMware\vCenterServer\cfg\install-defaults.
  • Open the vmdir.ldu-guid file to find the hostid.

  • On one of the other Platform Service Controllers, click Start > Run, type cmd.exe, and click OK. The Command Prompt window open.
  • Navigate to C:\Program Files\VMware\vCenter Server\bin
  • Run the cmsso-util unregister command to unregister the stopped Platform Services Controller
  • Where, Platform_Services_Controller_System_Name is the FQDN or IP address of the Platform Services Controller that you want to decommission. You must run this command only on one of the Platform Services Controller replication partners, as the synchronization removes the entries from all other Platform Services Controller replication partners.

cmsso-util unregister --hostId host_Id --node-pnid PSC_System_Name --username administrator@your_domain_name --passwd vCenter_Single_Sign_On_password

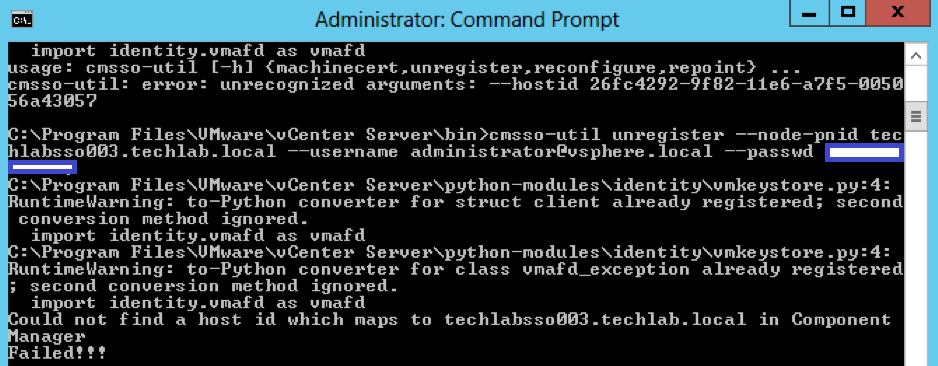
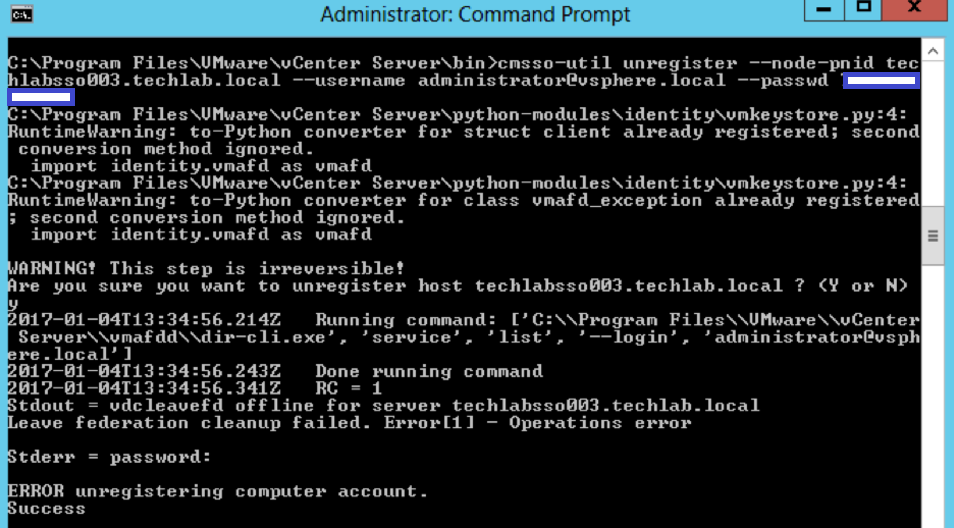
  • Now you may get errors such as the below

Could not find a host ID which maps to “Servername” in Component Manager

Leave federation cleanup failed. Error [1] – Operations error and Error registering Computer account

  • If either of these occur then make sure you have switched off the PSC to be decommissioned
  • Navigate to C:\Program Files\VMware vCenter Server\vmdird and run the below command

.\vdcleavefed -h -u administrator -w

  • If you get a message to say Leave Federation cleanup done then you can then go ahead and delete the Platform Services Controller appliance that you no longer need from the vSphere inventory.
  • Reviewing the Nodes > Objects tab in the Web Client successfully removed the object from inventory.

Notes on vdcleavefed

cmsso-util leverages vdcleavefed to clean up the machine account, but also goes through and cleans up the solution users and anything else that may have been registered in component manager. It also has some pre-flight checks involved. vdcleavefed on its own will just rip out the machine account, and really should not be used unless in case of an emergency where we are in such a state where cmsso-util will not suffice (e.g. doesn’t work). cmsso-util is the preferred method of cleanup.

Link

https://kb.vmware.com/selfservice/microsites/search.do?language=en_US&cmd=displayKC&externalId=2106736


Deploying Orchestrator 6.0.3 into vSphere 6

vRARobot2

Deploying Orchestrator 6.0.3 into vSphere 6

Software versions in my lab environment

  • vCenter v6.0.0, 3018524
  • vSphere Hosts v6.0.0, 3029758
  • VMware-vCO-Appliance-6.0.3.0-3000579_OVF10.ovf

and

screen-shot-2016-11-23-at-11-01-06

Instructions

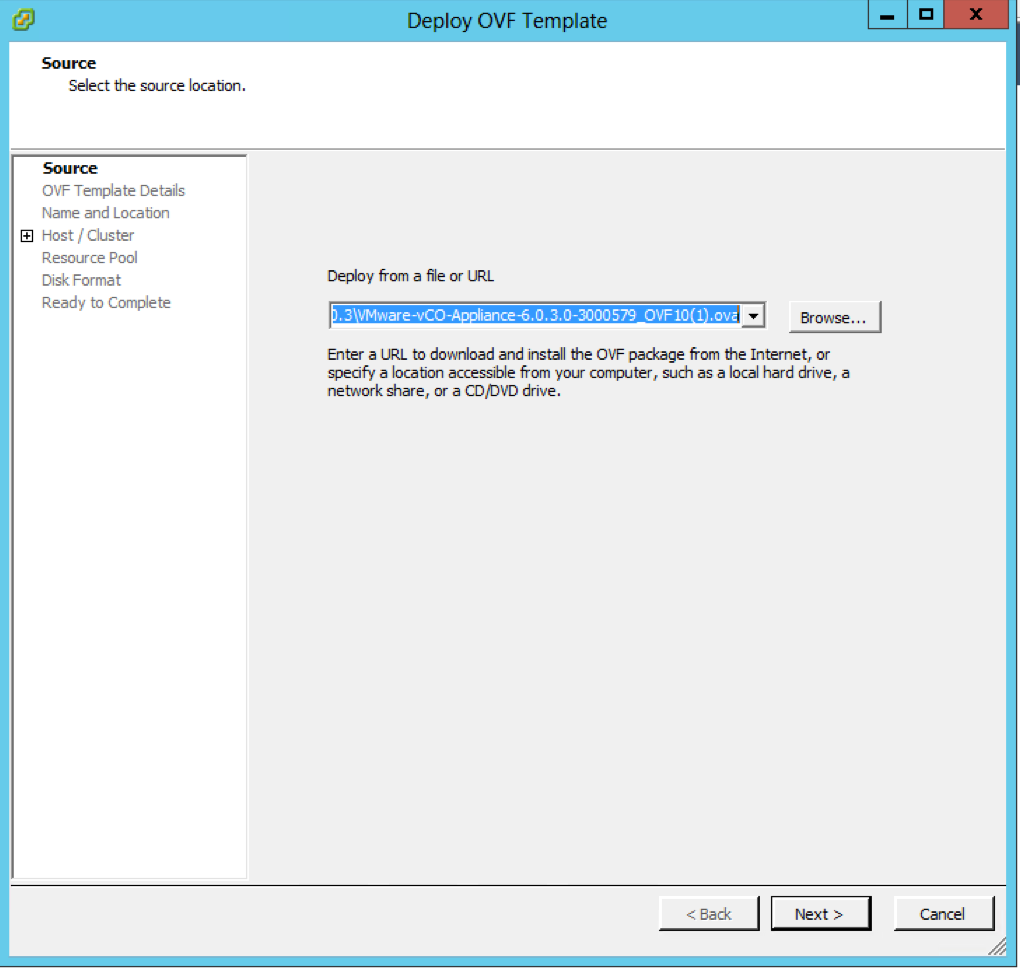
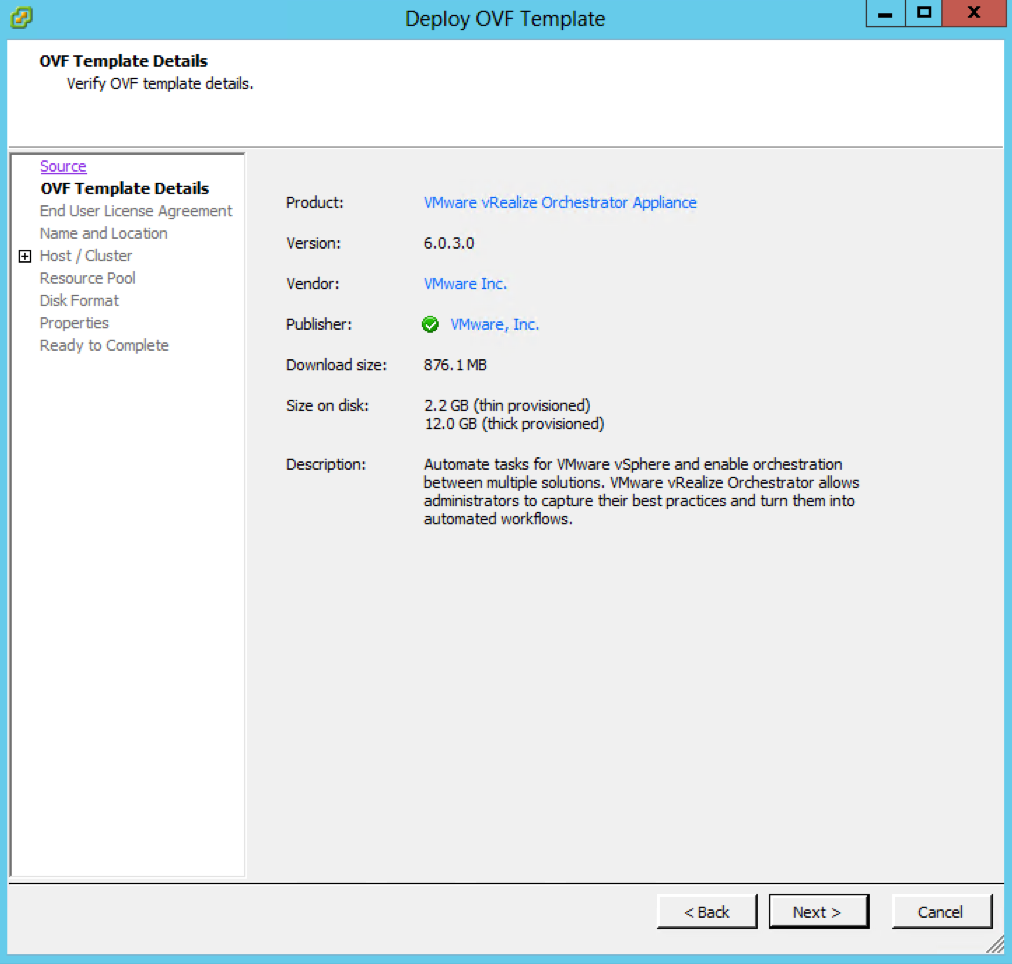
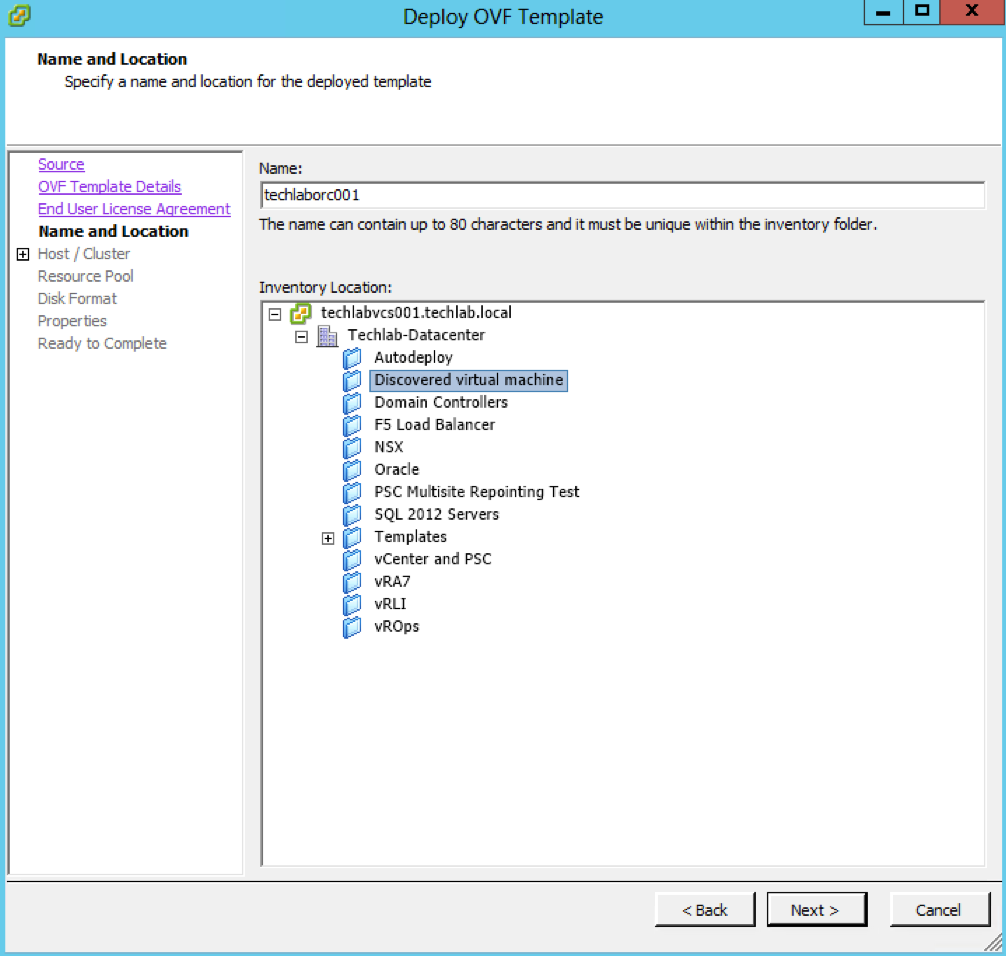
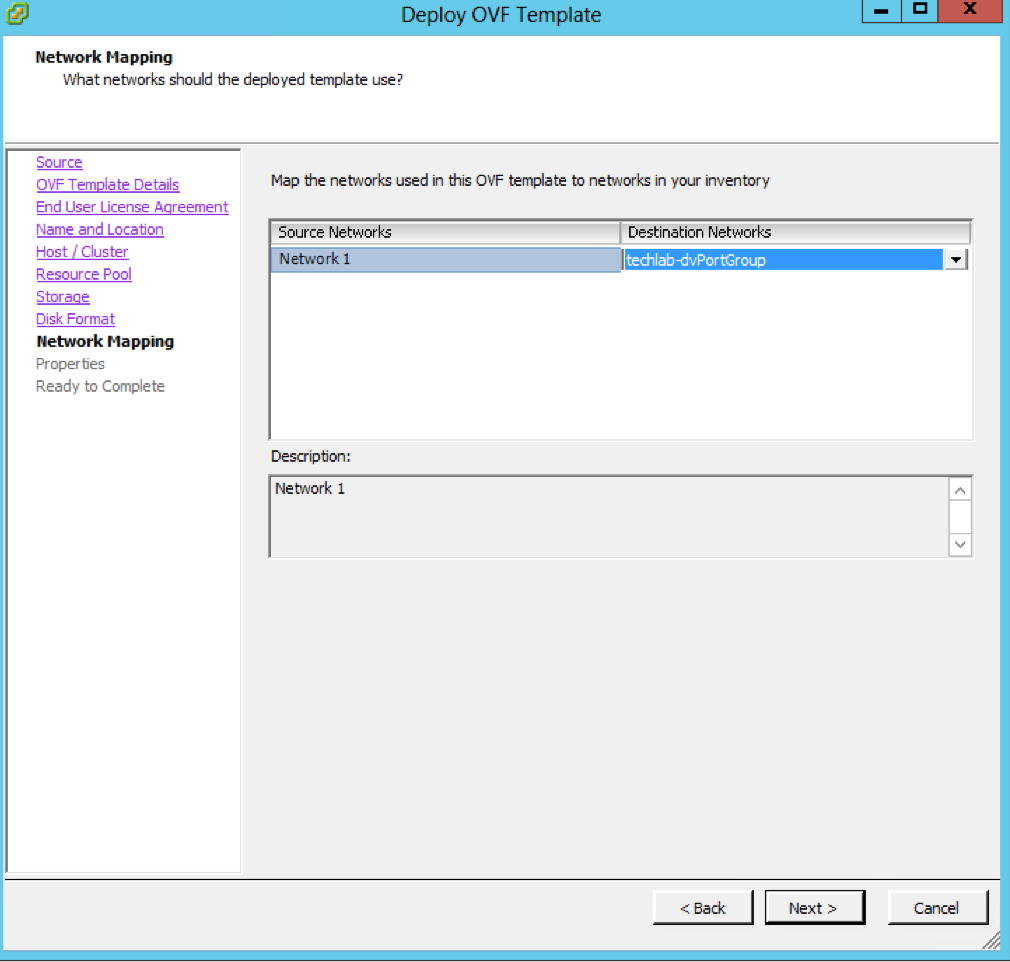
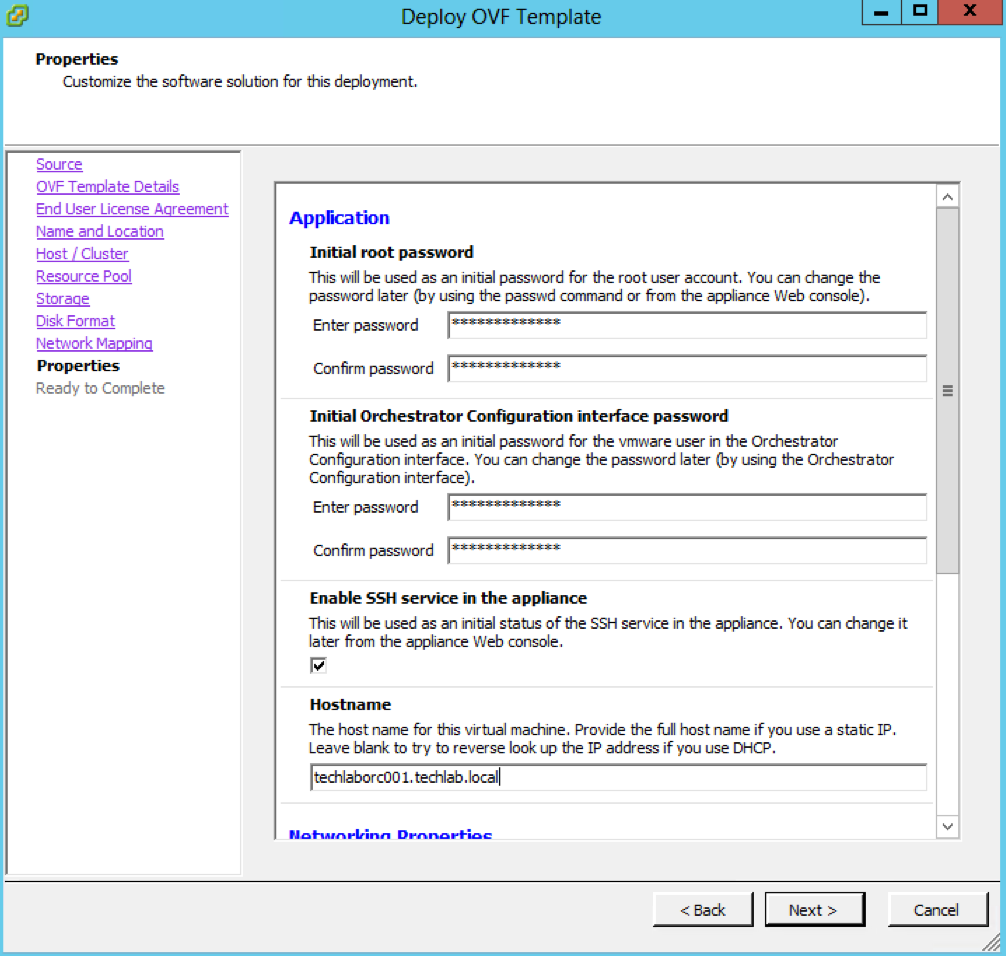
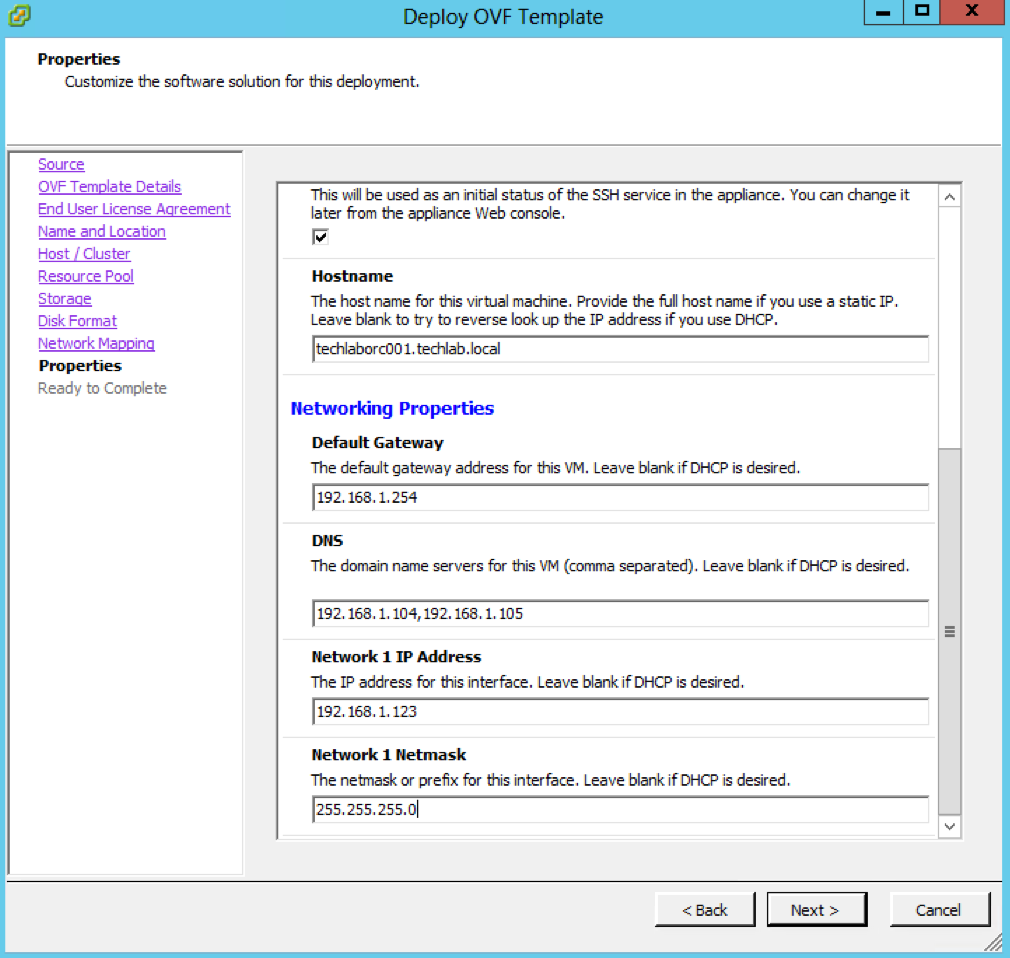
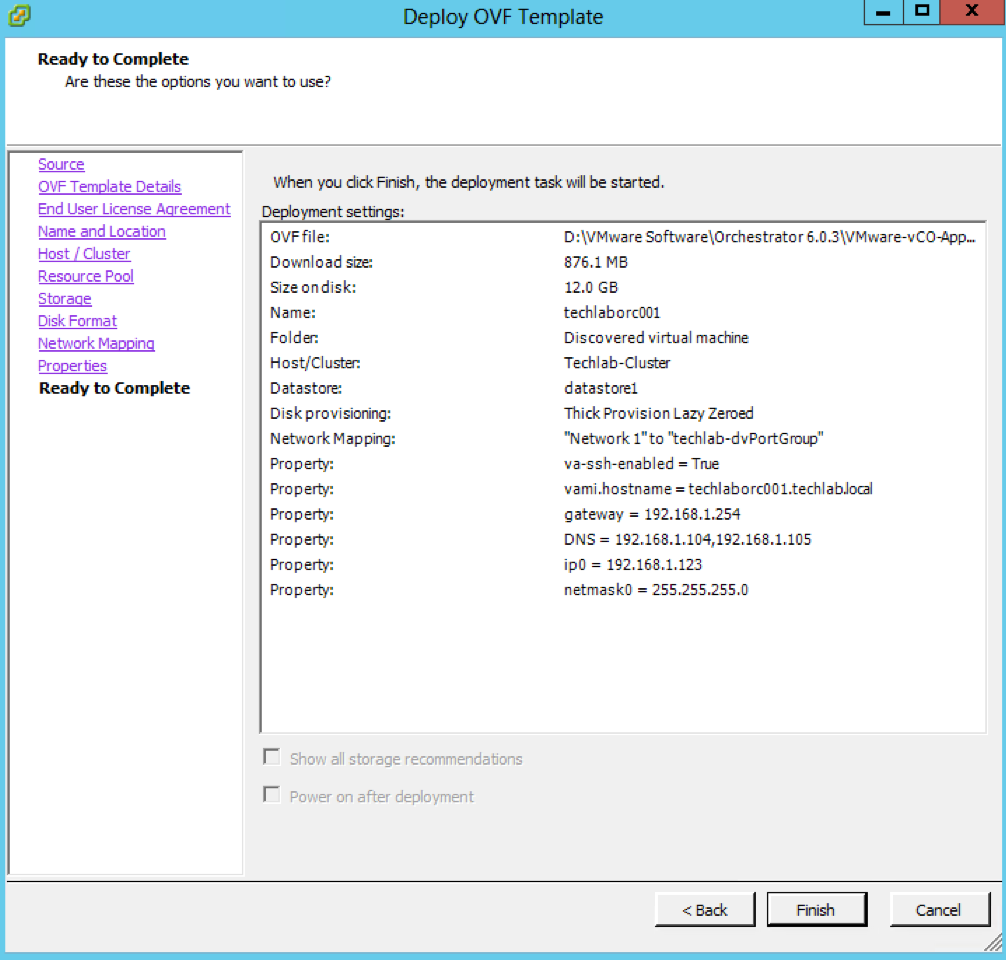
  • Download and deploy VMware-vCO-Appliance-6.0.3.0-3000579_OVF10.ovf into vCenter – File > Deploy ovf template

screen-shot-2016-11-22-at-20-26-33 screen-shot-2016-11-22-at-20-26-47 screen-shot-2016-11-22-at-20-28-11 screen-shot-2016-11-22-at-20-28-35 screen-shot-2016-11-22-at-20-29-07 screen-shot-2016-11-22-at-20-29-36 screen-shot-2016-11-22-at-20-29-59 screen-shot-2016-11-22-at-20-30-47 screen-shot-2016-11-22-at-20-31-58 screen-shot-2016-11-22-at-20-35-35 screen-shot-2016-11-22-at-20-37-18

  • Power on the VM
  • Log into a web browser using the Orchestrator appliance web address. In my case https://192.168.1.123:5480

screen-shot-2016-11-22-at-20-52-23

  • Change the time zone to Europe/London or whichever your timezone is and click Save Settings

screen-shot-2016-11-22-at-20-53-03

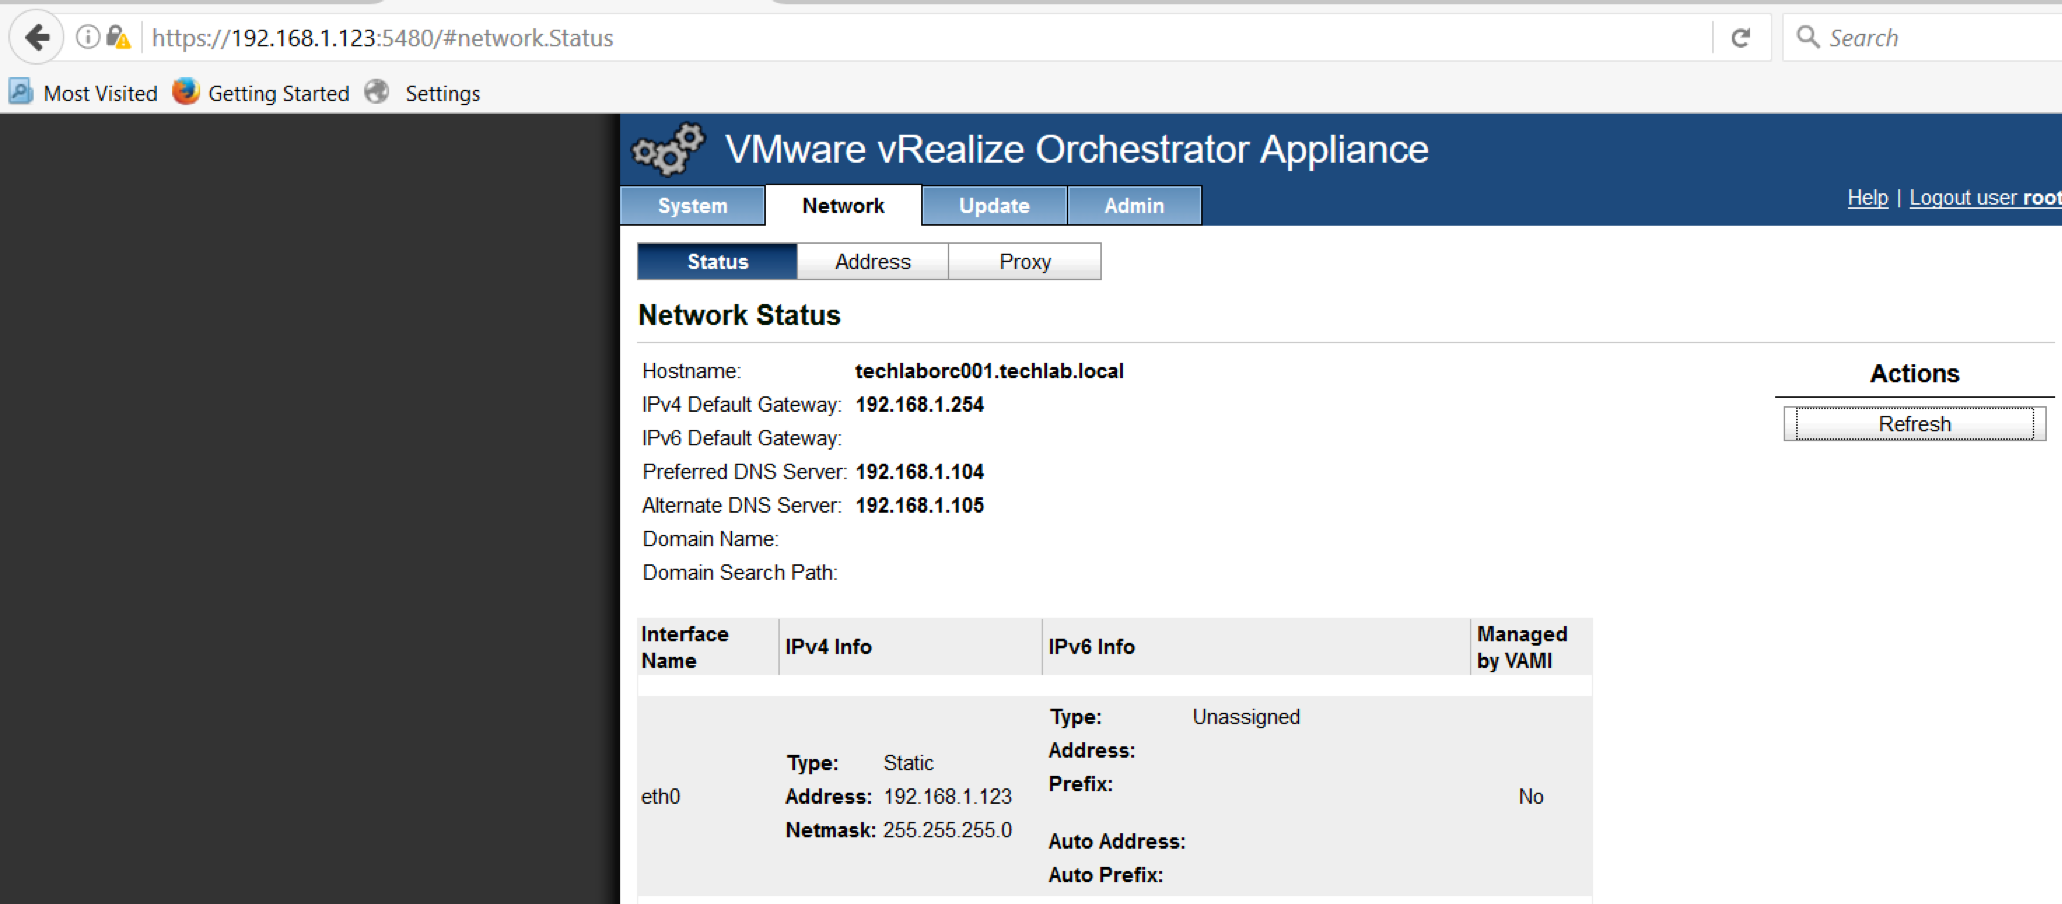
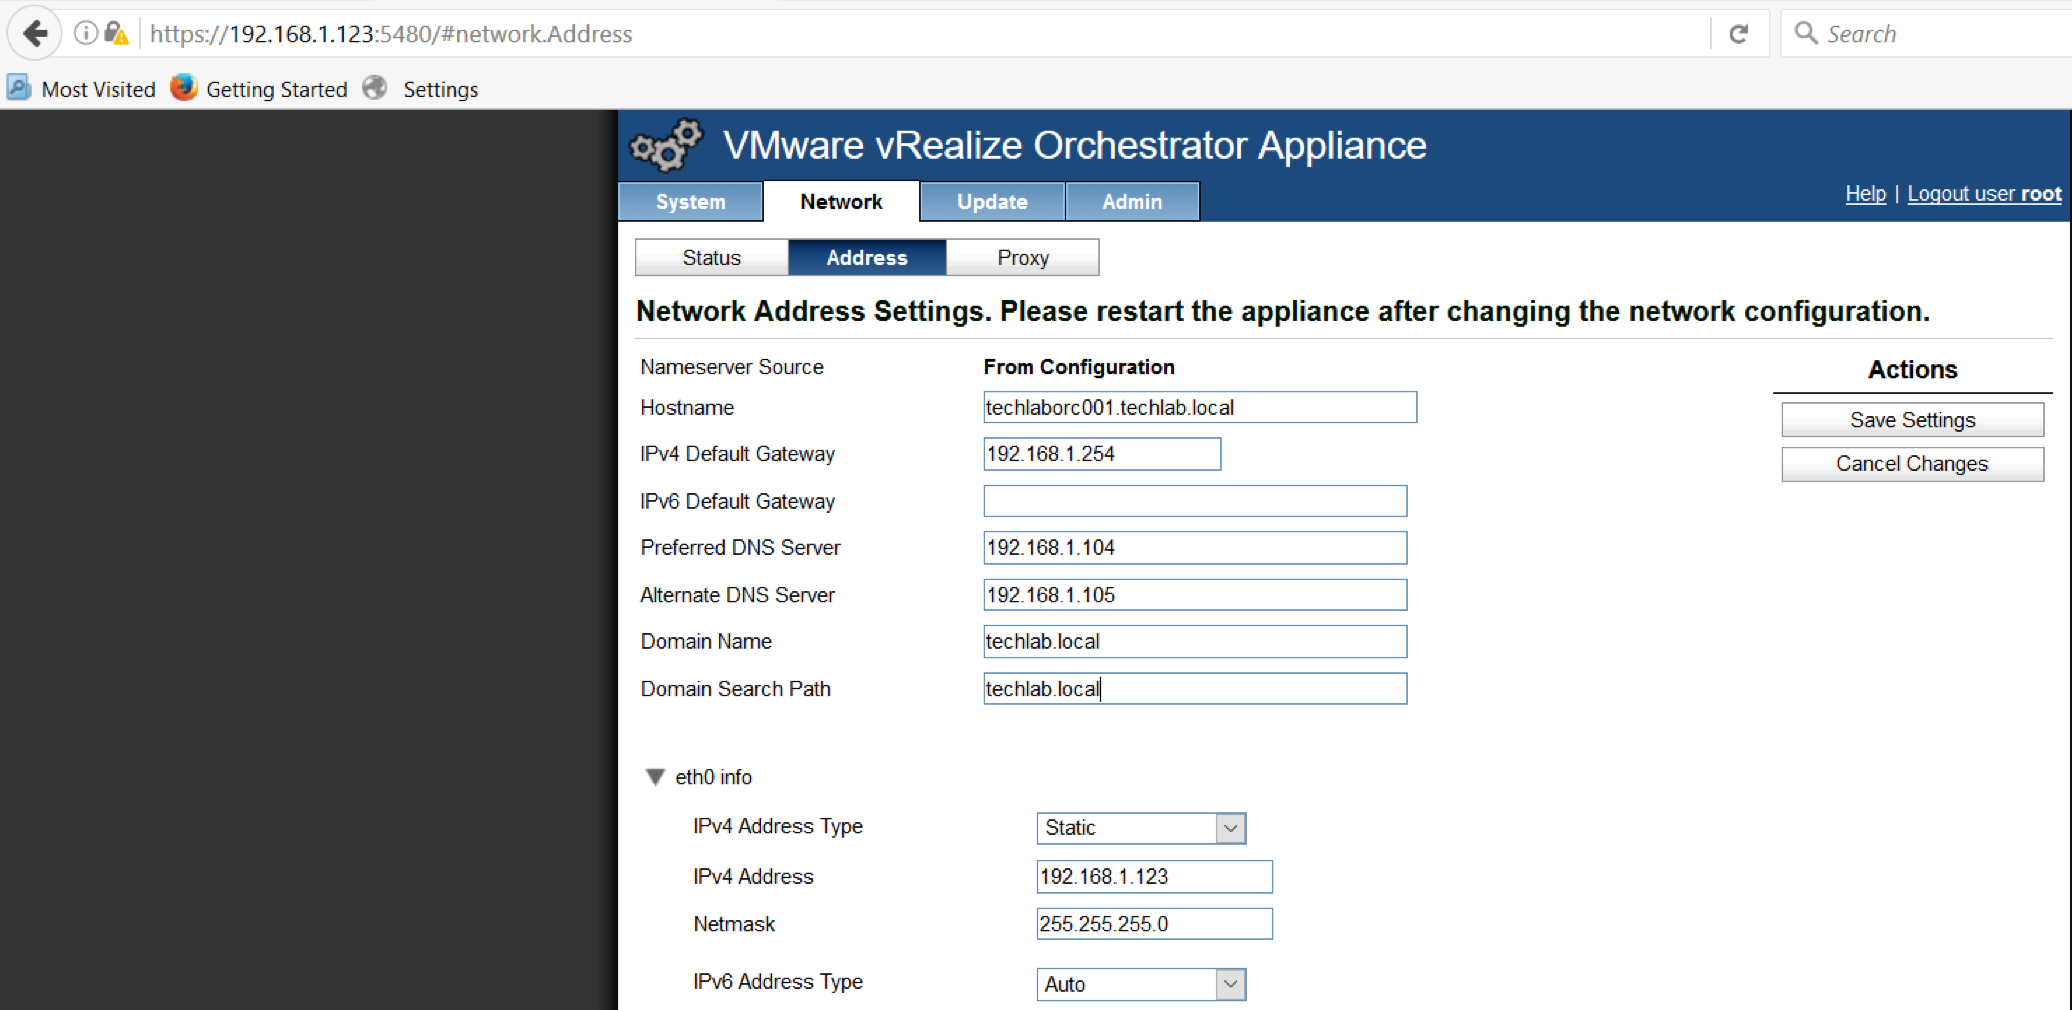
  • Click the Network tab and check the settings on the 3 tabs

screen-shot-2016-11-22-at-20-54-10 screen-shot-2016-11-22-at-20-56-20 screen-shot-2016-11-22-at-20-57-02

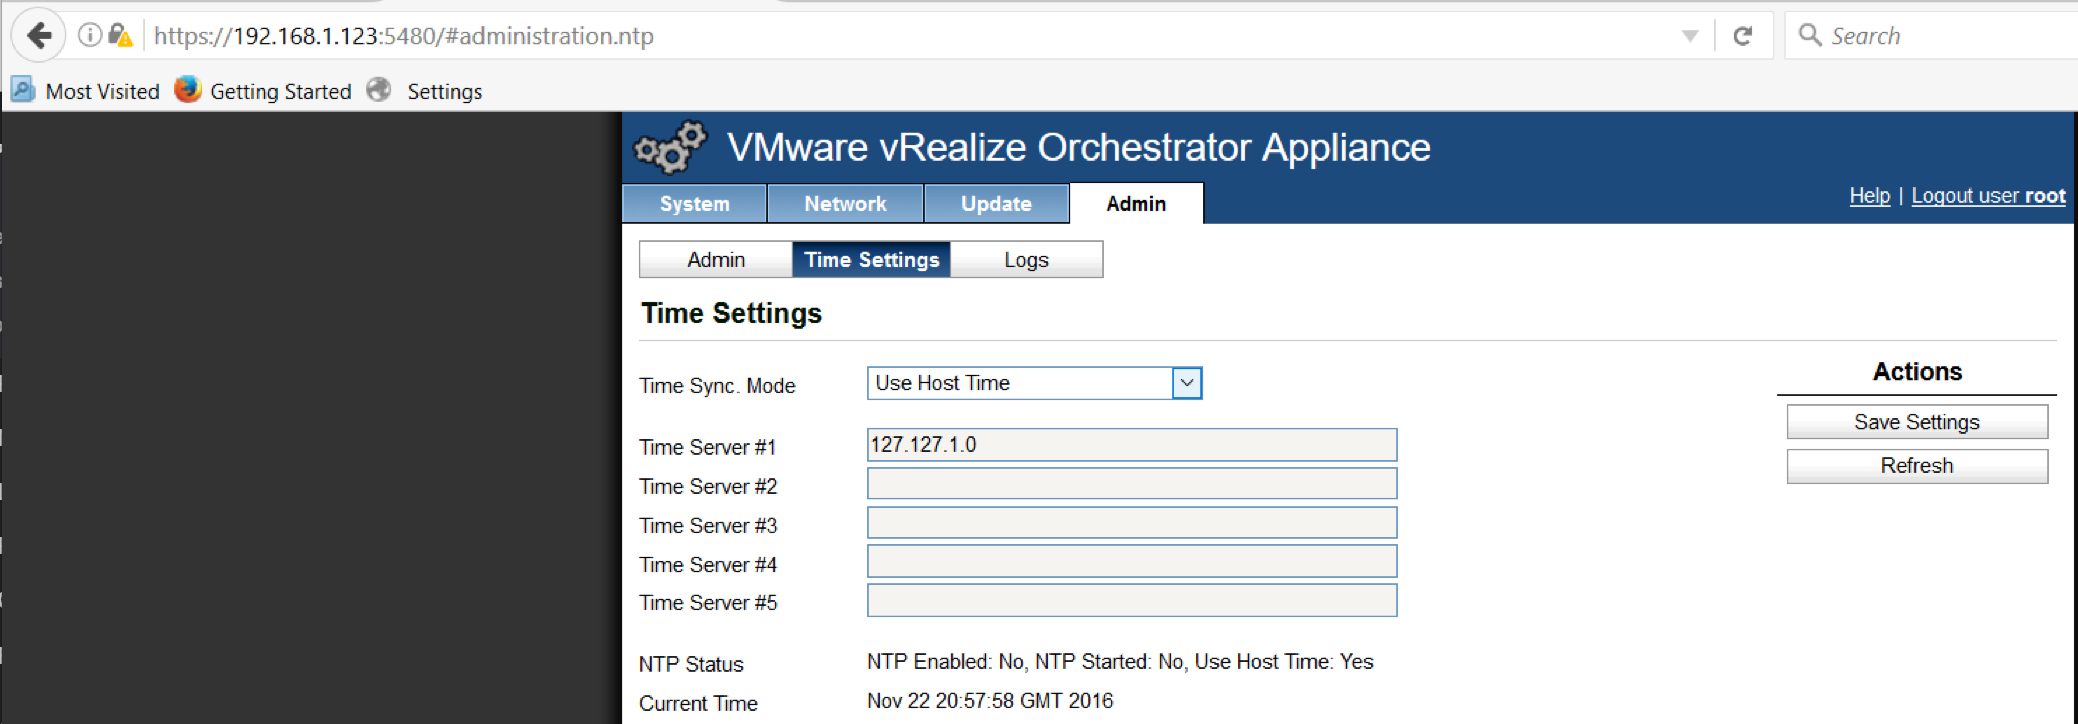
  • Click the Admin tab and click Time Settings are correct. I have Use Host Time but you can use Time Server

screen-shot-2016-11-22-at-20-57-49 screen-shot-2016-11-22-at-20-58-59

  • Click Save Settings

NEXT

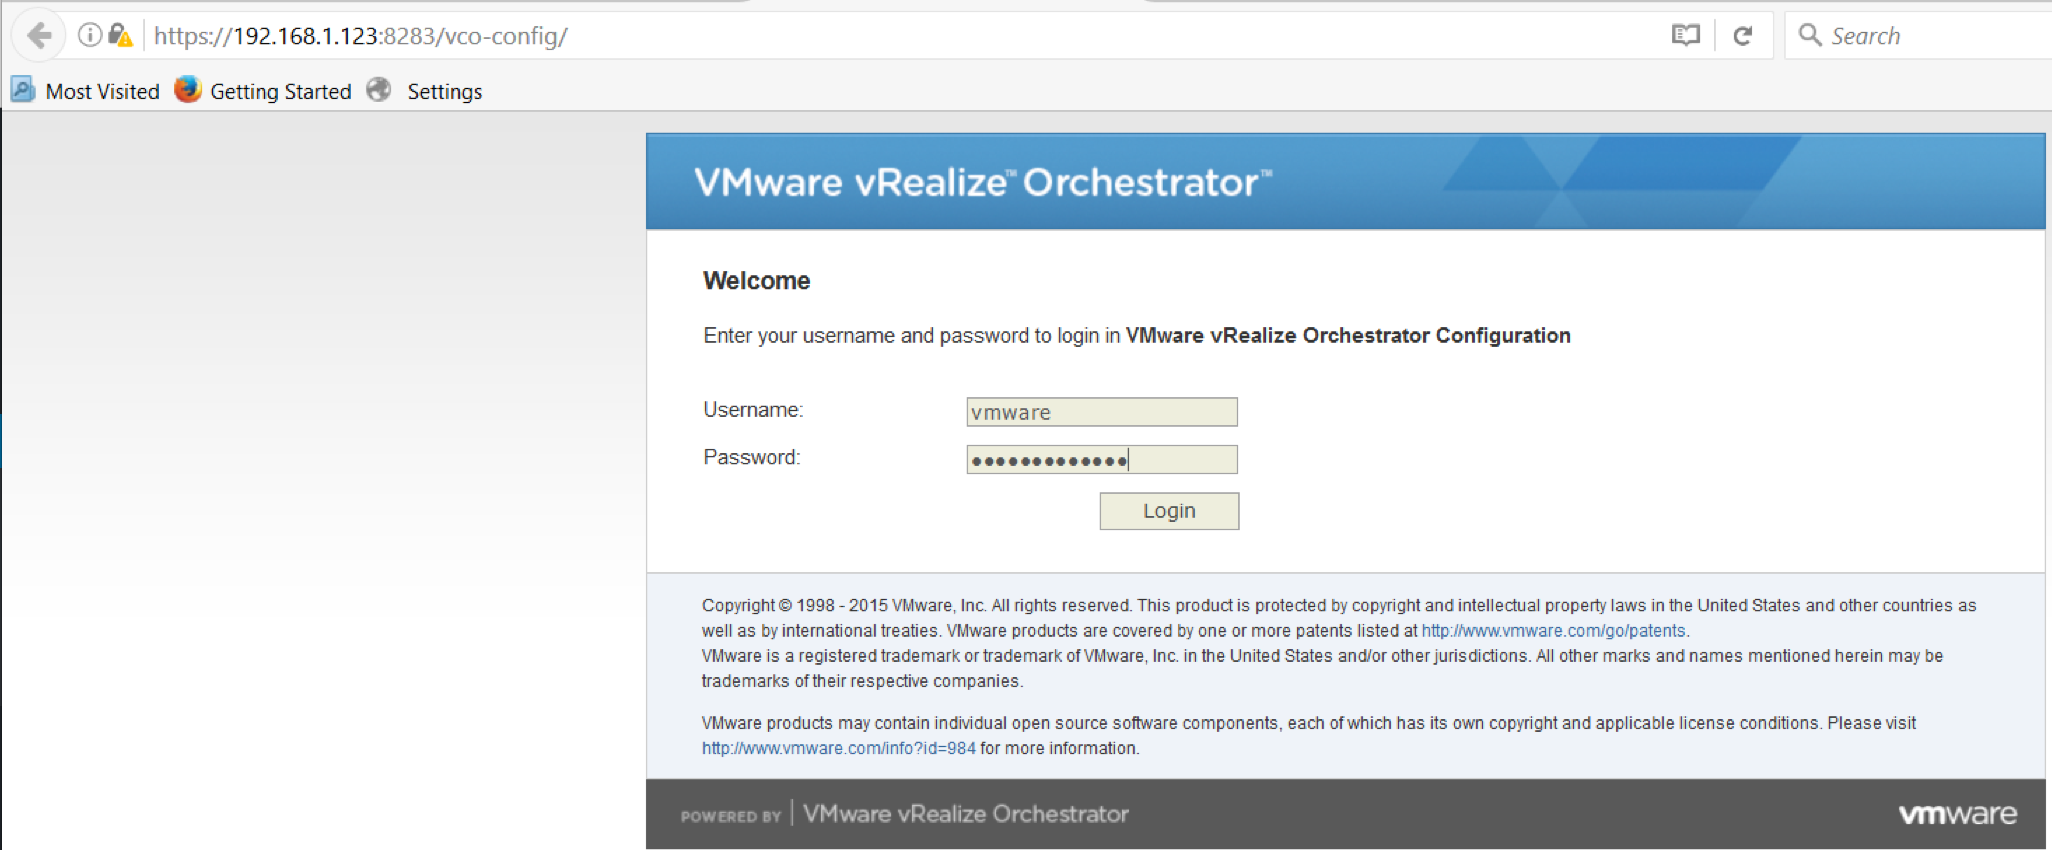
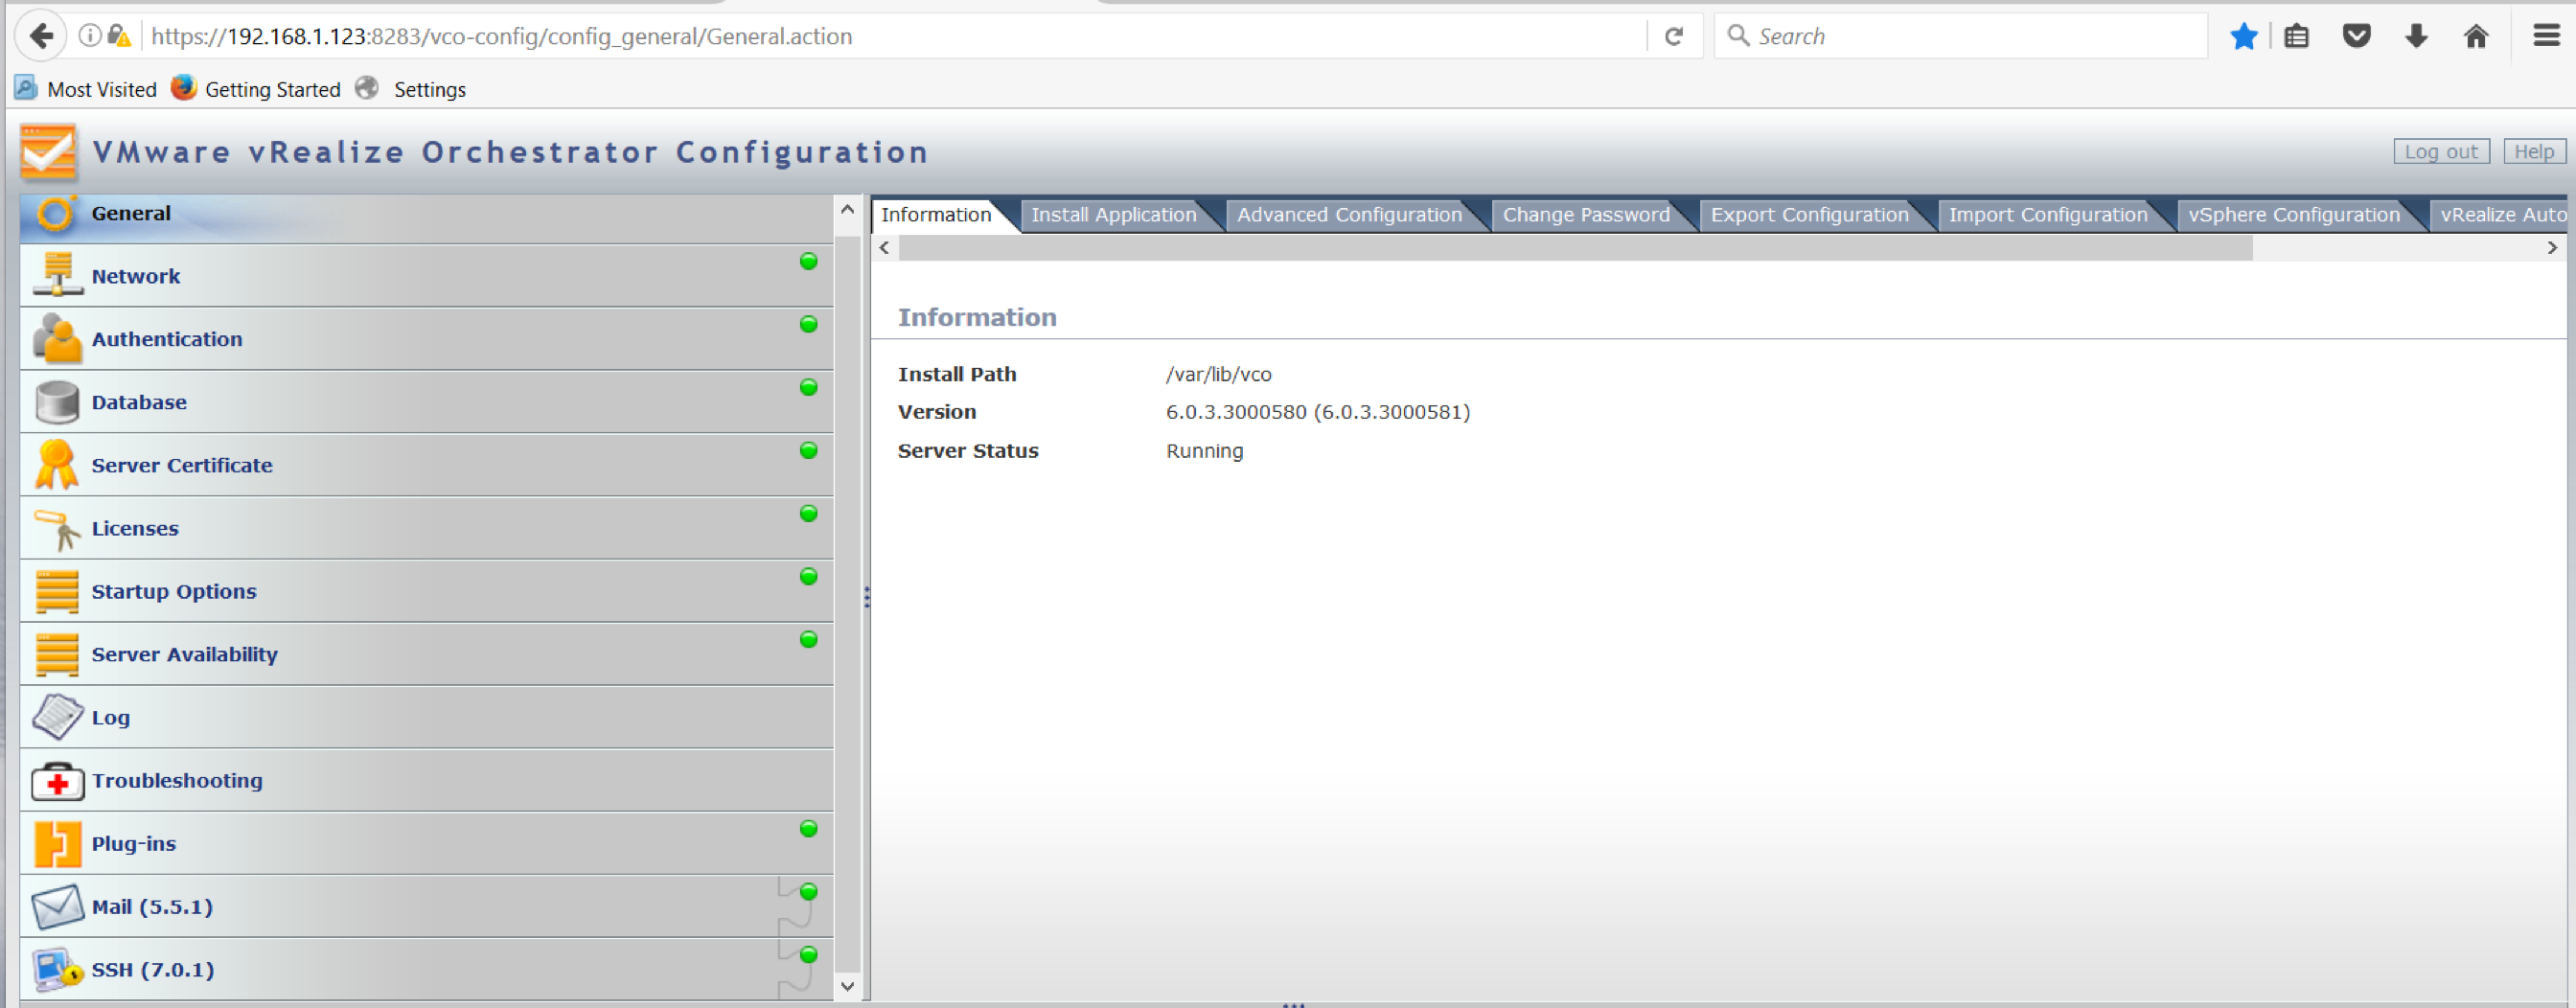
  • Log into a web browser using the Orchestrator web address. In my case https://192.168.1.123:8283
  • Use the vmware username and the password you set up in the OVF deployment

screen-shot-2016-11-22-at-21-01-17

  • You will reach the below screen

screen-shot-2016-11-22-at-21-02-27

  • Click on the Network tab on the left hand side and select your IP Address and check all other details are correct. Click Apply Changes at the bottom right of the screen

screen-shot-2016-11-22-at-21-03-40

  • Click on Authentication and scroll down the screen until you see a link for SSL Certificates. Click on this link

screen-shot-2016-11-22-at-21-05-05

  • Put in your vCenter server in the following format – techlabvcs001.techlab.local:7444 and click Import

screen-shot-2016-11-22-at-21-08-01 screen-shot-2016-11-22-at-21-21-36

  • Put in your Single Sign On/PSC server in the following format – techlapsc001.techlab.local:7444 and click Import

screen-shot-2016-11-22-at-21-12-04 screen-shot-2016-11-22-at-21-14-28

  • Go back to the Authentication tab
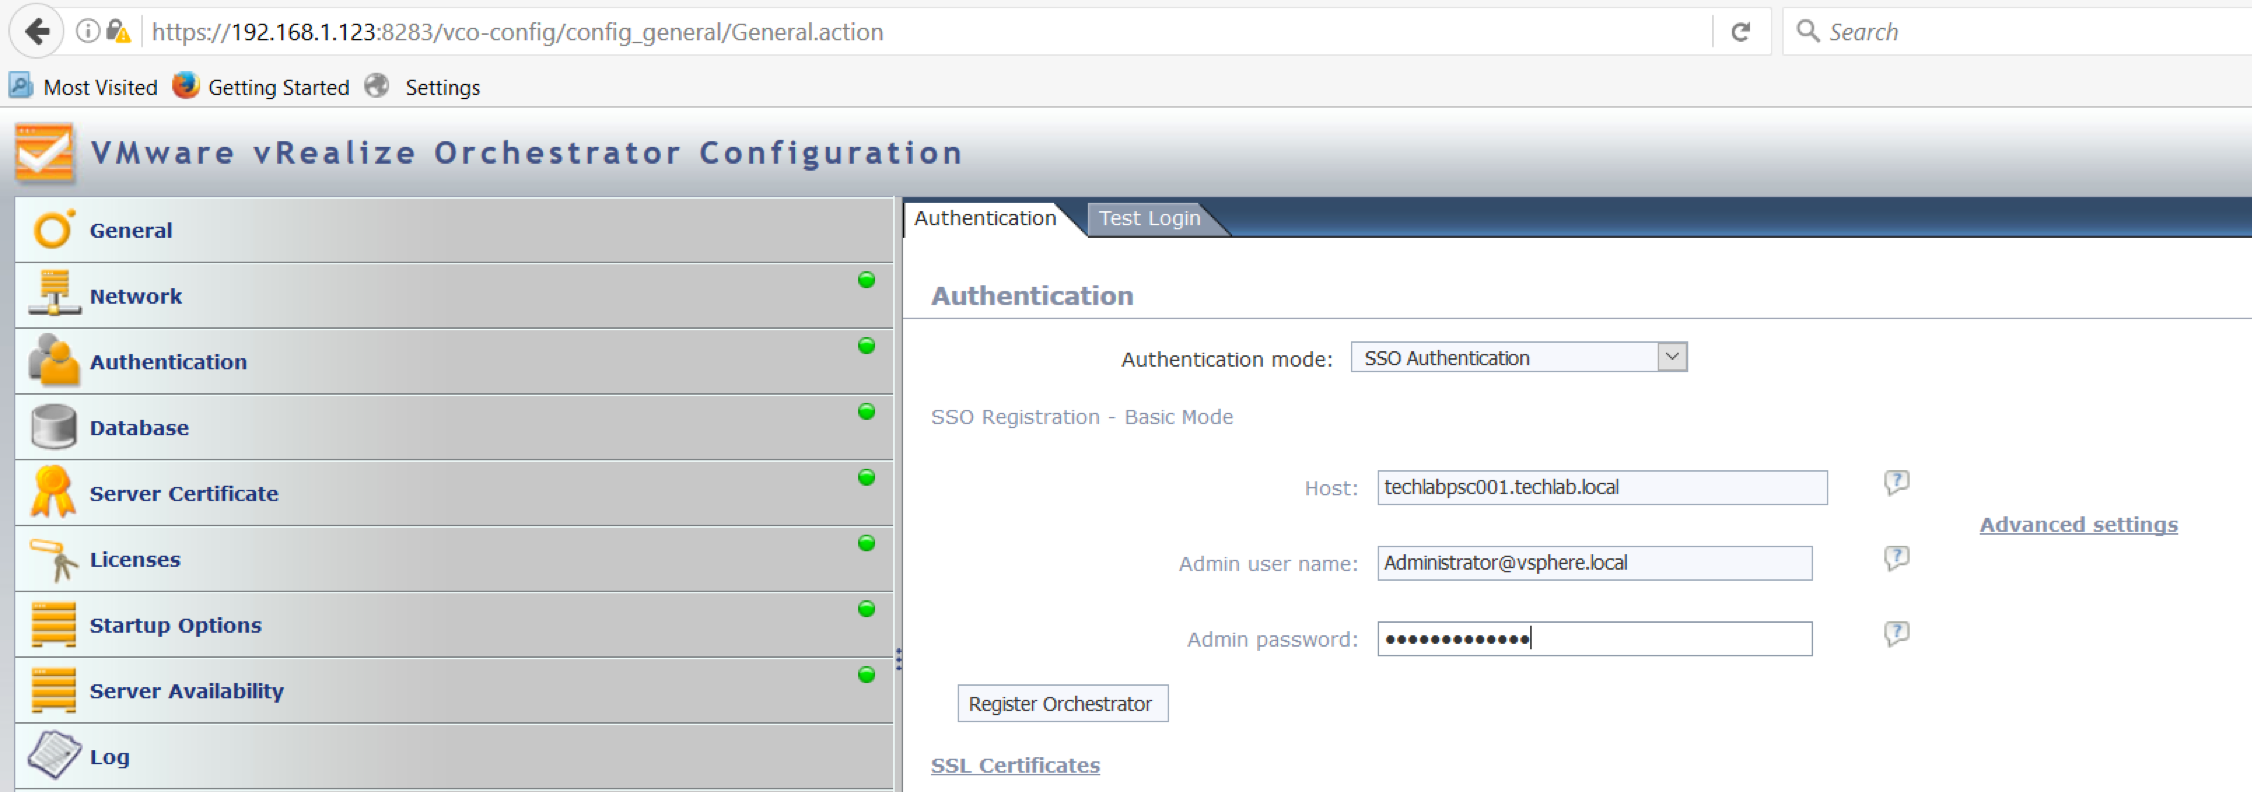
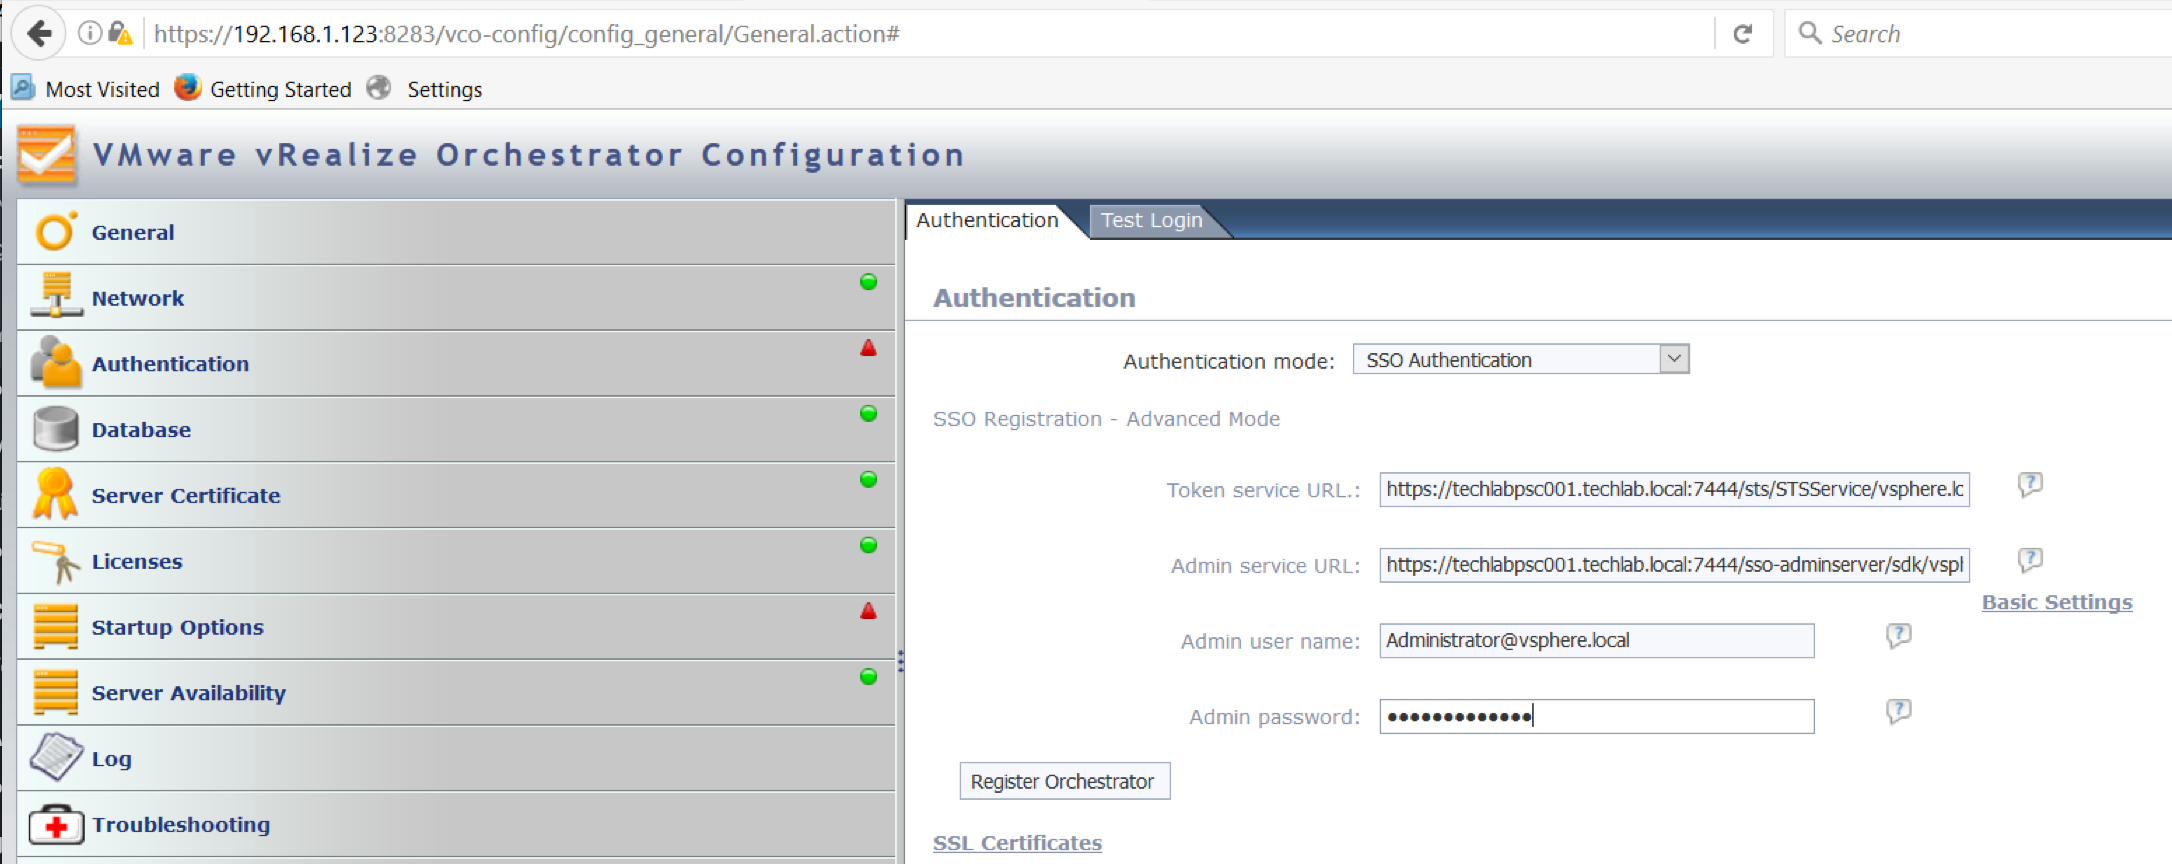
  • Put in your Single Sign On server and click Advanced
  • put in your Admin username and password
  • Click Register Orchestrator

screen-shot-2016-11-22-at-21-23-15

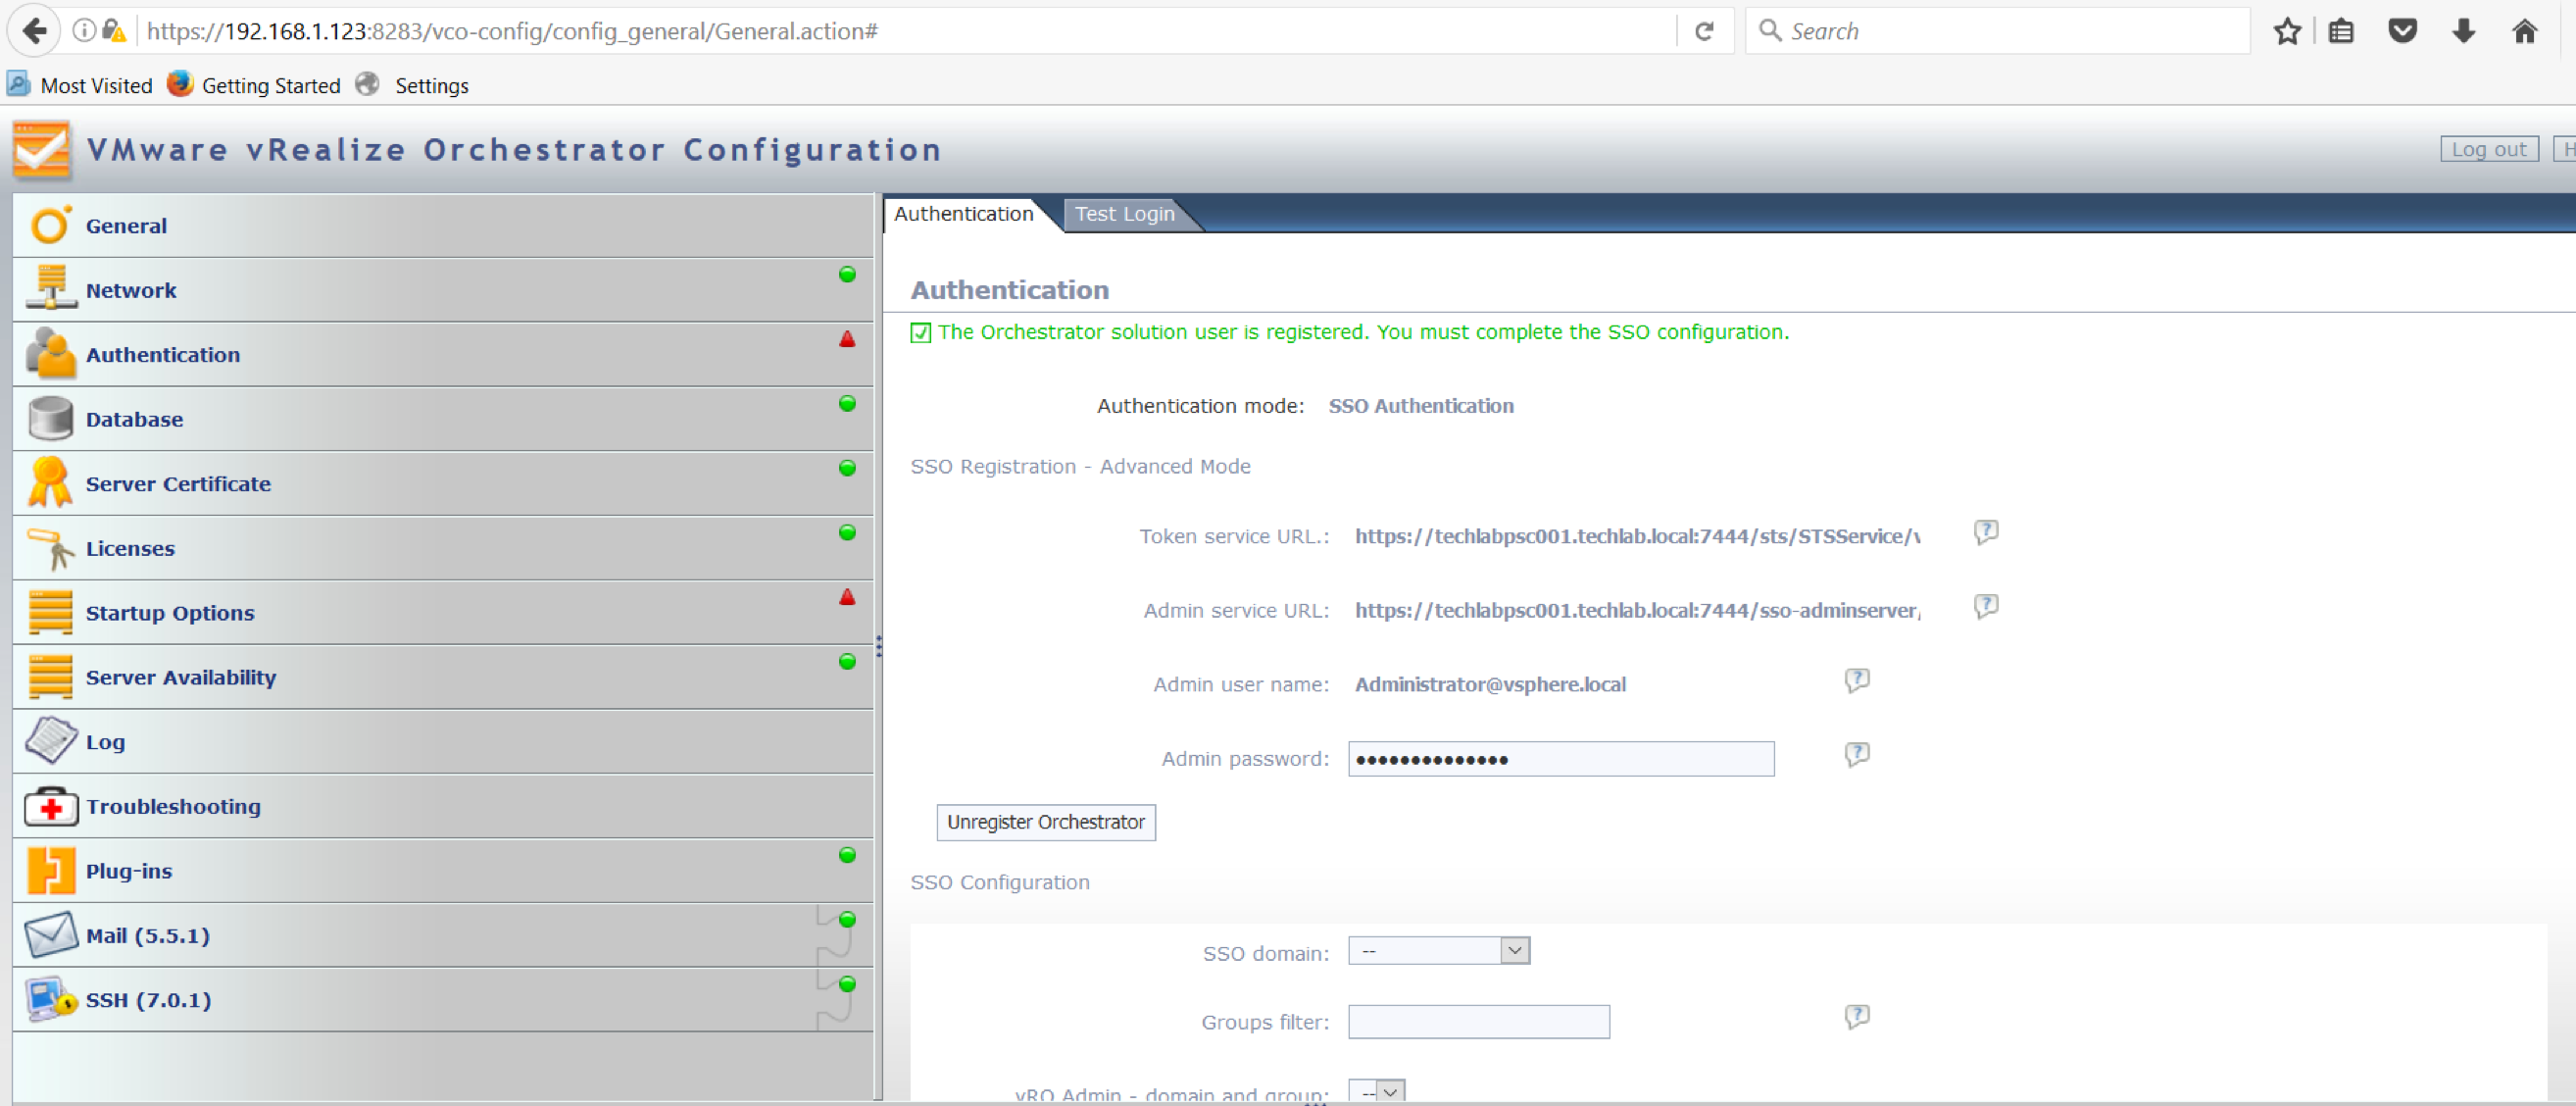
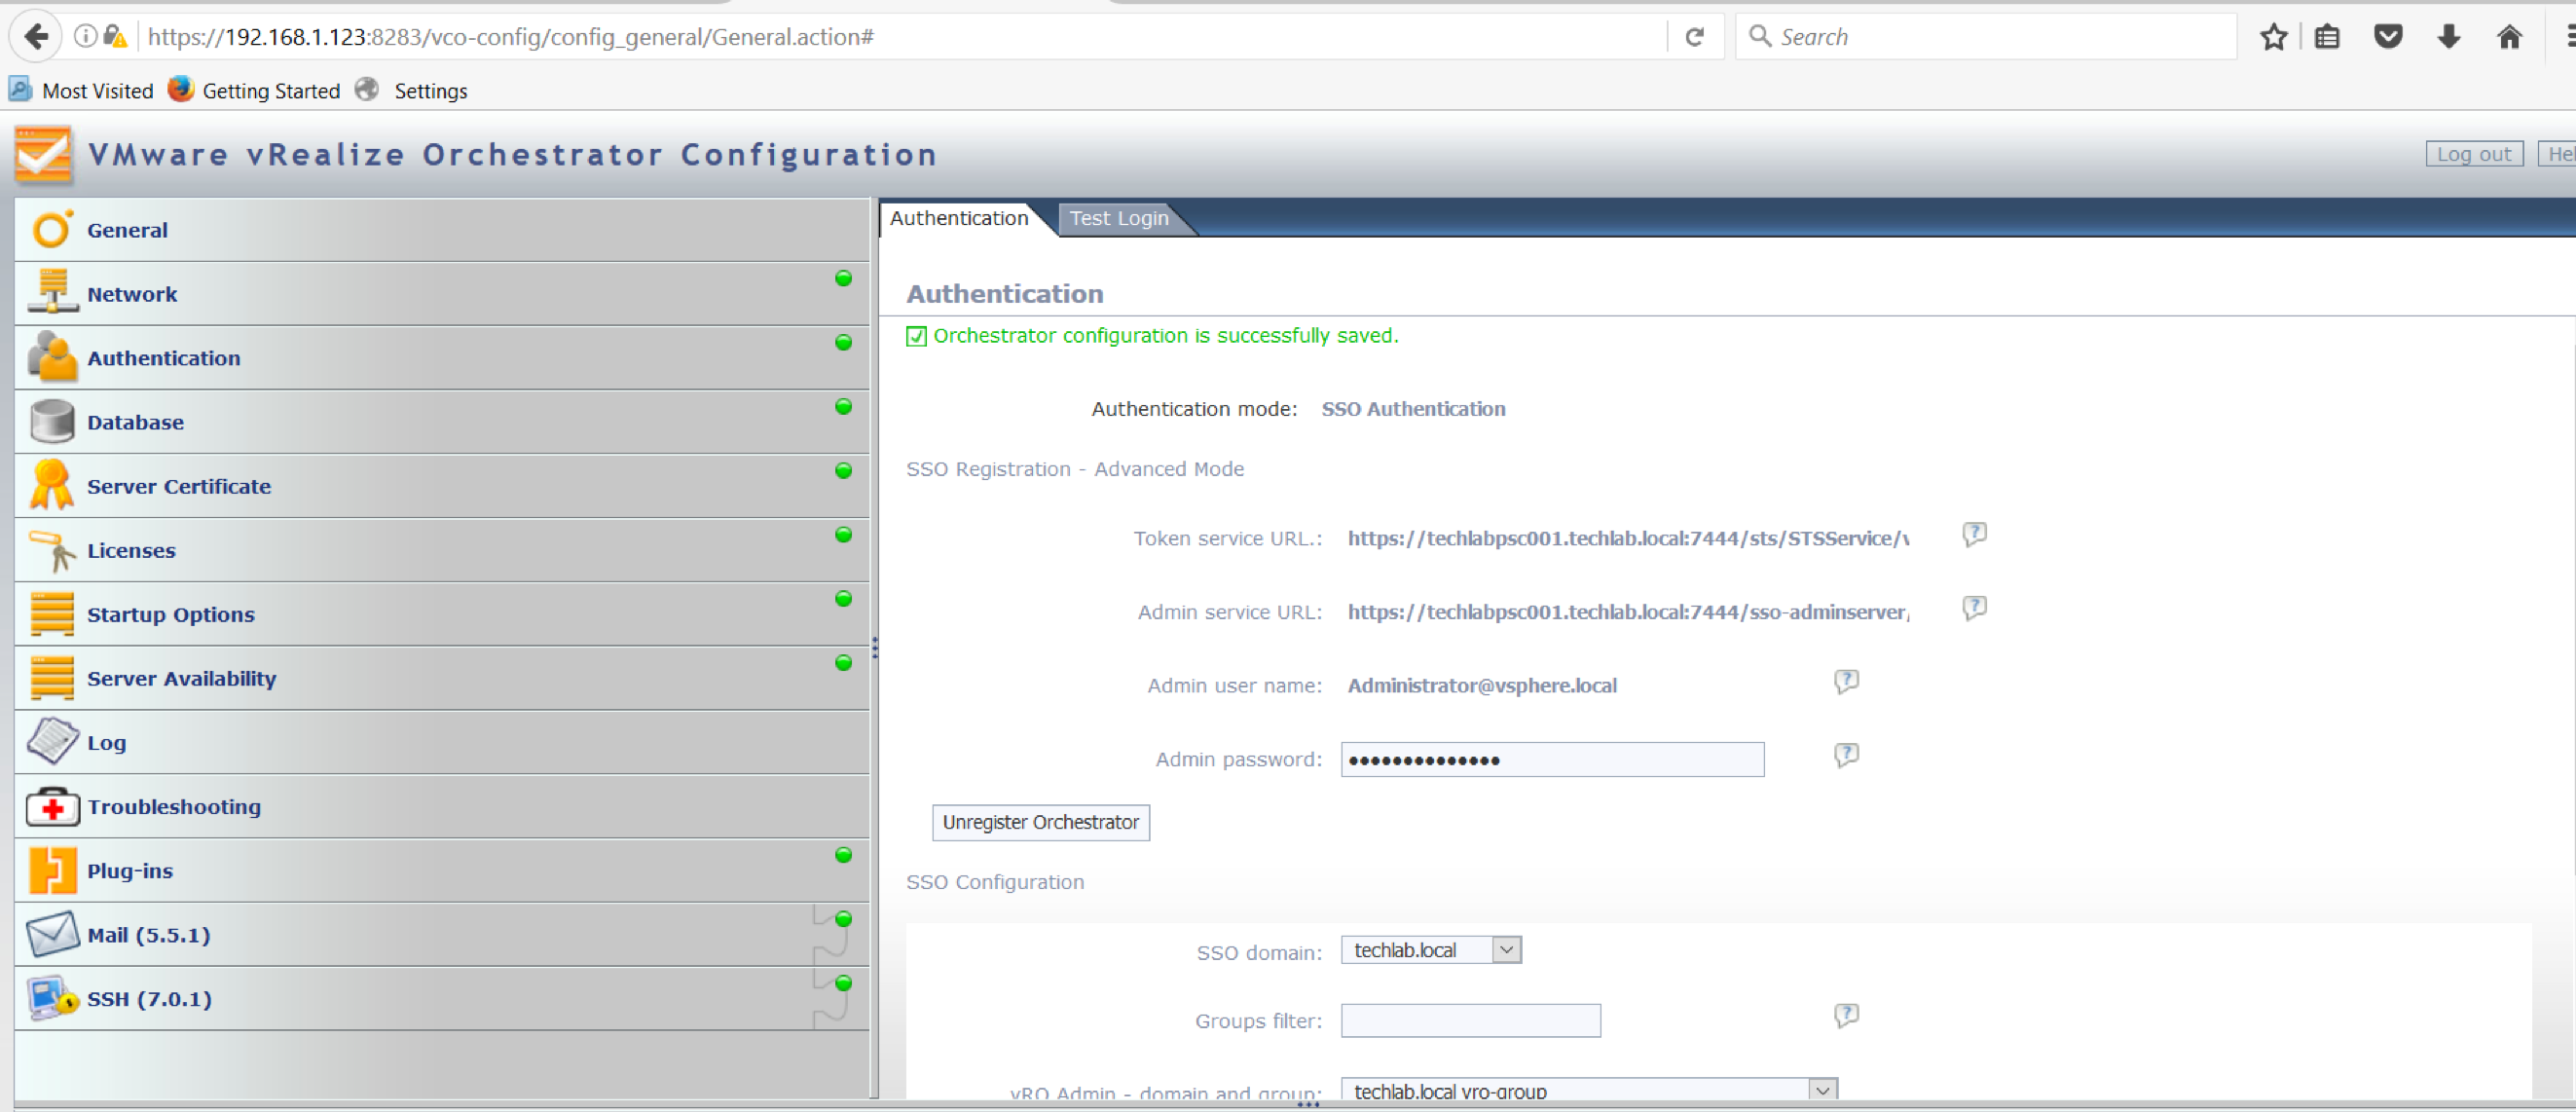
  • It should look like the below with further configuration to do

screen-shot-2016-11-22-at-21-24-52

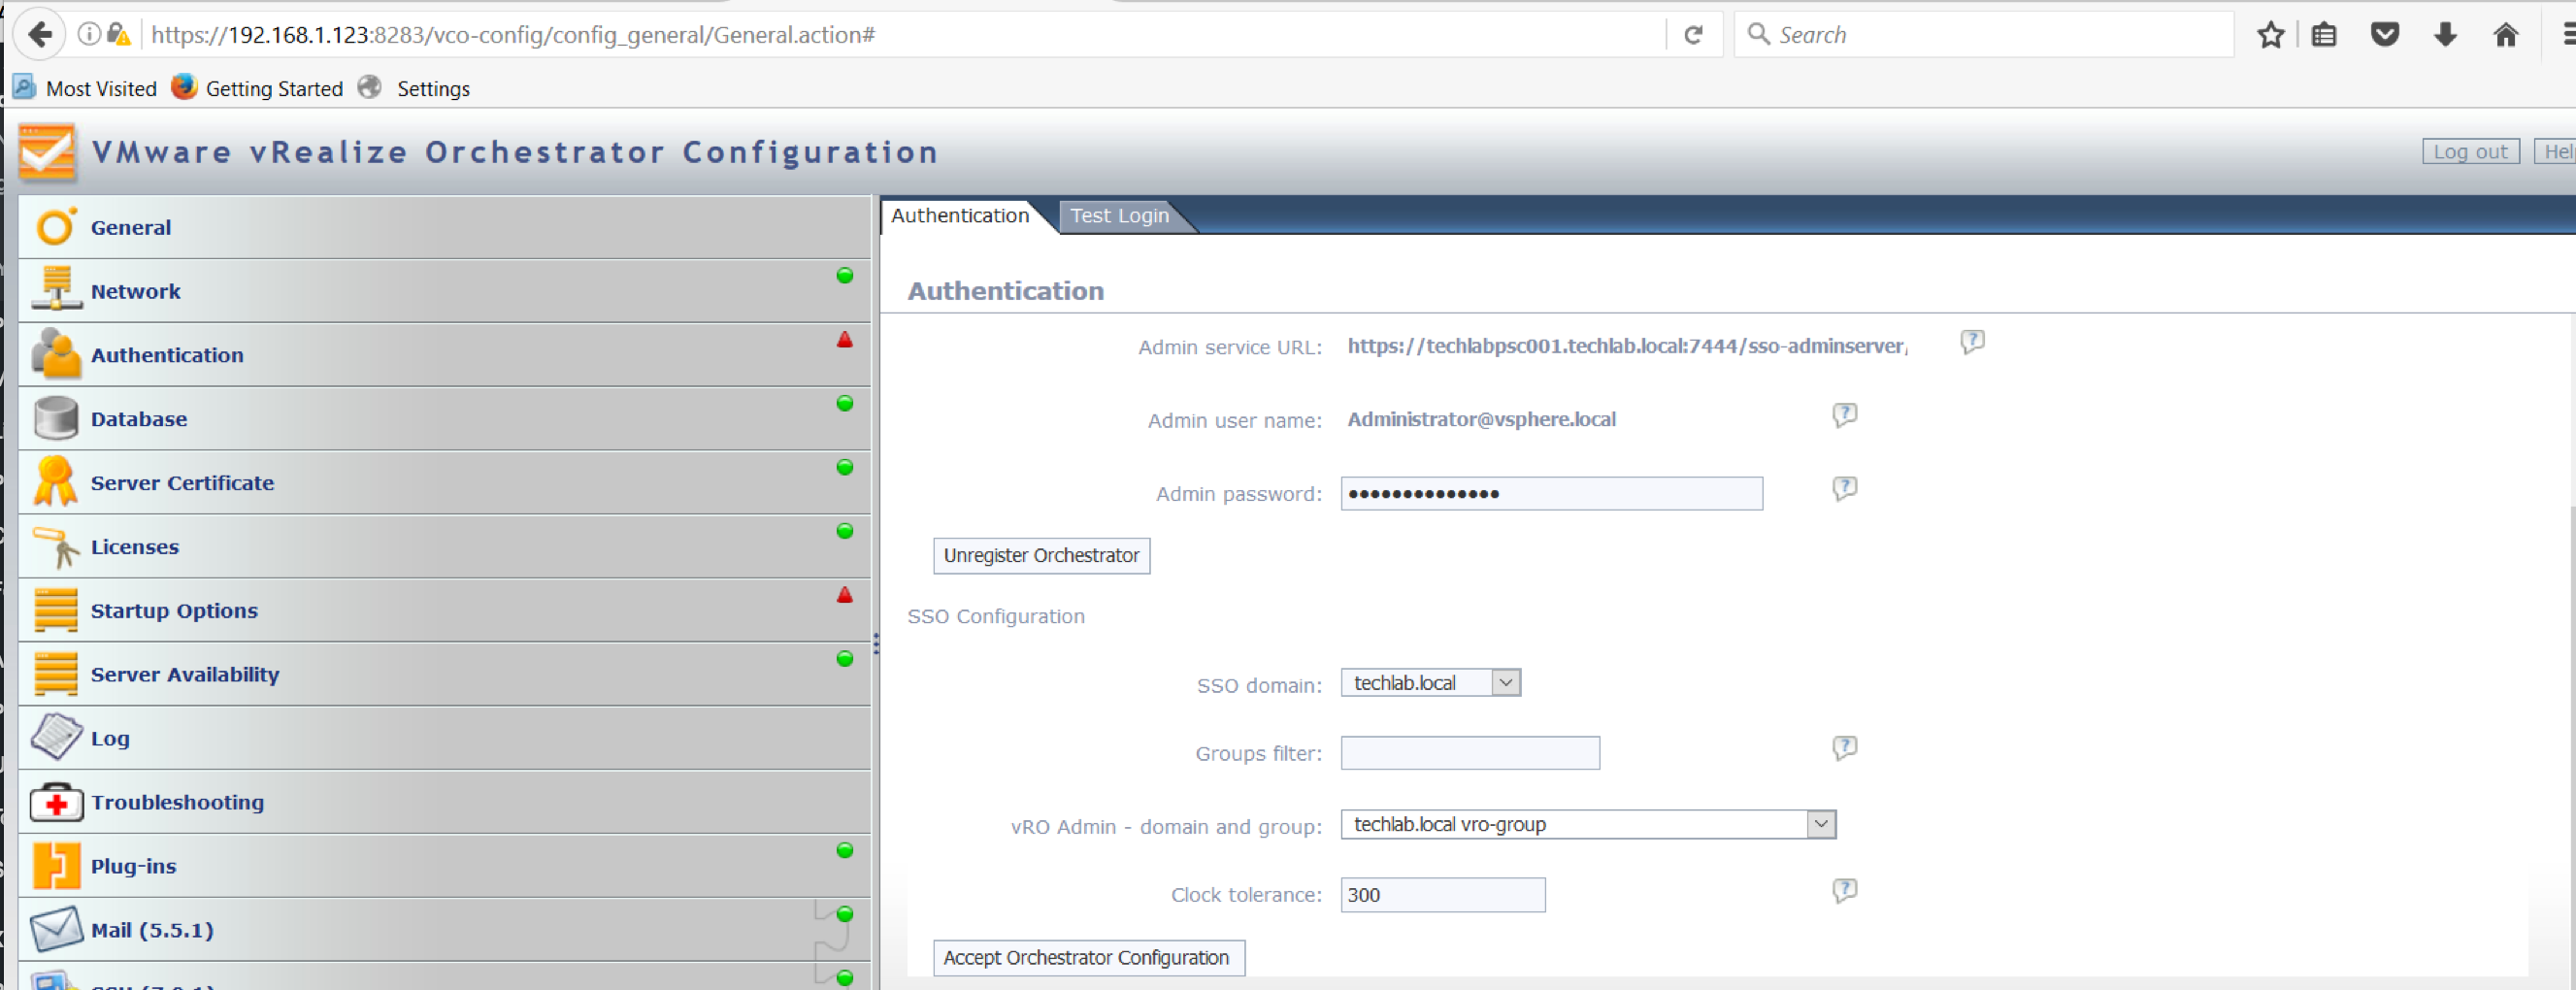
  • Choose your SSO Domain which can be the local domain, LAN domain or the vsphere.local domain.
  • In my case I chose my main domain techlab.local where I have set up a group called vro-group which contains user accounts I want to use as Admins

screen-shot-2016-11-22-at-21-26-22

  • Click Accept Orchestrator Configuration

screen-shot-2016-11-22-at-21-28-40

  • Click Test login and try one of your users

screen-shot-2016-11-22-at-21-30-20

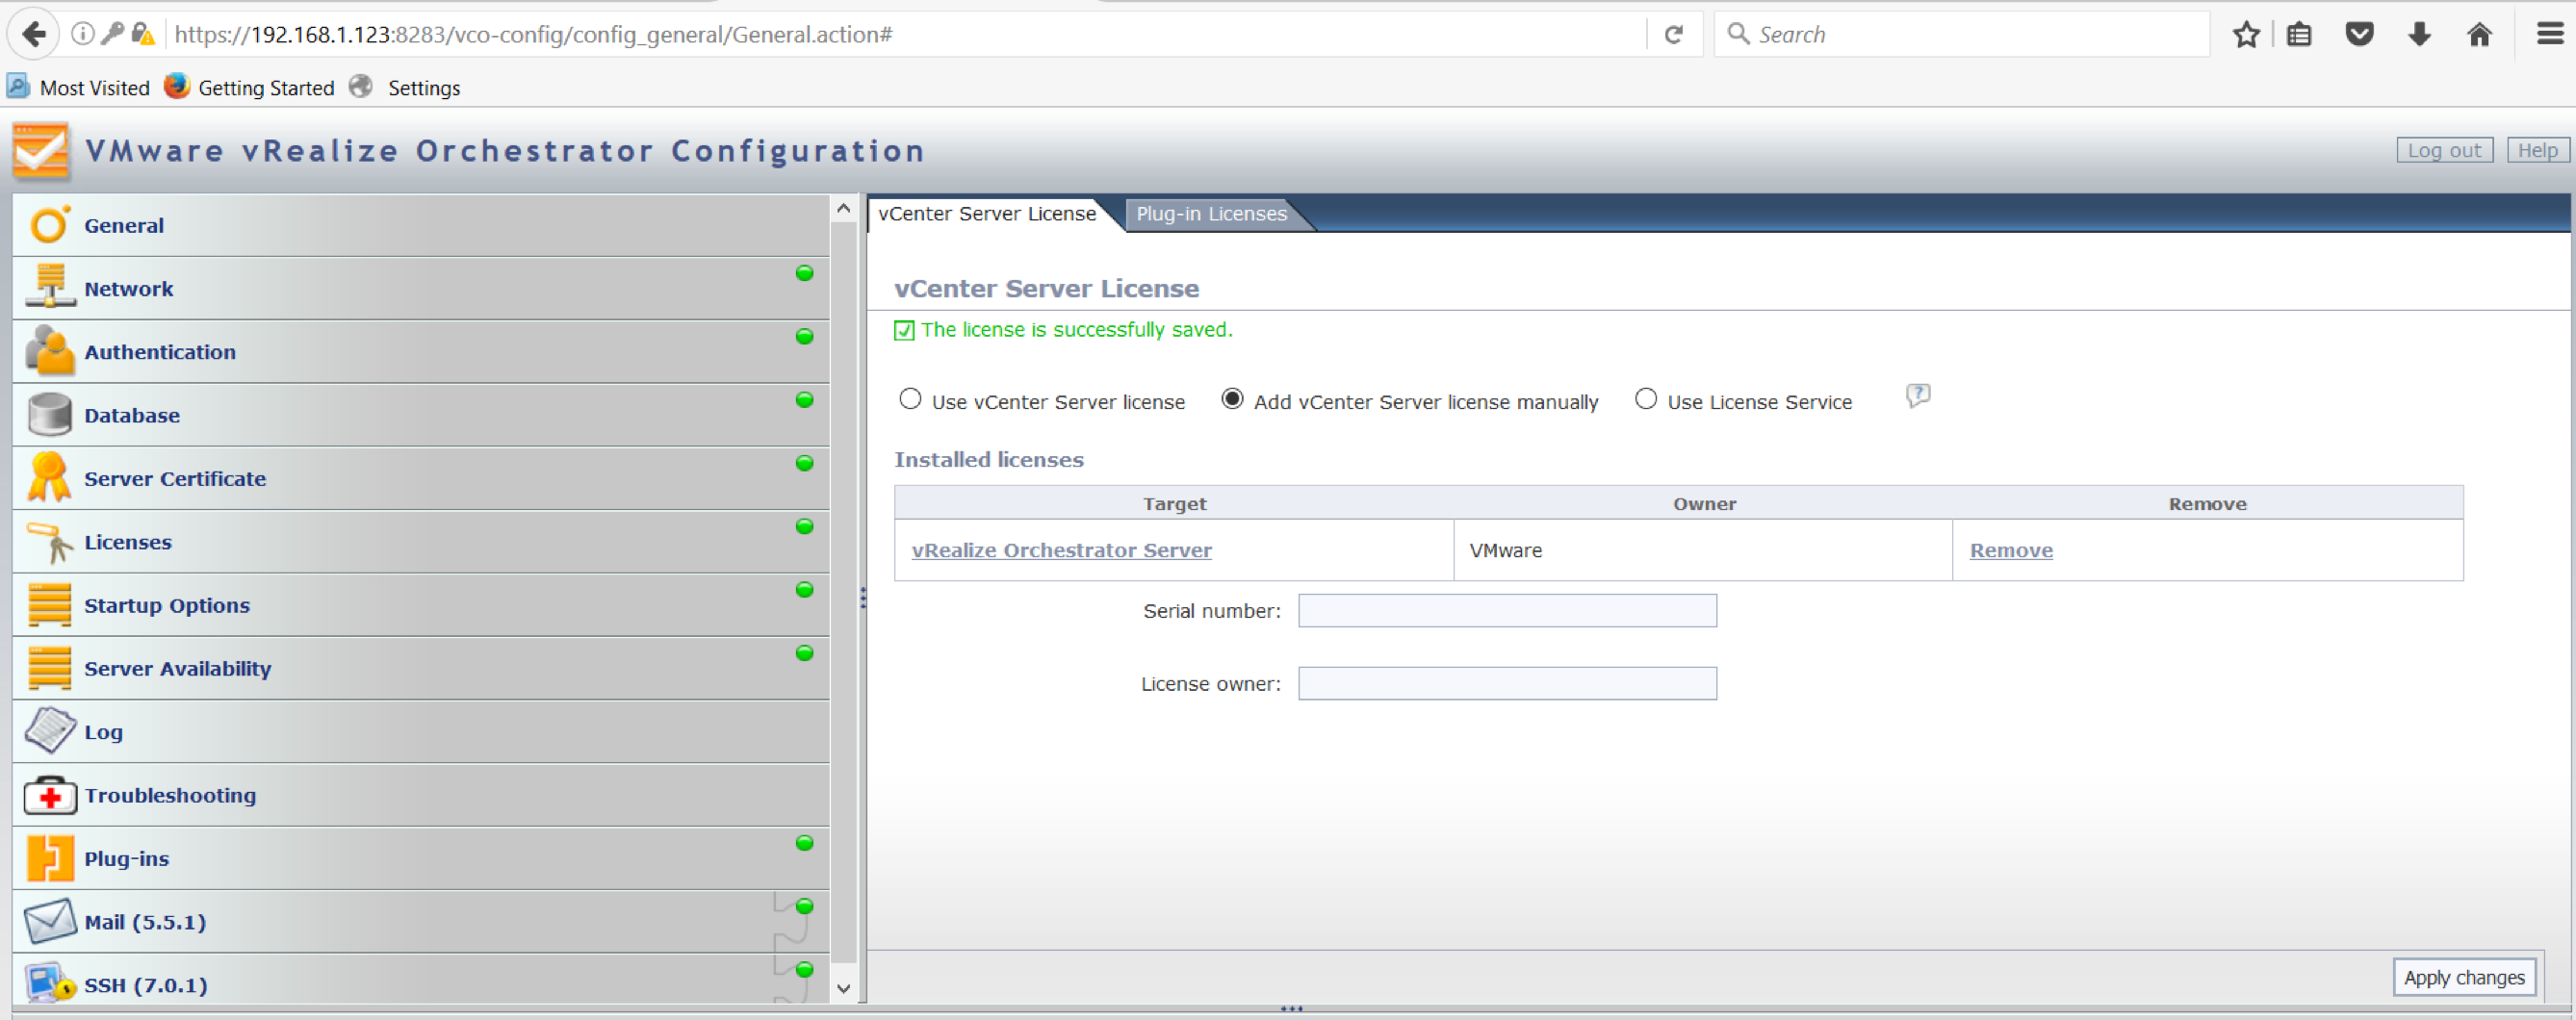
  • Check your license

screen-shot-2016-11-22-at-21-33-50

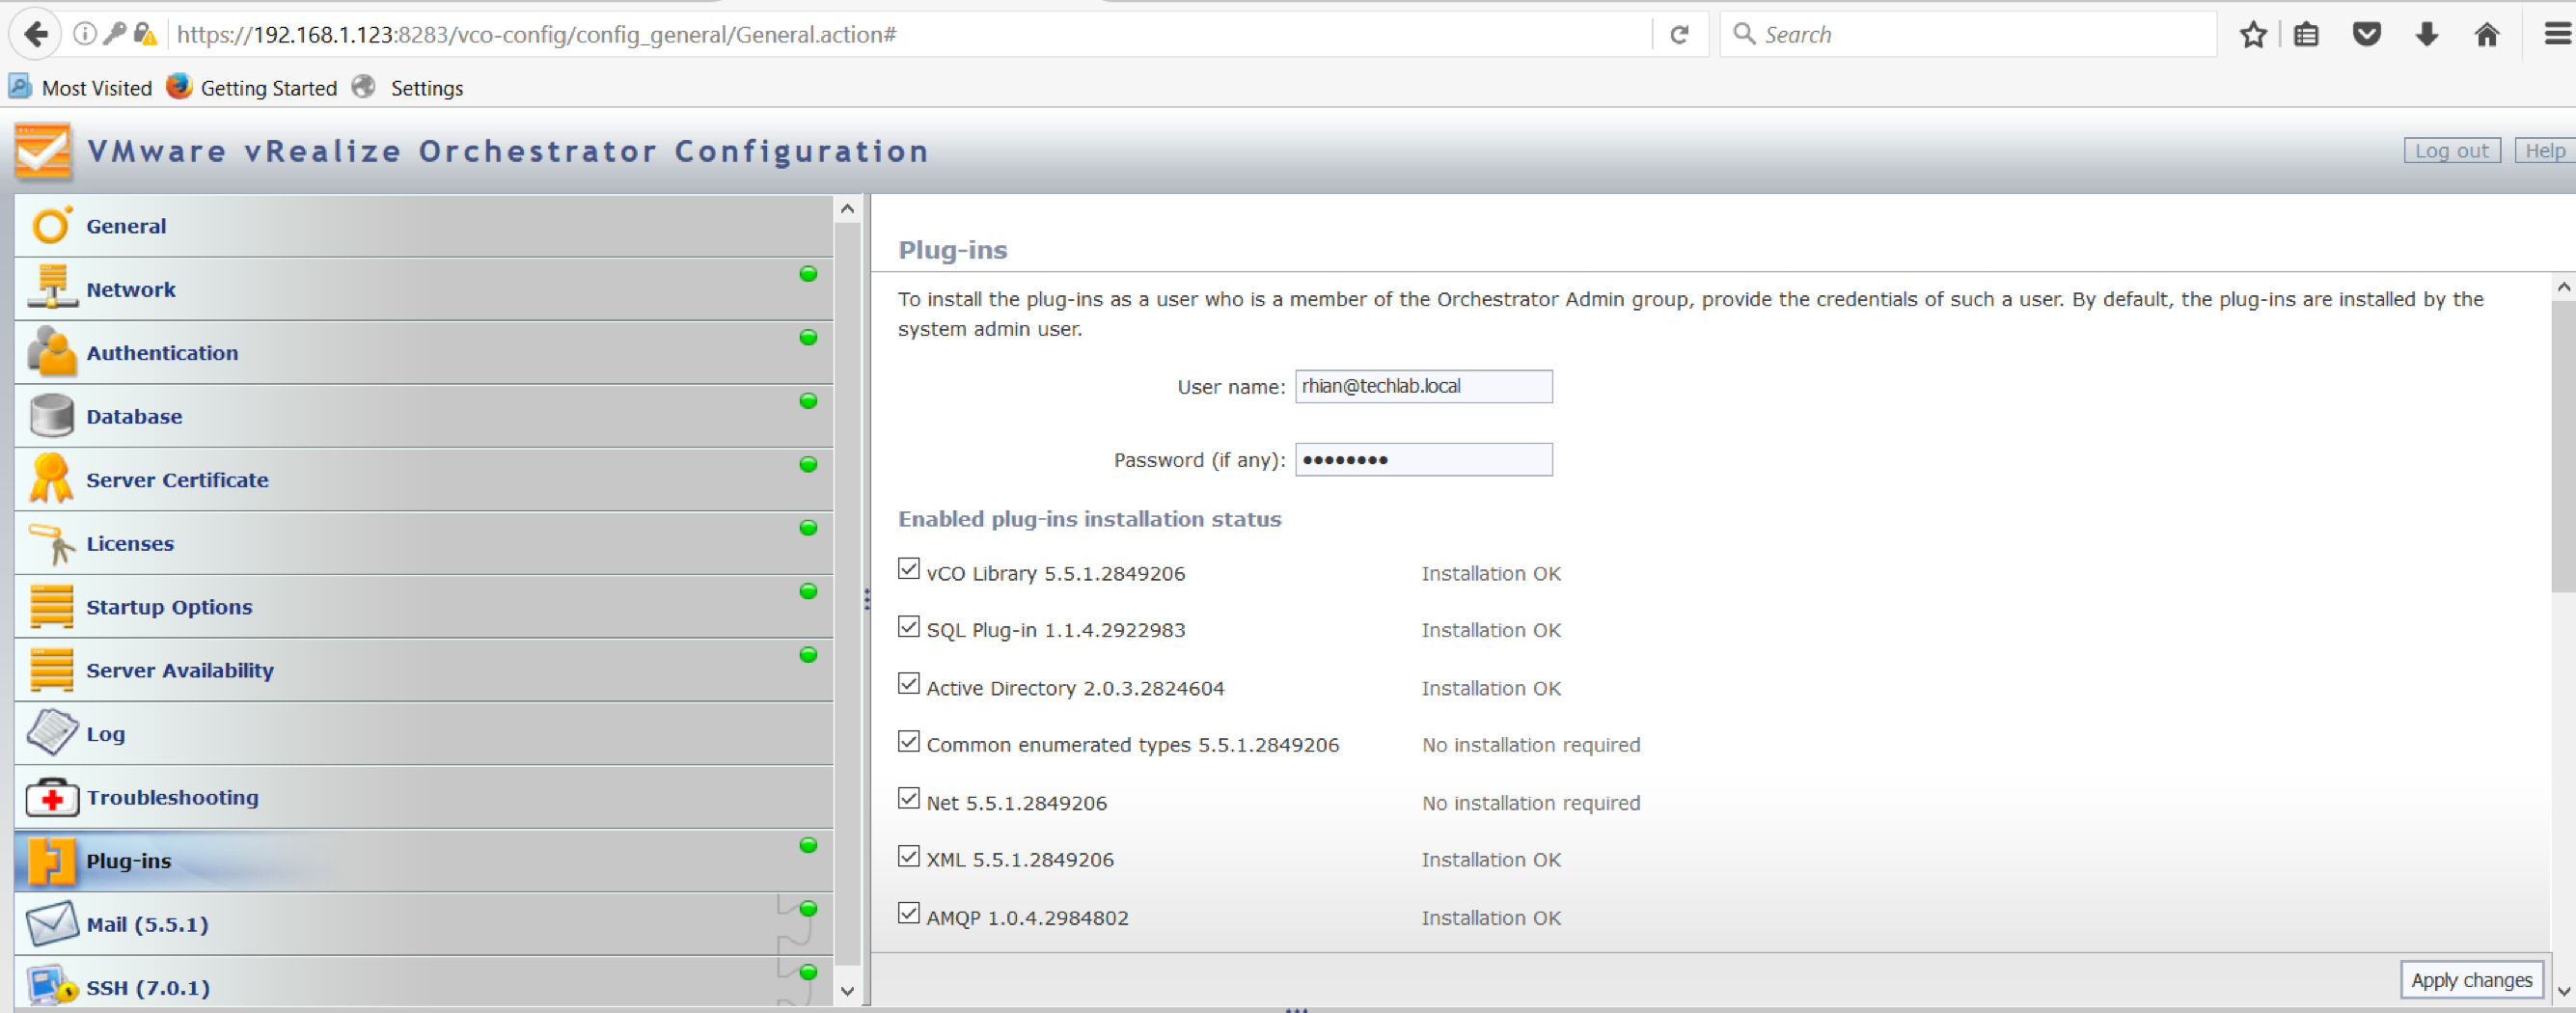
  • Check the Plugins are all ok

screen-shot-2016-11-22-at-21-34-50

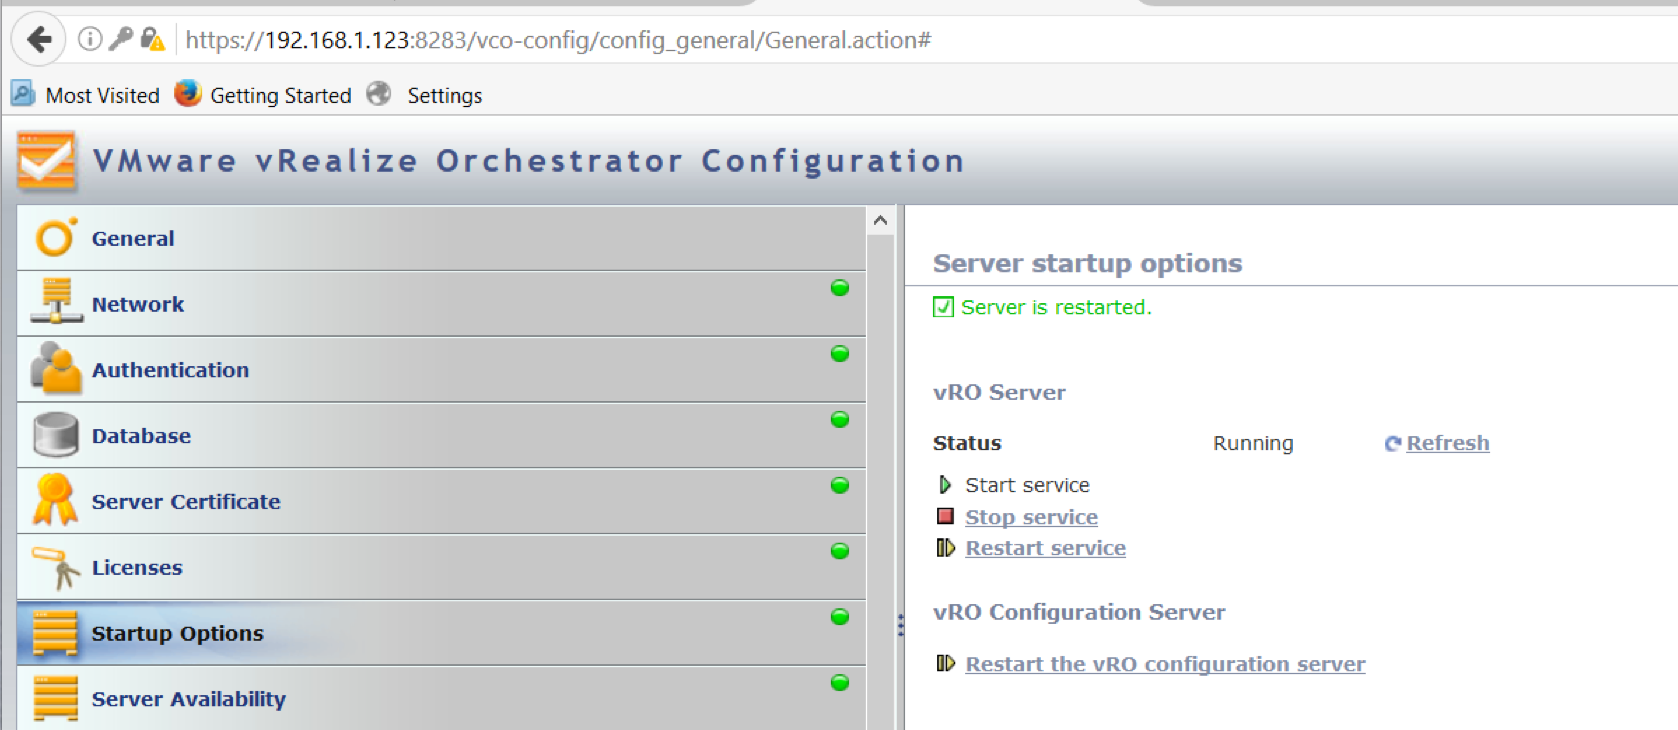
  • Click Startup options and restart both services
  • Log back in and check everything is green

screen-shot-2016-11-22-at-21-36-17 screen-shot-2016-11-22-at-21-37-48 NEXT

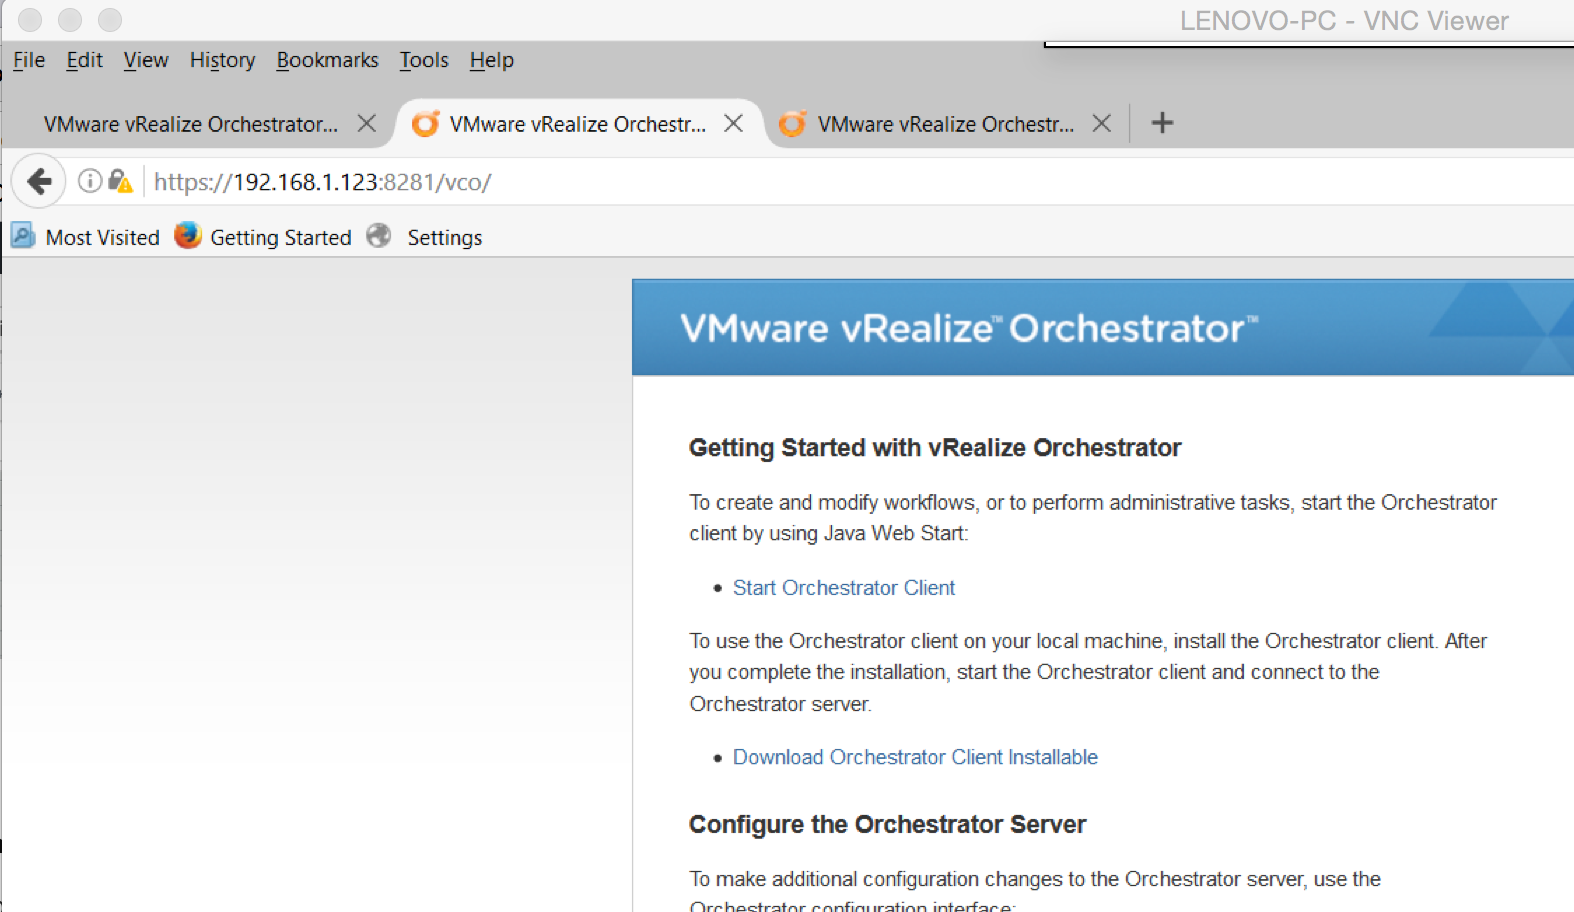
  • Open a web page and navigate to your Orchestrator configuration page which in my case is https://techlaborc001.techlab.local:8281
  • Click on Start Orchestrator Client

screen-shot-2016-11-22-at-23-17-55

  • Click on the drop down to Design
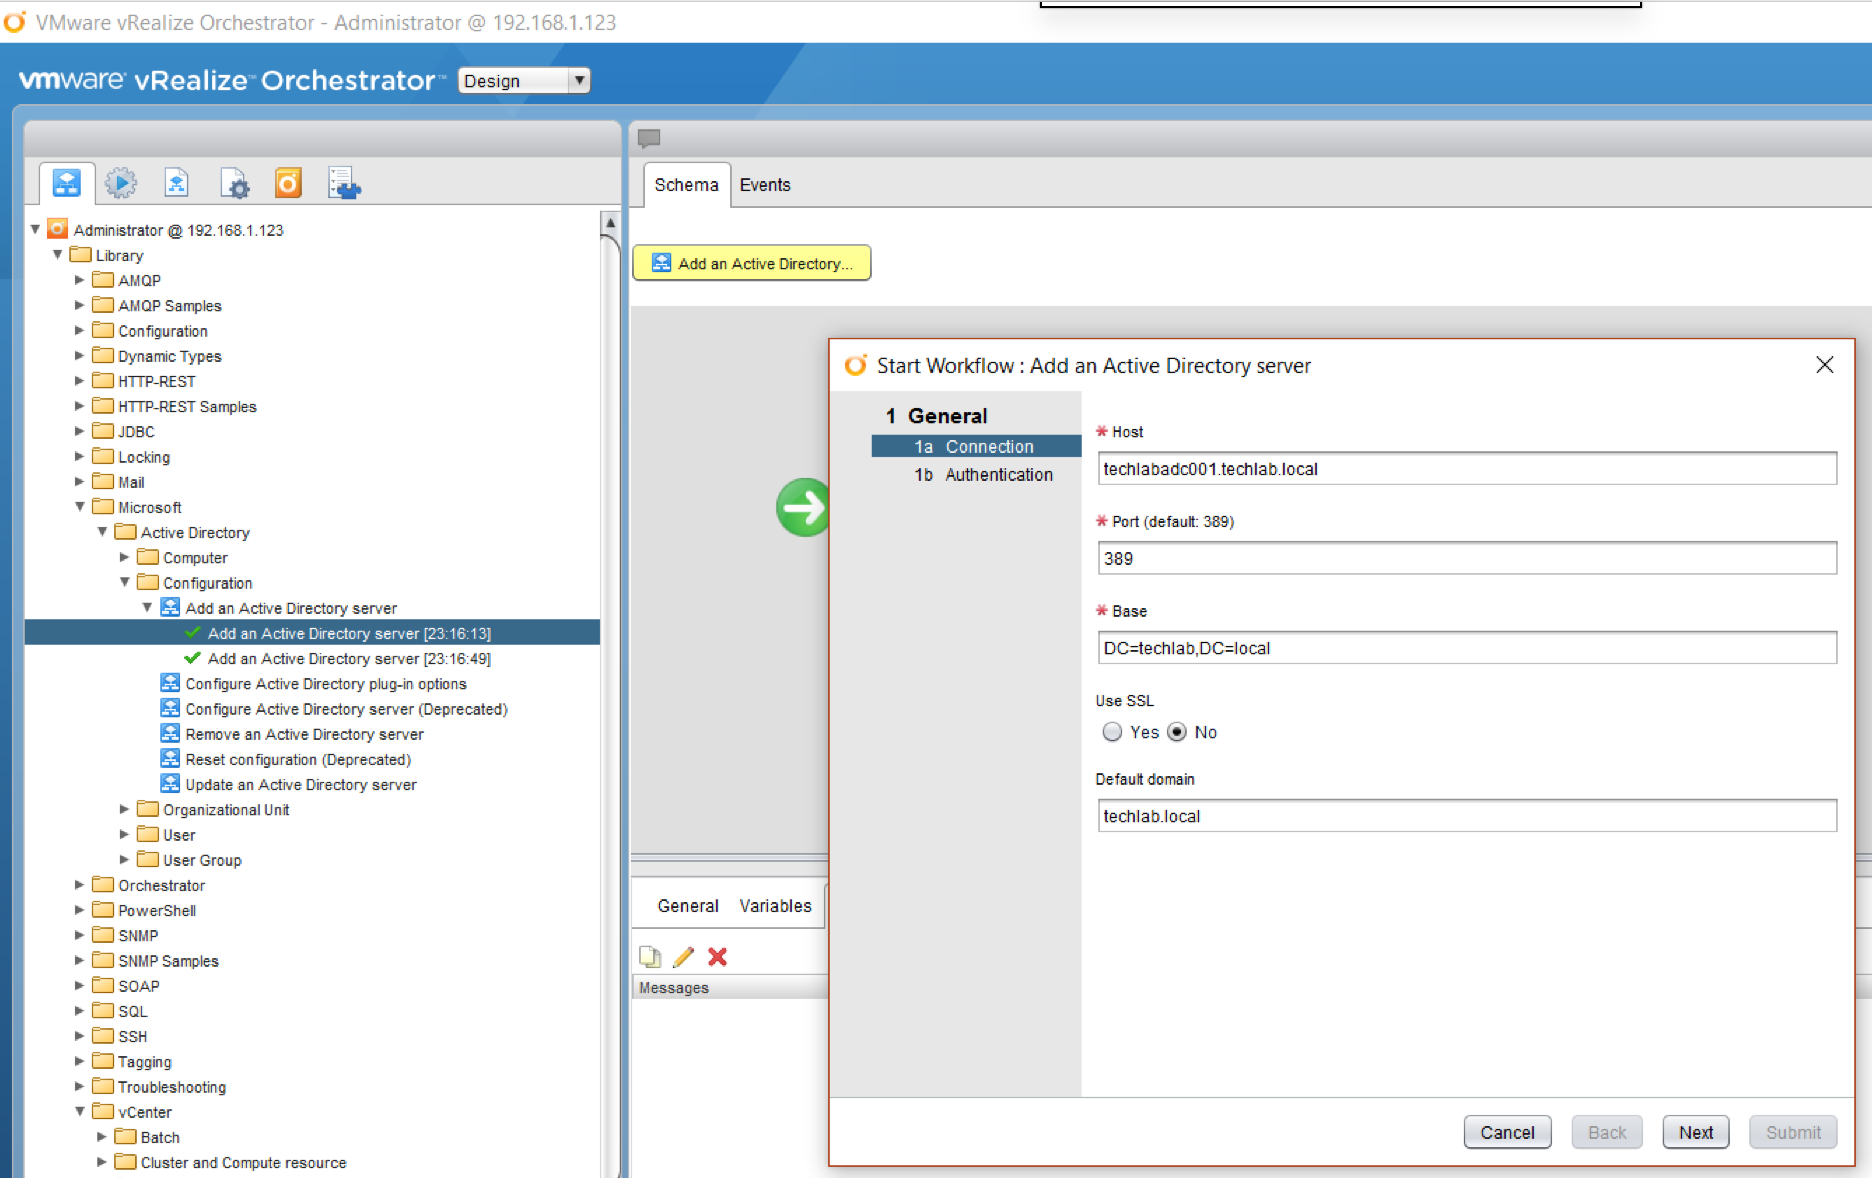
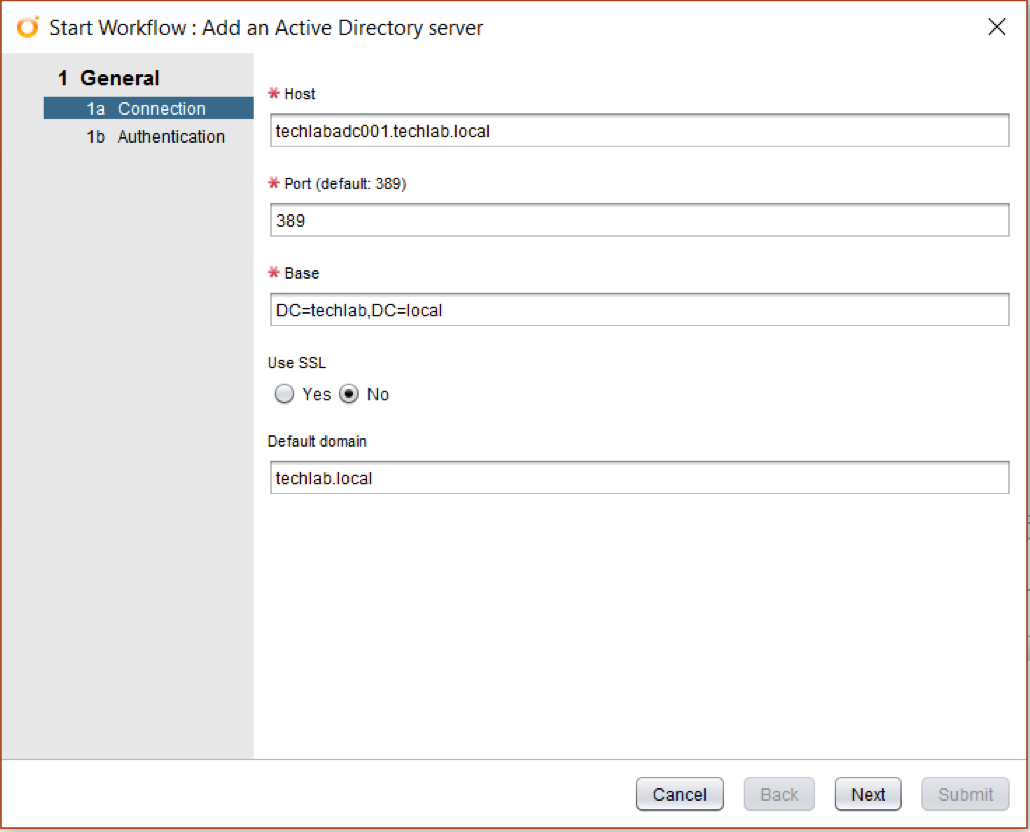
  • Navigate to Library > Microsoft > Active Directory > Configuration > Add an Active Directory server
  • Add in the relevant details for your AD server and add others as necessary

screen-shot-2016-11-22-at-23-19-53 screen-shot-2016-11-22-at-23-17-19

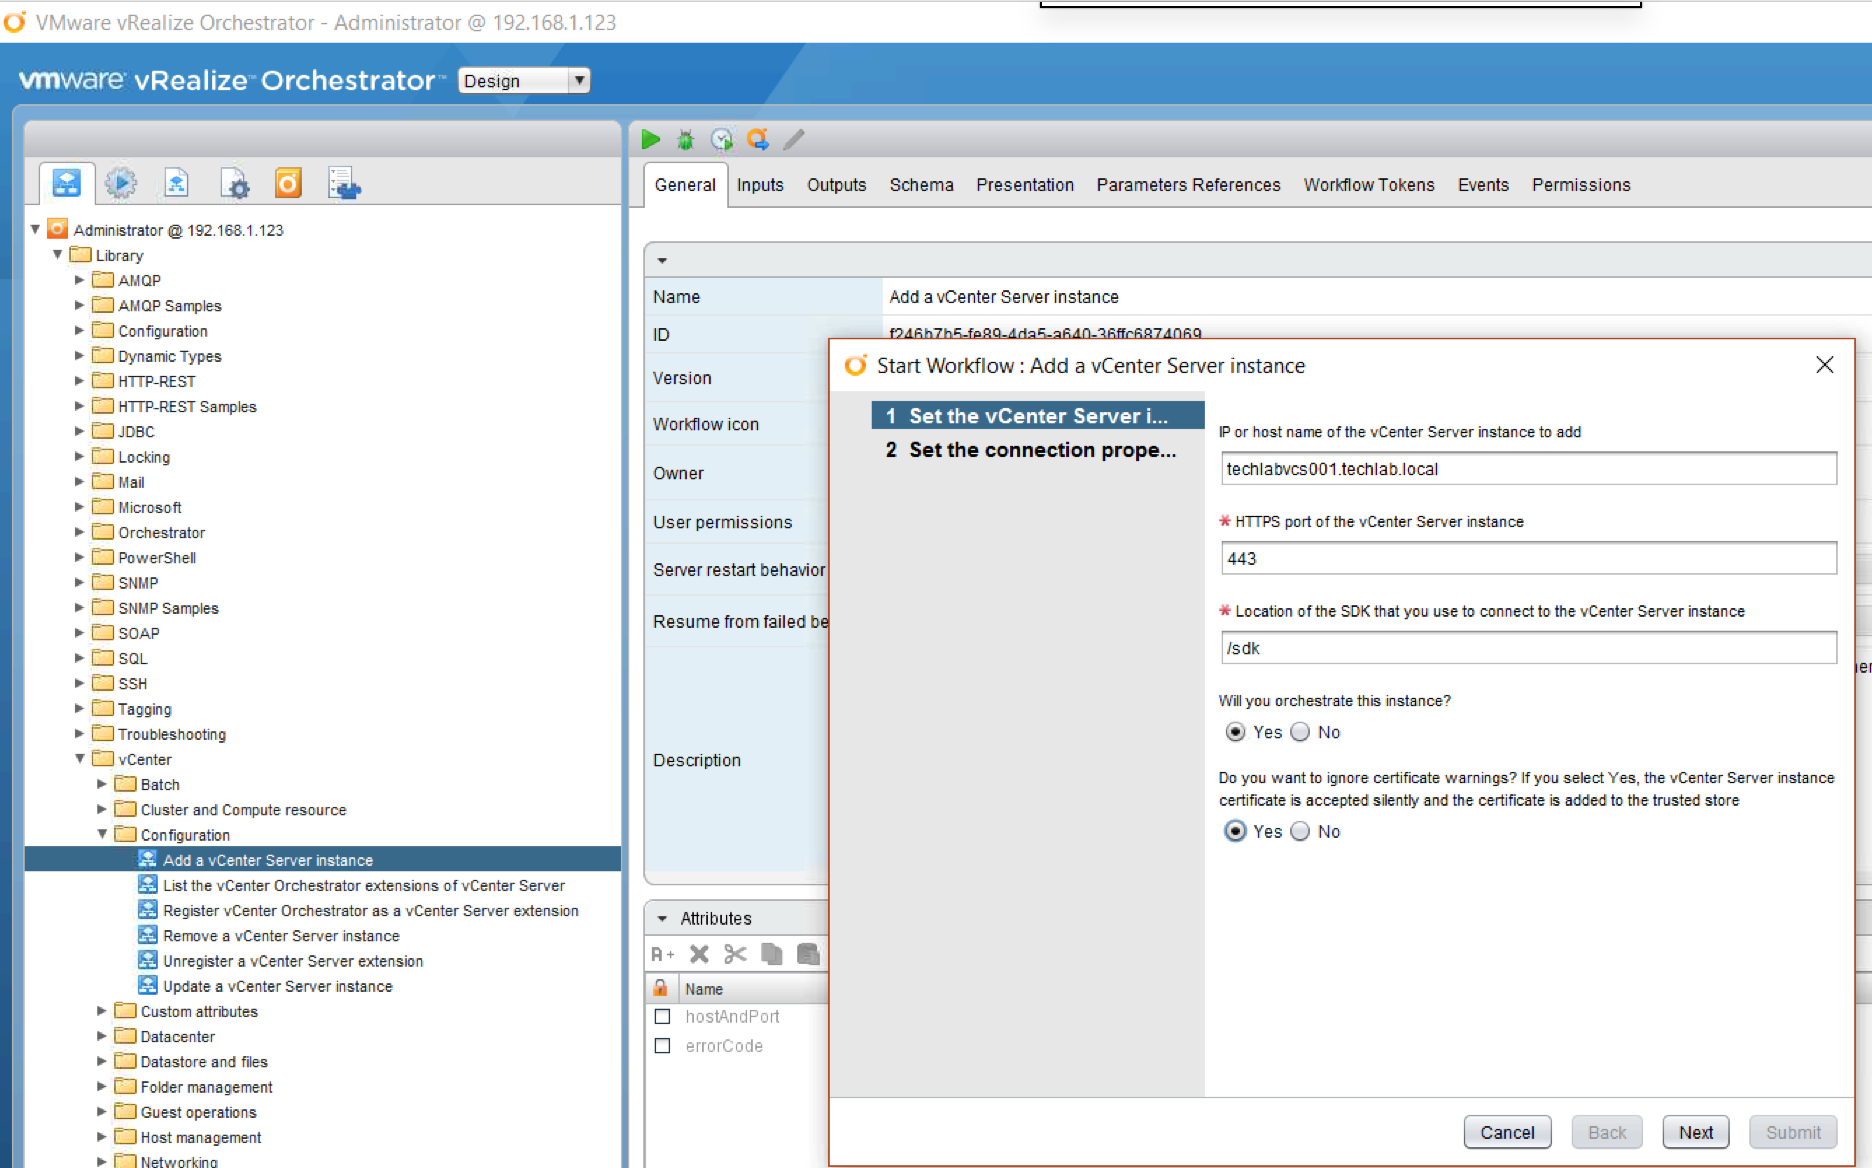
  • Next navigate to Library > vCenter > Configuration > Add a vCenter Instance

screen-shot-2016-11-22-at-23-23-34

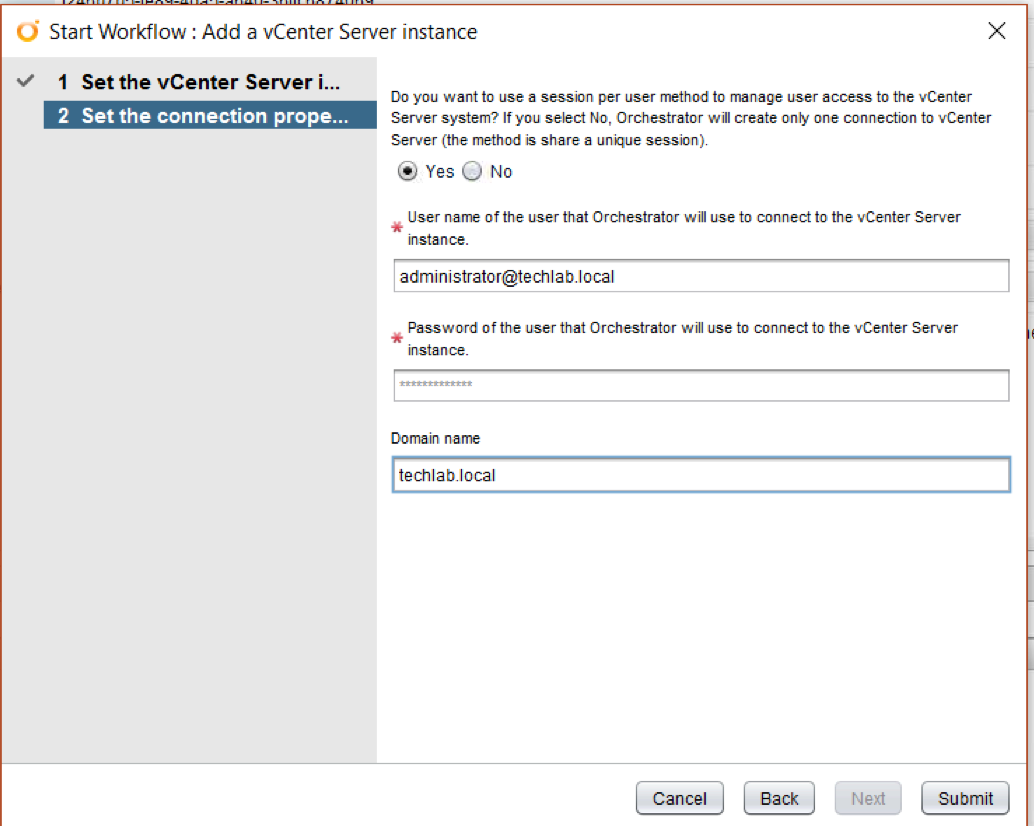
  • Click Next and fill in the next screen

screen-shot-2016-11-22-at-23-24-27

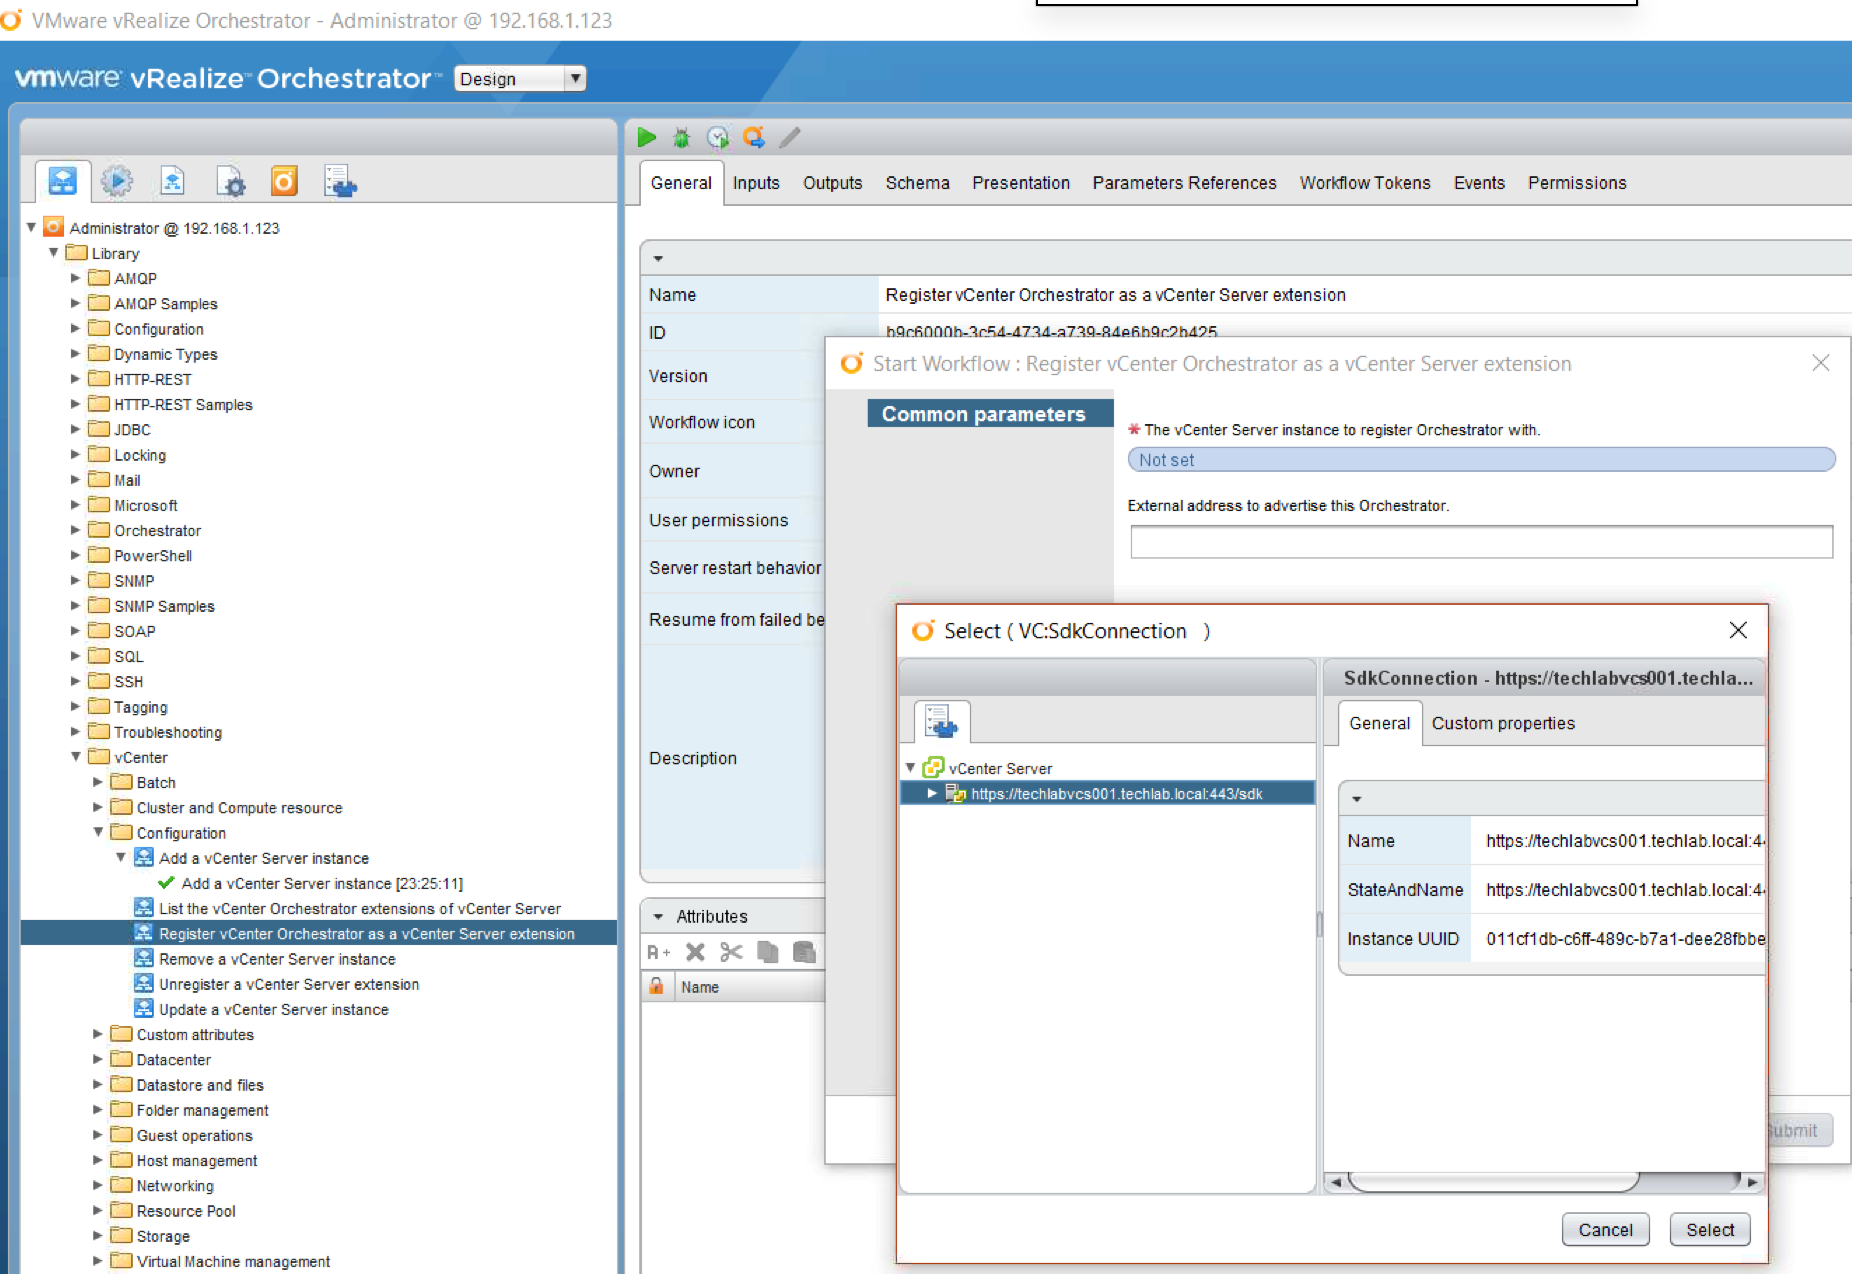
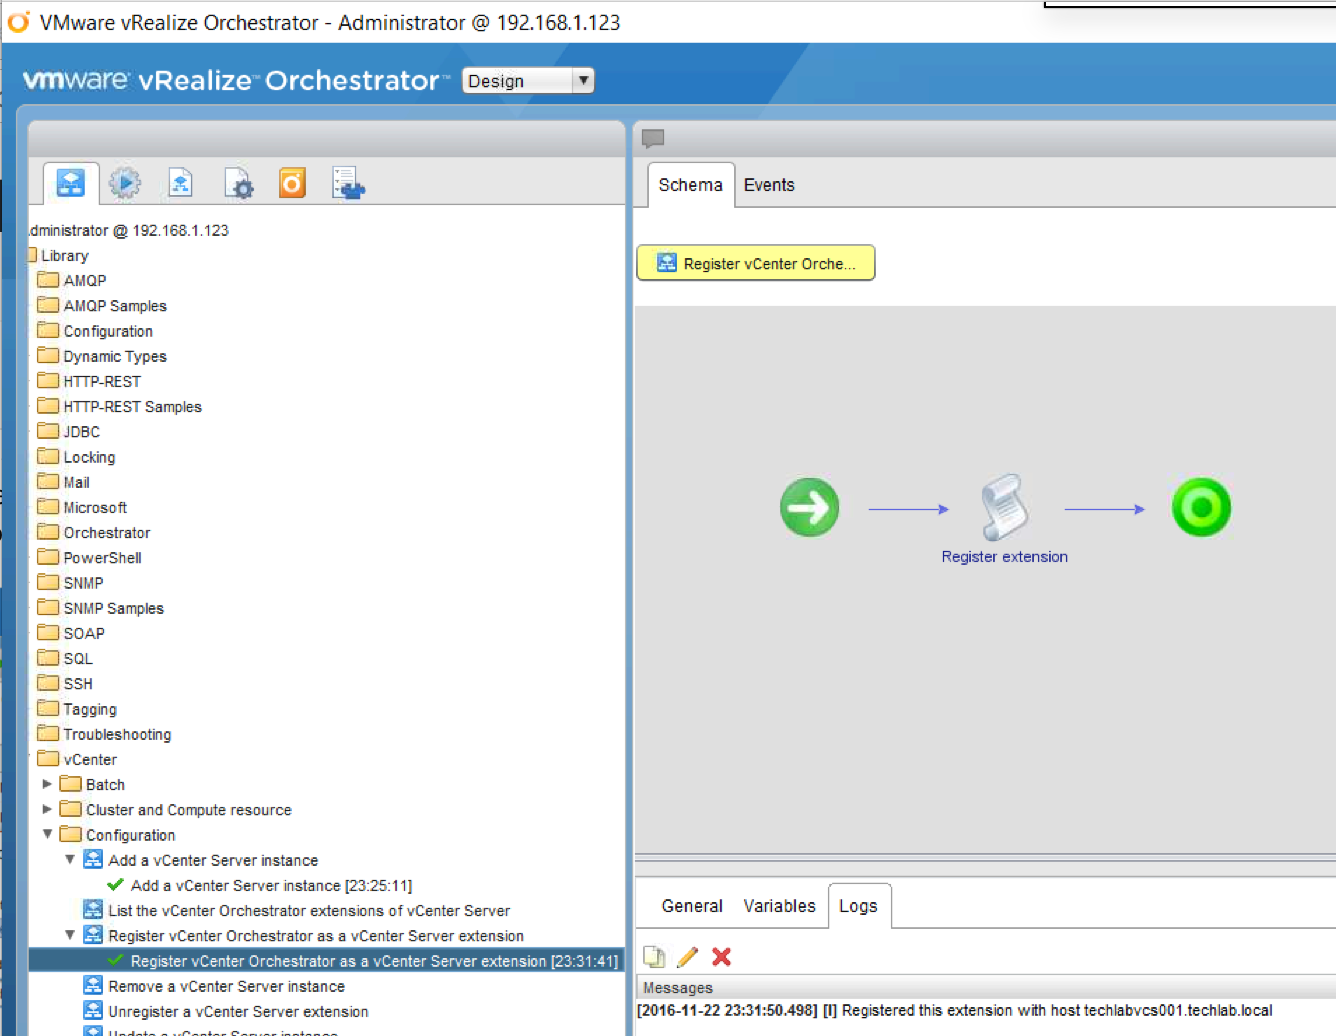
  • Next we need to run the workflow Register vCenter Orchestrator as a vCenter extension

screen-shot-2016-11-22-at-23-27-40

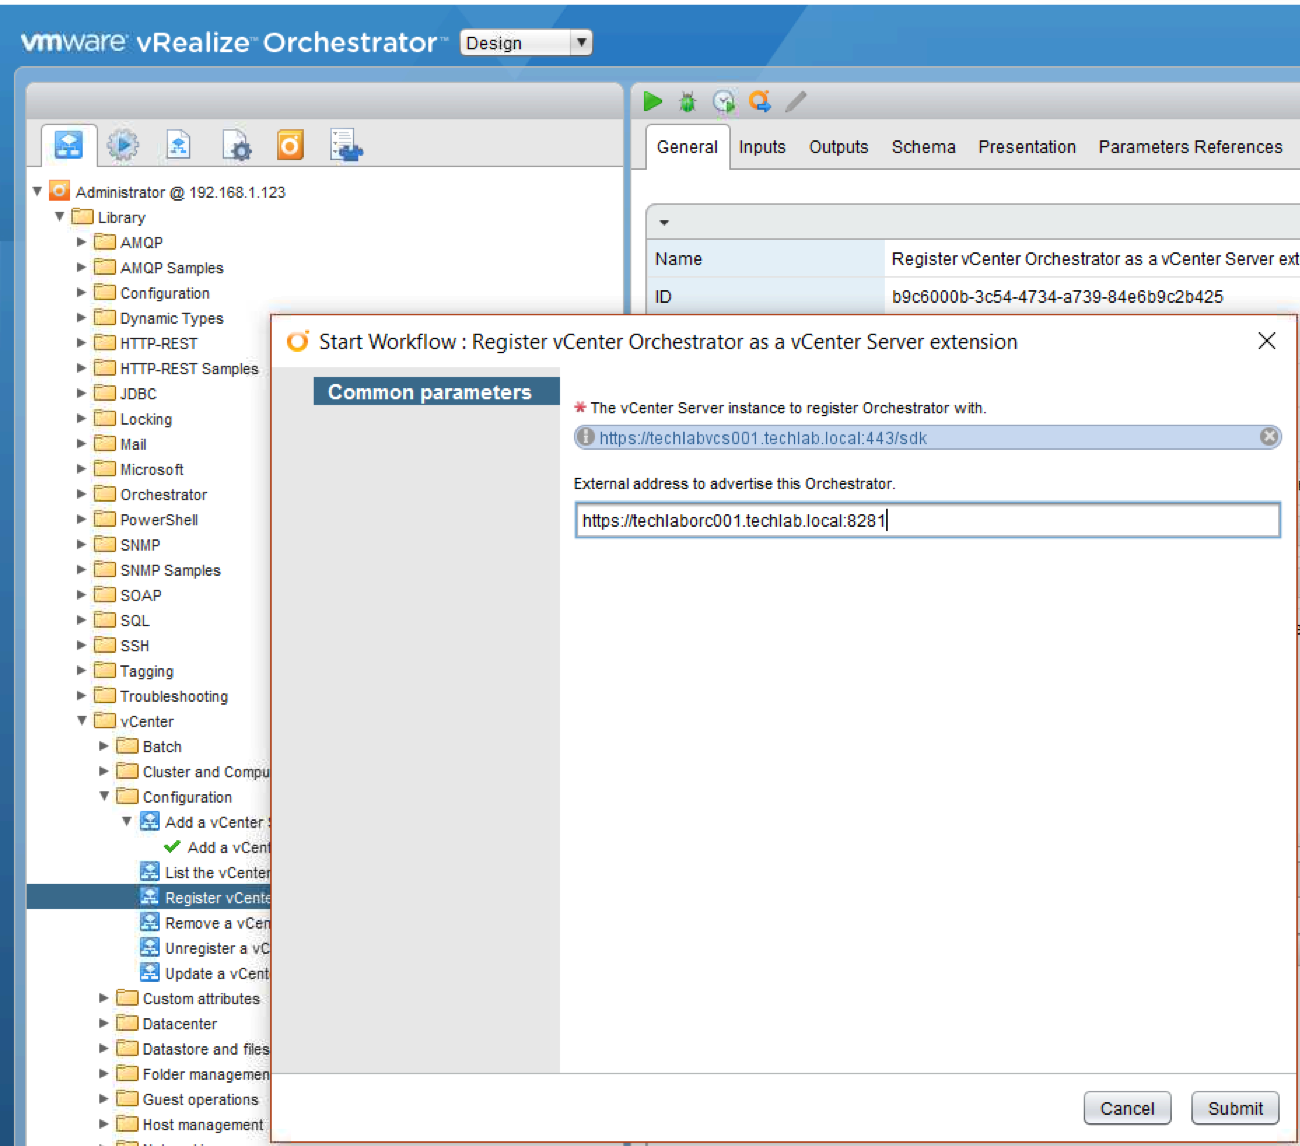
  • Next type in the external address to advertise this Orchestrator
  • this needs to be for example https://techlaborc001.techlab.local:8281

screen-shot-2016-11-22-at-23-30-38

  • It should say it has been registered as per below

screen-shot-2016-11-22-at-23-32-04

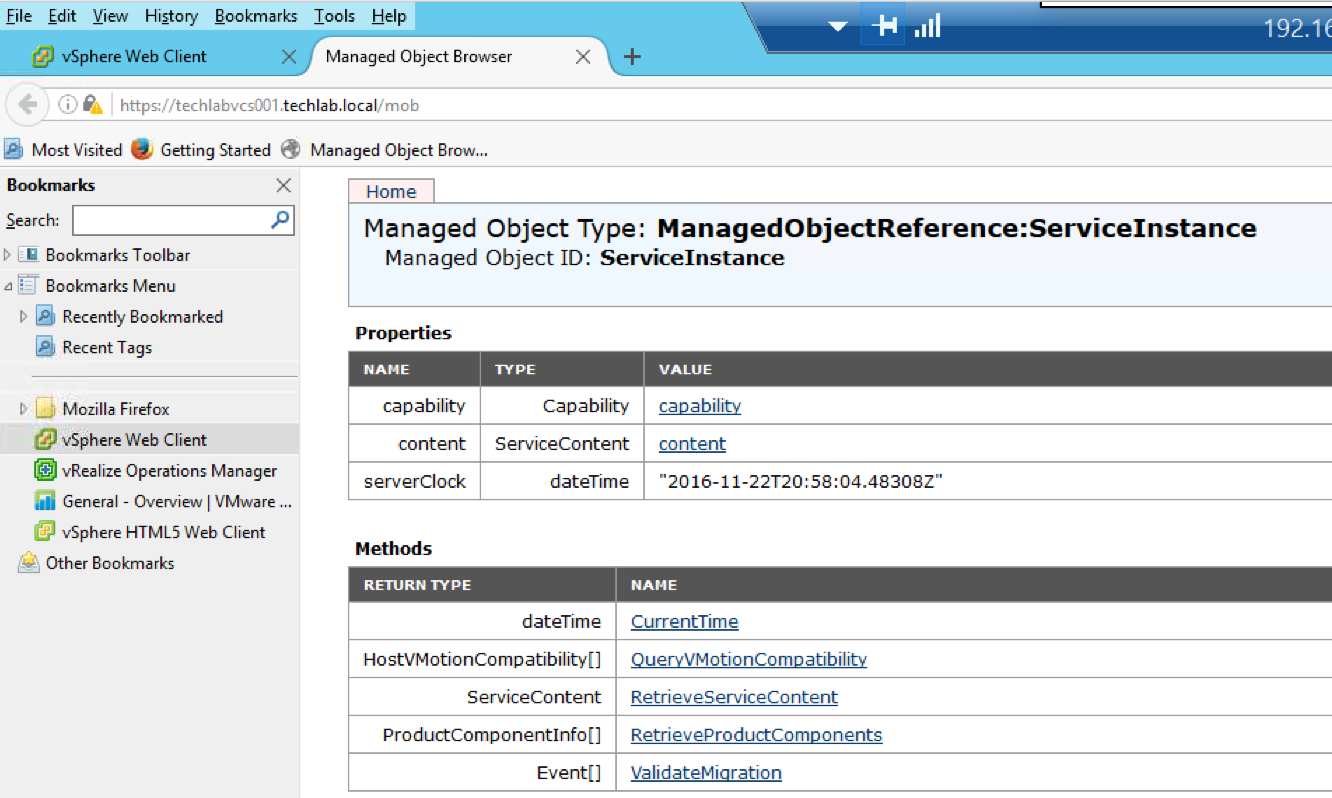
  • We can check it has been registered by opening a web browser and putting in the vCenter server address as per below
  • https://techlabvcs001.techlab.local/mob
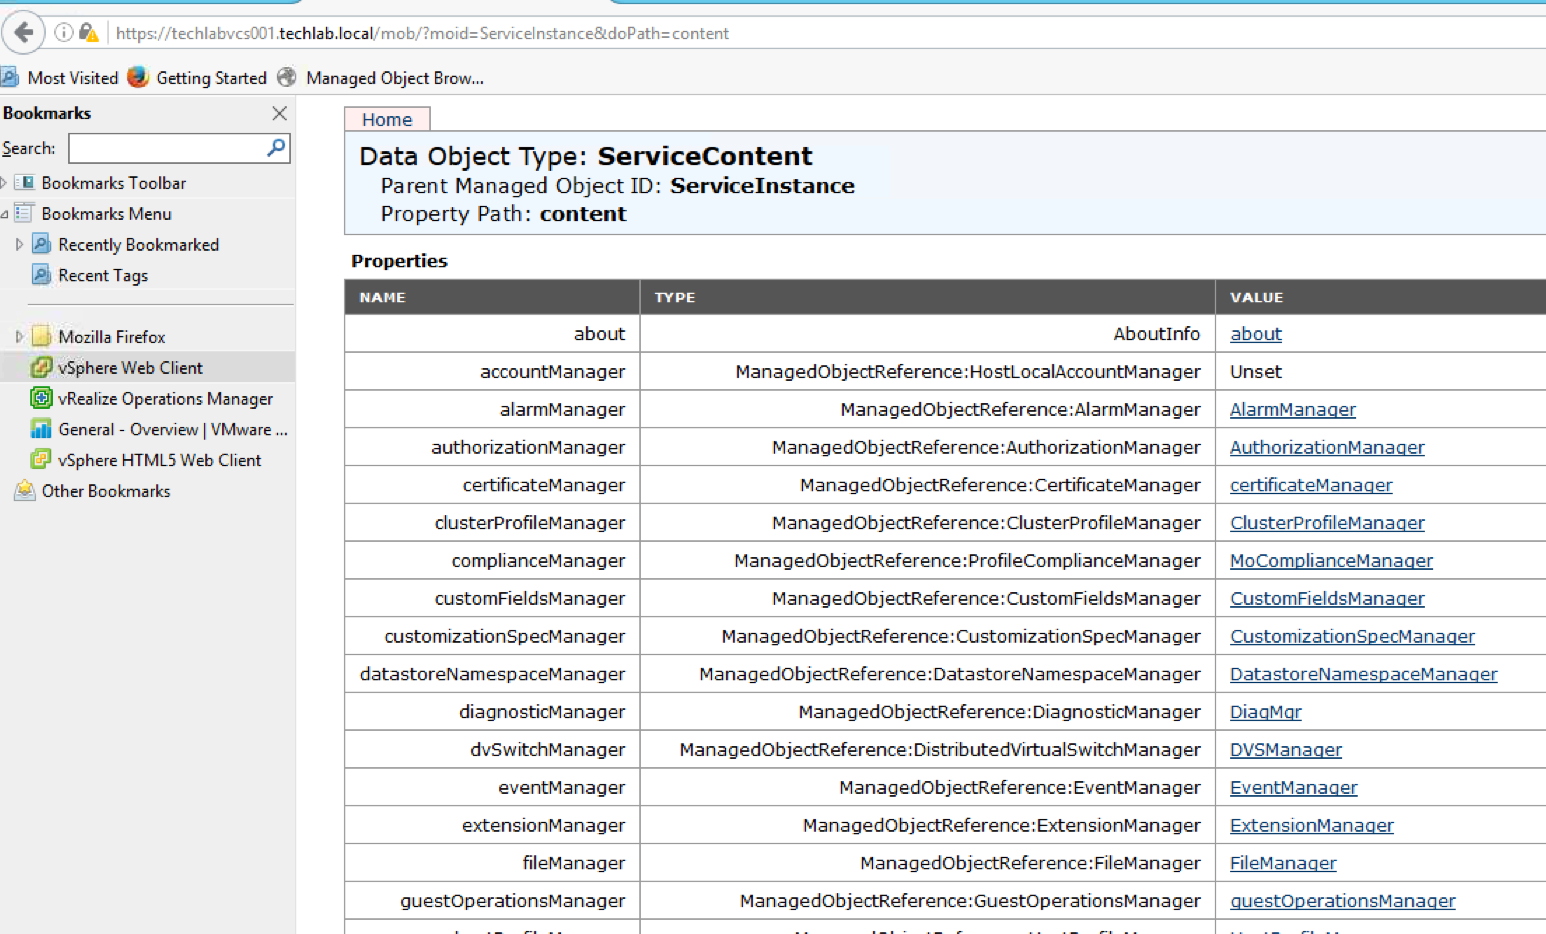
  • Click on Content

screen-shot-2016-11-22-at-23-34-17

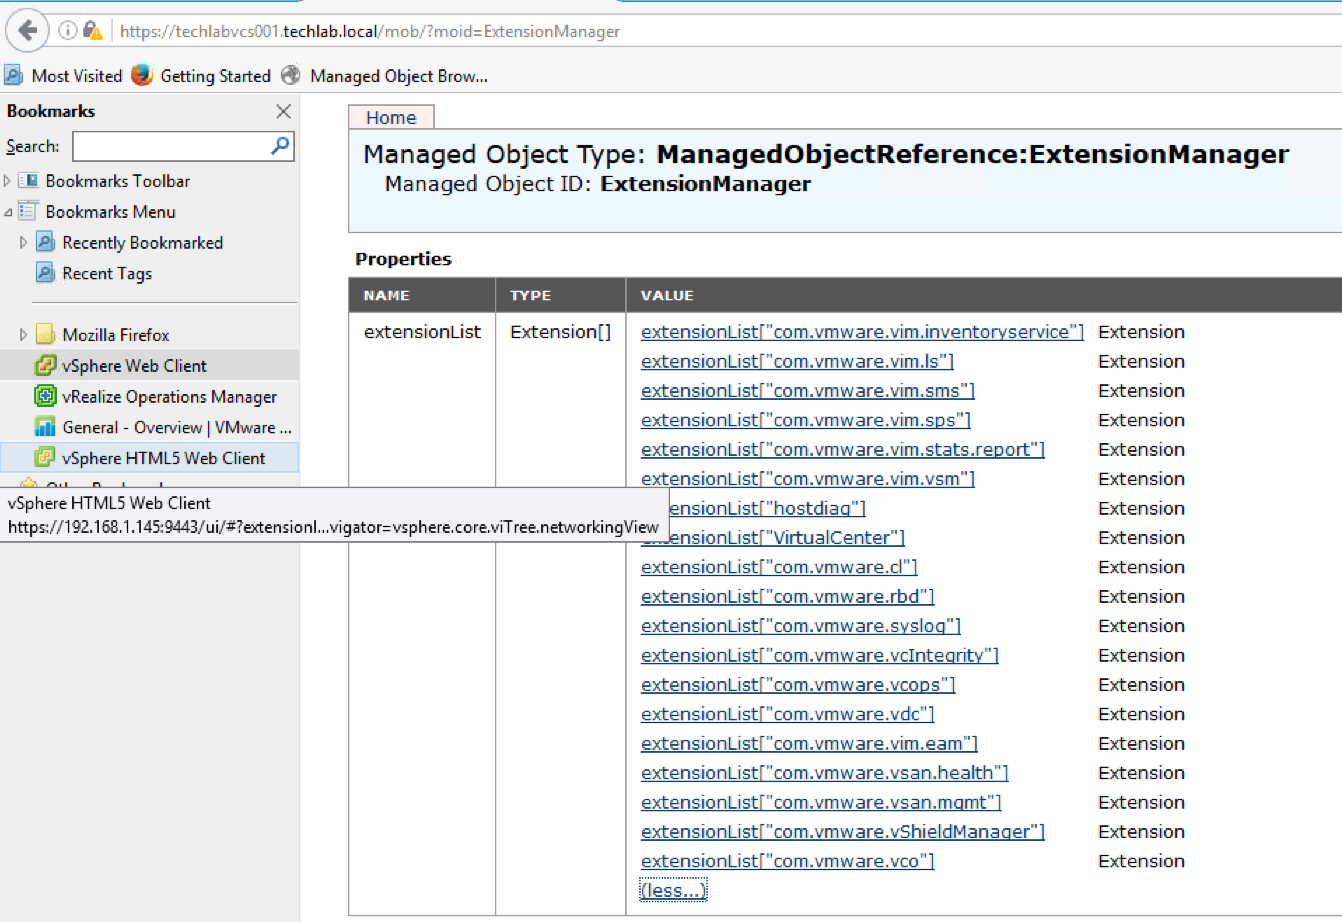
  • Click on ExtensionManager

screen-shot-2016-11-22-at-23-34-51

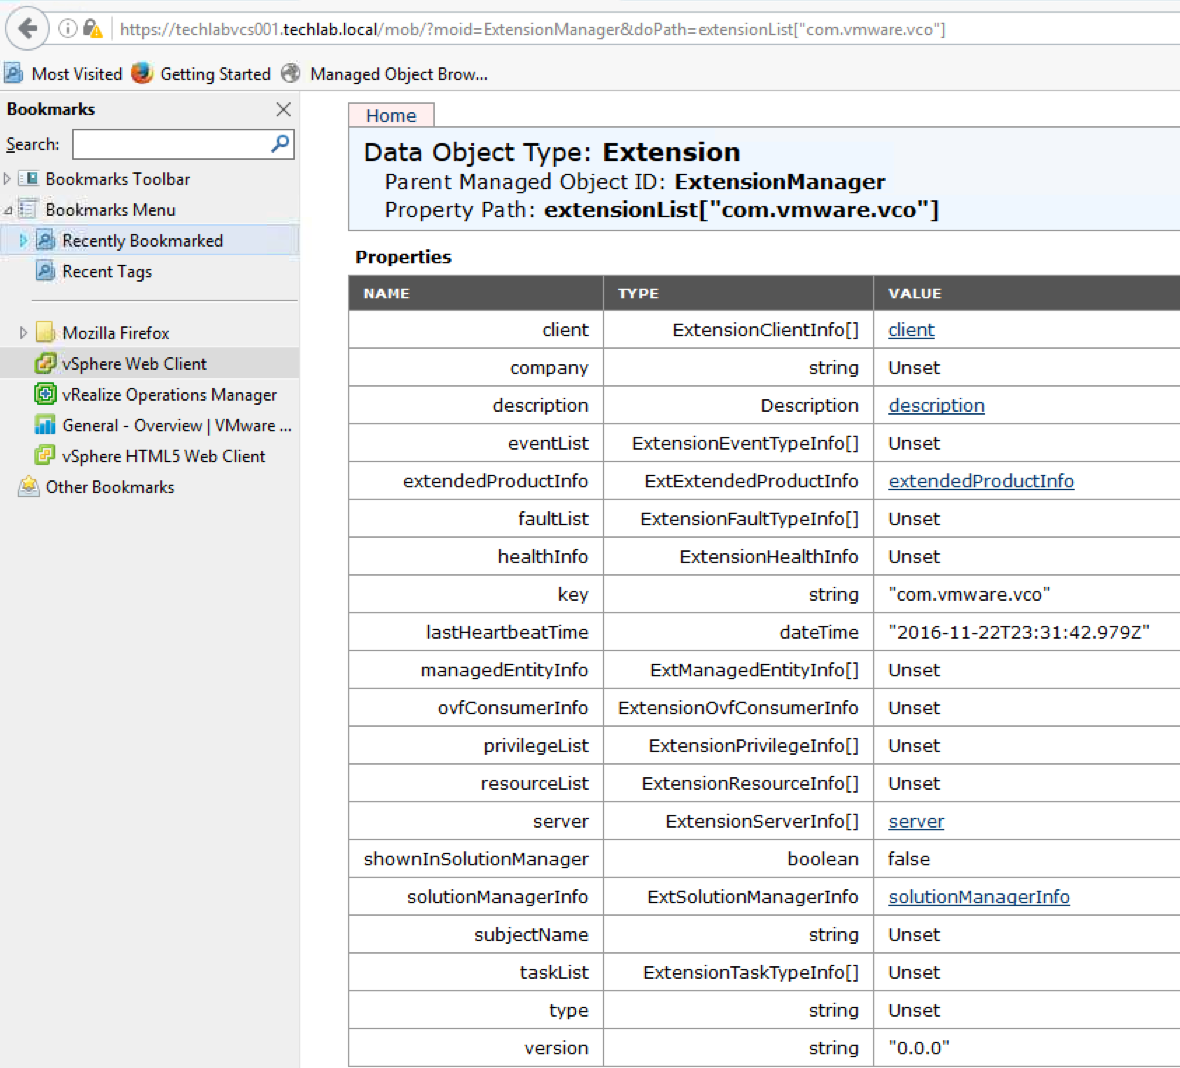
  • Look for extensionList[“com.vmware.vco”] which should only exist when the workflow has run correctly.

screen-shot-2016-11-22-at-23-35-44

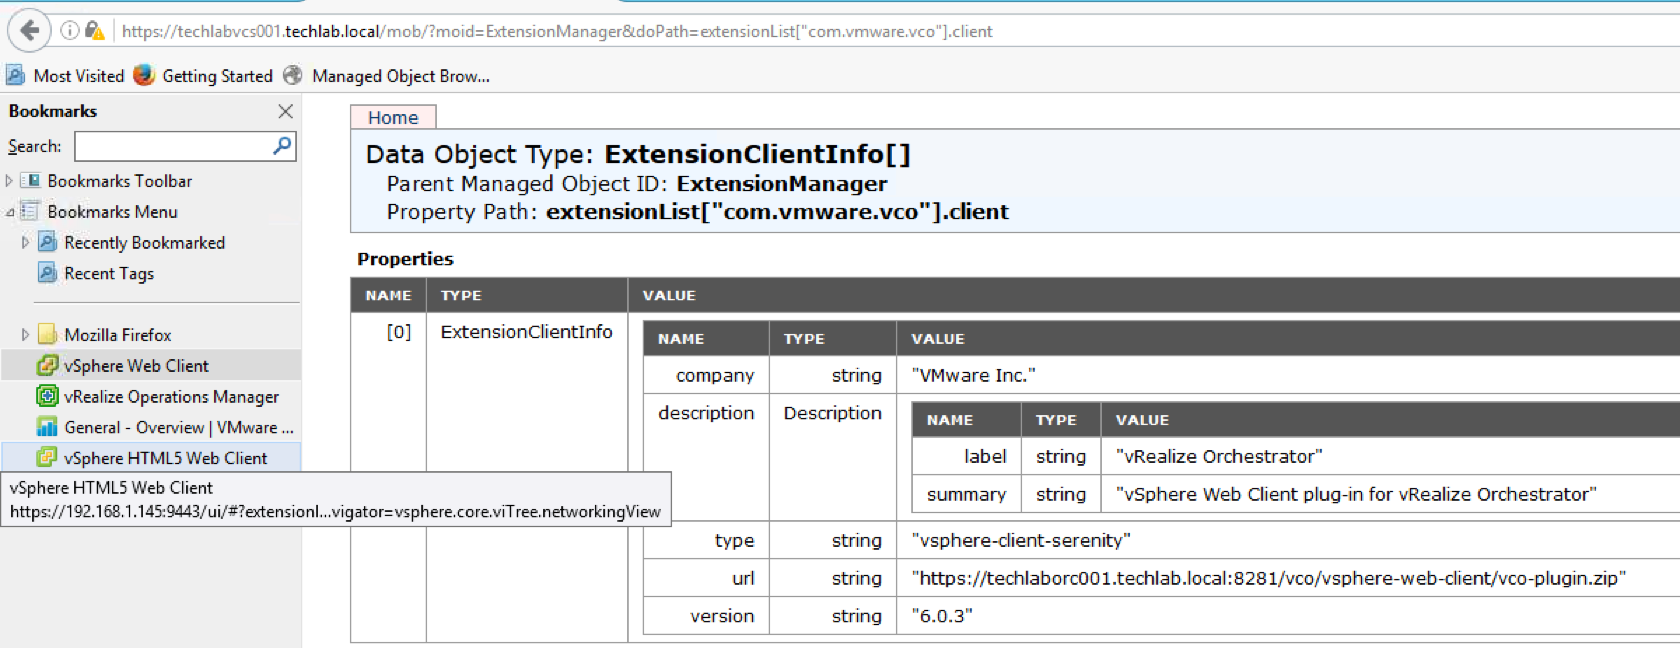
  • Click on Client

screen-shot-2016-11-22-at-23-37-23

  • You should see the below in url string. This will also appear in the Web Client which we’ll see further on in the instructions
  • You can put this link into a web browser and it should try and download the zip

screen-shot-2016-11-22-at-23-38-00

  • If you need to remove an extension, follow this useful blog below

Removing extensions link http://blog.mwpreston.net/2014/05/02/to-the-point-removing-stranded-vcenter-orchestrator-servers-from-vcenter

  • You now need to restart the web client
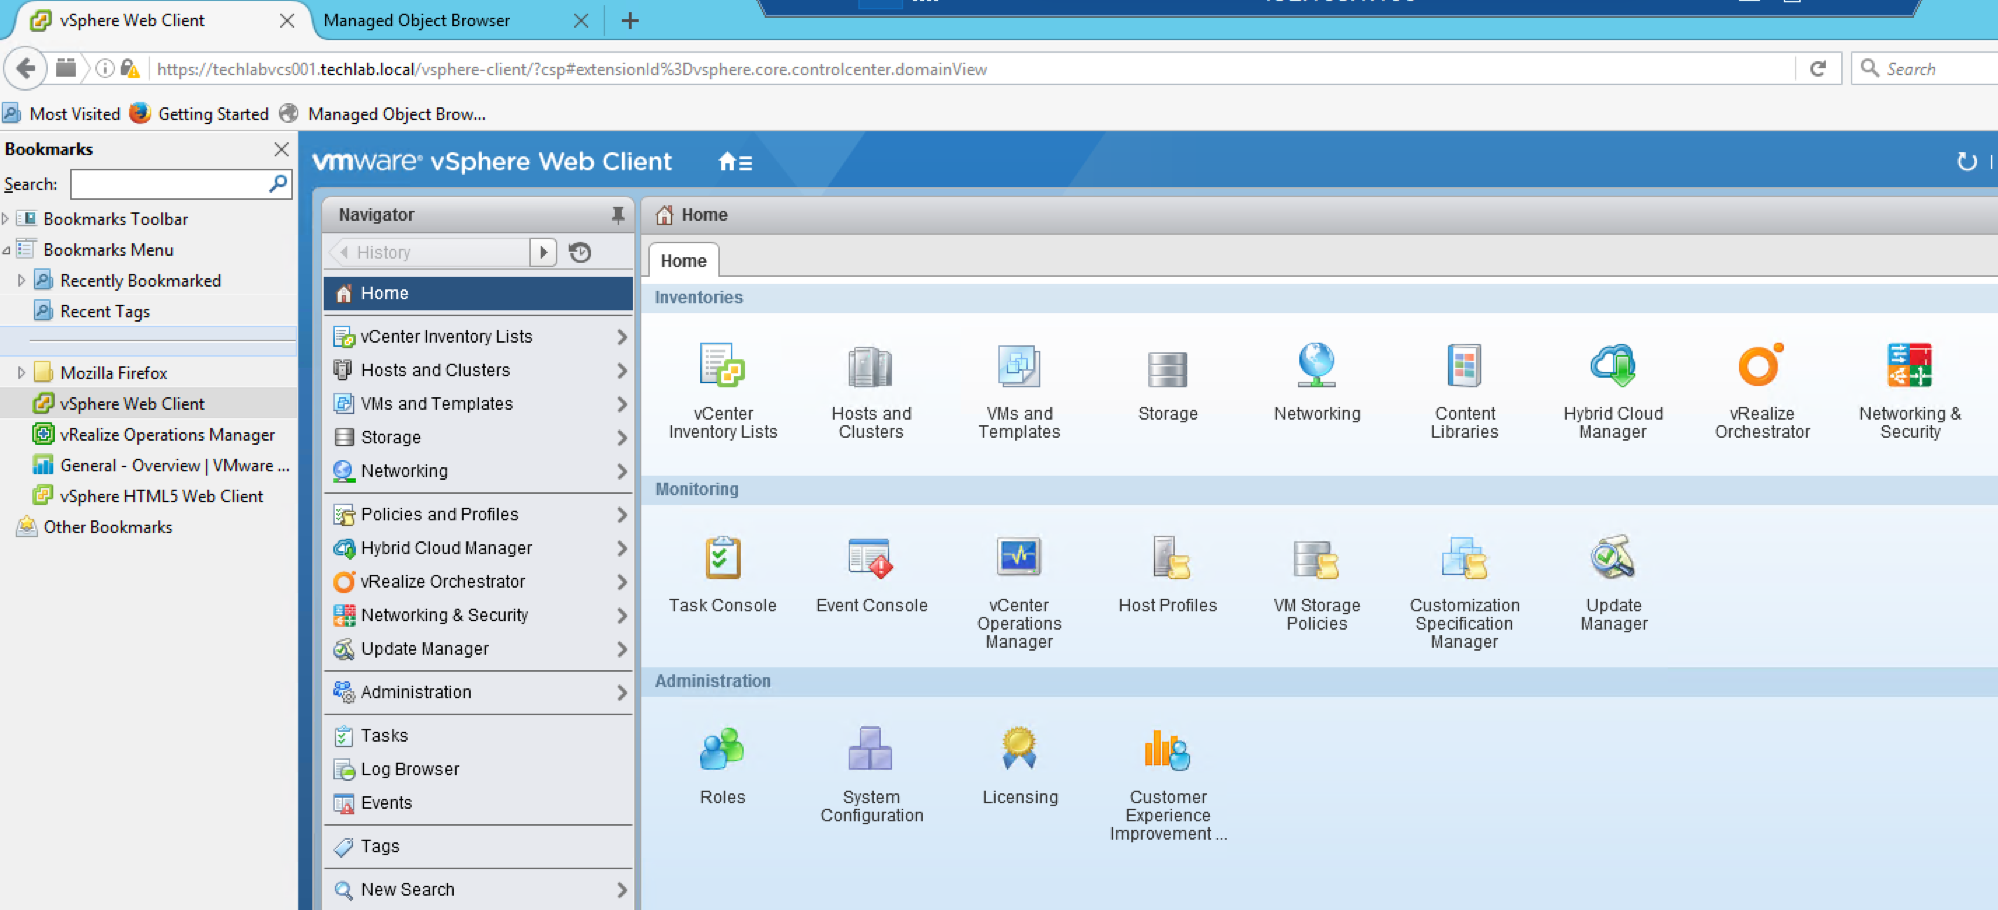
  • When the Web Client has restarted and come up again, Go to the Home screen and select the Orchestrator icon

screen-shot-2016-11-22-at-23-53-49

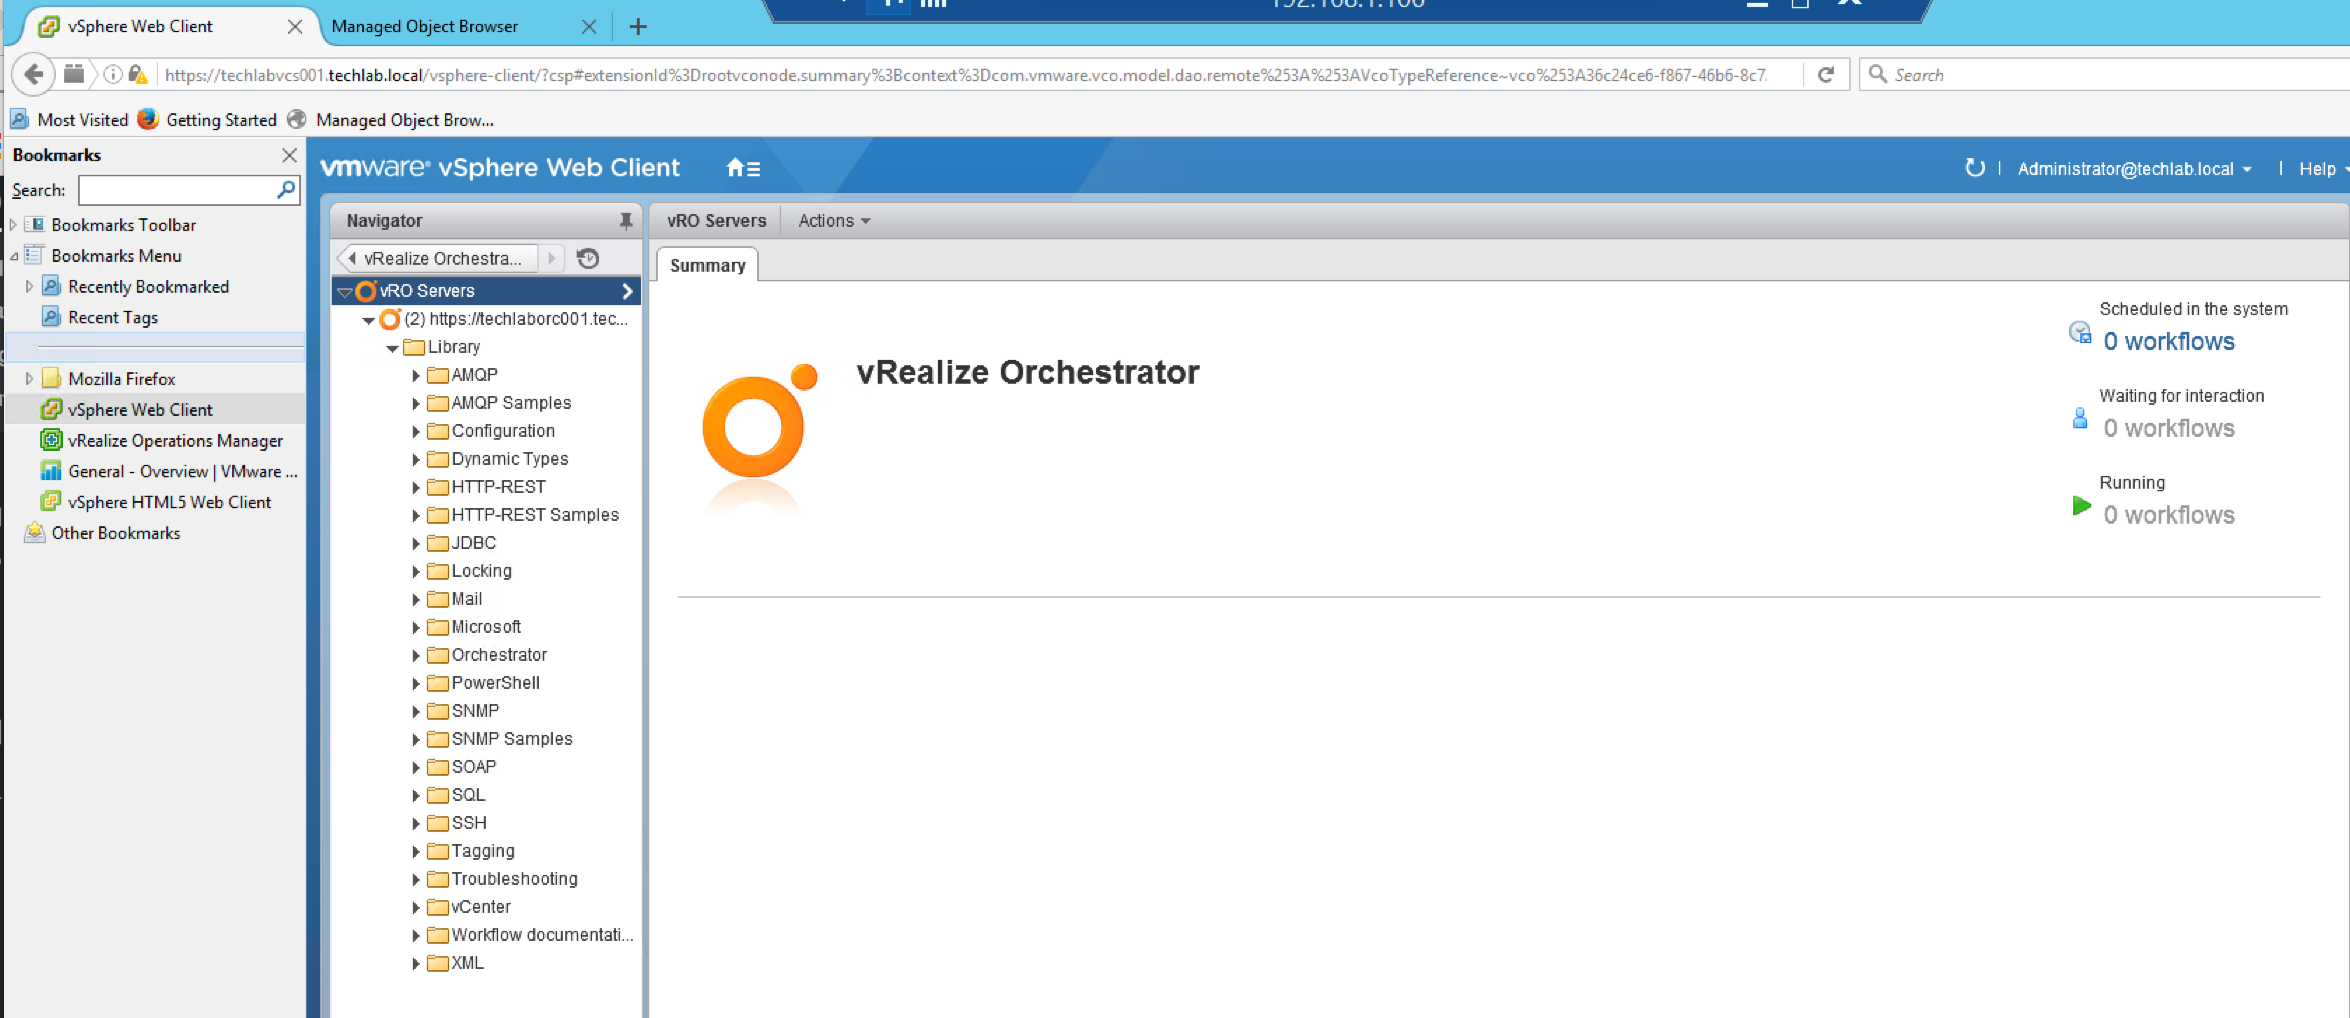
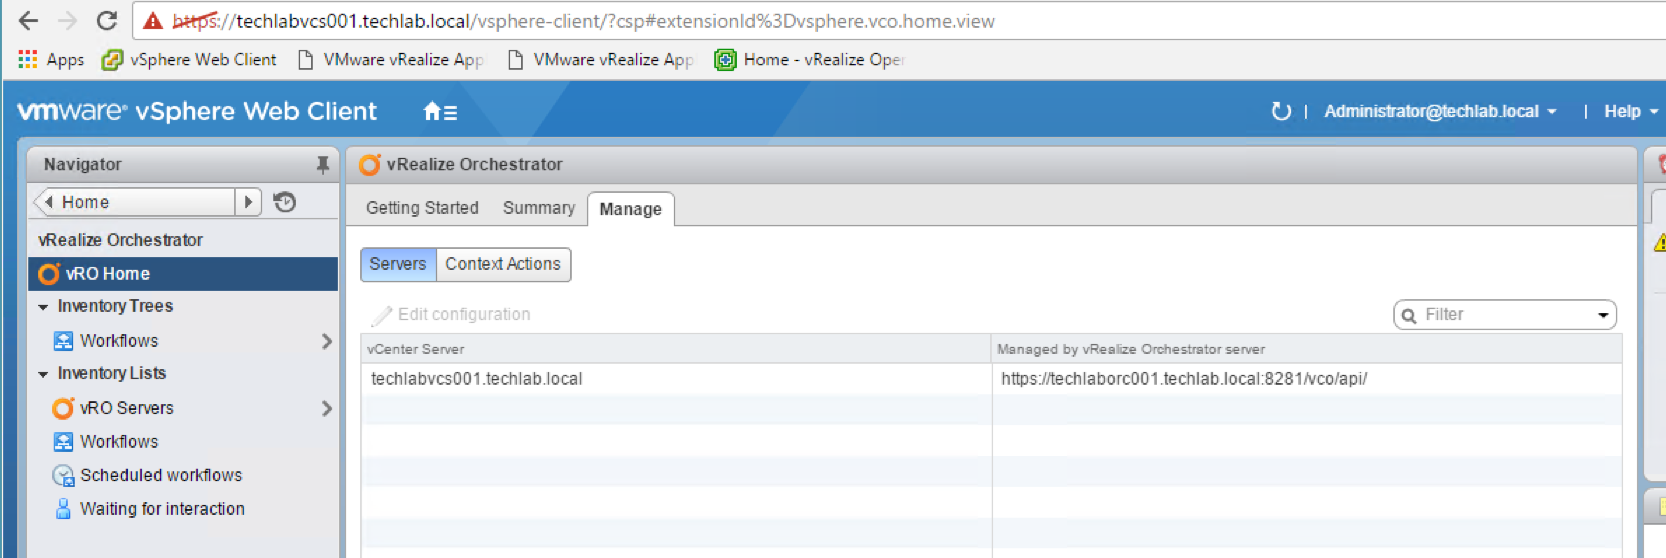
  • You should now see the vCenter and the Orchestrator server listed and you’ll see the information which we saw in the mob web page

screen-shot-2016-11-22-at-23-56-07

  • If you click on Workflows under Inventory trees, you will see the whole library of workflows

screen-shot-2016-11-22-at-23-57-45

  • You can then use the inbuilt workflows or create your own in Orchestrator
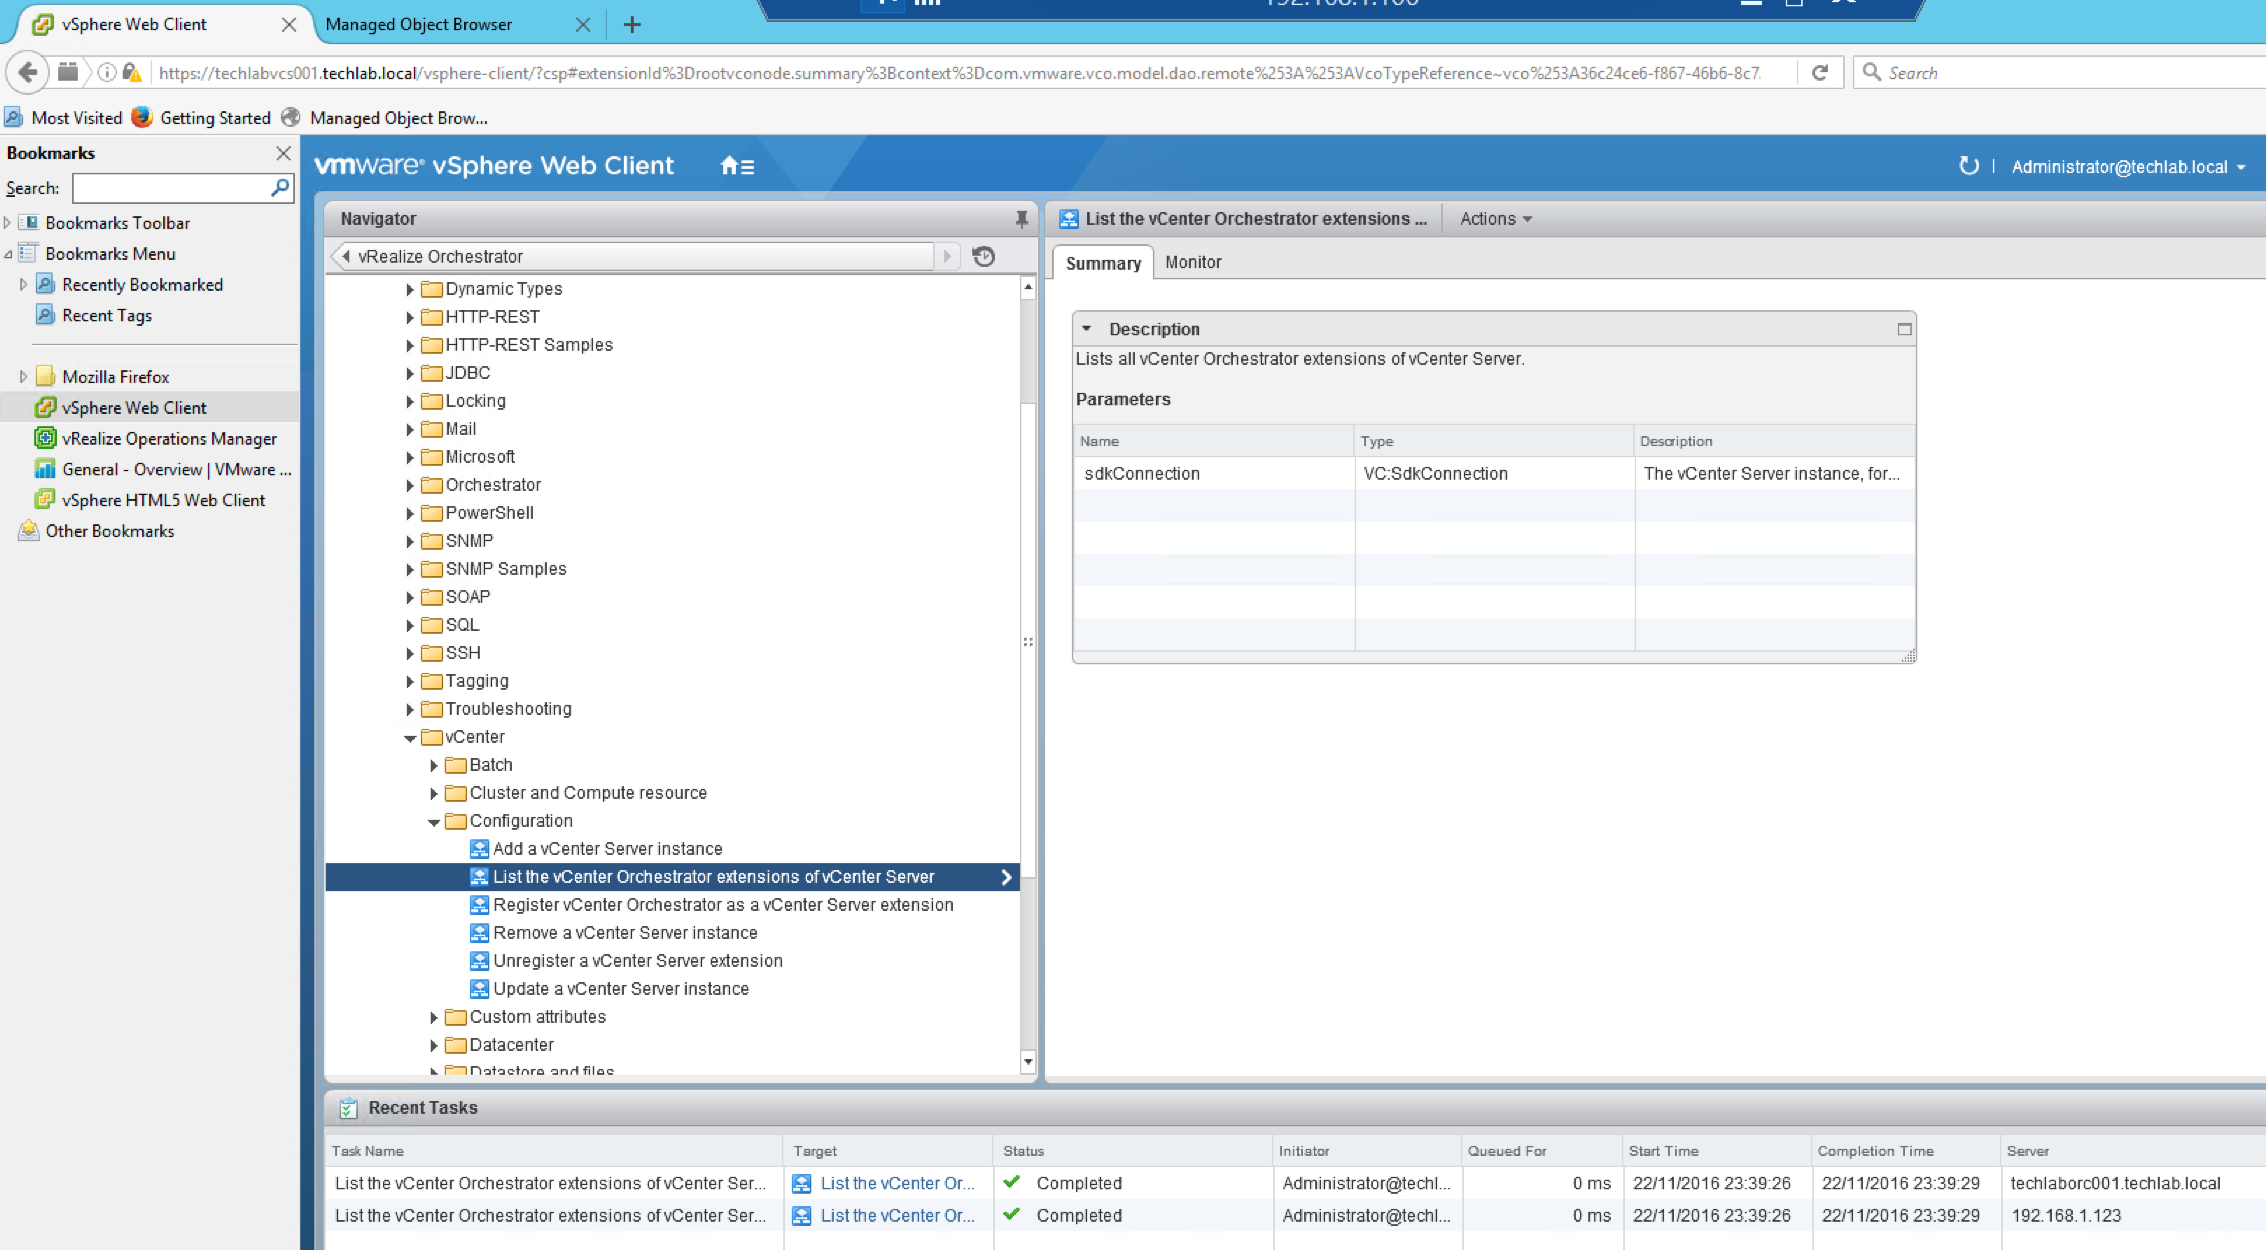
  • If you run the List the vCenter Orchestrator extensions of vCenter server, you will see it will pop up in the Recent Tasks list at the bottom of vCenter

screen-shot-2016-11-22-at-23-59-13

  • Pretty funky stuff 🙂

Next

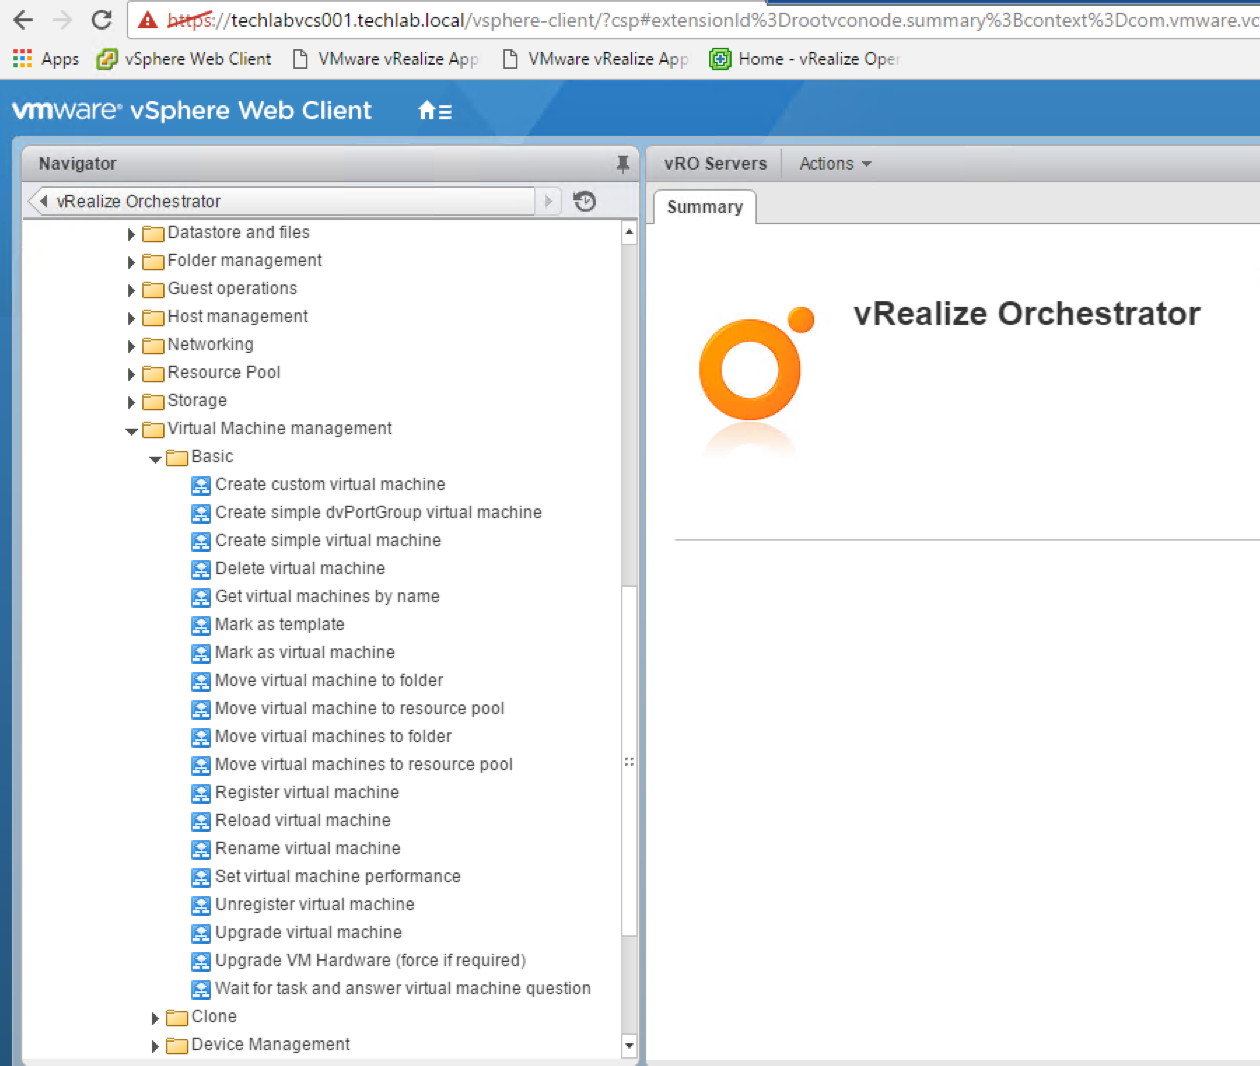
  • In the vSphere Web Client > Click Home > Orchestrator, click on the Workflow icon and expand vCenter > Virtual Machine Management > Basic

screen-shot-2016-11-28-at-14-24-30

screen-shot-2016-11-28-at-14-25-38

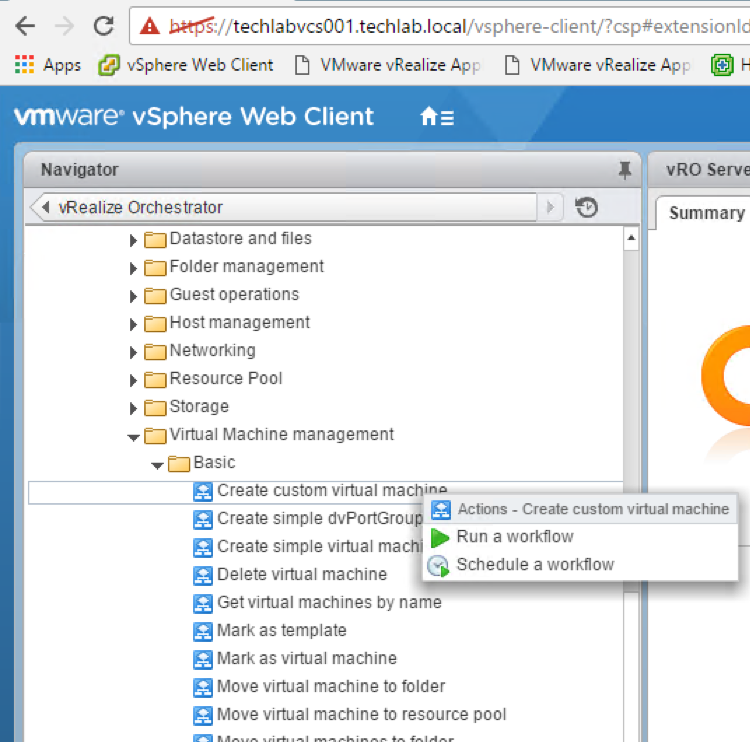
  • Right click “Create simple virtual machine”, here is where you can run a workflow directly from within vSphere Web Client.

screen-shot-2016-11-28-at-14-27-55


Installing the Linux Log Insight agent on the vCenter Orchestrator appliance

vRARobot2

Installing the Linux Log Insight agent on vCenter Orchestrator

The Log Insight agent now gets pre-installed on some of the vRealize appliances which is very useful which means there is no need to install agents manually.  Some of the VMware products which have the agent pre-installed:

vRealize Business
vRealize Operations Manager (beginning from 6.1)
vRealize Orchestrator (beginning from 7.0.1)
vRealize Automation (beginning from 7.0.1)
vRealize Log Insight

However this version of Orchestrator is 6.0.3 due to work testing so we need to install the agent manually.

vCO Details

  • Name = techlabvco001.techlab.local
  • IP Address = 192.168.1.123/24
  • SSH enabled
  • vCO Config Page = https://192.168.1.123:8283
  • vCO Getting started page and Orchestrator client download = https://192.168.1.123:8281/vco
  • vCO Appliance login = https://192.168.1.123:5480

Log Insight Details

  • Name = techlabvrl001.techlab.local
  • IP Address = 192.168.1.122/24
  • SSH enabled
  • Log Insight Configuration = https://192.168.1.122

Useful link to Log Insight Documentation Center

http://pubs.vmware.com/log-insight-30/index.jsp#com.vmware.log-insight.agent.admin.doc/GUID-04892000-72C6-4227-BB37-6A2271E03B8C.html

Steps

Note: You may already have Orchestrator installed. If so go from connecting WinScp to the Orchestrator appliance.

  • Download and install the vCenter Orchestrator OVF. In my case this was version 6.0.3 as I was doing some testing for work.
  • Import the OVF into vCenter and follow the wizard to set all the relevant configuration information. Note: You will need to set a root password and a default password for the vmware user account in the wizard in order to access the configuration page
  • Power on the vCO appliance
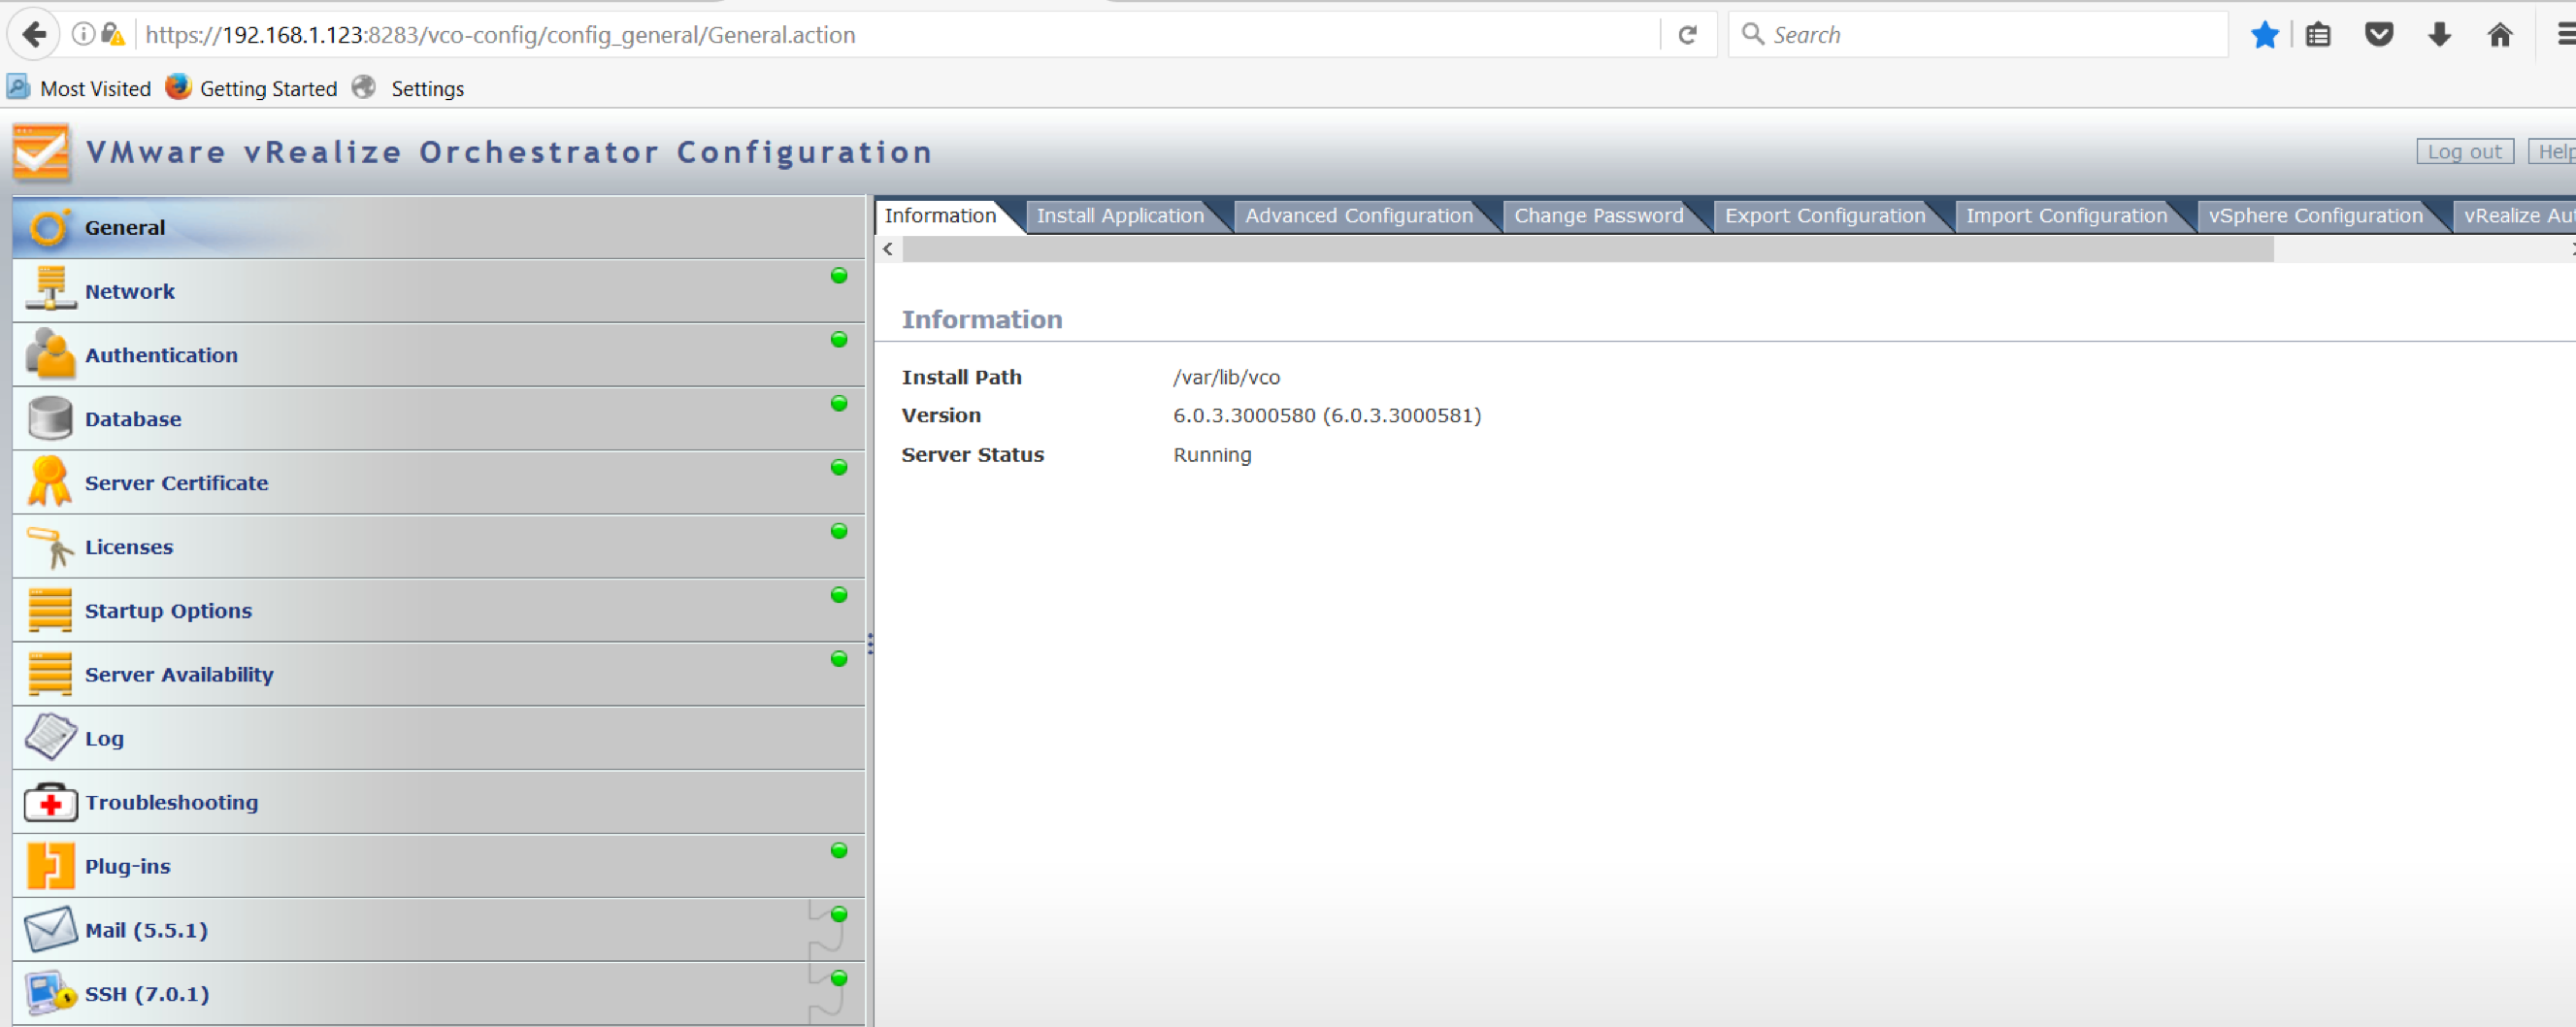
  • Navigate to the vCO Config Page = https://192.168.1.123:8283 and log in with the account vmware and the password you set during installation
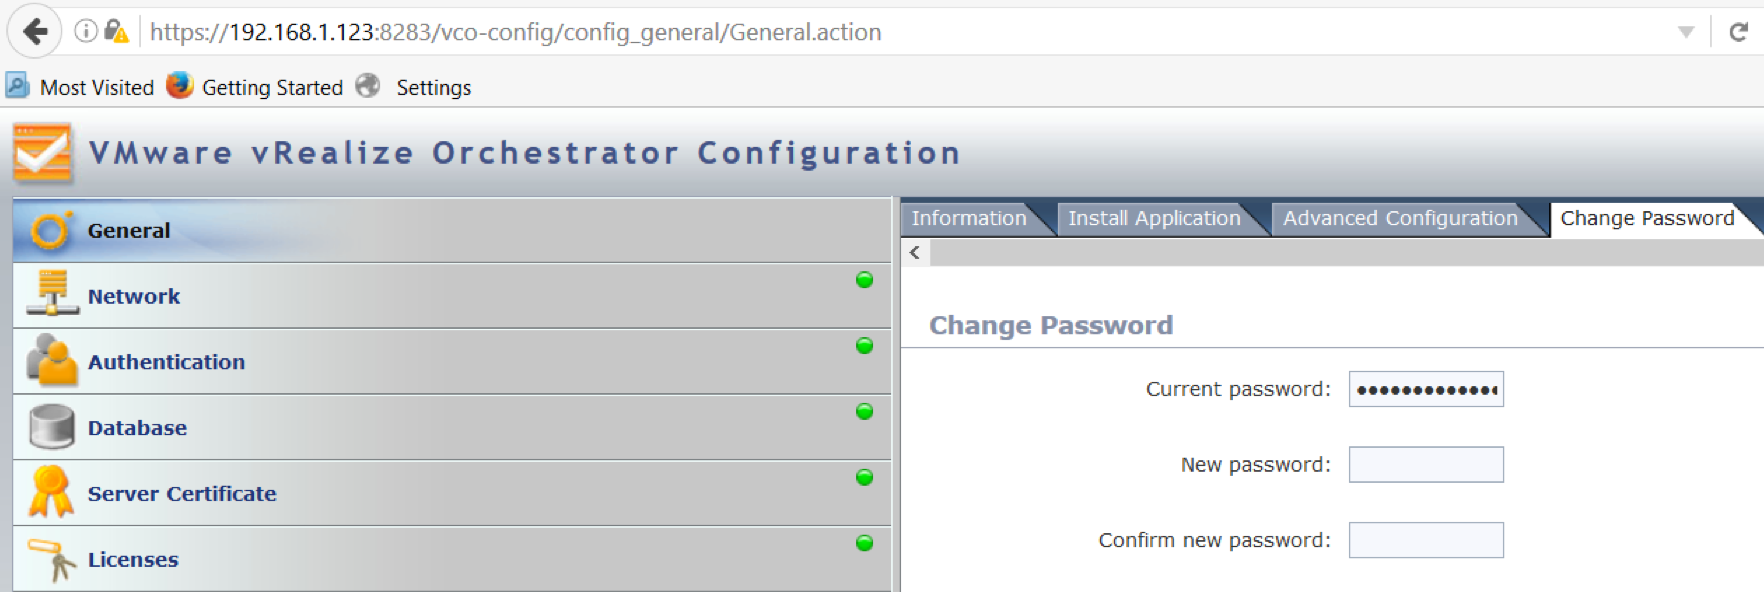
  • In the General Page you can reset the vmware account password if you wish

screen-shot-2016-11-14-at-11-22-37

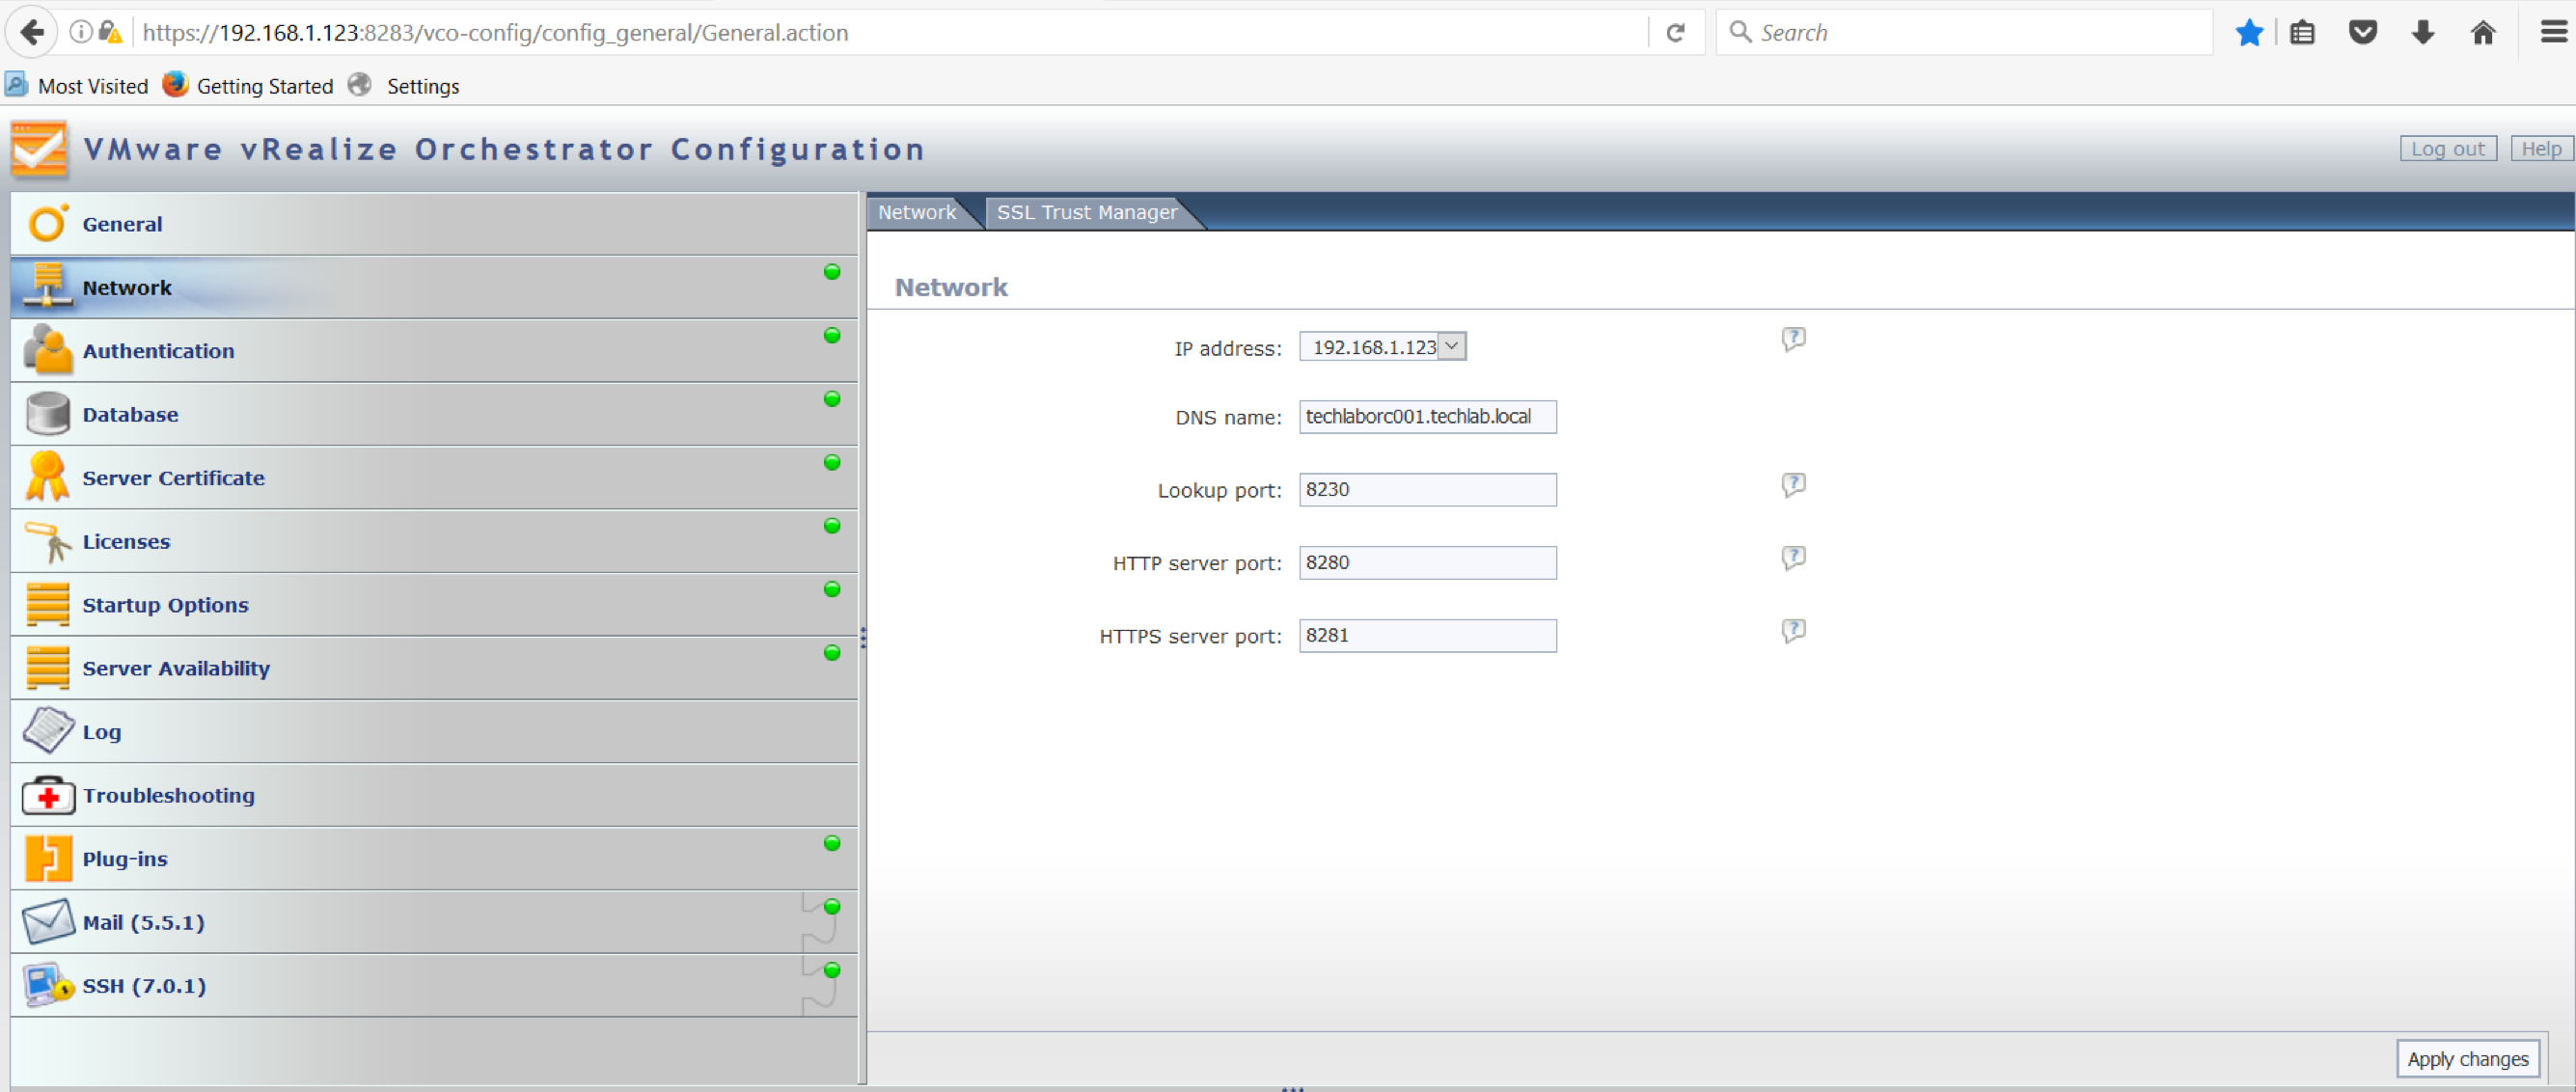
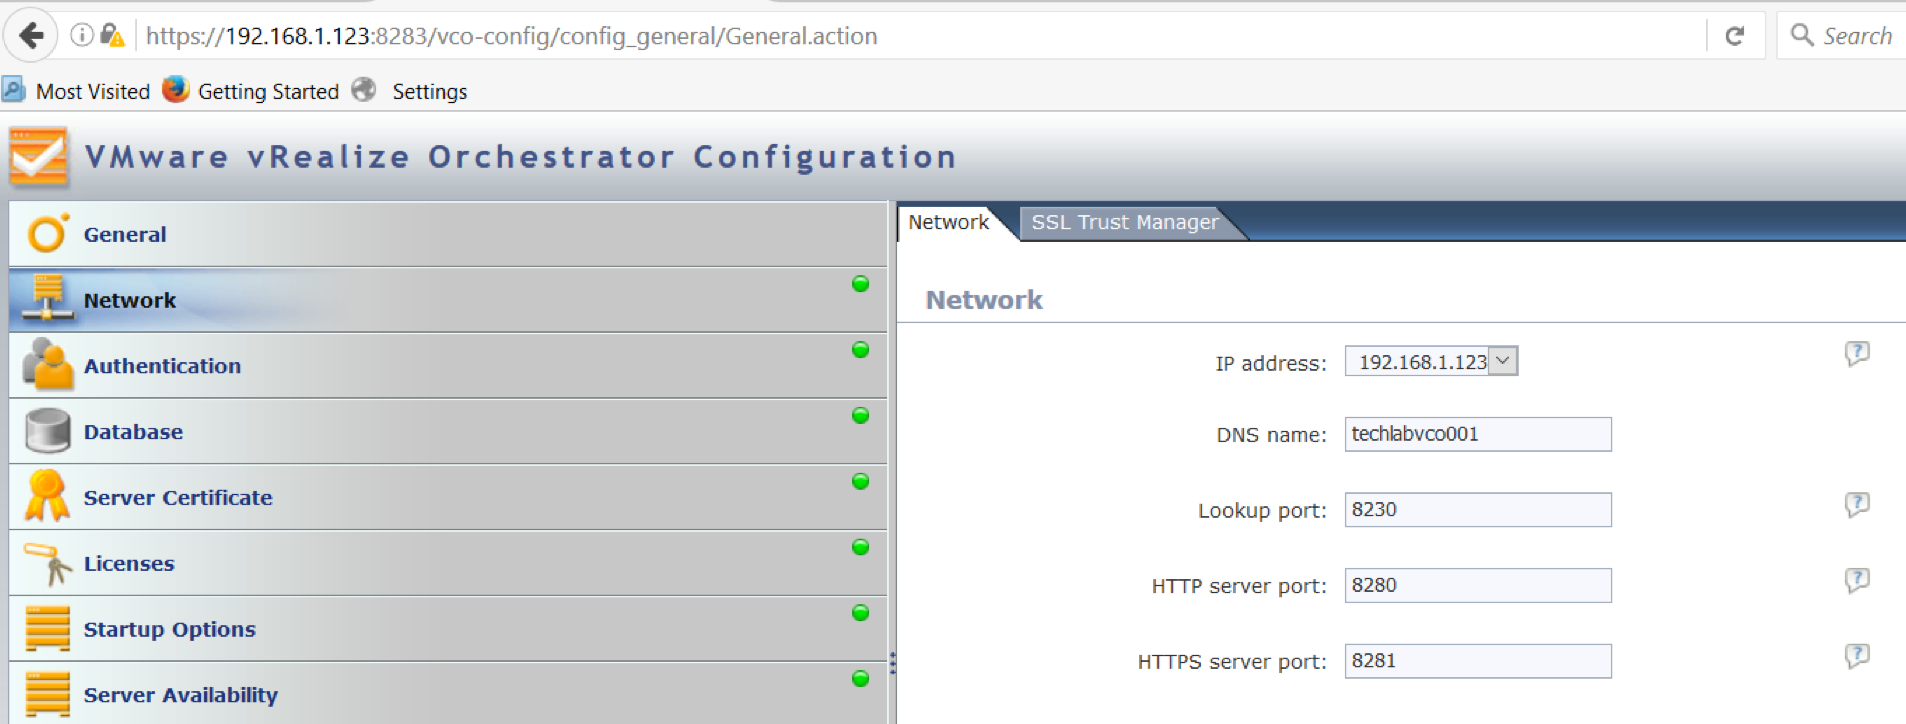
  • Click on Network and check all the details are correct

screen-shot-2016-11-14-at-11-23-57

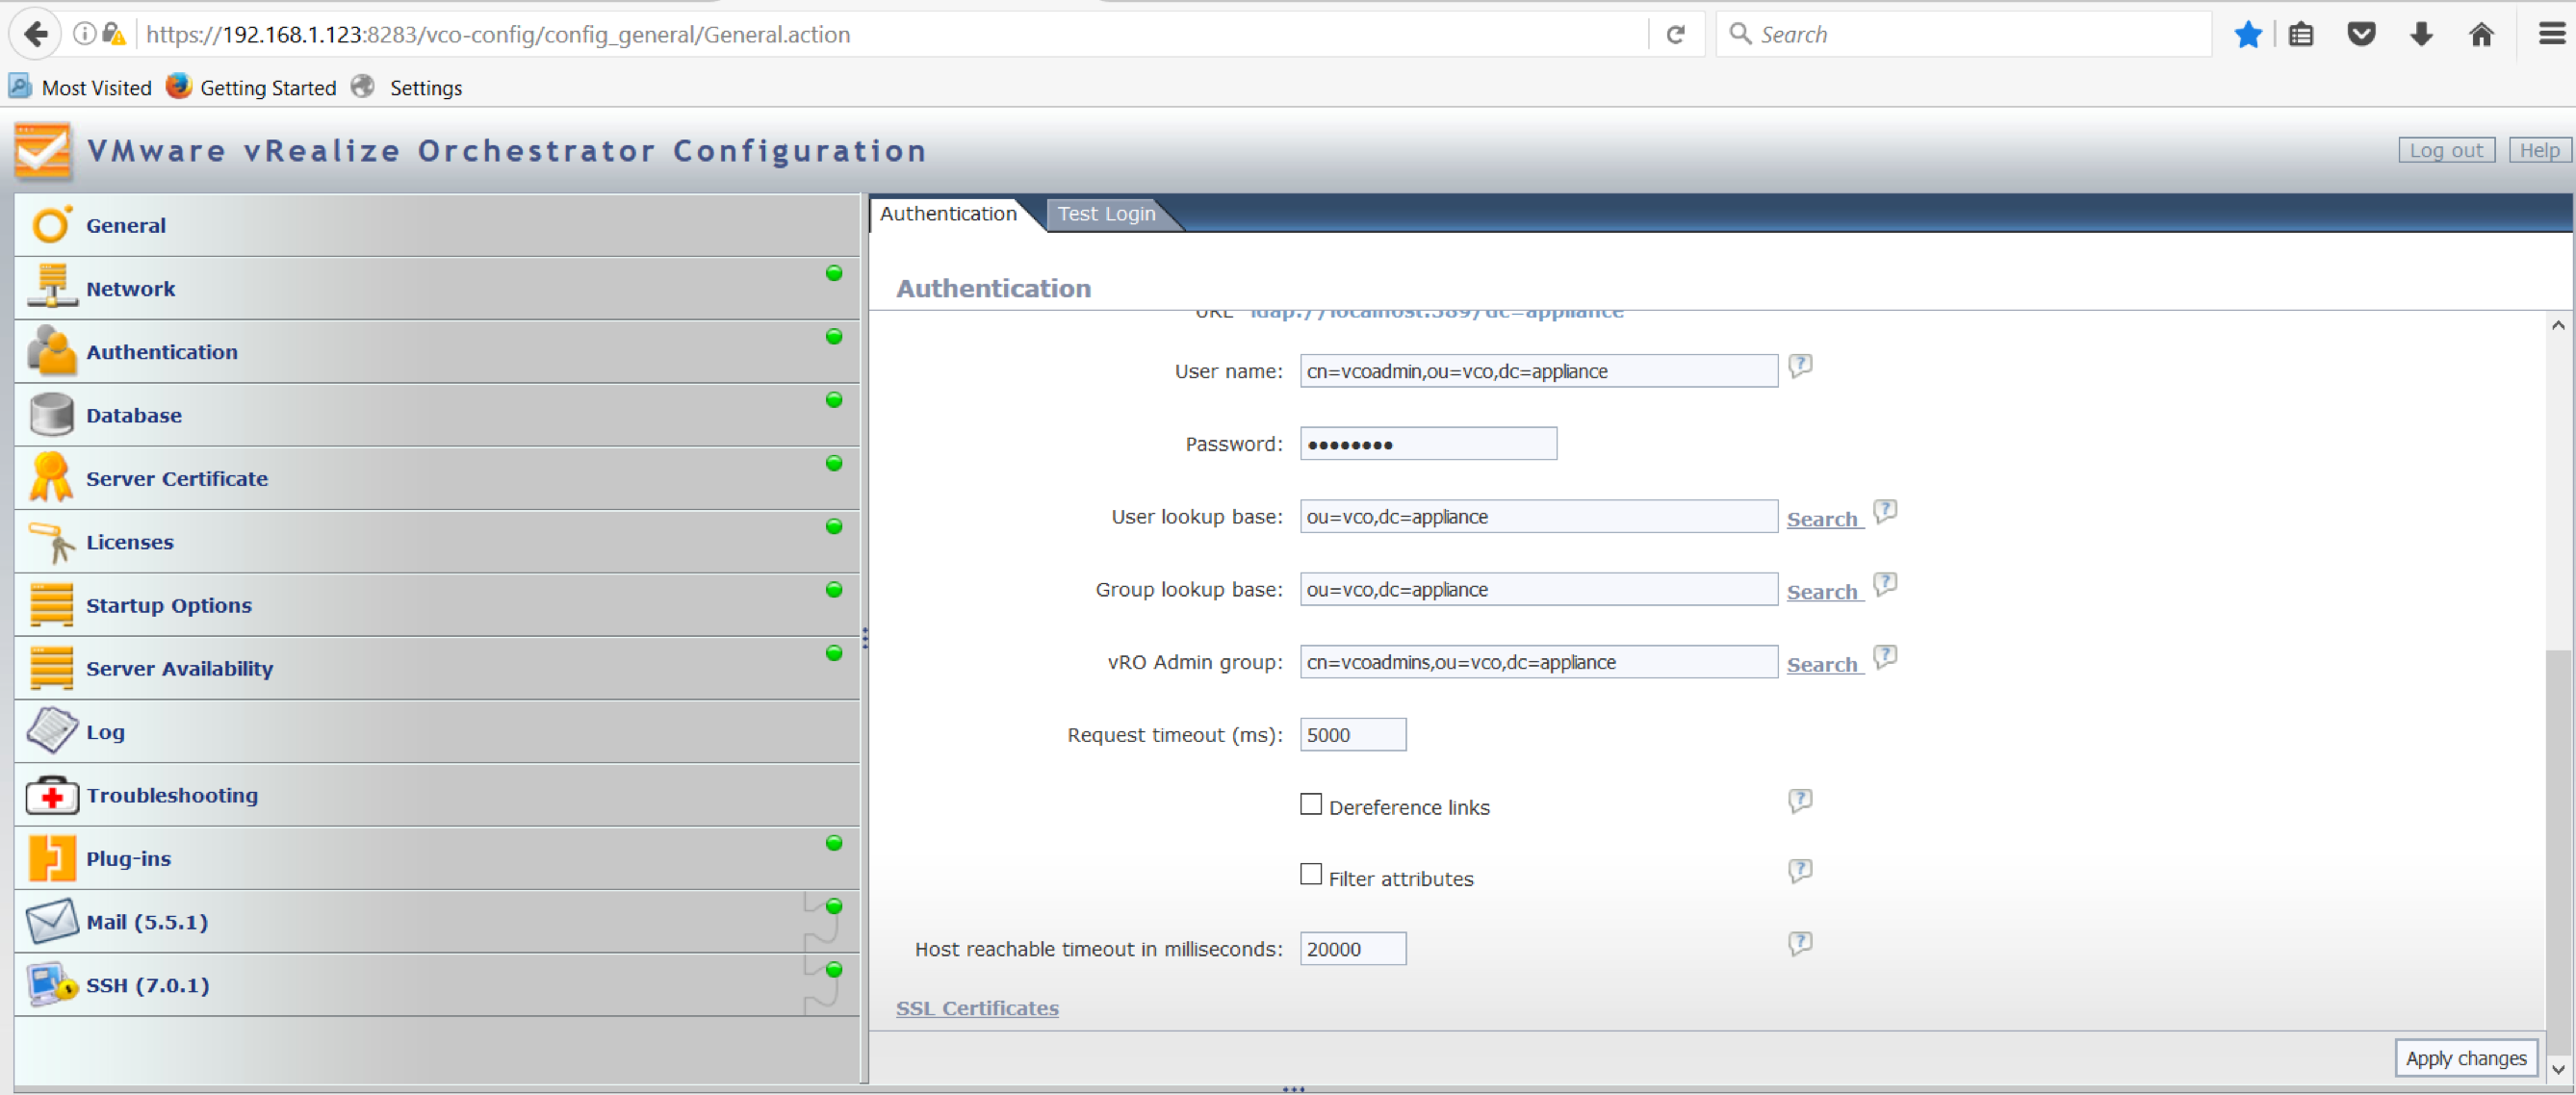
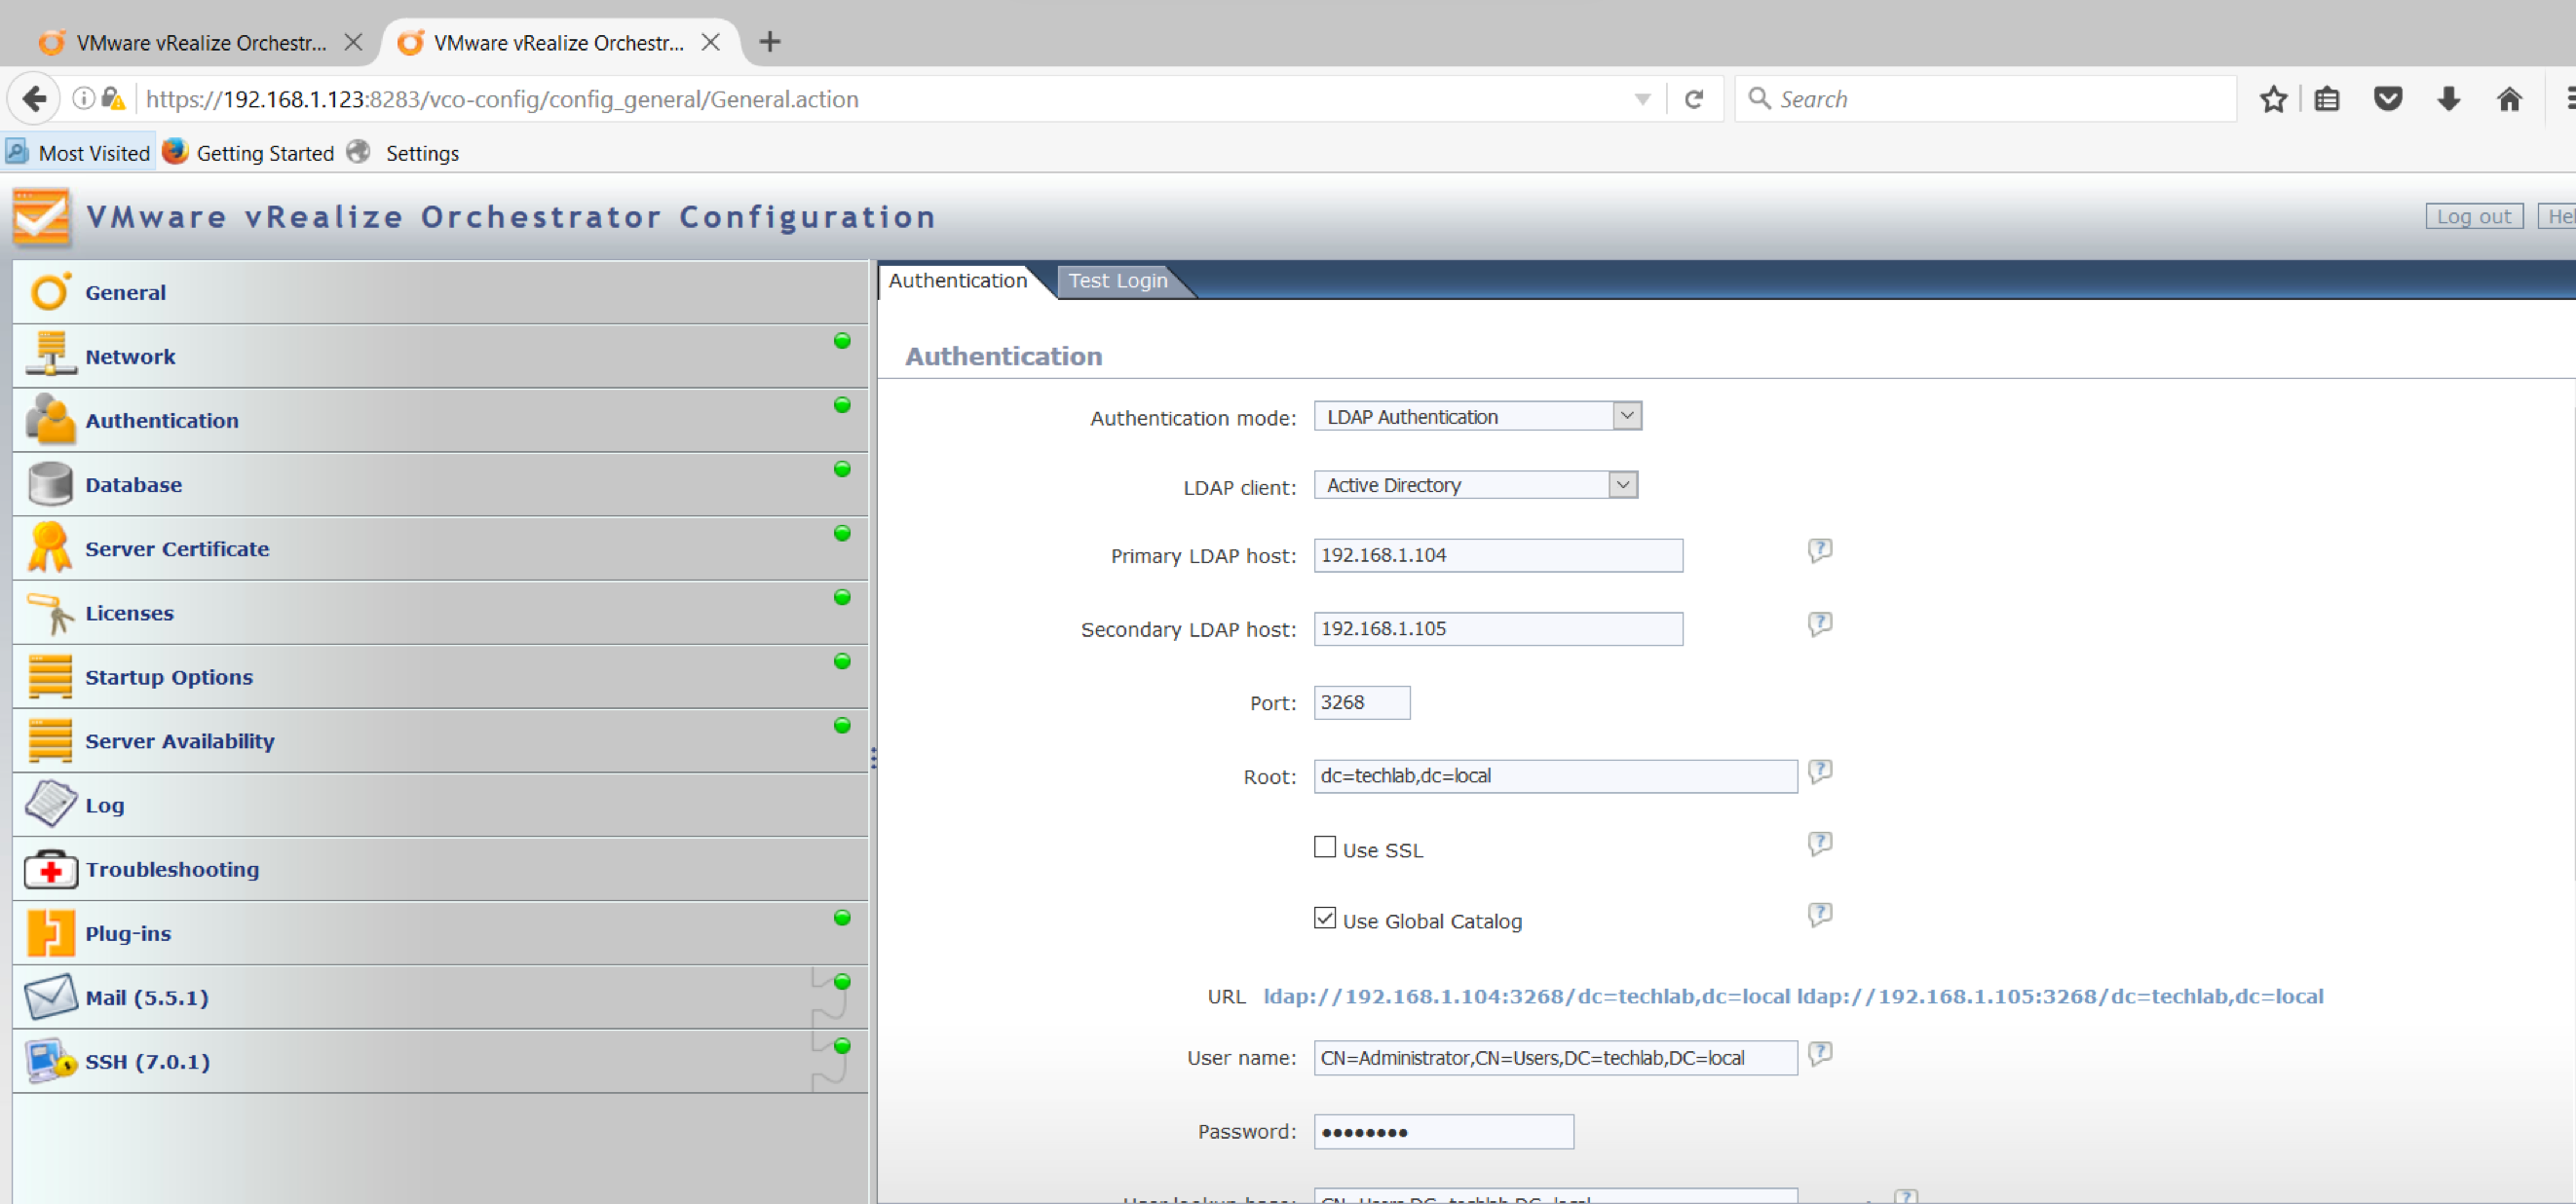
  • You will need to put in an authentication source (LDAP, Active Directory etc) This is required as you will need to have authentication sources to log in to the Orchestrator client

screen-shot-2016-11-14-at-11-24-54

screen-shot-2016-11-15-at-09-09-24

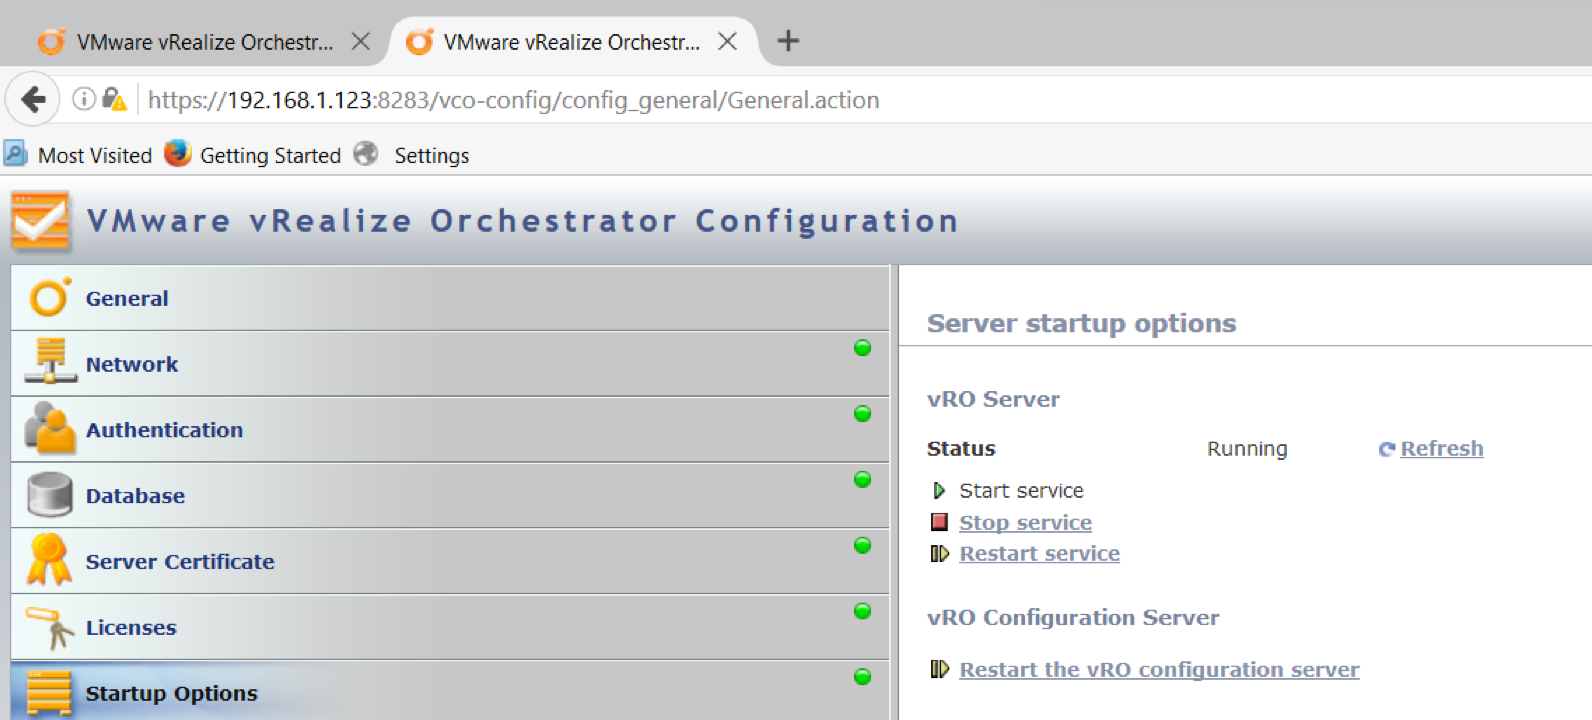
  • After configuring an authentication source, you may need to restart the vRO Server and the vRO Configuration Server.

screen-shot-2016-11-14-at-11-26-36

  • Add your license in. Options are below

screen-shot-2016-11-14-at-11-34-05

  • Check all other options and configure as relevant. Basically everything should look green.
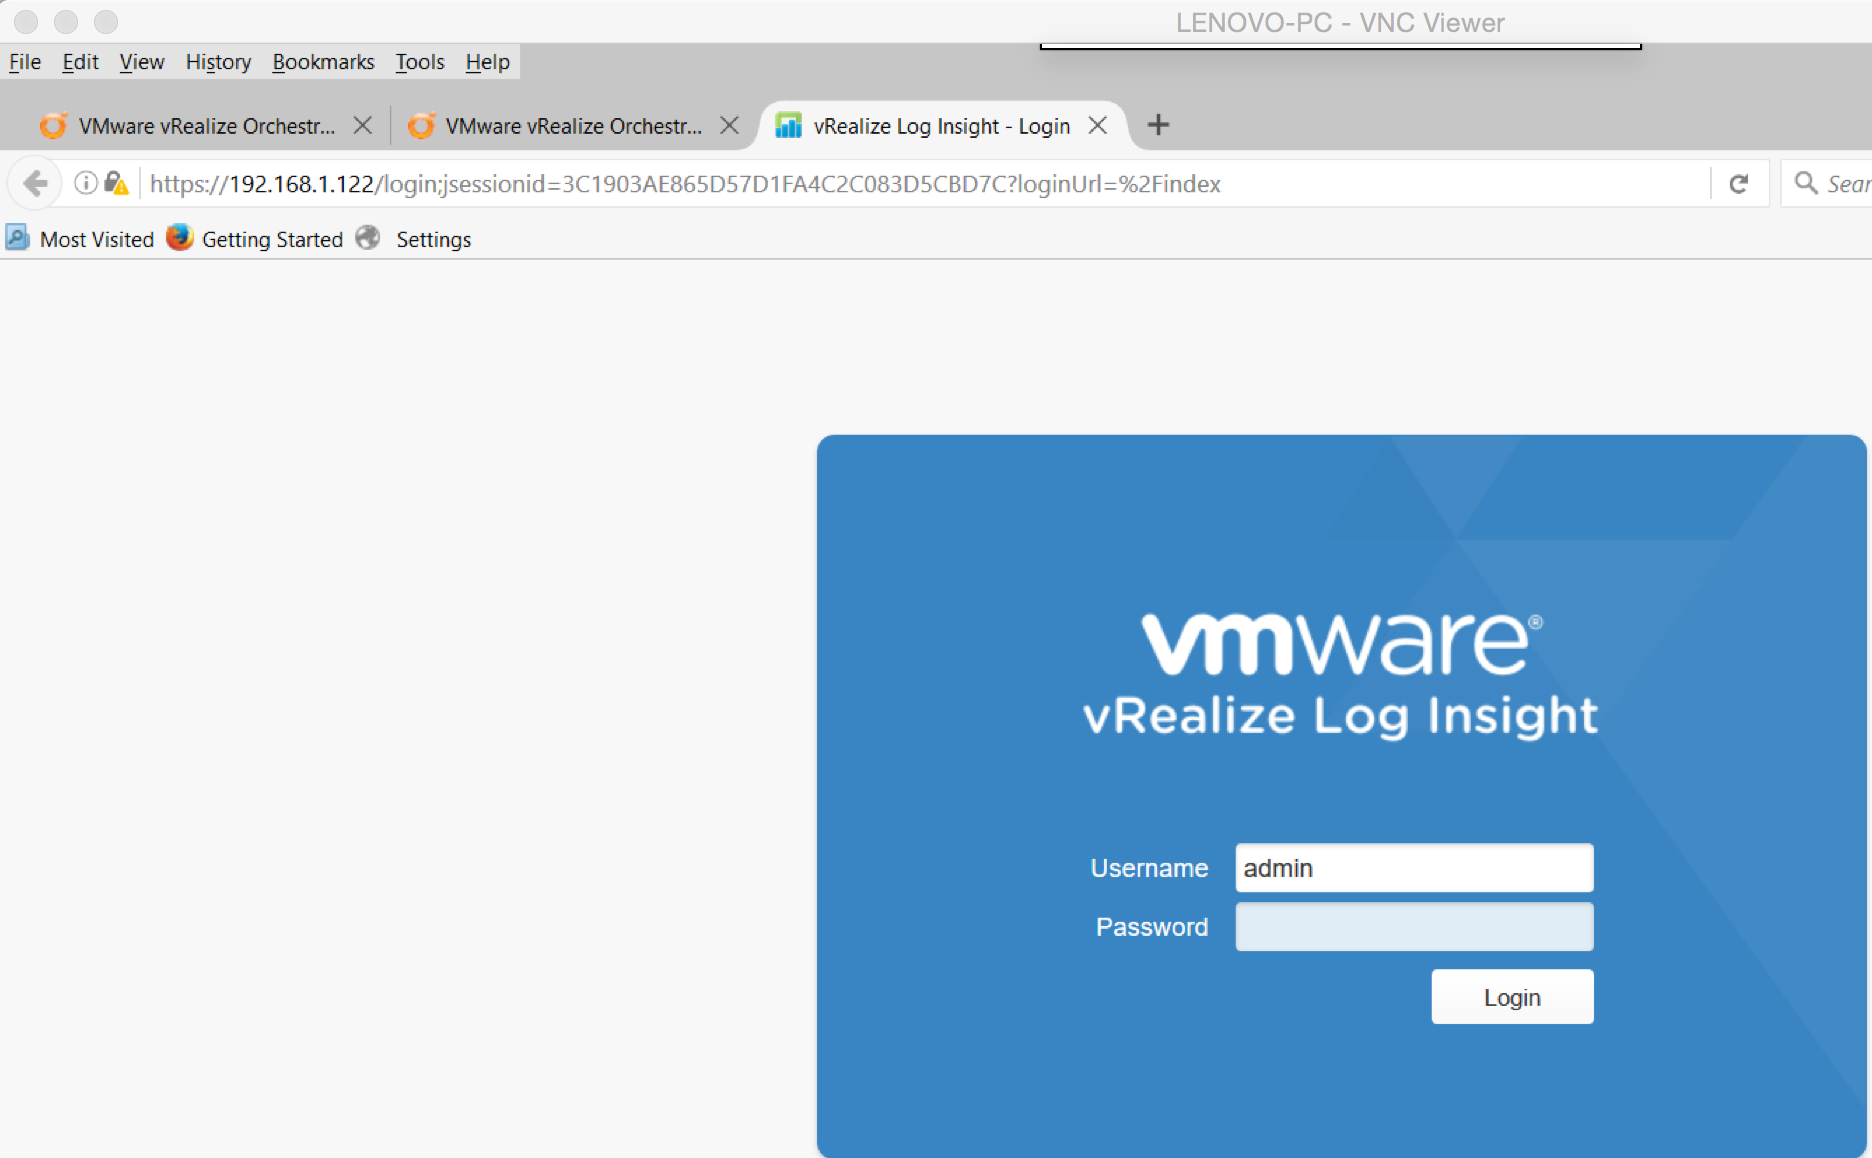
  • Next Log into Log Insight

screen-shot-2016-11-14-at-11-38-08

  • Click on the Administration icon (Top right in Log Insight)

screen-shot-2016-11-14-at-11-44-31

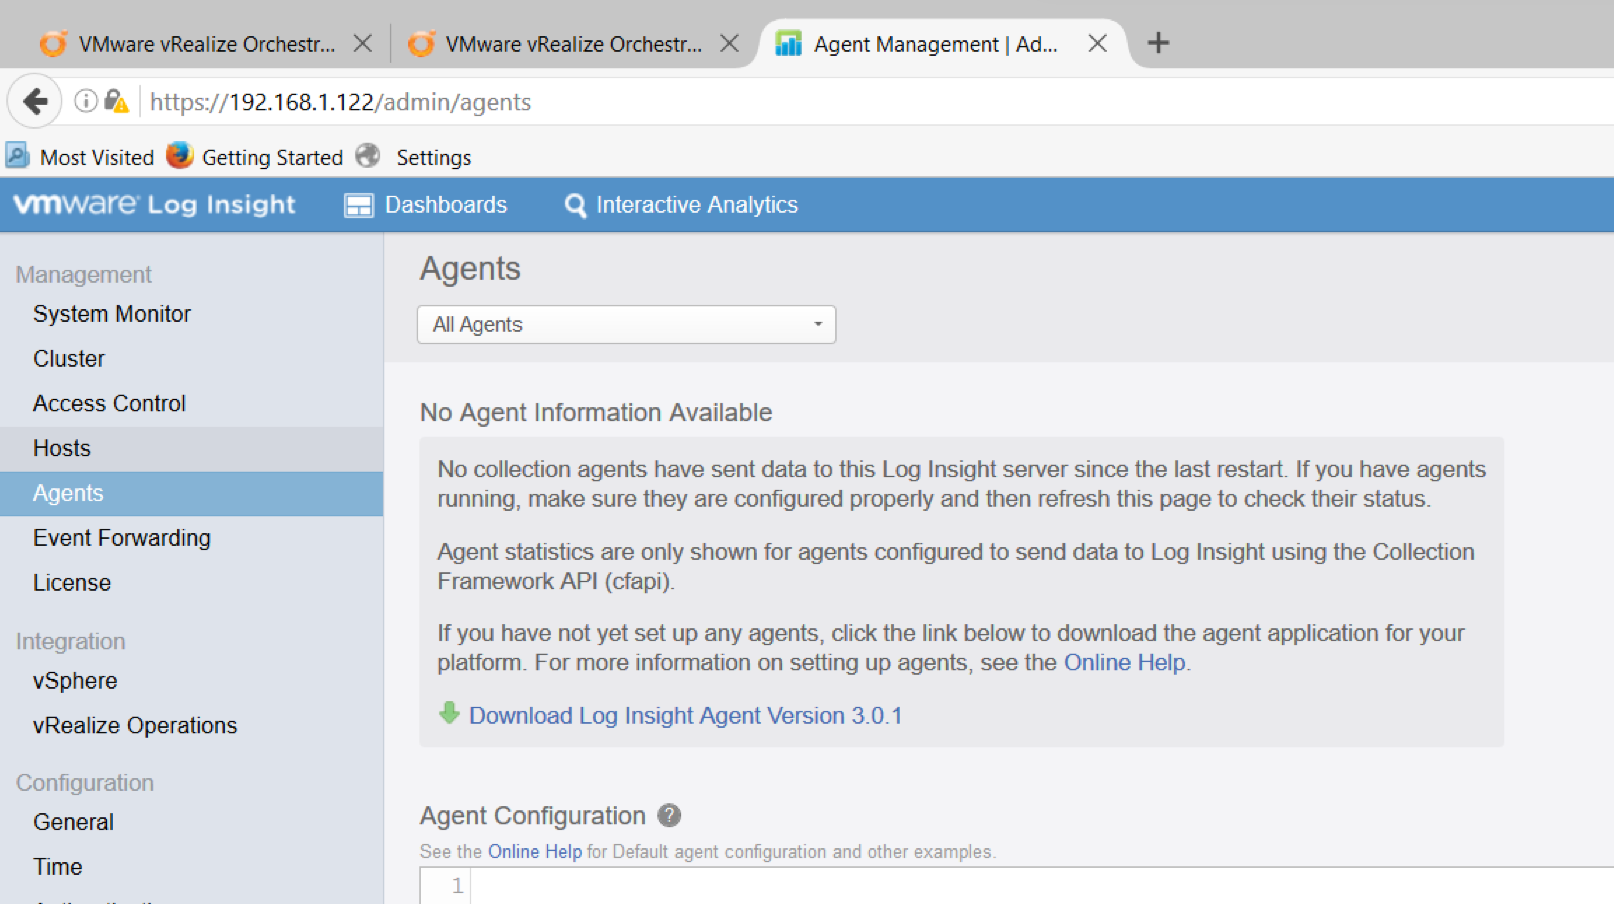
  • Click on Agents

screen-shot-2016-11-14-at-13-15-50

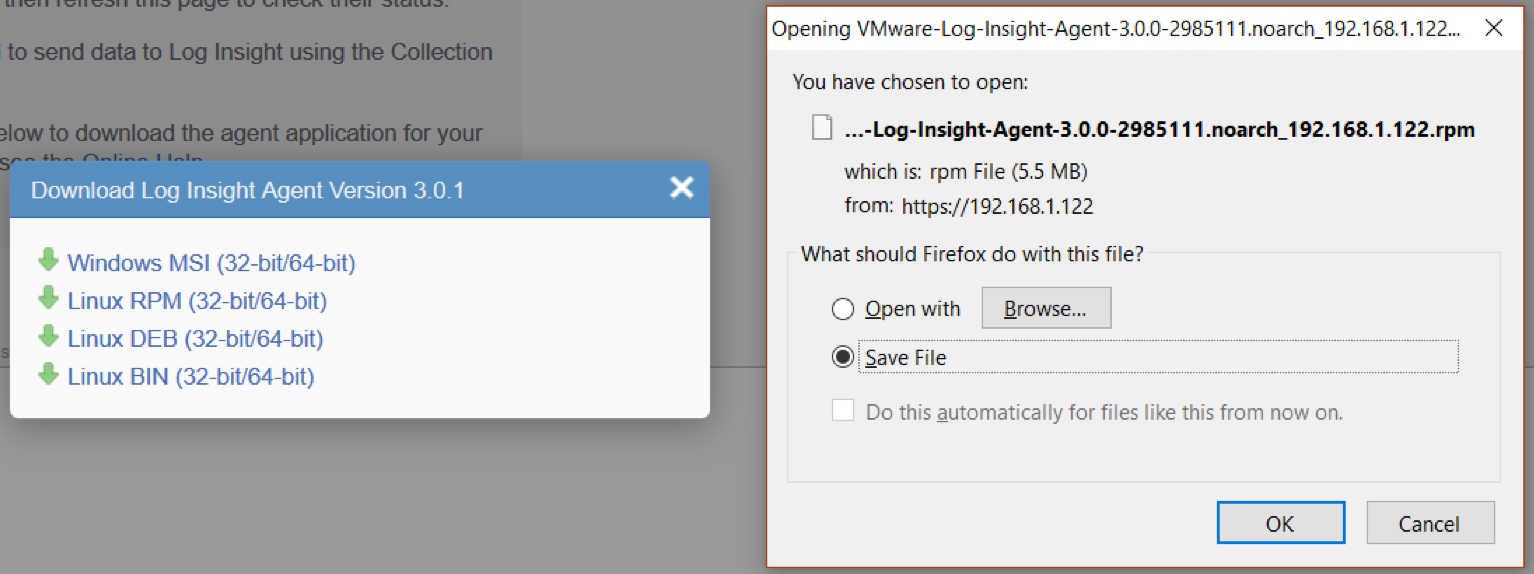
  • Click on Download Log Insight Agent Version 3.0.1
  • Choose Linux RPM

screen-shot-2016-11-14-at-13-17-11

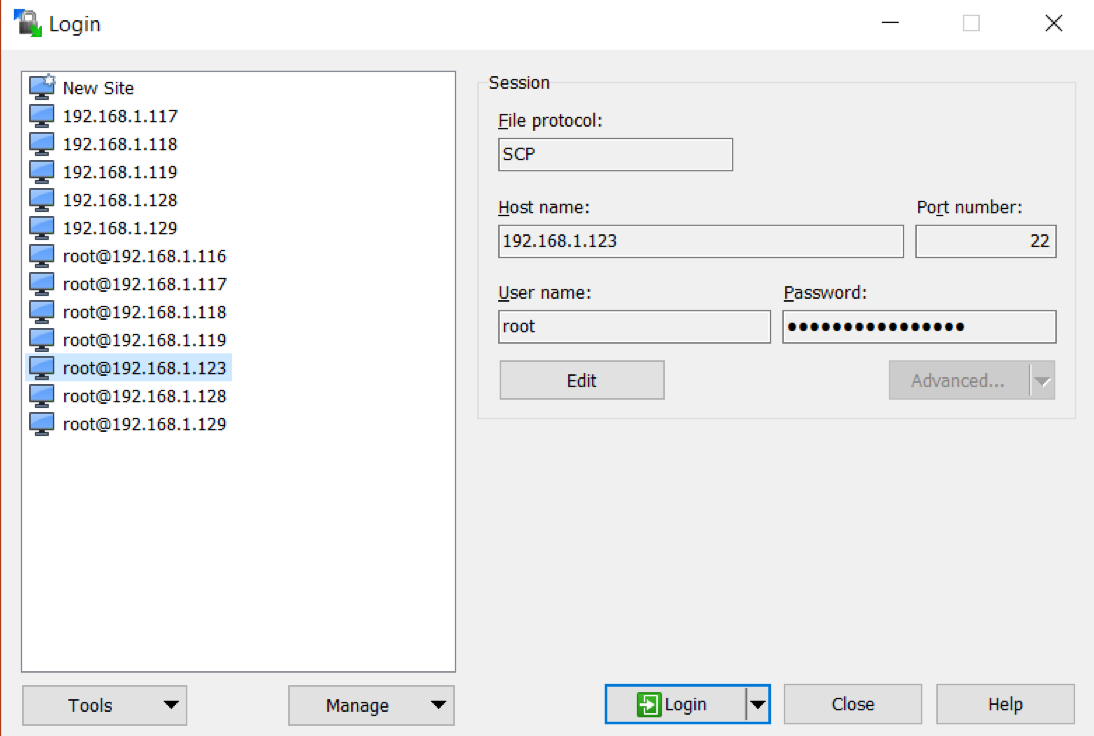
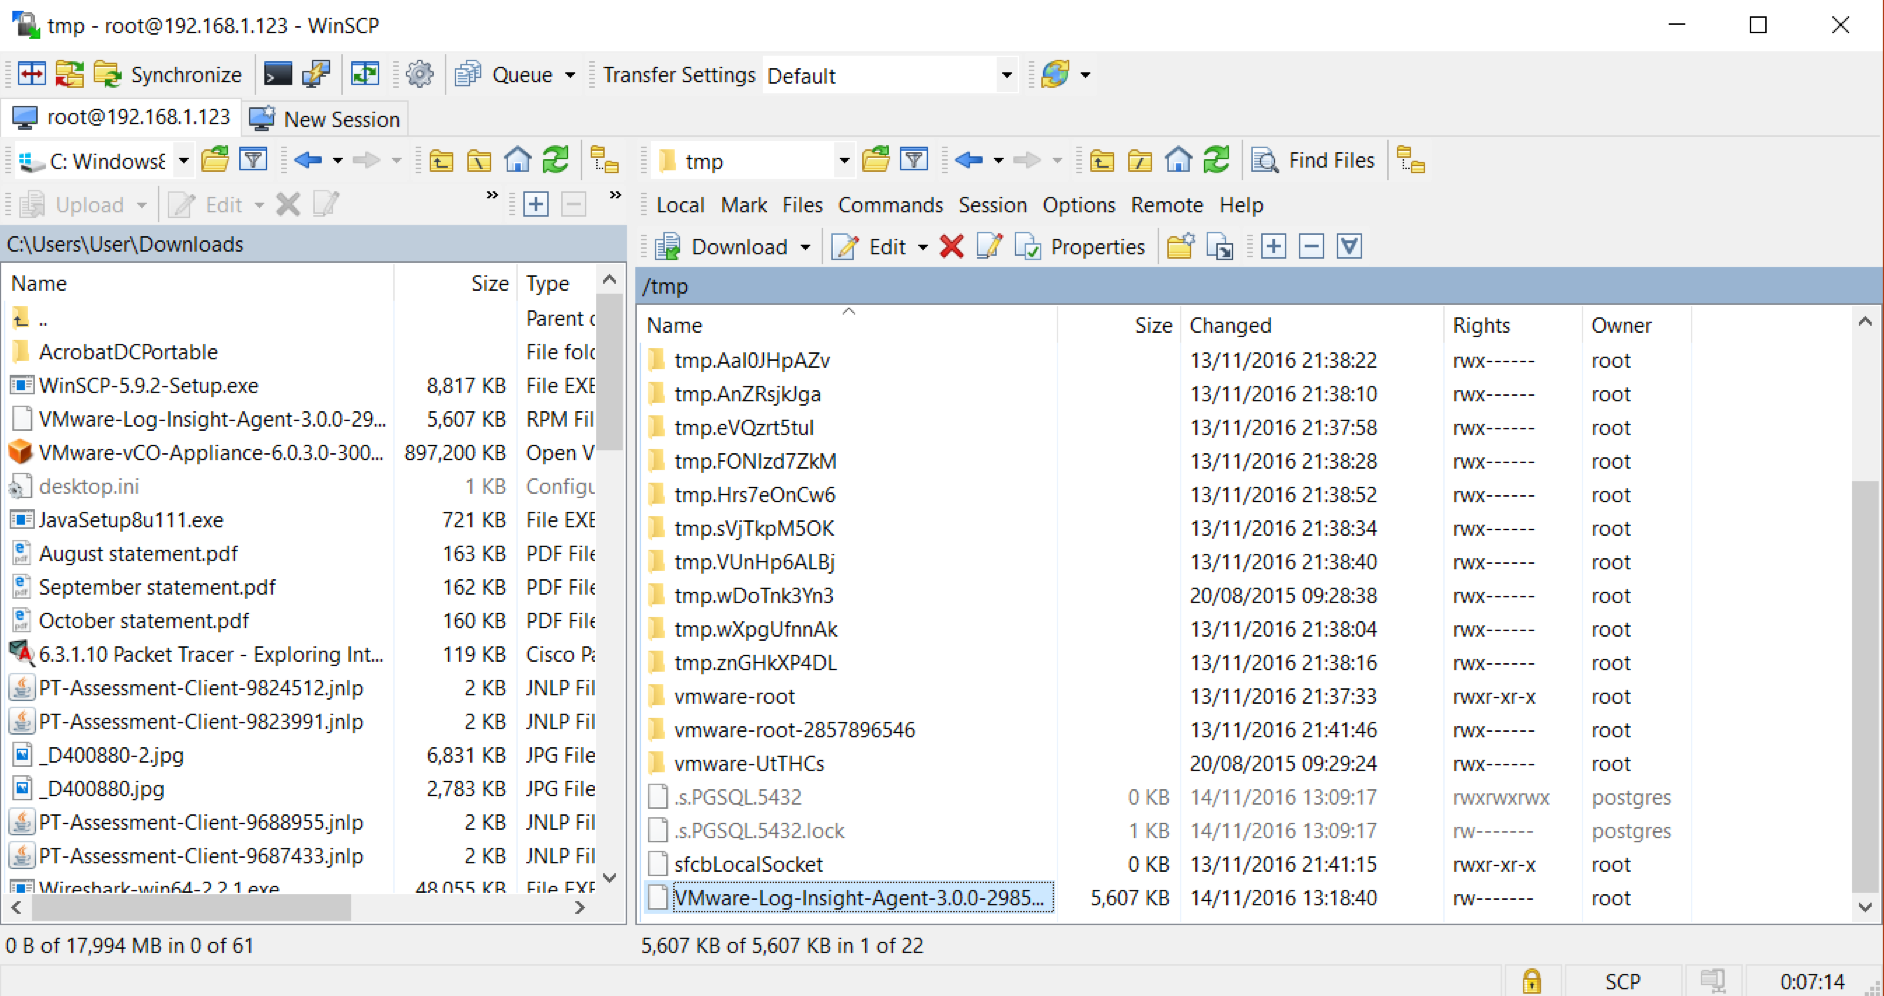
  • Using Winscp, log into the vCO appliance

screen-shot-2016-11-14-at-13-21-03

  • We now need to copy the Linux Log Insight agent to a directory on the vCO server
  • Copy the agent to the /tmp folder

screen-shot-2016-11-14-at-13-29-06

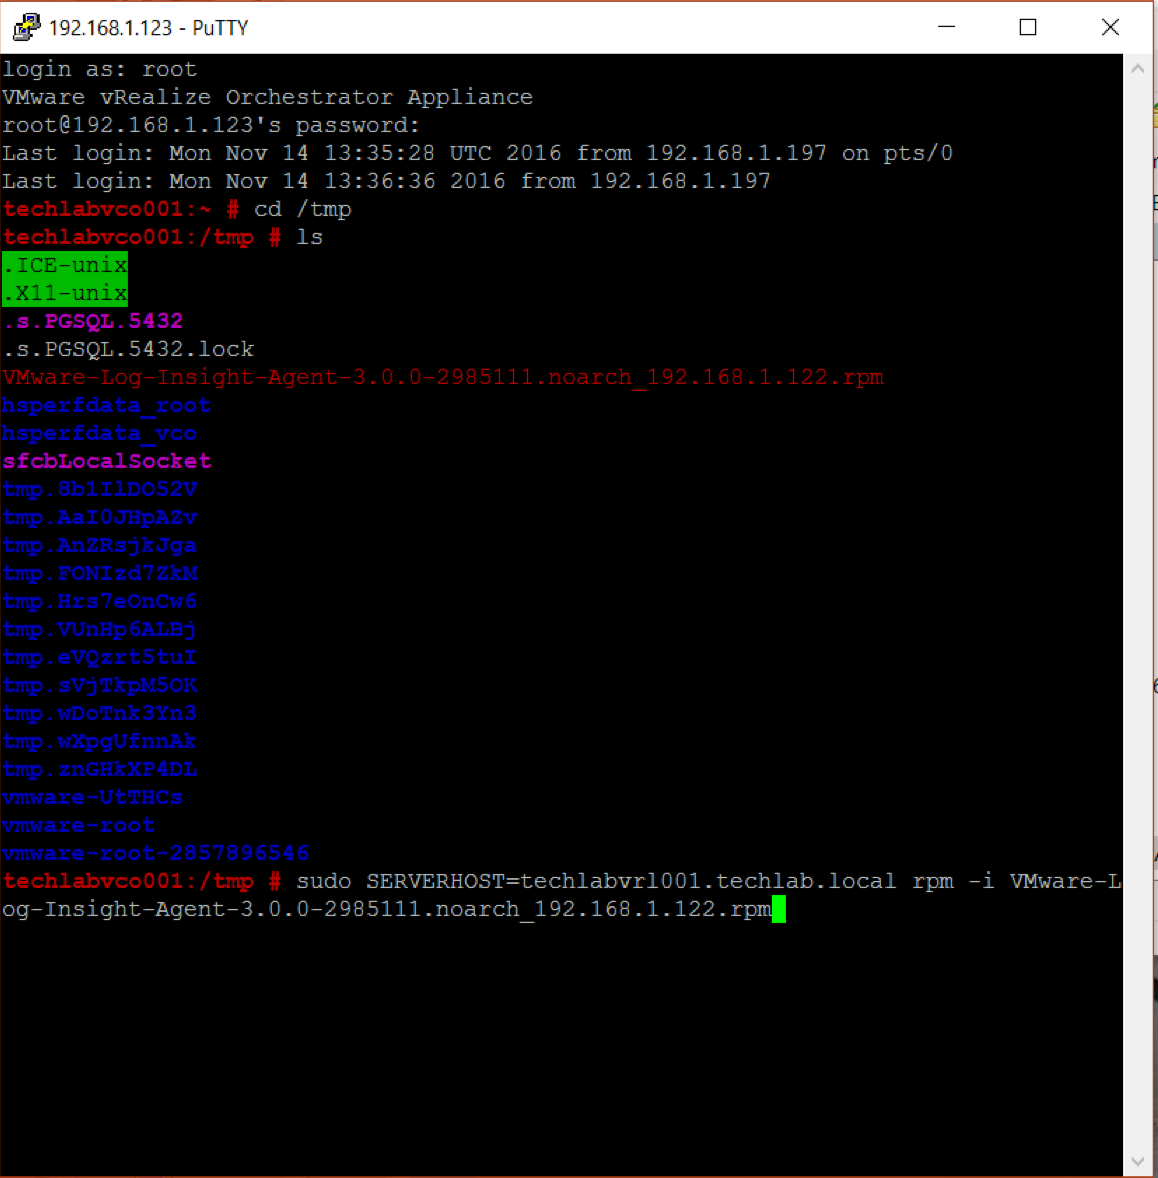
  • Putty in to the vCO box
  • Switch to the /tmp folder – cd /tmp
  • To set the target vRealize Log Insight server during installation run the sudo command and replace hostname with the IP address or hostname of the vRealize Log Insight server.
  • sudo SERVERHOST=hostname rpm -i VMware-Log-Insight-Agent-VERSION-BUILD_NUMBER.rpm
  • In my case
  • sudo SERVERHOST=techlabvrl001.techl;ab.local rpm -i VMware-Log-Insight-Agent-3.0.0-2985111.noarch_192.168.1.122.rpm

screen-shot-2016-11-14-at-13-39-25

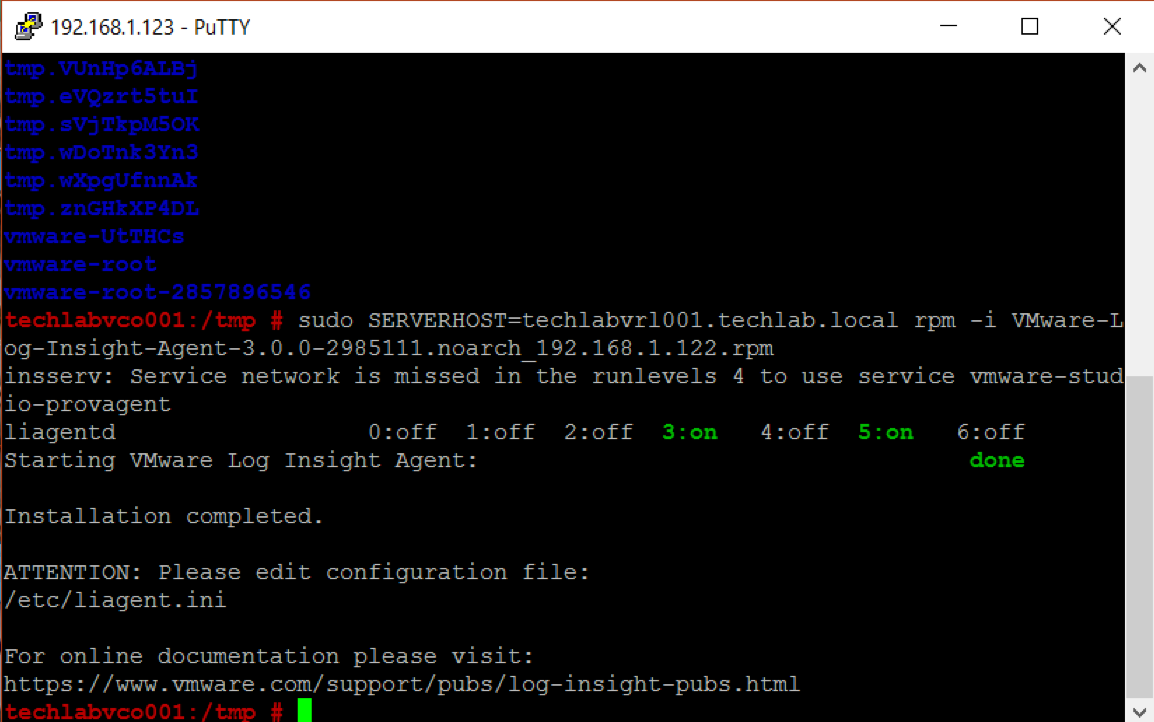
  • You should see the following

screen-shot-2016-11-14-at-14-03-03

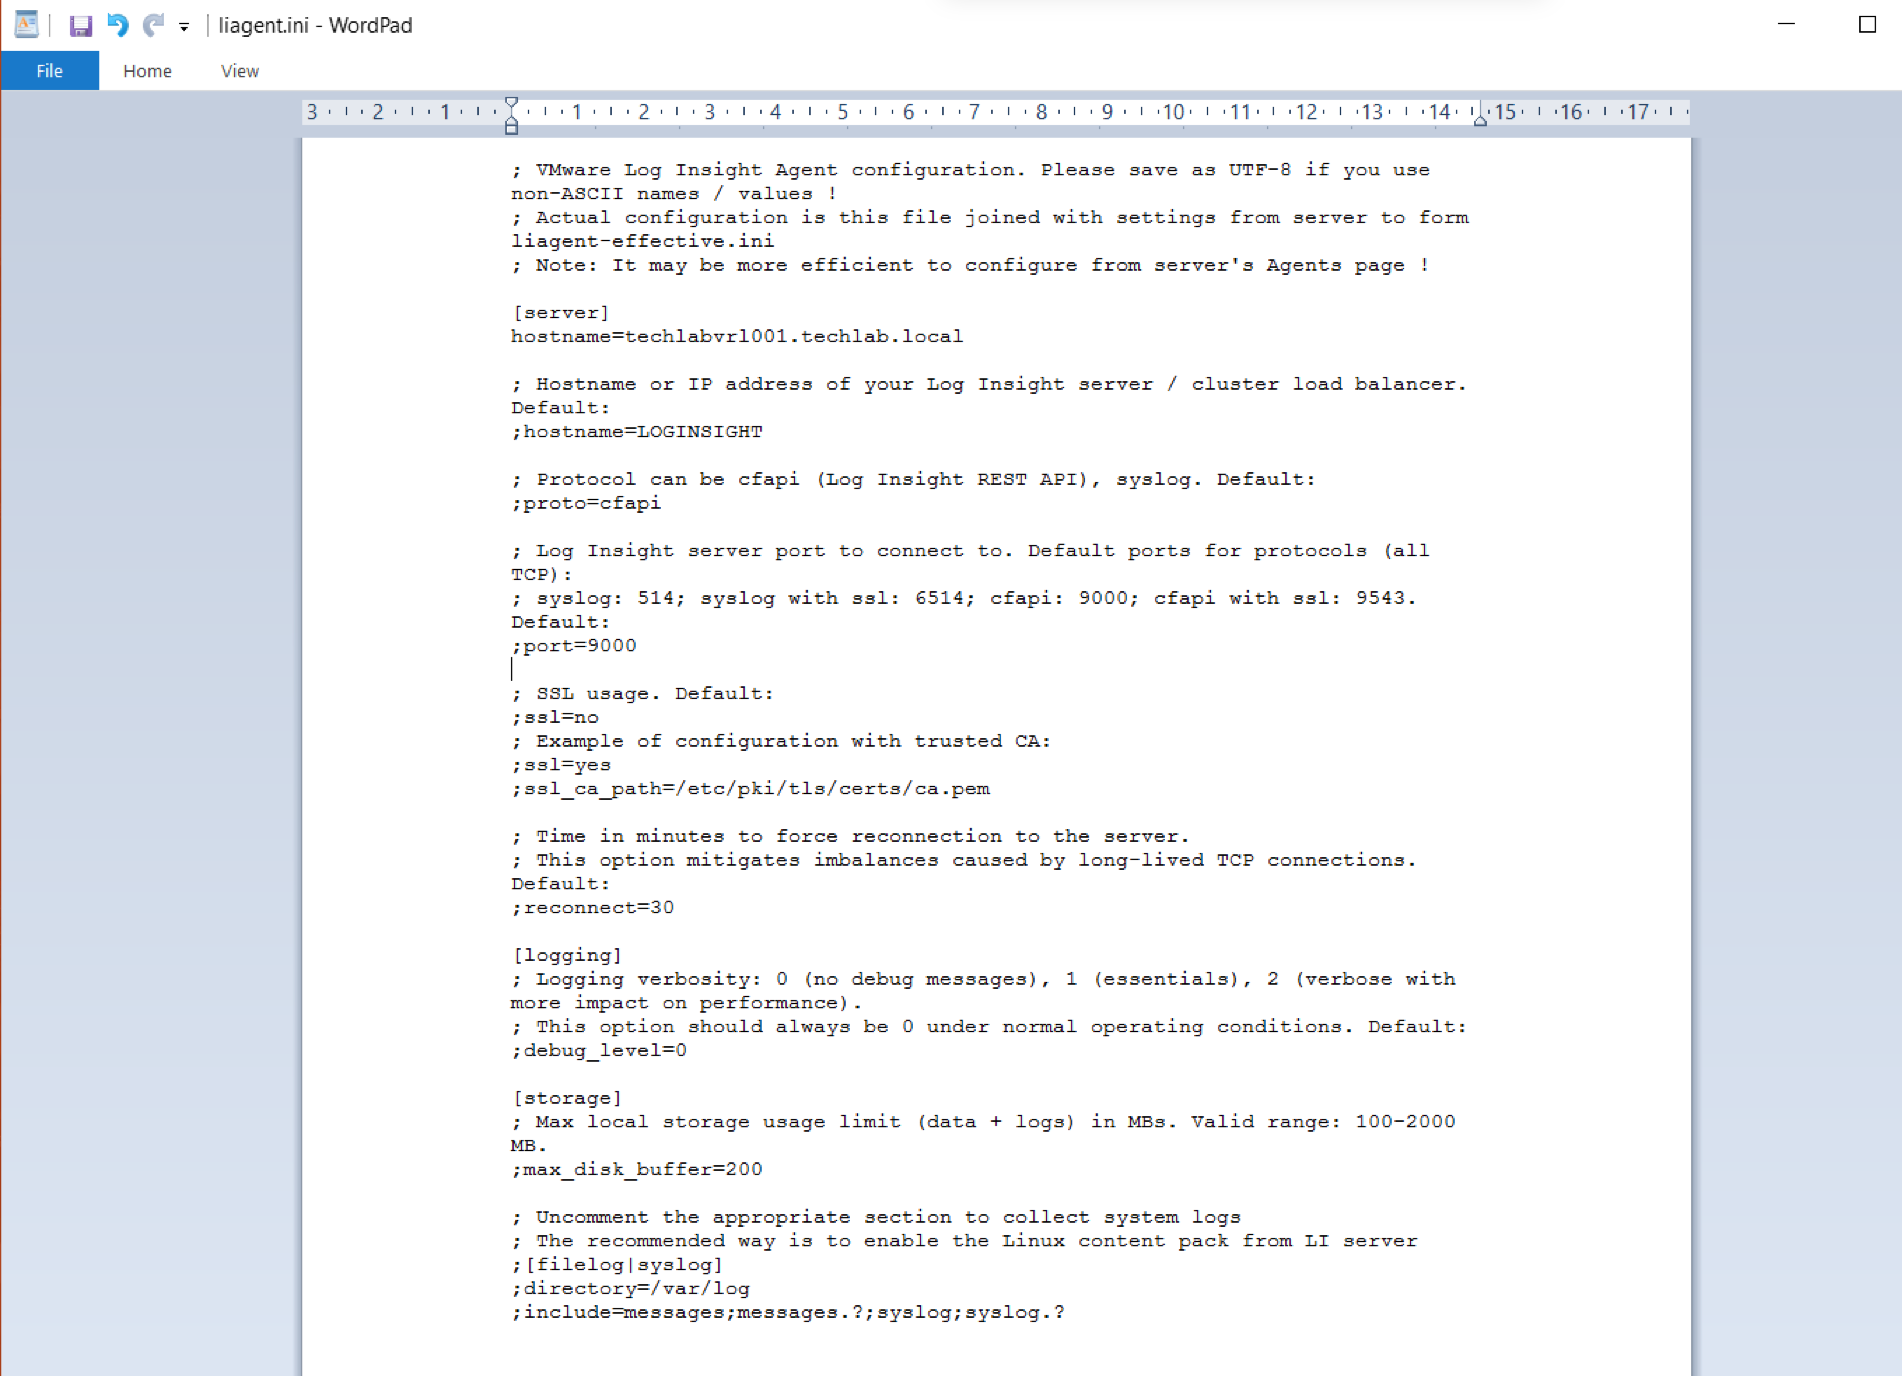
  • Go back into WinSCP and open the file liagent.ini from /etc/liagent.ini
  • Check the LogInsight hostname has been added in and check all other options. We will not be modifying this liagent file as the recommended way to modify these settings is via the Linux Content Pack which needs to be imported into Log Insight and configured from within here. Instructions below in further steps

screen-shot-2016-11-14-at-14-22-57

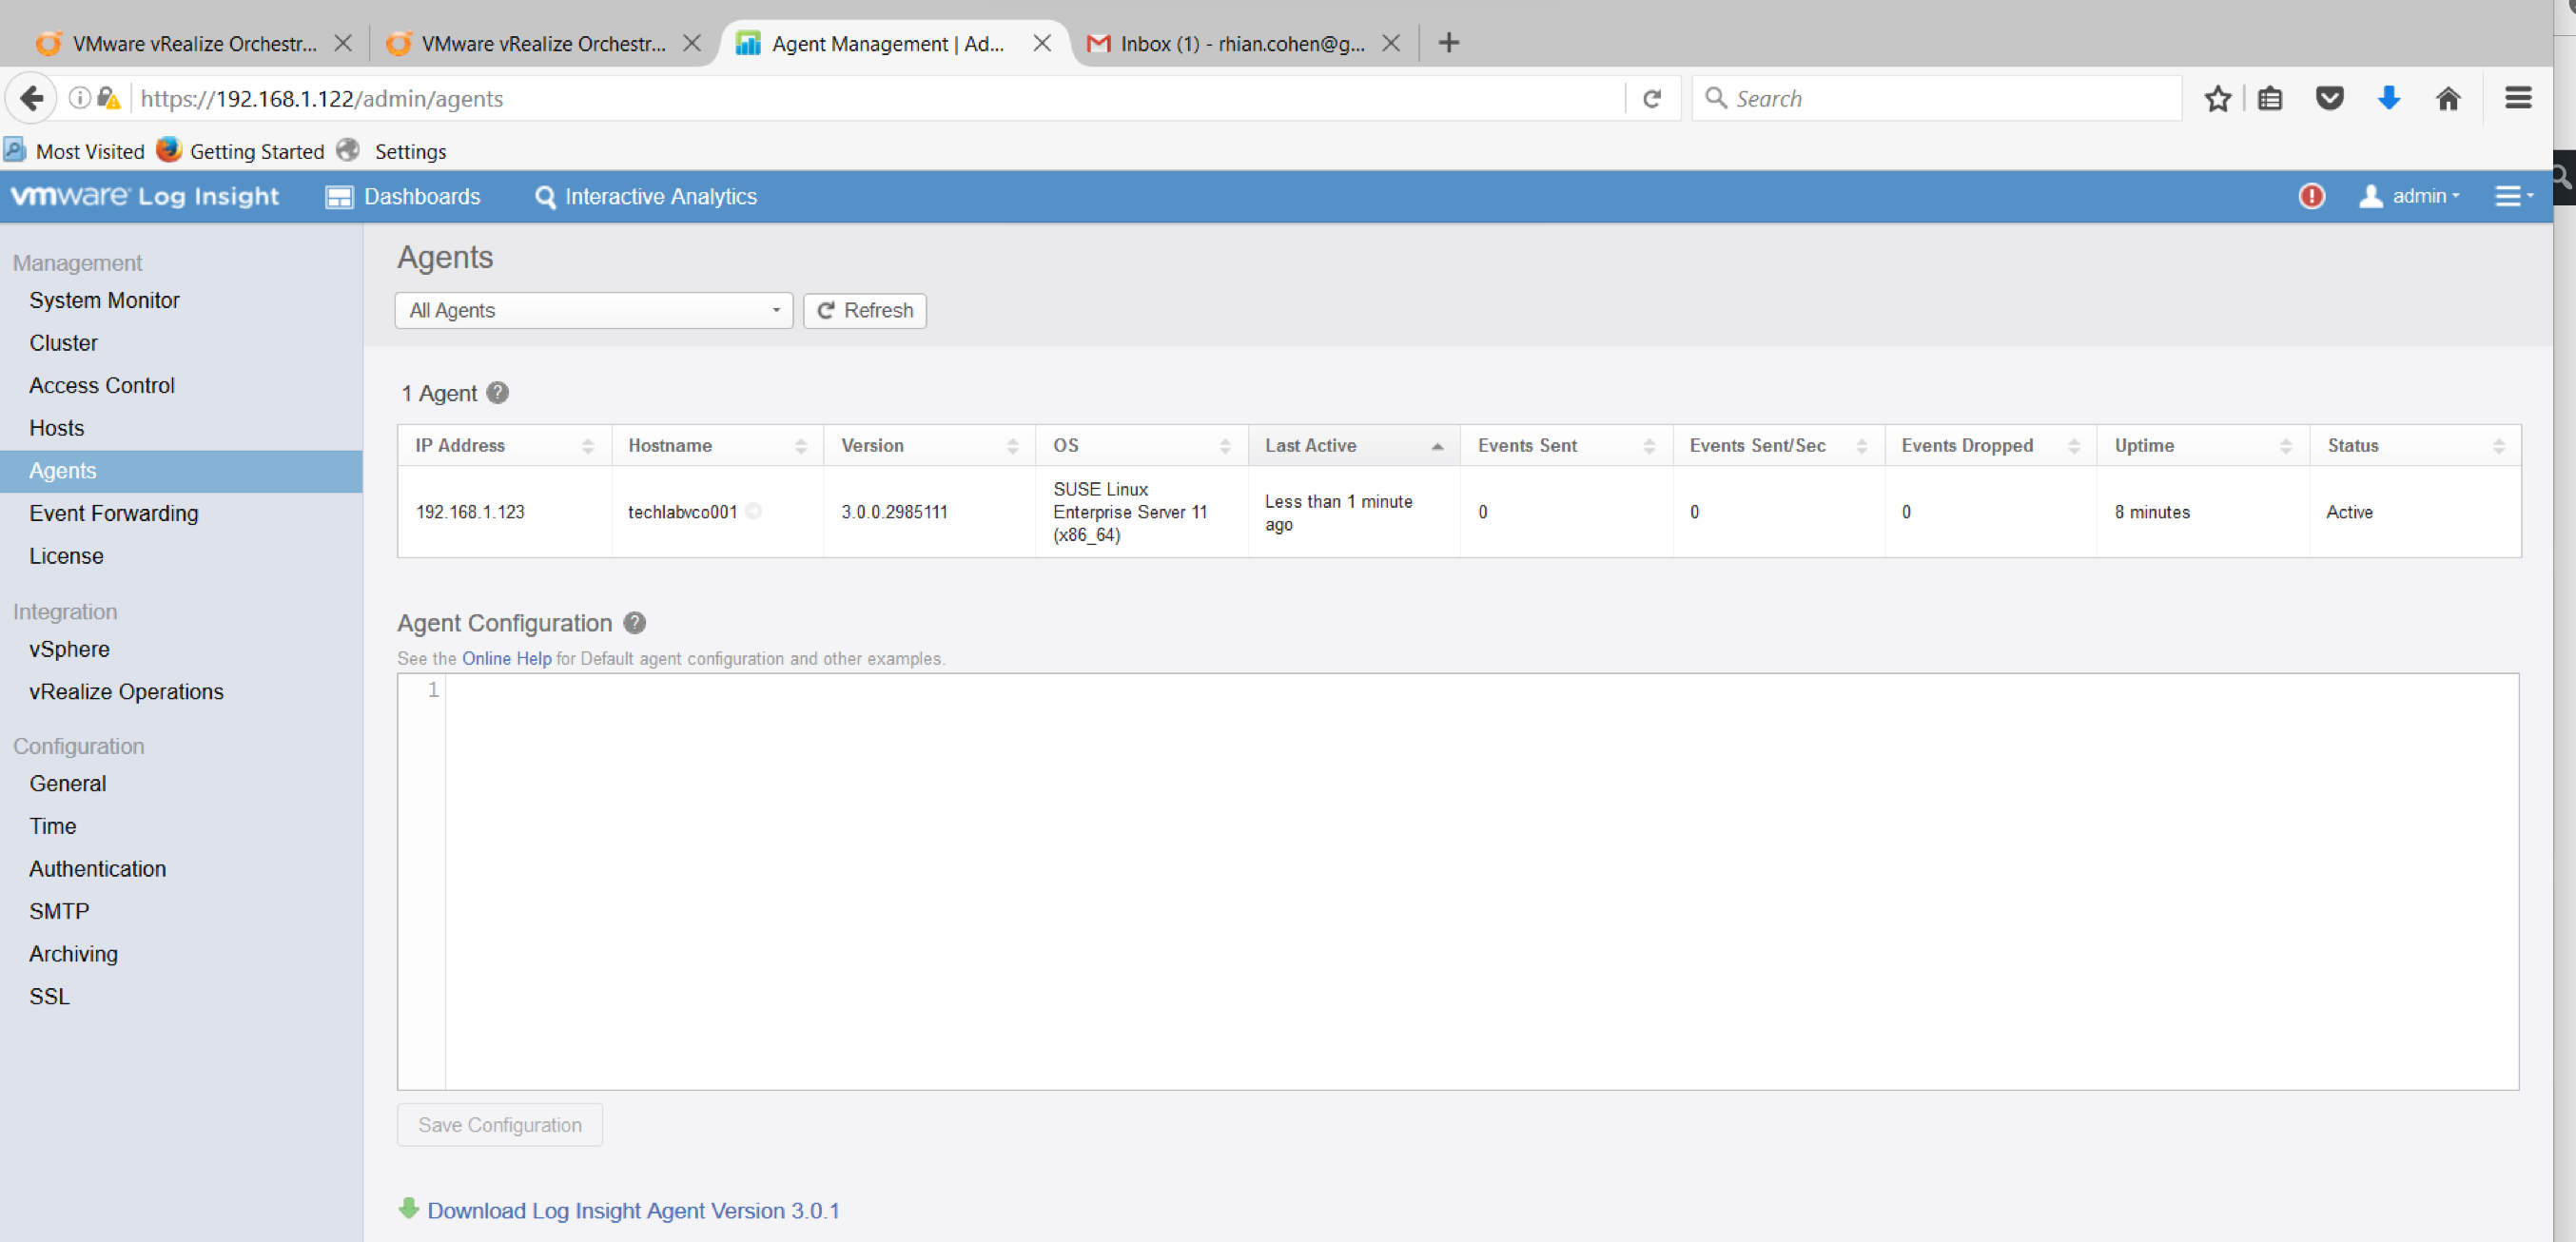
  • Go back into Log Insight and refresh the page and check the agent has been picked up.

screen-shot-2016-11-14-at-14-24-08

Next we need to install the Linux Content Pack – Linux__v1.0.vlcp currently

  • Go to the Administration icon and click on Content Packs

screen-shot-2016-11-14-at-14-34-25

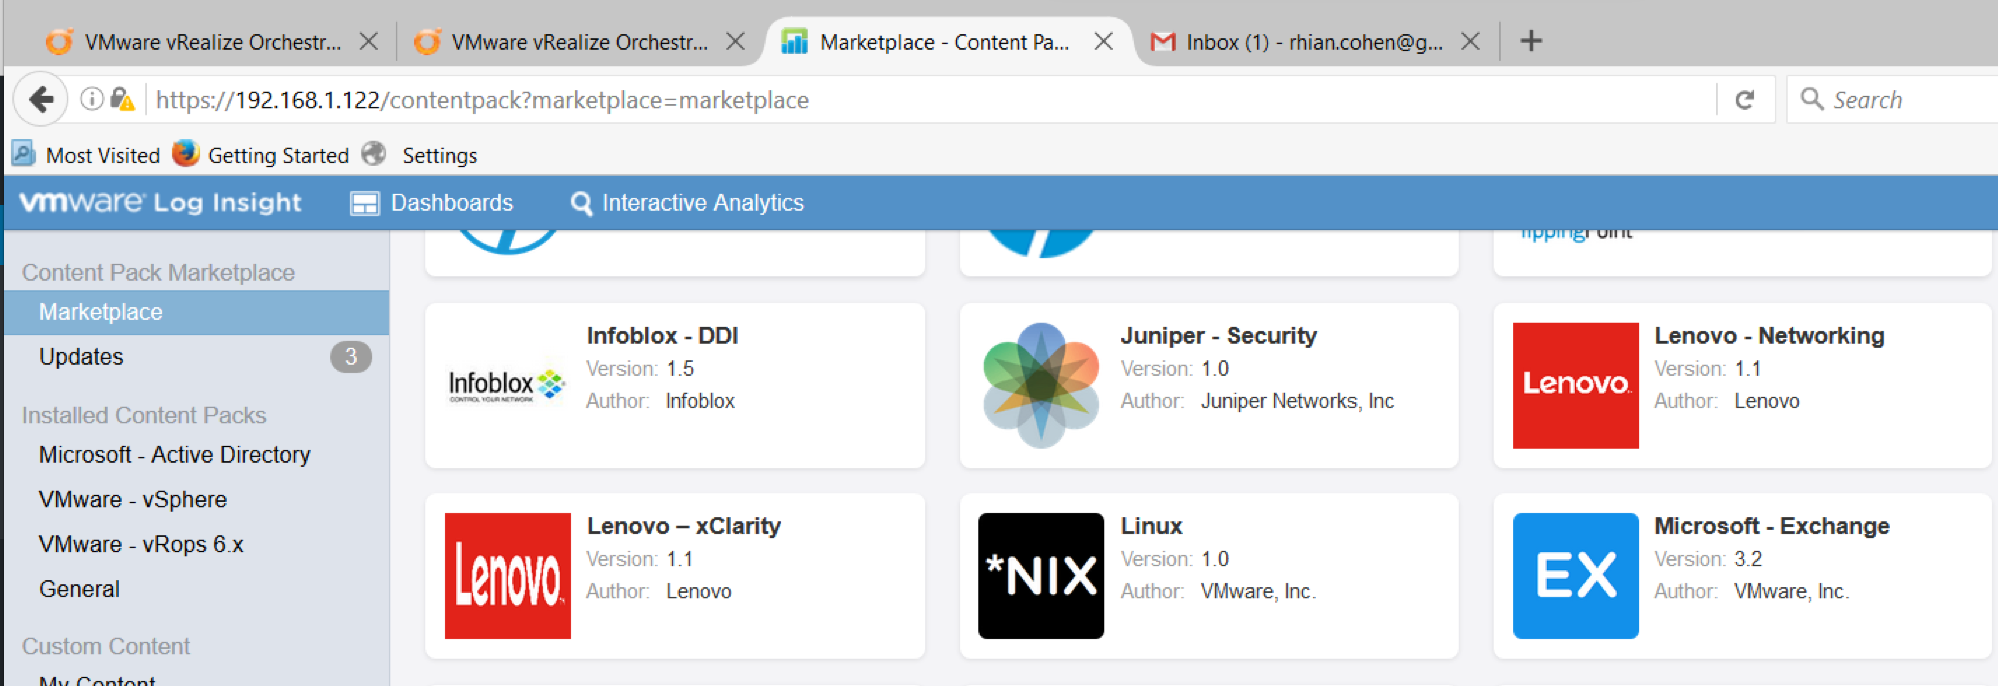
  • Find the Linux Content Pack

screen-shot-2016-11-14-at-14-36-40

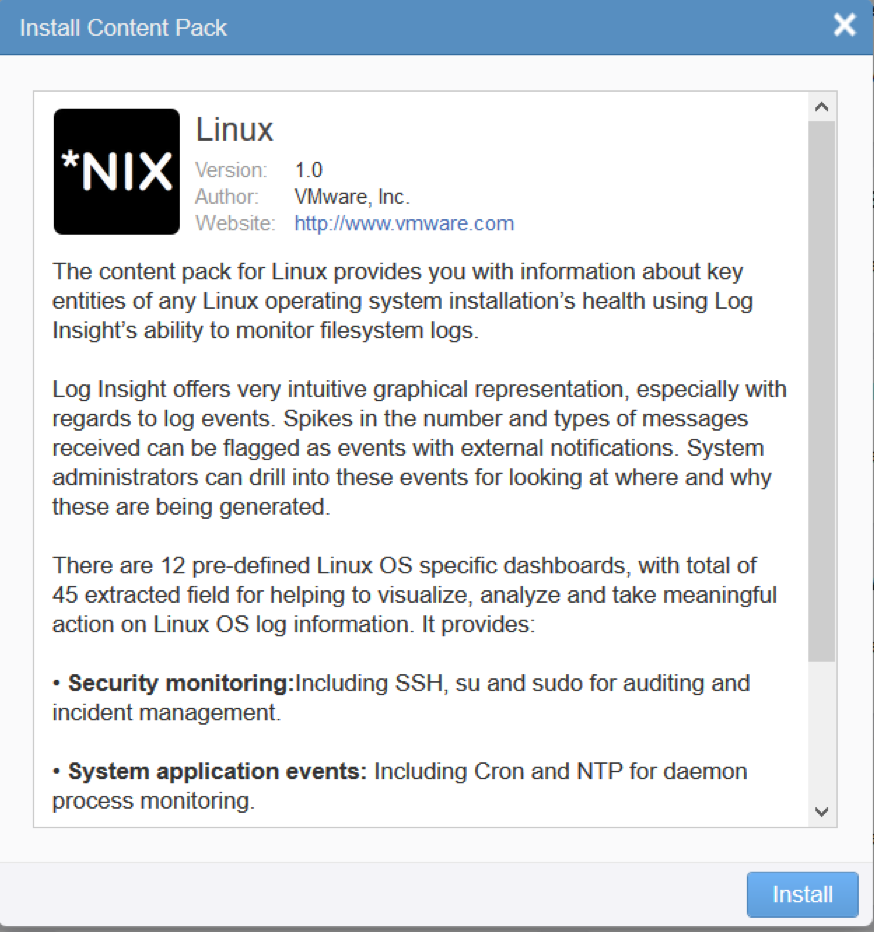
  • When you click on the Content Pack, the below information will come up

screen-shot-2016-11-14-at-14-37-30

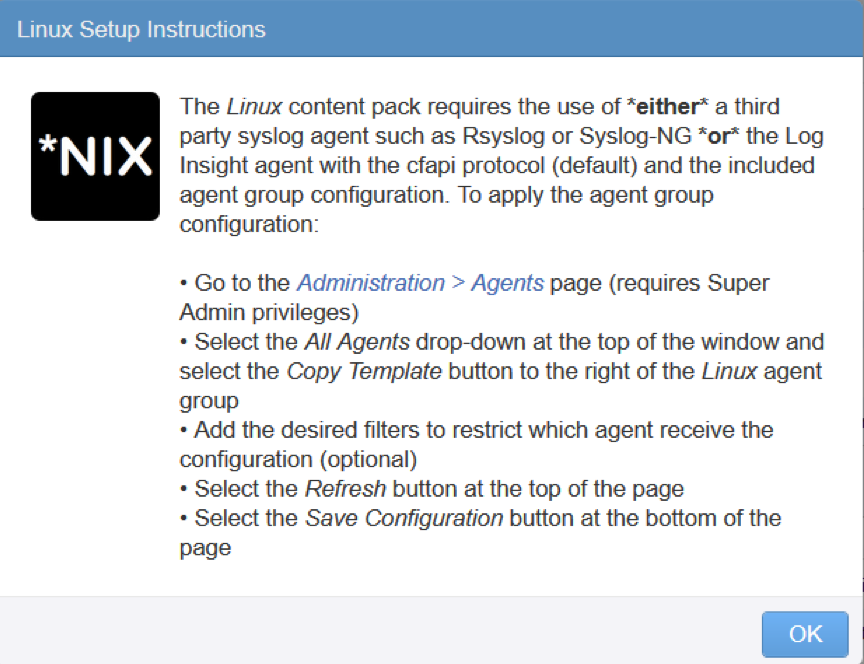
  • Click Install and the below message will come up

screen-shot-2016-11-14-at-14-39-31

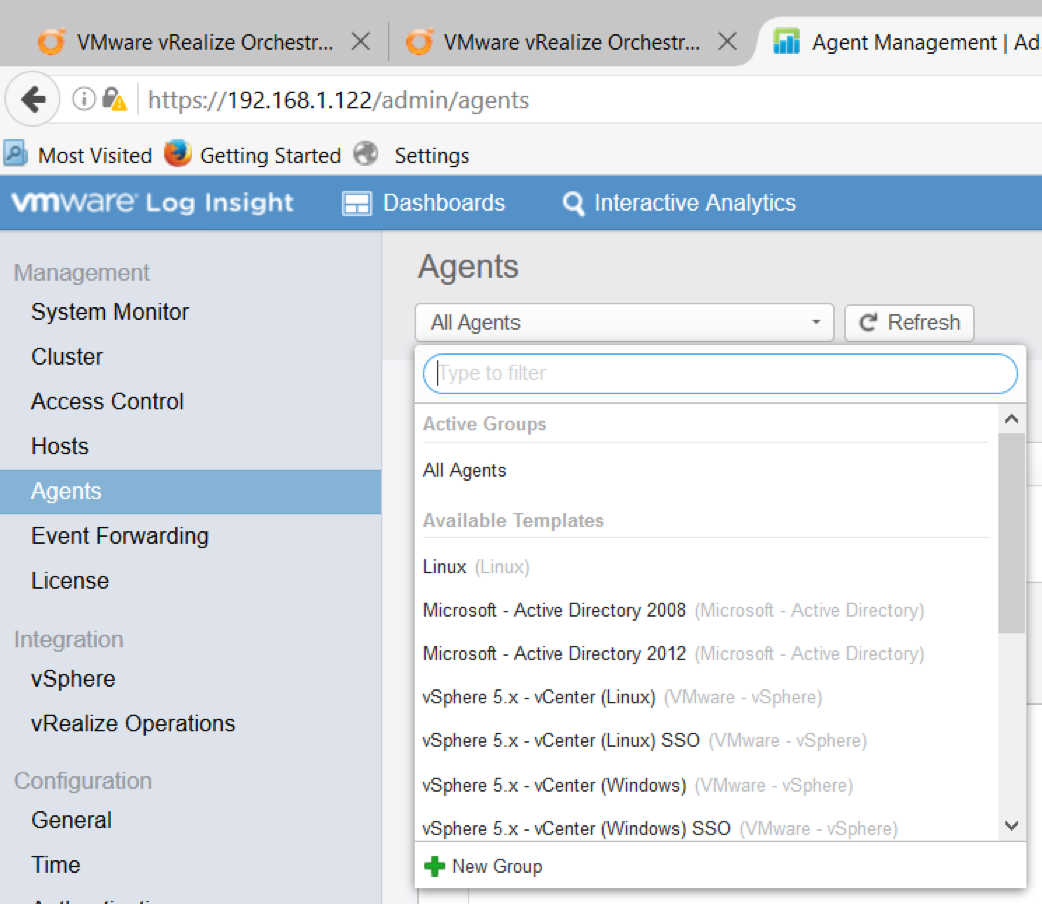
  • Now that you have installed the content pack you can create groups with specific configurations. Go back to Administration > Agents and create your first group for Linux computers.
  • Select Linux in the pull-down menu and click on the copy template button (2 rectangles). (Note you can’t see the 2 triangles until you hover over the agent)

screen-shot-2016-11-14-at-14-45-06

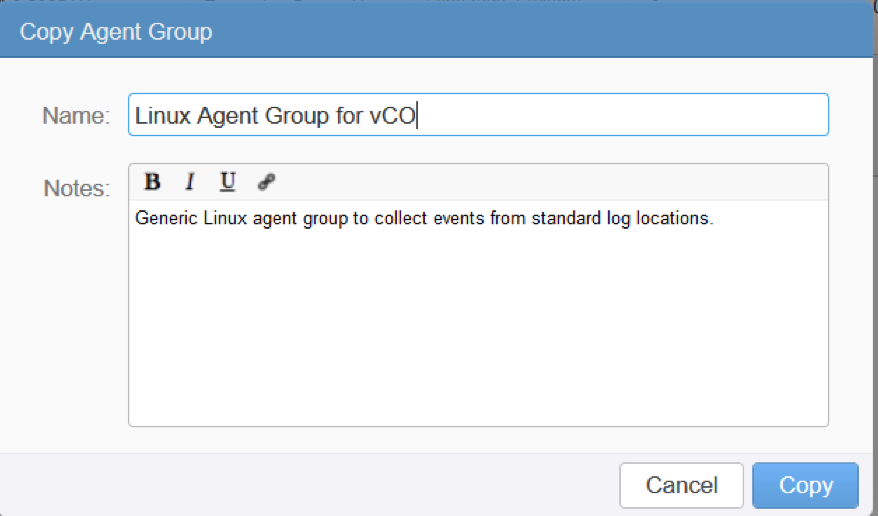
  • Put a name in for the agent group

screen-shot-2016-11-14-at-14-46-49

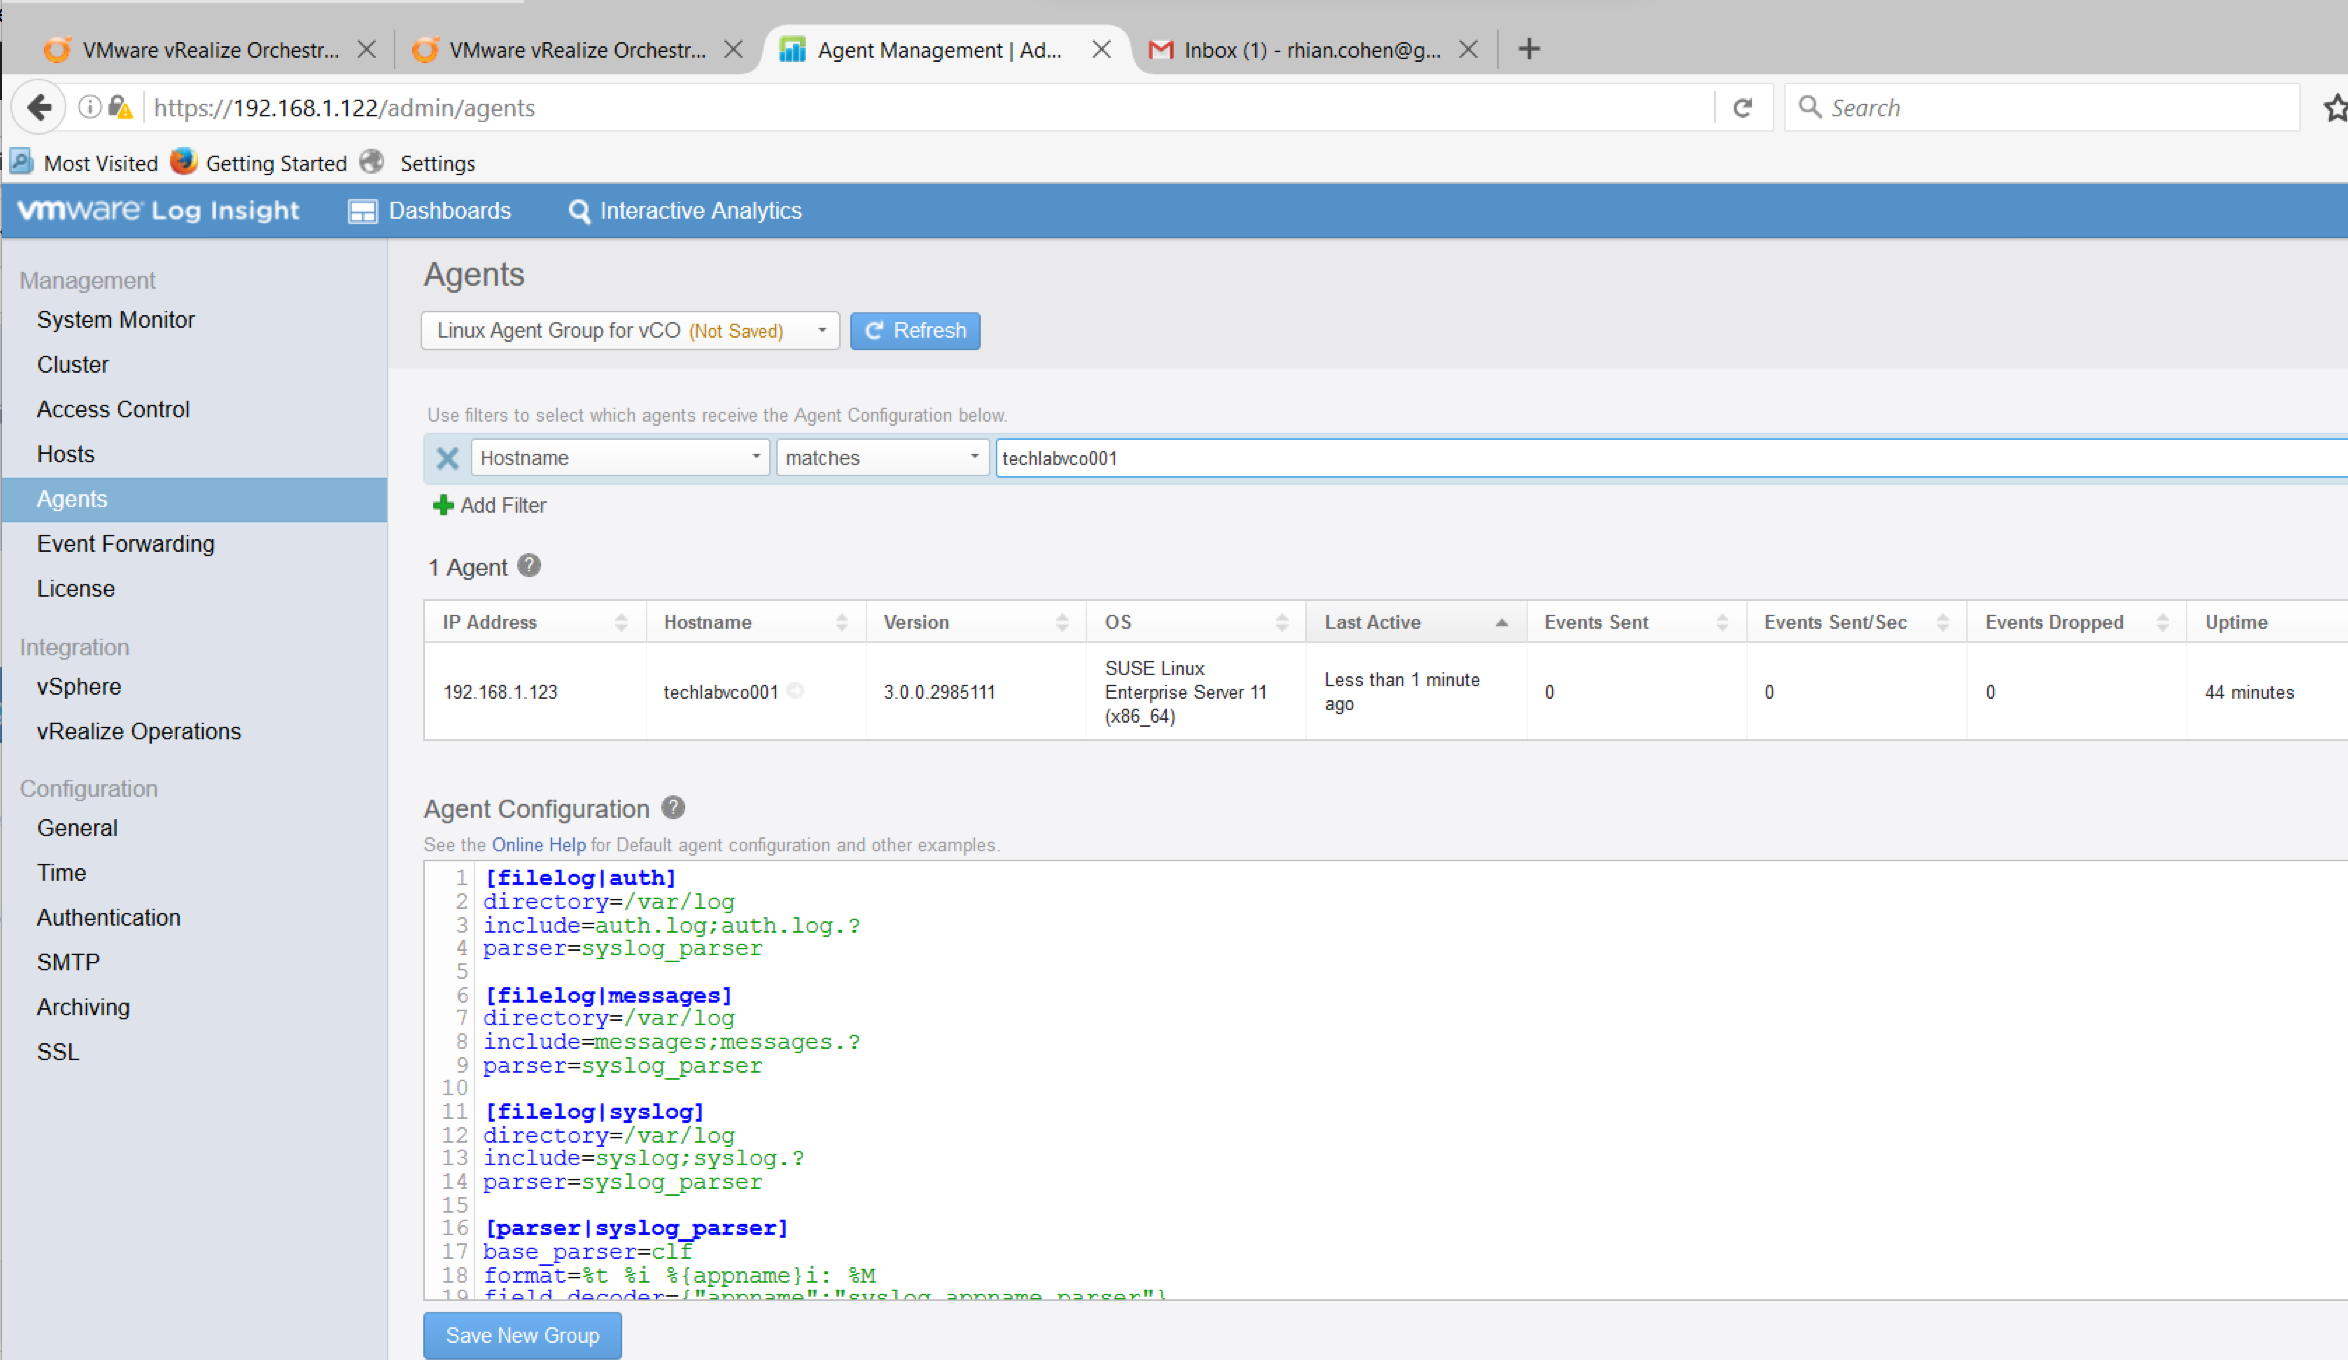
  • Adjust the filter to reflect what machine/machines you want to use
  • In this case I have just added a filter for the hostname of my vCO server

screen-shot-2016-11-14-at-14-48-11

  • This adds the following to the Agent Configuration for the agent on your Linux machines.
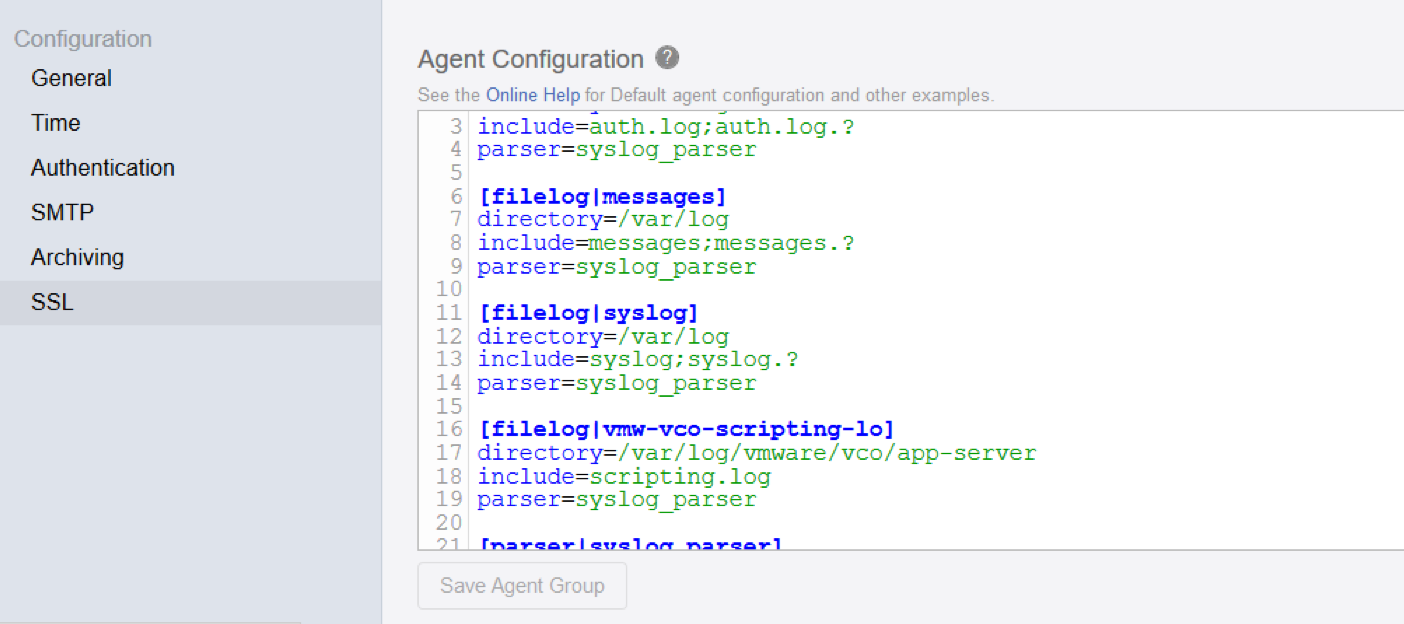
  • If you want to view the Orchestrator Workflow Information then you need to add another section in the Agent Configuration (

[filelog|vmw-vco-scripting-lo]
directory=/var/log/vmware/vco/app-server
include=scripting.log
parser=syslog_parser

screen-shot-2016-11-14-at-17-07-48

  • Click Save New Group
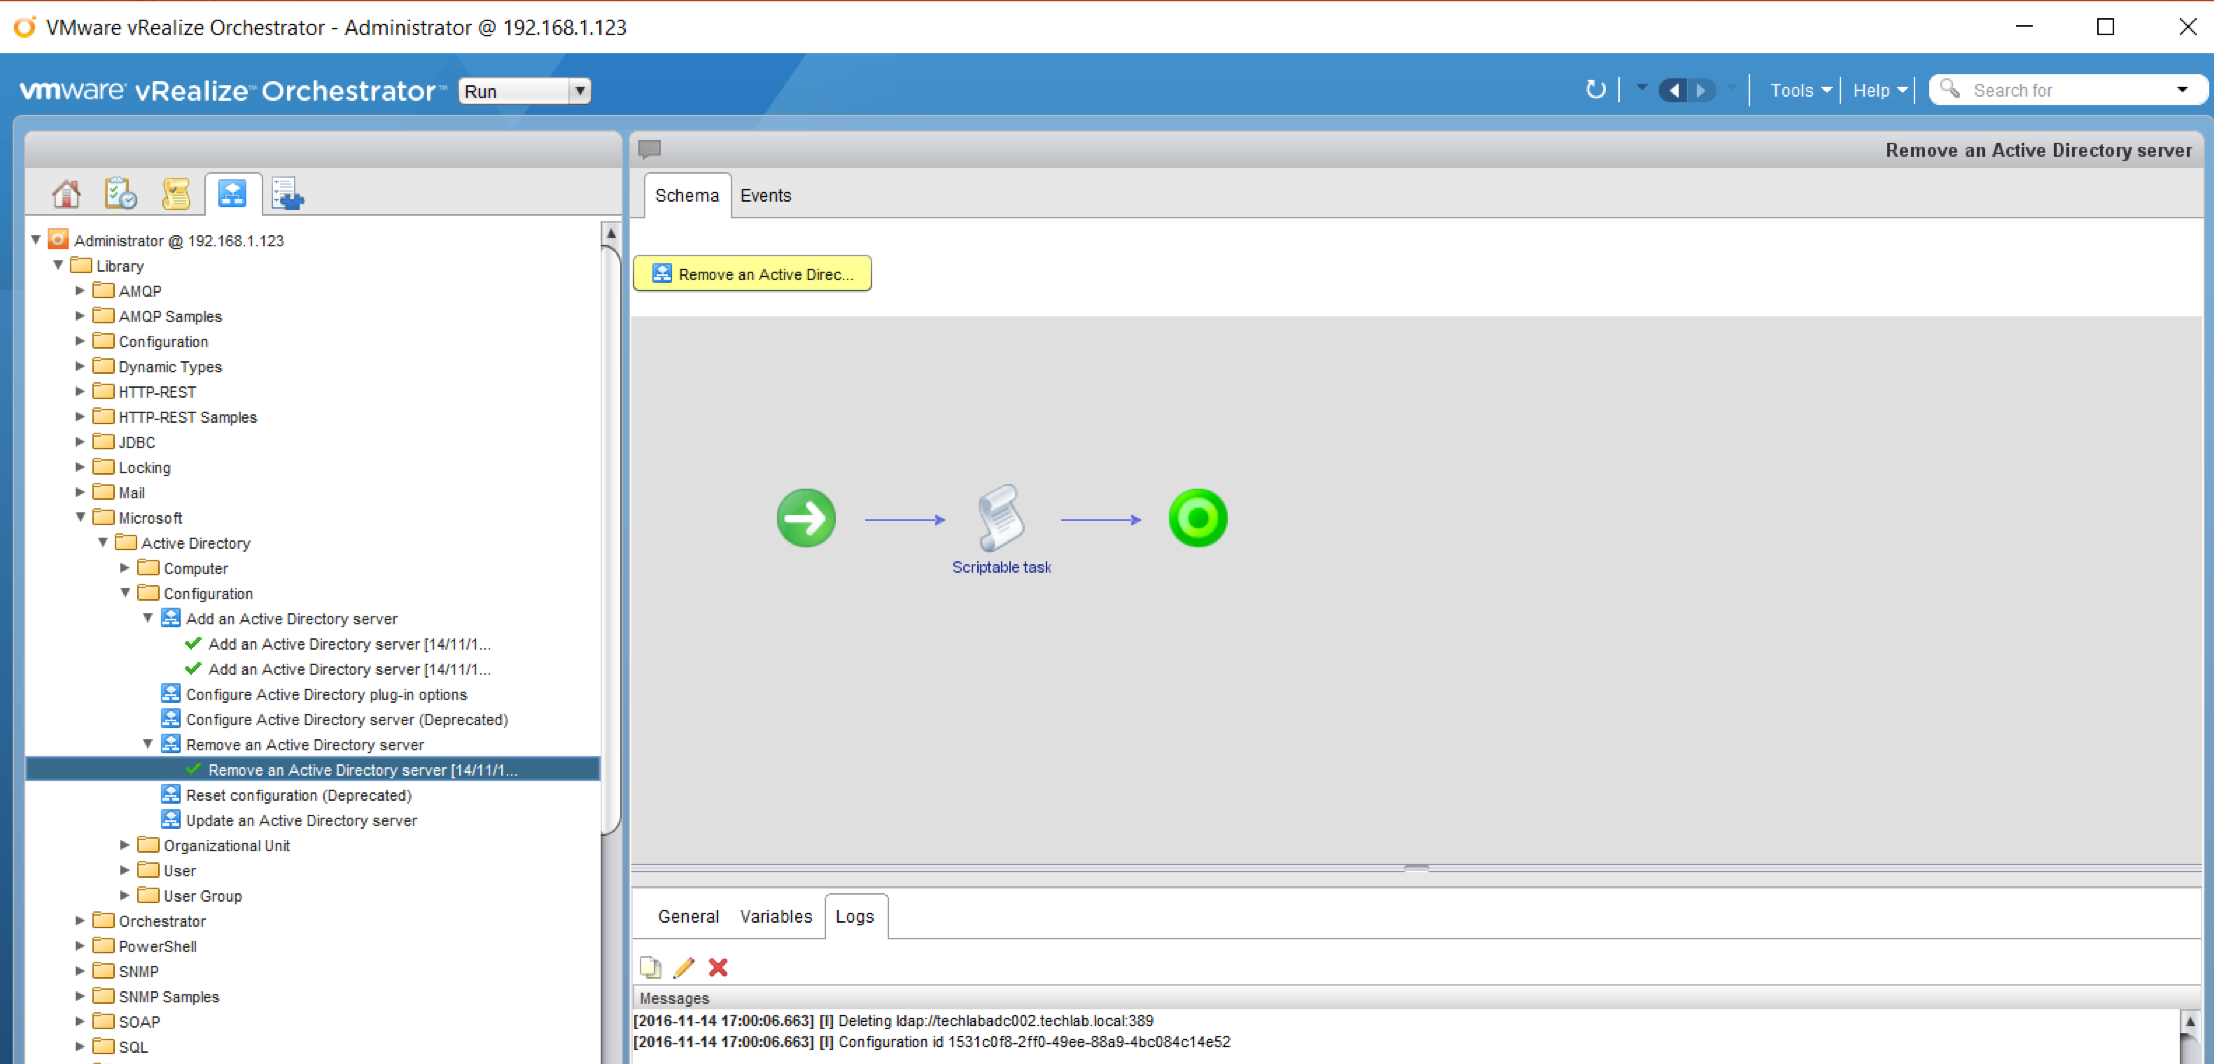
  • Log into the Orchestrator client and test a Workflow (I used Add an Active Directory Server and Remove an Active Directory Server but you could try anything)

screen-shot-2016-11-15-at-09-17-19

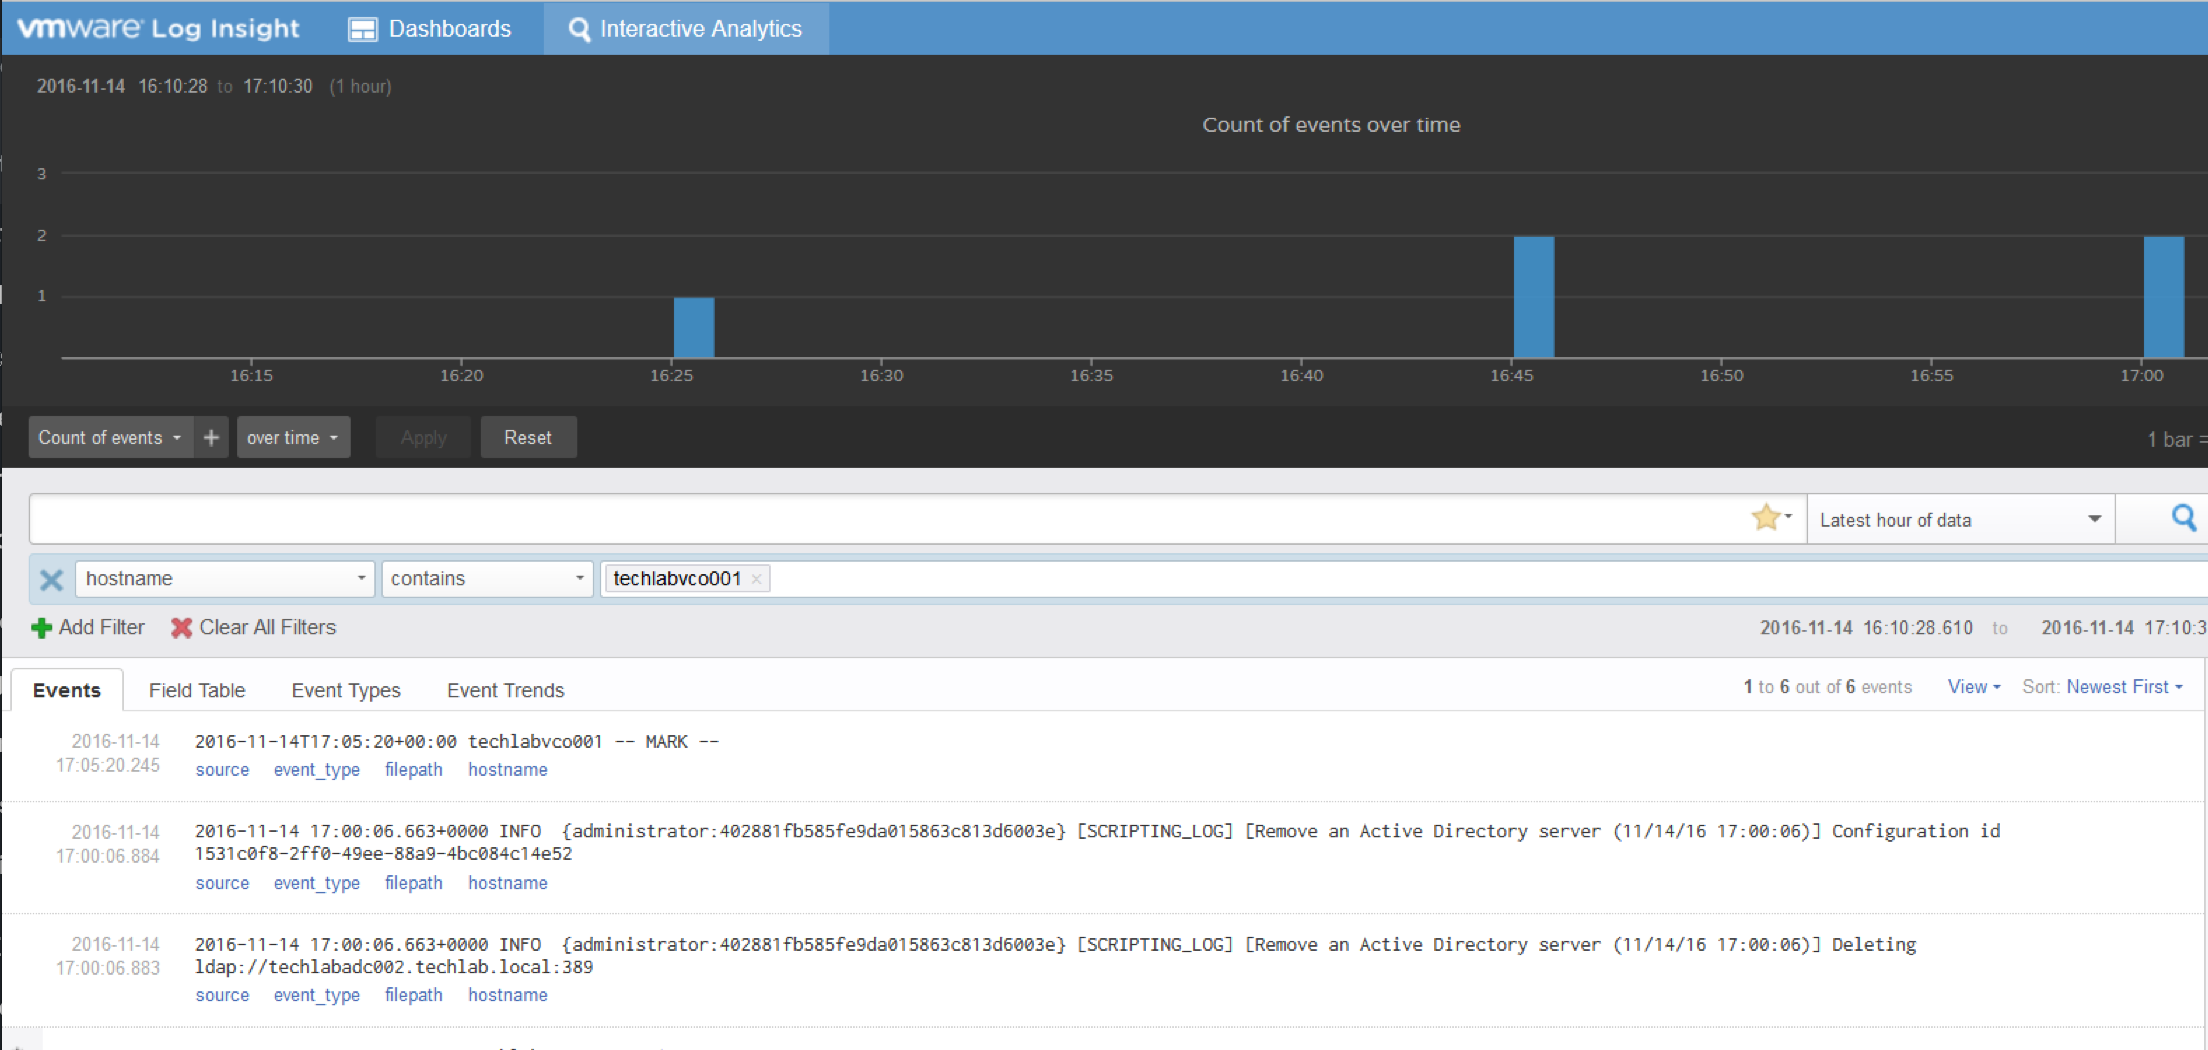
  • You should then see the below Workflow being logged in log Insight if you filter by vCO hostname

screen-shot-2016-11-14-at-17-10-37

  • Voila, you have logging set up for the vCO in Log Insight

Adding queries to Dashboards

  • We were using a Workflow which changed VM vDS Port Groups. Within this Workflow, it is set to output a string to the scripting log called PORTGROUP Change – Update completed successfully
  • We can create a favourite query using this query text contains PORTGROUP Change – Update completed successfully – See highlighted below
  • You can now add this query to a Dashboard. Whilst in the query, you can click on the icon to the right (highlighted in yellow) which means Add current query to dashboard

dashboard

  • Fill in the Dashboard details and then you should be able to view this anytime and adjust the time over which work has taken place

dashboard2

vSphere HTML 5 Web Client Fling

tools-icon

vSphere HTML 5 Web Client

The vSphere HTML5 Web Client is here! It is written using HTML5 and Javascript

The following features are available at the moment

  • VM Power Operations (common cases)
  • VM Edit Settings (simple CPU, Memory, Disk changes)
  • VM Console
  • VM and Host Summary pages
  • VM Migration (only to a Host)
  • Clone to Template/VM
  • Create VM on a Host (limited)
  • Additional monitoring views (Performance charts, Tasks, Events)
  • Global Views (Recent tasks, Alarms–view only)

This Fling has been designed to work with your existing vSphere 6.0 environments. The new client is deployed as a new VM from the downloadable OVA.  Currently the installation instructions are command line-based, but VMware are working on a GUI installation and plan to release it as an update to this Fling once it is ready.

Download and Information

https://labs.vmware.com/flings/vsphere-html5-web-client

System requirements

  • 2 vCPU, 4 GB RAM, 14 GB
  • An existing VC6.0 installation (VCSA or Windows). The H5 client appliance will need 4 GB RAM, 2 vCPUs and the hard disk will grow up to 14 GB
  • Recommended browsers: Chrome, Firefox, IE11. Others may work, with some functional or layout issues.
  • Windows vCenter: Was tested with a vCenter on Windows Server 2012 R2, but should work with other versions as well.

Instructions

Note: I have a Windows 2012 R2 server running vCenter Server 6 and a Windows 2012 R2 server running an external PSC version 6. There are different instructions for running different vCenter/PSC setups.

First of all download the H5 Client Deployment Instructions and Helpful Hints.

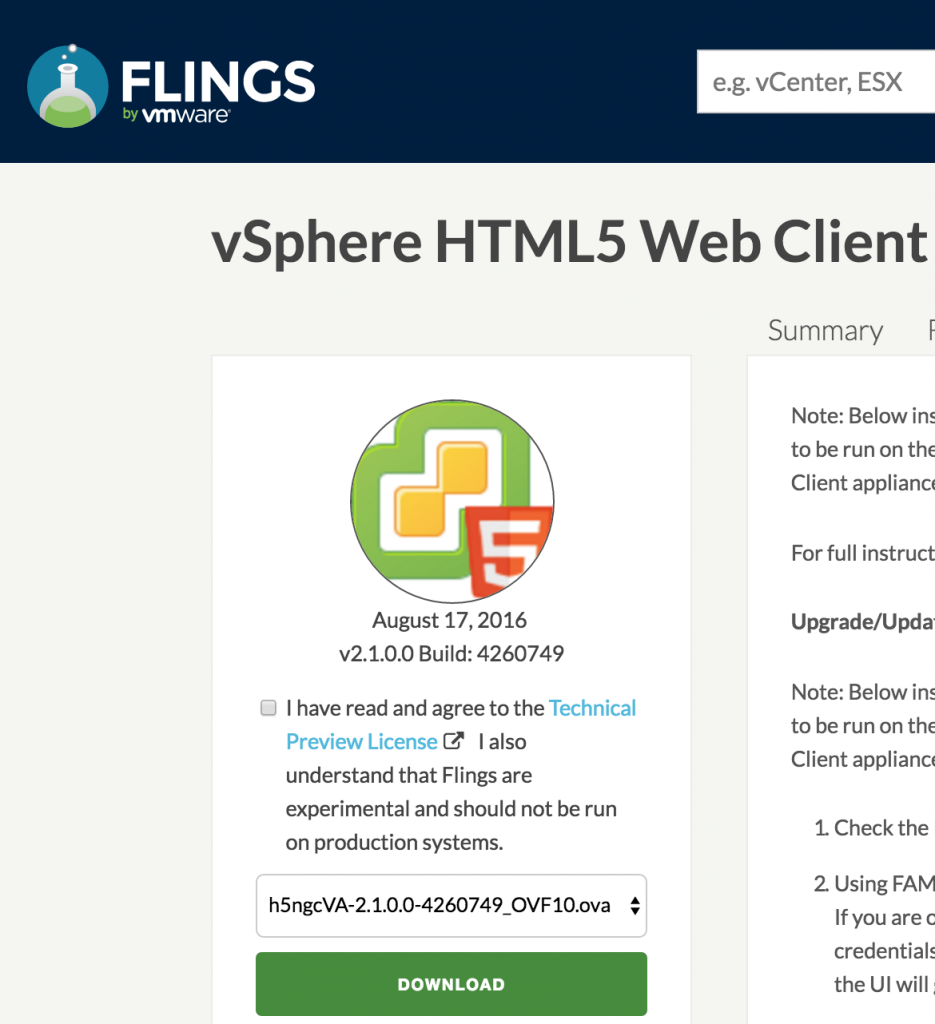
  • Download the OVA and server-configure.bat

Screen Shot 2016-08-23 at 11.35.34

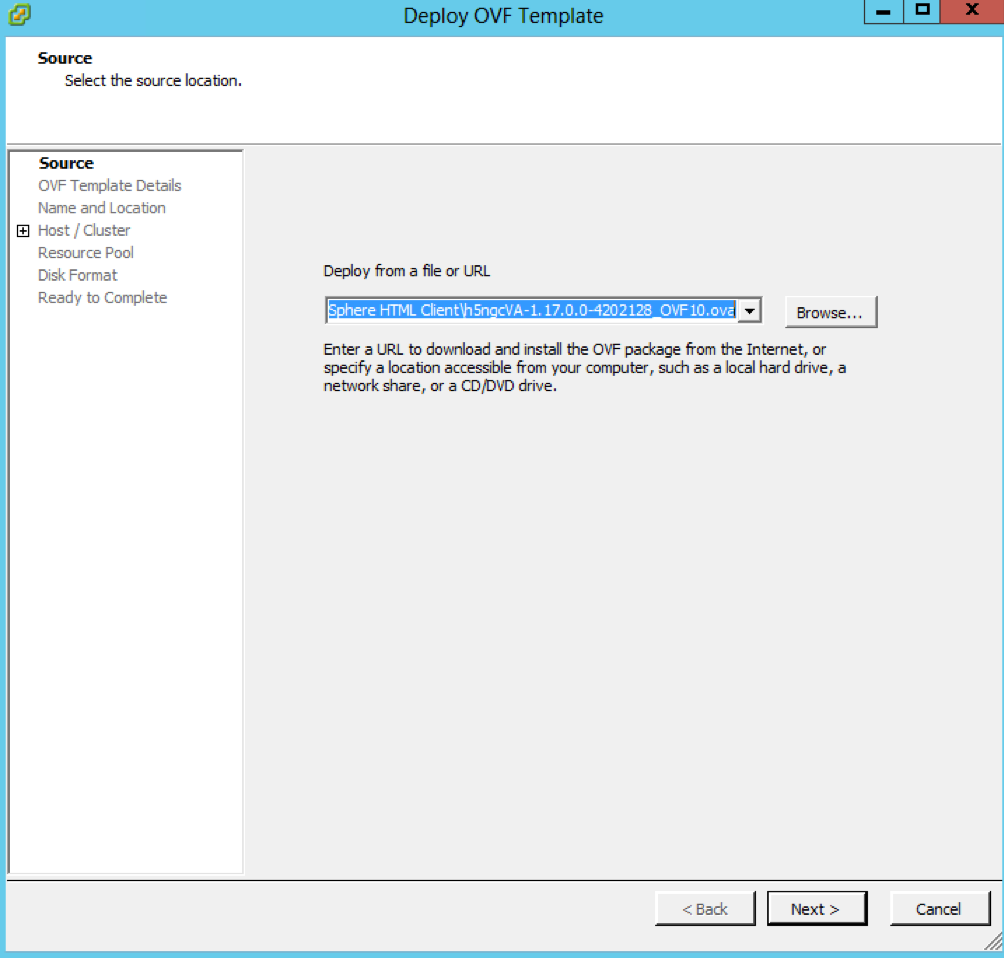
  • In vCenter, go to File > Deploy OVF Template

Screen Shot 2016-08-23 at 12.07.38

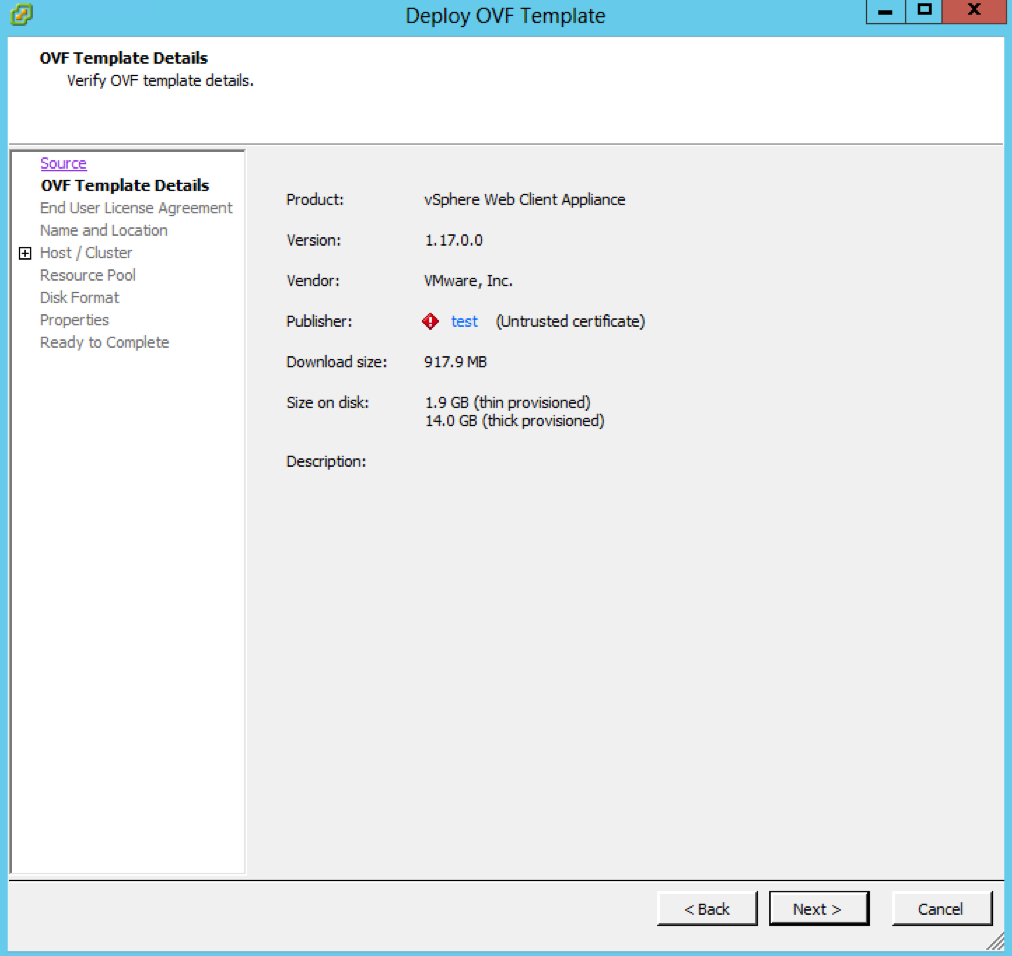
  • Check OVF Template details

Screen Shot 2016-08-23 at 12.08.37

  • Accept the License Agreement
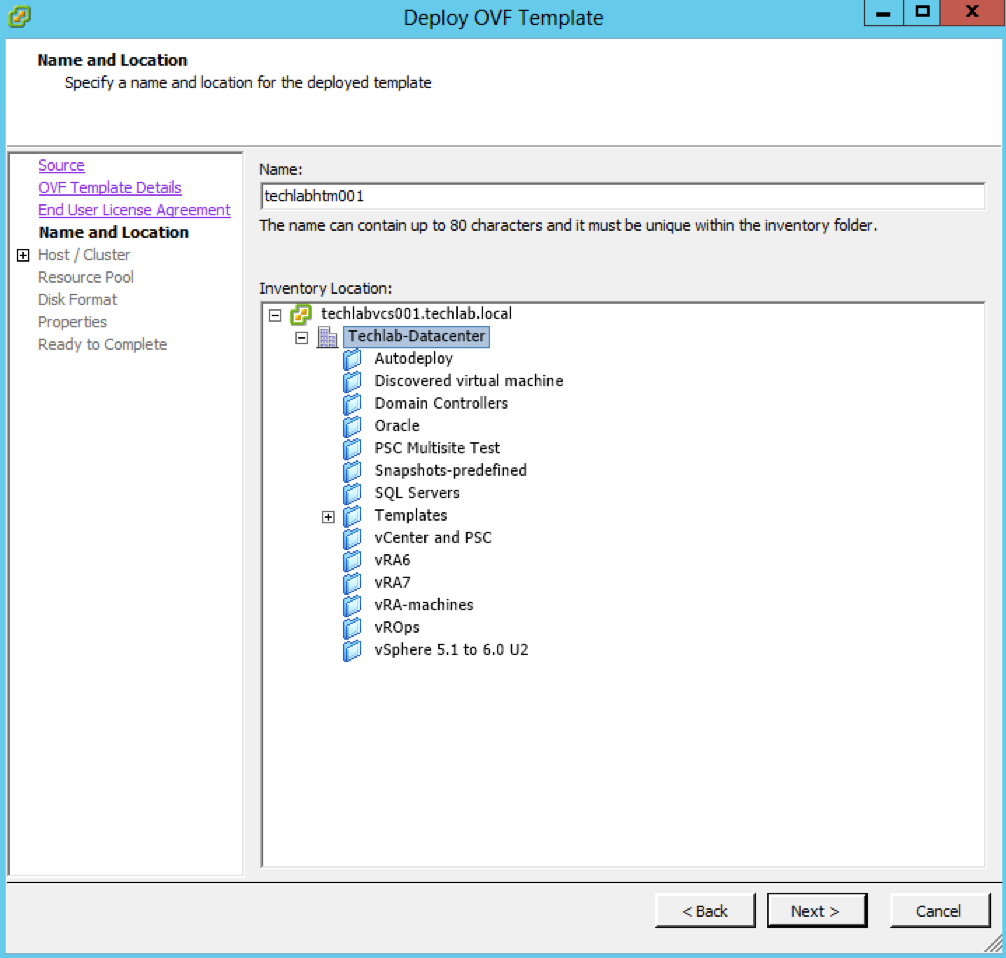
  • Put in a name and Location

Screen Shot 2016-08-23 at 12.09.30

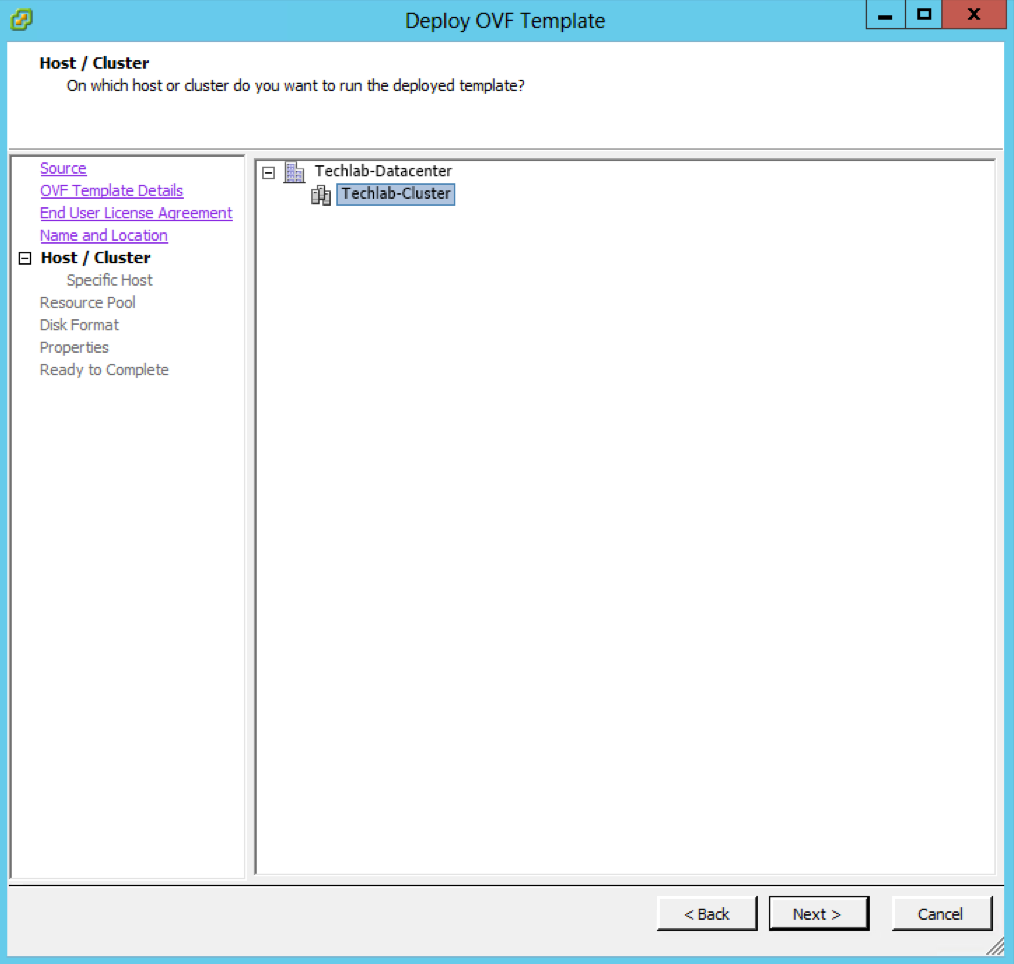
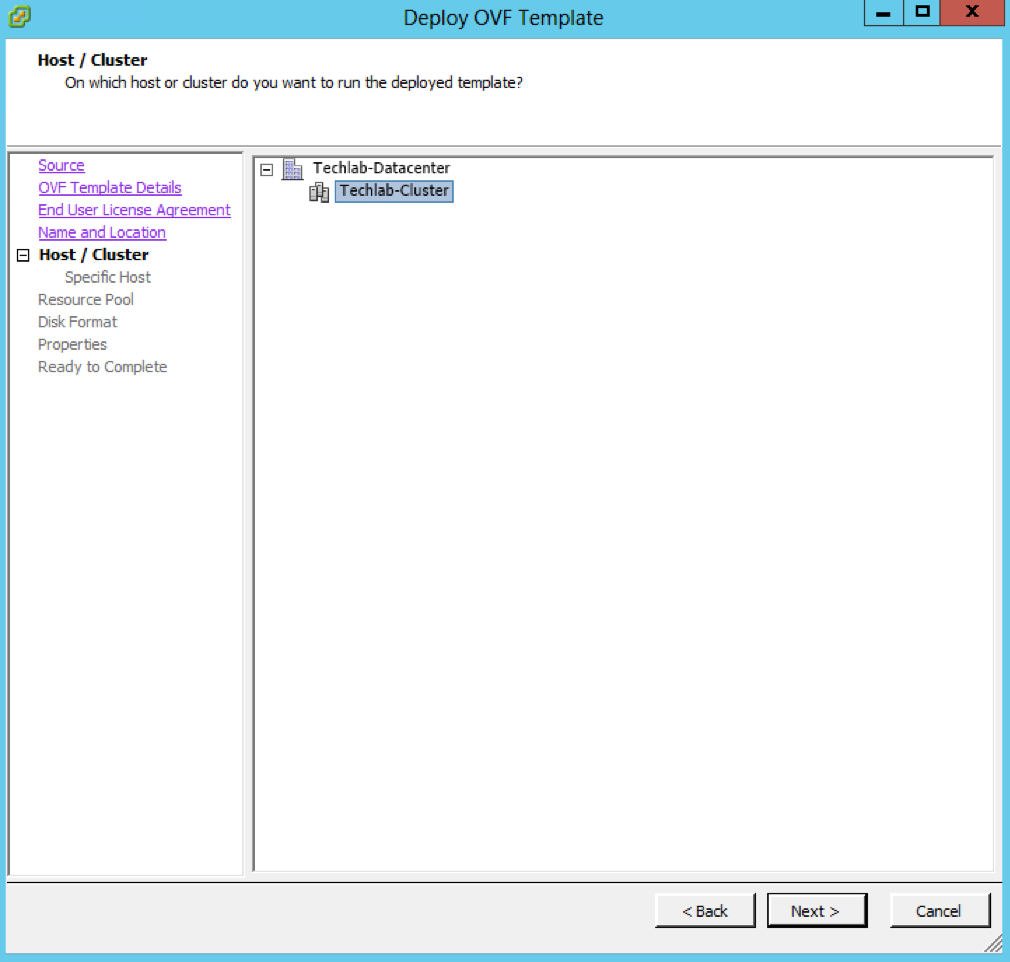
  • Choose a host and cluster

Screen Shot 2016-08-23 at 12.10.15

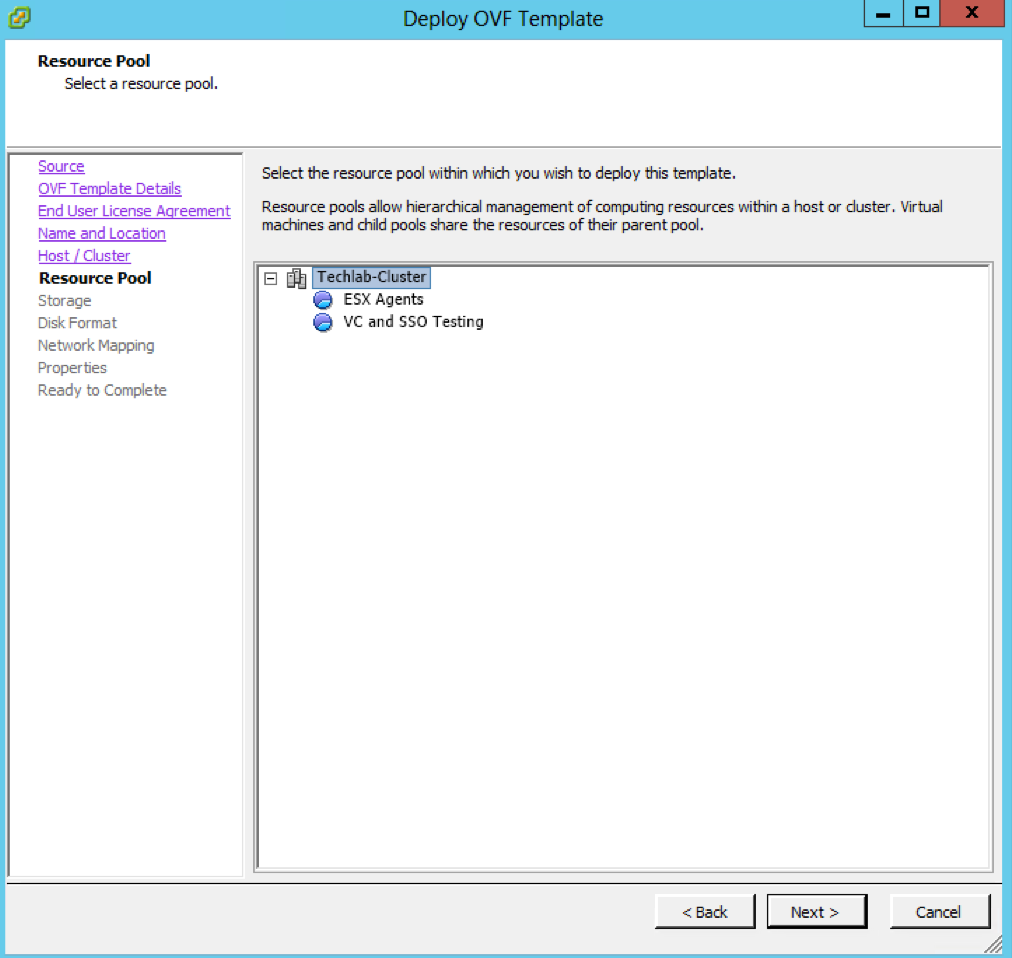
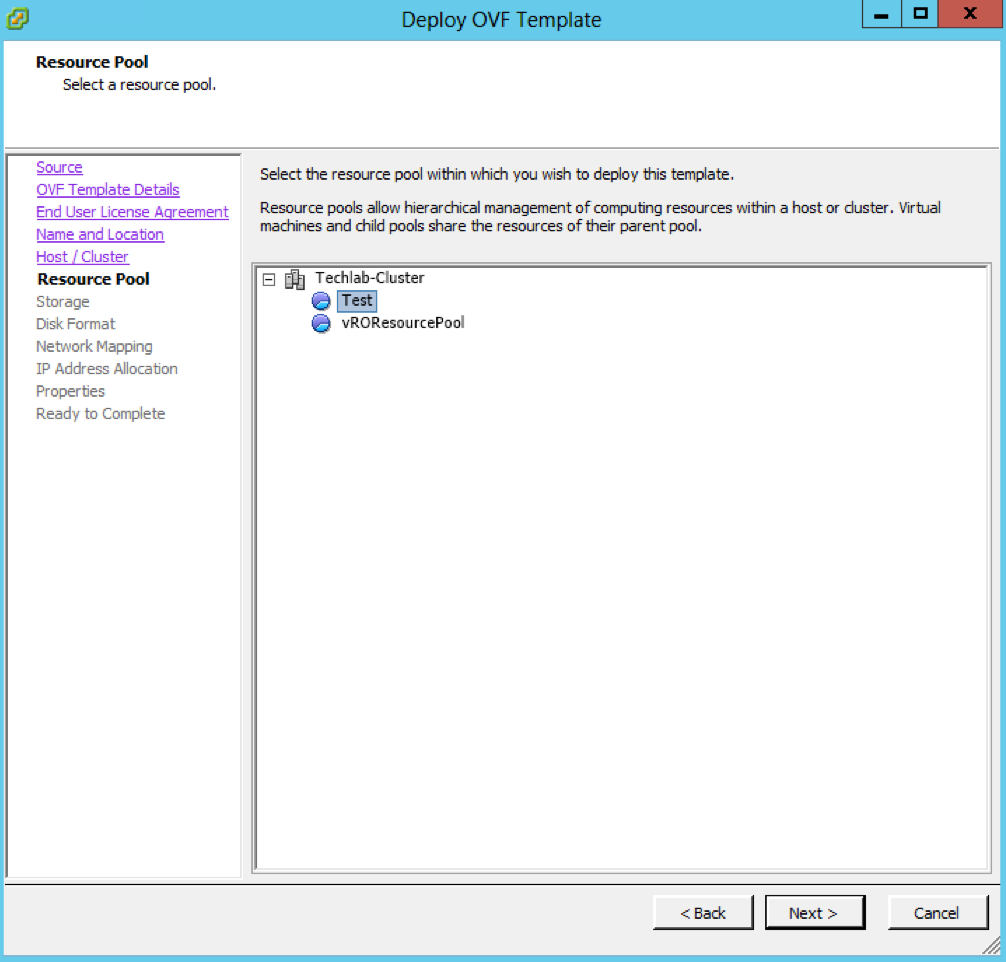
  • Select the Resource Pool if any

Screen Shot 2016-08-23 at 12.11.03

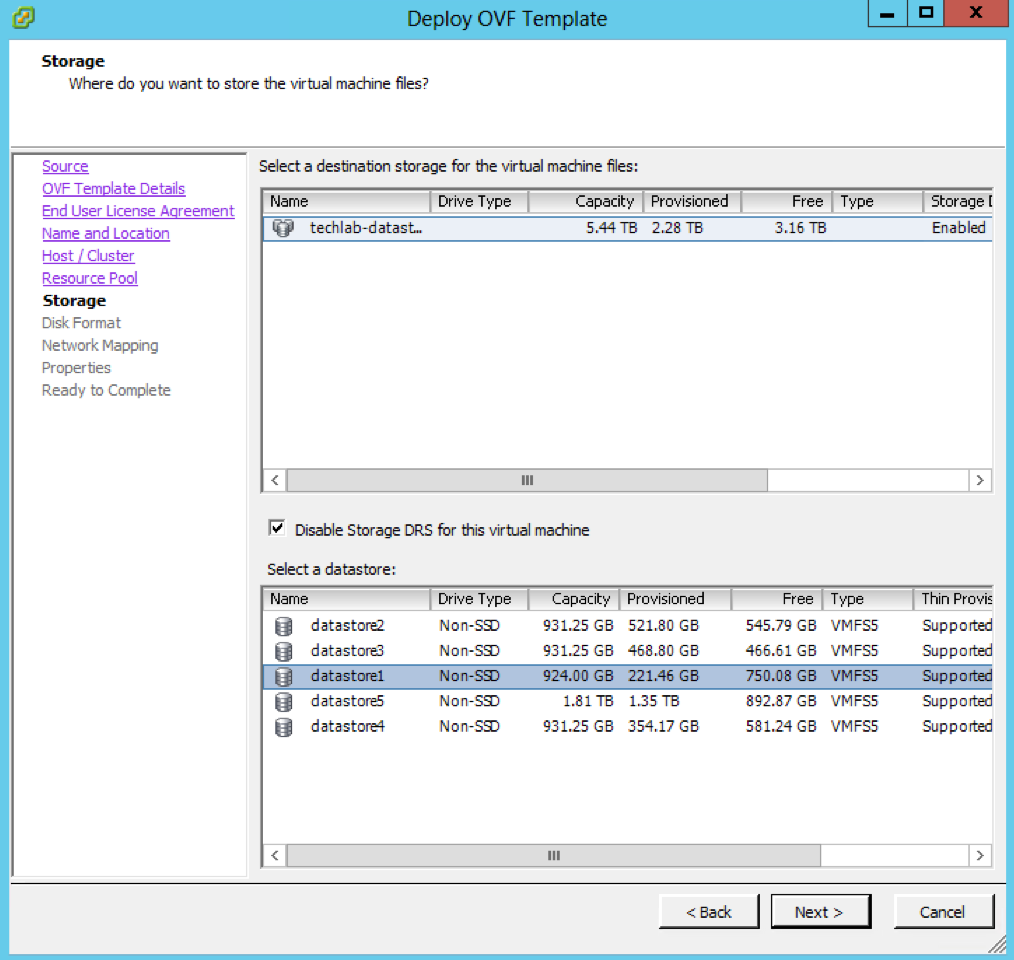
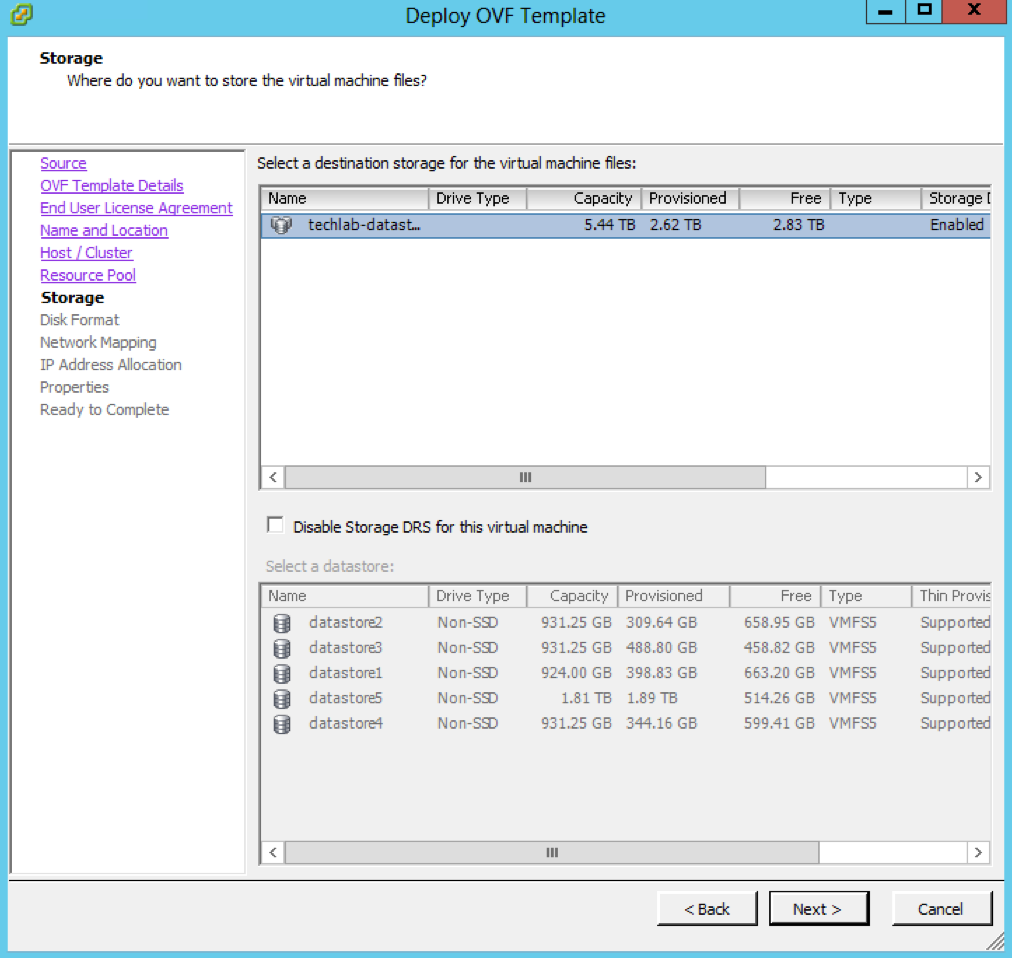
  • Choose your storage

Screen Shot 2016-08-23 at 12.11.43

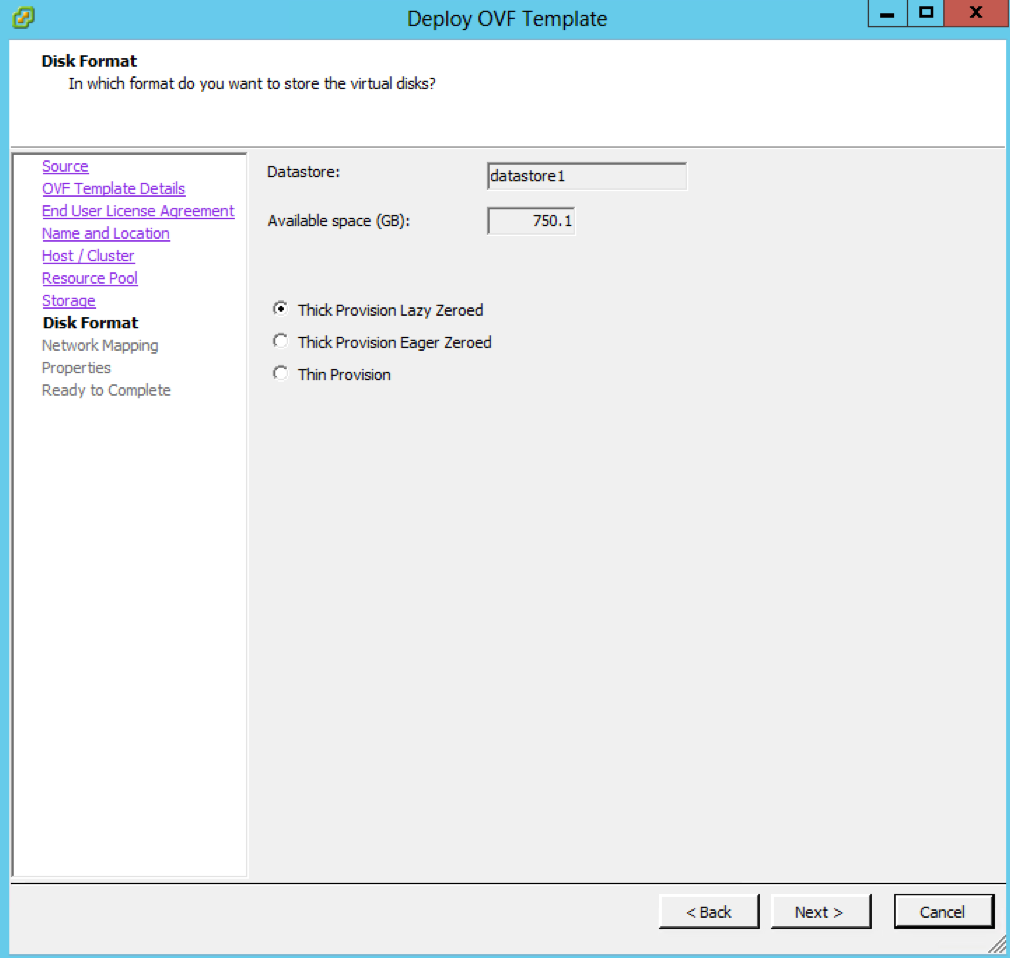
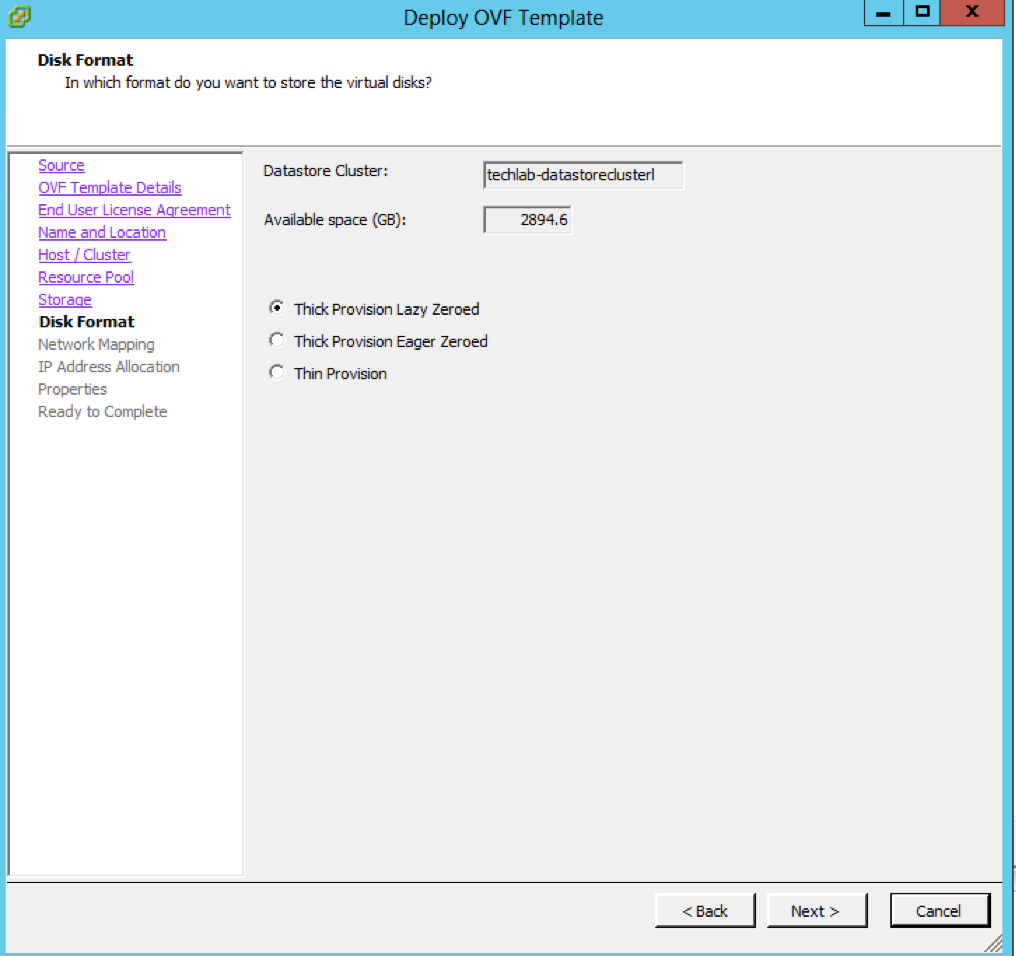
  • Check Disk Format

Screen Shot 2016-08-23 at 12.12.24

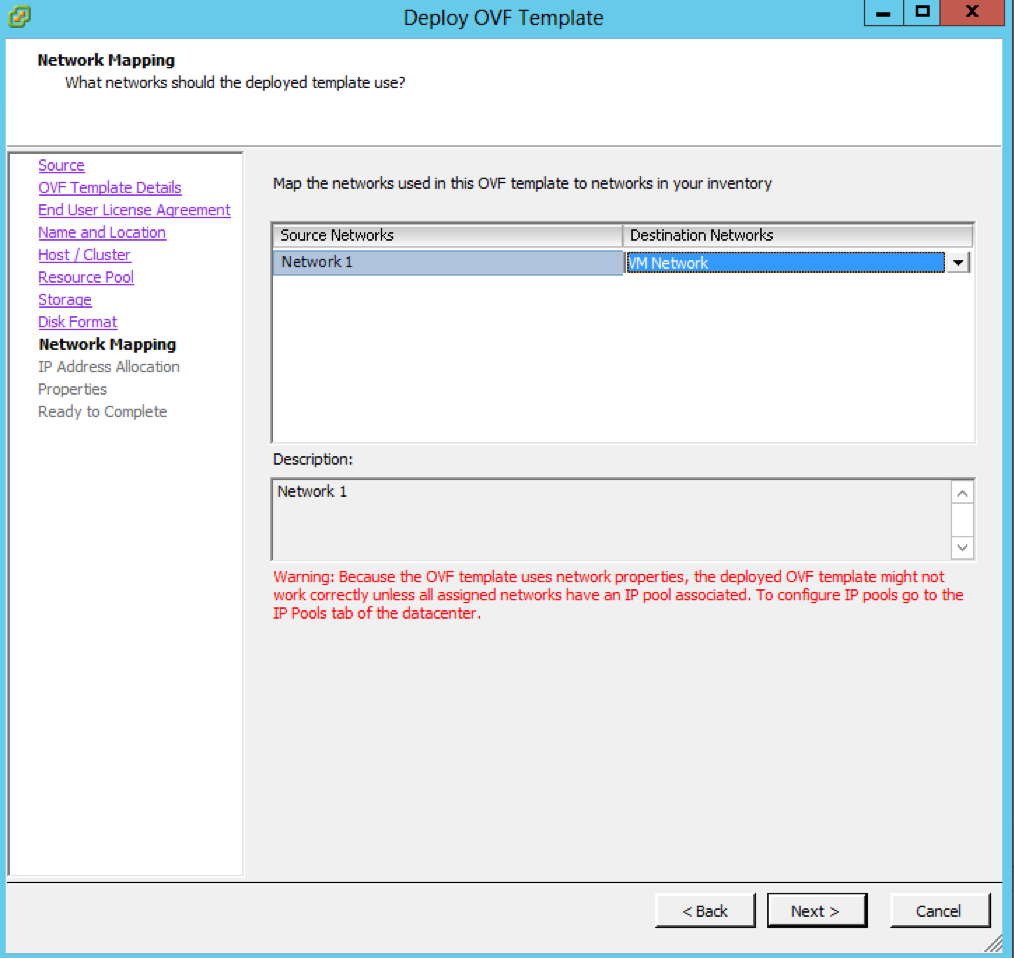
  • Check VM Networking and choose a Port Group

Screen Shot 2016-08-23 at 12.13.03

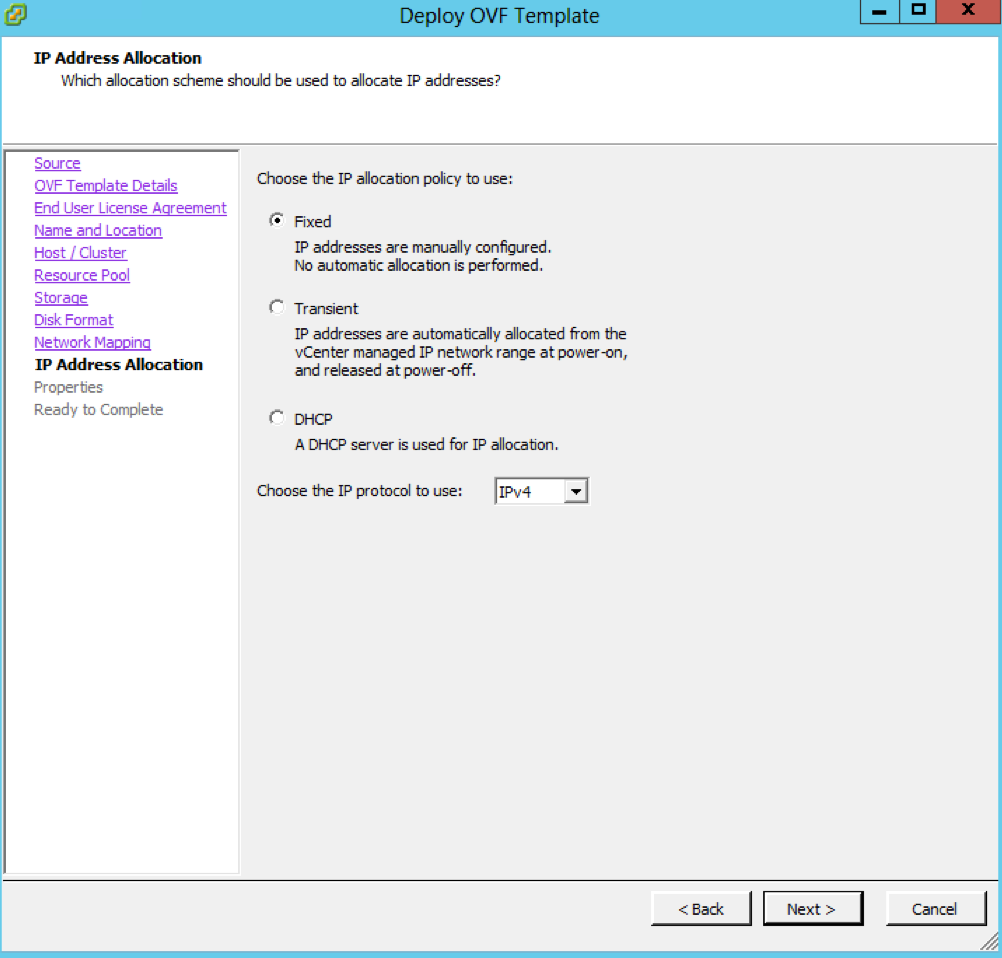
  • Choose IP Address allocation

Screen Shot 2016-08-23 at 12.13.45

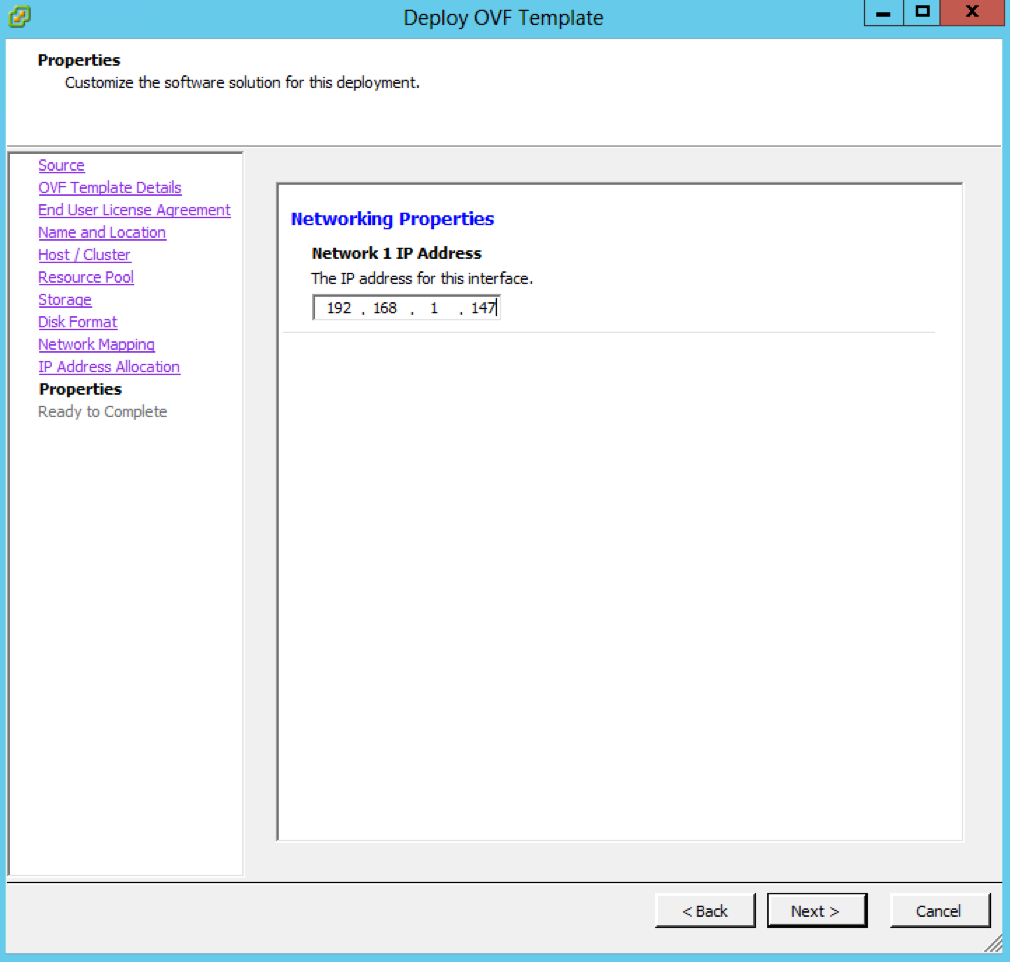
  • Put in an IP address

Screen Shot 2016-08-23 at 12.14.28

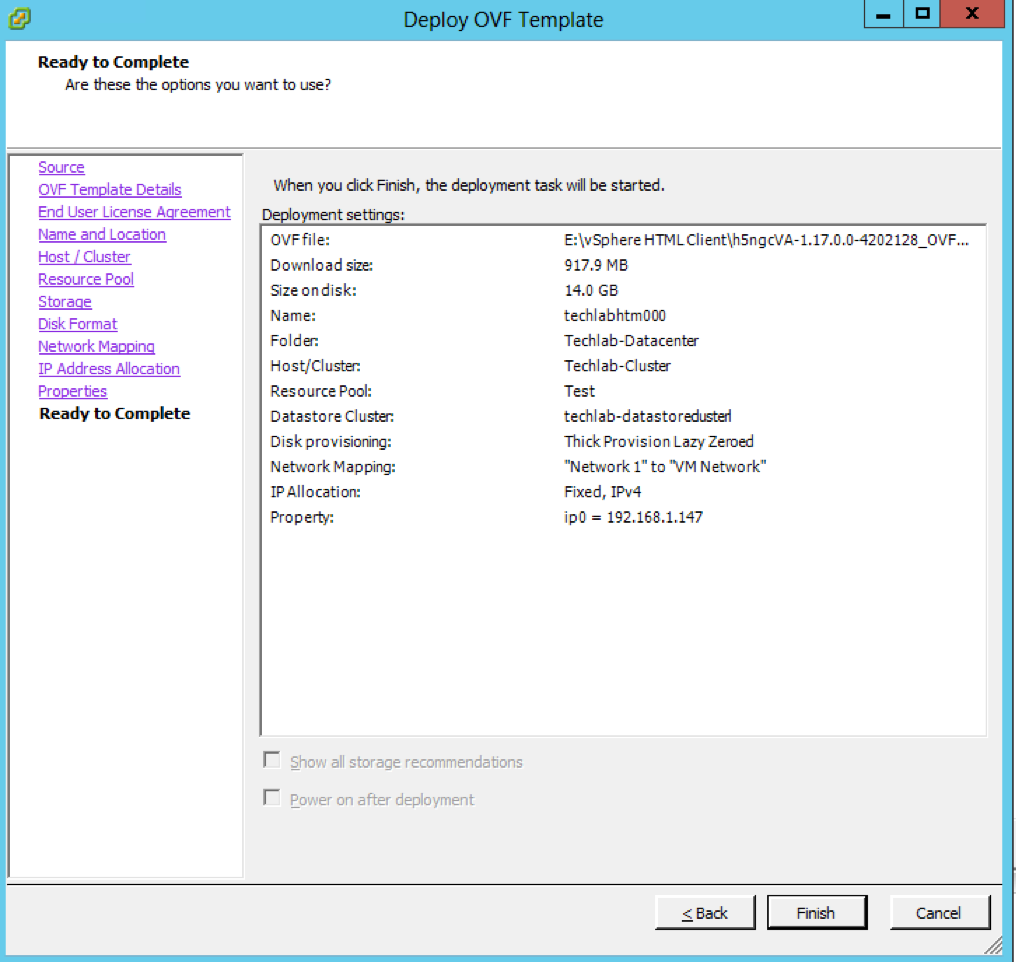
  • Click Finish

Screen Shot 2016-08-23 at 12.15.34

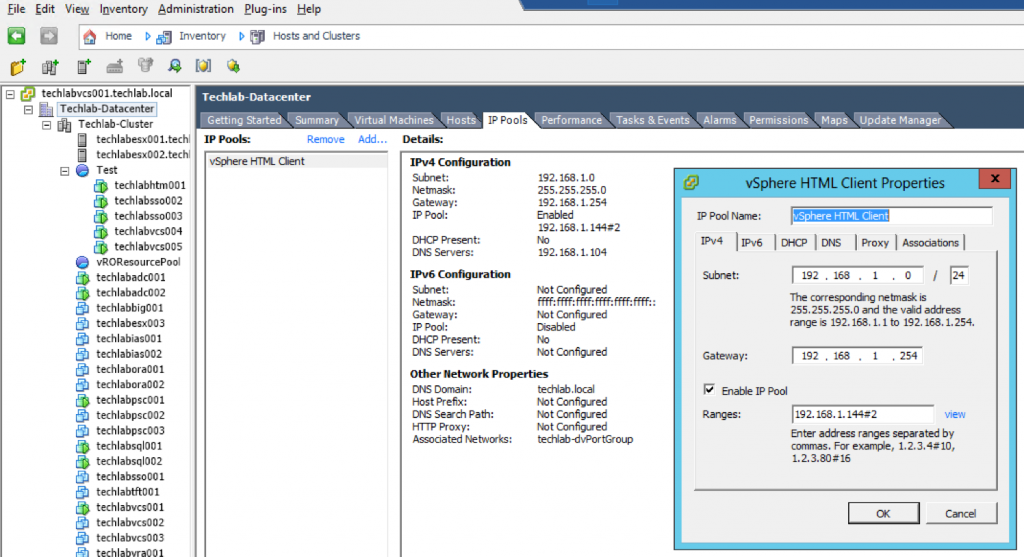
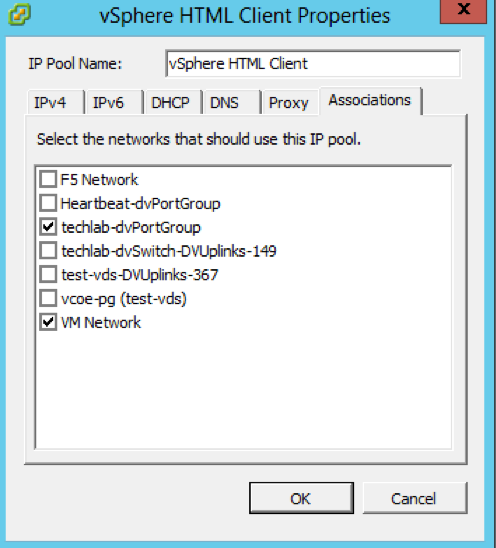
  • I then had to create an IP Pool in vCenter
  • Click on the Datacenter object > IP Pools

Screen Shot 2016-08-23 at 12.17.09

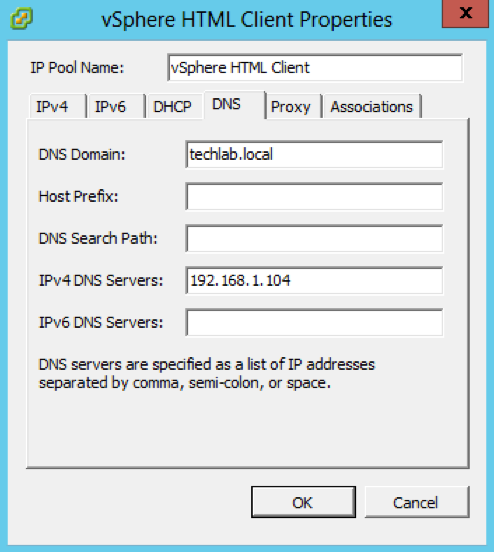
  • Click on the tabs and fill in the relevant information. In my case I needed to add some DNS and Association information to associate this resource pool with my networks and in particular the network my HTML 5 client is going to be on

Screen Shot 2016-08-23 at 12.18.27

Screen Shot 2016-08-23 at 12.19.26

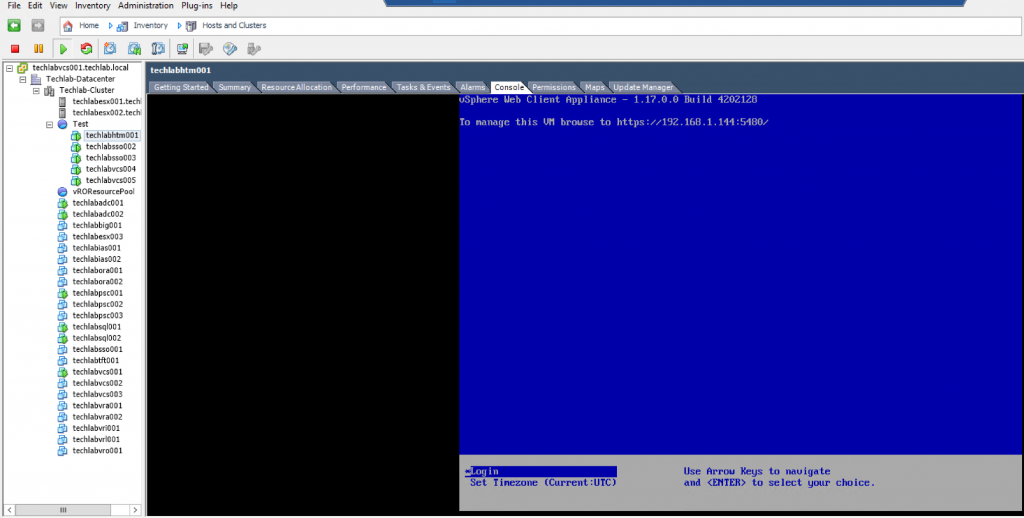
  • Power on the VM
  • If you click on the console, you should see the below screen

Screen Shot 2016-08-23 at 14.09.20

  • SSH or WINScp as root into the H5 client appliance VM (Note: Username is root and password is demova)
  • Create the following folders

Screen Shot 2016-08-23 at 12.37.00

Screen Shot 2016-08-23 at 12.36.19

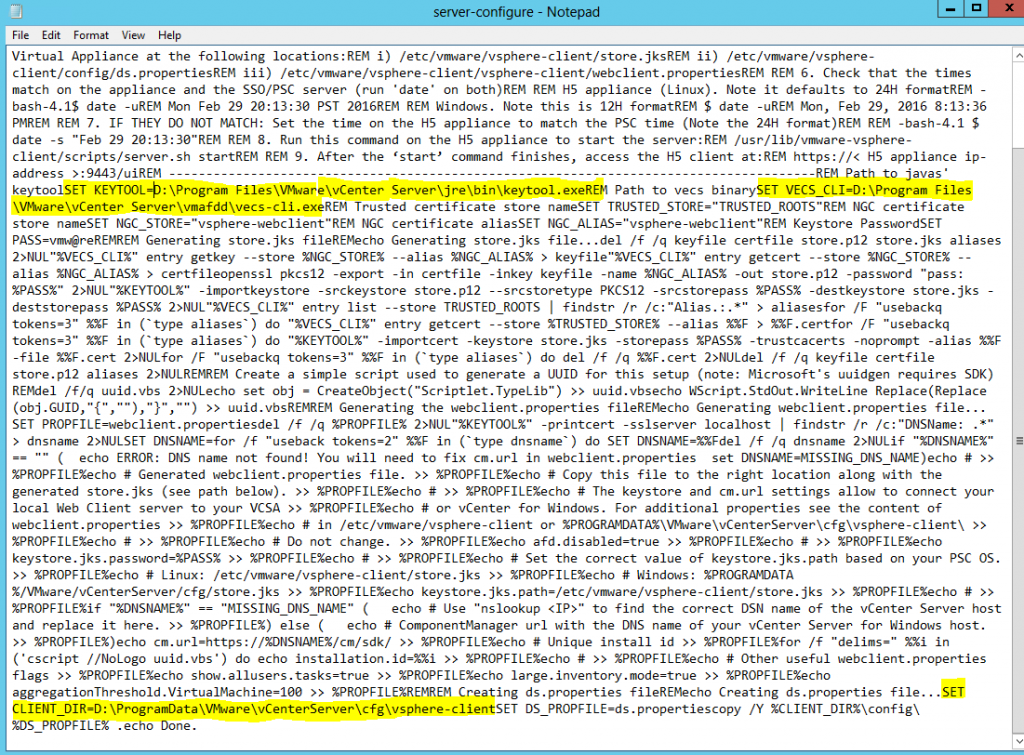
  • Copy the provided ‘server-configure.bat’ to any directory on the vCenter and PSC for Windows. (This file is one of the Fling downloads on the top left) NOTE: If you have installed vCenter into any folder other than default (%PROGRAMFILES%), the script may not find the appropriate files. You will need to edit the file and replace the two references to %PROGRAMFILES% with the appropriate path so that the “KEYTOOL” and “VECS_CLI” paths line up. These two variables are at the top of the file.
  • You may also need to change this at the end of the file to the correct path (this is for the ds.properties file): SET CLIENT_DIR=%PROGRAMDATA%\VMware\vCenterServer\cfg\vsphere-client
  • My PSC was all installed on the C Drive but I had my vCenter installed on the D Drive so I had to change the file below which is highlighted in yellow to my correct path

html5fling1

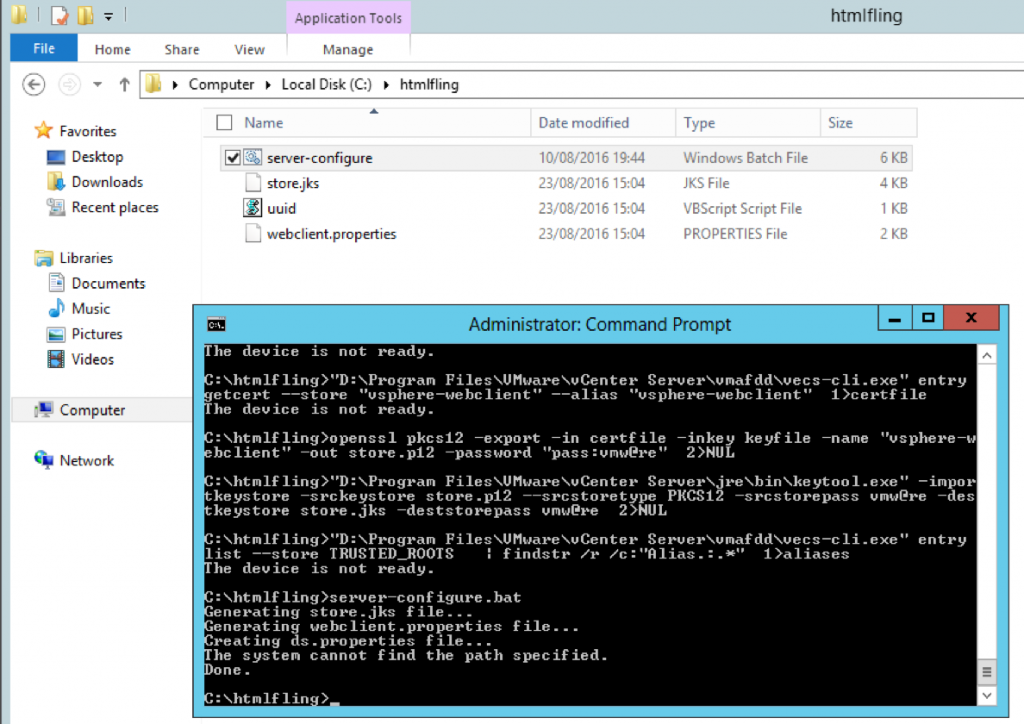
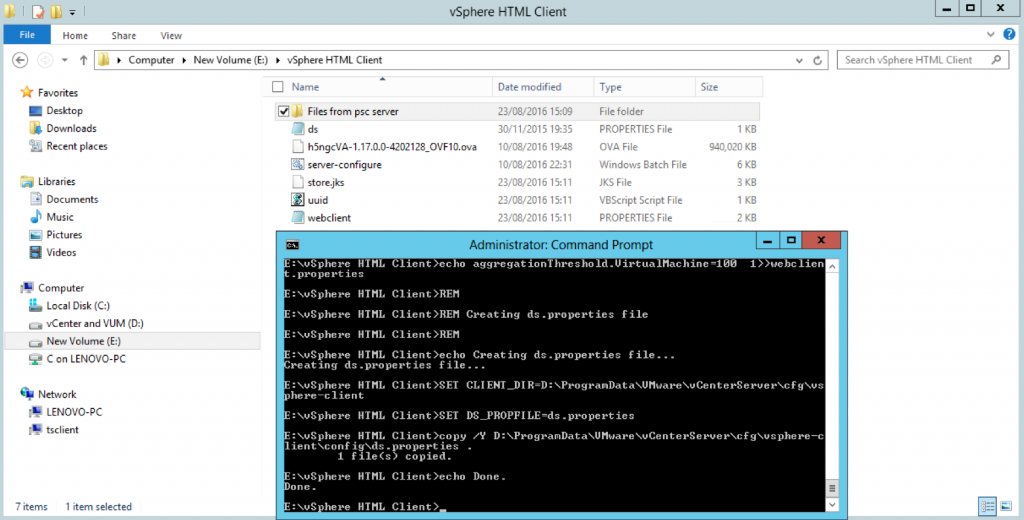
  • Run the server-configure.bat on your PSC server as Administrator
  • The store.jks and webclient.properties file will be created
  • Ignore the Creating ds.properties error message

Screen Shot 2016-08-23 at 15.11.17

  • Copy the files store.jks and webclient.properties which are generated to the below locations
  • /etc/vmware/vsphere-client/store.jks
  • /etc/vmware/vsphere-client/vsphere-client/webclient.properties
  • In the Windows VC machine, open an Administrator Command Prompt and run the ‘server-configure.bat’ script. The following files will get generated:

Screen Shot 2016-08-23 at 15.18.12

  • Copy the ds.properties file to H5 client virtual appliance at the following location
  • /etc/vmware/vsphere-client/config/ds.properties
  • Log into the H5 appliance and run this command to start the server:
  • /etc/init.d/vsphere-client start

Screen Shot 2016-08-23 at 15.23.06

  • It should come up and say started in xxx seconds

Screen Shot 2016-08-23 at 15.27.14

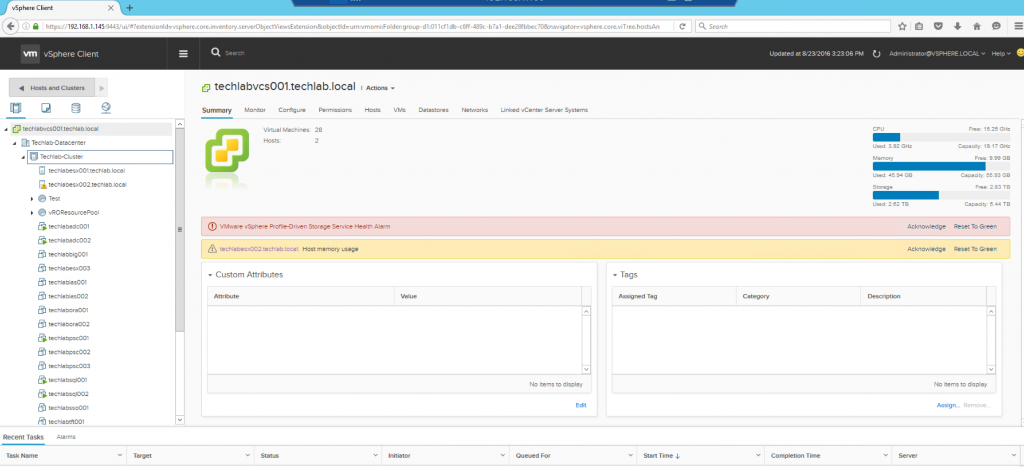
  • Once the installation steps above are completed, point your browser to this URL, and log in with your normal vCenter credentials:
  • https://H5_Appliance_Address:9443/ui

Screen Shot 2016-08-23 at 15.30.15

Migrating a vCenter and Update Manager Database from SQL 2008 to SQL 2012

SQLDB

Migration Options

There are 3 options available to migrate a SQL server database

  • Backup and Restore
  • Detach and Attach the Database
  • Copy the Database using SQL Server Management Studio

I am simply going to use the Copy the Database using SQL Server Management Studio option as this is quickest and easiest in my opinion

Instructions

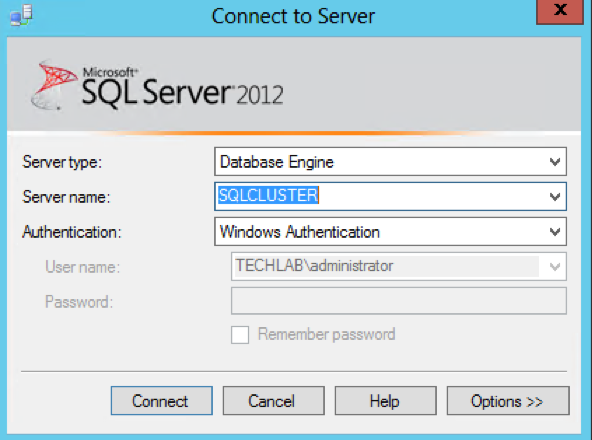
  • On the Windows Server 2012 server, open the SQL Management Studio console and connect to the old SQL server instance. From the File menu choose Connect Object Explorer, or click the icon from the Object Explorer window.

Screen Shot 2016-08-22 at 10.36.48

  • Connect to your Windows Server 2008 R2 SQL Server

Screen Shot 2016-08-22 at 10.37.14

  • Now that we are connected to the old SQL server, right-click the database and choose Tasks > Copy Database.
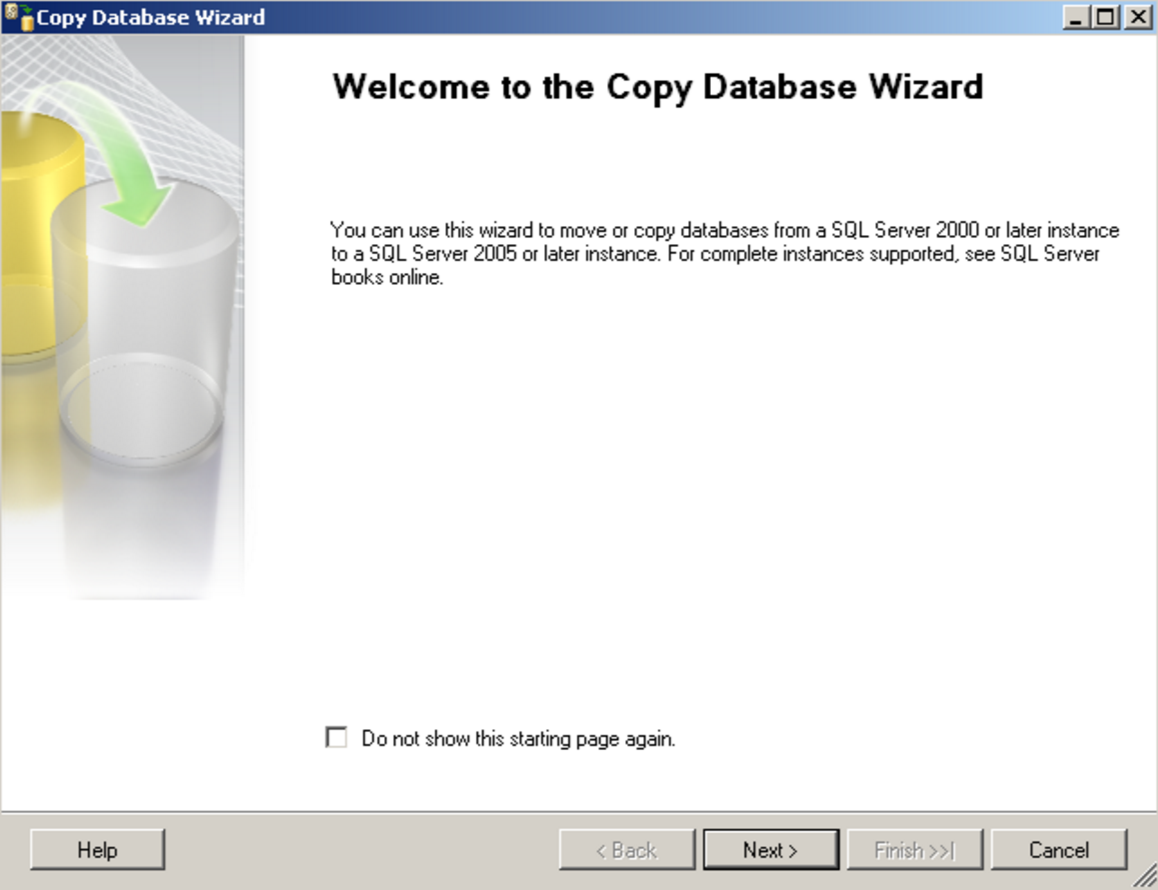
  • You will get the Welcome to Copy Database wizard

Screen Shot 2016-08-22 at 10.41.18

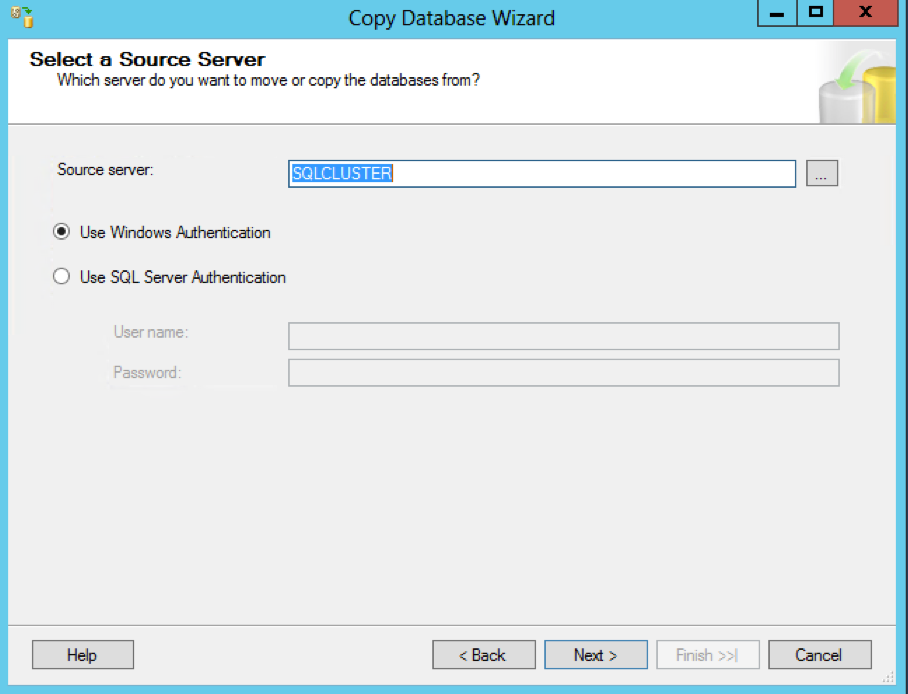
  • The wizard will automatically knows the source server, but make sure you check it anyway. If is not the one you want, type it in the Source server box
  • Select whether to use Windows or SQL Authentication

Screen Shot 2016-08-22 at 11.42.09

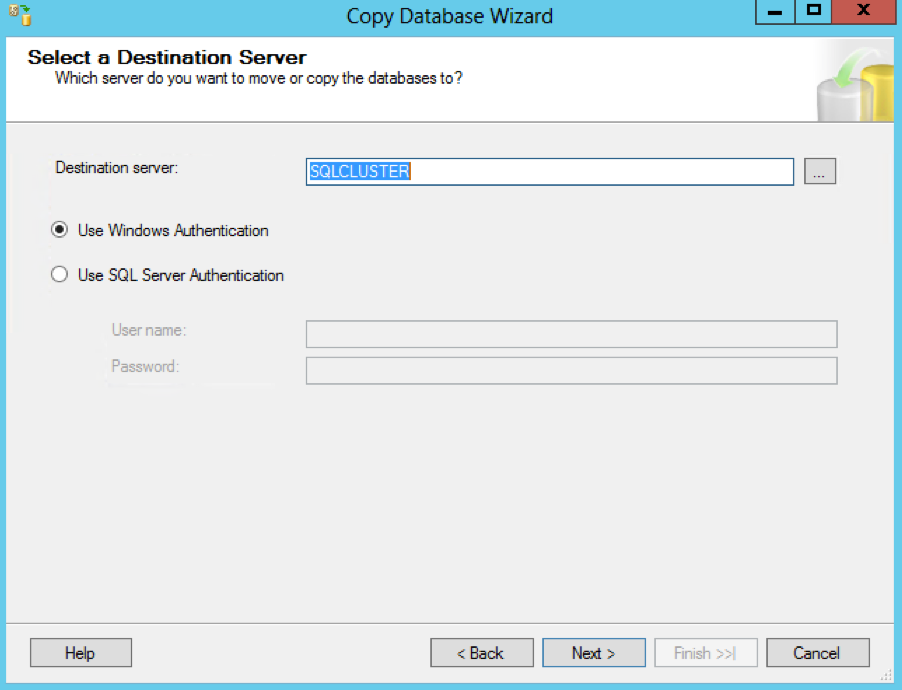
  • On the destination server, the server name most likely will be wrong, so we need to type the correct one. Click Next when you’re done
  • Select whether to use Windows or SQL Authentication

Screen Shot 2016-08-22 at 11.42.21

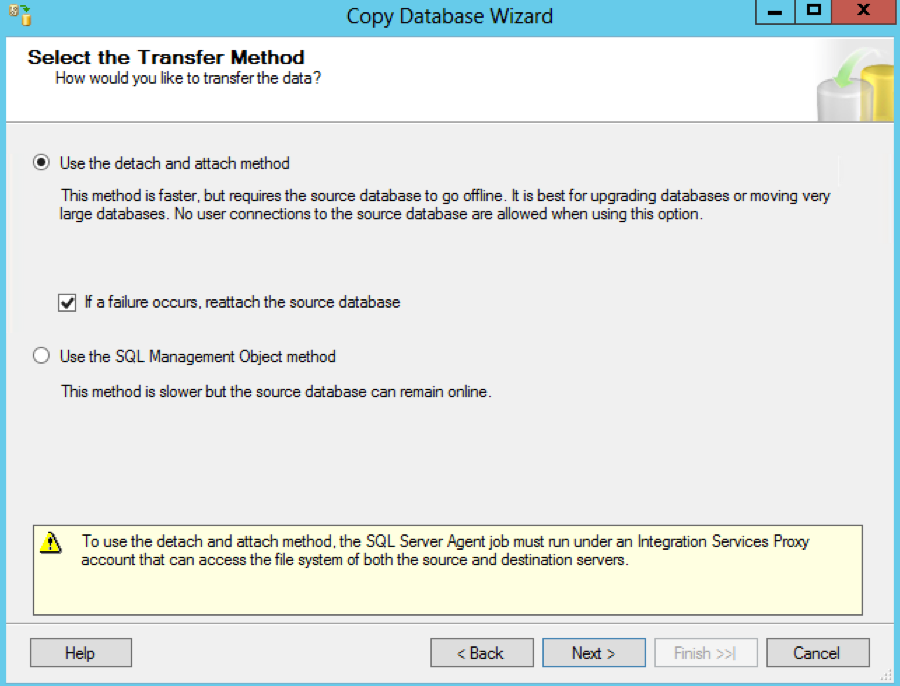
  • Next you are on the Select a Transfer Method
  • Once source & destination server details given, you need to select the way by which you are going to copy move the database.
  • Detach Attach Faster methods, requires db to be offline. Users will be disconnected and physical files of the db will be copied to the destination server
  • SMO Slower method, db will be in online state. This will create the db in the destination server with the same name and copy all the datas from source. I used this method

Screen Shot 2016-08-22 at 11.42.35

  • Next Select the Database you want to move or copy. I kept mine as Copy as when it has finished copying I can simply take the original database offline

IMG_1358

  • On the Configure Destination Database Page, you need to provide the new db name and the path where CDW should place the physical files in the destination serve

IMG_1359

  • If there are any related objects to this database, select them, then press the arrow to move them to the right, to the Selected related objects section.

IMG_1360

  • On the Configure a Package

IMG_1361

  • In the next page you need to provide the package name and the log file for this process, so that you can review any failures.

IMG_1362

  • Check the details in the final wizard and click Finish

IMG_1363

  • All actions should have success next to them

IMG_1365

  • Refresh the console and you should see the database up and running on the new server.
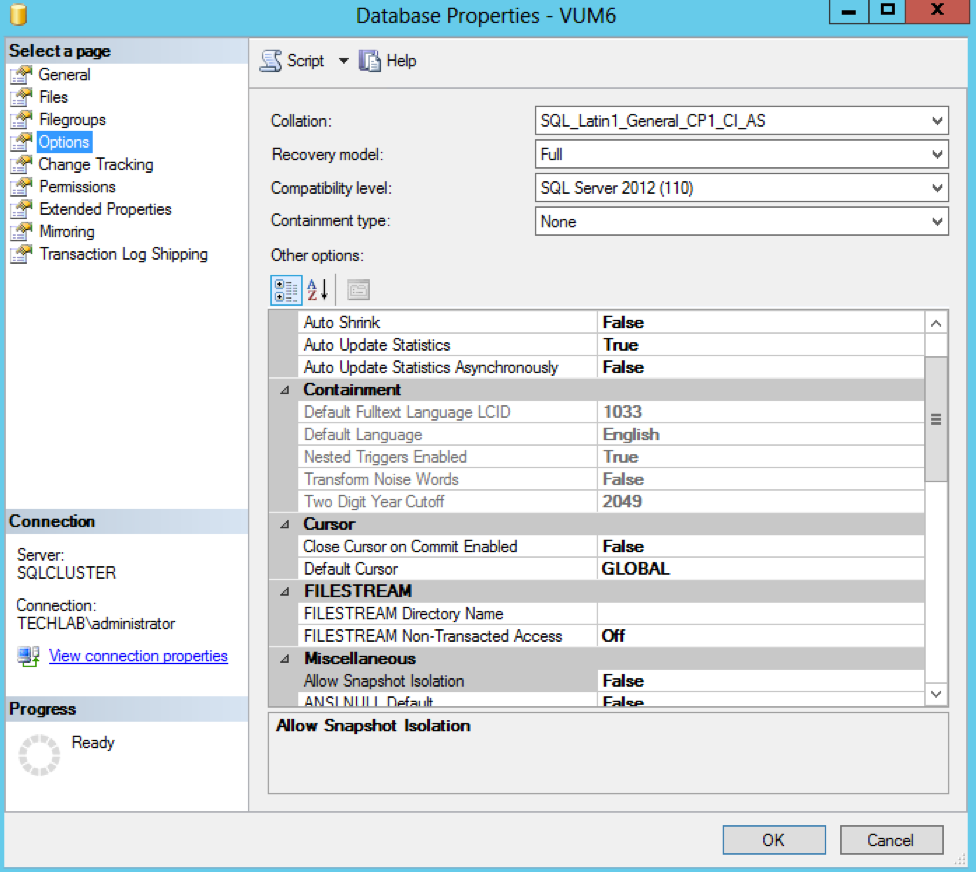
  • There is one more step that applies to all three migration methods. The database needs to be put in a 2012 mode, or the latest version of your SQL server in case you are not using SQL 2012. This is to take advantage of all the features that the latest SQL edition provides. After the database has been moved, right-click it and choose Properties.
  • Click the Options page and on the Compatibility level box choose the latest edition of SQL server. In mine case is 2012. You have to be careful with this, because if you ever wanted to migrate the database to an older SQL version is not going to work. There are going to be incompatibility problems, so again…caution.

Screen Shot 2016-08-22 at 11.49.59

  • On the vCenter server, open the ODBC Connection and adjust the connection to point to the new SQL server
  • If the connection doesn’t work, check the logins on the new server as these can come across as disabled. Right click on the user account, select Properties > Status > Under Login, select Enabled
  • Next go to the original database and select to take offline. if you have problems taking the database offline then follow the link below to kill existing connections to the database

How to fix a SQL Server Database stuck going offline

Considerations

  • You cannot move system databases
  • Selecting move option will delete the source db once it moves the db to destination server
  • If you use SMO method to move full text catalogs then you need to repopulate it
  • SQL Server Agent should be running or else it will fail in job creation step
  • You cant move encrypted objects (like objects, certificates etc) using CDW

Upgrading vSphere 5.1 with embedded SSO to vSphere 6 with external multi-site Platform Services Controllers

arrow-of-double-point-pointing-different-directions_318-50733

vSphere 6 Platform Services Controller Multimode setup

So this is a job I had to do recently which involves quite a few stages but on the whole works very nicely. So I decided to replicate it in my lab using the below 4 servers to show how we can upgrade and migrate from an embedded situation to an external PSC situation. This initial setup has 2 x 5.1 separate vCenter Servers with embedded SSO which will end up being 2 separate 6.0.2 vCenter servers pointing to their own Window 2012 PSCs which will be in Multisite mode.

  • 1 x Windows 2012 server with vCenter 5.1 with embedded SSO
  • 1 x Windows 2012 server with vCenter 5.1 with embedded SSO
  • 1 x Windows 2012 PSC 5.5 U3(New build) (Note we cannot build a v6 PSC at this point due to staged upgrade considerations) (This will be setup as the first PSC)
  • 1 x Windows 2012 PSC 5.5 U3 (New build) (Note we cannot build a v6 PSC at this point due to staged upgrade considerations) (This will be set up as the 2nd PSC in a multi-site configuration.

PSC Information

The Platform Services Controller is available on both the Windows vCenter Server ISO or within the vCenter Server Appliance (VCSA) ISO. We will be using the Windows vCenter Server ISO.

Components that are installed with PSC 6.0 include:

  • VMware Appliance Management Service (only in Appliance-based PSC)
  • VMware License Service
  • VMware Component Manager
  • VMware Identity Management Service
  • VMware HTTP Reverse Proxy
  • VMware Service Control Agent
  • VMware Security Token Service
  • VMware Common Logging Service
  • VMware Syslog Health Service
  • VMware Authentication Framework
  • VMware Certificate Service
  • VMware Directory Service

PSC 6.0 is supported with:

  • VMware vCenter Server
  • VMware vCenter Inventory Services
  • VMware vSphere Web Client
  • VMware Log Browser
  • VMware NSX for vSphere
  • VMware Site Recovery Manager
  • VMware vCloud Air
  • VMware vCloud Director
  • VMware vRealize Automation Center
  • VMware vRealize Orchestrator
  • VMware vSphere Data Protection
  • VMware vShield Manager

What does Multi-site PSCs give us?

  • Customers are able to seamlessly move the vCenter Servers between PSCs when necessary
  • This topology allows for Enhanced Linked Mode (ELM) which is facilitated by the PSC. Starting with vSphere 6.0, the implementation of Linked Mode has changed. You no longer need to join vCenter Server instances to Linked Mode groups. You can access the replication functionality provided by Linked Mode in vSphere 6 by registering multiple vCenter Server instances to the same Platform Services Controller or joining Platform Services Controller instances in the same vCenter Single Sign-On domain
  • Enhanced Linked Mode provides for a single point of management for all vCenter Servers in the same vSphere domain
  • In vSphere 6 the Windows-based and Virtual Appliance-based vCenter Servers have the same operational maximums and can belong to the same linked mode configuration
  • The configuration replicates all license, global permissions, tags and roles across all sites
  • While it is possible to deploy PSCs over a WAN, the replication between PSCs is very latency sensitive. It is recommended that the latency between PSCs, as with any replicating directory service, to be as low as possible. Additionally, now that Enhanced Linked Mode (ELM) and all features that utilize ELM are facilitated via the PSC, for the best user experience within a vSphere environment, low latency is highly recommended
  • Regarding an environment in which multiple PSCs are in the same vSphere Domain and Enhanced Link Mode is being used, if a PSC in which a vCenter Server is connected to fails, access to this vCenter Server through a different vCenter Server’s vSphere Web Client is not possible. This is due to a user’s SAML token from the vSphere Web Client being unable to be passed to the failed PSC, thus to vCenter Server. Unless the PSC is brought back online or vCenter Server is repointed to a different PSC in the same domain, users cannot access it.

Considerations

  • It is not supported to re-register vCenter Server 5.1 to a PSC 6.0. you need to repoint vCenter 5.1 to a 5.5U3 SSO server first
  • You cannot re-register vCenter Server 6.0 to a PSC 6.0 that does not reside in the existing SSO Domain.
  • You cannot install SSO 5.5 and join a PSC 6.0 (and vice versa)

High Level Overview

  1. Install new Windows Server 2012 R2 SSO 5.5 Server – version 5.5 U3 in the vSphere domain vSphere.local and site configuration Default-First-Site or whatever you want to call your first site for example
  2. Install new Windows Server 2012 R2 SSO 5.5 Server – version 5.5 U3 in the same vSphere domain vSphere.local and multisite configuration Default-Second-Site or whatever you want to call your first site for example
  3. Register/Repoint the first 5.1 embedded SSO vCenter to external 5.5 U3 SSO/PSC
  4. Register/Repoint the second 5.1 embedded SSO vCenter to external 5.5 U3 SSO/PSC
  5. Uninstall 5.1 Single Sign-On from the two 5.1 vCenters. It is important to do this as the underlying SSO schema changed significantly between major versions
  6. Upgrade first external SSO 5.5 to PSC 6.0 U2
  7. Upgrade second external SSO 5.5 to PSC 6.0 U2
  8. Upgrade vCenters to 6.0.2
  9. Upgrade Update Manager and vSphere Client
  10. Check Multisite is working using vcdrepadmin tool in command prompt
  11. Upgrade hosts and VMs

Step 1 and 2 Install 5.5 Single Sign On only on both servers in multisite mode

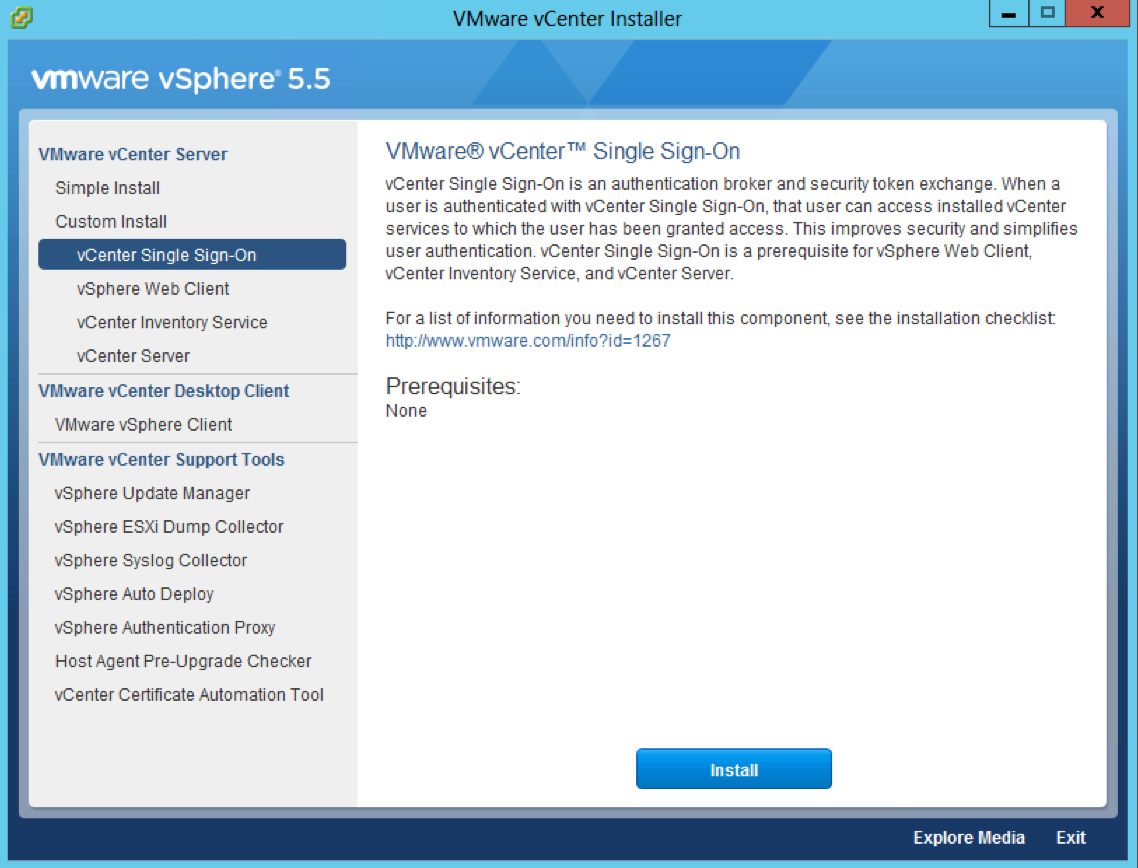
  • Attach the vSphere 5.5 U3 ISO to the first Windows Server 2012 R2 server
  • Select Single Sign-On and click Install
Screen Shot 2016-08-16 at 14.37.33

  • Click Next

Screen Shot 2016-08-16 at 14.38.38

  • Accept the License Agreement
  • Check the below screens details

Screen Shot 2016-08-16 at 14.40.20

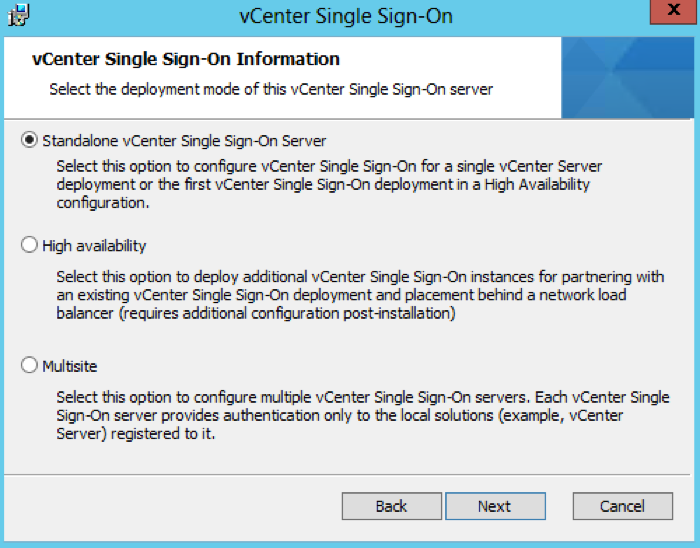
  • Choose Standalone vCenter Single Sign-On server as this is the first SSO server before we attach the second in multisite mode
Screen Shot 2016-08-16 at 14.41.27

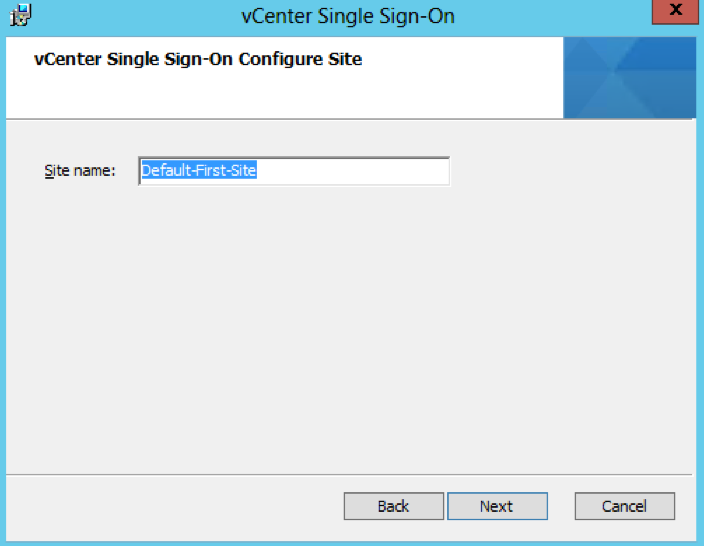
  • Leave the Site name as Default-First-Site or you can change it to what you want
Screen Shot 2016-08-16 at 14.43.04

  • HTTPS port is 7444

Screen Shot 2016-08-16 at 14.43.58

  • Check the Directory you are installing in to
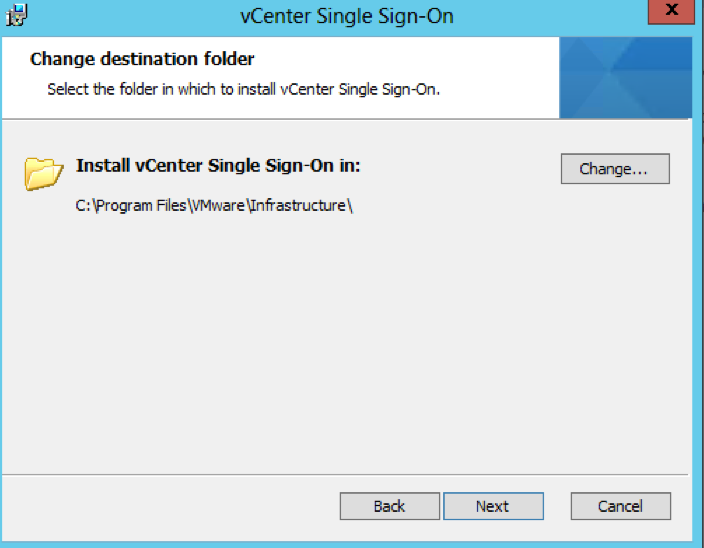
Screen Shot 2016-08-16 at 14.44.33

  • Check all the final details

Screen Shot 2016-08-16 at 14.45.17

  • Attach the vSphere 5.5 U3 ISO to the second Windows Server 2012 R2 server

Screen Shot 2016-08-16 at 14.37.33

  • Click Next

Screen Shot 2016-08-16 at 14.38.38

  • Check the details

Screen Shot 2016-08-16 at 14.59.49

  • For this second 5.5 PSC, choose Multisite
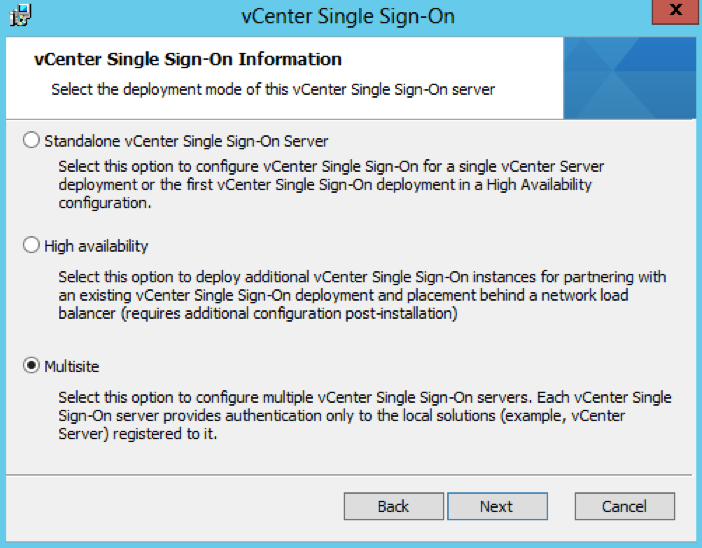
Screen Shot 2016-08-16 at 15.15.56

  • Put in the Single Sign-On information putting in the partner host name as the first PSC server we set up
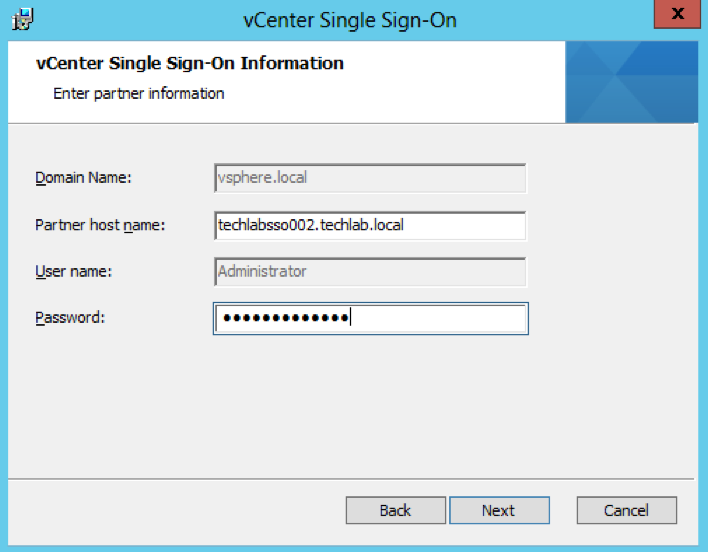
Screen Shot 2016-08-16 at 15.17.09

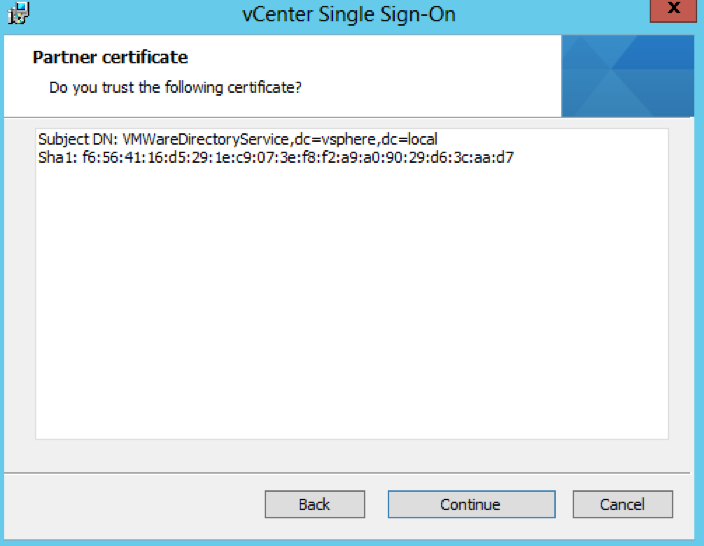
  • Check the certificate and click Next

Screen Shot 2016-08-16 at 15.18.19

  • Put in a name for the second site (Note the first PSC was Default-First-Site and this second one I have named Default-Second-Site)
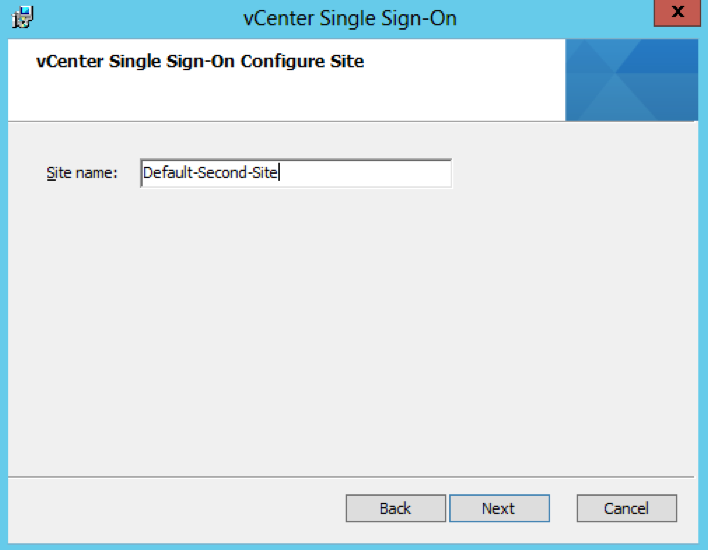
Screen Shot 2016-08-16 at 15.19.12

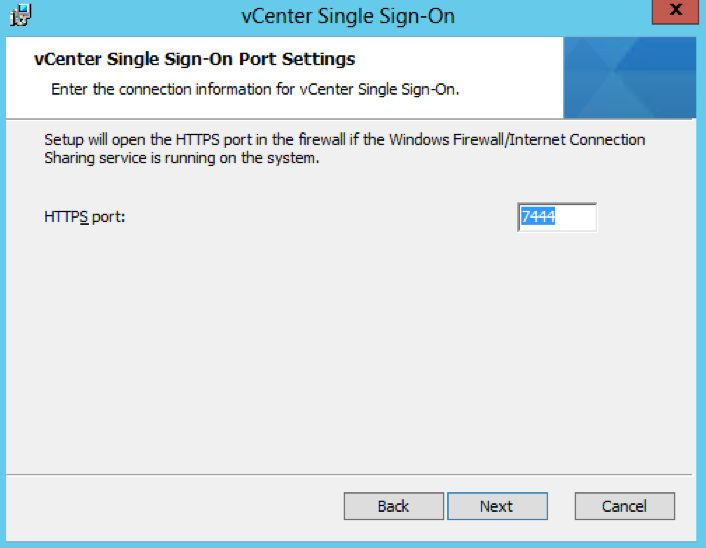
  • HTTPS port is 7444

Screen Shot 2016-08-16 at 14.43.58

  • Check the Directory you are installing in to

Screen Shot 2016-08-16 at 14.44.33

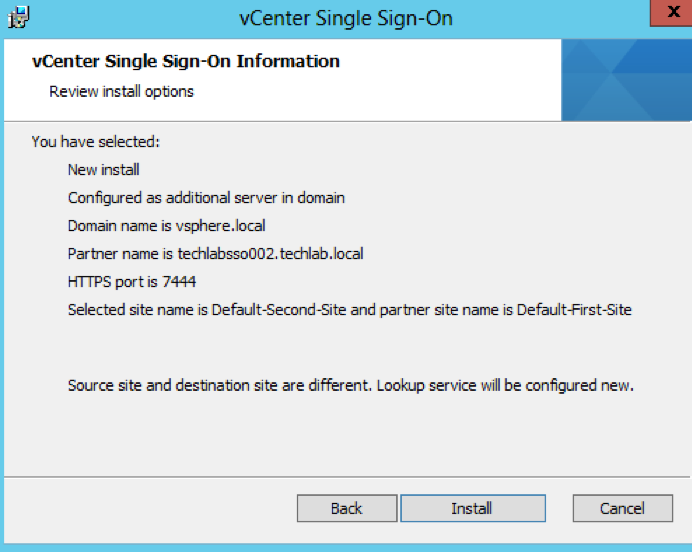
  • Check the Final Details and click Install
Screen Shot 2016-08-16 at 15.20.59

Step 3 and 4 Repointing and reregistering VMware vCenter 5.1 to the new 5.5 SSO/PSC

After certain changes to your VMware vSphere deployment topography, you might need to re-point or re-register vCenter Server components with the vCenter Inventory Service or vCenter Single Sign-On and the vCenter Lookup Service to ensure that the components can continue to communicate.

https://kb.vmware.com/selfservice/microsites/search.do?language=en_US&cmd=displayKC&externalId=2033620

  • On the first vCenter, open a command prompt and change directory to C:\Program Files\VMware\Infrastructure\Inventory Service\scripts
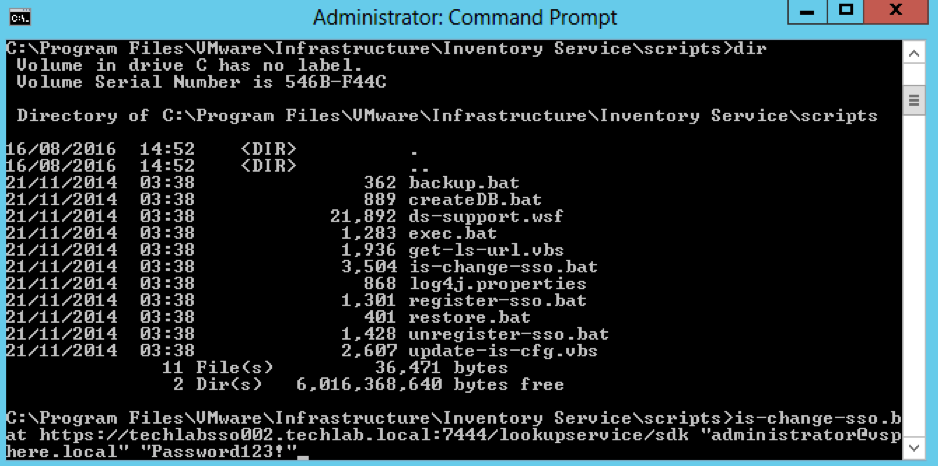
  • Run the is-change-sso.bat command to update the stored configuration information of the Inventory Service. Point to the https address of the new 5.5 SSO server
  • is-change-sso.bat https://techlabsso002.techlab.local:7444/lookupservice/sdk “administrator@vSphere.local” “SSO_password”
Screen Shot 2016-08-17 at 09.39.21

  • Type net stop vimqueryservice
  • Type net start vimqueryservice
  • Next Register vCenter Server with a different Single Sign-On instance

During installation or upgrade, vCenter Server is registered with the Lookup Service for a vCenter Single Sign-On instance. You can change this registration to the Lookup Service for a different Single Sign-On instance. You might register vCenter Server to a different vCenter Single Sign-On instance if the original Single Sign-On instance fails, or if you add a new Single Sign-On node and want to associate vCenter Server with the new node.

Note: When you register vCenter Server to a new Single Sign-On instance, you lose these permissions:

  • All permissions created for users from the Single Sign-On system identity source
  • All permissions granted to users from identity sources that are not present in the new Single Sign-On instance
  • All permissions granted to local operating system users

To register vCenter Server to a different vCenter Single Sign-On instance:

  • Open a command prompt and change directory to C:\Program Files\VMware\Infrastructure\VirtualCenter Server\ssoregtool
  • Note: If you have installed vCenter Server in a location other than the default C:\Program Files\ folder, adjust the path
  • Unzip the sso_svccfg.zip file. Best practice is to unzip these files into a new folder and change directory to the new folder before executing the next step. Unzip to a folder called sso_svccfg
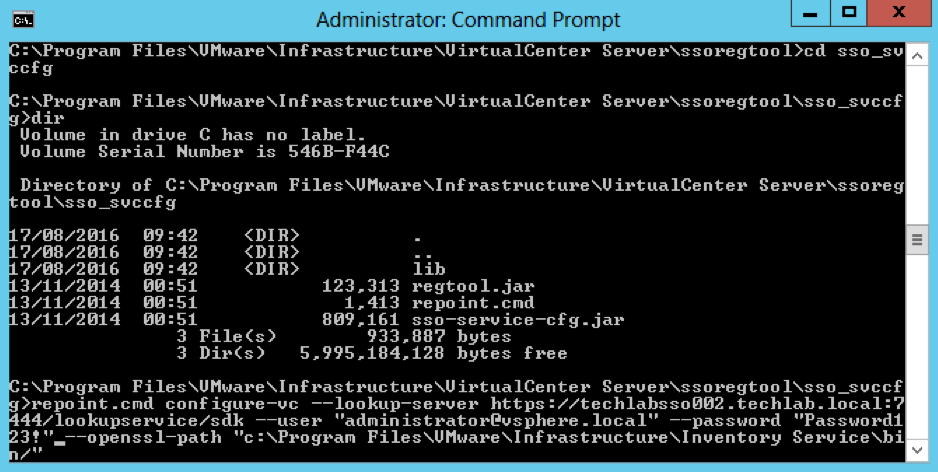
  • Run the below command
  • repoint.cmd configure-vc –lookup-server https://techlabsso002.techlab.local:7444/lookupservice/sdk –user “administrator@vSphere.local” –password “SSO_password@” –openssl-path “C:\Program Files\VMware\Infrastructure\Inventory Service\bin/”
Screen Shot 2016-08-17 at 09.54.07

  • Restart the VMware VirtualCenter Server and the VMware VirtualCenter Management Webservices services
  • Next Ignore the next step in the article which says to re-register vCenter with the Inventory Service unless any of the conditions are relevant
  • Next Register the vSphere Web Client with a different Single Sign-On instance
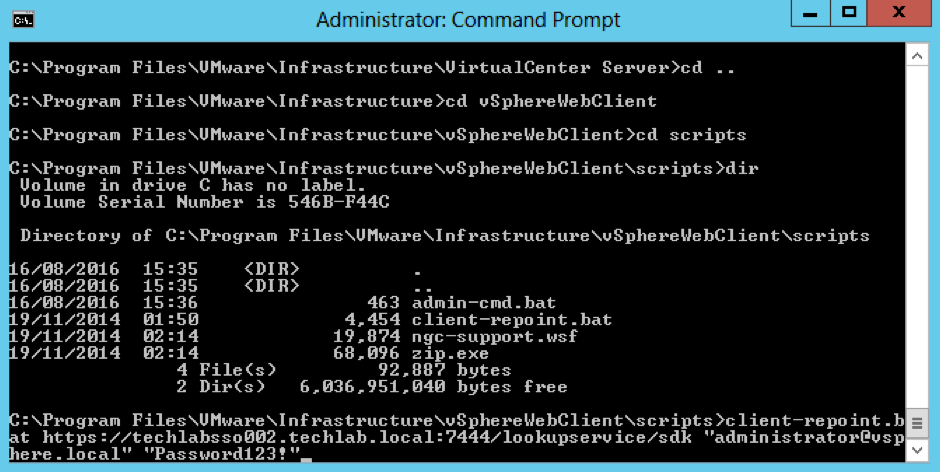
  • Open a command prompt and change directory to c:\Program Files\VMware\Infrastructure\vSphereWebClient\Scripts
  • Run the following command
  • client-repoint.bat https://techlabsso002.techlab.local:7444/lookupservice/sdk “administrator@vSphere.local” “SSO_password”

Screen Shot 2016-08-17 at 10.07.41

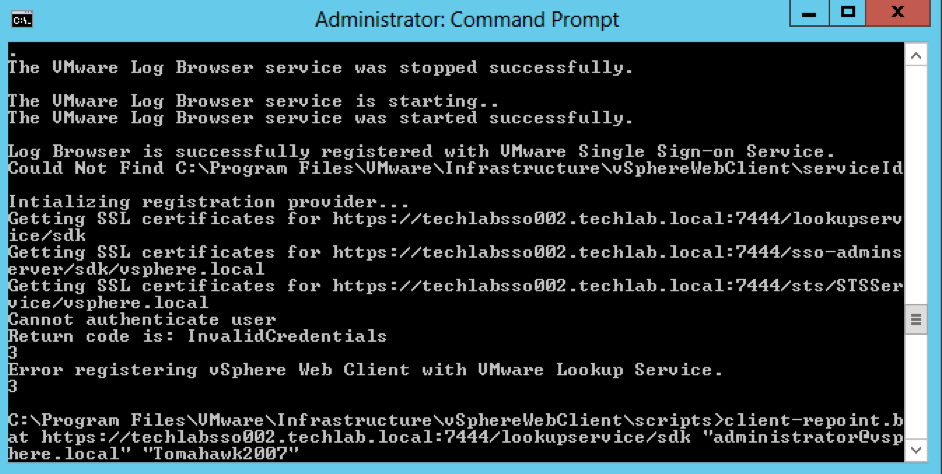
Now interestingly at this point my vSphere Web Client re-registration failed so i had a look at this KB – https://kb.vmware.com/selfservice/search.do?cmd=displayKC&docType=kc&docTypeID=DT_KB_1_1&externalId=2060637 and it said my SSO password is supported with an exclamation mark. However I had to log into the web client on techlabsso002 and change the password and remove the exclamation mark in order for the registration to work!

If you have issues, it will look like this
Screen Shot 2016-08-17 at 10.43.55

  • Next you need to follow exactly the same re-registration steps for the other 5.1 vCenter server and 5.5 SSO server

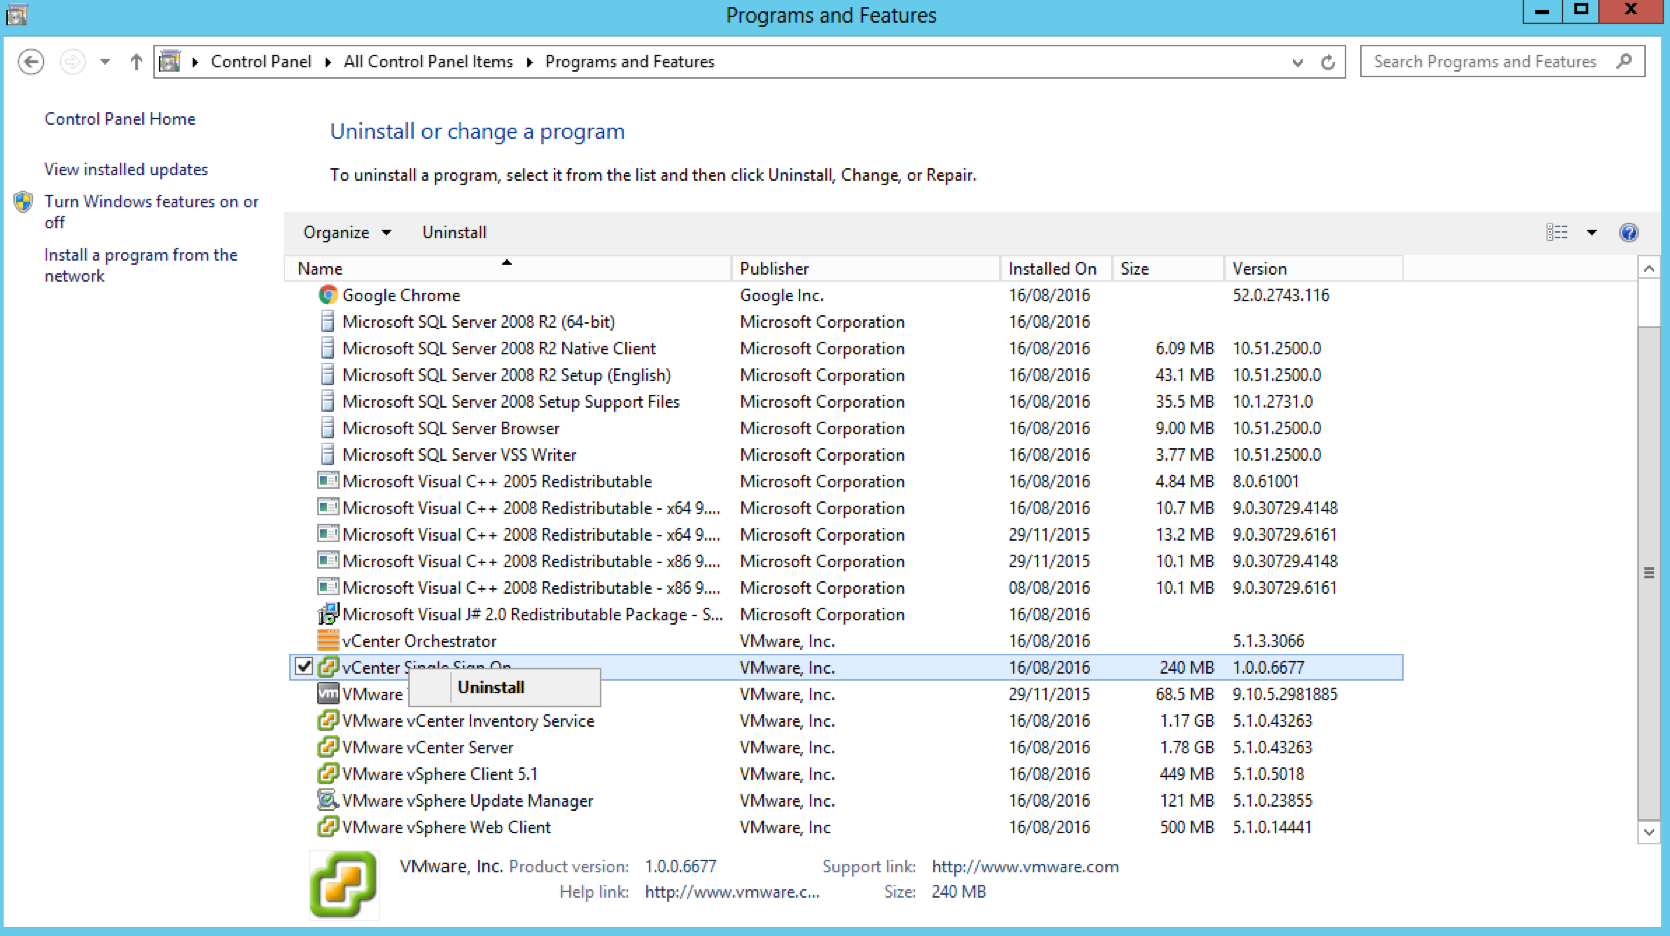
Step 5 – Uninstall 5.1 Single Sign-On from the two 5.1 vCenters (Important!)

  • Go to Control Panel and Uninstall

Screen Shot 2016-08-17 at 13.31.58

Step 6 and 7 – Upgrade both 5.5 SSO servers to PSC 6 servers

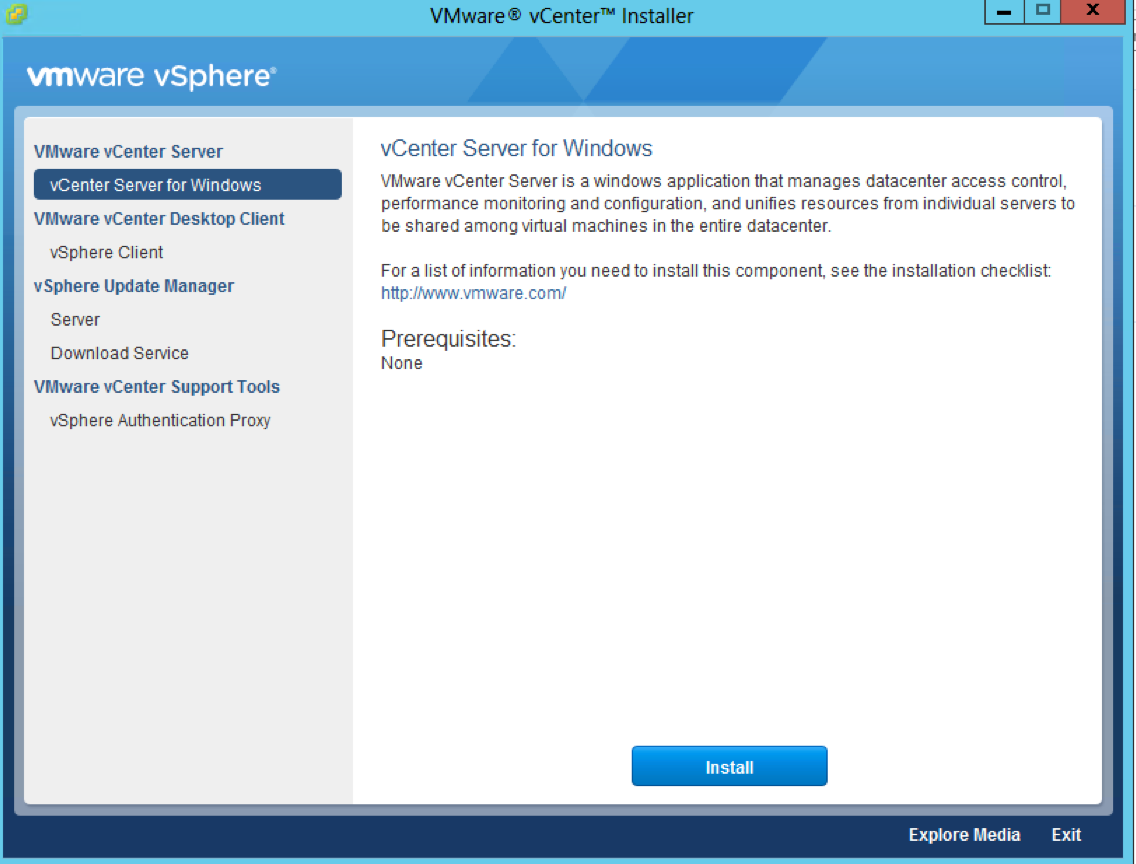
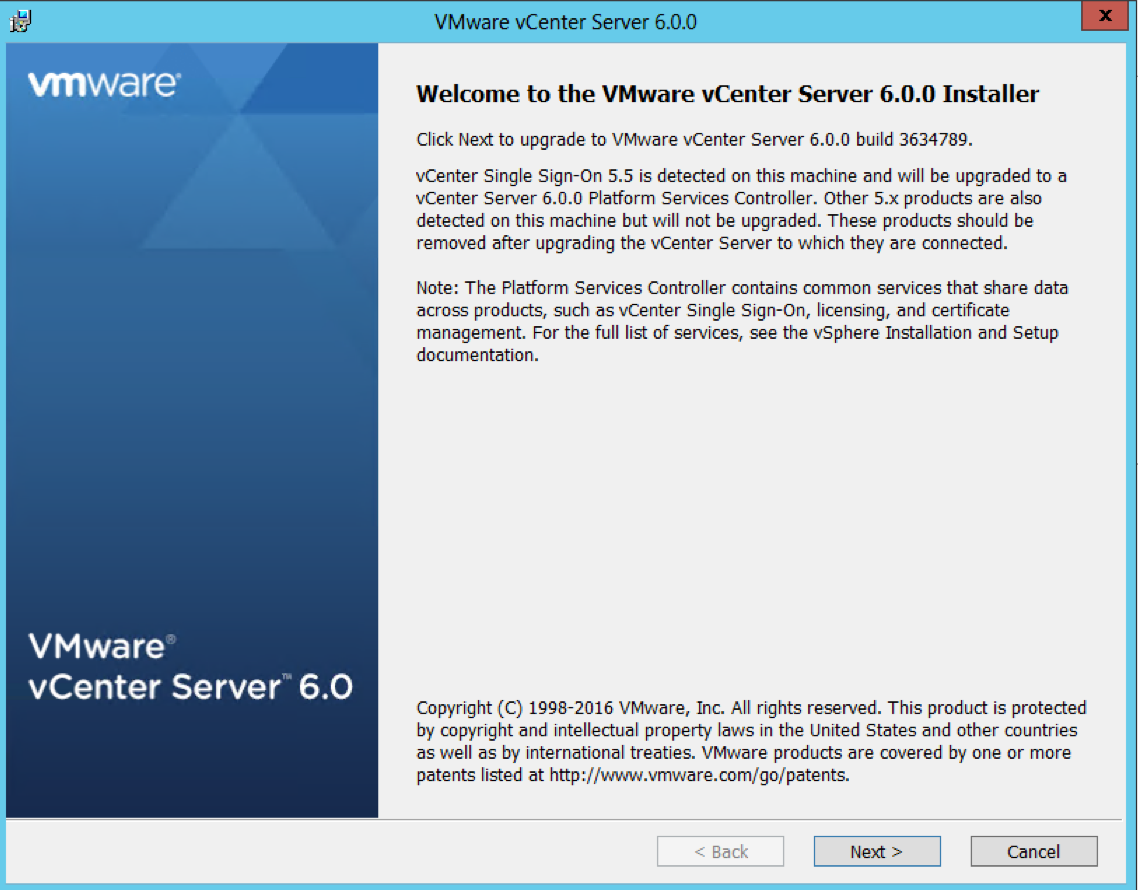
  • Attach the vCenter 6 iso to the first PSC server and select vCenter Server for Windows and Install
Screen Shot 2016-08-17 at 13.41.10

  • Click Next

Screen Shot 2016-08-17 at 14.15.48

  • Accept the License Agreement
  • Put in the Single Sign-On password in and you will see it going through pre-upgrade checks
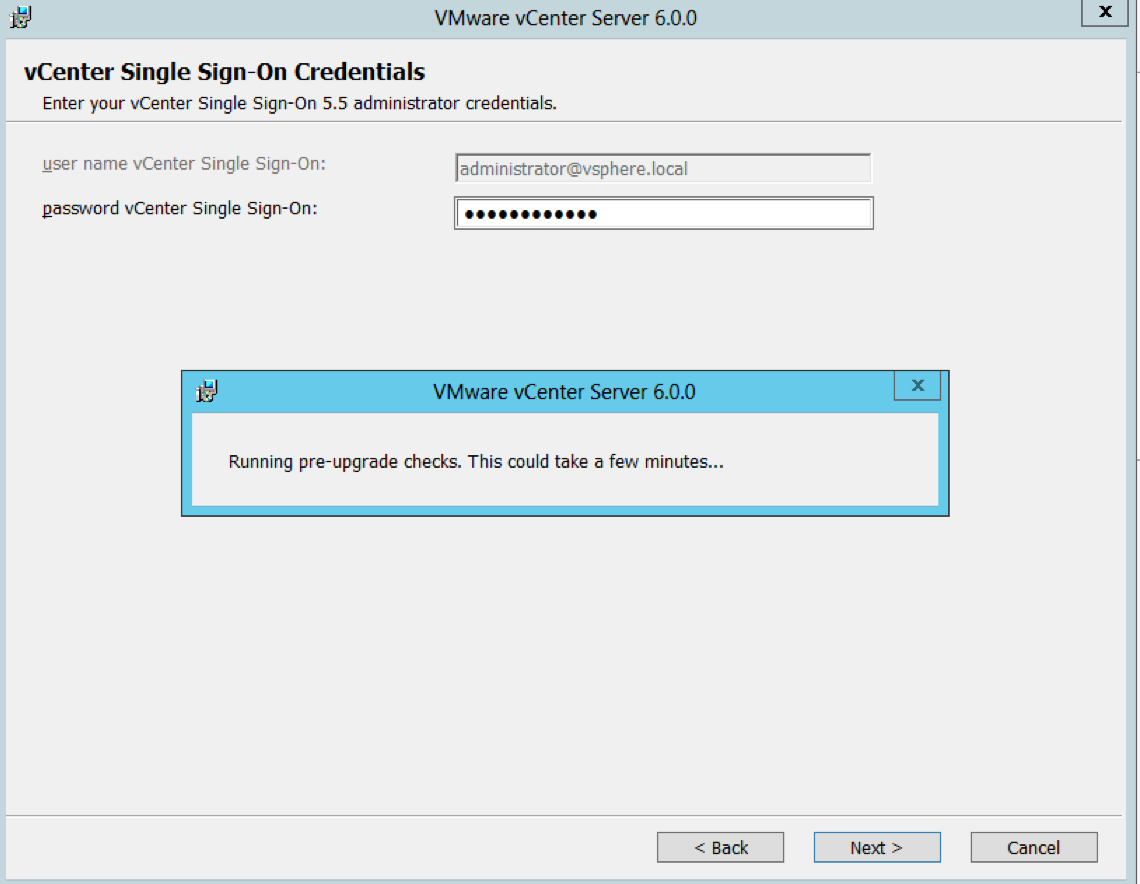
Screen Shot 2016-08-17 at 14.17.16

  • Check Ports (Important for multi-site communication) (There will be further information at the end of this post about ports required
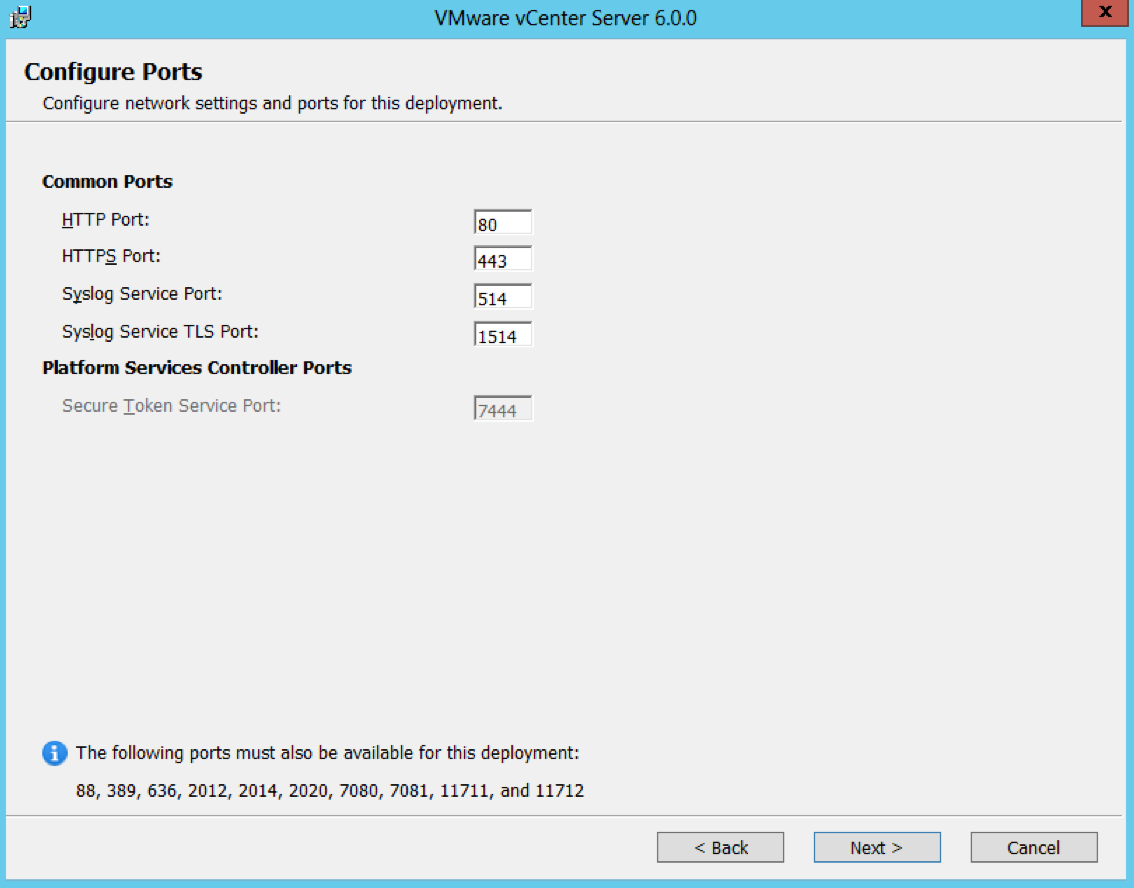
Screen Shot 2016-08-17 at 14.47.57

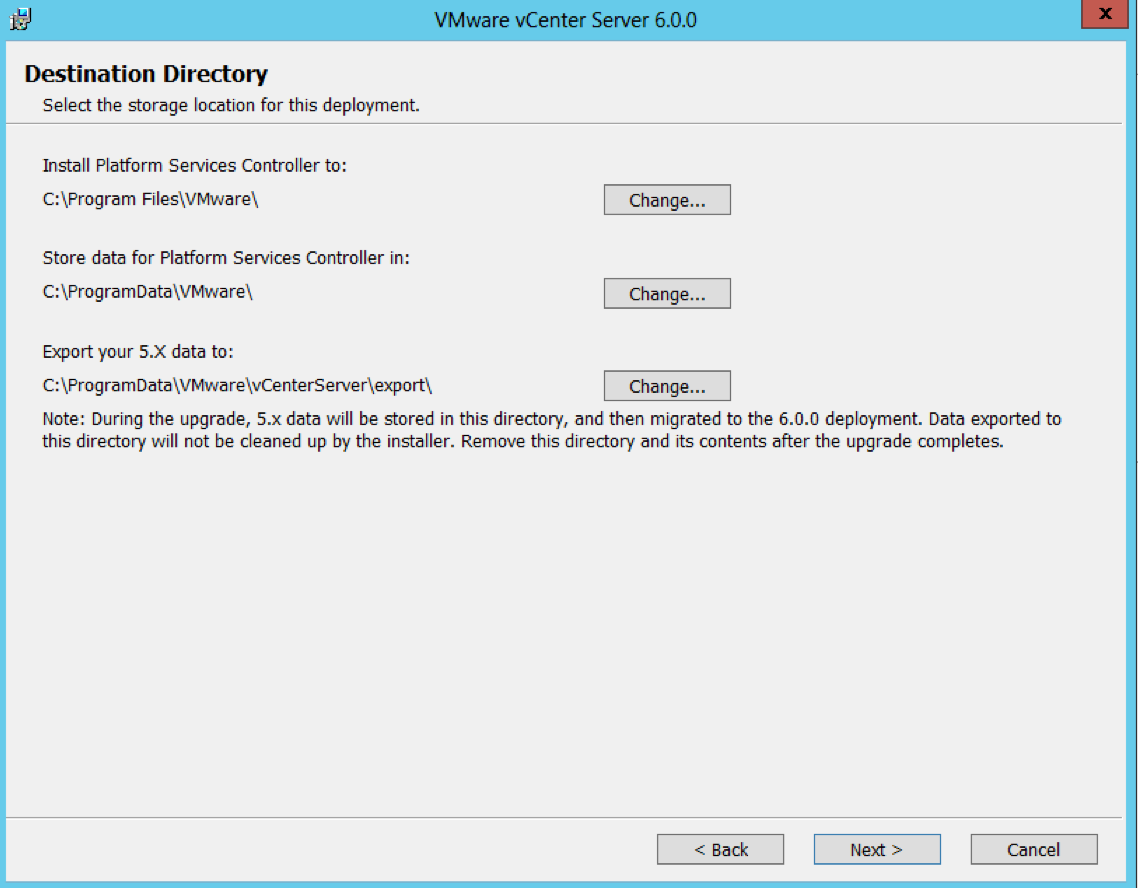
  • Check Destination Directories

Screen Shot 2016-08-17 at 14.48.55

  • Choose whether to join the Customer Improvement Program
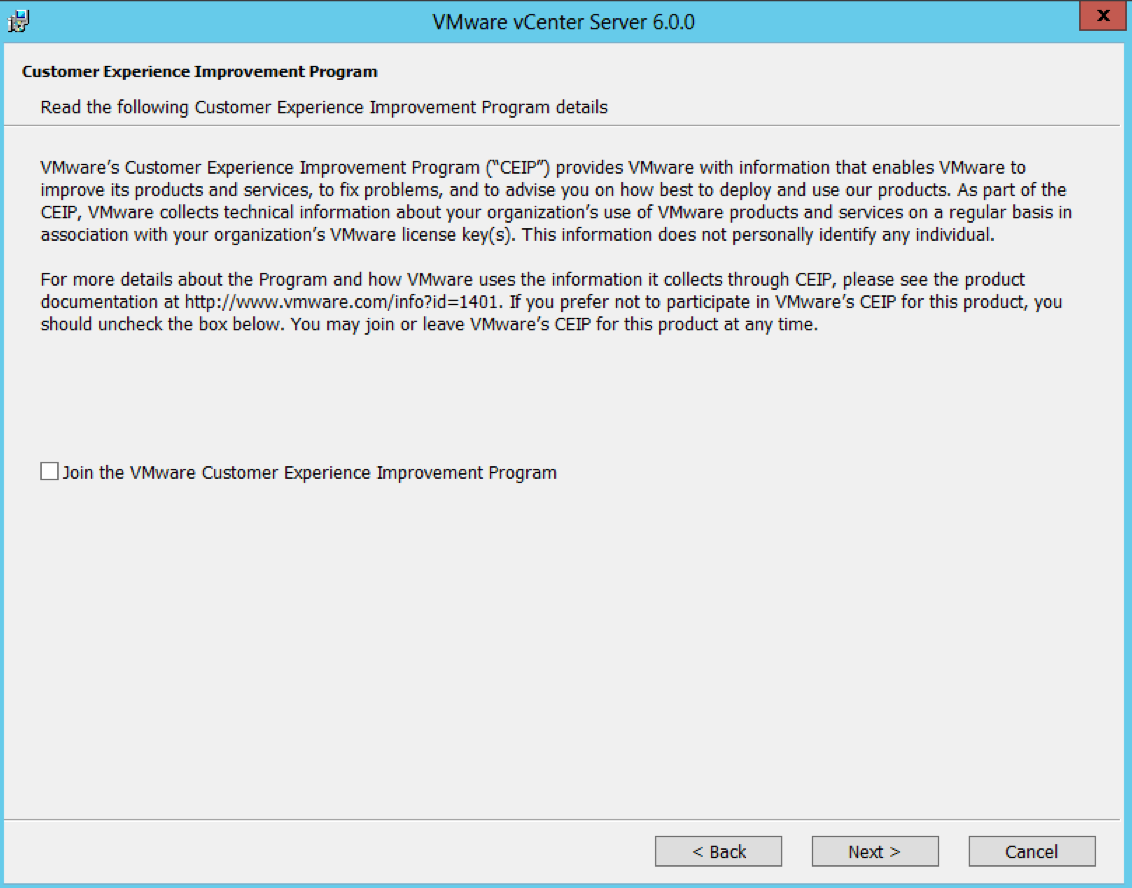
Screen Shot 2016-08-17 at 14.50.11

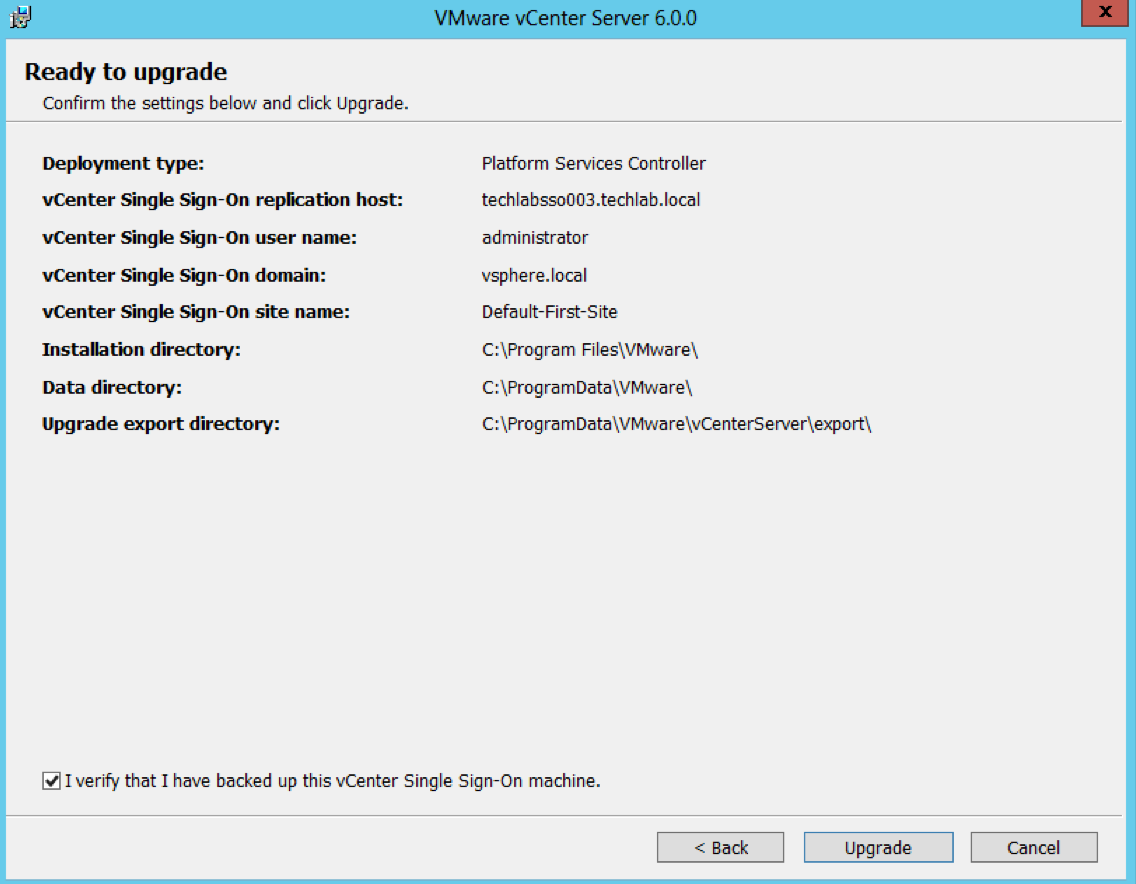
  • Check the final details and tick I verify that I have backed up this Single Sign-On machine
  • You can see that this SSO server has a replication partner of the other SSO server techlabsso003 which is in the multi-site setup
  • Click Upgrade

Screen Shot 2016-08-17 at 14.51.08

  • You can check a couple of links such as https://techlabsso002.techlab.local/websso
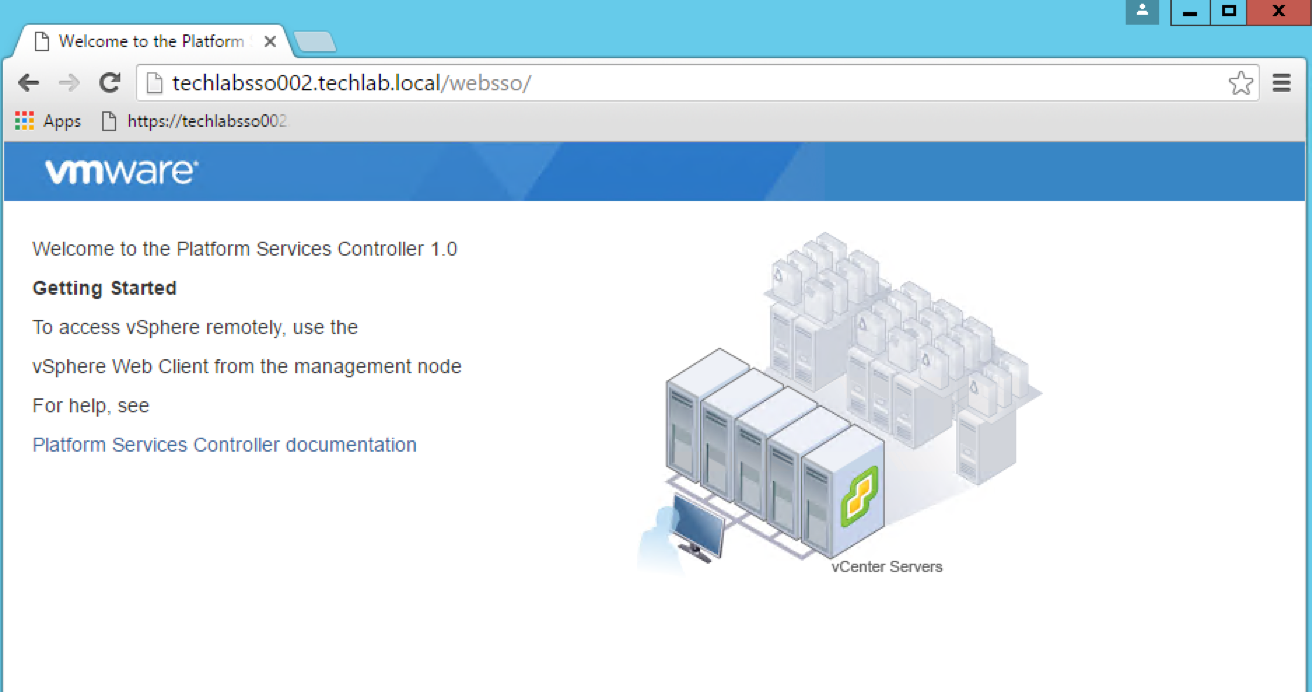
Screen Shot 2016-08-17 at 15.17.42

  • Check the below link is working also –https://techlabsso002.techlab.local/psc
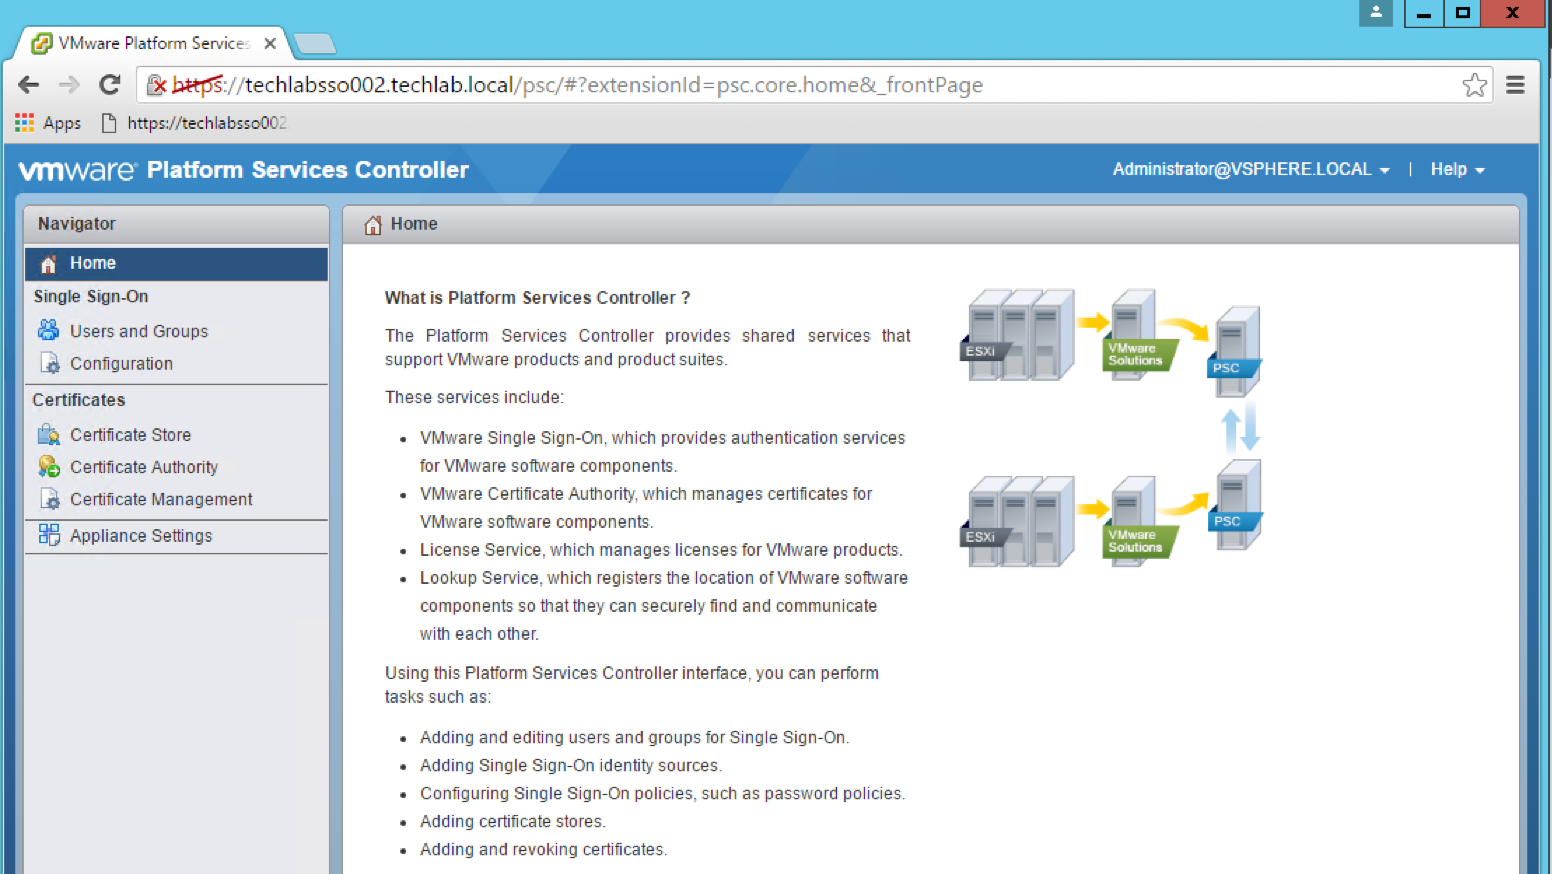
Screen Shot 2016-08-17 at 15.19.29

  • Next follow the exact same steps to upgrade the second SSO server to a PSC v6 server
  • You will see on the final screen in the details that this is the second site (Default-Second-Site)
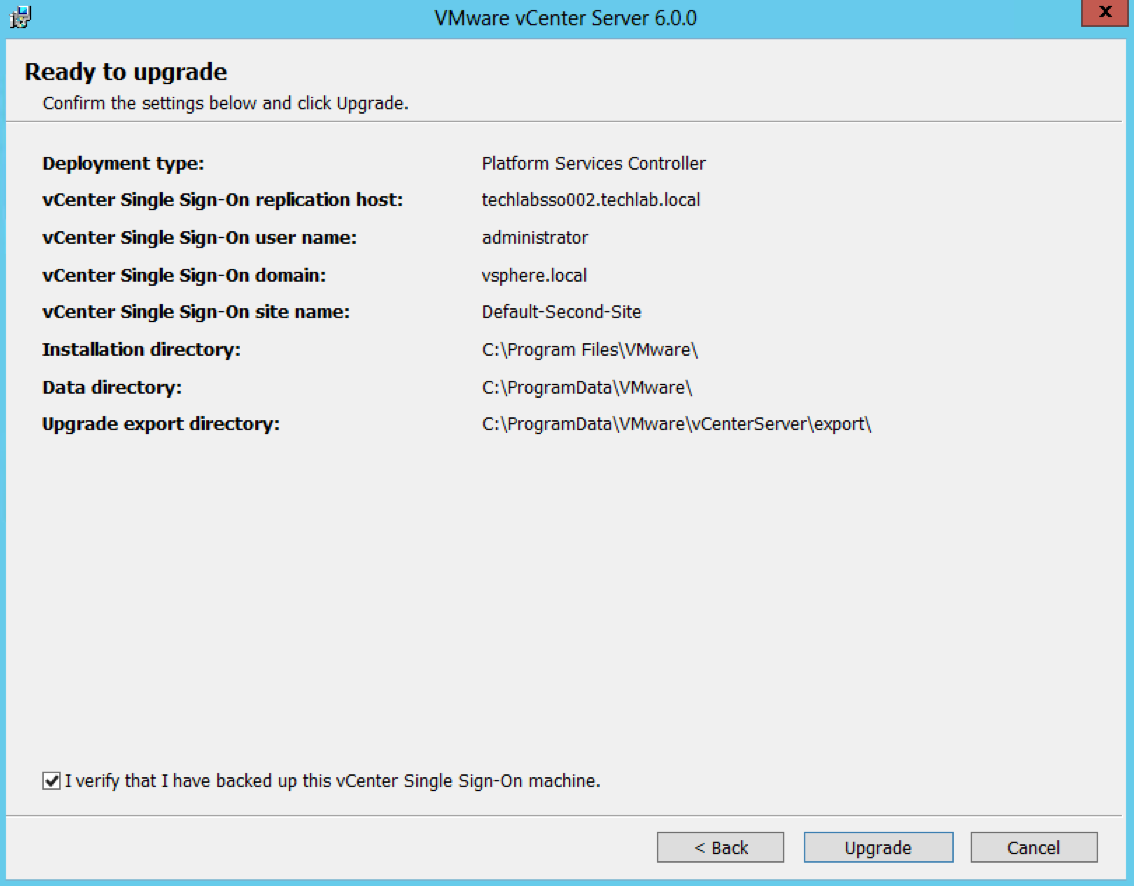
Screen Shot 2016-08-17 at 15.27.00

Step 8 – Upgrade both vCenter 5.1 U3 servers to vCenter v6.0 U2

Note: vCenter needs at least 2 vCPUs and 8GB RAM

Note: There is sometimes and error which comes up which says

The user group “NT SERVICE\ALL SERVICES” does not have the “Log on as a service” user right. This precludes the ability to use the virtual accounts feature in Windows permit greater security through increased idolation of services. We recommend that you add this group back to the list of services that have this right. If this right is not added then any installed services that would normally use a virtual account will instead use “Local Service” account

Please see the below KB for further information

https://kb.vmware.com/selfservice/microsites/search.do?language=en_US&cmd=displayKC&externalId=2124709

If this right is not added then any installed services that would normally use a virtual account will instead use the “Local Service” account.

  • Attach the vSphere 6 ISO and select vCenter Server for Windows and click Install
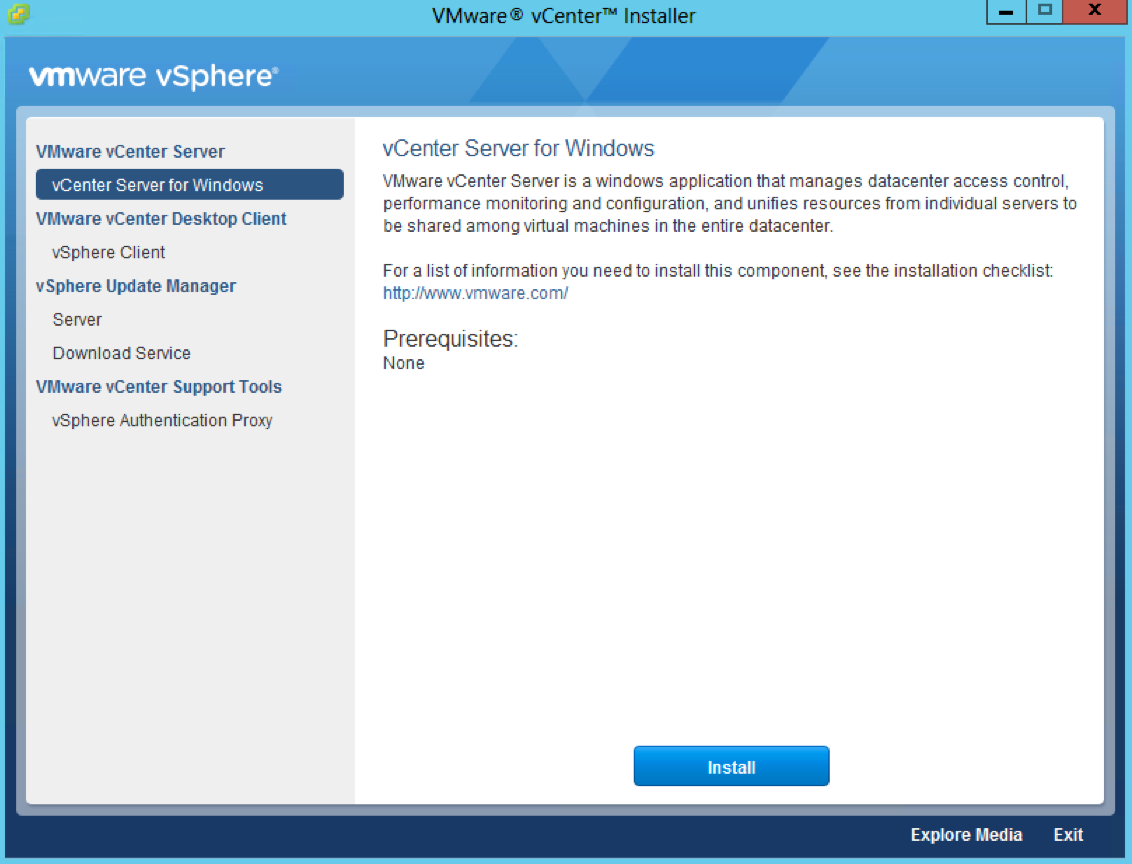
Screen Shot 2016-08-17 at 15.30.48

  • Accept the License Agreement
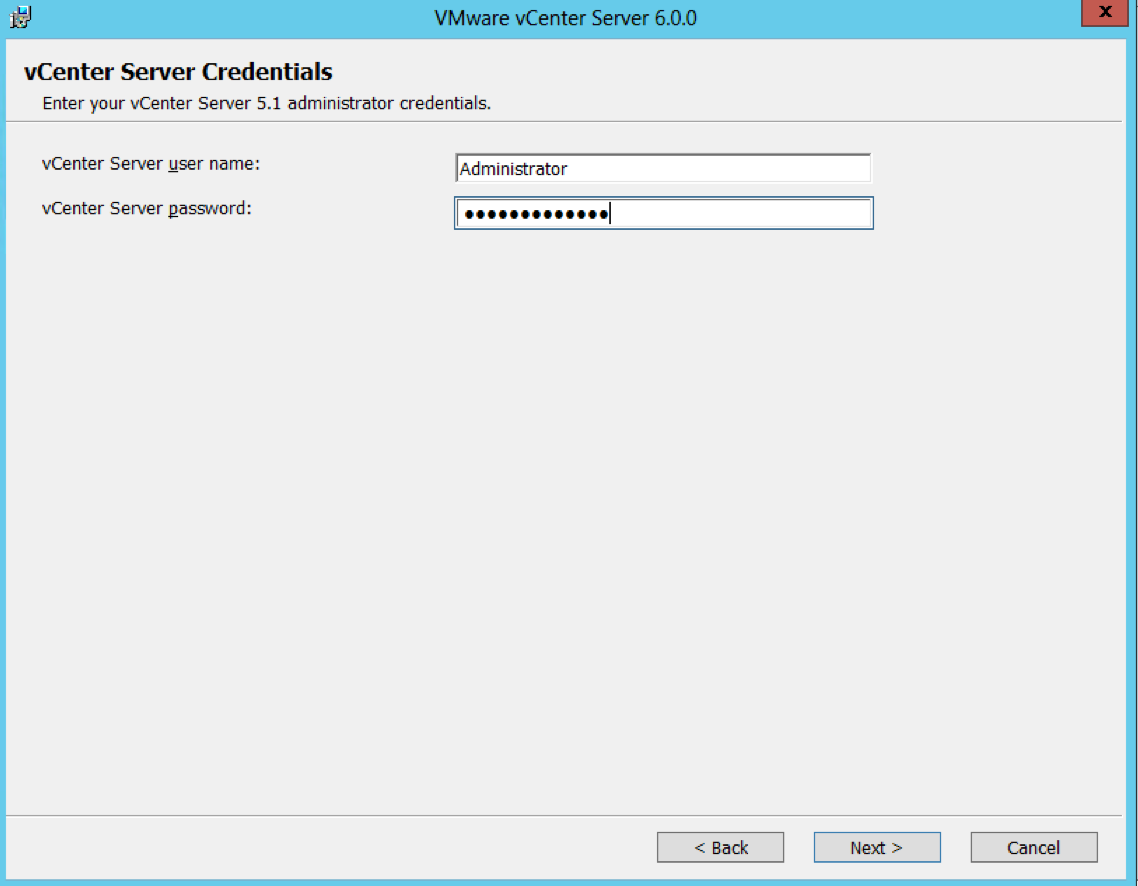
  • Put in the vCenter Server credentials

Screen Shot 2016-08-17 at 16.56.12

  • It will run the pre-upgrade scripts
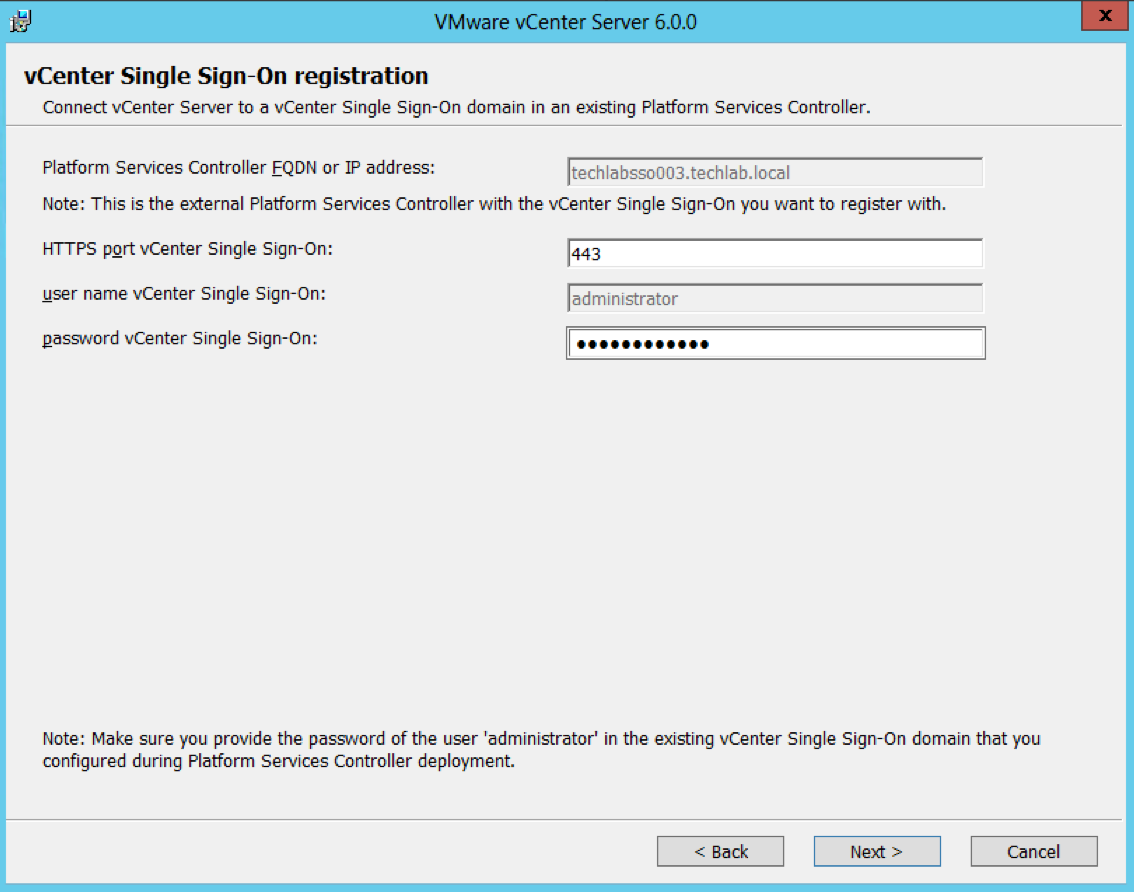
  • Put in the Single Sign-On password

Screen Shot 2016-08-17 at 17.20.40

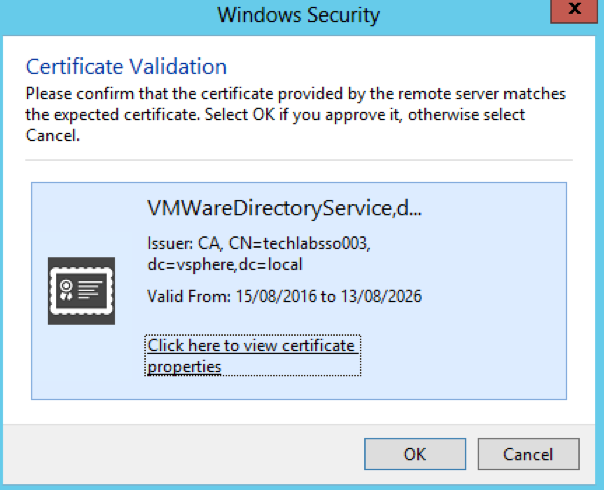
  • Accept the certificate

Screen Shot 2016-08-17 at 17.22.53

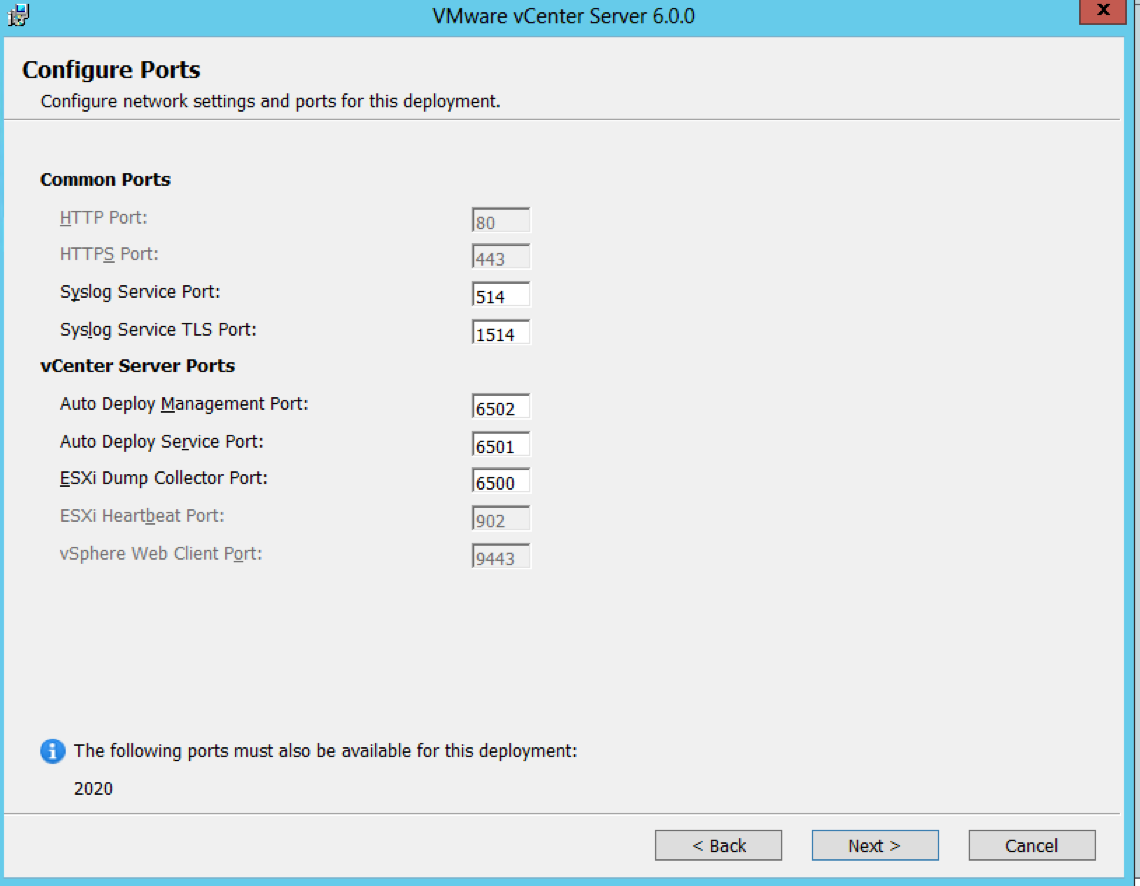
  • Check Ports

Screen Shot 2016-08-17 at 17.23.20

  • Select Destination Directories

Screen Shot 2016-08-17 at 17.23.47

  • Check the details on the Ready to Upgrade Page
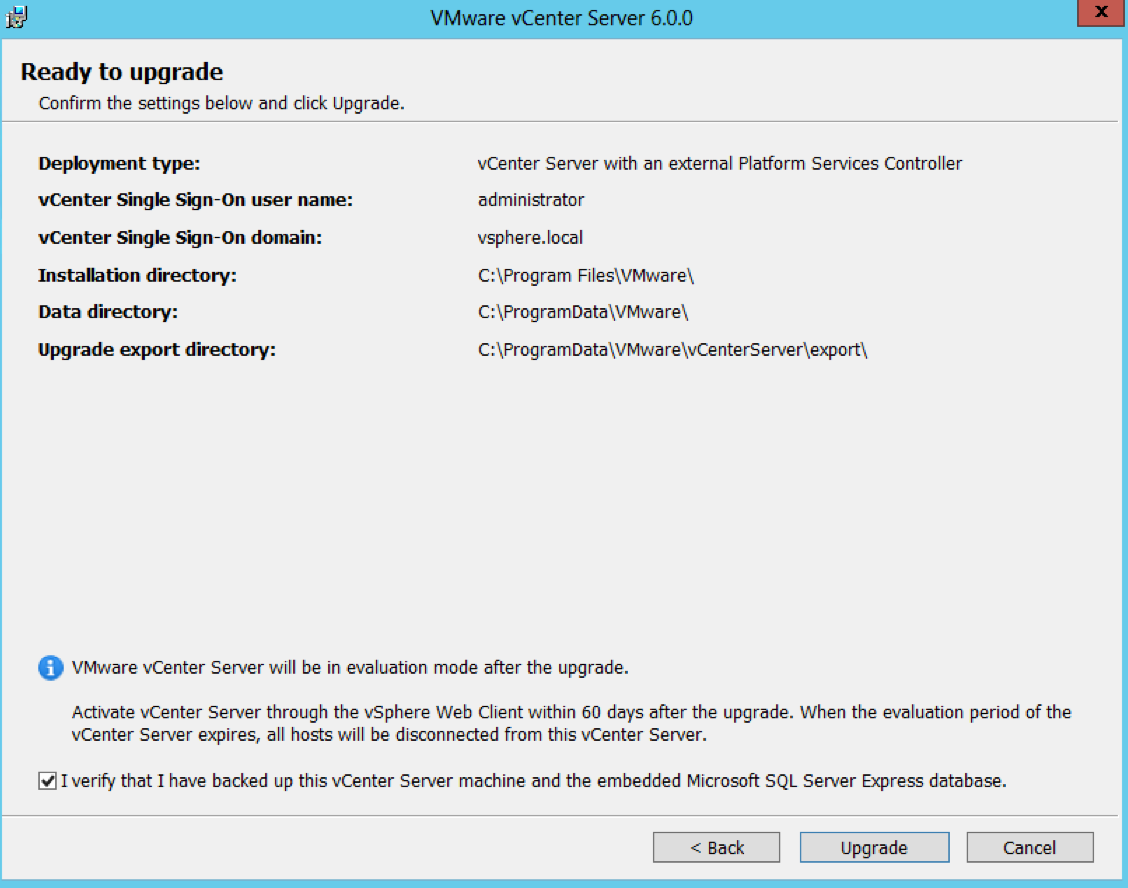
Screen Shot 2016-08-17 at 17.24.23

  • Note: When I then kicked off the installer in a client site, they had the Task Scheduler Service turned off on the vCenter server which resulted in this error message during the installation.

An error occurred while invoking external command : ‘Command: schtasks /create /ru SYSTEM /rl highest /f /sc minute /mo 5 /tn “VMwareIIAD” /tr “C:\Program Files\VMware\vCenter Server\python\python.exe\” \”C:\Program Files\VMware\vCenter Server\python-modules\iiad\iiad.py\””

Stderr: ERROR: The network address is invalid

Error occurred while creating scheduled task for IIAD
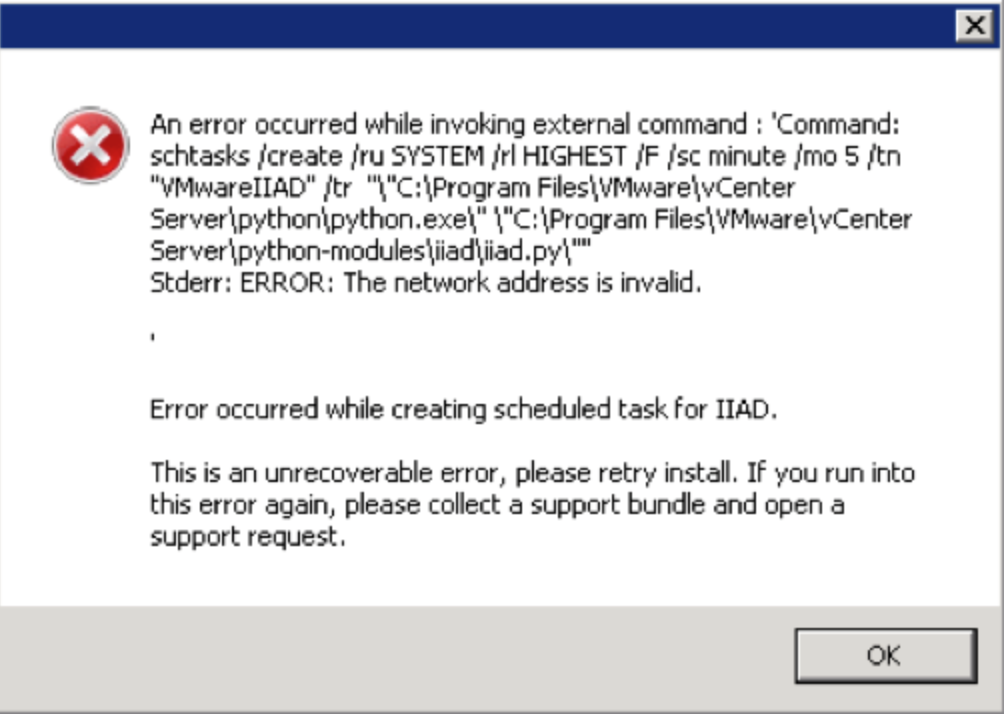
Screen Shot 2016-09-06 at 15.12.31

  • If this happens, you must makse sure the Task Scheduler is started in the services on the vCenter server

Monitoring the Installation logs

Installation Logs

·       C:\ProgramData\VMware\vCenterServer\logs
·       %TEMP% directory, usually C:\Users\username\AppData\Local\Temp

Step 9 – upgrade the vSphere Client

Step 10 -Upgrade Update Manager

Step 11 – Determining multi-site replication agreements and status with the Platform Services Controller using vdcrepadmin

Useful VMware KB Link here

Use these parameters using the vdcrepadmin CLI:

  • showservers – Displays all of the PSCs in a vSphere domain.
  • showpartners – Displays the current partnerships from a single PSC within a vSphere domain.
  • showpartnerstatus – Displays the current replication status of a PSC and any of the replication partners of the PSC.
  • createagreement and removeagreement – Allows for creation and removal of additional replication agreements between PSCs within a vSphere domain.

Steps for vdcrepadmin showservers

This steps below provide information on using the vdcrepadmin command-line interface (CLI) for reviewing the existing vSphere domain, Platform Services Controllers (PSC) that make up your vSphere domain as well as checking the replication agreements configured and replication status within your environment. Although the utility can be used for other operations, at this time, only what is documented must be executed by technical support staff and customers.

  • Log into the PSC and open a Command Prompt as Administrator
  • Navigate to cd c:\Program Files\VMware\vCenter Server\vmdird
  • Type the below command to show all the PSC Controllers in the vSphere domain

vdcrepadmin -f showservers -h PSC_FQDN -u administrator -w Administrator_Password where administrator is the PSC administrator@vsphere.local user account

Example

vdcrepadmin -f showservers -h techlabsso002.techlab.local -u administrator -w Password123!
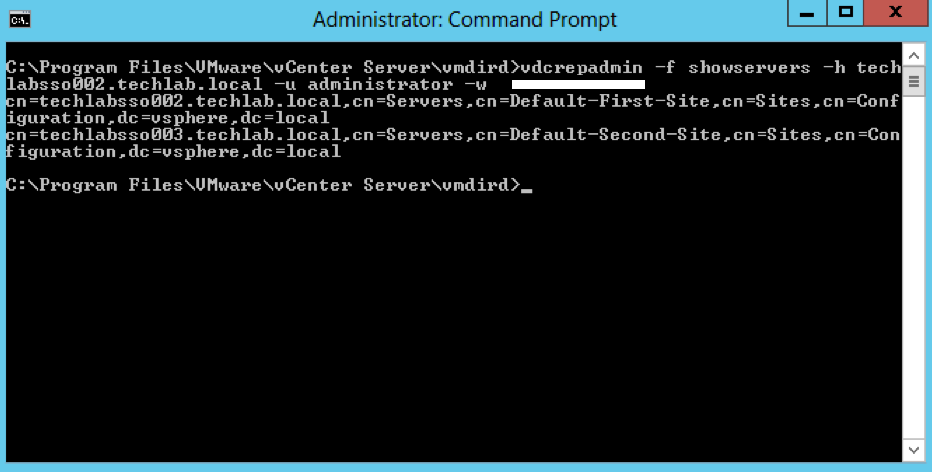
Screen Shot 2016-08-17 at 21.35.11

  • You should now see the below showing you your 2 PSCs. In my case techlabsso002 and techlabsso003

Steps for vdcrepadmin showpartners

  • Next type the following command to show the psc partners

vdcrepadmin -f showpartners -h psc1.vmware.local -u administrator -w VMw@re123

Example

vdcrepadmin -f showpartners -h techlabpsc002.techlab.local -u administrator -w Password123!
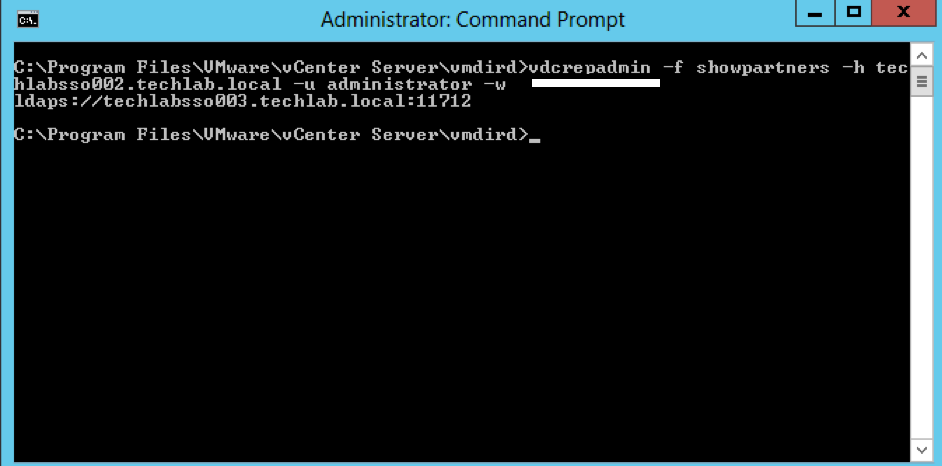
Screen Shot 2016-08-17 at 21.37.08

  • You could run this showpartners command against all PSCs to map out the topology of the current vSphere domain by re-running this command against each of the PSCs in order to determine all of the partnerships.
  • You can see that some environments will be installed in an in-line fashion, with each PSC installed against the previous PSC, rather than a hub-and-spoke fashion where all of the PSCs would terminate to a central PSC

Interesting Info as per above screenprint courtesy of VMware engineer Sung Ruo.

As you can see above the replication agreement is listed as LDAPS. Any automatic agreement such as when we join PSC servers together is created as LDAPS as per this 5.5 to 6.0U2 upgrade however if we create any manual replication agreements, these will be created as LDAP going forwards.

In 5.5. the only secure LDAP communication between SSO/PSC nodes are via LDAPS.  Thus in automatic replication agreements establishment, LDAPS is used.

In 6.0 and after, we introduced LDAP SASL/SRP binding which go through port 389. LDAP SASL/SRP (or KRB) is the simple and safe to manage between LDAP nodes. This binding mechanism is preferable to LDAPS as the SSL port is difficult to manage/deploy correctly as it depends on PKI. Also, LDAP layer sites below certificate. You need an ID before you can get a cert

Regardless, in 6.0 and after, the server will try SASL/SRP first and fall back to LDAPS if necessary regardless of LDAP/LDAPS in the labeledURI in the replication agreement definition. You also cannot force the replication agreements to use LDAPS in 6.0 and after.

Steps for vdcrepadmin showpartnerstatus

  • Next type the following command to show the partner replication status.
  • This CLI is limited to execution only against the local PSC. Using the command to query the replication status from one PSC to a different PSC is not yet supported.

vdcrepadmin -f showpartnerstatus -h localhost -u administrator -w Administrator_password

Example

vdcrepadmin -f showpartnerstatus -h techlabpsc002.techlab.local -u administrator -w Password123!
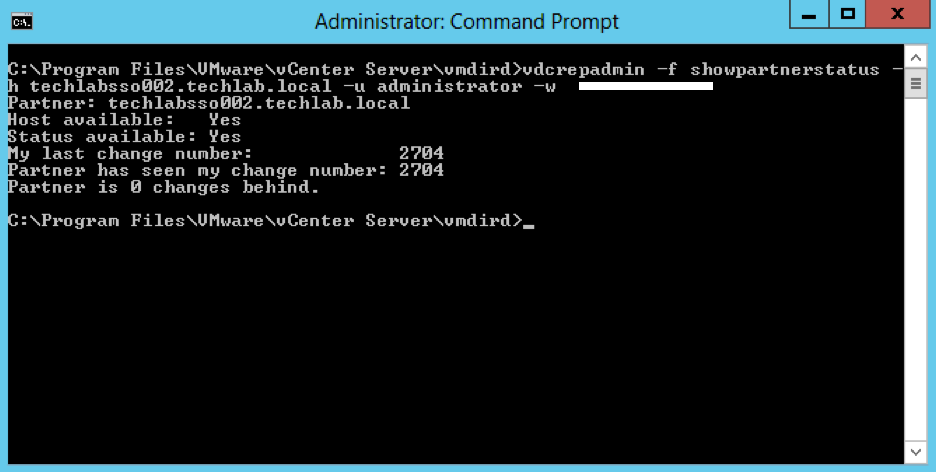
Screen Shot 2016-08-17 at 21.38.20

  • If you have problems with replication failing, review the /var/log/vmware/vmdird/vmdird-syslog.log or C:\ProgramData\VMware\vCenterServer\logs\vmdird\vmdird-syslog.log file for details. This provides all information related to replication status and the objects that are replicated

What do you see with multisite?

  • When multisite is installed, you can then log in to each vCenter and see all other vCenters which are set up and control them
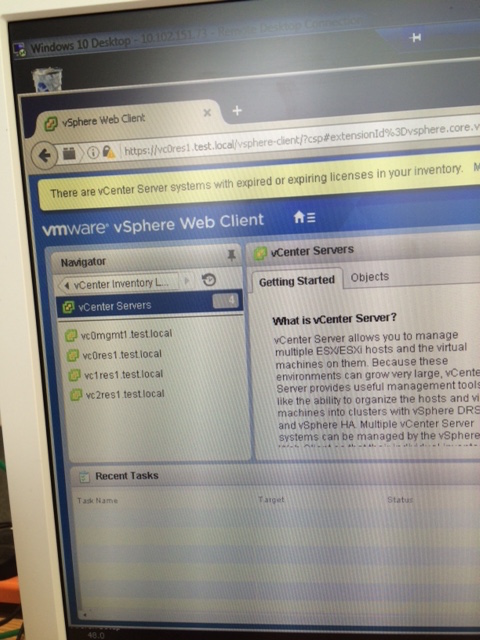
Multimode

Steps for vdcrepadmin createagreement – Example only with 4 PSCs as I only have 2 PSCs

  • Note: This cannot be used to create replication agreements between disparate (separate) vSphere domains
  • Map out the topology of the current vSphere domain by re-running the showpartners command against each of the PSCs in order to determine all of the partnerships

For example you have 4 PSCs

  • psc1
  • psc2
  • psc3
  • psc4

You can use the showservers parameter to get a list of all of the PSCs in the domain.

Navigate to C:\Program Files\VMware\vCenter Server\vmdird and run the below commands

vdcrepadmin -f showpartners -h psc1.vmware.local -u administrator -w VMw@re123
ldap://psc2. vmware.local

vdcrepadmin -f showpartners -h psc2.vmware.local -u administrator -w VMw@re123
ldap://psc1. vmware.local
ldaps://psc3. vmware.local

vdcrepadmin -f showpartners -h psc3.vmware.local -u administrator -w VMw@re123
ldap://psc4. vmware.local
ldaps://psc2. vmware.local

vdcrepadmin -f showpartners -h psc4.vmware.local -u administrator -w VMw@re123
ldap://psc3. vmware.local

  • With the topology defined, we can now generate new replication agreements. Using the PSCs 1-4 in this section as a model, we need to generate additional replication agreements between:
  • PSC1.* and PSC3.*
  • PSC1.* and PSC4.*
  • PSC2.* and PSC4.*
  • Use the following command to create a new replication agreement between PSCs to generate a mesh topology:

vdcrepadmin -f createagreement -2 -h Source_PSC_FQDN -H New_PSC_FQDN_to_Replicate -u administrator -w Administrator_Password

For example:

vdcrepadmin -f createagreement -2 -h psc1.vmware.local -H psc3.vmware.local -u Administrator -w VMw@re123

vdcrepadmin -f createagreement -2 -h psc1.vmware.local -H psc4.vmware.local -u Administrator -w VMw@re123

vdcrepadmin -f createagreement -2 -h psc2.vmware.local -H psc4.vmware.local -u Administrator -w VMw@re123

  • Repeat this operation for additional PSCs until you have created an entire mesh topology.
  • After completion, repeat Step 5 to confirm that you have generated a mesh topology.
  • Note: Due to replication time, it may take a few seconds to minutes for a complete mesh topology to be configured.

Steps for vdcrepadmin removeagreement – Example only with 4 PSCs as I only have 2 PSCs

  • Map out the topology of the current vSphere domain by re-running the showpartners command against each of the PSCs in order to determine all of the partnerships

For example you have 4 PSCs

  • psc1
  • psc2
  • psc3
  • psc4

You can use the showservers parameter to get a list of all of the PSCs in the domain.

vdcrepadmin -f showpartners -h psc1.vmware.local -u administrator -w VMw@re123
ldap://psc2. vmware.local
ldap://psc3. vmware.local
ldap://psc4. vmware.local

vdcrepadmin -f showpartners -h psc2.vmware.local -u administrator -w VMw@re123
ldap://psc1. vmware.local
ldap://psc3. vmware.local
ldap://psc4. vmware.local

ldap://psc4. vmware.local

vdcrepadmin -f showpartners -h psc3.vmware.local -u administrator -w VMw@re123
ldap://psc4. vmware.local
ldap://psc2. vmware.local
ldap://psc1. vmware.local

vdcrepadmin -f showpartners -h psc4.vmware.local -u administrator -w VMw@re123
ldap://psc3. vmware.local
ldap://psc1. vmware.local
ldap://psc2. vmware.local

  • Use the following command to remove a replication agreement

vdcrepadmin -f removeagreement -2 -h Source_PSC_FQDN -H PSC_FQDN_to_Remove_from_Replication -u administrator -w Administrator_Password

For example:

vdcrepadmin -f removeagreement -2 -h psc1.vmware.local -H psc3.vmware.local -u administrator -w Administrator_Password

Monitoring the PSC Replication Logs

C:\ProgramData\VMware\vCenter Server\Logs\sso\vmware-sts-idmd.log

This is a good log to use as a “one-stop-shop” for SSO authentication issues. Authentication requests/failures as well as problems with an identity source will post here.

C:\ProgramData\VMware\vCenter Server\Logs\vmafdd\vdcpromo.log

Contains installation errors during configuration of vmdir. Especially useful for errors when adding another PSC to the same SSO domain.

C:\ProgramData\VMware\vCenter Server\Logs\vmafdd\vmafdd.log

C:\ProgramData\VMware\vCenter Server\Logs\vmdird\vmdird-syslog.log

Has information concerning the SSO LDAP instance named vmdir. Problems with ldap operations and replication within SSO can be found here.

C:\ProgramData\VMware\vCenter Server\Logs\vmdird\vdcrepadmin.log

C:\ProgramData\VMware\vCenter Server\Logs\vmdird\vmafdvmdirclient.log

C:\Program Data\VMware\CIS\logs\vmdird\vmdir.log

vCenter and PSC Ports

Ports can also be seen here in the vSphere Documentation Center

The table below shows all the ports which vCenter uses but multisite communication only needs a subset of these ports
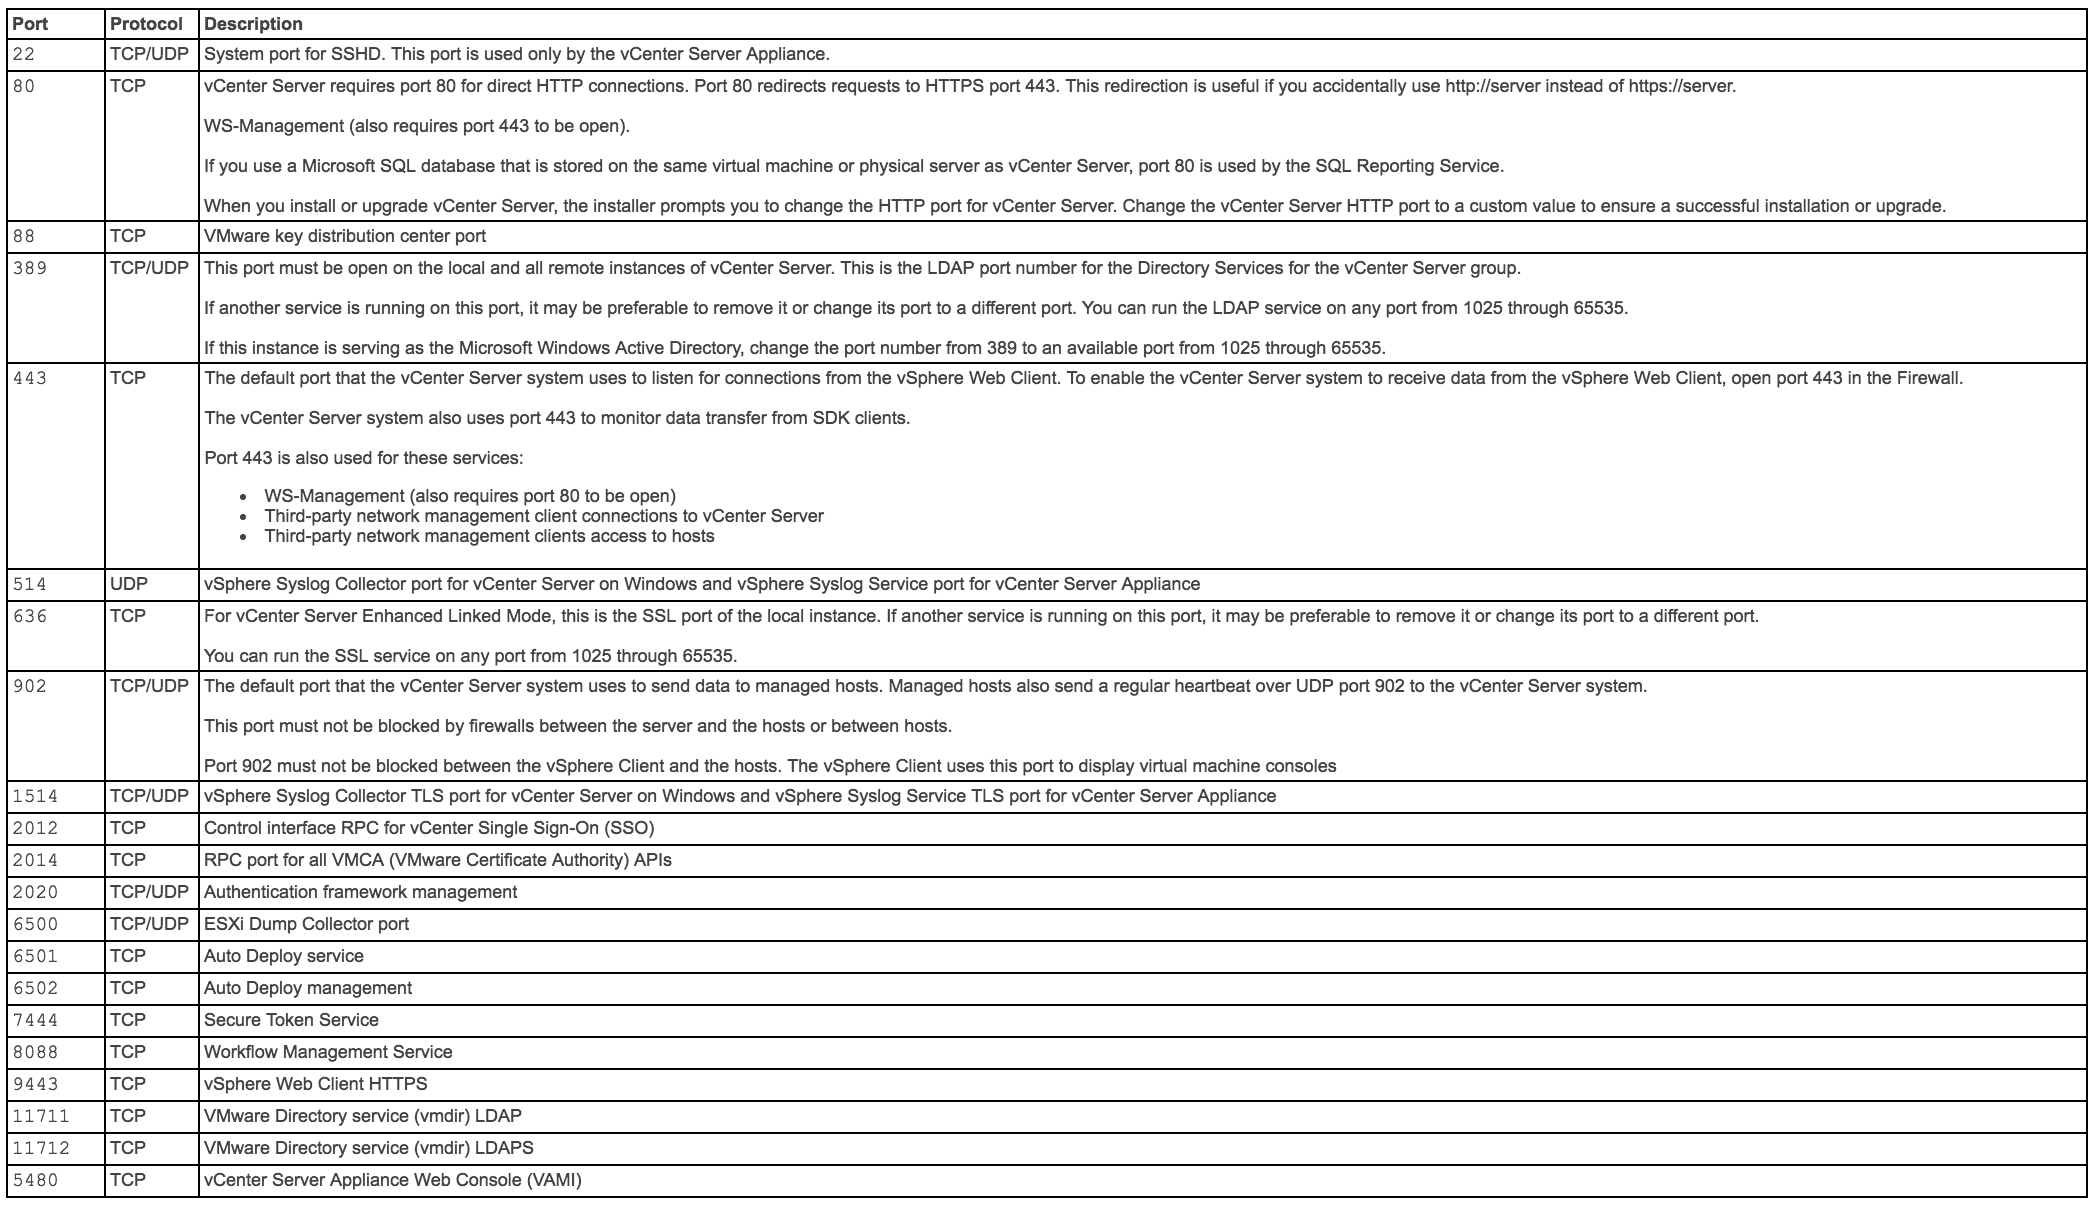
Screen Shot 2016-08-17 at 15.08.10

What ports need to be open between sites for PSC Multisite Mode?

Some situations exist where communication within the same SSO domain can be blocked by external firewalls. The ports which should be open are

PSC to PSC should be 389, 636, 2012, 2014, 2020 and 7444 (Plus 11711 and 11712 if using 5.5)

VC to VC should be 443

PSC to VC should be 443, 389, 636, 11711,11712 and 2012 (11711 and 11712 legacy)

vCenter to vCenter

techlabvcs004 vCenter to techlabvcs005 vCenter – 443

techlabvcs005 vCenter to techlabvcs004 vCenter – 443

PSC to PSC

techlabsso002 PSC to techlabsso003 PSC – 389, 636, 11711, 11712, and 2012 (11711 and 11712 legacy)

techlabsso003 PSC to techlabsso002 PSC – 389, 636, 11711, 11712, and 2012 (11711 and 11712 legacy)

vCenter to PSC 

techlabvcs004 vCenter to techlabsso002 PSC – 443, 389, 636, 2012, 2014, 2020, and 7444 (plus 11711 and 11712 if using 5.5)

techlabvcs004 vCenter to techlabsso003 PSC – 443, 389, 636, 2012, 2014, 2020, and 7444 (plus 11711 and 11712 if using 5.5)

techlabvcs005 vCenter to techlabsso002 PSC – 443, 389, 636, 2012, 2014, 2020, and 7444 (plus 11711 and 11712 if using 5.5)

techlabvcs005 vCenter to techlabsso003 PSC – 443, 389, 636, 2012, 2014, 2020, and 7444 (plus 11711 and 11712 if using 5.5)

Checking what sites and domains the PSCs are running on

You can use the following commands from the PSC to discover the SSO topology

SSO Site

  • VCSA: /usr/lib/vmware-vmafd/bin/vmafd-cli get-site-name –-server-name localhost
  • Windows: C:\Program Files\VMware\vCenter Server\vmafdd\vmafd-cli get-site-name –-server-name localhost

SSO Domain

  • VCSA: /usr/lib/vmware-vmafd/bin/vmafd-cli get-domain-name –-server-name localhost
  • Windows: C:\Program Files\VMware\vCenter Server\vmafdd\vmafd-cli get-domain-name –-server-name localhost

How can I see what PSC I am connected to?

Under the vCenter Server’s Advanced Setting, there is a property called “config.vpxd.sso.admin.uri” which specifies the PSC it is currently linked to

Home > vCenter Inventory Lists > Your vCenter Server > Manage > Advanced Settings > Look for “config.vpxd.sso.admin.uri

The second option is to use the vmafd-cli utility which is available on the vCenter Server itself. You will need to run the following command depending on your vCenter Server platform (VCSA or Windows)

  • /usr/lib/vmware-vmafd/bin/vmafd-cli get-ls-location –server-name localhost
  • C:\Program Files\VMware\vCenter Server\vmafdd\vmafd-cli get-ls-location –server-name localhost

SQL Database Password issues during the upgrade

Interestingly we had an error at one site due to special characters

https://kb.vmware.com/selfservice/microsites/search.do?language=en_US&cmd=displayKC&externalId=2125492

Installing vCenter Single Sign-On 5.5 fails if the password for administrator@vsphere.local contains certain special characters

https://kb.vmware.com/selfservice/search.do?cmd=displayKC&docType=kc&docTypeID=DT_KB_1_1&externalId=2060746


Setting up an F5 Load Balancer v12

arrow-of-double-point-pointing-different-directions_318-50733

Instructions

  • On the F5 website, click trial license and download your software and request a license to be emailed to you (F5 BIG-VE-LAB-LIC)

https://f5.com/products/trials/product-trials

F5a

  • Download the installer (ESXi Server)

F5b

  • Open vCenter and select File > Deploy OVF Template

F5c

  • Accept License agreement
  • Put in a name

F5dPNG

  • Check the resources

f55PNG

  • Choose the storage

f56PNG

  • Choose disk formatting options

f57PNG

  • Check network mappings
  • Management and Internal need to be on different networks so my machines will sit on the F5 network. I’m not worried about the oher 2 networks for now as I will use the management and the Internal only

F5e

  • Check details
  • Click Finish

F5f

  • Power on the appliance
  • Put in root as the username and default as the password
  • Type config and the following screen will open

vRAD133

  • Say No to automatically configured address
  • Put in your IP address, Subnet Mask and Gateway
  • You should now be able to log into the interface on https://youripaddress

vRAD134

  • The username is admin and the password is admin

vRAD135

  • You will need to activate the license which will have been emailed to you

vRAD136

  • Accept the license agreement

vRAD137

  • You should now see the below screen which shows you current resource reservations, License status and disk provisioning figures

vRAD138

  • Click Next and you will now see your device certificates screen

Screen Shot 2016-07-07 at 10.45.49

  • You will now be on the General properties screen
  • Add in your Hostname in FQDN format, Timezone and change the Root and Admin account password and any other details which require changing

Screen Shot 2016-07-07 at 10.49.55

  • It will ask you to Log out and in again
  • When you log back in you will be presented with a network screen
  • Click Next

F5g

  • Click Next on the page below

F5h

  • On the VLANs page put in a self IP, and subnet mask this needs to be an address on your internal network, in my case the F5 network
  • Put in a floating IP address on the same network
  • In Internal VAN configuration, select the 1.0 VLAN interface and select untagged and click Add

F5i

  • Interface 1.0 is the Management interface that was initialized during the deployment of the OVA and configured earlier in this document.
  • As mentioned earlier for the purpose of this document we will be utilizing only the Internal (Interface 1.1) Interface for load balancing
  • The Internal Interface or Interface 1.1 corresponds to Network Adapter 2 of our F5 appliance
  • You are now on the External Network Configuration screen
  • In External Network Configuration, Choose Select existing VLAN and select Internal
  • In External VLAN configuration delete anything in interfaces then add 1.2 as untagged

F5k

  • On the High Availability screen do the same as the above and Select existing VLAN as Internal
  • On the High Availability VLAN Configuration screen, delete the interface in interfaces and choose 1.3 and untagged and add

F5l

  • Add in the NTP Configuration. I just pointed to my domain controller.

F5m

  • Make sure the correct DNS Lookup Servers and DNS search Domain have been added.

vRAD143

  • Click Next, Next, Next until you get to the Finished screen

F5o

  • You will now be on the default F5 page and ready to set up load balancing

Setting up VMware vCenter PSCs with an F5 Load Balancer

Please see the below link to see the F5 in action 🙂

vSphere 6 Platform Services Controller HA Setups – High Availability with an F5 Load Balancer
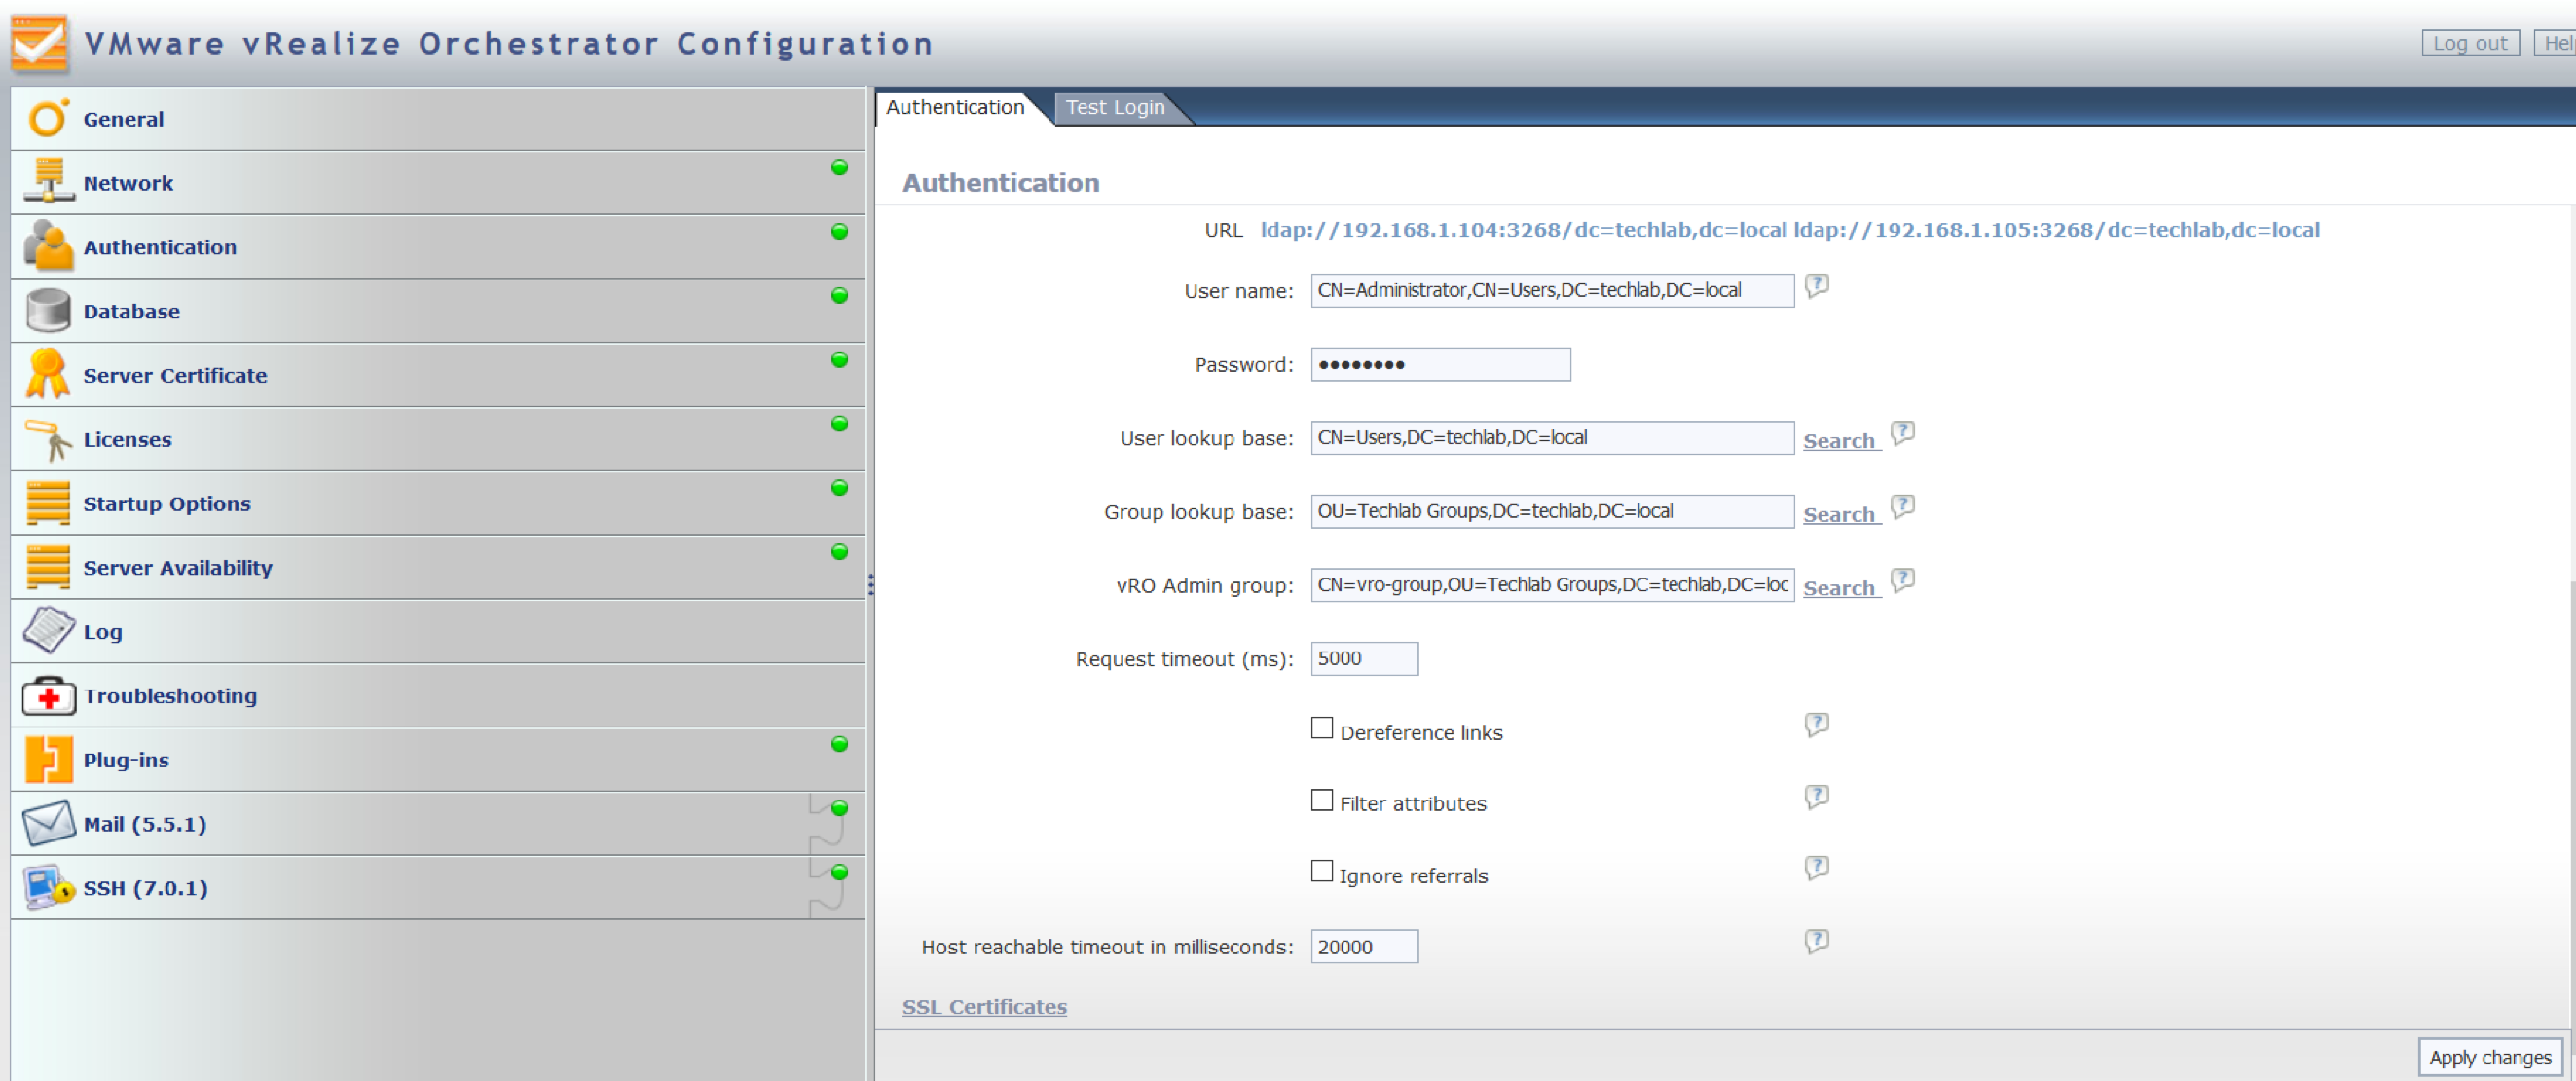
Useful Links

http://kaloferov.com/blog/configuring-vrealize-automation-load-balancing-using-f5-big-ip/

http://networkjutsu.com/f5-big-ip-ltm-ve-home-lab/

https://downloads.f5.com/esd/ecc.sv?sw=BIG-IP&pro=big-ip_v11.x&ver=11.6.0&container=Virtual-Edition