What do you need to install to use Quotas in Windows Server 2008 R2?
- File Server role
- File Server Resource Manager.
Installation
- Open Server Manager
- Click Add Roles
- Select File Services

- Next Click on Add Role Services in Server Manager
- Select File Server Resource Manager
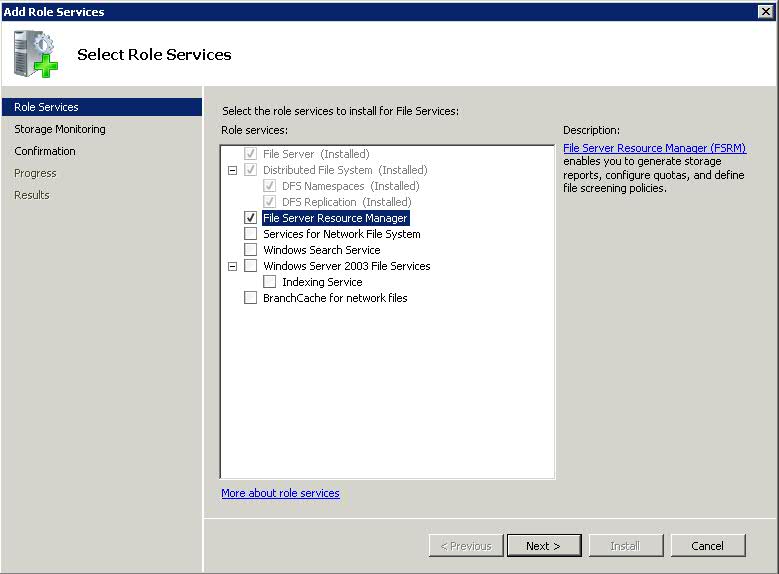
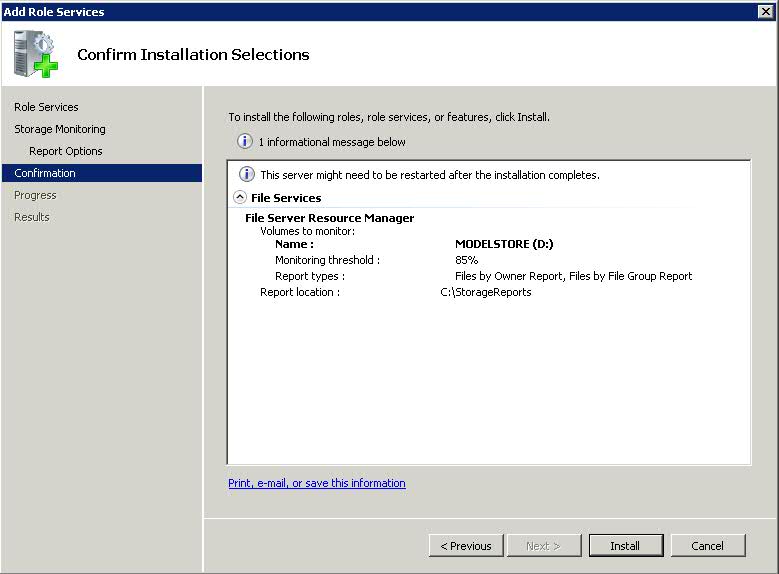
- Click Next. You will be on the Configure Storage Usage Monitoring
- Select the Drives you want to monitor
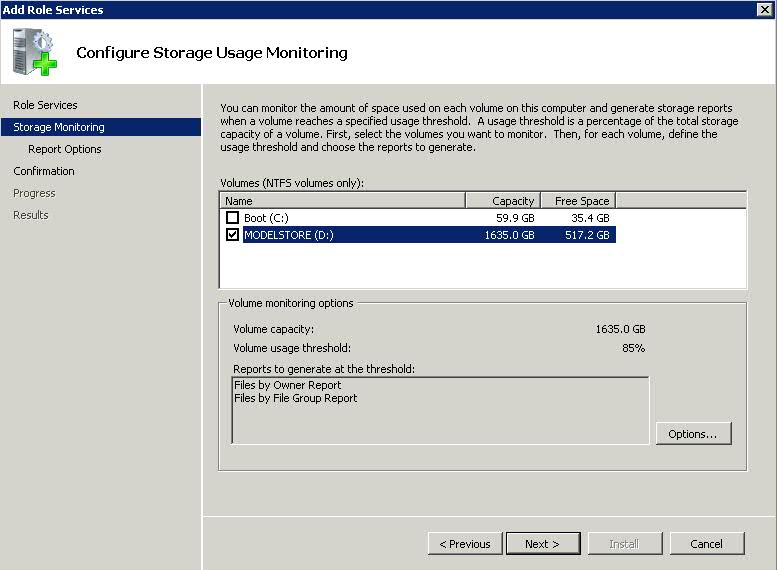
- Click Options and choose your volume usage threshold and reports to generate when this volume reaches the threshold
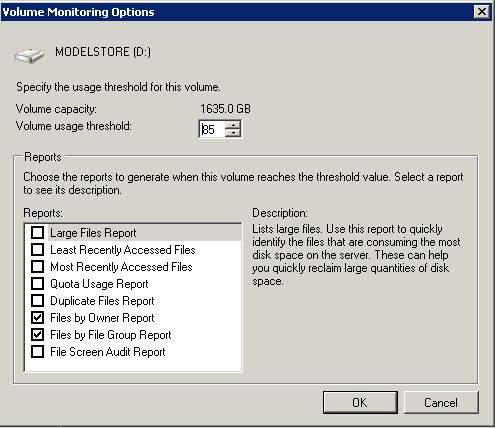
- Click Next
- Set Report Options
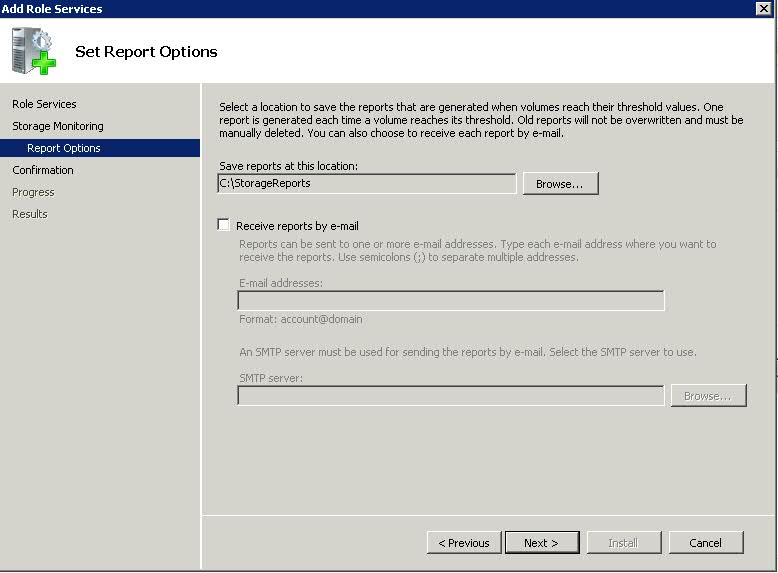
- Next and Install.
- Note: The server may need to be restarted after the installation completes
Tools > Options
- Click on Action
- Click on Configure Options
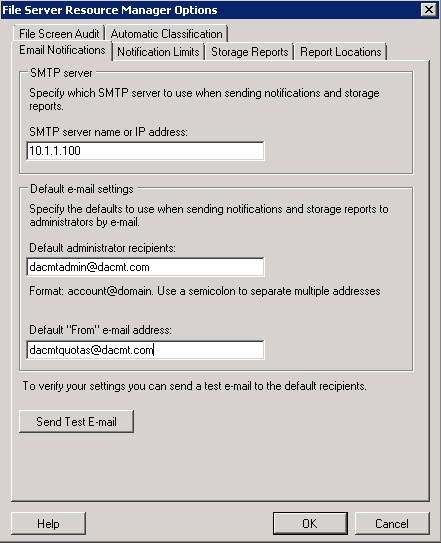
- Email Notifications is the first screen. Only examples below. Values don’t exist!
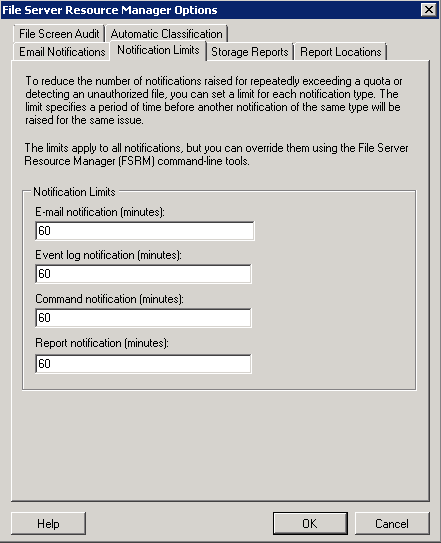
- Second tab is Notification Limits
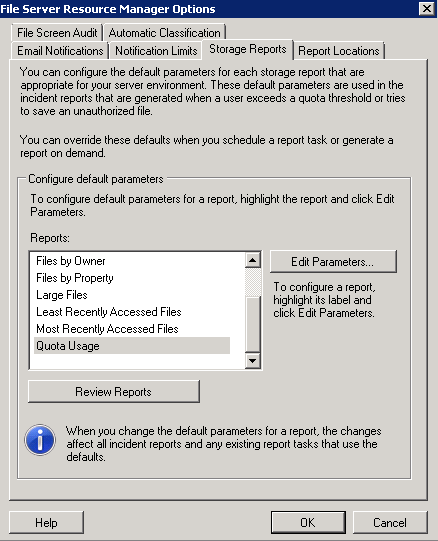
- Third tab is Storage Reports
- The Storage Reports tab allows you to customize default parameters on the various storage reports FSRM generates. These defaults can be overridden, but let you set baselines or defaults so you don’t have to constantly change your parameters if you’re using the same thing over and ove
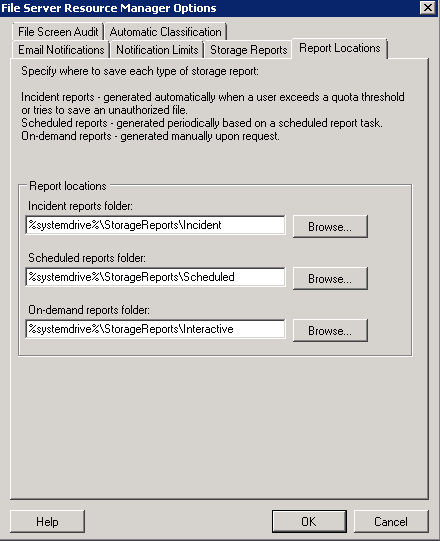
- Fourth tab is Report Locations
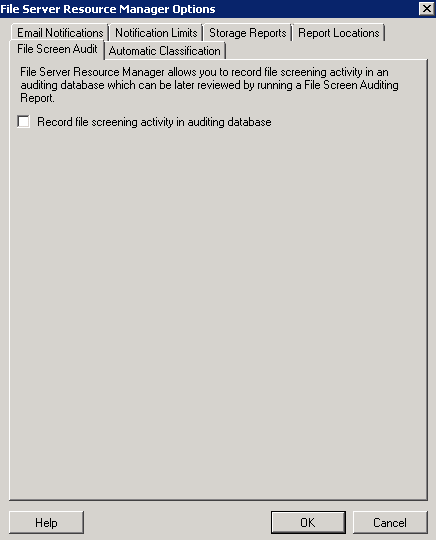
- Fifth tab is File Screen Audit. A file screen provides a flexible method to control the types of files that are saved on company servers. For example, you can ensure that no music files are stored in personal folders on a server, yet allow storage of specific types of media files that support legal rights management or comply with company policies.
- You can also implement a screening process to notify you by e-mail when an
unauthorized file type has been stored on a shared folder.
- Create, manage, and obtain information about file screens, which are used to
block selected file types from a volume or folder.
• Create file screening exceptions to override certain file screening rules.
• Create and manage file screen templates to simplify file screening
management.
• Create and manage file groups.
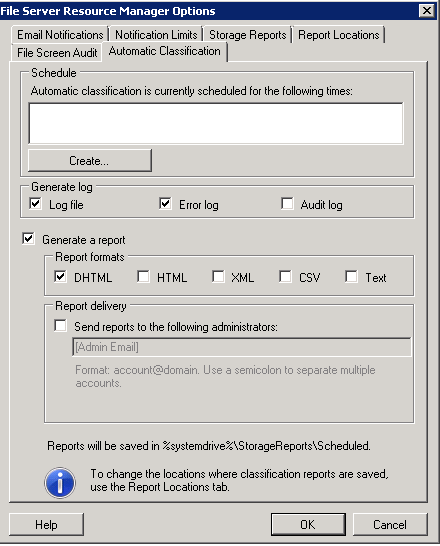
- Sixth tab is Automatic Classification
Hard and Soft Quotas
There are two kinds of quotas: soft quotas and hard quotas. A soft quota means that the disk space limits are not enforced. A user will be allowed to go over the quota and will not be prevented from adding additional data. Soft quotas are good for monitoring usage and generating notifications. A hard quota means that disk space limits are enforced. A user will not be allowed to store data beyond what has been allowed in the quota. Hard quotas are used for controlling disk space usage especially in SLA situations where customers pay for set blocks of storage
Quota Templates
Quota templates are designed to make the process of creating quotas easier. The basic idea behind these templates is that they allow you to develop a model for setting quotas. Once you have constructed a template, you can use that template as a way of applying a quota to the various folders on your server. Windows Server 2008 ships with half a dozen predefined templates, but you’ve always got the option of creating your own.
The important thing to remember with the templates is that they are just templates. You’re not stuck with any of the settings in the templates once you select one and create the quota. You can go in at any point and adjust the settings without being restricted to the settings from the template
To access the quota templates
- Open the File Server Resource Manager
- Navigate through the console tree to File Server Resource Manager | Quota Management | Quota Templates
- Upon doing so, the details pane will show you the predefined templates
- Click Edit Template and you will see the below
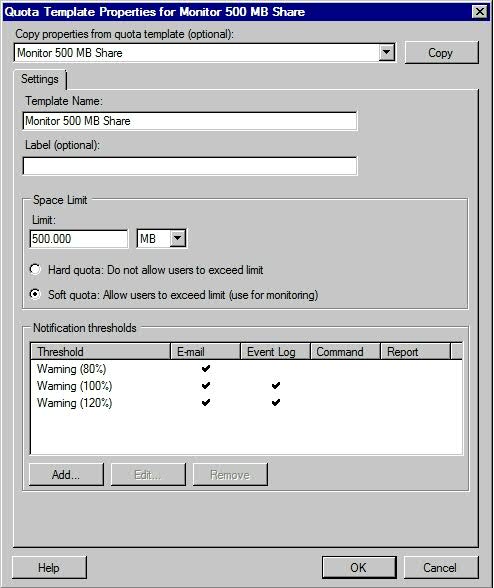
- Add Template Name
- Add Optional Label
- The next section of the dialog box allows you to define the space limit that is associated with the quota. When you define the space limit
- Next tell Windows whether the template will define a hard quota or a soft quota. A hard quota is a quota that users are not allowed to exceed. A soft quota is generally used for monitoring purposes and is not actually enforced.
- The last section in this dialog box allows you to control what happens at various threshold levels. In this particular case, an e-mail warning is generated when a user has used 80% of their allotted disk space. When the closure eventually met, an e-mail message is sent to the user, and an event log entry is also generated. Since the dialog box shown above applies to a soft quotas, we also have a warning that is generated when a user exceeds 120% of their allotted disk space. Once again, Windows sends an e-mail message and generates an event log entry. If you look closely at the dialog box though, you will notice that we also have the option of executing a command or of generating a report.
Implementing Disk Quotas
By now you should already be familiar with the File Server Resource Manager, because we used it to create and edit disk quota templates. This is also the tool that you will be using to implement disk quotas.
- Open the File Server Resource Manager, and then navigate through the console tree to Quota Management | Quotas.
- When you select that Quotas container, the Details pane will display any existing quotas. From the initial install wizard, you should see the disk you selected to monitor if you adjusted this. Example below after selecting Edit Quota Properties
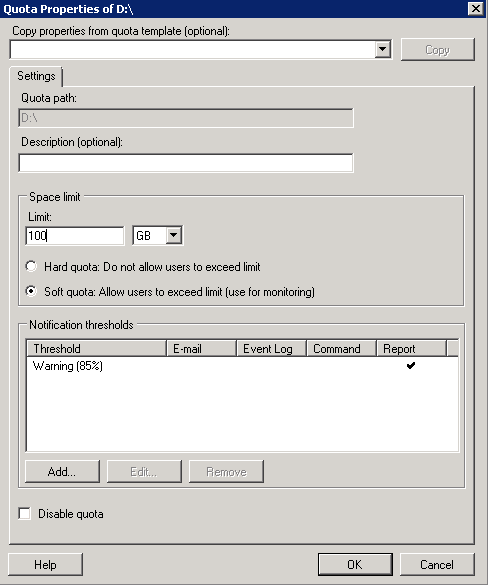
- You can add a Description
- You can change it from Hard to Soft
- You can also add another Notification Threshold by clicking Add under Notification Threshold
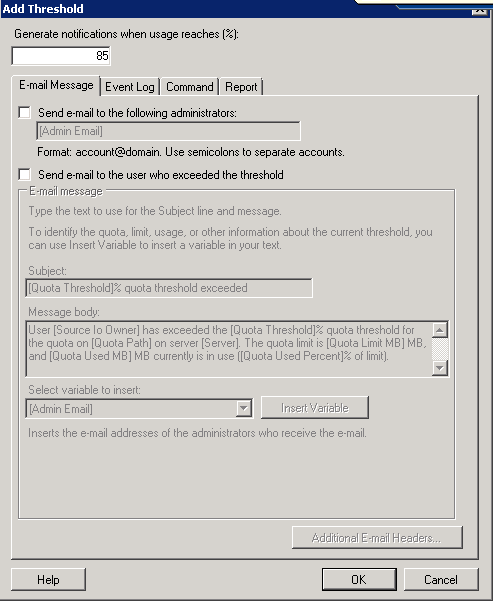
- To create a new quota, right-click on the Quota container and choose the Create Quota command from the shortcut menu. When you do, Windows will display the Create Quota dialog box, shown in below
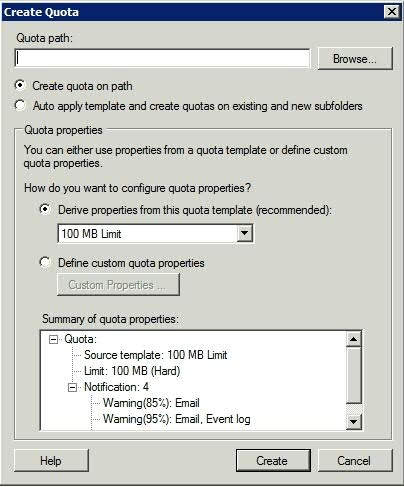
- The first thing that you have to provide is the file system path that you want to apply the quota to
- After you specify a path, you need to tell Windows whether you want to simply apply the quota to the path, or if you are planning on basing the quota template, and want to apply the template in a way that allows the quota to extend to both new and to existing subfolders
- The next section on the Create Quota dialog box allows you to choose whether you want to use an existing quota template, or whether you want to define a custom set of properties for the disk quota. Microsoft recommends that you use a quota template. If you want to use a quota template, then simply select the template that you want to use from the drop-down list.
- The bottom section of the dialog box provides a summary of the settings within the selected template.
- Creating a custom quota is also an option. To do so, just click the Define Custom Quota Properties button, and then click the Custom Properties button. This will provide you with an opportunity to enter the same types of information that you would normally provide when you are manually creating a quota template.
File Server Resource Manager Overhead
Quotas: Internal benchmarks have consistently shown I/O performance cost of less than 10% for tracking quotas on a volume. The cost remains fairly flat with volume size and number of quotas.
Screening: The I/O performance impact is negligible for this feature.
Reporting: Running reports can negatively impact server performance, though we do not have any hard benchmark data. It is recommended that storage reports be scheduled for off-peak hours.

