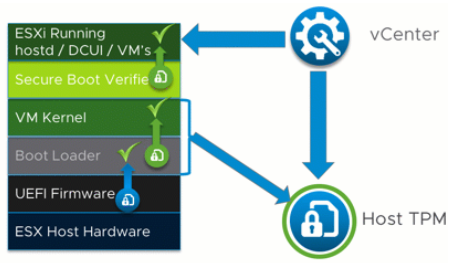
TPM (Trusted Platform Module) is an industry standard for secure cryptoprocessors. TPM chips are serial devices found in most of today’s desktops, laptops and servers. vSphere 6.7 supports TPM version 2.0. Physical TPM chips are secure cryptoprocessors that enhance host security by providing a trust assurance in hardware compared to software. A TPM 2.0 chip validates an ESXi host’s identity. Host validation is the process of authenticating and attesting to the state of the host’s software at a given point in time. UEFI secure boot, which ensures that only signed software is loaded at boot time, is a requirement for successful attestation. The TPM 2.0 chip records and securely stores measurements of the software modules booted in the system, which vCenter Server verifies.
What is the functionality of TPM?
Random number generator: prevents the platform from relying on software pseudo random numbers generators to generate cryptographic keys (except for the primary keys generated from seeds in 2.0.
Symmetric and asymmetric cryptographic keys generator
Encryption/decryption.
It also provides secure storage capabilities in two memory types, Volatile and NonVolatile memory (NVRAM) for the following elements:
Primary Storage Key (known as Storage Root Key in TPM 1.2). This is a root key of a key hierarchy for key derivation process and stored in persistent memory
Other entities, such as Indexes, Objects, Platform Configuration Registers (PCR), Keys, Seeds and counters.
What is vTPM?
The Virtual Trusted Platform Module (vTPM) feature lets you add a TPM 2.0 virtual cryptoprocessor to a virtual machine. A vTPM is a software-based representation of a physical Trusted Platform Module 2.0 chip.
Differences Between a Hardware TPM and a Virtual TPM
You use a hardware Trusted Platform Module (TPM) as a cryptographic coprocessor to provide secure storage of credentials or keys. A vTPM performs the same functions as a TPM, but it performs cryptographic coprocessor capabilities in software. A vTPM uses the .nvram file, which is encrypted using virtual machine encryption, as its secure storage
A hardware TPM includes a preloaded key called the Endorsement Key (EK). The EK has a private and public key. The EK provides the TPM with a unique identity. For a vTPM, this key is provided either by the VMware Certificate Authority (VMCA) or by a third-party Certificate Authority (CA). Once the vTPM uses a key, it is typically not changed because doing so invalidates sensitive information stored in the vTPM. The vTPM does not contact the CA at any time
A physical TPM is not designed for 1000’s of VM’s to store their credentials. The “Non-Volatile Secure Storage” size is tiny in kilobytes.
How does a physical TPM work with vCenter?
When the host boots, the host loads UEFI which checks the Boot Loader and ESXi starts loading. VMKBoot communicates with TPM and information about the host is sent to vCenter to check everything is correct.
How does a vTPM work?
The specific use case for a vTPM on vSphere is to support Windows 10 and 2016 security features.
How do you add a vTPM?
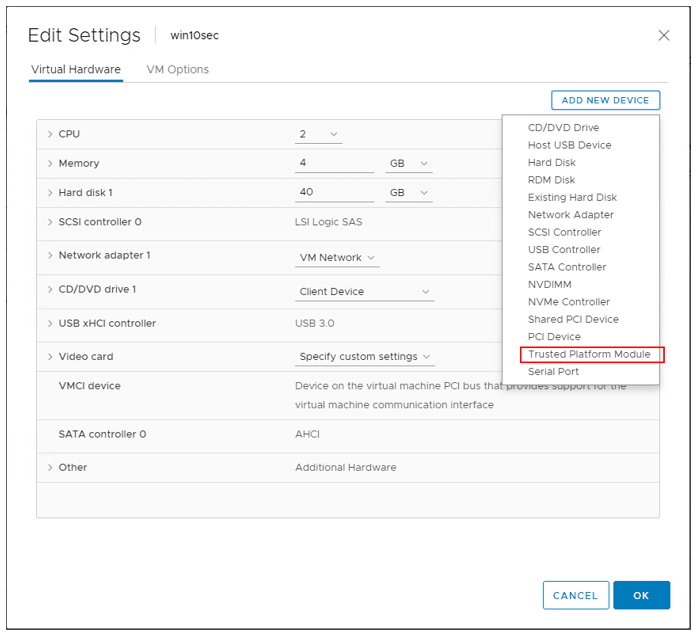
You can add a vTPM to a virtual machine in the same way you add virtual CPUs, memory, disk controllers, or network controllers. A vTPM does not require a physical Trusted Platform Module (TPM) 2.0 chip to be present on the ESXi host. However, if you want to perform host attestation, an external entity, such as a TPM 2.0 physical chip, is required.
Note: If you have no KMS Server added to vCenter Server, even with a new virtual machine that has EFI and secure boot enabled, you will not see the option to add the Trusted Platform Module.
When added to a virtual machine, a vTPM enables the guest operating system to create and store keys that are private. These keys are not exposed to the guest operating system reducing the virtual machine’s attack surface. Enabling a vTPM greatly reduces this risk of compromising a guest O/S. These keys can be used only by the guest operating system for encryption or signing. With an attached vTPM, a third party can remotely attest to (validate) the identity of the firmware and the guest operating system.
You can add a vTPM to either a new virtual machine or an existing virtual machine. A vTPM depends on virtual machine encryption to secure vital TPM data. When you configure a vTPM, VM encryption automatically encrypts the virtual machine files but not the disks. You can choose to add encryption explicitly for the virtual machine and its disks.
You can also back up a virtual machine enabled with a vTPM. The backup must include all virtual machine data, including the *.nvram file which is the storage for the vTPM. If your backup does not include the *.nvram file, you cannot restore a virtual machine with a vTPM. Also, because the VM home files of a vTPM-enabled virtual machine are encrypted, ensure that the encryption keys are available at the time of a restore.
What files are encrypted and not encrypted?
The .nvram file
Parts of the VMX file
Swap, .vmss, .vmsn, namespacedb
DeployPackage (used by Guest Customization)
Log files are not encrypted.
Virtual machine requirements:
EFI firmware (Set in VM Settings > VM Options > Boot Options > Firmware
Hardware version 14
vCenter Server 6.7 or greater.
Virtual machine encryption (to encrypt the virtual machine home files).
Key Management Server (KMS) configured for vCenter Server (virtual machine encryption depends on KMS)
Windows Server 2016 (64 bit)
Windows 10 (64 bit)
Can you vMotion a machine with vTPM?
Yes, you can but Cross vCenter vMotion of an encrypted VM is not supported.
Does the host need a physical TPM to run a virtual TPM?
With vTPM, the physical host does not have to be equipped with a TPM module device. Everything is taken care of by the software by using the .nvram file to contain the contents of the vTPM hardware. The file is encrypted using virtual machine encryption and a KMS server.
This release of VMware vSphere 7.0 includes VMware ESXi 7.0 and VMware vCenter Server 7.0. There are almost too many features to mention so I have summarized some of the new tools available below.
Deployment and Planning Tools
vSphere Hardware and Guest Operating System Compatibility Guides. An online reference that shows what hardware, converged systems, operating systems, third-party applications, and VMware products are compatible with a specific version of a VMware software product.
VMware Product Interoperability Matrices. Provides details about the compatibility of current and earlier versions of VMware vSphere components, including ESXi, vCenter Server, and other VMware products.
VMware Configuration Maximums. When you configure, deploy, and operate your virtual and physical equipment, you must stay at or below the maximums supported by your product. The limits presented in the Configuration Maximums tool are tested limits supported by VMware.
Lifecycle management
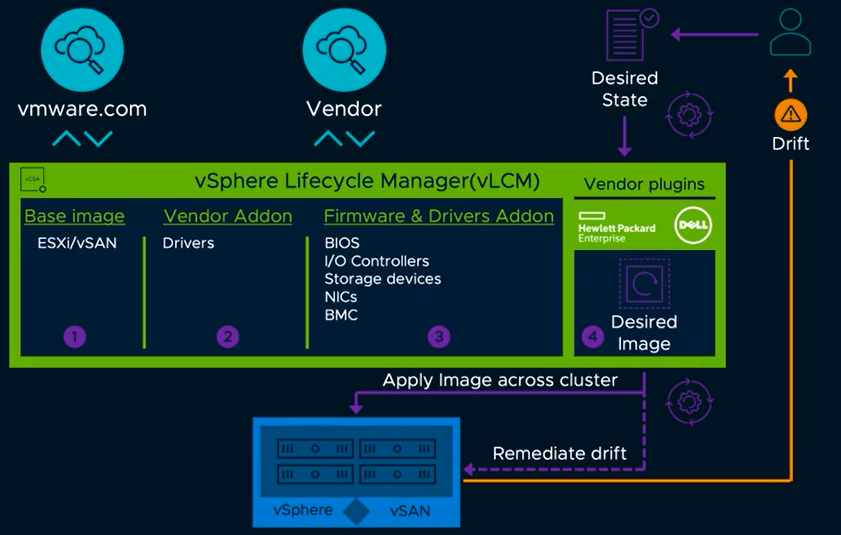
Lifecycle management for larger customers has proved tricky at times and VMware Update Manager is sometimes not the best tool for lifecycle management at scale. VMware is introducing vSphere Lifecycle Management (VLCM), which will replace the vSphere Update Manager (VUM) The new approach will be able to upgrade the hypervisor including firmware and drivers for physical hardware. The most important capabilities of vLCM are to achieve a desired state model, integration with hardware vendors for full-stack firmware updates and drivers, and simplified OEM image customizations, along with automatic compatibility checks.
vCenter Profiles
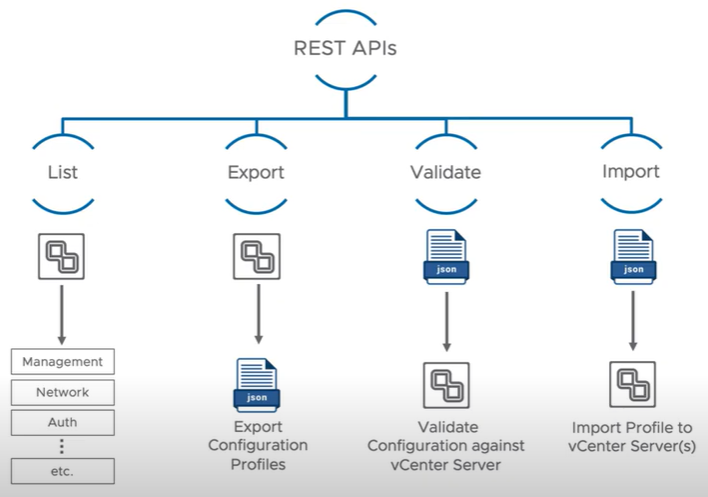
This is a brand new API feature allowing an administrator to export existing vCenter server configurations and import them them into another vCenter. vCenter Server profiles consist of 4 REST APIs. List Validate, Export and Import.
List returns a listing of the configurations that can be imported or exported. Export can export the vCenter configuration as a JSON file for editing. Validate can be used by administrators to validate the configuration which will be implemented on the target vCenter server. Import can then be run to pass the desired configuration changes to the target vCenter Server. These changes do not require a reboot.
With vCenter Server 7.0 profiles you can easily revert to the last known good configuration by importing a valid vCenter server profile.
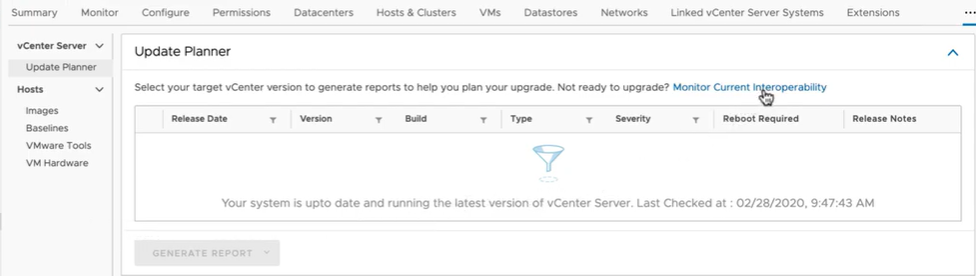
vCenter Server Update Planner
vCenter Server Update Planner helps to plan, discover, and upgrade customer environments successfully. You will receive notifications when an upgrade or update is available directly in the vSphere Client. With vCenter Server 7, you can run what if scenarios with pre-checks which will show whether your environment would be affected by the Upgrade and also shows which applications need to upgraded first and to which version.
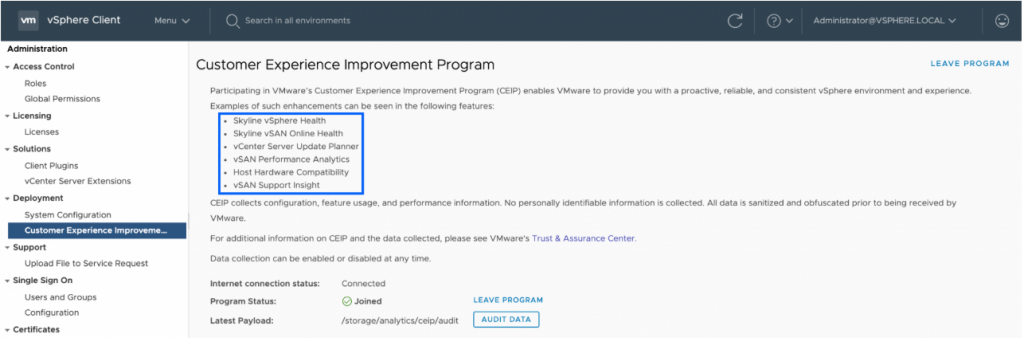
vCenter Server must have access to the internet to participate in CEIP either directly or via proxy
Update Planner (along with; Skyline Health for vSphere, vSAN Performance Analytics, vSAN Support Insight, Host Hardware Compatibility, etc.) uses this path to query VMware Product Interoperability Matrices online and report findings via the vSphere Client
vCenter Server Planner is accessed from the Updates tab
Content Library
The updates to Content Library include added administrative control and versioning support. It provides centralized management for virtual machine templates, virtual appliances, ISO images, and scripts. You can now use Check-In and Check-Out actions, as well as template versioning, allowing an administrator to make changes and keep track of VM Template versions
Multihomed vCenter
vCenter Server NIC multihoming is now supported with vCenter Server 7. This will allow more options and flexibility for management networks and network segmentation
Upgrade and converge PSCs in one operation
External PSCs are converged during the upgrade operation.
vMotion enhancements
In previous versions the vMotion process installs Page Tracers on all vCPUs to monitor changed memory pages. Leveraging all vCPUs on large VMs takes up a huge amount of resources. vSphere 7 installs the Page Tracer on just one vCPU which reduces the impact and resource utilization. vSphere 7 also makes changes to the way the memory bitmap is transferred during the switch-over phase. Previously the entire bitmap was copied, but now it’s only transfers a compacted bitmap which takes significantly less time.
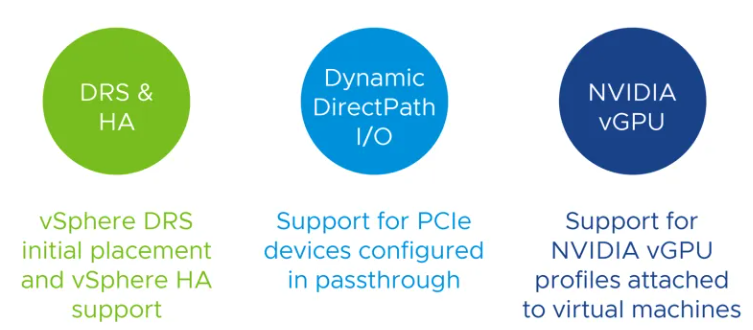
Assignable hardware
VMware has included Bitfusion in vSphere 7. Bitfusion, a company VMware acquired in 2019, is able to take advantage of GPU virtualization for the purposes of AI/ML use cases. vSphere 7 now allows you to assign hardware that you used to be locked to a specific host for. NVIDIA vGPU and Dynamic DirectPath I/O devices can now be set on a VM and are fully supported across the cluster with DRS and HA
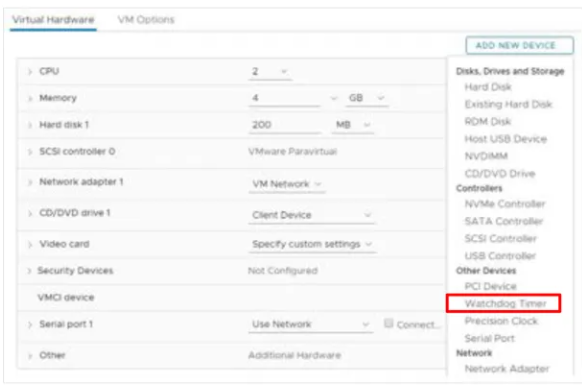
Watchdog timer
Hardware version 17 introduces the Watchdog Timer to monitor your VM’s guest OS. If it detects that the VM is hung or down, it will take an action to restart the VM. The feature is based on the following Microsoft specifications: Watchdog Resource Table (WDRT) and Watchdog Action Table (WDAT). It’s supported on Windows Servers and Linux guests.
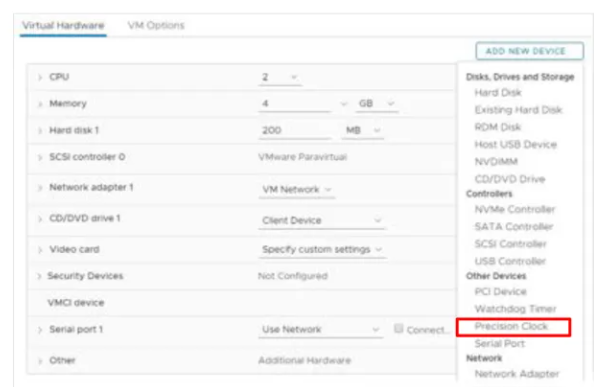
Precision time control
This is a feature which is enabled on the host and VM. and it will keep sub-millisecond accuracy on the VM based on the host time. it is useful for financial and scientific virtual machines and requires hardware version 17. You can choose between NTP and PTP
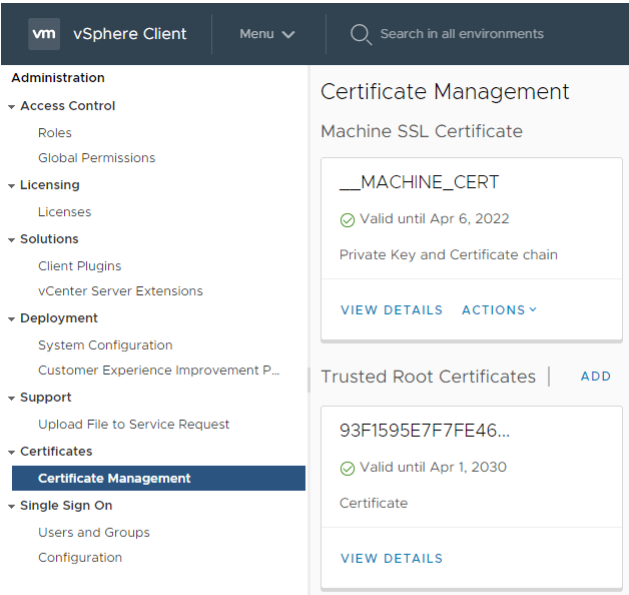
vCenter certificates
vSphere 7 has now changed the way we renew and replace certificates which will make it far easier to manage. You can now renew a VMware CA-signed certificate, replace a VMware CA-signed certificate, replace the current certificate with a third-party CA-signed certificate and you can create a new Certificate Signing Request all through the vCenter GUI. Previously this was done via the certificate management tool in the CLI.
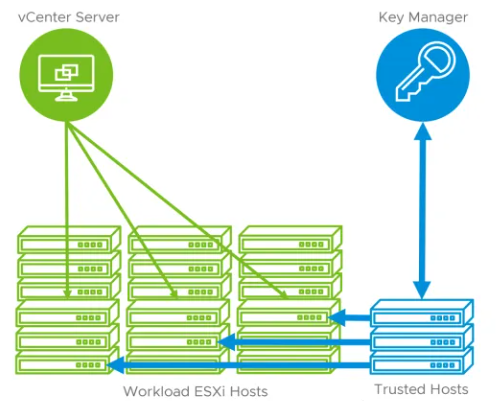
vSphere Trust Authority
The vSphere Trust Authority creates a hardware root of trust to secure the environment using a hardware Trusted Platform Module (TPM) and a separate Trust Authority Cluster which involves having extra hosts to do this. You will also need an external Key Management Server. The Trust Authority Cluster becomes the Trusted Key Provider over the cluster and in the Workload ESXi hosts. This approach allows the Trust Authority Cluster to attest the entire workload cluster and the vCenter managing it
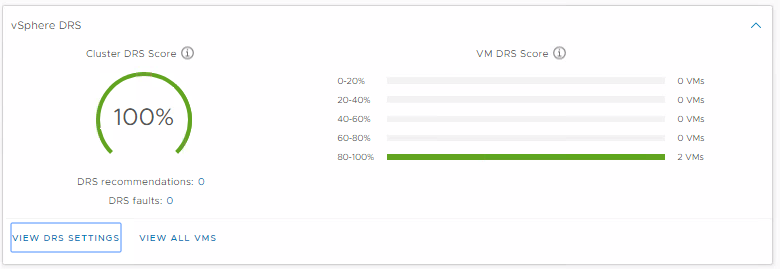
Improved DRS
The Distributed Resource Scheduler (DRS) now runs every minute and bases the decision to move a VM by looking at the actual workload inside the VM and checking if it would run better on another host. It does not base the score on the relative load on the hosts, it bases it on the workload of the VM. Performance and capacity metrics are used in the algorithm Obtaining a VM DRS score of 80-100% shows that there is mild to no resource contention.
You can view the scores at the Cluster summary level
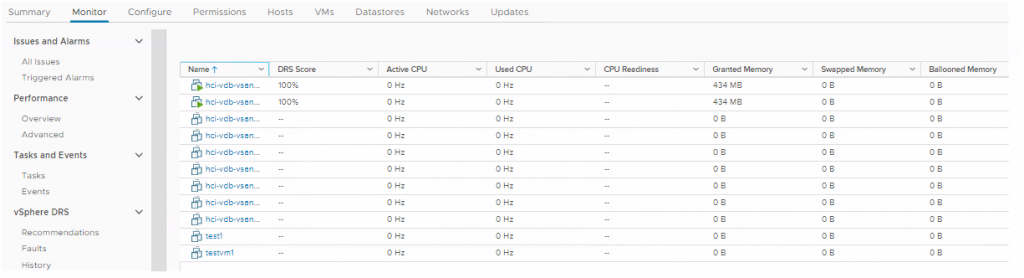
And at the Monitor > VM DRS Score level when the cluster is selected.
vSphere 7 with Kubenetes
vSphere 7 is available in two editions
vSphere 7 – The next generation of vSphere for non-container apps
vSphere 7 with Kubernetes – The new generation of vSphere for containerized applications. This is available through VMware Cloud Foundation
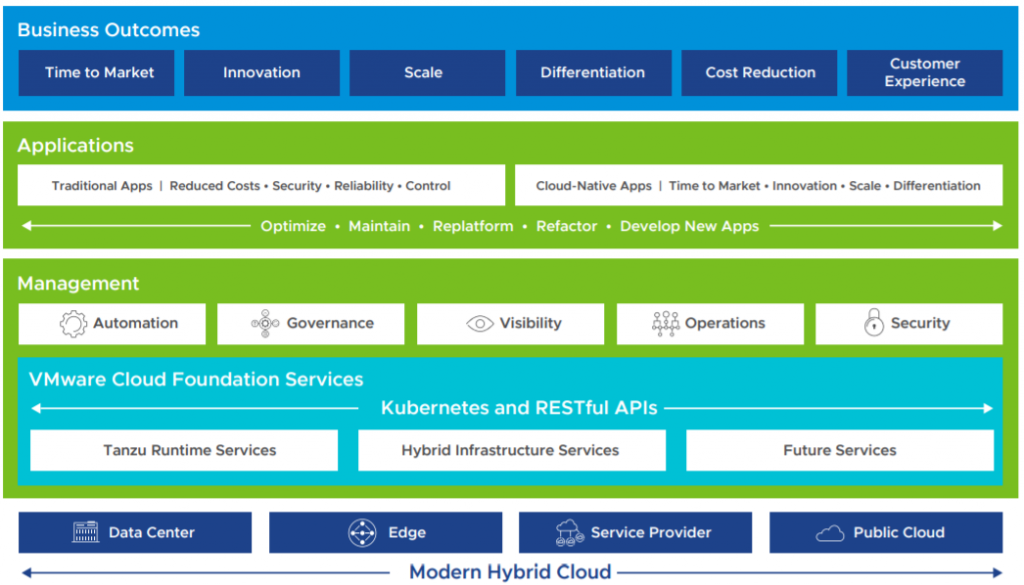
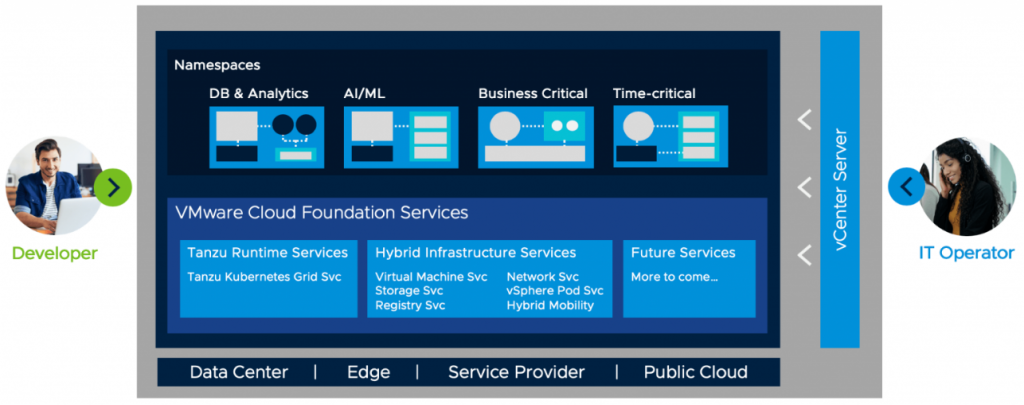
With vSphere 7 with Kubernetes, VMware delivers embedded Tanzu Kubernetes Grid Service for fully compliant and conformant Kubernetes capabilities for containerized applications. This approach provides Kubernetes APIs to developers, enabling CI/CD processes across a global infrastructure including on-premises data centers, hyperscalers, and Managed Service Providers (MSP) infrastructure
VMware Cloud Foundation Services consists of two families of services: Tanzu Runtime Services and Hybrid Infrastructure Services.
Tanzu Runtime Services allow developers to build applications using the upstream Kubernetes distributions.
Tanzu Kubernetes Grid Service The Tanzu Kubernetes Grid Service allows developers to manage consistent, compliant and conformant Kubernetes clusters
Hybrid Infrastructure Services allow developers to provision and work with infrastructures such as compute, storage, and networking.
vSphere Pod Service The vSphere Pod Service lets developers run containers directly on the hypervisor for improved security, performance, and manageability.
Storage Service The Volume Service allows developers to manage persistent disks for use with containers, Kubernetes and virtual machines.
Network Service The Network Service allows developers to manage Virtual Routers, Load Balancers and Firewall Rules.
Registry Service The Registry Service allows developers to store, manage and secure Docker and OCI images.
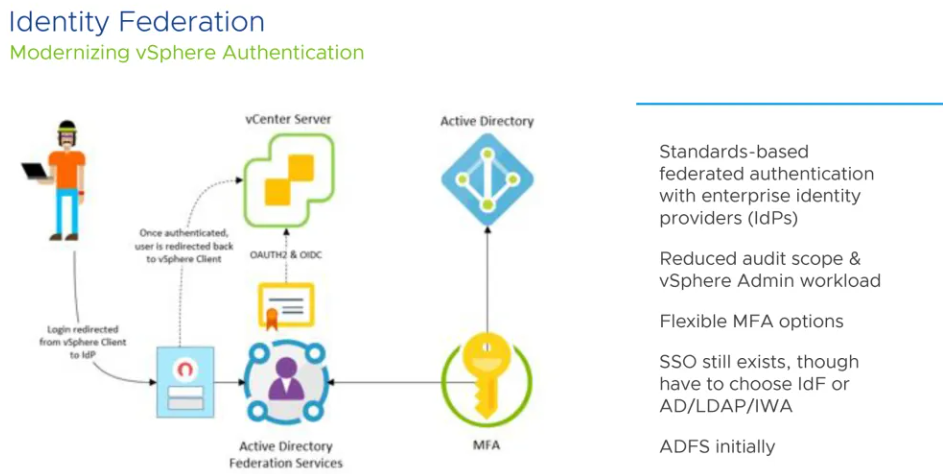
Identity Federation
vCenter Server supports identity provider federation for Microsoft Active Directory Federation Services (ADFS) It also acts as an identity provider to manage identity information for users. It also provides authentication services that can be leveraged by applications.
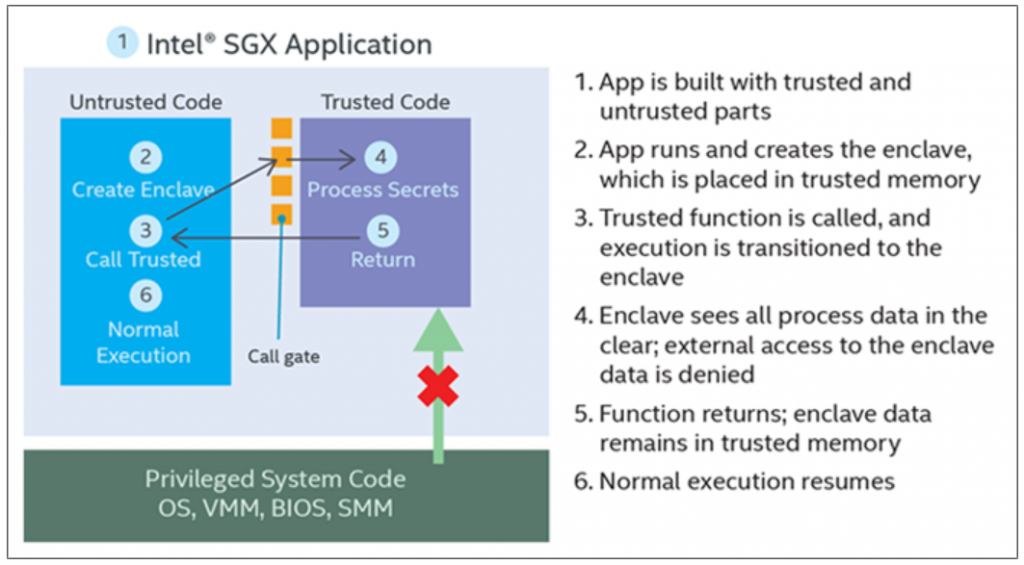
vSGX / Secure Enclaves
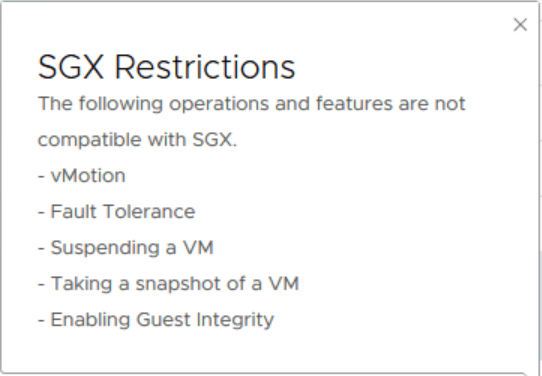
When an application has something it needs to keep secret such as an encryption key or personally identifying information then that the secret is visible to a lot of layers. the secret is stored in system memory and in the CPUs. Next, the hypervisor can see it followed by the guest OS and the application. Intel’s Software Guard Extensions (SGX) are used to keep secrets from the guest OS and the hypervisor. This functionality is now exposed to VMs runing hardware version 17 where you can enable it in the VM settings. While there are various processes in place that protect one application from another, and the OS from an unprivileged user, an application has virtually no protection from processes running with higher privileges, including the OS itself. Malware which gains administrative privileges has unrestricted access to all system resources and all applications running on the system. Sophisticated malware can target an application’s protection schemes to extract encryption keys and even the secret data itself directly from memory.
There are restrictions to using this feature though as listed below
vSAN enhancements
vSphere Lifecycle Manager
VMware vSAN 7.0 benefits from the new vSphere Lifecycle Manager functionality. vLCM delivers a single lifecycle workflow for the full HCI server stack: vSphere, vSAN, drivers and OEM server firmware.
Native File services
vSAN 7 now offers file and block persistent volumes. This allows vSphere administrators to enable NFS 3 and 4.1 shares, vVols. These can support encryption and snapshots. VMware vSAN 7.0 will also provide file-level persistent storage for containers
Increased Visibility into vSAN Used Capacity.
Replication objects are now visible in vSAN monitoring for customers using SRM and vSphere Replication. The objects are labelled “vSphere Replicas” in the “Replication” category.
Uninterrupted Application Run Time.
vSAN 7 provides improvements to the uptime in stretched clusters by introducing the ability to redirect VM I/O from one site to another in the event of a capacity imbalance. Once the disks at the first site have freed up capacity, customers can redirect I/O back to the original site without disruption.
VM Encryption cloning enhancements
In vSphere 7, encryption is now supported when cloning a VM or creating a VM from a template. When cloning an unencrypted VM, you can encrypt the destination VM and when cloning an encrypted VM, you can decrypt the destination VM. Also when cloning an encrypted VM, you can recrypt the destination VM by shallow rekeying. Note that the VM to be cloned must be powered off.
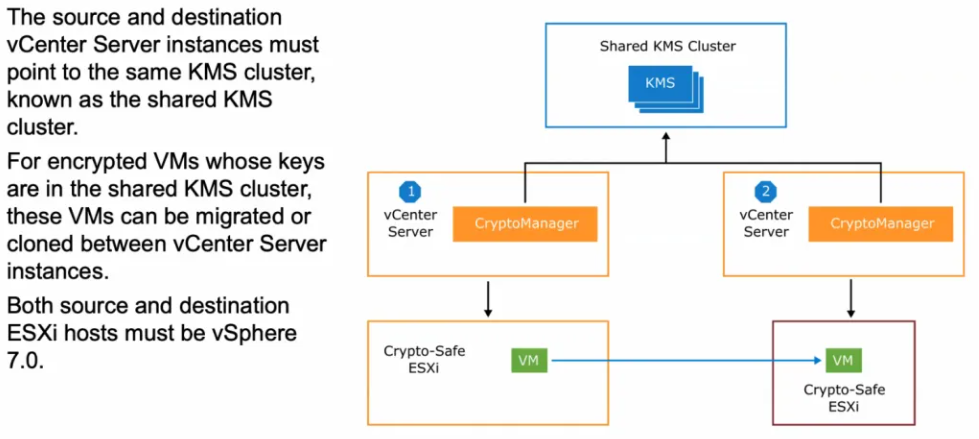
Encrypted VM cross vCenter migration
Cross vCenter server migrations of an encrypted VM is now possible as long as both vCenters can see the same KMS Server and are all vSphere 7.0 hosts. VMs can be powered on or off to migrate.
I have a vSphere 6.7U3 cluster using vSAN and VM encryption. I need to move the vSAN cluster to another vCenter. The new vCenter is set up with the same Thales KeySecure KMS server as the original vCenter I am migrating from. The machines all copy over fine and will boot and be accessible however they cannot vMotion between any other hosts. This is because the KeySecure server keys for these VMs are permissioned to the old vCenter and not the new vCenter. While doing a test of 3 VMs means we could simply reapply permisssions to these 3 VMs on the KeySecure KMS server, this is definitely not practical for 1000s of VMs. What I’m going to test today is a shallow and deep rekey of my test VMs to see if I can force them to rekey using the new vCenter.
This module only works for vSphere products that support VM Encryption. E.g. vSphere 6.5 and later.
All the functions in this module only work for KMIP Servers.
Install the latest version of Powershell and PowerCLI.
Import this module by running: Import-Module -Name “location of this module”
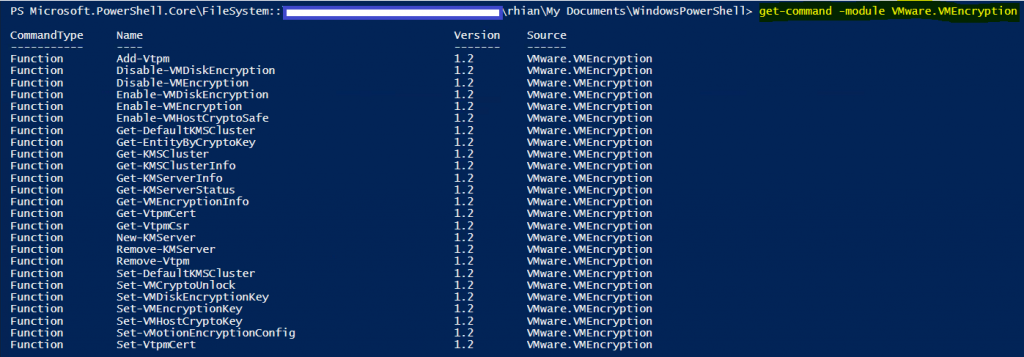
Get-Command -Module VMware.VMEncryption to list all available functions.
Steps to get started
You want to save the VMware.VMEncryption modules in the correct place that PowerShell expects to find the module. to check this, type $env:PSModulePath in Powershell
Open PowerShell and type import-module VMware.VMEncryption
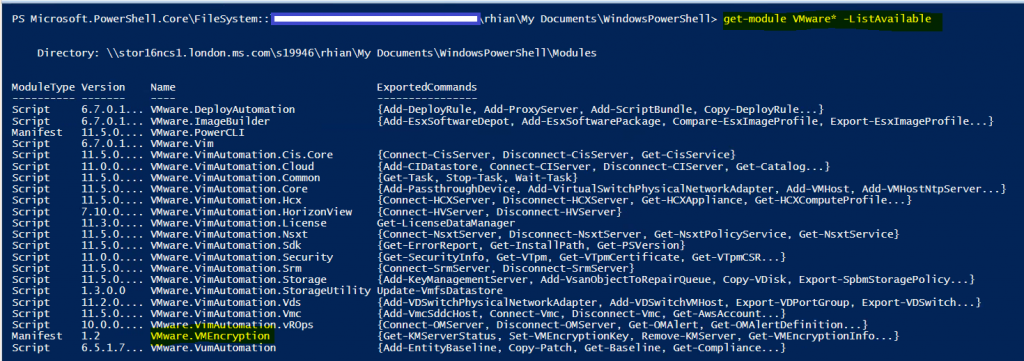
To check if it has loaded and also to check any other modules, type get-module VMware* -ListAvailable
Connect to your new vCenter using the connect-viserver <vcenter-server> command
Run the following command to do a shallow rekey
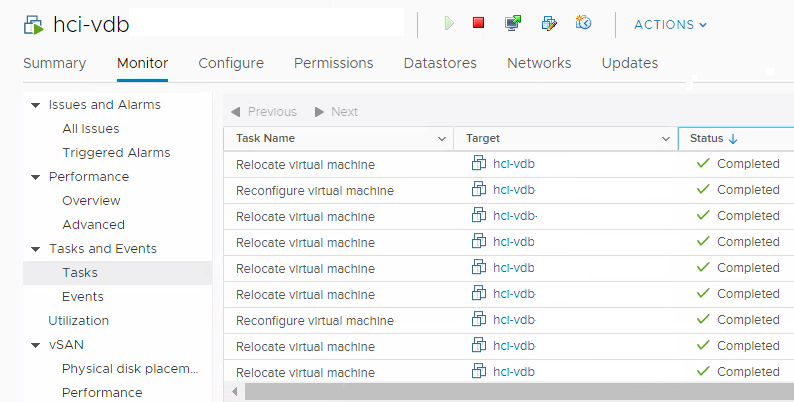
Test a vMotion – All looks good.
Automating the shallow rekeying of VMs in this situation
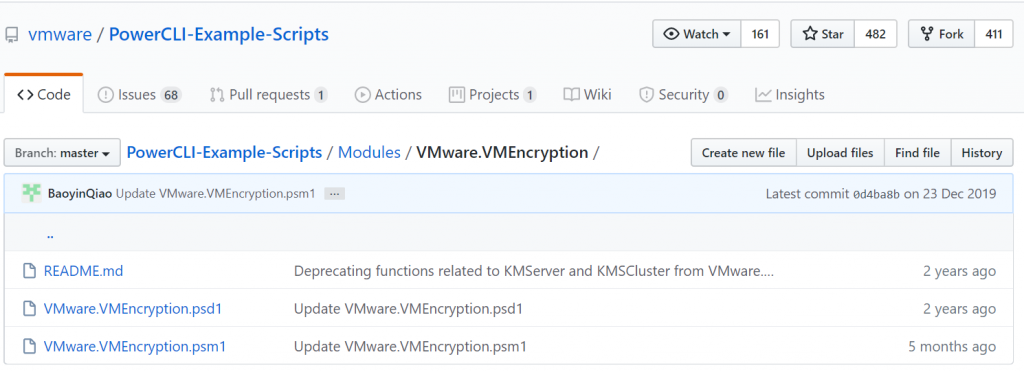
All credit to James Doyle for providing a blog 2 PowerCLI scripts on GitHub to apply the rekeying on all VMs needed in a cluster. Details below
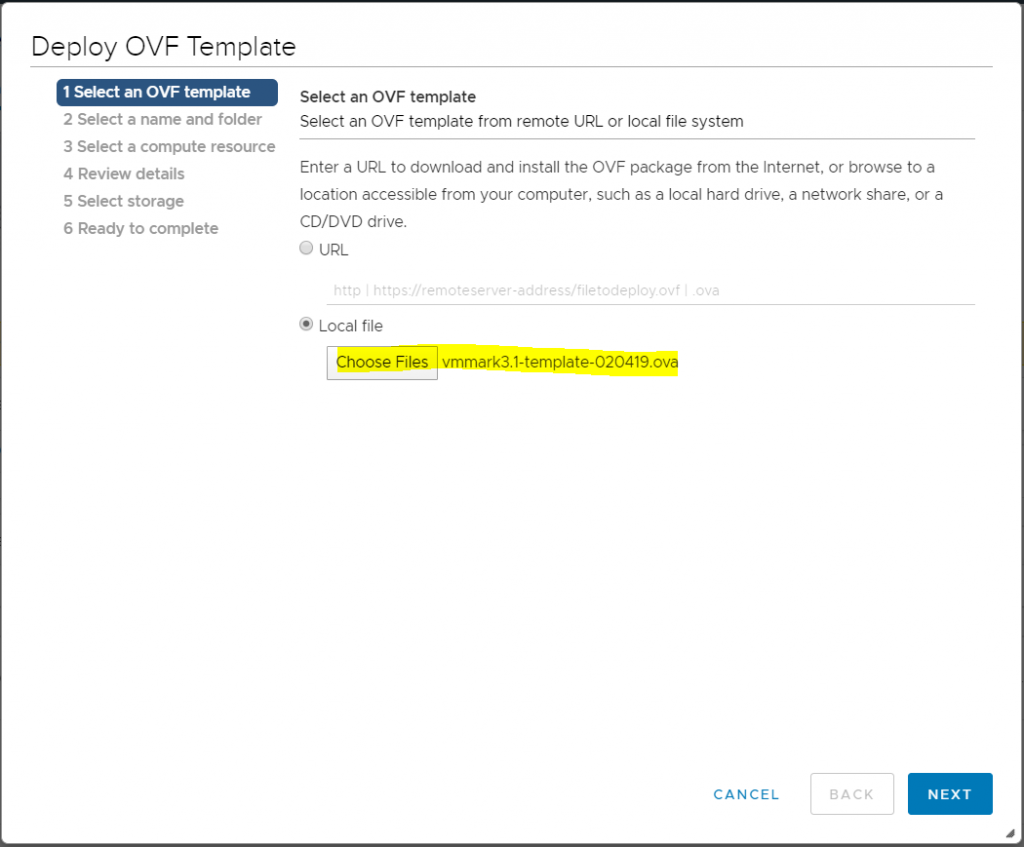
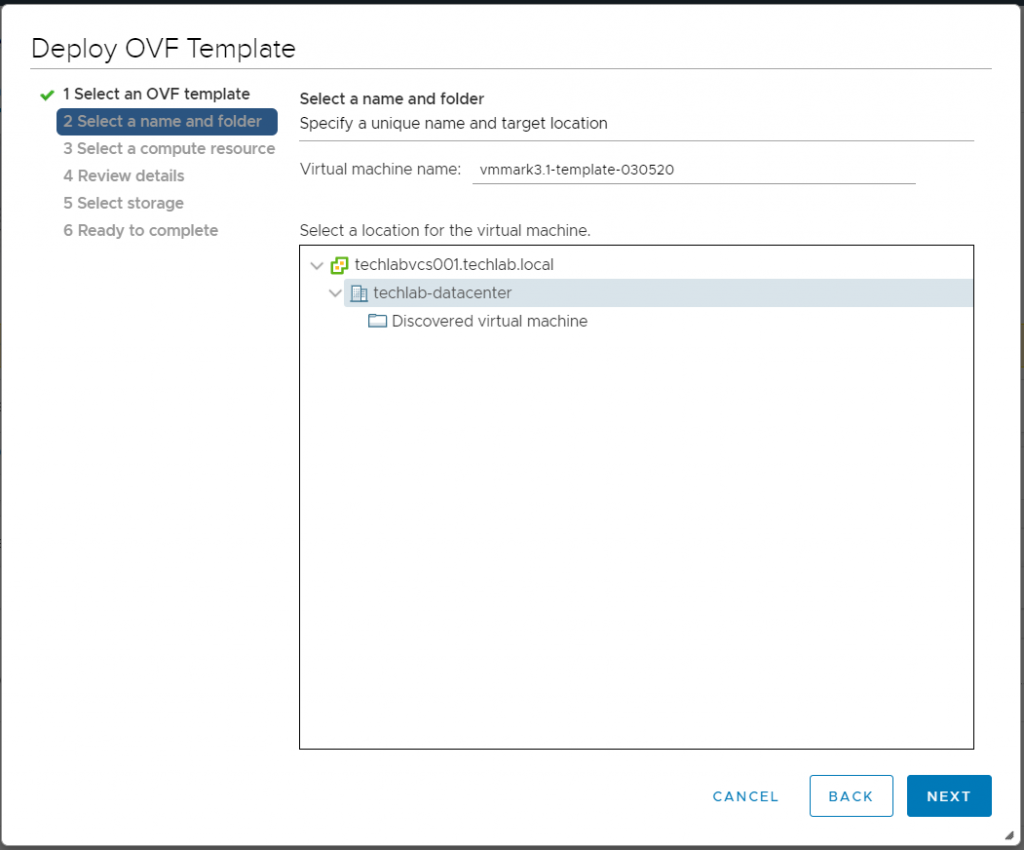
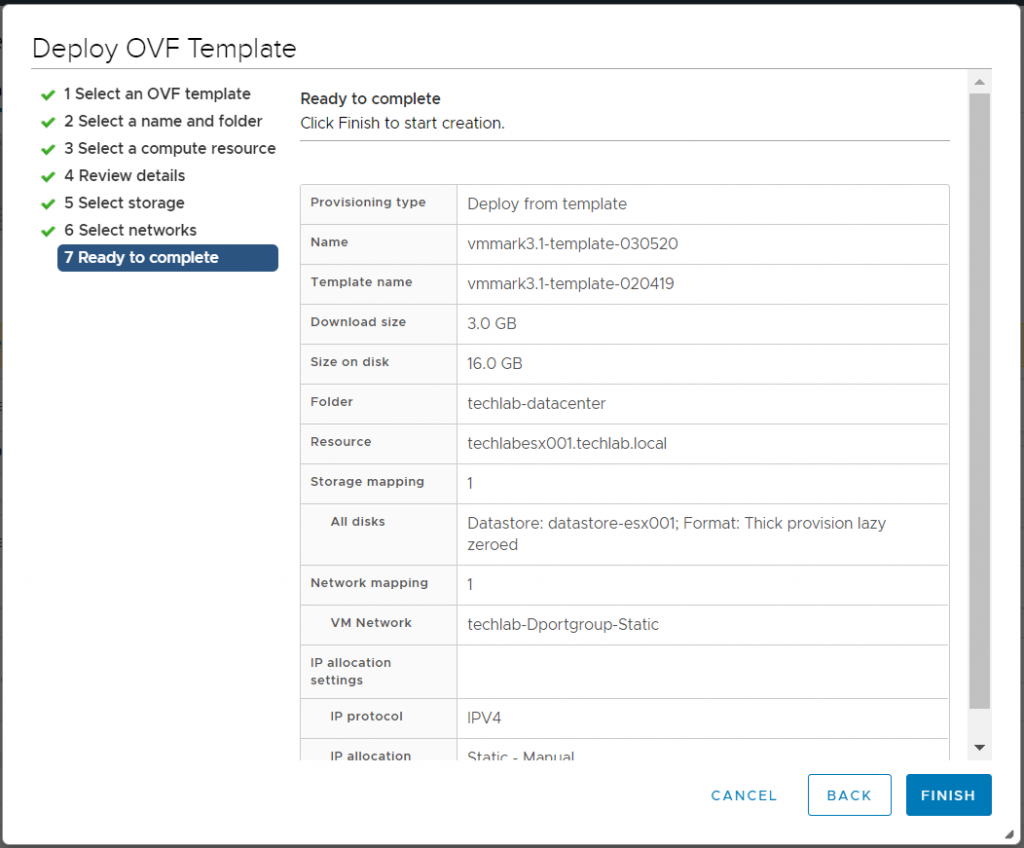
Using the latest VMmark3 template (vmmark3.1-template-020419.ova) as the source, deploy a new VM and name it VMmark3.1.1-template-030520. (See “Deploy the VMmark Template” on page 46 of the VMmark User’s Guide for detailed instructions.)
Name it VMmark33.1.1-template-030520
Make sure the new template VM (VMmark3.1.1-template-030520) has network connectivity that allows you to reach it via SSH and note the IP address for use in subsequent steps.
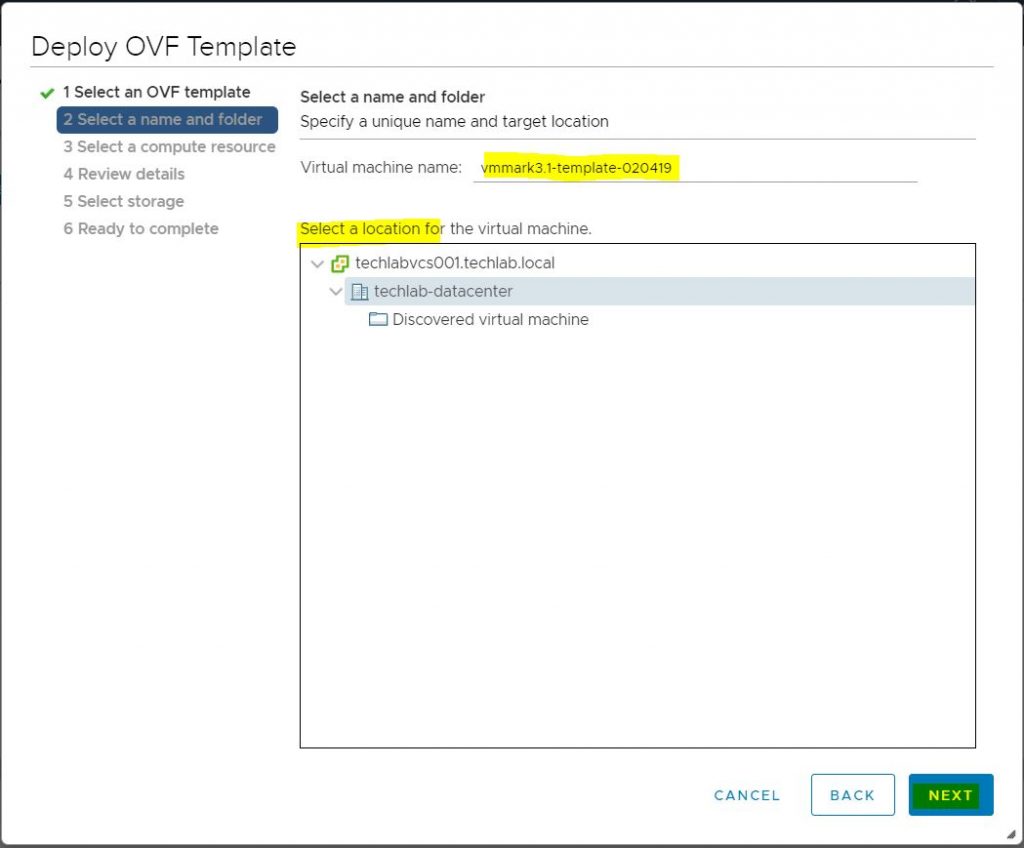
Select a name and folder
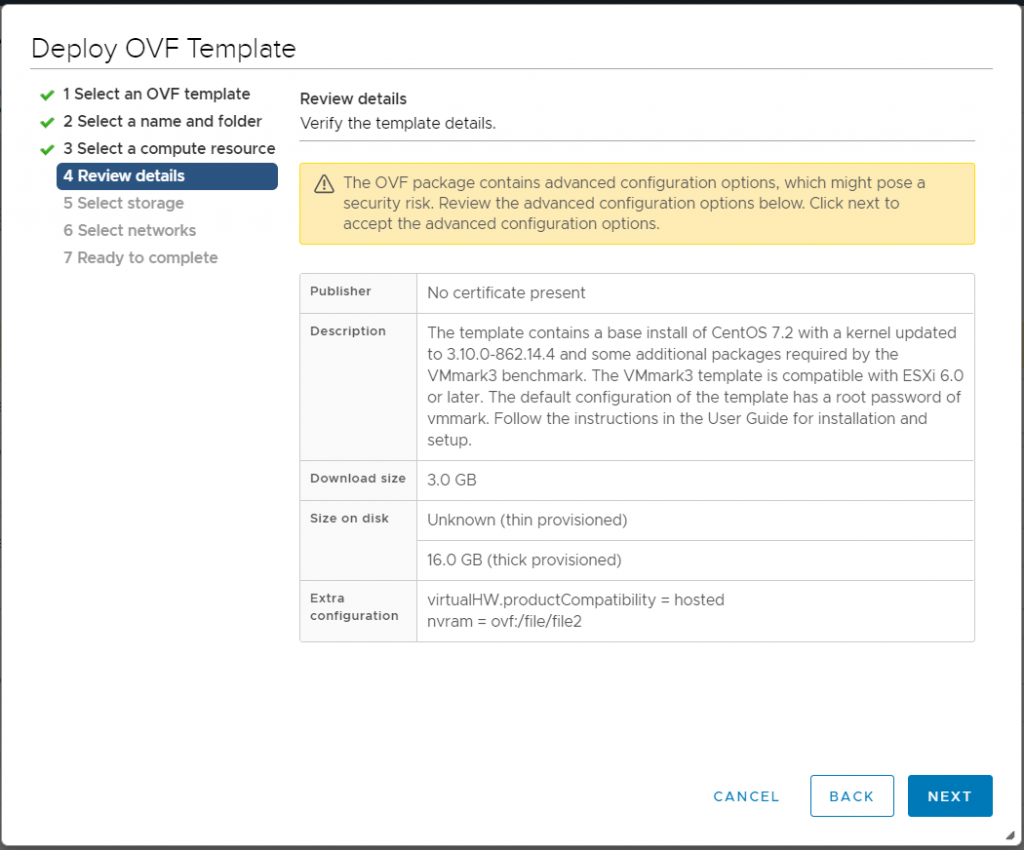
Review details
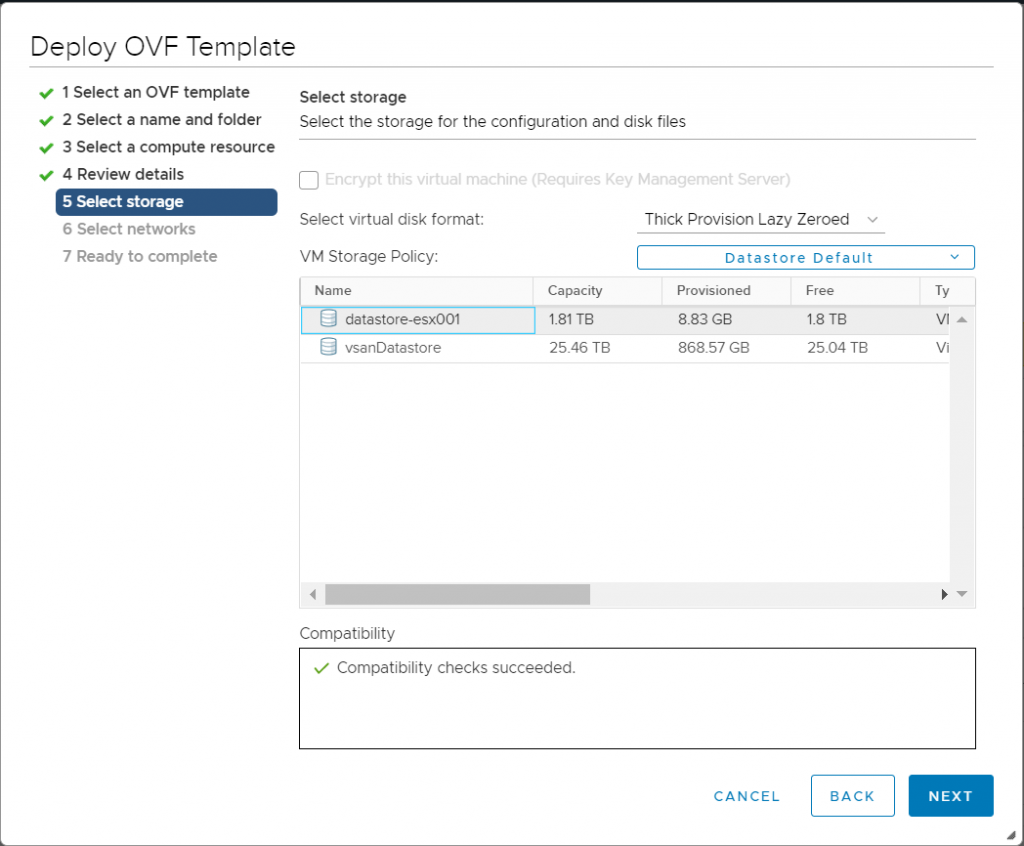
Select storage
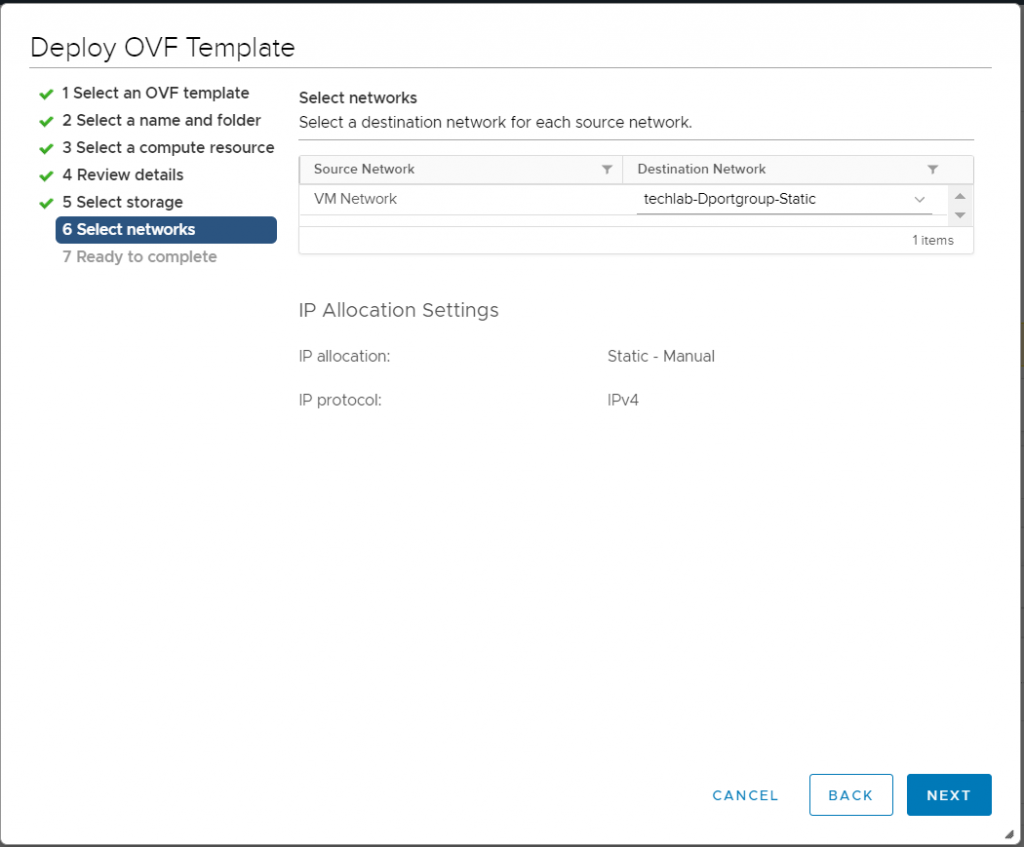
Select networks
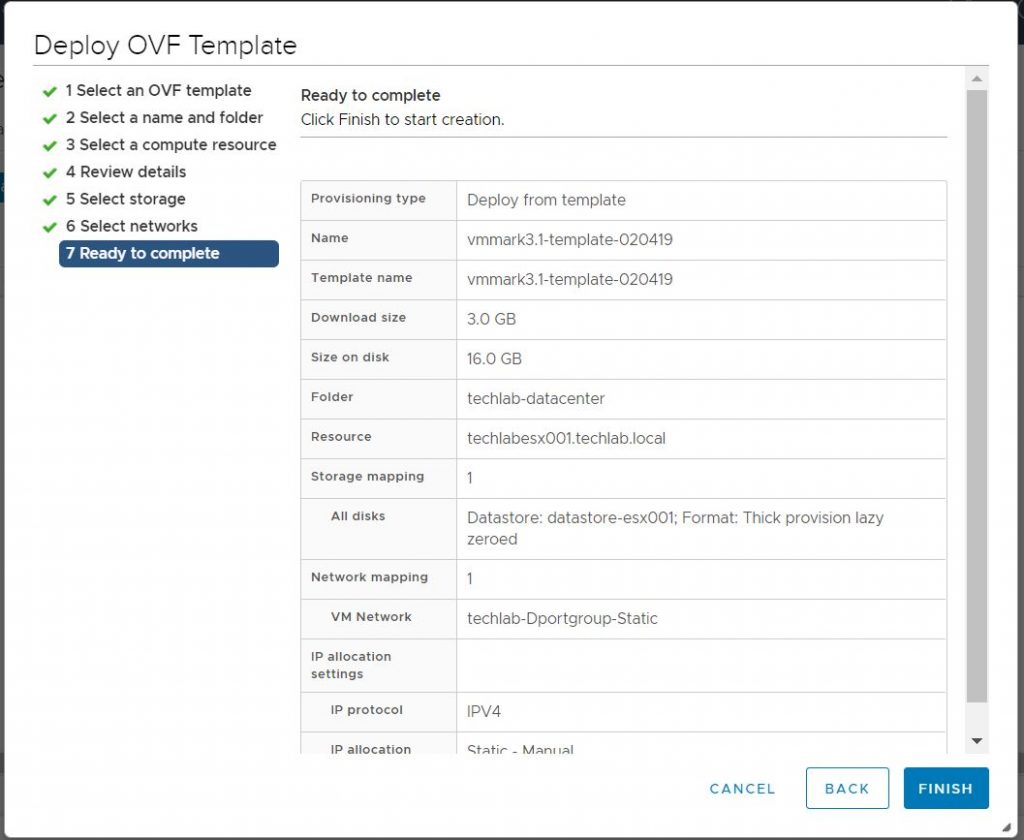
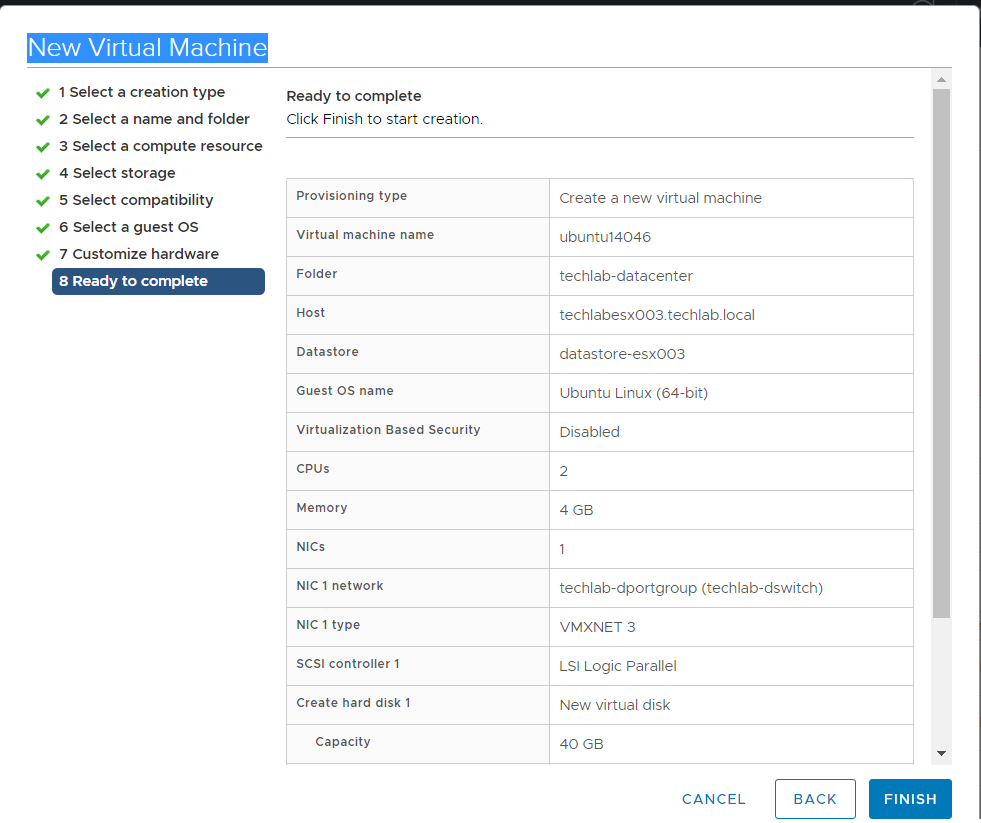
Check the Ready to Complete screen
Power on the new VMmark3.1.1-template-030520 VM
SSH into the new VM: ssh root@vmmark3.1.1-template030520-IP-address
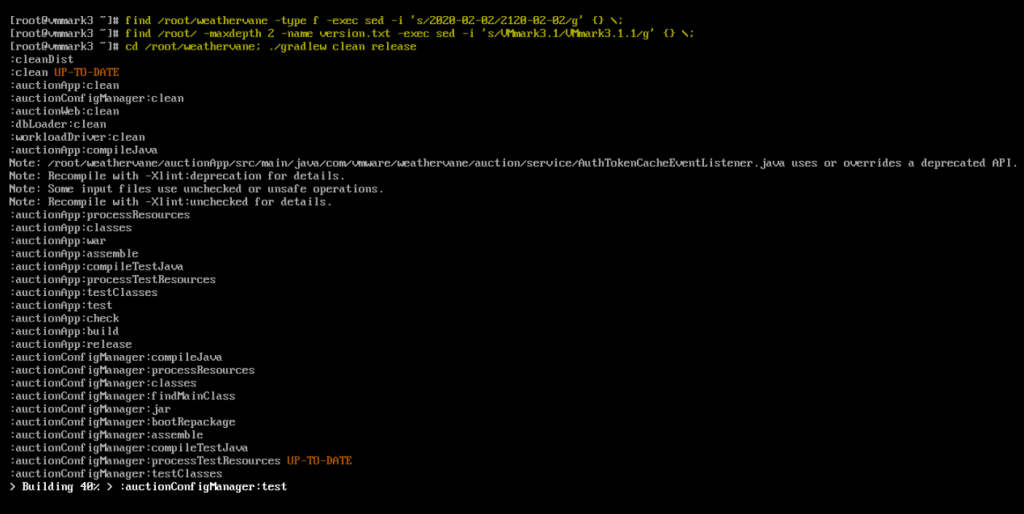
Run the following commands
find /root/weathervane -type f -exec sed -i ‘s/2020-02-02/2120-02-02/g’ {} \; find /root/ -maxdepth 2 -name version.txt -exec sed -i ‘s/VMmark3.1/VMmark3.1.1/g’ {} \; cd /root/weathervane; ./gradlew clean release
You should see the below when the first 3 commands have completed
Run the following command: cp /root/weathervane/dist/*.war /opt/apache-tomcat-auction1/webapps/
Shut down VMmark3.1.1-template-030520.
Delete the following VMs:
• All existing workload client VMs (but do not delete the prime client).
• All Weathervane workload VMs (that is, all VMs beginning with Auction or Elastic).
Power on all remaining workload VMs (that is, all VMs beginning with DS3 or Standby) and wait until the boot process has completed and they are all online.
Reprovision the client VMs and Weathervane workload VMs you just deleted:
a. In the VMmark3.properties file update the provisioning source and the deploy template: ProvisioningSource = vmmark3.1.1-template-030520 Deploy/Templates = vmmark3.1.1-template-030520 b. Still in the VMmark3.properties file, modify the ProvisioningDatastores parameter so that only the VMtype:DatastoreName pairs you deleted are listed and will be reprovisioned. (By removing the VMtype:DatastoreName pairs for the VMs you don’t want to recreate, you prevent the provisioning service from seeing those VMs and issuing an error message.) These VM types must be reprovisioned: Client, AuctionLB, AuctionMSQ, AuctionWebA, AuctionWebB, AuctionAppA, AuctionAppB, AuctionNoSQL, AuctionDB, ElasticLB, ElasticWebA, ElasticWebB, ElasticAppA, ElasticAppB, and ElasticDB. c. Issue a new provisioning request that includes the tile number (or numbers) in which you wish to recreate VMs. (See “Recreating Part of a Tile”)
VMmark is a free tool used by hardware vendors and others to measure the performance, scalability, and power consumption of virtualization platforms.
VMmark is a free tool used by hardware vendors and others to measure the performance, scalability, and power consumption of virtualization platforms.
The VMmark benchmark:
Allows accurate and reliable benchmarking of virtual data center performance and power consumption.
Allows comparison of the performance and power consumption of different virtualization platforms.
Can be used to determine the performance effects of changes in hardware, software, or configuration within the virtualization environment.
How to install
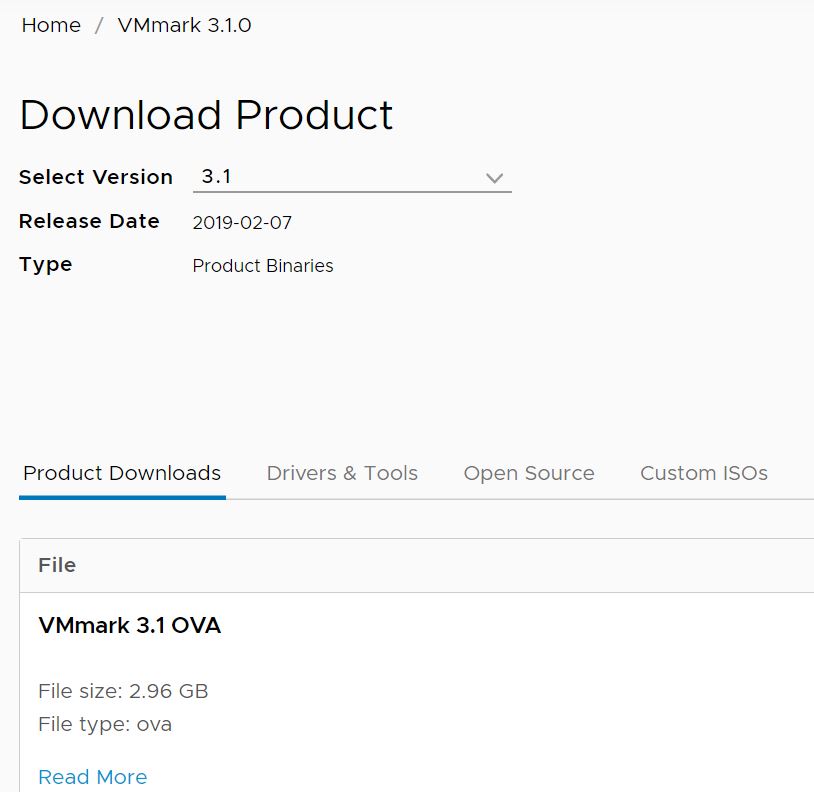
Download the VMmark OVA
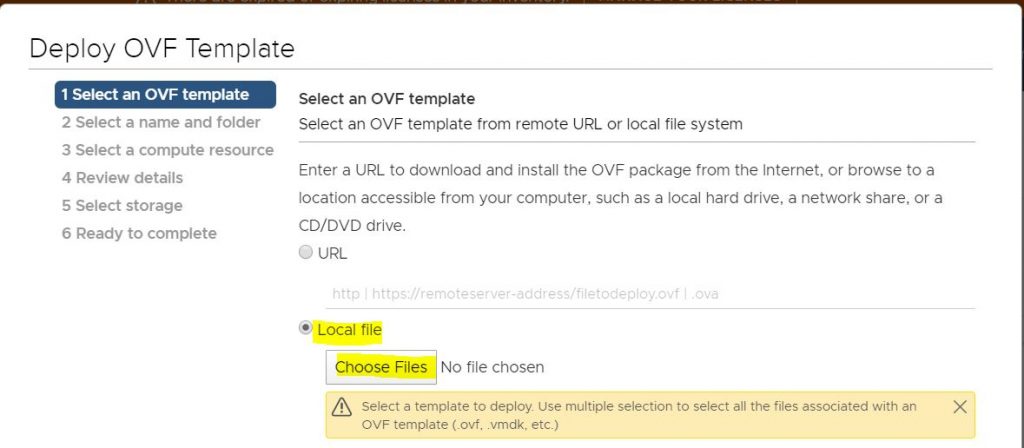
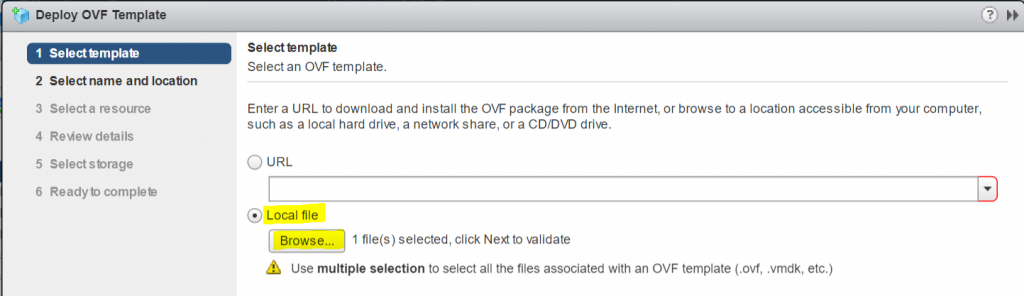
Rightclick on the cluster and select Deploy OVF template
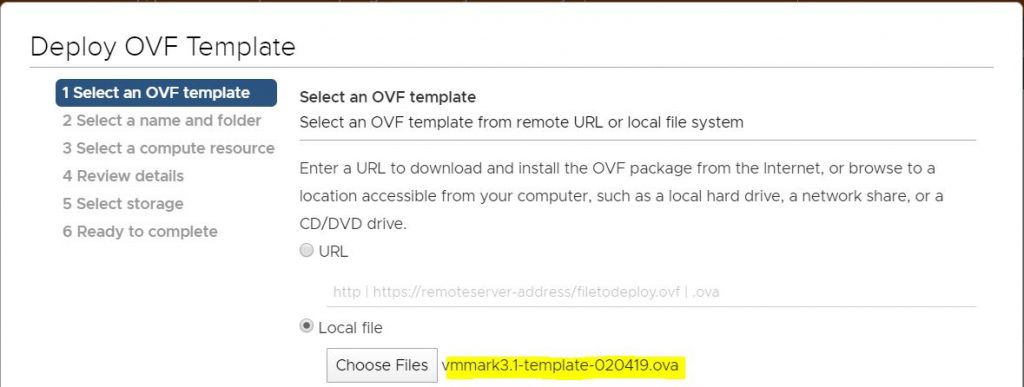
Select your VMmark downloaded OVA
Select a name and folder
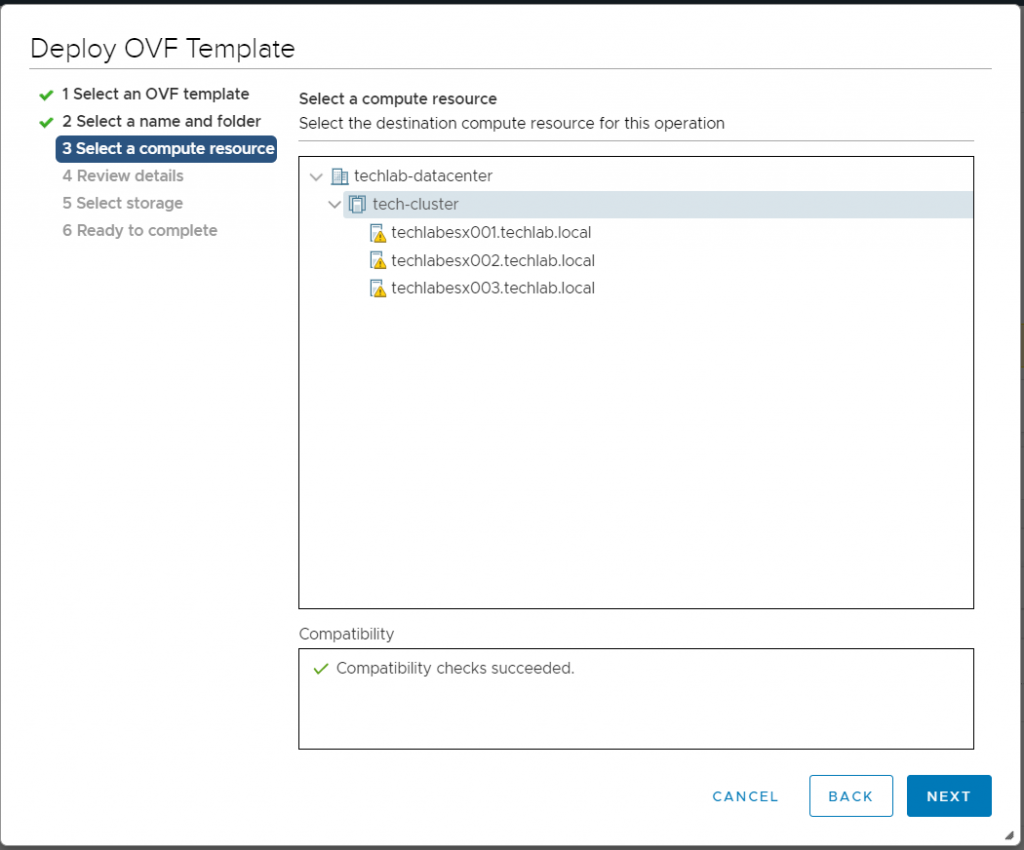
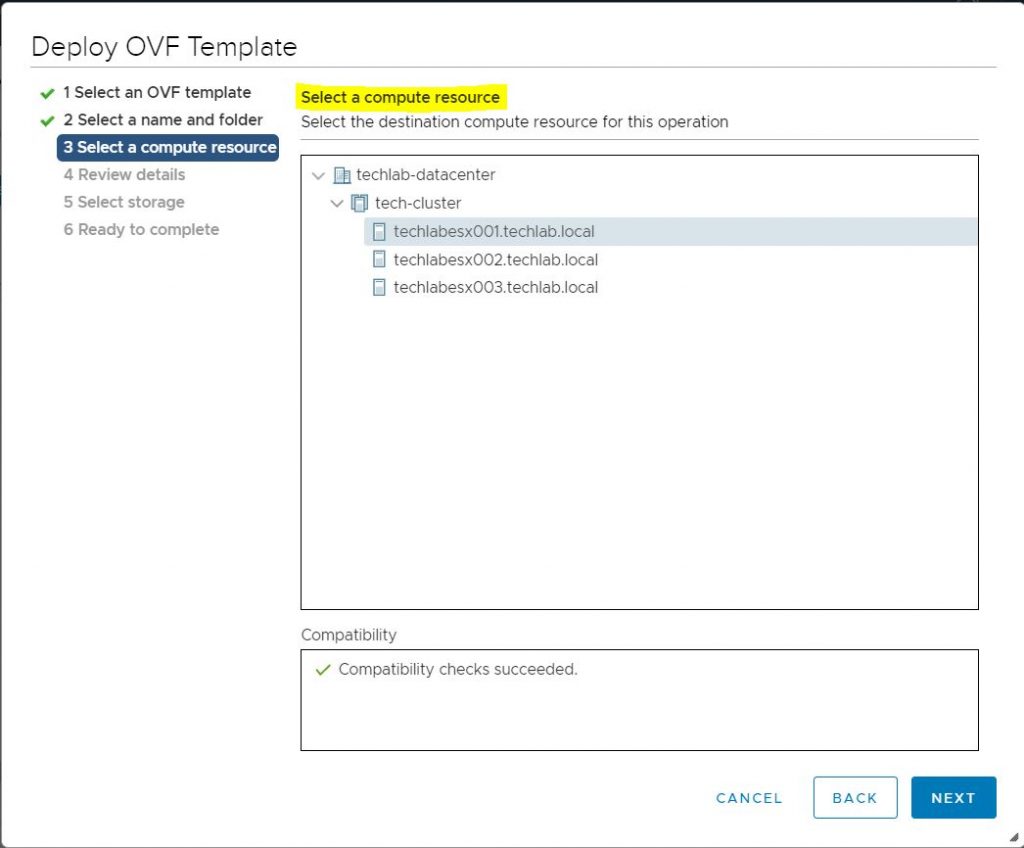
Select a compute resource
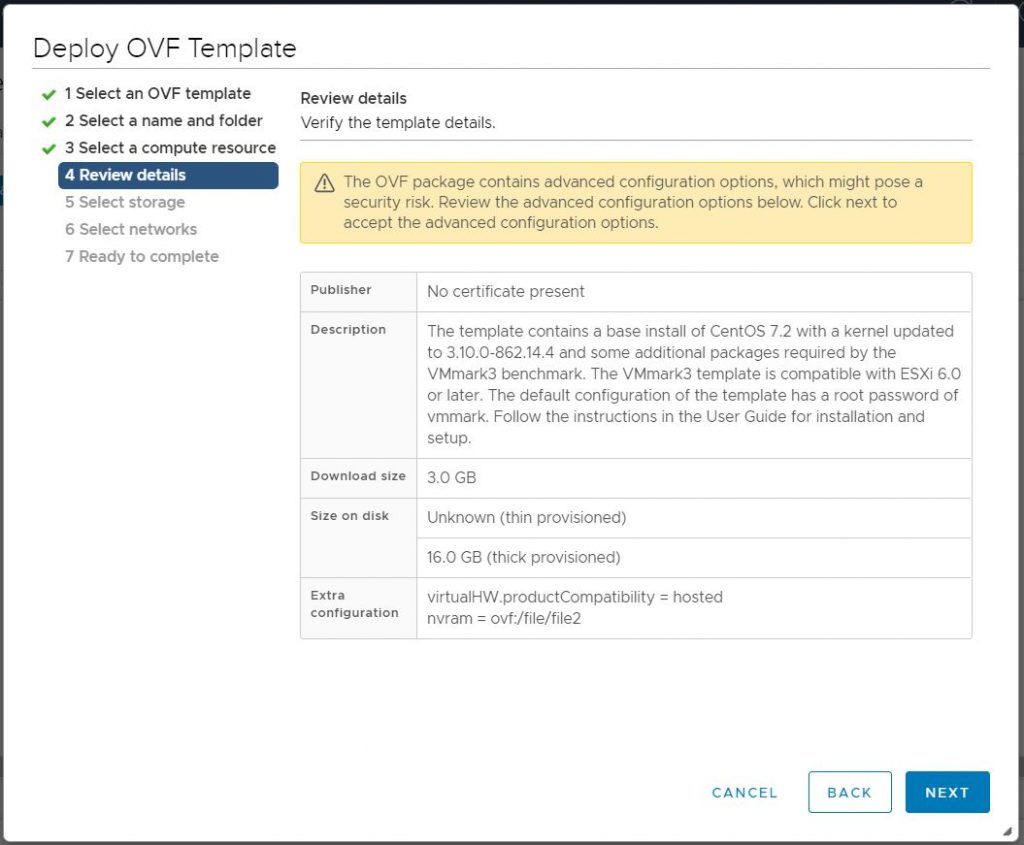
Review details
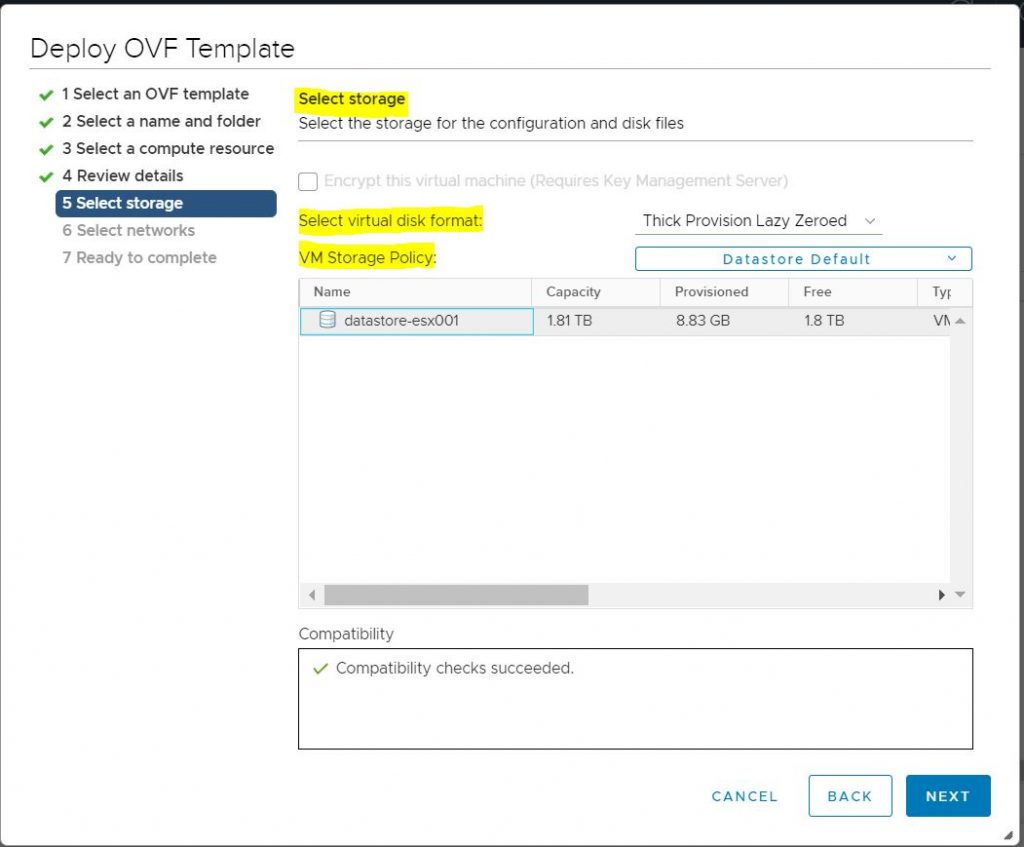
Select Storage
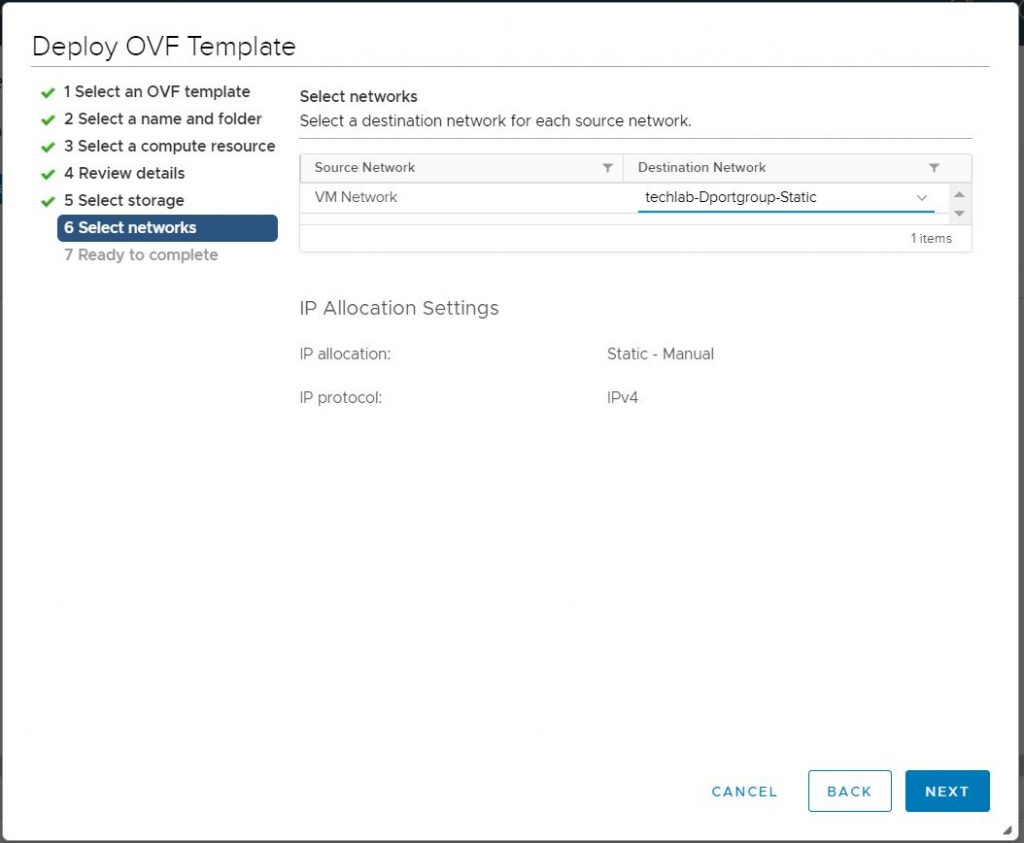
Select networks
Check Ready to Complete page
The template will deploy
Follow steps in my other blog to upgrade this template – Note, you only need to run the four commands in Step 5 if this is a fresh install which hasn’t been used for benchmarking before.
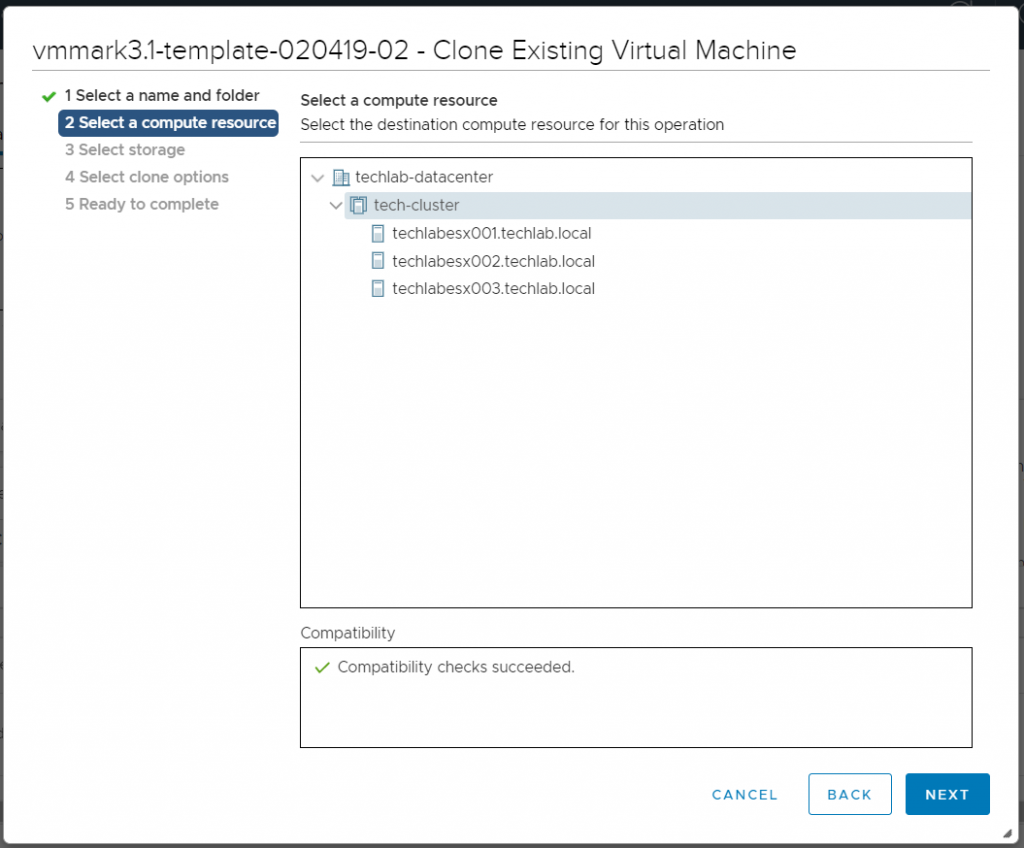
Next, from the vSphere Client, right click on the newly-deployed vmmark3-template* virtual machine and select Clone > Clone to Virtual Machine. This creates an infrastructure operations template which has -02 at the end . You can create multiple templates. Page 47 of the user guide details more.
Choose the host or cluster to deploy on
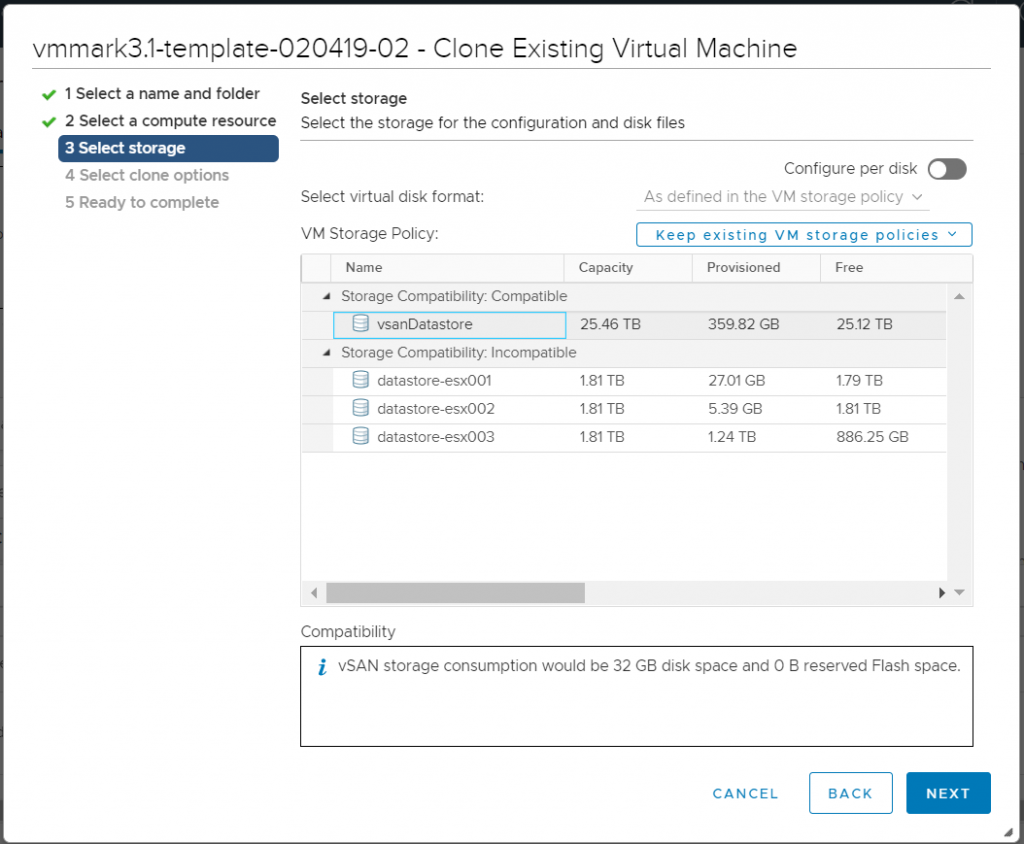
Select the storage
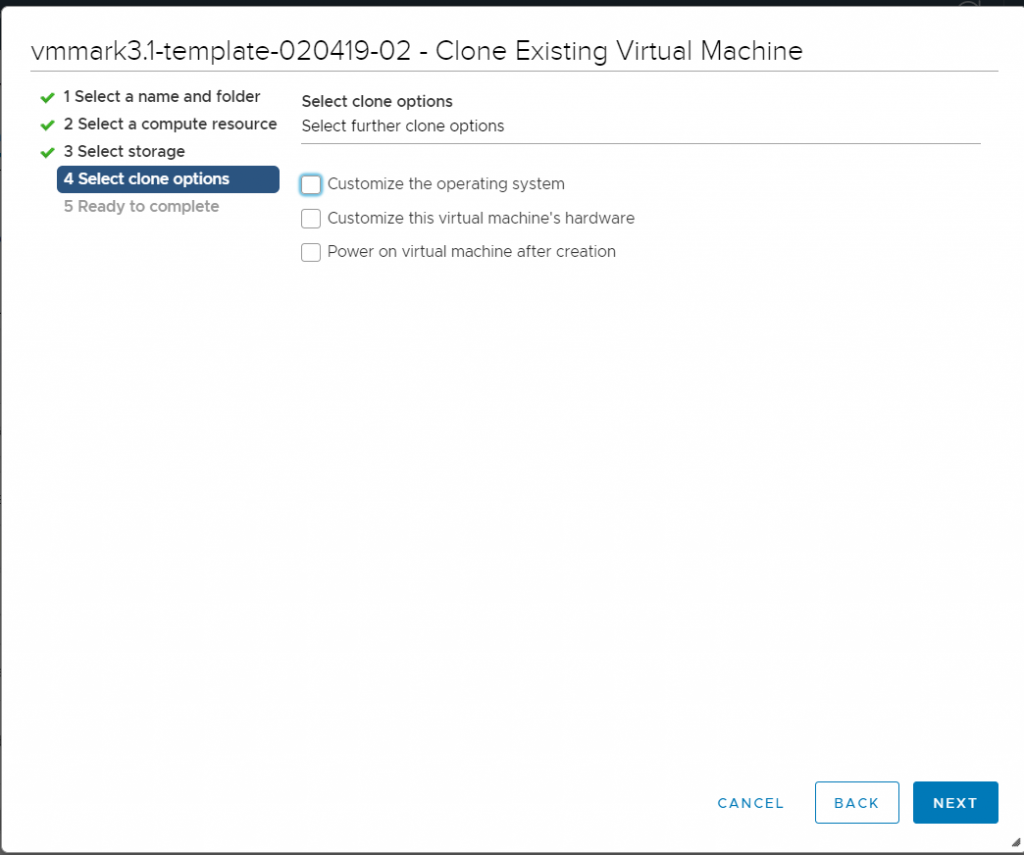
Leave customisation options blank
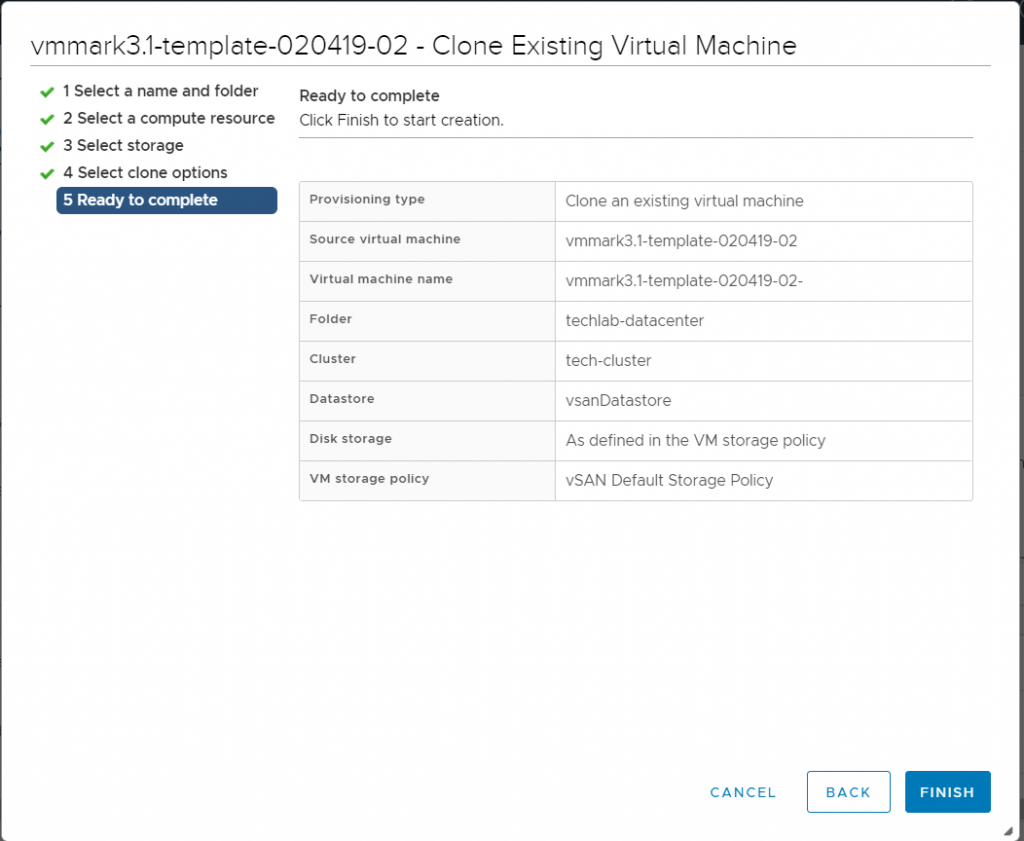
Check the details and Finish the wizard
Next we need to create the Prime Client
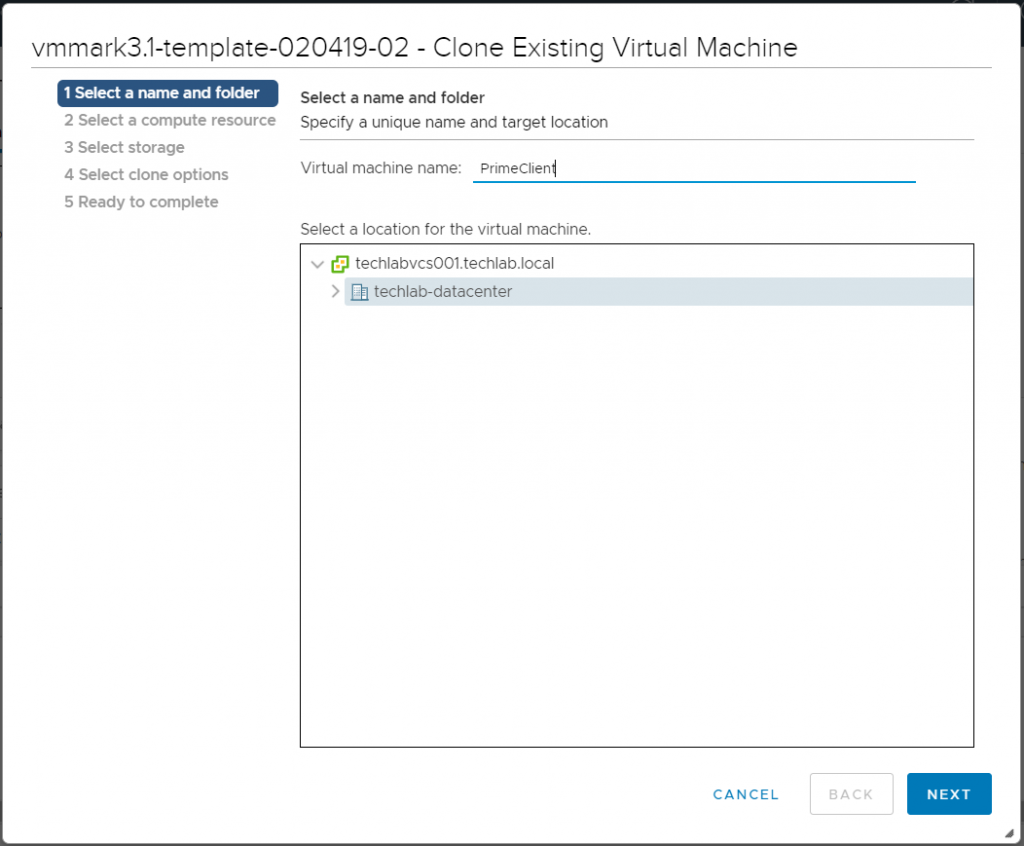
From the vSphere Client, right click on the newly-deployed vmmark3-template* virtual machine and select Clone > Clone to Virtual Machine…
Under Select a name and folder enter PrimeClient, select the location for the prime client, then click Next.
Select a compute resource
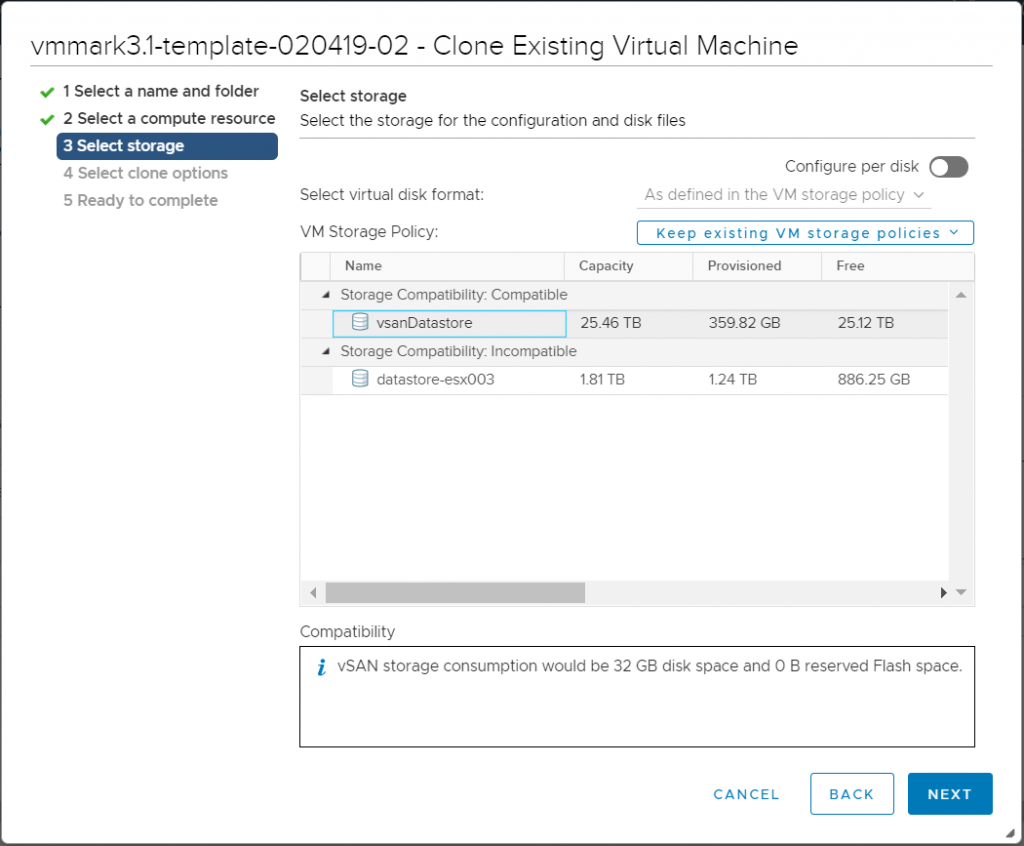
Select storage
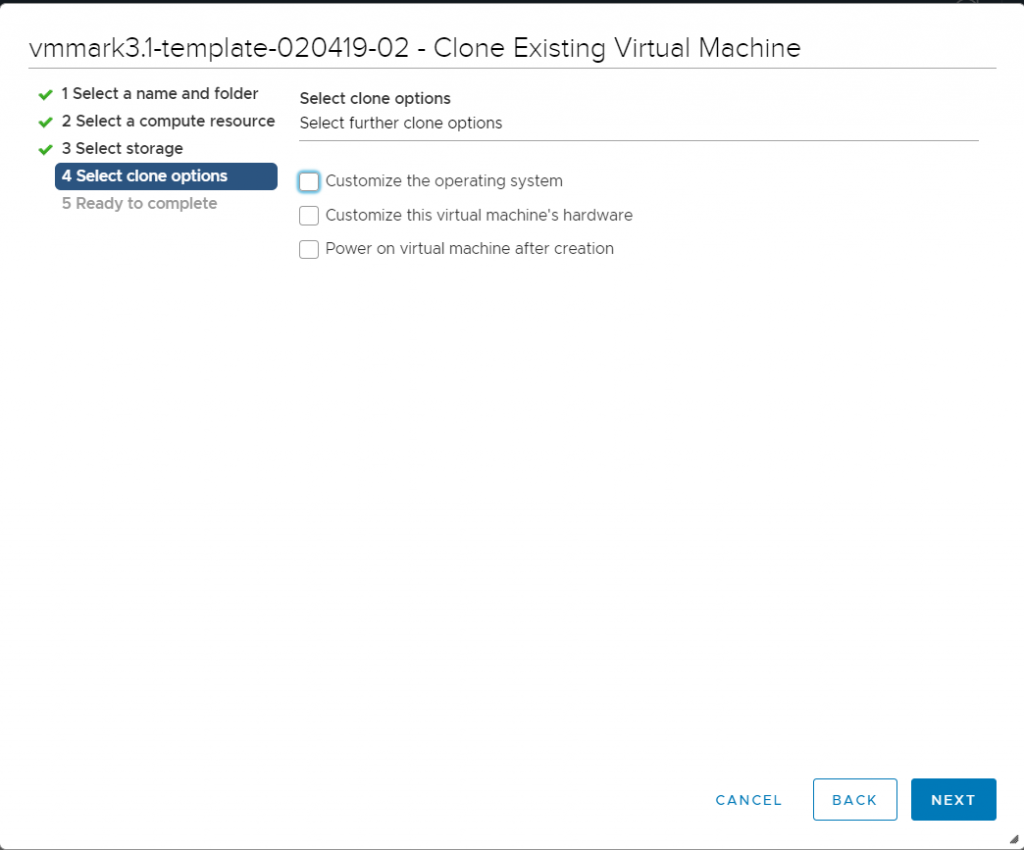
Don’t choose any clone customisation options
Check and finish
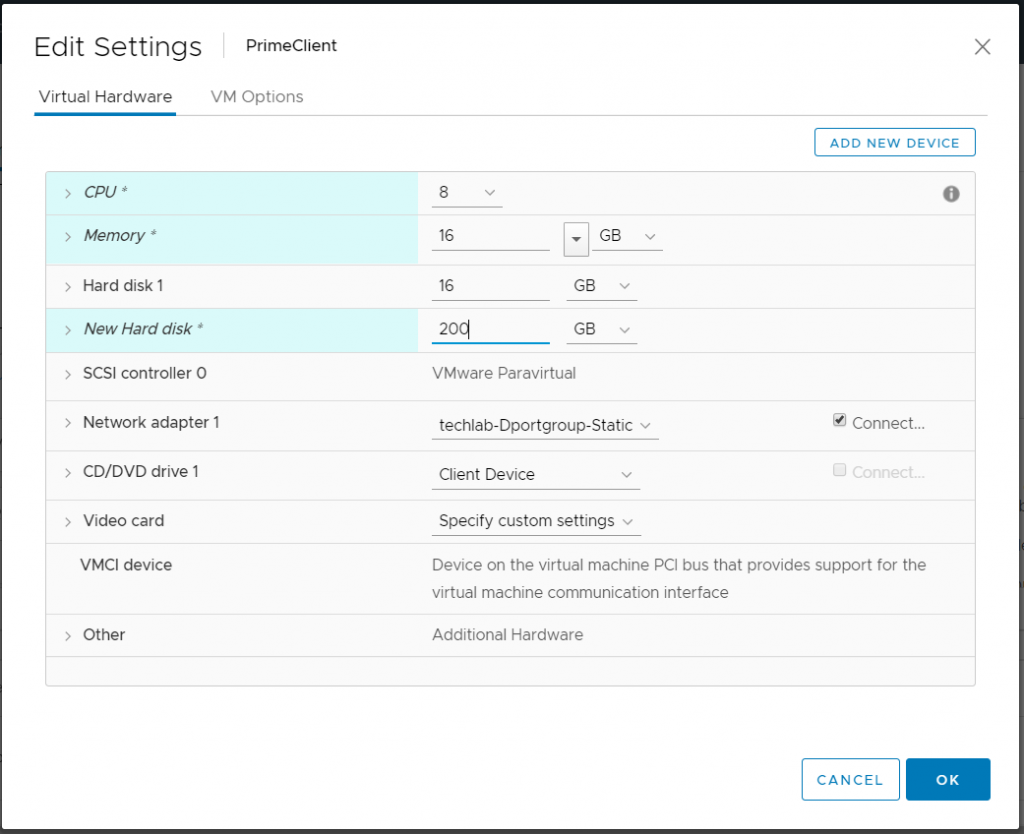
Edit the virtual hardware using 8vCPUs, 16GB RAM and a second virtual disk of 100GB. You can add another nic also.
Next we need to configure the Prime Client
Power on the PrimeClient VM.
Right click on the PrimeClient VM and select Open Console
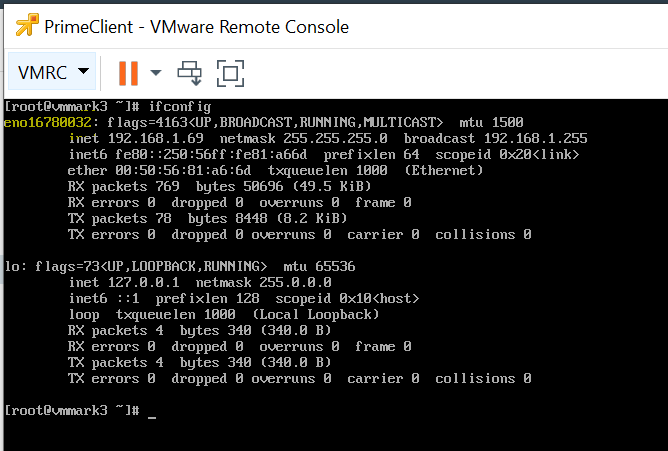
In a terminal window run ifconfig to determine which network is active. It will be of the form enoXXXXXXXX.
Change to the networks script directory – cd /etc/sysconfig/network-scripts
Copy the appropriate network script (ifcfg-sample-static for networks with static IP address assignment, ifcfg-sample-dhcp for networks with DHCP IP address assignment) to be used by the active network identified in Step a above. In my case ifcfg-en16780032. For example, to configure a network named eno16780032 for use with a static IP address use the below command and press enter to overwrite the file.
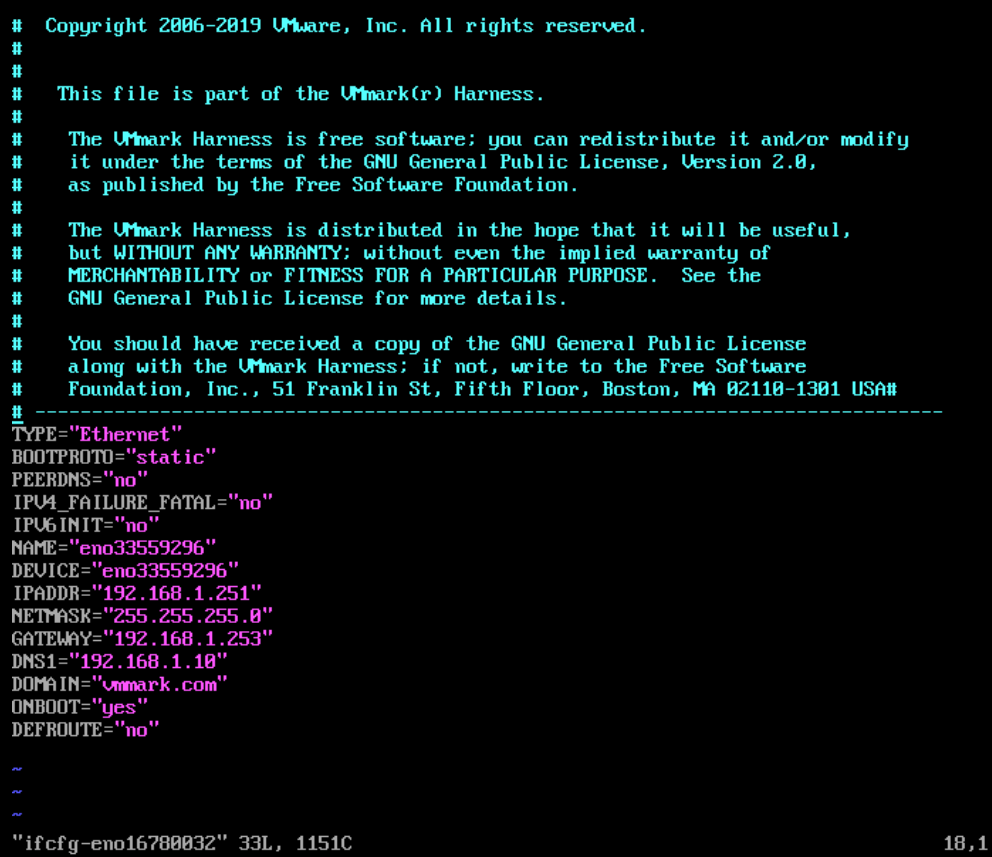
Open the new network script in an editor and update the name, the device, the IP address and other IP settings as needed. Place the cursor where you want to edit and press the letter i to enter insert mode to be able to edit what you need.
Type vim ifcfg-eno16780032 and you will see the below screen
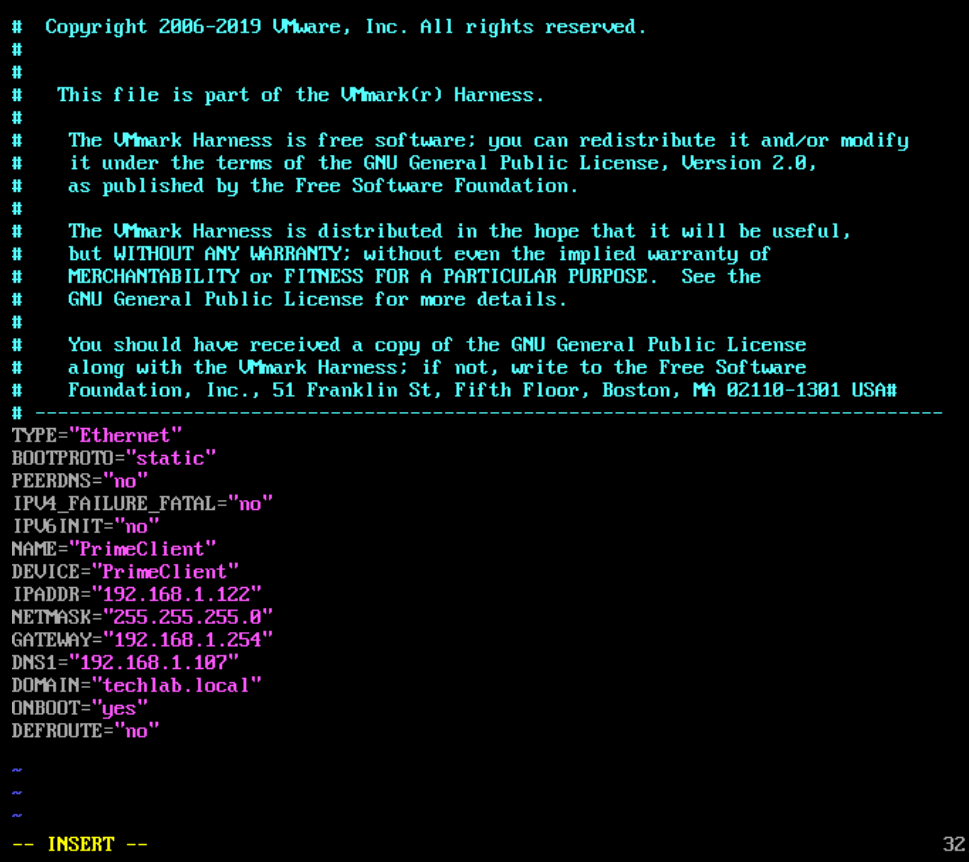
Note: On our work lab we had to do a command route add default gw $default_gw_ip and in the file below select yes to DEFROUTE. I have edited the file as seen below. Press Esc and then :wq to save and exit the file
Note: If you get an LSB cannot start when you restart the network after configuring these fields, then the device field below may need to be changed to your network device. In our case it will be eno16780032 instead of PrimeClient.
Run the following command
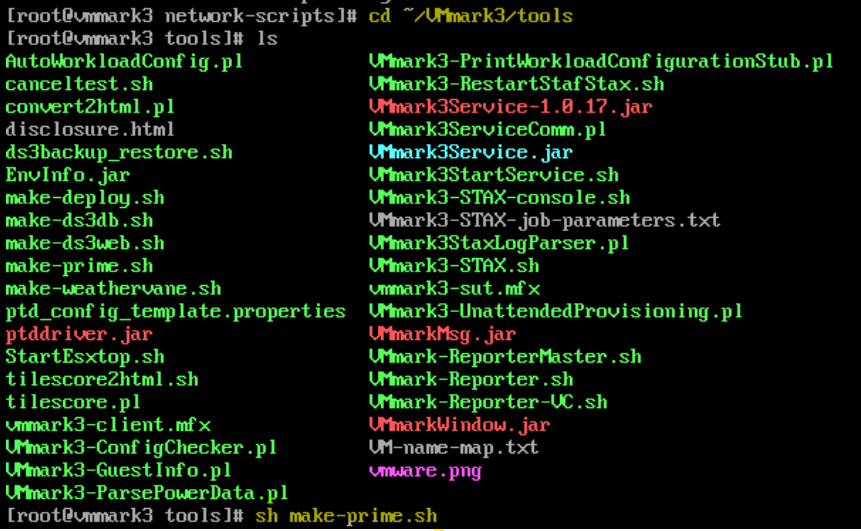
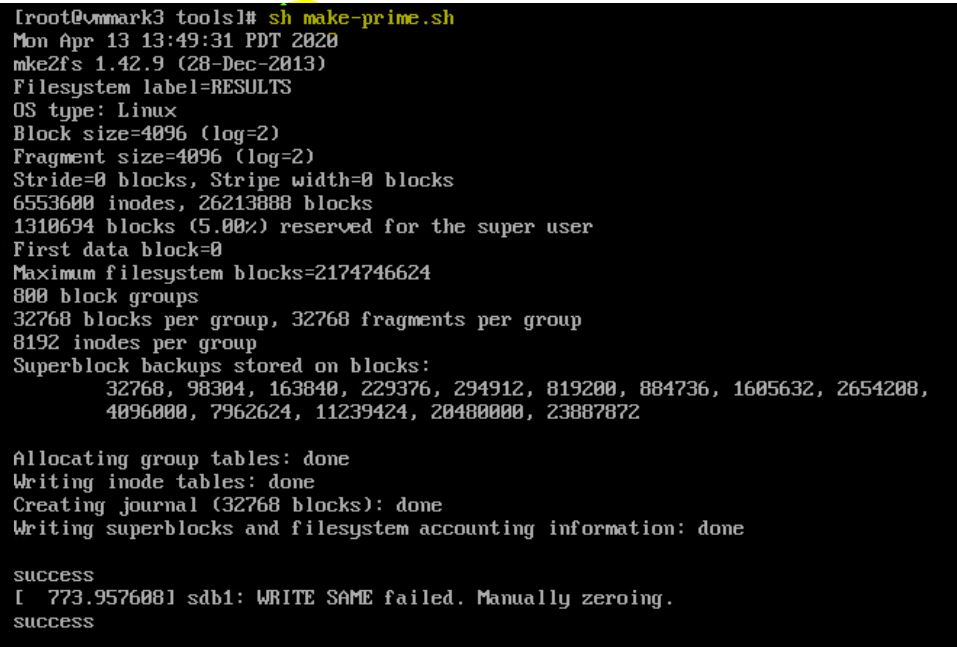
Still in the terminal window, convert this virtual machine into the prime client by running the make-prime script: cd ~/VMmark3/tools
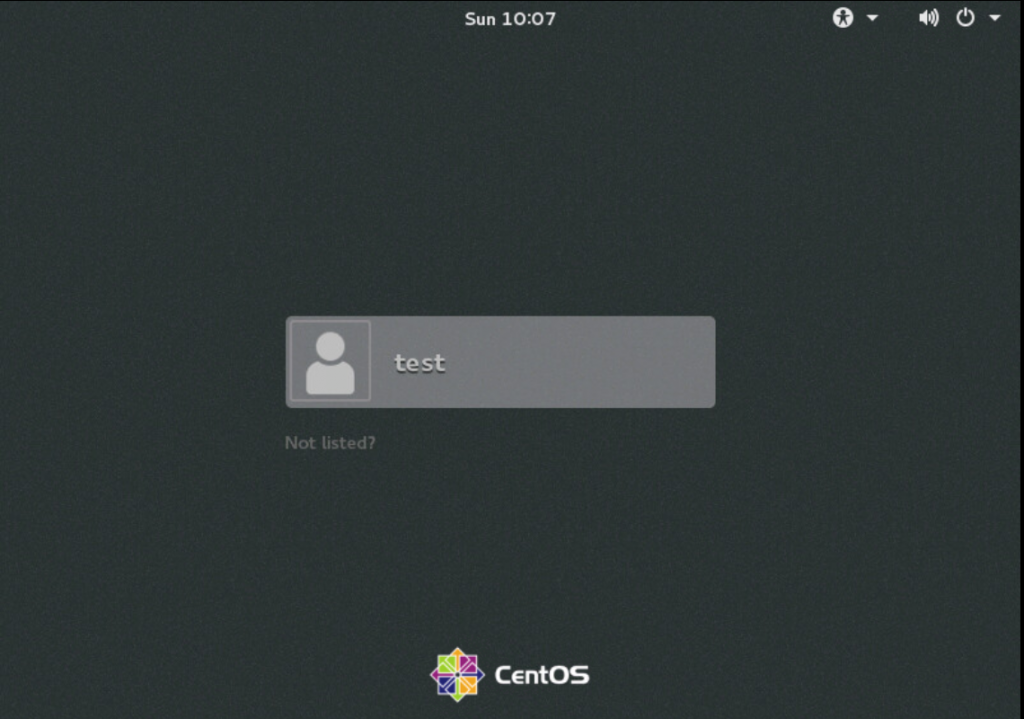
Run the script: sh make-prime.sh The make-prime script will start an X Windows GUI and display a login dialog.
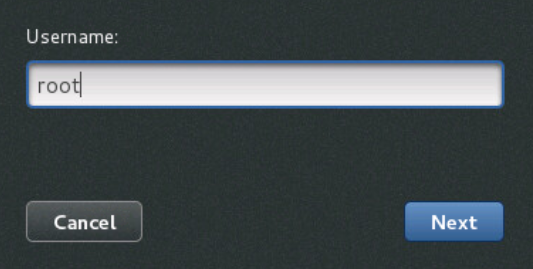
Click Not Listed
Log in as root. (The default login is test, but click Not listed? and log in as user: root, password: vmmark.)
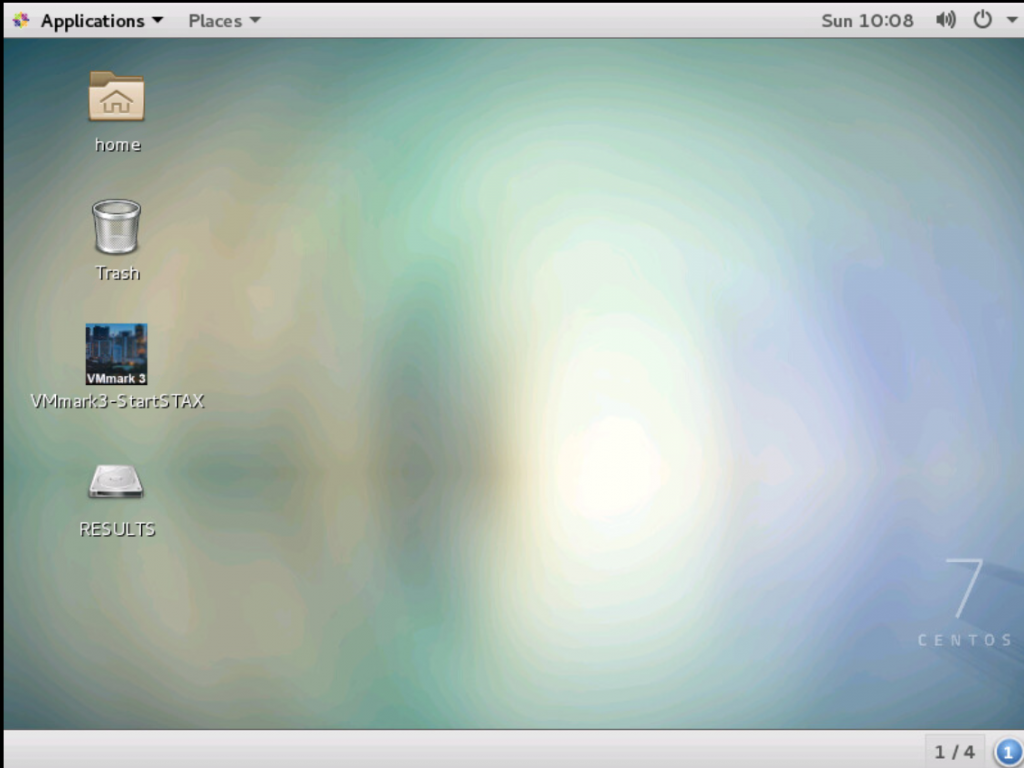
You will see the below screen when logged in
Configure passwordless SSH in the VMware ESXi hosts to allow for the PrimeClient to log into them without a password. Make sure you have enabled ESXi Shell access and SSH access on your hosts
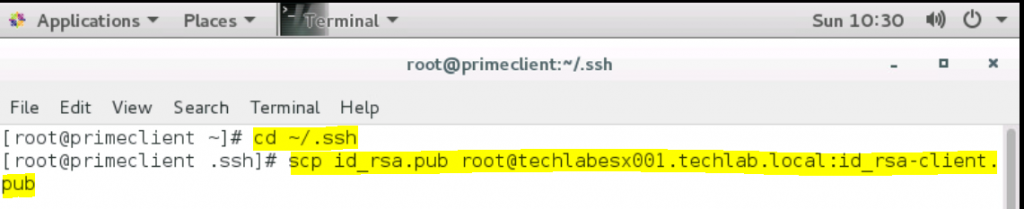
From the PrimeClient copy id_rsa.pub to each ESXi system. Open Terminal.
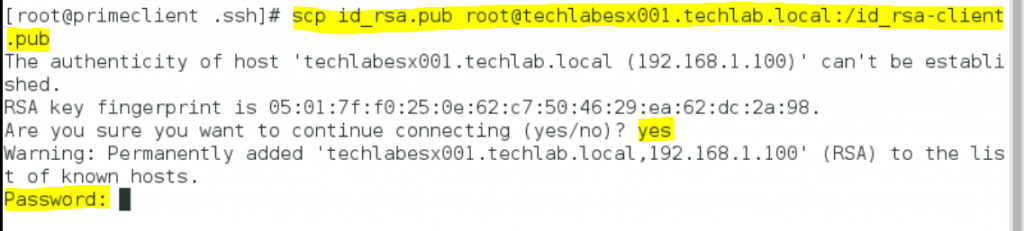
You will be asked to accept a certificate and enter the host password
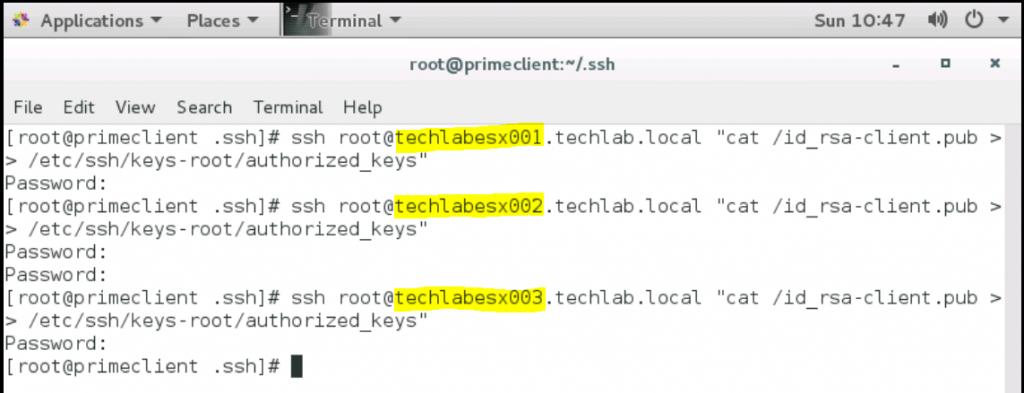
Do the same for the rest of your hosts
Still on the prime client, for each ESXi system, add the new key to the authorized-keys list: ssh root@ESXisystem “cat /id_rsa-client.pub >> /etc/ssh/keys-root/authorized_keys”
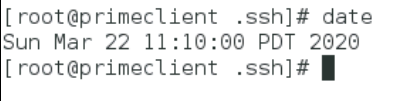
Make sure the prime client is configured for the correct time zone. The prime client, tile clients, and all workload virtual machines must be set to the same time zone. In a terminal window, run the date command to determine the prime client’s current time zone.
In my case the date is correct but the timezone is wrong
Make a backup copy of the default localtime file: mv /etc/localtime /etc/localtime.bak
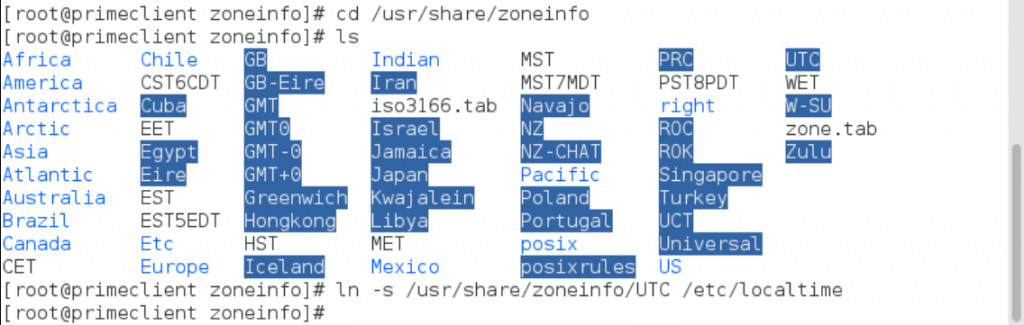
Under /usr/share/zoneinfo, locate the correct time zone file for your environment.
Type ln -s /usr/share/zoneinfo/<Your_time_zone> /etc/localtime to change. in my case this was UTC.
Reboot the PrimeClient
I took a snapshot at this point of the PrimeClient.
VMmark Harness
It is worth noting some information on VMmark harness
The VMmark Harness is a utility run on the prime client system that can start and stop the applications running on the workload virtual machines and can report the results of a test run. The VMmark Harness is based on the open-source Software Testing Automation Framework (STAF, see http://staf.sourceforge.net/index.php) and its companion execution engine, STAX. These tools support the development and running of distributed coordinated tests across heterogeneous machines and operating systems. The VMmark Harness consists of several STAX XML modules, the VMmark3.properties file, and several workload-specific configuration files. The main STAX module, vmmark3_main.xml, processes the VMmark3.properties file to configure the test to be run. Each workload has its own <workload>_functions.xml module that contains the workload-specific code needed to initialize the test, run the test, and collect the results. The VMmark3.properties file defines the actual test, identifying all the clients and server virtual machines involved in the test, the number of tiles to be run, and the workloads within each tile. After the VMmark3.properties file has been processed, the VMmark Harness performs pre-run system and timing validation and initiates the setup phase for the VMmark infrastructure operations and for each workload in each tile. After the setup has completed, the VMmark Harness simultaneously initiates the individual workloads in all the tiles. When the workload runs have completed, the harness again validates the timing, then collects the results into a results directory
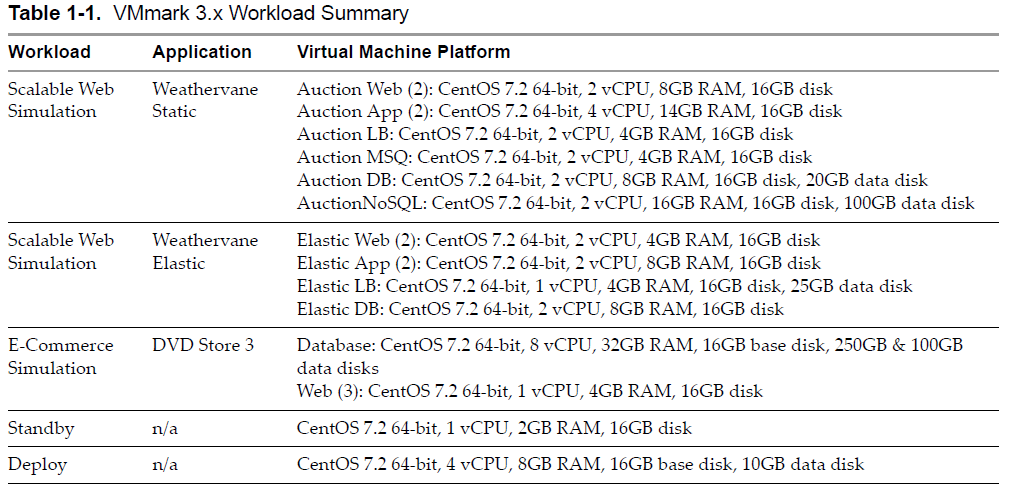
Resource usage per tile
You need to ensure that you have adequate resources across the system to accommodate the increasing tile load
Provision VMmark Tiles
Once the prime client is created and configured, it is used to create all other clients and the workload virtual machines
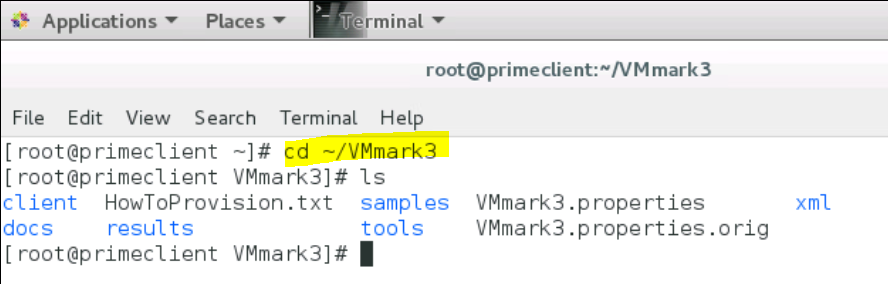
Stay logged in to the PrimeClient and type cd ~/VMmark3
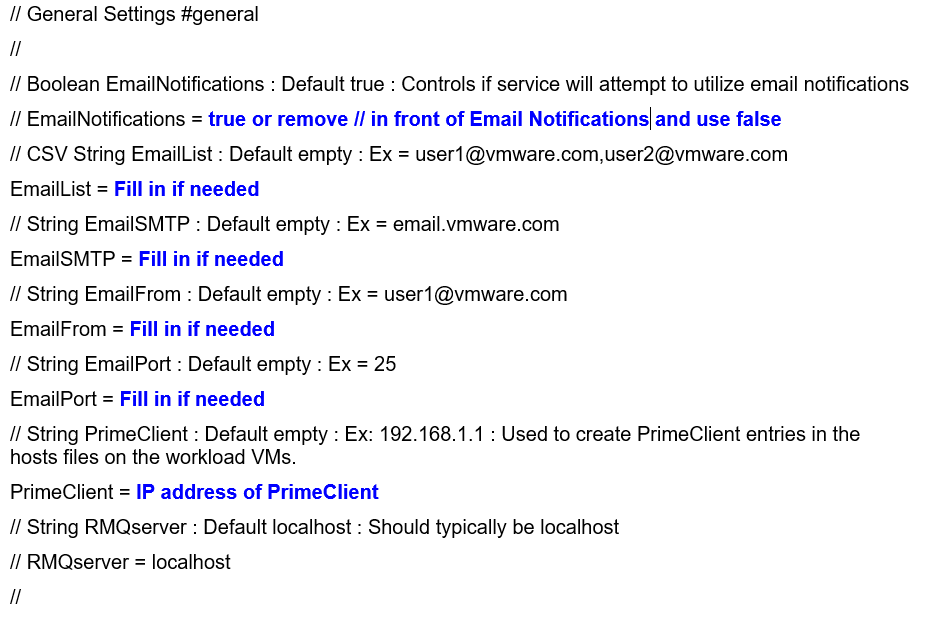
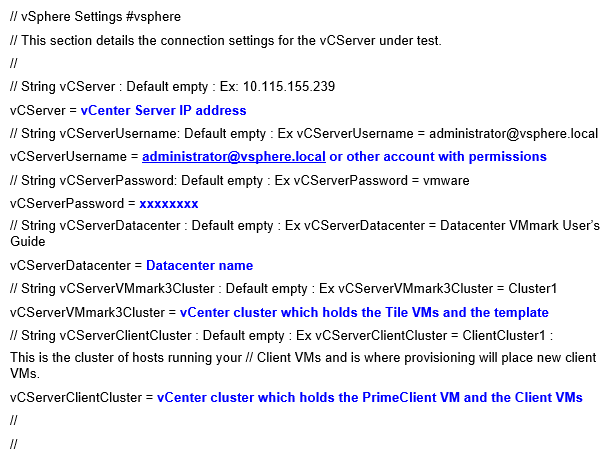
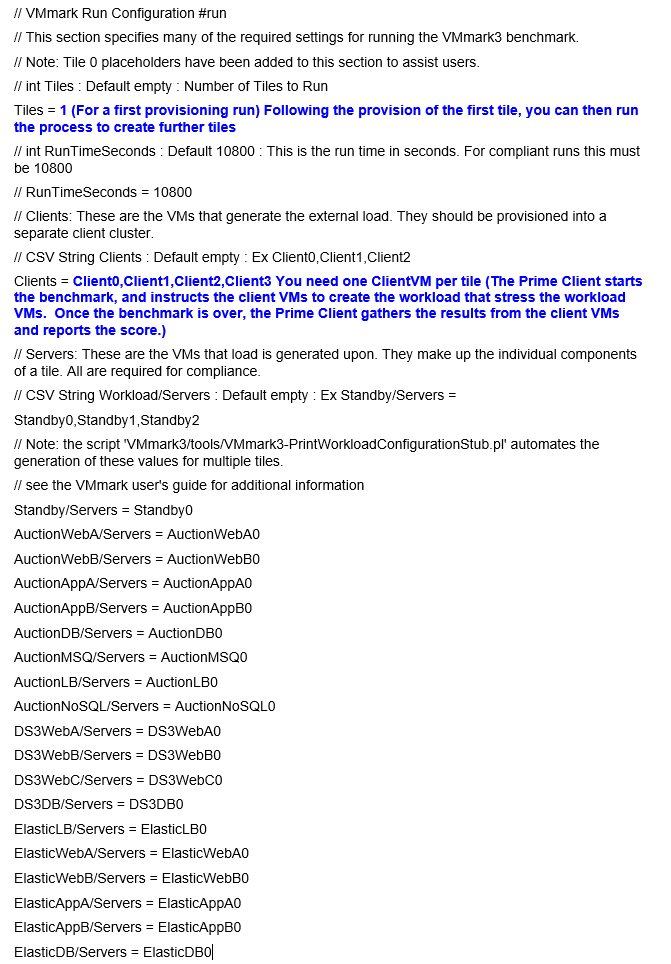
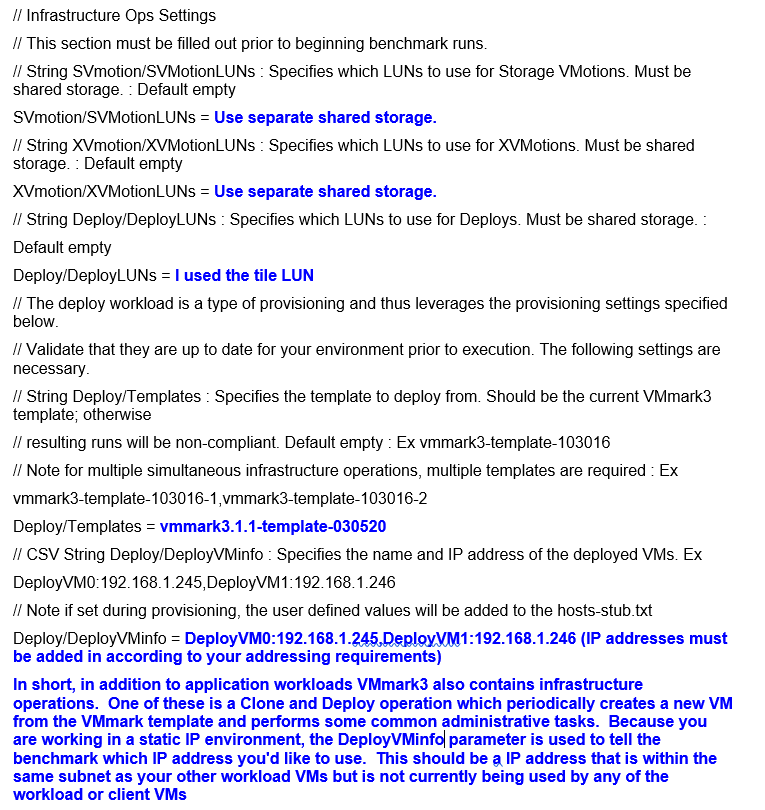
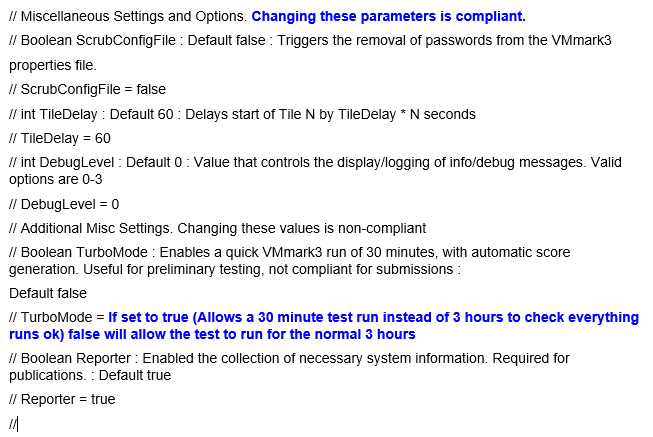
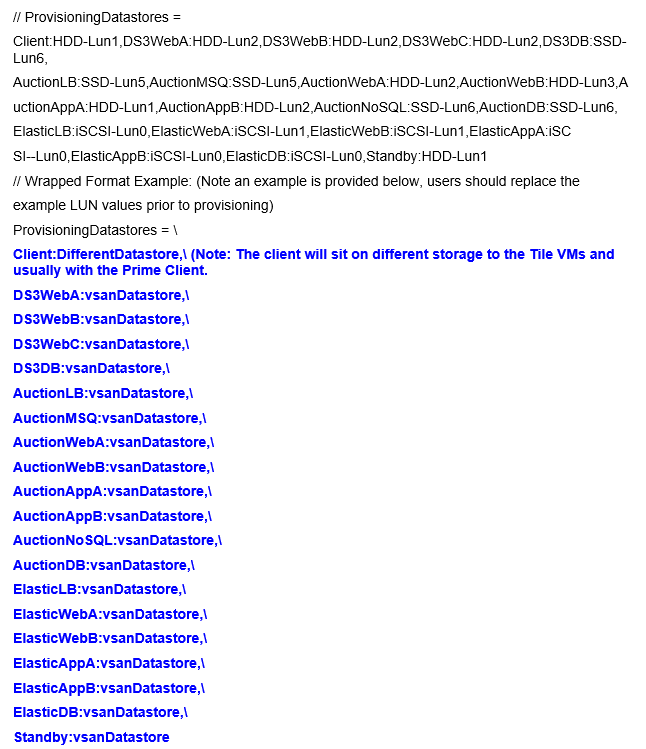
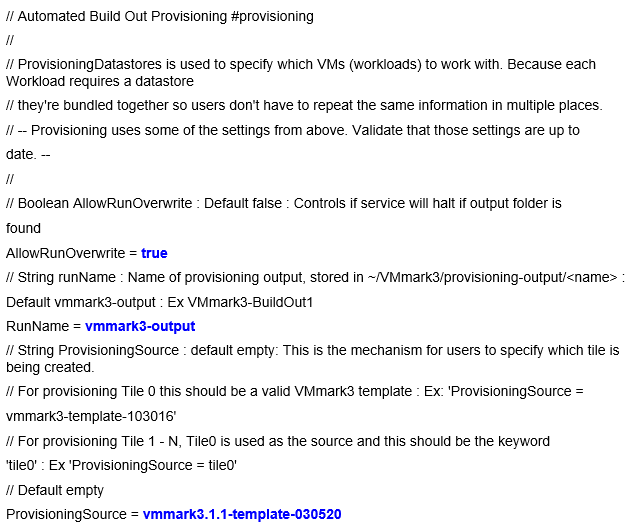
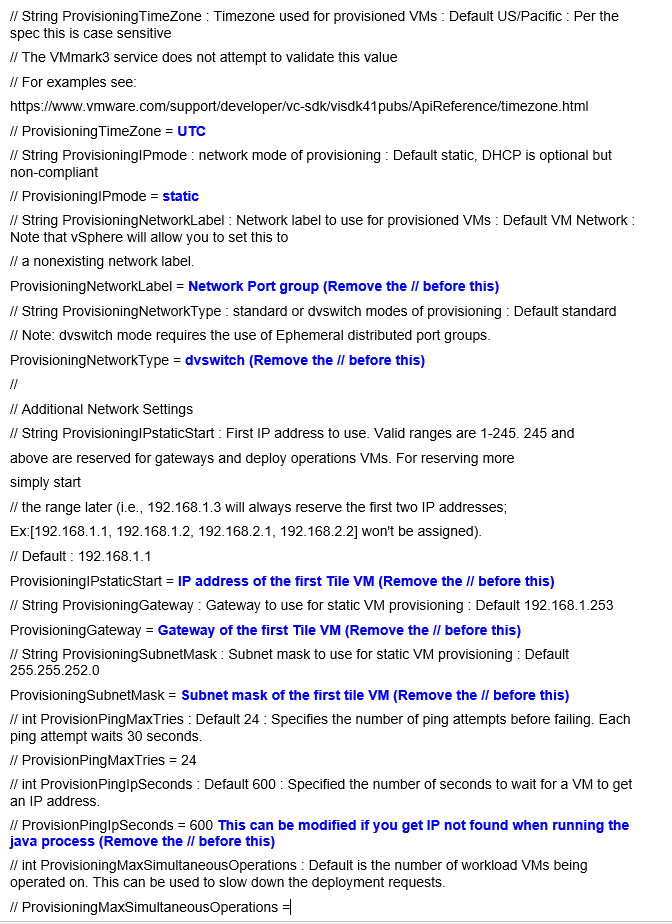
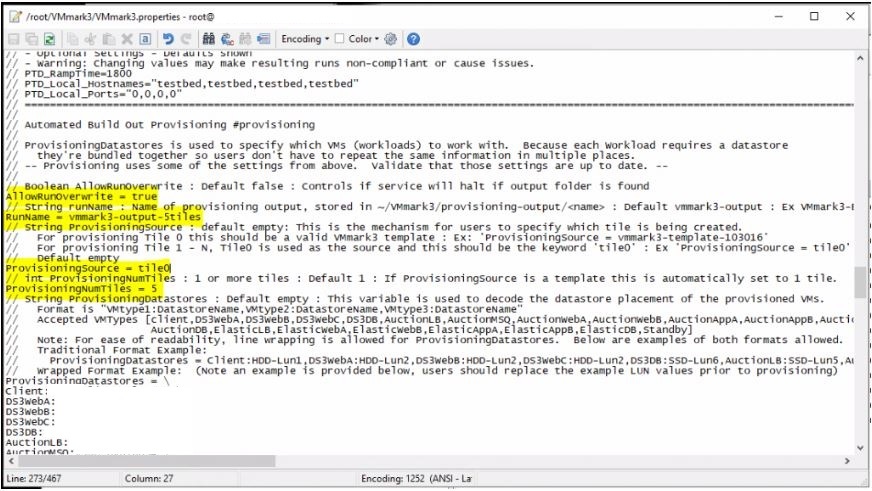
Modify the following parameters in the VMmark3.properties file according to your environment and needs. (Page 51 of the Users Guide has some information and Page 57 has a full template file so you can see all the settings) See more info following the figure below. Note the file is very large
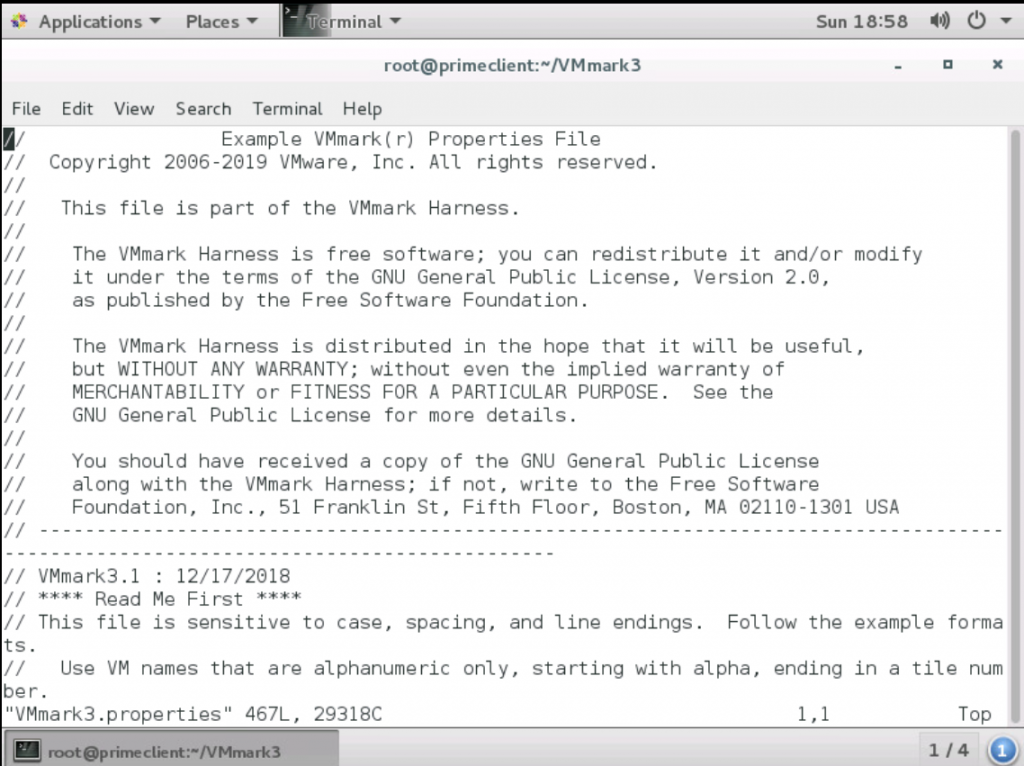
Edit the VMmark3.properties file by typing vim VMmark3.properties
You will see the below screen. Type i to enter Insert Mode
Scroll down and fill in the various settings required in all sections of the file. Note: Some are not modified or the test is not valid.
The settings I modified are as per below
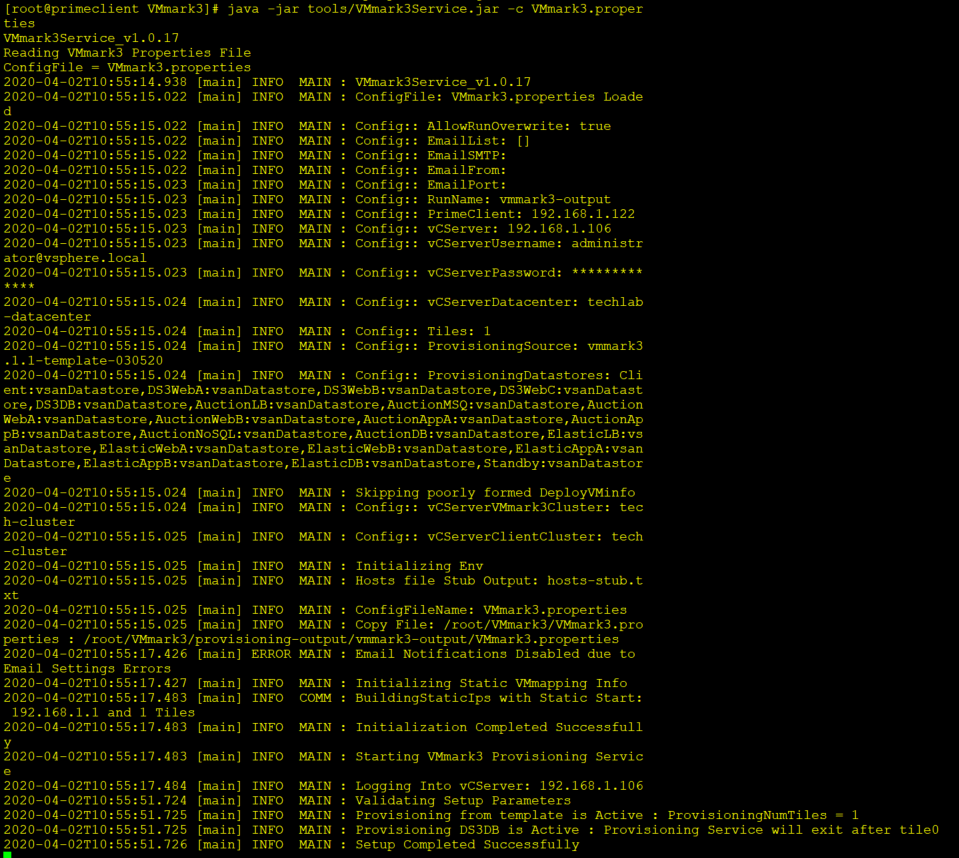
To start the provisioning process, from the VMark3 folder execute:
NOTE The provisioning process initiates creation of the DS3DB0 virtual machine, which can take 12 hours or more while data is loaded into the DS3DB0 database. This procedure is not considered part of the provisioning process.
A tile consists of
Though creation of the DS3DB0 virtual machine can take many hours, the provisioning process will complete much more quickly than that. Once the provisioning process has completed, update the prime client’s hosts file, with the command below while DS3DB0 builds. Check the names and addresses are correct and add the ESXi hosts as well.
NOTE The provisioning service does not modify the prime client’s hosts file. Once provisioning has completed, the output folder will contain a hosts-stub.txt file that can be imported into the prime client’s hosts file as described below.
Populate the prime client’s hosts file. In a terminal window on the prime client, run the following command:
Add entries for the systems under test to the prime client’s /etc/hosts file.
Test the passwordless SSH configuration by using SSH to manually log in at least once to each host (i.e. ssh root@[ESXhost1,2…] hostname).
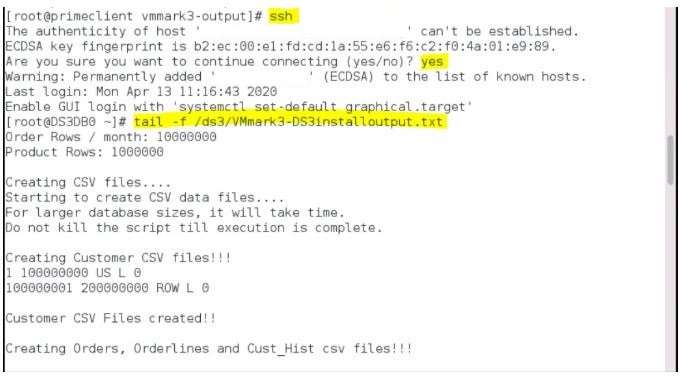
Wait for the DS3DB0 creation process to complete; depending on your environment, this can take 12 hours or more. To determine if it’s complete, follow these steps: a. In a terminal window on the prime client, SSH into DS3DB0 using its IP address and run tail -f /ds3/VMmark3-DS3installoutput.txt or run the following command:
(where <DS3DB0-IP-address> is the IP address of the DS3DB0 VM, which can be found in the hosts-stub.txt file referenced above). You will see the start of the creation of DS3DB0.
If you check the console screen of DS3DB0, you might see this message which you can safely ignore
b. Watch for the following text: VMmark3 DS3DB Setup Completed : Rebooting
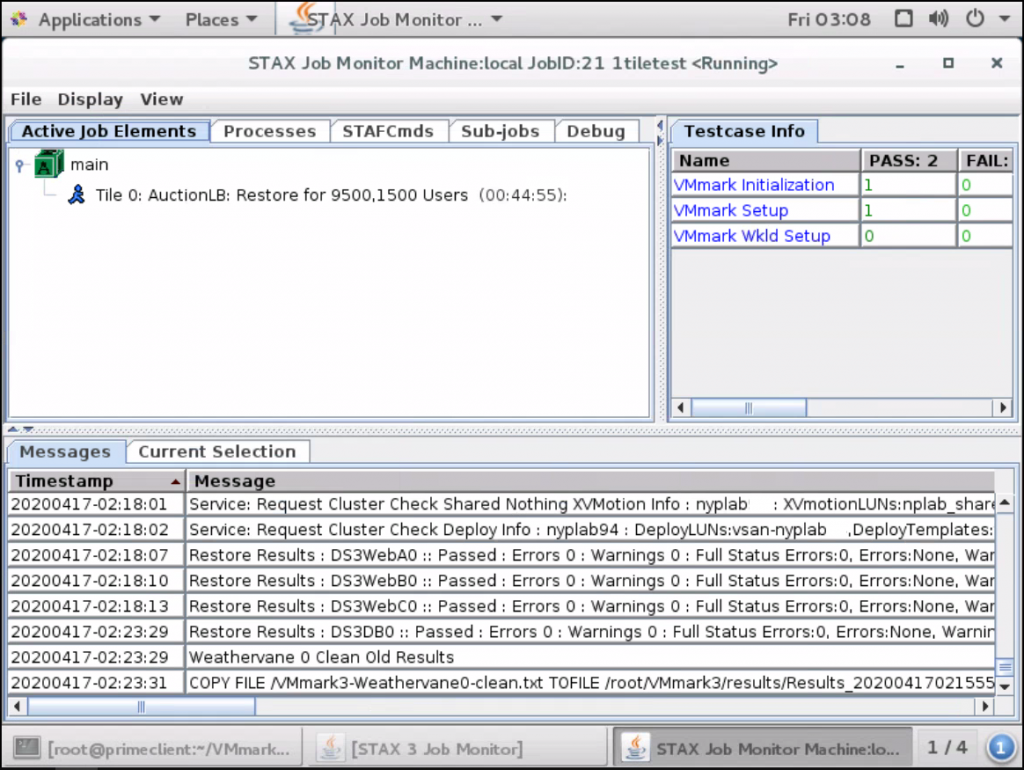
Once this is complete we can try and test Turbo mode run which will run 1 tile for 30 minutes just to check everything is ok with no errors to start with
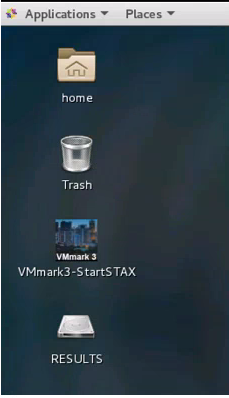
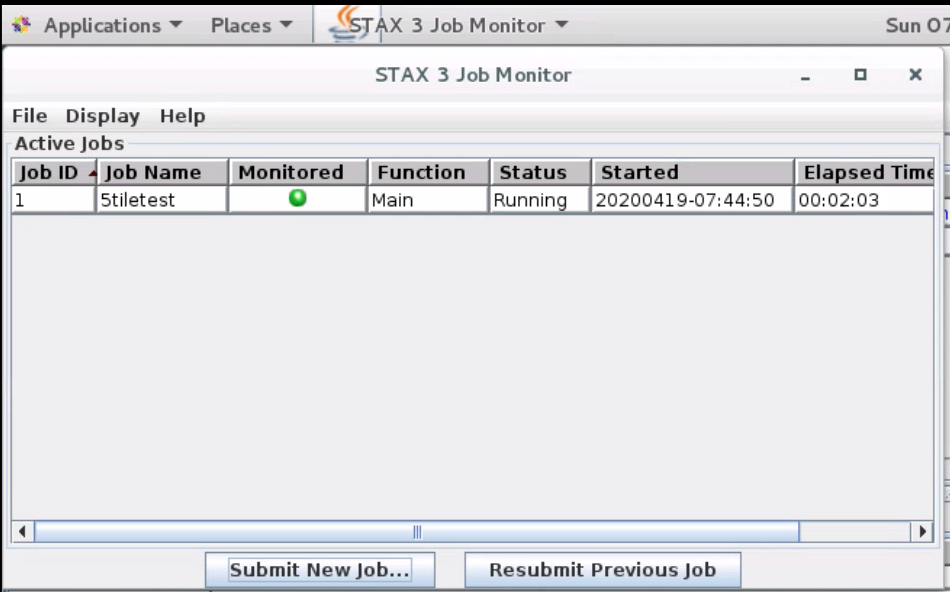
Log into the Primeclient and double click on the VMmark3-StartSTAX icon on the desktop
Click on Submit new job
In the Job Info tab in XML Job File > Local Machine > Filename Browse to /root/VMmark3/xml/ and select vmmark3_main.xml
In the STAX Job monitor window, under the Job Info tab, under Job Options, enter a name. (No spaces in the job name)
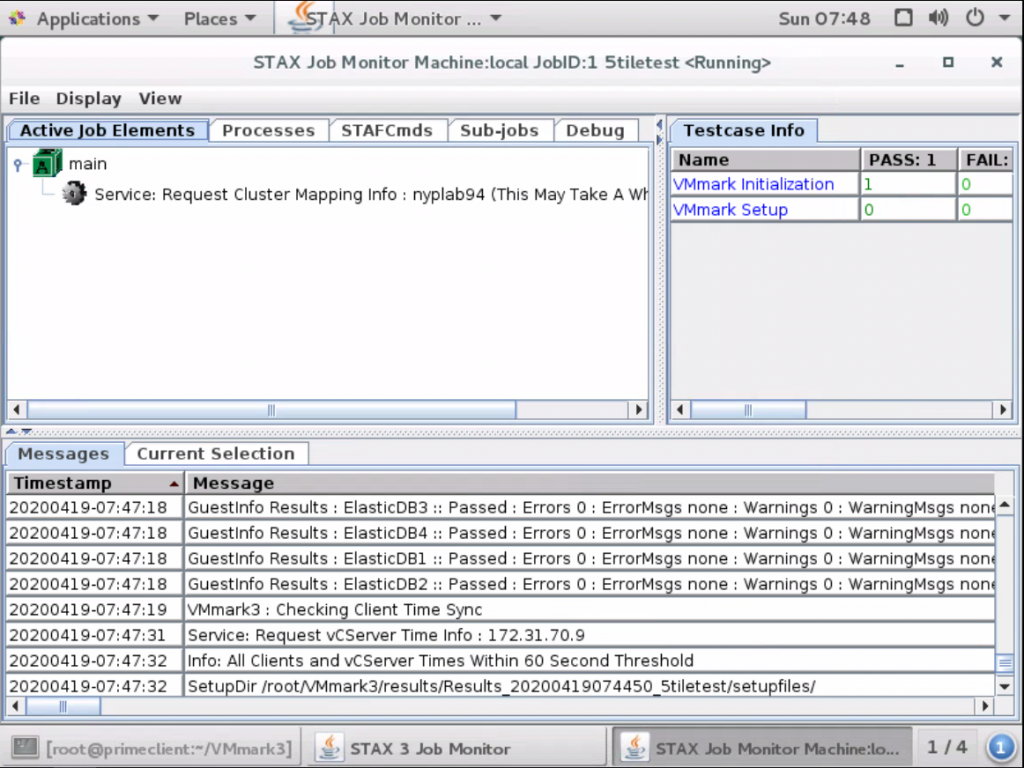
Click Submit new job and you will see the STAX Job Monitor Machine test running
Once this has finished, check everything has run ok in the GUI as seen below – Results can be found in /root/VMmark3/results/<yourjobname>
Next you will need to create the extra tiles you need to use – Follow Page 53 of the manual to do this under section Creating Additional VMmark Tiles (Tiles 1 through n) I needed to run 5 tiles.
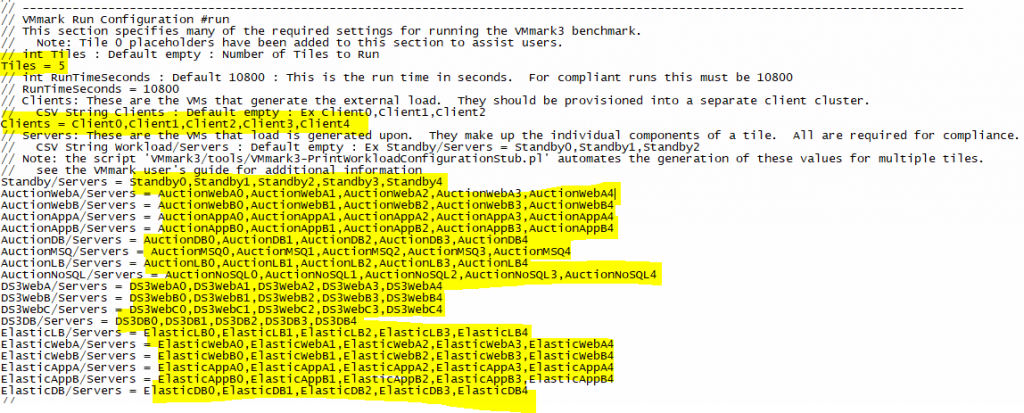
Once the 5 tiles are created you then need to edit the VMmark.properties files again under the VMmark Run Configuration section
Select 5 for Tiles (Or however many tiles you need)
Add the extra Clients (1 Client per tile) so I need to make sure there are 5.
You then need to add the extra names in for each of the extra tiles as per below. You can run a perl script which will print the output on screen to tell you what you need to put in (5 at the end for 5 tiles)
You will also need to make sure that all the new tile hosts are in the file /etc/hosts
Run the test with 5 tiles
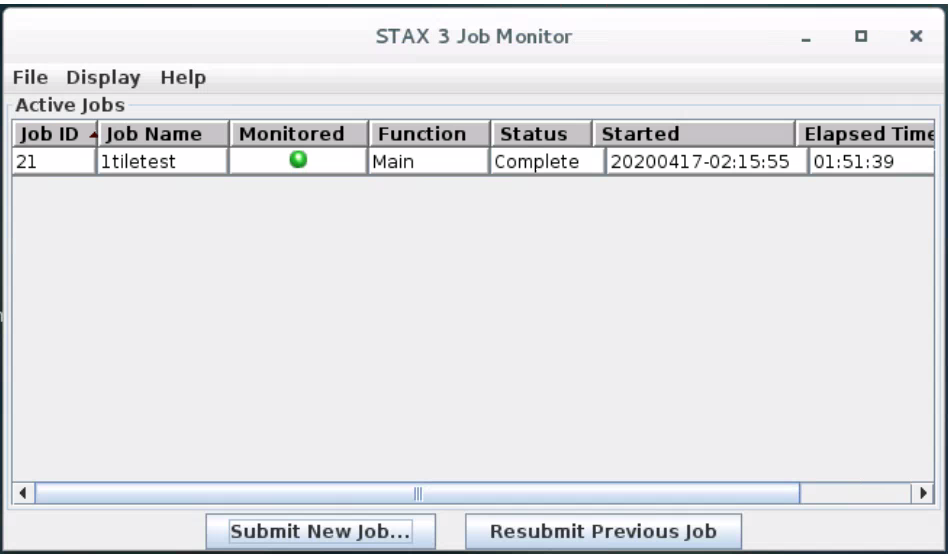
To start STAX using the GUI, double click on the VMmark3-StartSTAX icon on the desktop.
In the Job Info tab: XML Job File > Local Machine > Filename Browse to /root/VMmark3/xml/vmmark3_main.xml
In the STAX 3 Job Monitor window, under the Job Info tab, under Job Options, enter a job name with no spaces and click Submit job which will then start running in a STAX 3 Monitor window and a job window
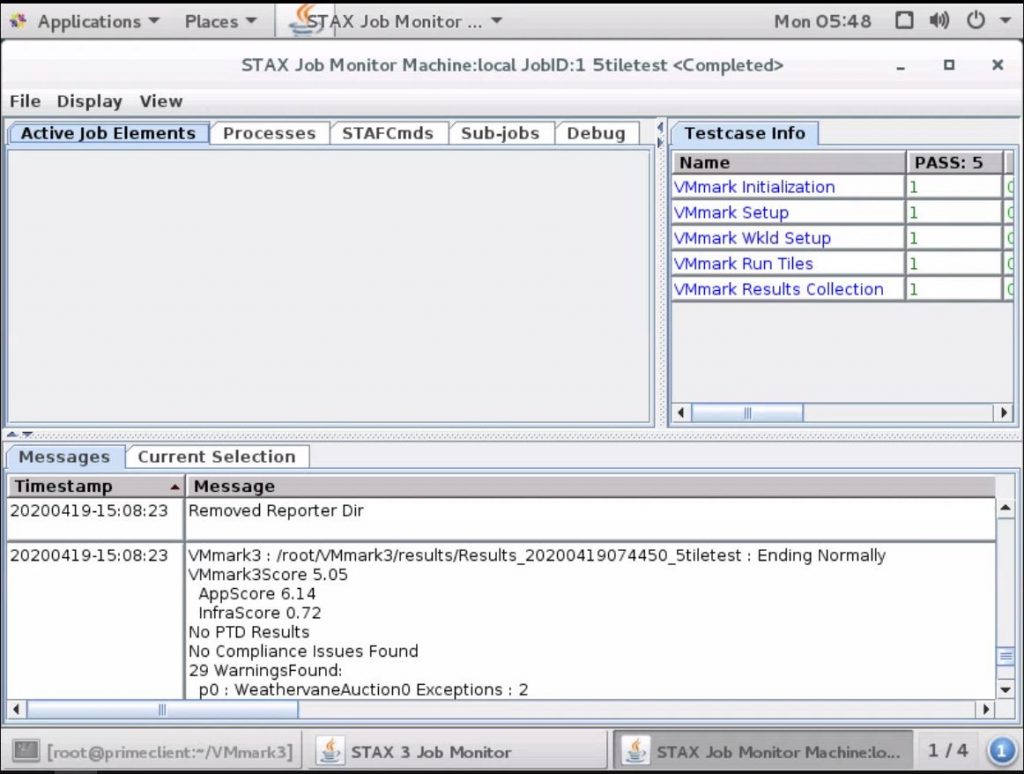
When the test completes, you should see the below screen
Results can be found in root/vmmark3/results/<yourjobname>
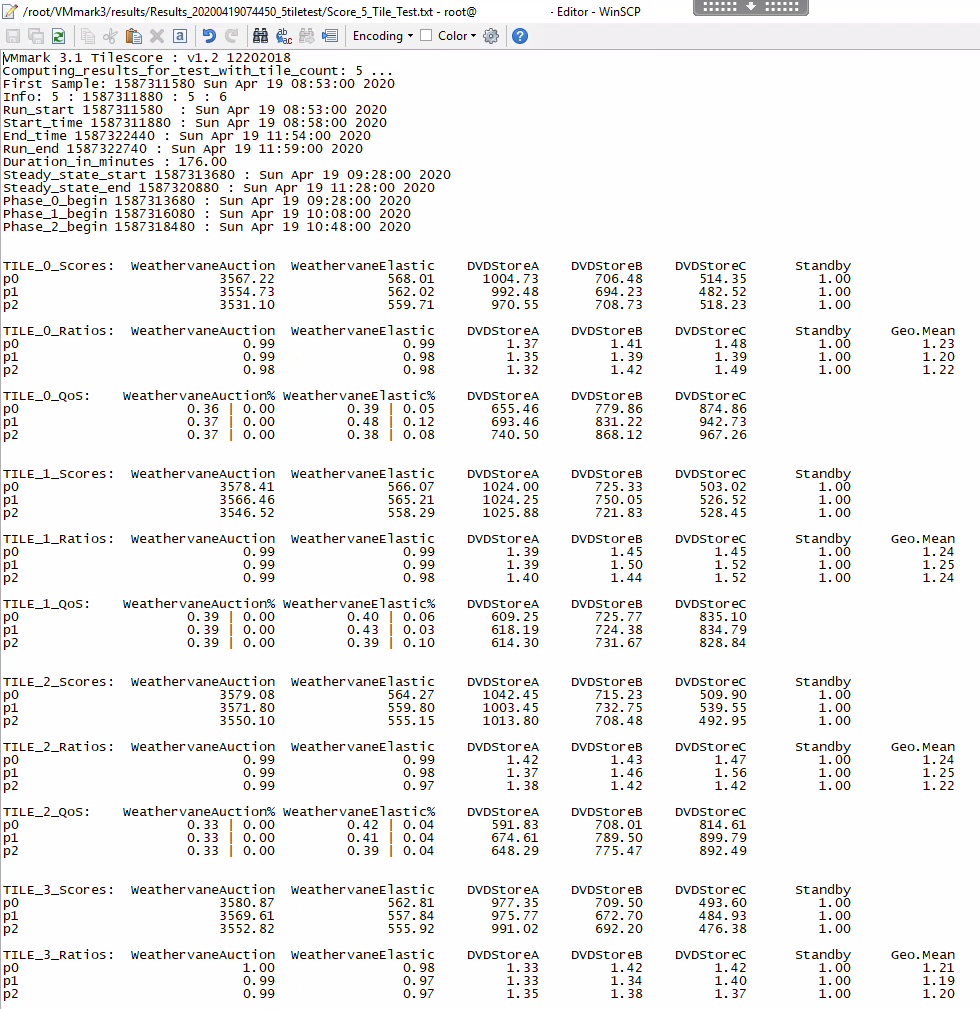
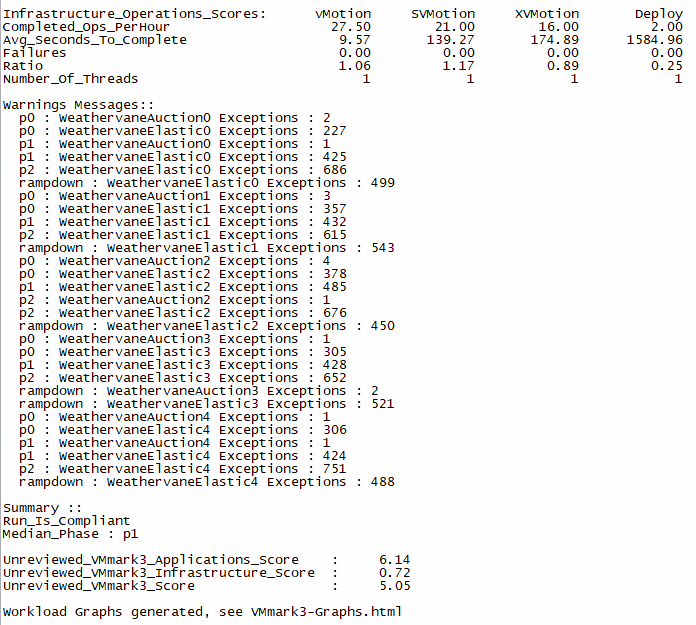
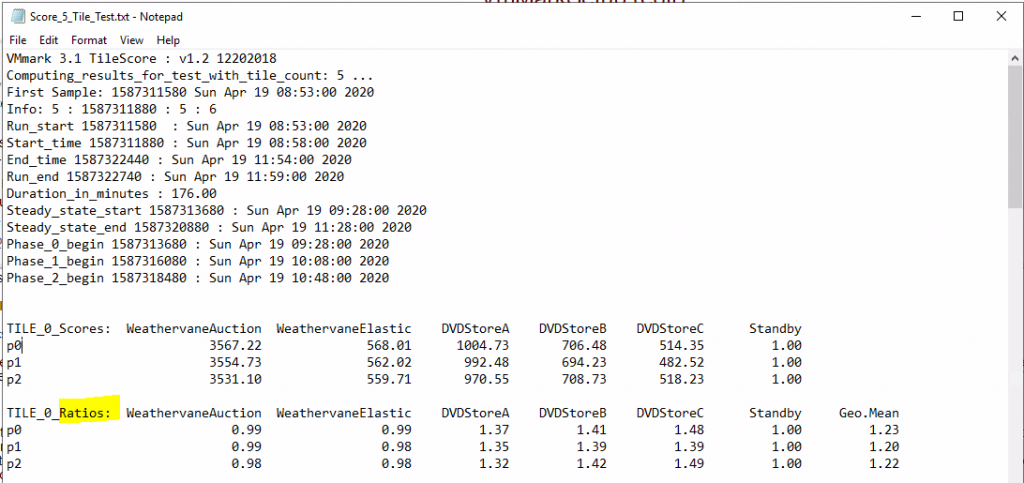
The file is screenprinted below in 2 parts so you can see what gets produced
Analysing the results
Each workload within a tile is constrained to execute at less than full utilization of its virtual machine. However, the performance of each workload can vary to a degree with the speed and capabilities of the underlying platform
A VMmark 3.x score aggregates the throughput metrics of all application and infrastructure workloads to create a single overall benchmark score that can be used to quickly compare different platform configurations. Every workload must also pass its minimum quality-of-service requirements for the benchmark result to be considered compliant
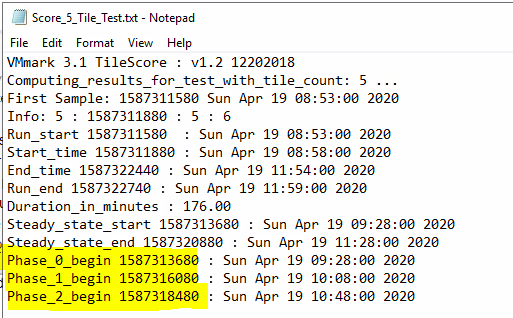
The test has a ramp up time, three 40 minute steady state phases and a ramp down time. For each of the 40 minute phases, we compute the overall result for the platform and select the median score of the three as the reported score. The 40 minute phases can be seen as P0, P1 and P2
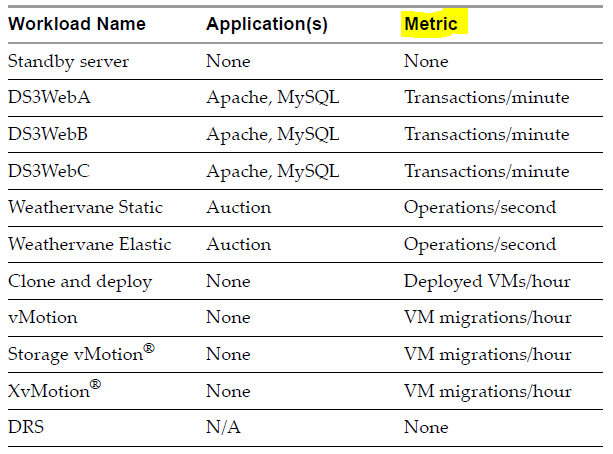
After a VMmark Benchmark test run completes, each individual application and infrastructure workload reports its relevant performance metric. The performance metrics are shown below
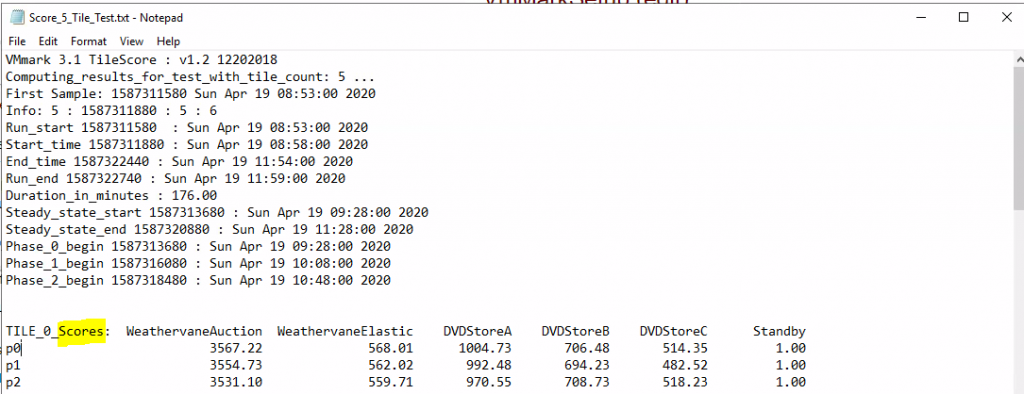
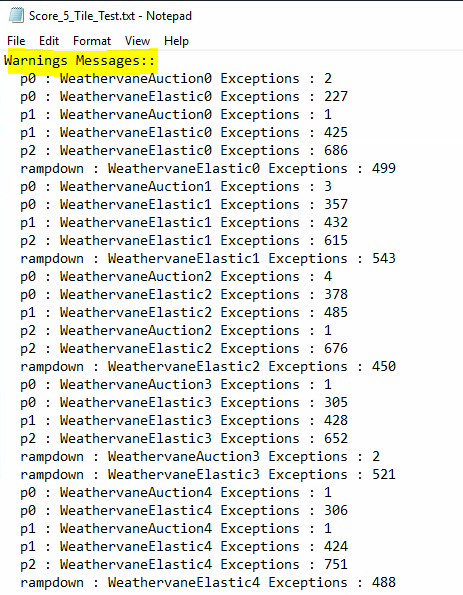
These metrics are collected at frequent intervals during the course of the run. The standard VMmark 3.x workload is designed to run for at least 3 hours with workload metrics reported every 60 seconds. This means that rather than having a single number upon completion of a test run, the user will have a series of numbers for each of the workloads. The series of data points for each workload is averaged to generate a single score for that workload which is then listed in the VMmark results file (Score_N_Tile_Test.txt).
After a valid run, the metrics of the application workloads within each tile are computed and aggregated into a score for that tile. This aggregation is performed by first normalizing the different performance metrics (such as Actions/minute and operations/minute) with respect to a reference platform. Then a geometric mean of the normalized scores is computed as the final score for the tile. .
The ratios are calculated based on a baseline from VMware so the closer to 1 the better
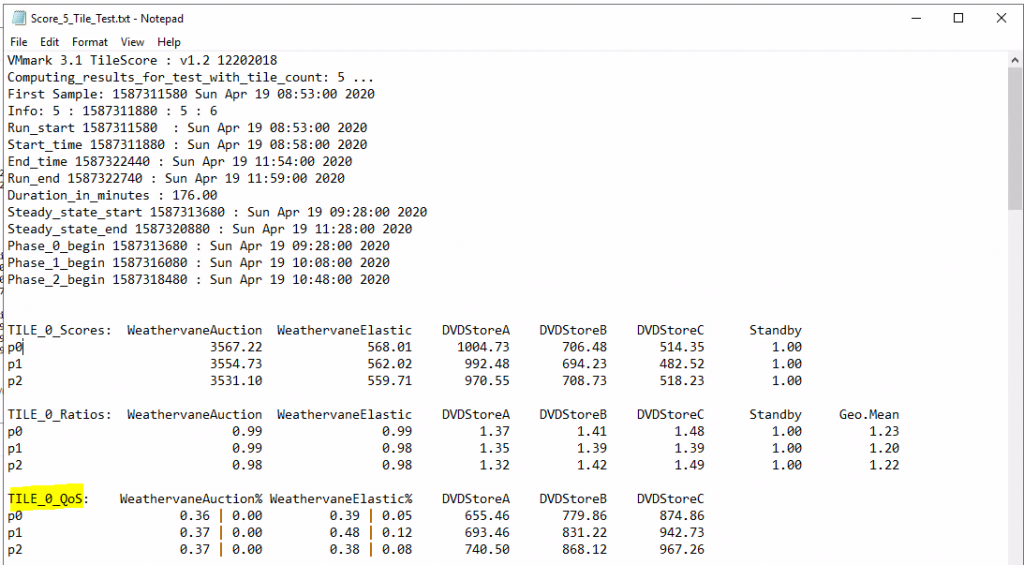
QoS is an important section to look at to see if workloads passed QoS requirements. You need to get a passed run or at least one workload failed the requirements. A * will indicate a failed run
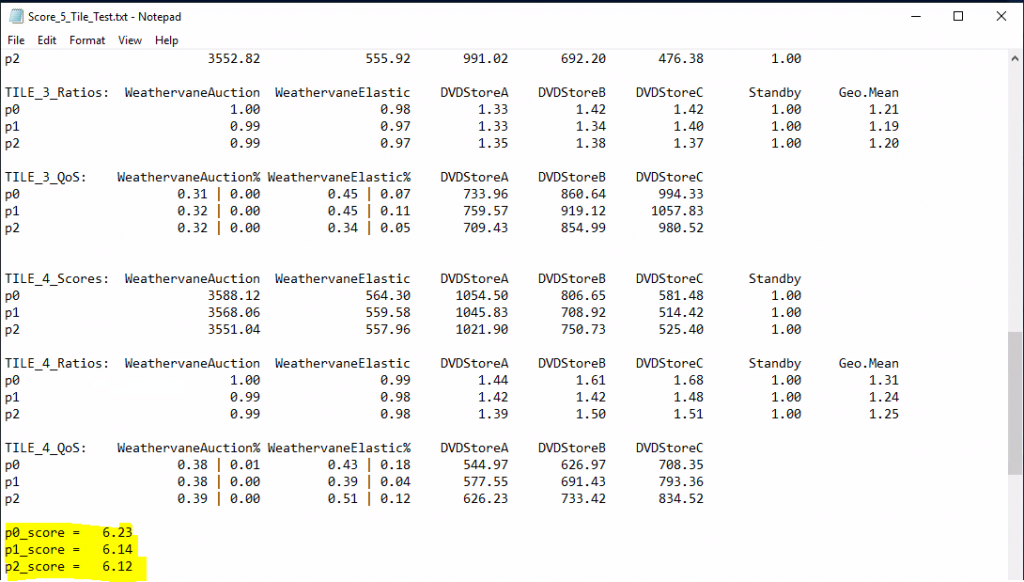
The resulting per-tile scores are then summed to create the application-workload portion of the final metric
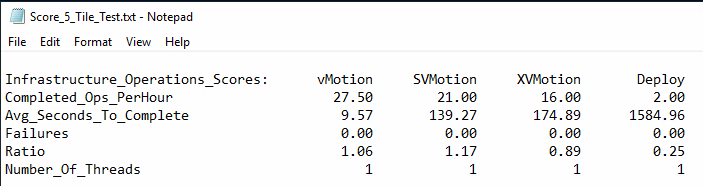
The metrics for the infrastructure workloads are aggregated separately using the same mathematical technique of normalization with respect to a reference platform followed by the computation of the geometric mean. Unlike the application workloads, the infrastructure workloads are not scaled explicitly by the user. Consequently, the infrastructure workloads are compiled as a single group and no multi-tile sums are required.
You will also see any warning messages listed. This is normal and will log a warning if there are timeouts for example. You just do not want the figures to be too large or it may indicate an issue.
The final benchmark score is then computed as a weighted average of the application-workload component and the infrastructure-workload component. VMmark 3.x gives weights of 80% to the application-workload component and 20% to the infrastructure-workload component. These weights were chosen to reflect the relative contribution of infrastructure and application workloads to overall resource demands.
The benchmark helps measure the virtualization overheads of the individual workloads as well as the scalability of the entire system. Therefore results for multi-tile runs are reported as the aggregate score for all tiles, the individual scores for each of the tiles, and the scores for the workloads within the tiles as well as the individual scores for each infrastructure workload.
If any of the workloads within any tile fails to run, produces errors during a run, or fails its minimum quality-of-service requirement, that entire VMmark run is considered to be invalid. This applies to programs running on both the servers and the client systems. Also, the configuration of the workloads, the versions of the benchmarks, operating systems, tools, and all other software used must conform to the specifications in the VMmark documentation.
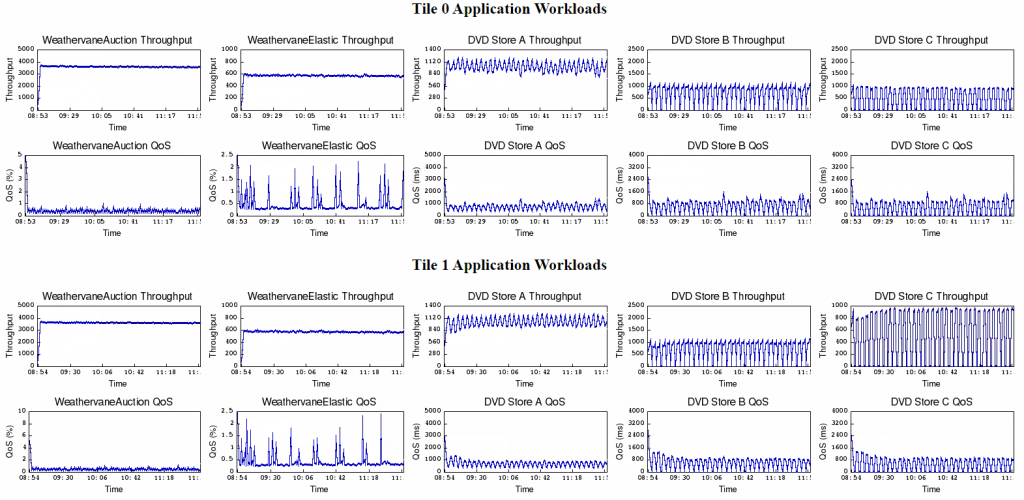
There is also a file called VMMark3-Graphs.html in the results file. You will need to download the results and open the file from here
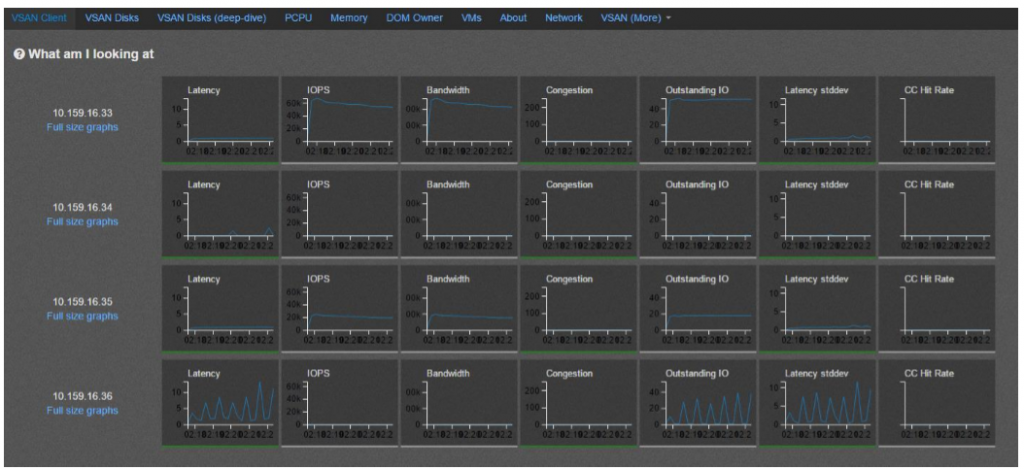
The VMmark3-Graphs.html file plots the throughput and quality of service (QoS) results of each VMmark workload over time for each tile. This provides an in-depth and visually intuitive look at workload performance during the run. Compliant workloads are graphed in blue and non compliant workloads are graphed in red, so you can easily isolate characteristics of non-compliant workloads and can compare performance across tiles. Note that the plotted workload includes the ramp-up and ramp down periods. The VMmark3-Graphs.html file also contains details of the test, such as duration, start time, and end time, so that the most important information about the run is accessible in one file.
Useful Benchmarking link
This link will show you other vendors benchmarking scores and information in a much more detailed view for comparison
An OVA file is a virtual appliance used by virtualization applications such as VMware Workstation and Oracle VM Virtualbox. It is a package that contains files used to describe a virtual machine, which includes an . OVF descriptor file, optional manifest (. MF) and certificate files, and other related files.
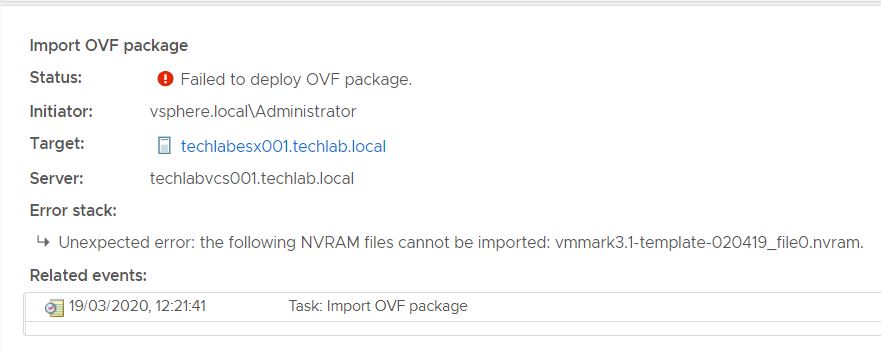
The problem
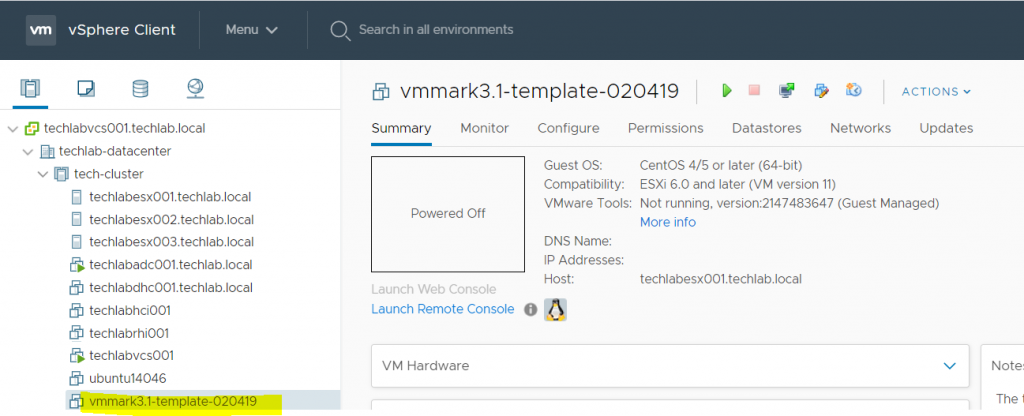
I want to do some performance testing with VMmark – https://www.vmware.com/uk/products/vmmark.html . To do this I need to import/deploy the VMmark .ova file- vmmark3.1-template-020419.ova into my 6.7U3 vCenter, however when I try this a message appears which says it cannot import the .nvram file which is part of this .ova 🙁
So what do we do?!
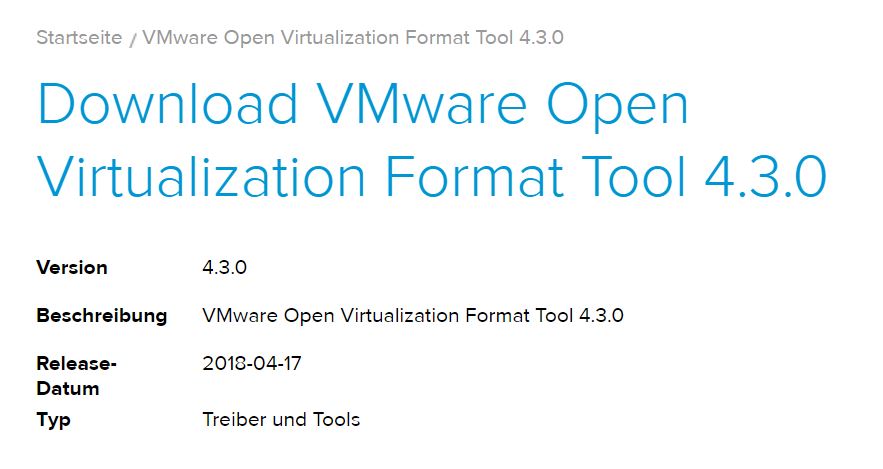
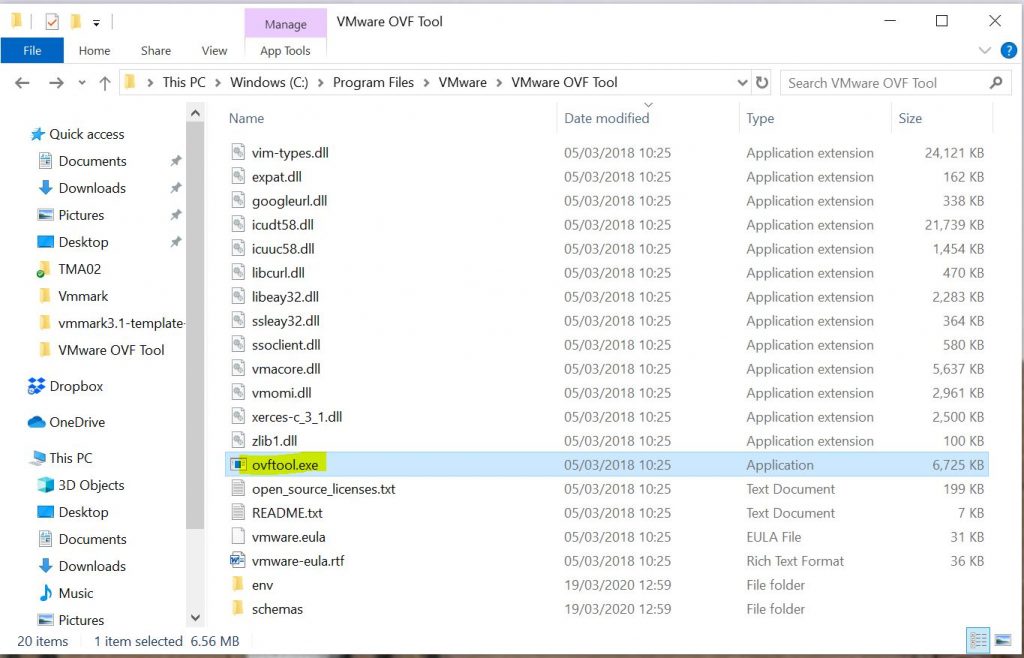
First of all I need a .ovf / .ova editor because I am going to need to edit this .ova. I decided to choose VMware Open Virtualization Format Tool. 4.3.0
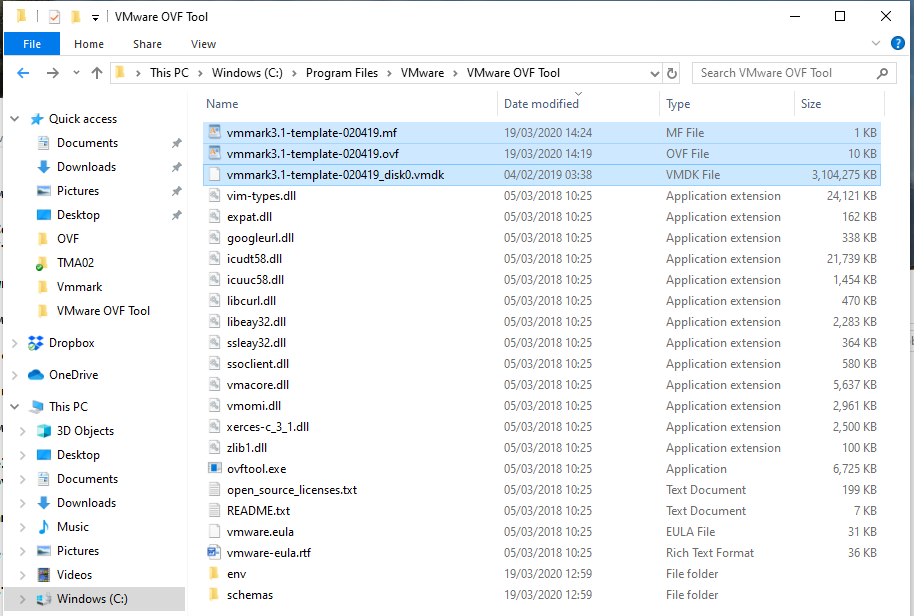
I downloaded and installed it on my laptop (Windows 10) in C:\Program Files\VMware\VMware OVF Tool and you will see the below files
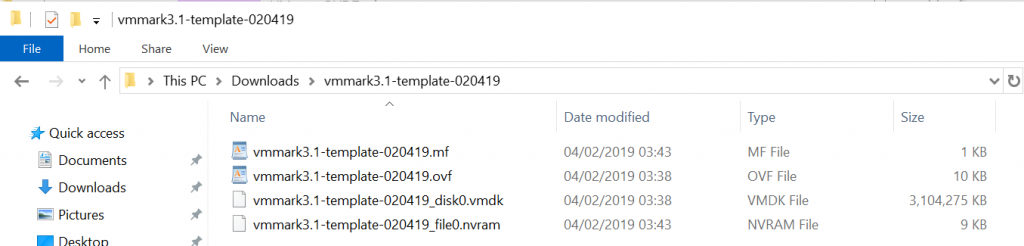
Next, I will find my downloaded VMmark file – vmmark3.1-template-020419.ova and unzip it into a folder. I can now see I have 4 files – A .mf file, a .ovf file, a .vmdk file and a .nvram file
The first thing I am going to do is delete the .nvram file from this folder.
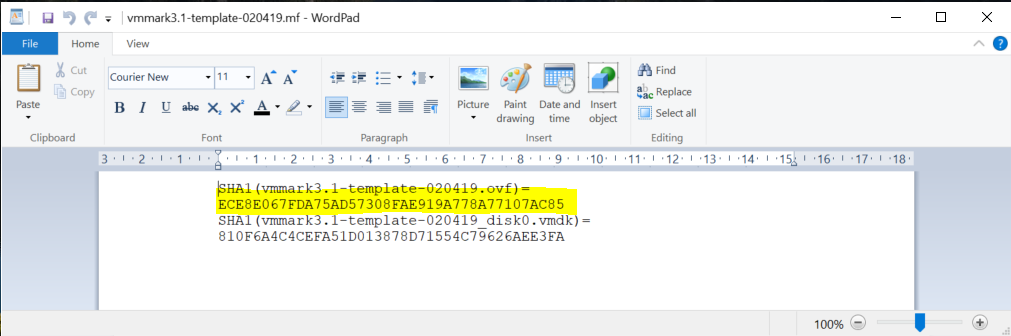
Next, I am going to edit the vmmark3.1-template-020419.mf which I opened in Wordpad. I removed the section highlighted in yellow relating to nvram.
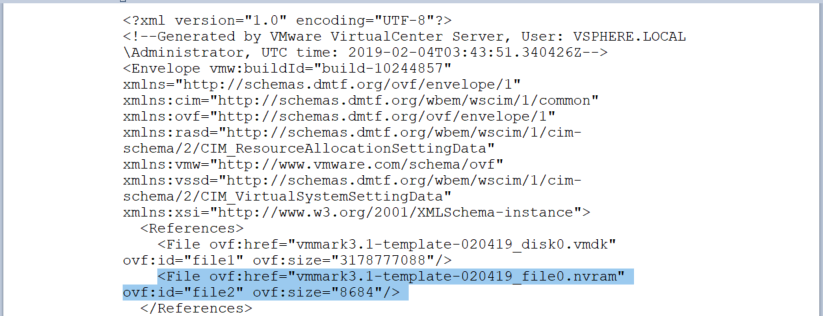
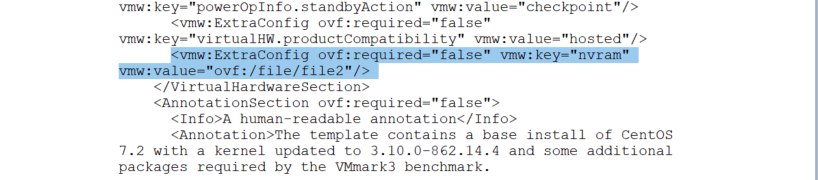
Next, I opened the vmmark3.1-template-020419.ovf file and removed the following sections highlighted in blue below relating to nvram and saved the file. This link was useful to me at this point – https://kb.vmware.com/s/article/67724
and
Now, that we have adjusted the .ovf file and the manifest file, we need to do another step before we are able to repackage the .ova again. As we edited the .OVF file and deleted content from it, the SHA1 checksum has changed. We need to recalculate the SHA1 checksum of the .ovf file to update it in the manifest file. Otherwise we will encounter issues while repackaging the .OVA file. Powershell can be used for this with the command below.
Copy the new hash and you will need to copy this into the vmmark3.1-template-020419.mf file for the .ovf line. Save the file. You do not have to run this for the .vmdk file as this has not changed.
I then copied all 3 unzipped files in my folder (vmmark3.1-template-020419.mf, vmmark3.1-template-020419.ovf and vmmark3.1-template-020419_disk0.vmdk) to the C:\Program Files\VMware\VMware OVF Tool folder
Now I can run a command in cmd.exe to repackage my files into a .ova file
ovftool.exe –allowExtraConfig vmmark3.1-template-020419.ovf new-vmmark3.1-template-020419.ova. Hopefully it completes successfully
Now you can try deploying the new-vmark3.1-templates-020419.ova into vCenter. Thankfully it worked great 🙂
In vSphere 6.7 releases and older, the UMDS 6.7 is bundled with the vCenter Server Appliance installer. You can use the UMDS bundle from the vCenter Server Appliance to install UMDS 6.7 on a separate Linux-based system.
UMDS is a 64-bit application and requires a 64-bit Linux-based system.
You cannot upgrade UMDS that runs on a Linux-based operating system. You can uninstall the current version of UMDS, perform a fresh installation of UMDS according to all system requirements, and use the existing patch store from the UMDS that you uninstalled.
Supported Operating Systems
The Update Manager Download Service (UMDS) can run on a limited number of Linux-based operating systems.
Once this is built, edit the settings and attach the iso to the Ubuntu CD drive via the datastore
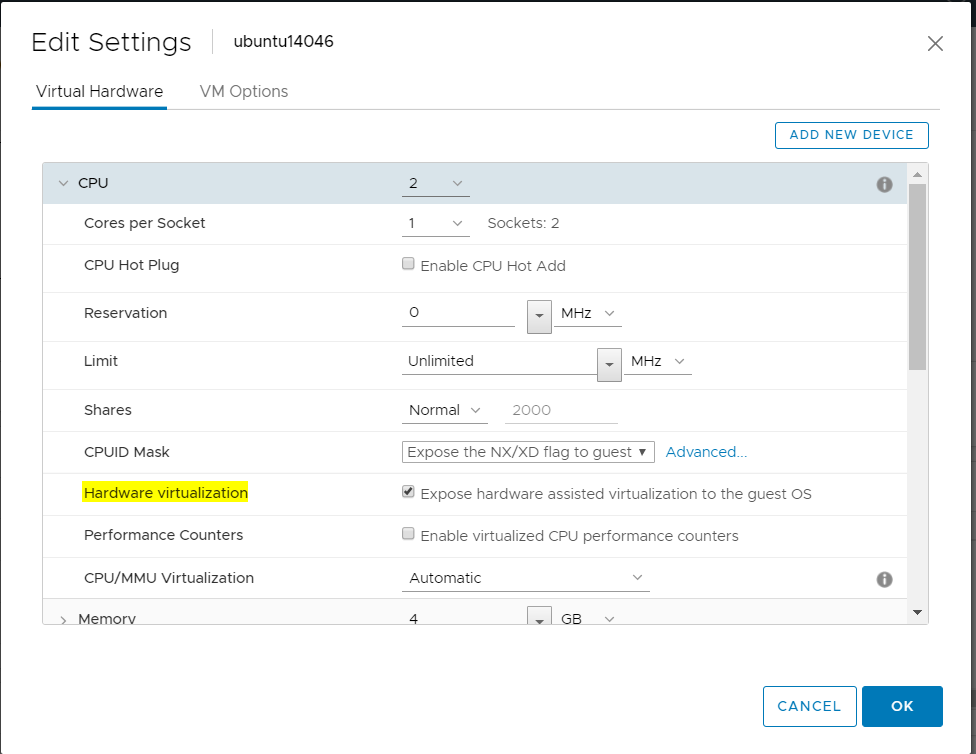
On the “Virtual Hardware” tab, expand “CPU,” and select “Expose hardware assisted virtualization to guest OS.”
Right-click your newly created VM and select “Power On.”
Right-click the VM again and select “Open Console.”
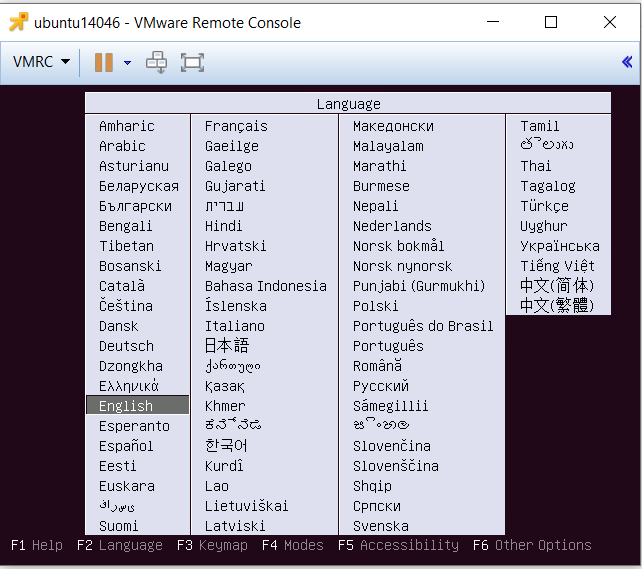
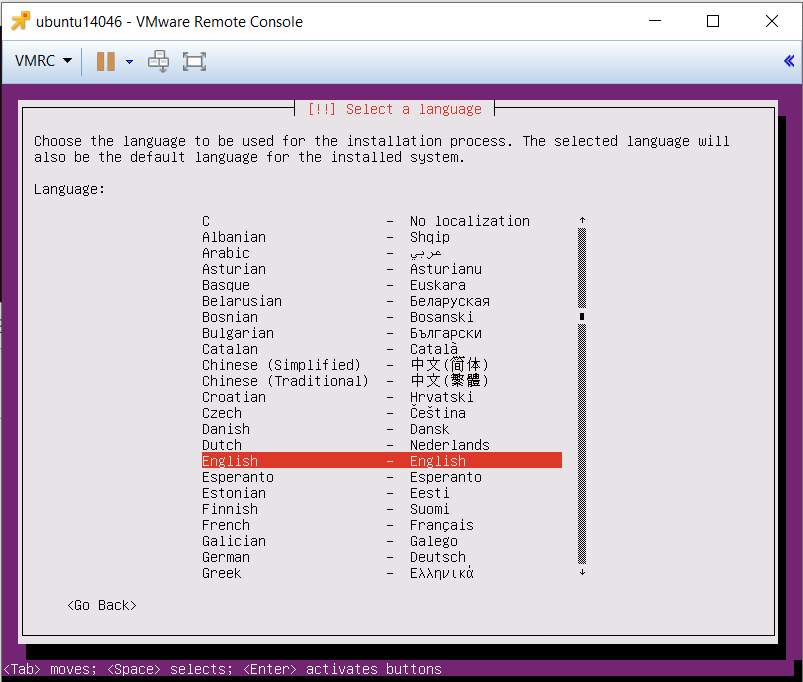
The Ubuntu installation process should begin automatically and the first prompt is to choose a language. Select English and press Enter
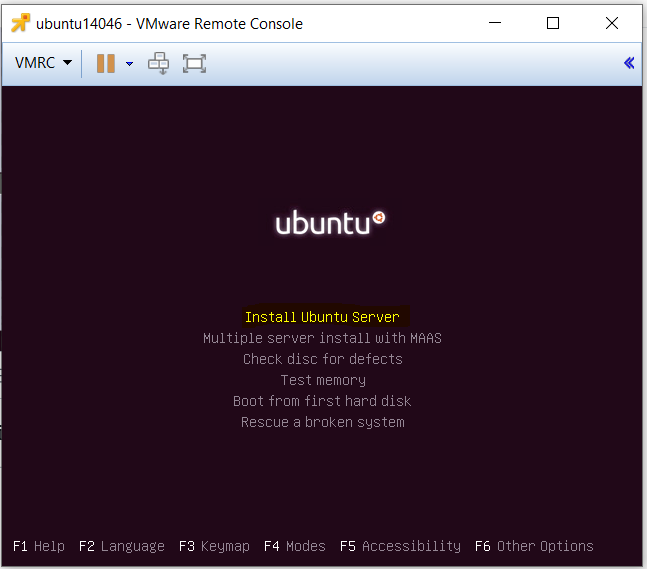
Highlight “Install Ubuntu Server” and press Enter
Select English
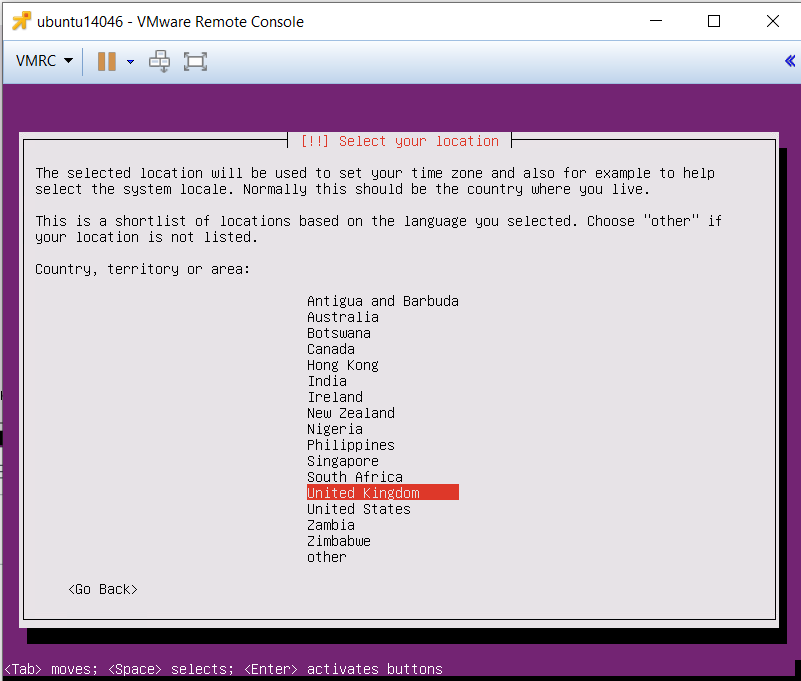
Select your location – In my case the United Kingdom
On the “Configure the keyboard” screen select “Yes” and press Enter. Once it has taken you through the configuration, you will see the page below
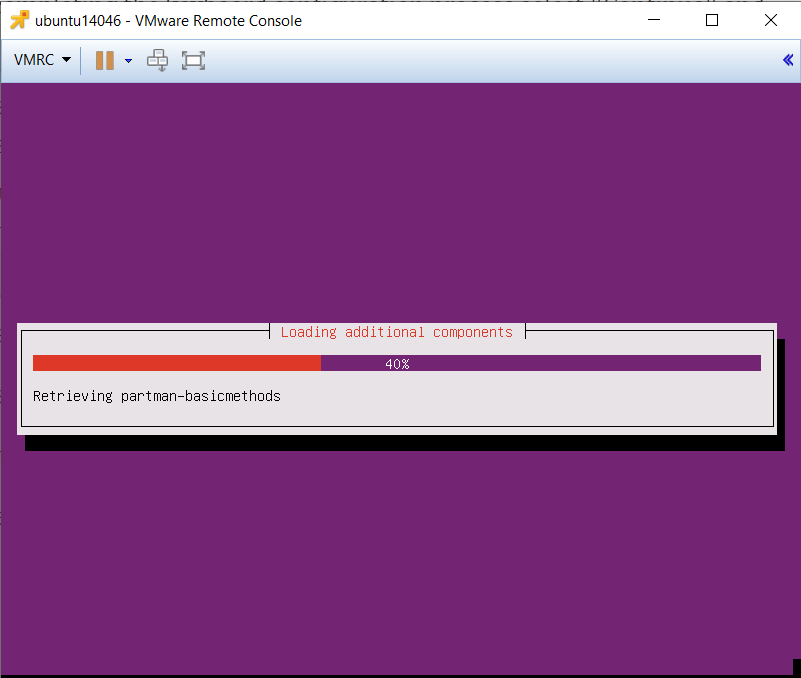
It will run through the below screen
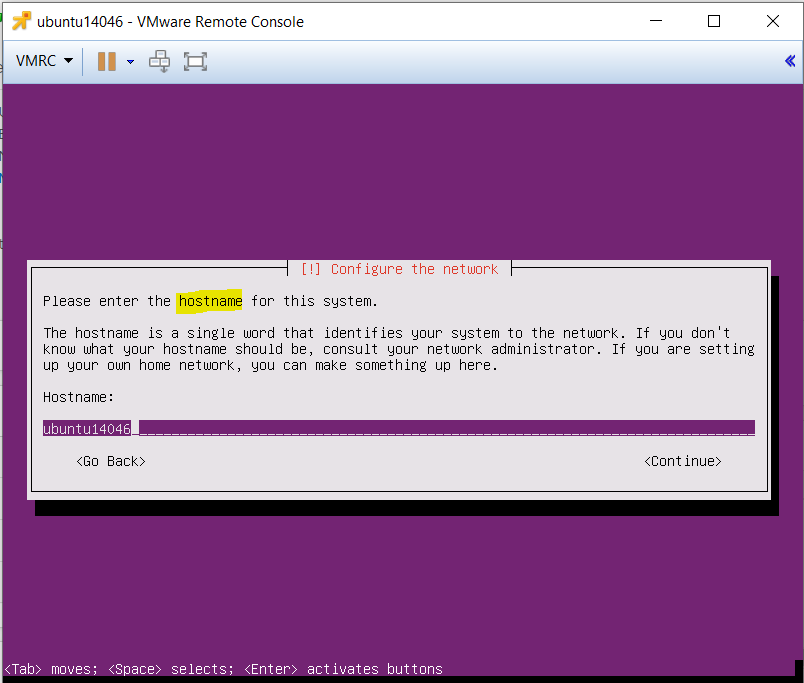
Enter a hostname
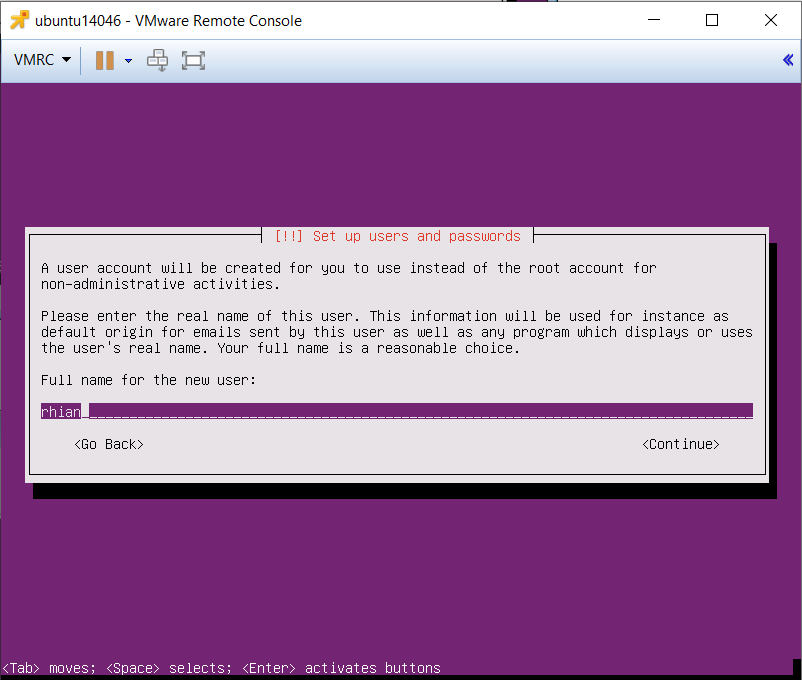
Ubuntu prompts you to create a user account to be used instead of a root account. Start by entering the full name (first and last) of the user and Press Enter
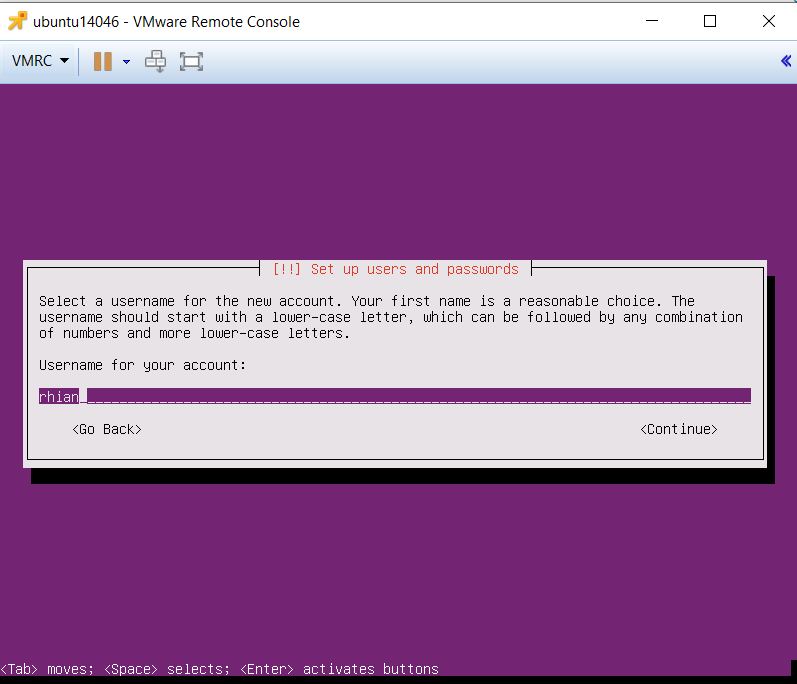
Enter a username for the account
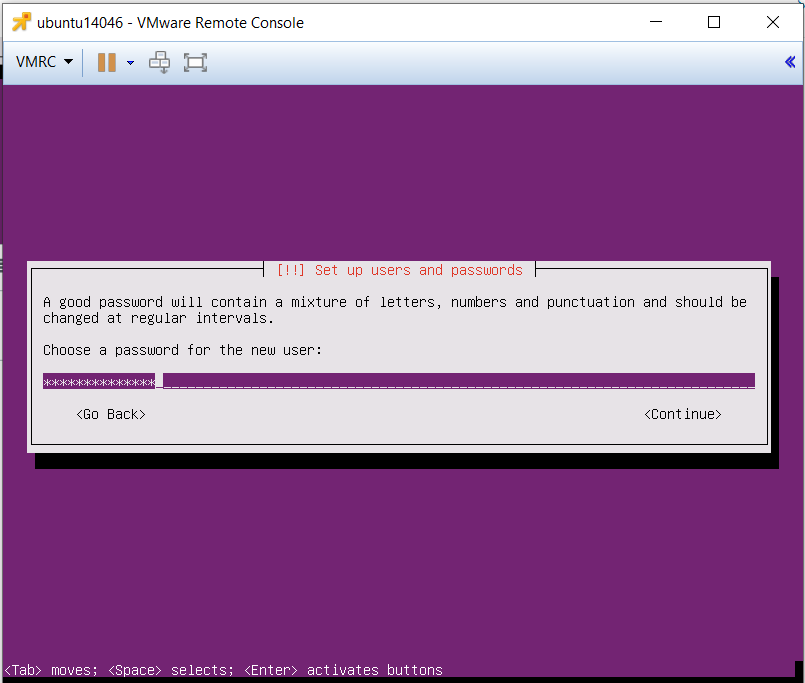
Choose a password
Enter the password again
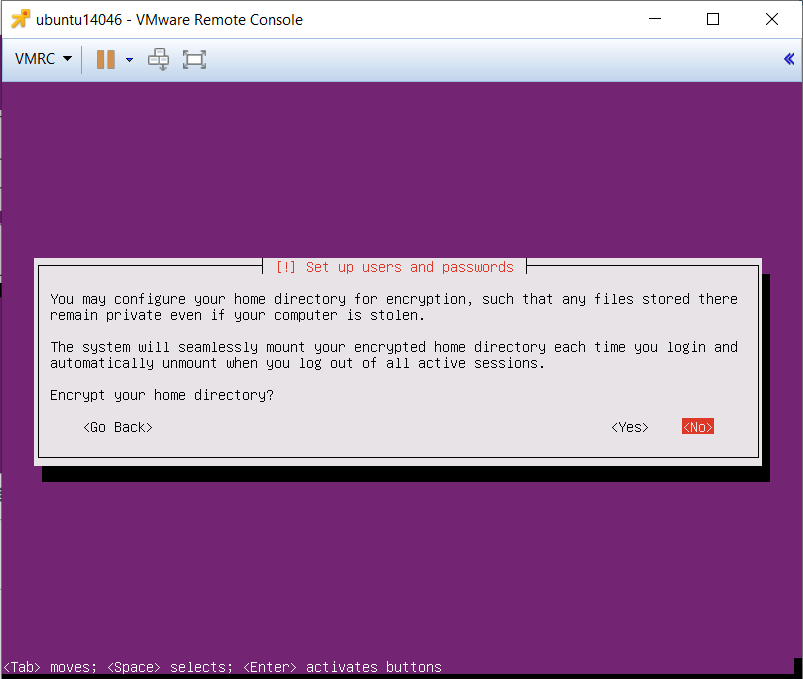
I chose not to encrypt my home directory, so select “No” and press Enter
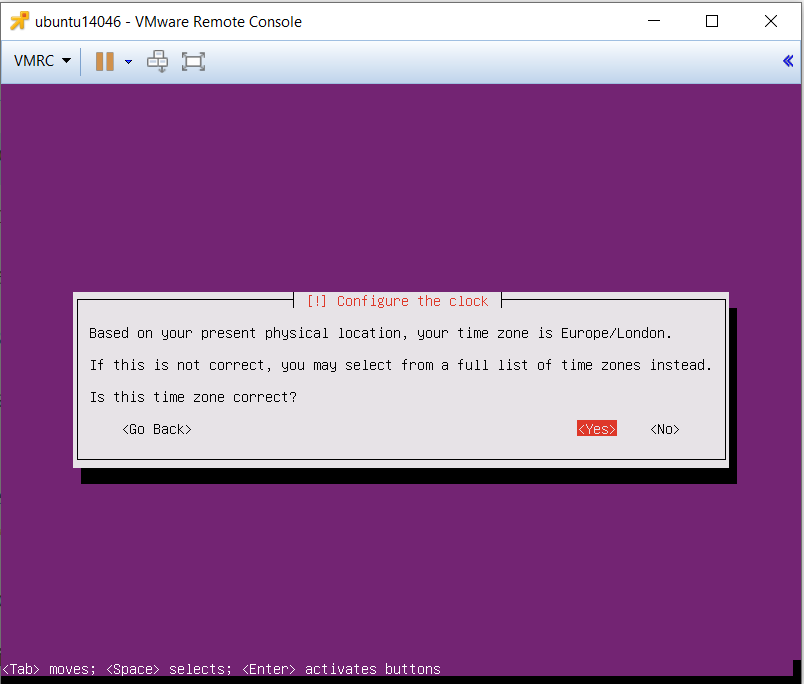
Configure the clock
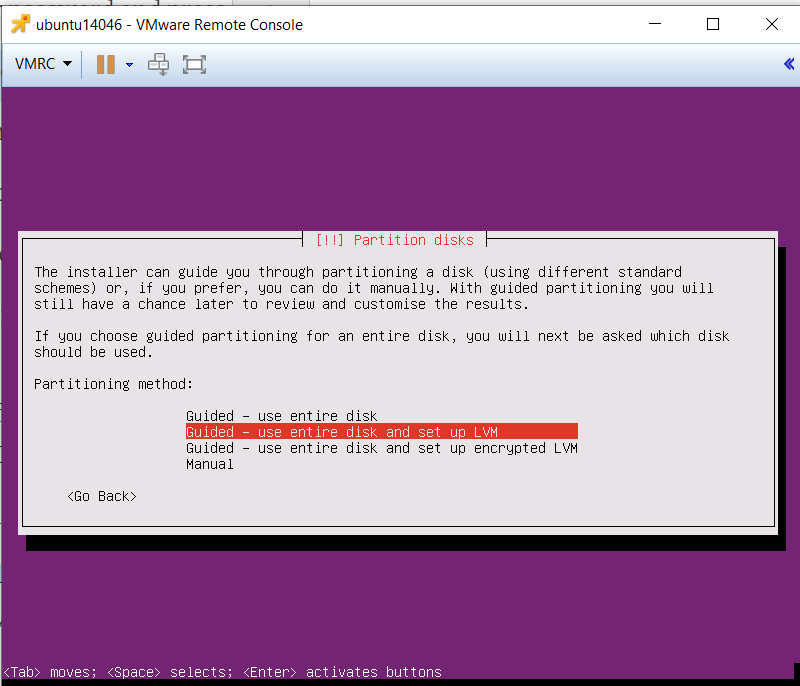
Select “Guided – use entire disk and set up LVM” and press Enter
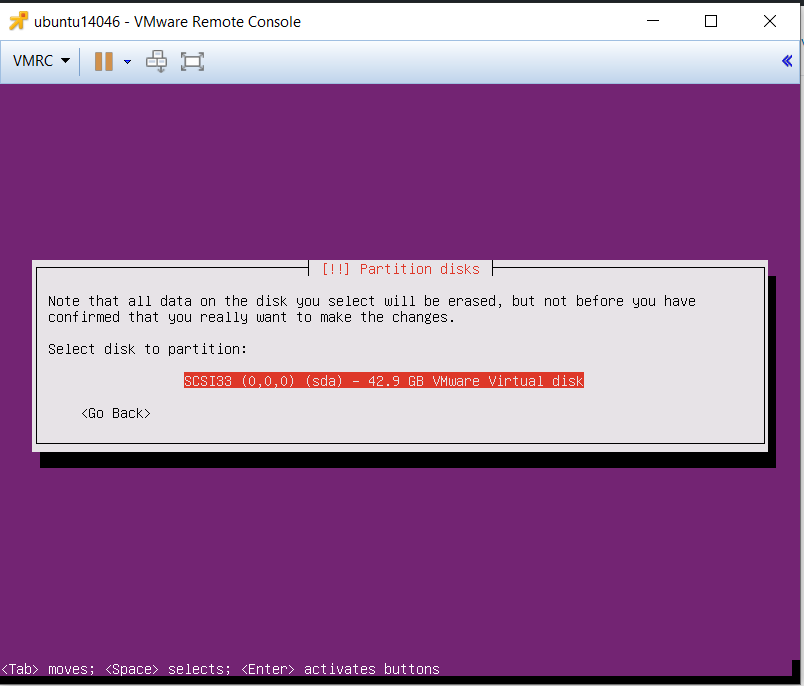
Choose the disk to partition. I only have one
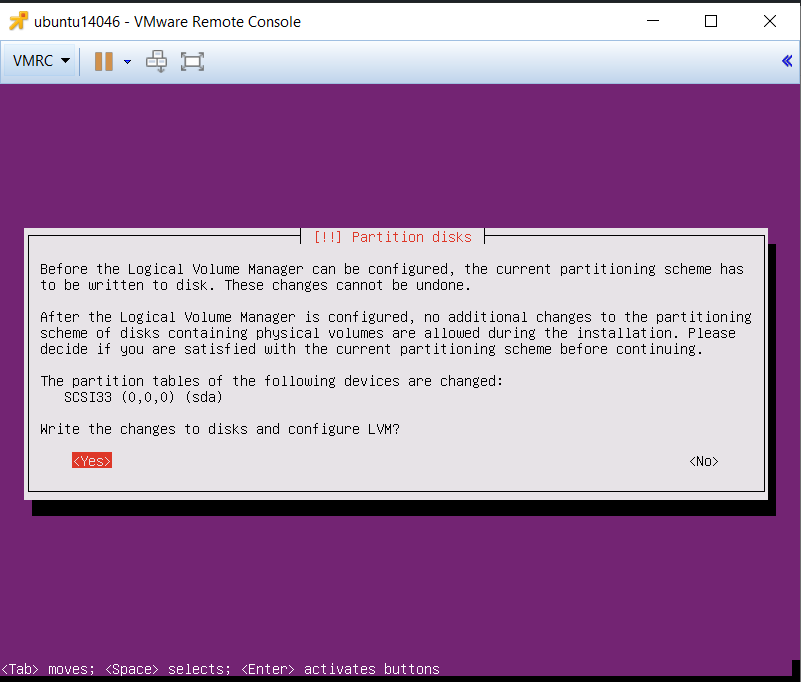
Select “Yes” and press enter to write the changes to disk and configure LVM.
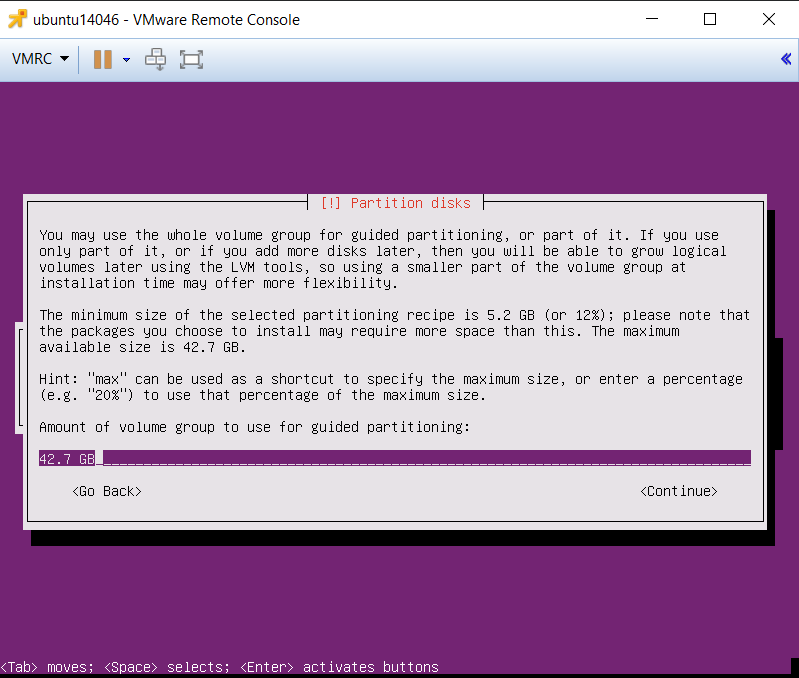
Accept the default amount of the volume group that will be used for guided partitioning. This tells the installer to use the full disk and press Enter
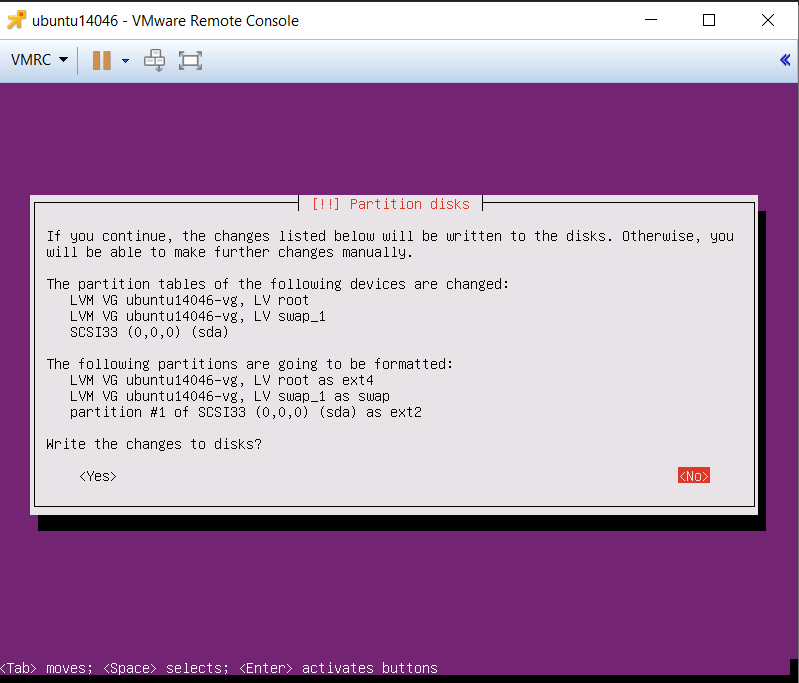
Select Yes and press enter to write the changes to disk
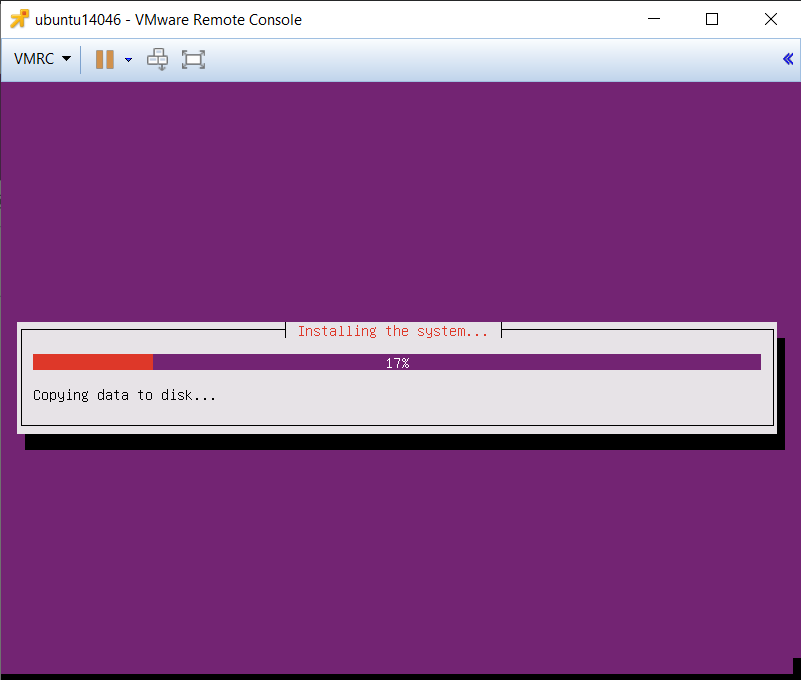
It will proceed to install the system
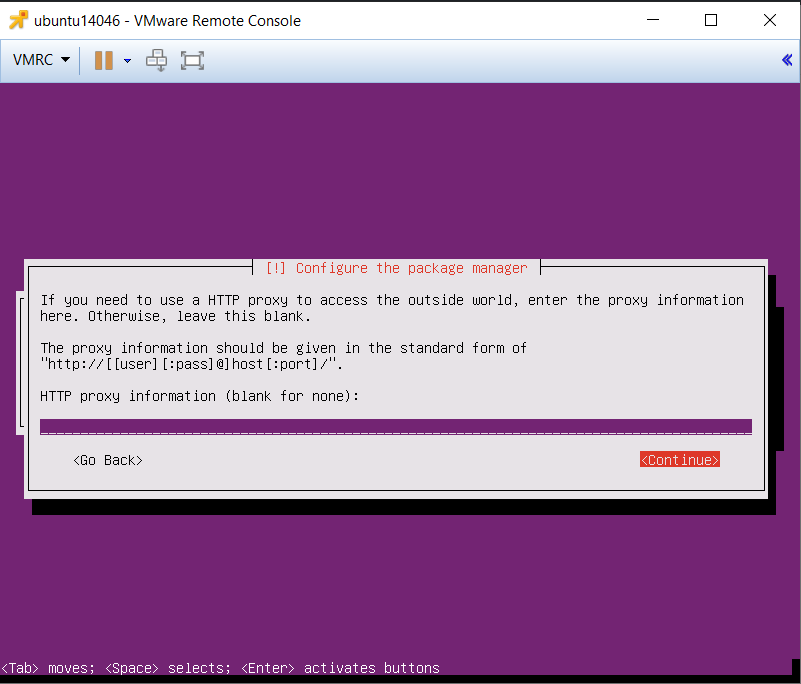
The install will begin and at some point it will prompt you to enter your Internet proxy. I don’t use one, so I left it blank and pressed Enter
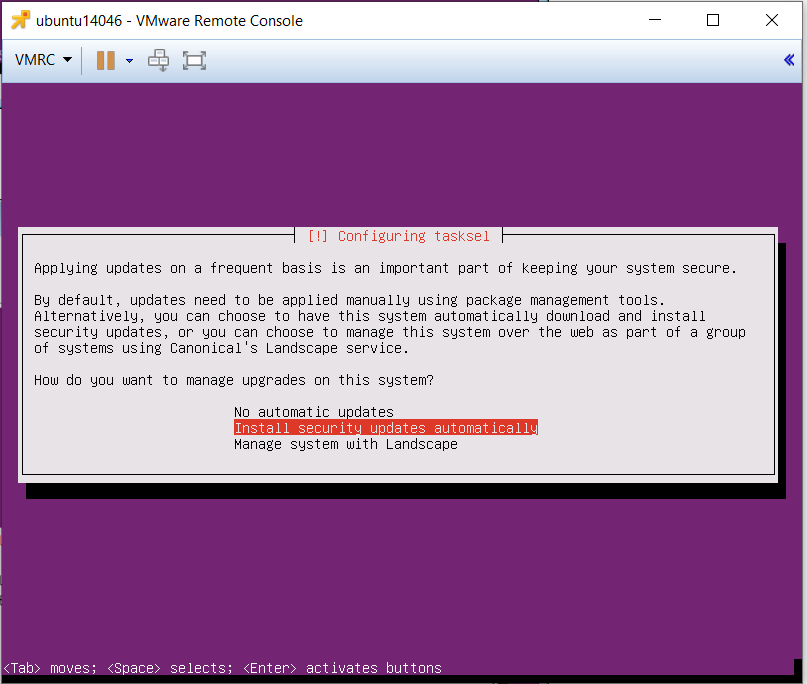
A dialog will be presented asking you how you want to manage system upgrades. In this case I’ll manually apply updates, so I selected “No automatic updates” and pressed Enter
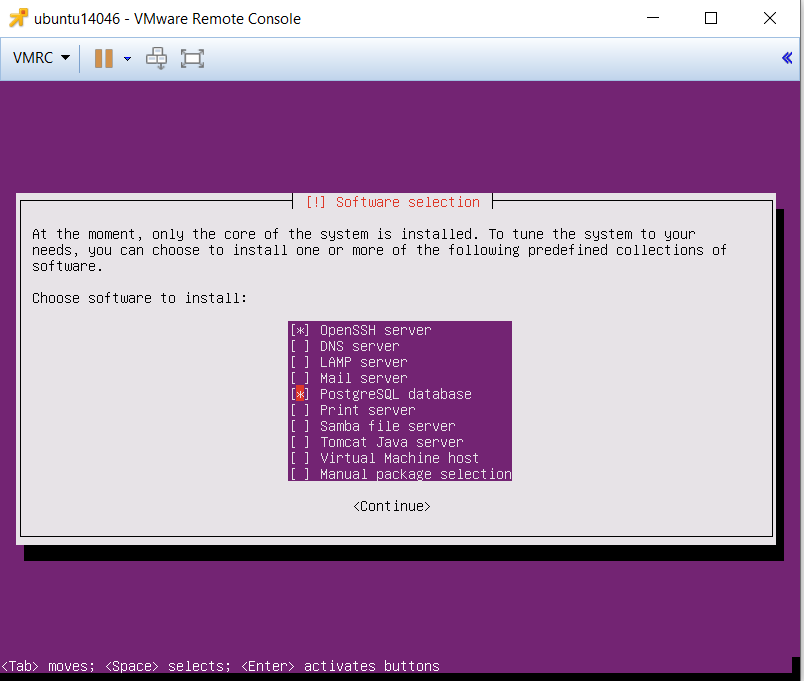
On the Software selection I have just chosen OpenSSH and PostGres as I am installing a VMware UMDS server
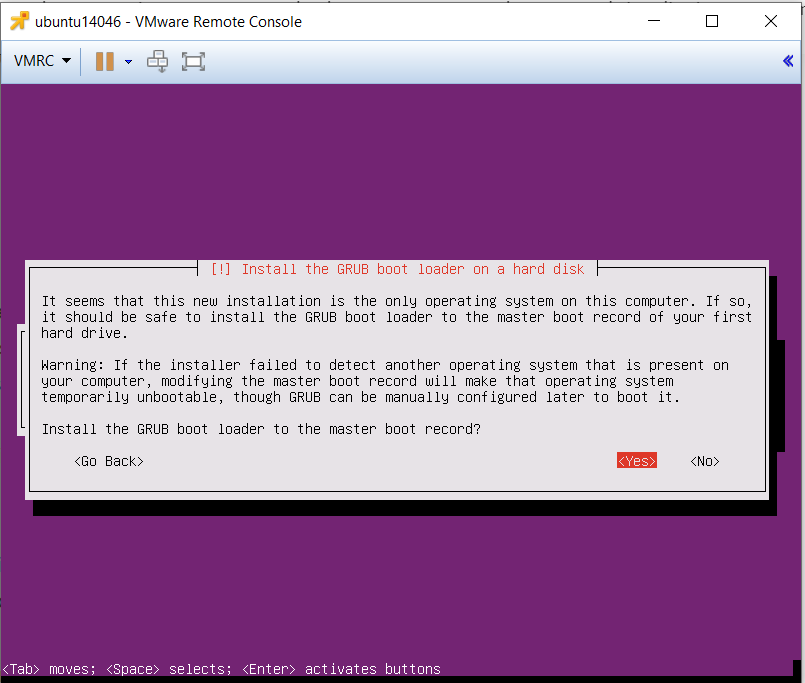
I clicked Yes to the Grub boot loader message
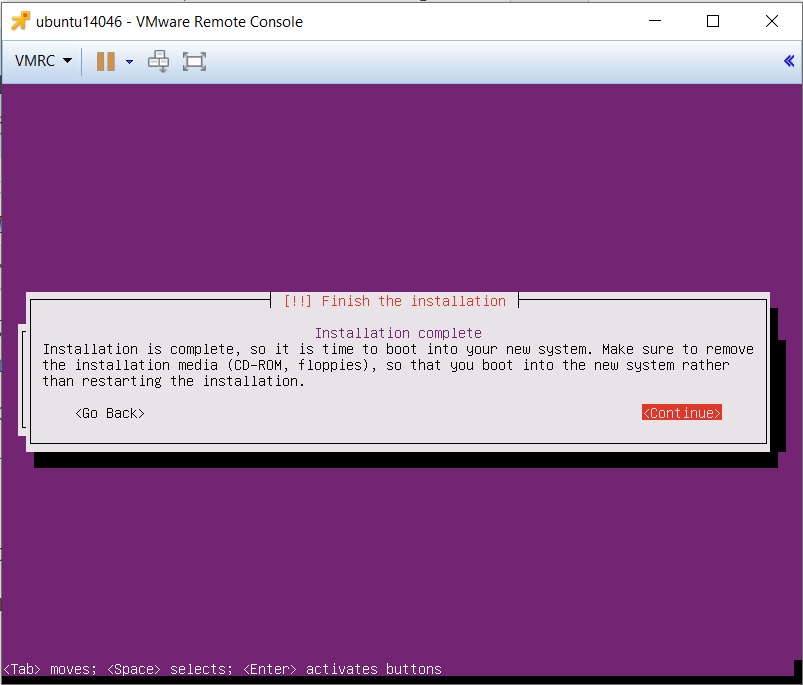
Finish the Installation
You are now ready to use the Ubuntu VM
Update VMware Tools
VMware Tools is a group of utilities and drivers that enhance the performance of the virtual machine’s guest operating system when running on an ESXi host. The steps below walk you through installing VMware Tools on our Ubuntu Server 14.04.06 virtual machine using the command line. Note that whenever you update the Linux kernel you will have to reinstall VMware Tools.
Launch a Web browser and login to the vSphere Web Client.
From the vCenter Home page click on “VMs and Templates.”
Right-click the VM and navigate to “All vCenter Actions” > “Guest OS” > “Install VMware Tools.”
When prompted click “Mount” to mount the VMware Tools installation disk image on the virtual CD/DVD drive of the Ubuntu Server virtual machine.
Right-click the VM again and select “Open Console.”
Login with the credentials used during the server installation process
Mount the VMware Tools CD image to /media/cdrom:
$ sudo mount /dev/cdrom /media/cdrom mount
/dev/sr0 is write-protected, mounting read-only
Extract the VMware Tools installer archive file to /tmp
$ tar xzvf /media/cdrom/VMwareTools-*.tar.gz -C /tmp/
Install VMware Tools by running the command below. Note that the -d switch assumes that you want to accept the defaults. If you don’t use -d switch you can opt to choose the default or a custom setting for each question.
$ cd /tmp/vmware-tools-distrib/
$ sudo ./vmware-install.pl -d ... The configuration of VMware Tools 9.4.5 build-1598834 for Linux for this running kernel completed successfully. ...
Reboot the virtual machine after the installation completes:
$ sudo reboot
Preparing the VM for UMDS
The next step is to prepare the VM for UMDS and then install it.
The following pre-requisite components for Linux are required but read on..
When you install UMDS manually, you are prompted for several responses and the script currently just uses those defaults. If you wish to change them, you simply just need to edit the “answer” file that the script generates to provide to the UMDS installer itself.
Here is what the script is doing at a high level:
Extract the UMDS installer into /tmp
Install all OS package dependencies
Create UMDS installer answer file /tmp/answer
Create the /etc/odbc.ini and /etc/odbcinst.ini configuration file
Updating pg_hba.conf to allow UMDS user to access the DB
Start Postgres DB
Create UMDSDB user and setting the assigned password
Install UMDS
Procedure
Upload both the UMDS install script (install_umds65.sh) as well as the UMDS install package found in the VCSA 6.5 ISO to an already deployed Ubuntu system
The script needs to run as root and it requires the following 5 command-line options:
UMDS package installer
Name of the UMDS Database
Name of the UMDS DSN Entry
Username for running the UMDS service
Password for the UMDS username
Running the script
I found I had to adjust the permissions on the script which I did via WinSCP first
It will start to install and this is what you will see
Extracting VMware-UMDS-6.7.0-14203538.tar.gz to /tmp …
vmware-umds-distrib/
vmware-umds-distrib/bin/
vmware-umds-distrib/bin/7z
vmware-umds-distrib/bin/vciInstallUtils
vmware-umds-distrib/bin/vmware-umds
vmware-umds-distrib/bin/downloadConfig.xml
vmware-umds-distrib/bin/vciInstallUtils_config.xml
vmware-umds-distrib/bin/unzip
vmware-umds-distrib/bin/zip
vmware-umds-distrib/bin/umds
vmware-umds-distrib/bin/vmware-updatemgr-wrapper
vmware-umds-distrib/bin/vmware-vciInstallUtils
vmware-umds-distrib/EULA
vmware-umds-distrib/share/
vmware-umds-distrib/share/VCI_proc_postgresql-100-110.sql
vmware-umds-distrib/share/VCI_proc_postgresql-110-120.sql
vmware-umds-distrib/share/VCI_data_postgresql-100-110.sql
vmware-umds-distrib/share/VCI_table_postgresql-110-120.sql
vmware-umds-distrib/share/VCI_base_postgresql.sql
vmware-umds-distrib/share/VCI_undo_postgresql.sql
vmware-umds-distrib/share/VCI_initialsetup_postgresql.sql
vmware-umds-distrib/share/VCI_table_postgresql-100-110.sql
vmware-umds-distrib/share/VCI_data_postgresql-110-120.sql
vmware-umds-distrib/share/VCI_proc_postgresql.sql
vmware-umds-distrib/lib/
vmware-umds-distrib/lib/libvim-types.so
vmware-umds-distrib/lib/libboost_program_options-gcc48-mt-1_61.so.1.61.0
vmware-umds-distrib/lib/libboost_serialization-gcc48-mt-1_61.so.1.61.0
vmware-umds-distrib/lib/libvci-types.so
vmware-umds-distrib/lib/libssl.so.1.0.2
vmware-umds-distrib/lib/libvmacore.so
vmware-umds-distrib/lib/libvci-registrar.so
vmware-umds-distrib/lib/libboost_thread-gcc48-mt-1_61.so.1.61.0
vmware-umds-distrib/lib/libvci-vcIntegrity.so
vmware-umds-distrib/lib/libufa-types.so
vmware-umds-distrib/lib/libssoclient.so
vmware-umds-distrib/lib/libvsanmgmt-types.so
vmware-umds-distrib/lib/liblog4cpp.so.4
vmware-umds-distrib/lib/libstdc++.so.6
vmware-umds-distrib/lib/libboost_filesystem-gcc48-mt-1_61.so.1.61.0
vmware-umds-distrib/lib/libcares.so.2
vmware-umds-distrib/lib/libodbc.so.2
vmware-umds-distrib/lib/libufa-common.so
vmware-umds-distrib/lib/libcurl.so.4
vmware-umds-distrib/lib/libvmomi.so
vmware-umds-distrib/lib/libexpat.so
vmware-umds-distrib/lib/libboost_system-gcc48-mt-1_61.so.1.61.0
vmware-umds-distrib/lib/libnfclib.so
vmware-umds-distrib/lib/libcrypto.so.1.0.2
vmware-umds-distrib/lib/libz.so.1
vmware-umds-distrib/vmware-install.pl
Installing UMDS package dependencies …
Hit http://security.ubuntu.com trusty-security InRelease
Ign http://gb.archive.ubuntu.com trusty InRelease
Hit http://gb.archive.ubuntu.com trusty-updates InRelease
Hit http://gb.archive.ubuntu.com trusty-backports InRelease
Hit http://gb.archive.ubuntu.com trusty Release.gpg
Hit http://gb.archive.ubuntu.com trusty Release
Hit http://security.ubuntu.com trusty-security/main Sources
Hit http://gb.archive.ubuntu.com trusty-updates/main Sources
Hit http://security.ubuntu.com trusty-security/restricted Sources
Hit http://gb.archive.ubuntu.com trusty-updates/restricted Sources
Hit http://security.ubuntu.com trusty-security/universe Sources
Hit http://gb.archive.ubuntu.com trusty-updates/universe Sources
Hit http://security.ubuntu.com trusty-security/multiverse Sources
Hit http://gb.archive.ubuntu.com trusty-updates/multiverse Sources
Hit http://security.ubuntu.com trusty-security/main amd64 Packages
Hit http://gb.archive.ubuntu.com trusty-updates/main amd64 Packages
Hit http://gb.archive.ubuntu.com trusty-updates/restricted amd64 Packages
Hit http://security.ubuntu.com trusty-security/restricted amd64 Packages
Hit http://security.ubuntu.com trusty-security/universe amd64 Packages
Hit http://gb.archive.ubuntu.com trusty-updates/universe amd64 Packages
Hit http://security.ubuntu.com trusty-security/multiverse amd64 Packages
Hit http://gb.archive.ubuntu.com trusty-updates/multiverse amd64 Packages
Hit http://security.ubuntu.com trusty-security/main i386 Packages
Hit http://gb.archive.ubuntu.com trusty-updates/main i386 Packages
Hit http://gb.archive.ubuntu.com trusty-updates/restricted i386 Packages
Hit http://security.ubuntu.com trusty-security/restricted i386 Packages
Hit http://gb.archive.ubuntu.com trusty-updates/universe i386 Packages
Hit http://security.ubuntu.com trusty-security/universe i386 Packages
Hit http://gb.archive.ubuntu.com trusty-updates/multiverse i386 Packages
Hit http://security.ubuntu.com trusty-security/multiverse i386 Packages
Hit http://gb.archive.ubuntu.com trusty-updates/main Translation-en
Hit http://security.ubuntu.com trusty-security/main Translation-en
Hit http://security.ubuntu.com trusty-security/multiverse Translation-en
Hit http://security.ubuntu.com trusty-security/restricted Translation-en
Hit http://security.ubuntu.com trusty-security/universe Translation-en
Hit http://gb.archive.ubuntu.com trusty-updates/multiverse Translation-en
Hit http://gb.archive.ubuntu.com trusty-updates/restricted Translation-en
Hit http://gb.archive.ubuntu.com trusty-updates/universe Translation-en
Hit http://gb.archive.ubuntu.com trusty-backports/main Sources
Hit http://gb.archive.ubuntu.com trusty-backports/restricted Sources
Hit http://gb.archive.ubuntu.com trusty-backports/universe Sources
Hit http://gb.archive.ubuntu.com trusty-backports/multiverse Sources
Hit http://gb.archive.ubuntu.com trusty-backports/main amd64 Packages
Hit http://gb.archive.ubuntu.com trusty-backports/restricted amd64 Packages
Hit http://gb.archive.ubuntu.com trusty-backports/universe amd64 Packages
Hit http://gb.archive.ubuntu.com trusty-backports/multiverse amd64 Packages
Hit http://gb.archive.ubuntu.com trusty-backports/main i386 Packages
Hit http://gb.archive.ubuntu.com trusty-backports/restricted i386 Packages
Hit http://gb.archive.ubuntu.com trusty-backports/universe i386 Packages
Hit http://gb.archive.ubuntu.com trusty-backports/multiverse i386 Packages
Hit http://gb.archive.ubuntu.com trusty-backports/main Translation-en
Hit http://gb.archive.ubuntu.com trusty-backports/multiverse Translation-en
Hit http://gb.archive.ubuntu.com trusty-backports/restricted Translation-en
Hit http://gb.archive.ubuntu.com trusty-backports/universe Translation-en
Hit http://gb.archive.ubuntu.com trusty/main Sources
Hit http://gb.archive.ubuntu.com trusty/restricted Sources
Hit http://gb.archive.ubuntu.com trusty/universe Sources
Hit http://gb.archive.ubuntu.com trusty/multiverse Sources
Hit http://gb.archive.ubuntu.com trusty/main amd64 Packages
Hit http://gb.archive.ubuntu.com trusty/restricted amd64 Packages
Hit http://gb.archive.ubuntu.com trusty/universe amd64 Packages
Hit http://gb.archive.ubuntu.com trusty/multiverse amd64 Packages
Hit http://gb.archive.ubuntu.com trusty/main i386 Packages
Hit http://gb.archive.ubuntu.com trusty/restricted i386 Packages
Hit http://gb.archive.ubuntu.com trusty/universe i386 Packages
Hit http://gb.archive.ubuntu.com trusty/multiverse i386 Packages
Hit http://gb.archive.ubuntu.com trusty/main Translation-en_GB
Hit http://gb.archive.ubuntu.com trusty/main Translation-en
Hit http://gb.archive.ubuntu.com trusty/multiverse Translation-en_GB
Hit http://gb.archive.ubuntu.com trusty/multiverse Translation-en
Hit http://gb.archive.ubuntu.com trusty/restricted Translation-en_GB
Hit http://gb.archive.ubuntu.com trusty/restricted Translation-en
Hit http://gb.archive.ubuntu.com trusty/universe Translation-en_GB
Hit http://gb.archive.ubuntu.com trusty/universe Translation-en
Reading package lists… Done
Reading package lists… Done
Building dependency tree
Reading state information… Done
psmisc is already the newest version.
sed is already the newest version.
perl is already the newest version.
postgresql is already the newest version.
postgresql-contrib is already the newest version.
tar is already the newest version.
vim is already the newest version.
The following extra packages will be installed:
libltdl7 libodbc1 odbcinst odbcinst1debian2
Suggested packages:
libmyodbc tdsodbc unixodbc-bin
The following NEW packages will be installed
libltdl7 libodbc1 odbc-postgresql odbcinst odbcinst1debian2 unixodbc
0 to upgrade, 6 to newly install, 0 to remove and 32 not to upgrade.
Need to get 791 kB of archives.
After this operation, 2,607 kB of additional disk space will be used.
Get:1 http://gb.archive.ubuntu.com/ubuntu/ trusty/main libltdl7 amd64 2.4.2-1.7ubuntu1 [35.0 kB]
Get:2 http://gb.archive.ubuntu.com/ubuntu/ trusty/main libodbc1 amd64 2.2.14p2-5ubuntu5 [175 kB]
Get:3 http://gb.archive.ubuntu.com/ubuntu/ trusty/main odbcinst amd64 2.2.14p2-5ubuntu5 [12.6 kB]
Get:4 http://gb.archive.ubuntu.com/ubuntu/ trusty/main odbcinst1debian2 amd64 2.2.14p2-5ubuntu5 [40.6 kB]
Get:5 http://gb.archive.ubuntu.com/ubuntu/ trusty/universe odbc-postgresql amd64 1:09.02.0100-2ubuntu1 [507 kB]
Get:6 http://gb.archive.ubuntu.com/ubuntu/ trusty/main unixodbc amd64 2.2.14p2-5ubuntu5 [19.8 kB]
Fetched 791 kB in 0s (3,669 kB/s)
Selecting previously unselected package libltdl7:amd64.
(Reading database … 61291 files and directories currently installed.)
Preparing to unpack …/libltdl7_2.4.2-1.7ubuntu1_amd64.deb …
Unpacking libltdl7:amd64 (2.4.2-1.7ubuntu1) …
Selecting previously unselected package libodbc1:amd64.
Preparing to unpack …/libodbc1_2.2.14p2-5ubuntu5_amd64.deb …
Unpacking libodbc1:amd64 (2.2.14p2-5ubuntu5) …
Selecting previously unselected package odbcinst.
Preparing to unpack …/odbcinst_2.2.14p2-5ubuntu5_amd64.deb …
Unpacking odbcinst (2.2.14p2-5ubuntu5) …
Selecting previously unselected package odbcinst1debian2:amd64.
Preparing to unpack …/odbcinst1debian2_2.2.14p2-5ubuntu5_amd64.deb …
Unpacking odbcinst1debian2:amd64 (2.2.14p2-5ubuntu5) …
Selecting previously unselected package odbc-postgresql:amd64.
Preparing to unpack …/odbc-postgresql_1%3a09.02.0100-2ubuntu1_amd64.deb …
Unpacking odbc-postgresql:amd64 (1:09.02.0100-2ubuntu1) …
Selecting previously unselected package unixodbc.
Preparing to unpack …/unixodbc_2.2.14p2-5ubuntu5_amd64.deb …
Unpacking unixodbc (2.2.14p2-5ubuntu5) …
Processing triggers for man-db (2.6.7.1-1ubuntu1) …
Setting up libltdl7:amd64 (2.4.2-1.7ubuntu1) …
Setting up libodbc1:amd64 (2.2.14p2-5ubuntu5) …
Setting up odbcinst (2.2.14p2-5ubuntu5) …
Setting up odbcinst1debian2:amd64 (2.2.14p2-5ubuntu5) …
Setting up odbc-postgresql:amd64 (1:09.02.0100-2ubuntu1) …
odbcinst: Driver installed. Usage count increased to 1.
Target directory is /etc
odbcinst: Driver installed. Usage count increased to 1.
Target directory is /etc
Setting up unixodbc (2.2.14p2-5ubuntu5) …
Processing triggers for libc-bin (2.19-0ubuntu6.14) …
Creating UMDS Installer answer file …
Creating /etc/odbc.ini …
Updating /etc/odbcinst.ini …
Updating pg_hba.conf …
Symlink /var/run/postgresql/.s.PGSQL.5432 /tmp/.s.PGSQL.5432 …
Starting Postgres …
Starting PostgreSQL 9.3 database server [ OK ]
Sleeping for 60 seconds for Postgres DB to be ready …
Creating UMDS DB + User …
SELECT pg_catalog.set_config(‘search_path’, ”, false)
CREATE ROLE umdsuser NOSUPERUSER CREATEDB CREATEROLE INHERIT LOGIN;
ALTER ROLE
Install VUM UMDS …
Installing VMware Update Manager Download Service.
Logs would be store at /var/log/vmware/vmware-updatemgr/umds
Creating the log directory if required….
In which directory do you want to install Download service?
[/usr/local/vmware-umds]
The path “/usr/local/vmware-umds” does not exist currently. This program is
going to create it, including needed parent directories. Is this what you want?
Let us setup some things for you…
Do you need proxy to connect to internet? [no]
One more thing…we need a storage location to store patches. Make sure you
have enough space in that location
Where do you want download service to store patches
[/var/lib/vmware-umds]
The path “/var/lib/vmware-umds” does not exist currently. This program is going
to create it, including needed parent directories. Is this what you want?
The installation of VMware Update Manager Download Service 6.7.0 build-14203538
completed successfully. You can decide to remove this software from your system
at any time by invoking the following command:
“/usr/local/vmware-umds/vmware-uninstall-umds.pl”.
Enjoy,
–the VMware team
Post script install
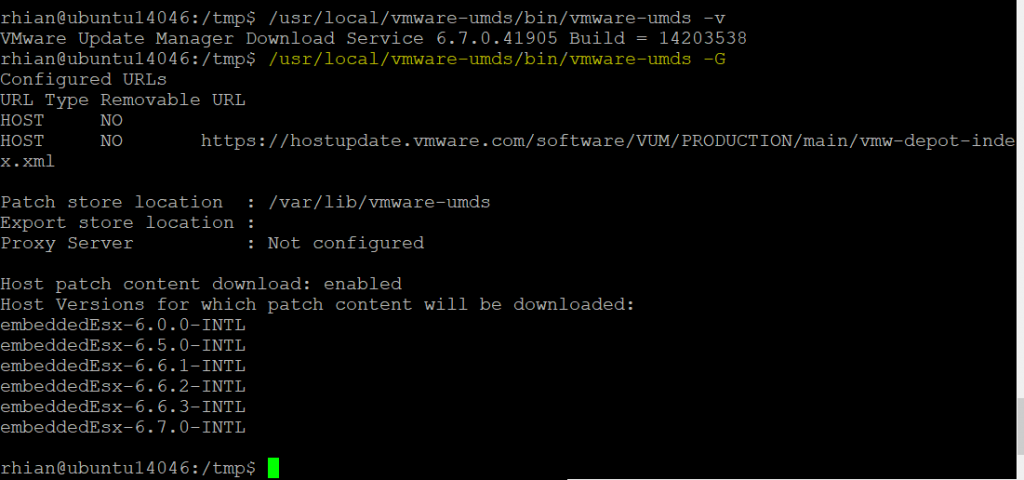
Once the UMDS installer script completes, you can verify by running the following two commands which provides you with the version of UMDS as well as the current configurations:
/usr/local/vmware-umds/bin/vmware-umds -v
/usr/local/vmware-umds/bin/vmware-umds -G
More setup Commands
Log in to the machine where UMDS is installed, and open a Command Prompt window.
The default location in 64-bit Linux is /usr/local/vmware-umds.
Enabling ESXi Updated and VA Updates
To set up a download of all ESXi host updates and all virtual appliance upgrades, run the following command:
vmware-umds -S –enable-host –enable-va
To set up a download of all ESXi host updates and disable the download of virtual appliance upgrades, run the following command:
vmware-umds -S –enable-host –disable-va
To set up a download of all virtual appliance upgrades and disable the download of host updates, run the following command:
vmware-umds -S –disable-host –enable-va
Changing the Patch Store folder
The default folder to which UMDS downloads patch binaries and patch metadata on a Linux machine is /var/lib/vmware-umds
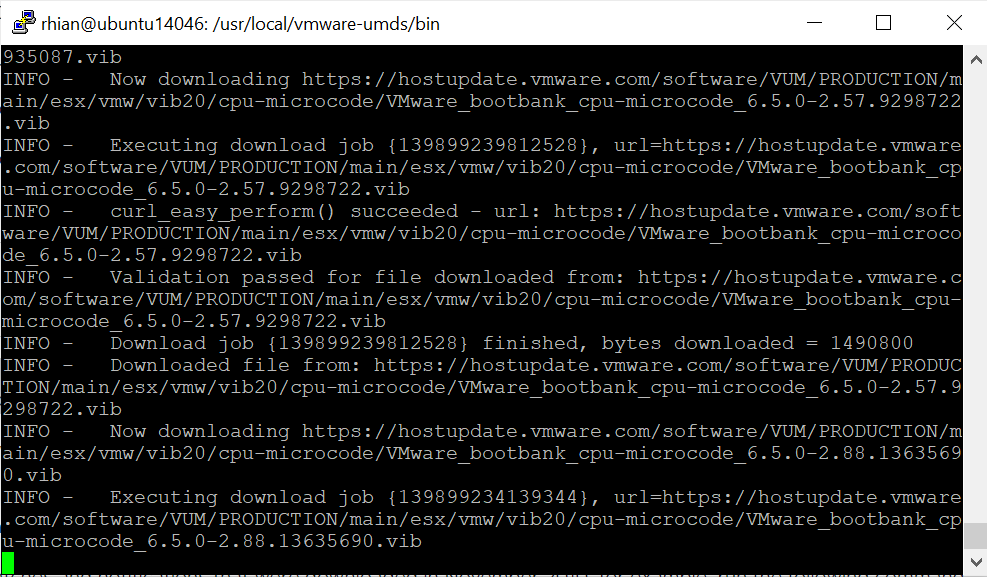
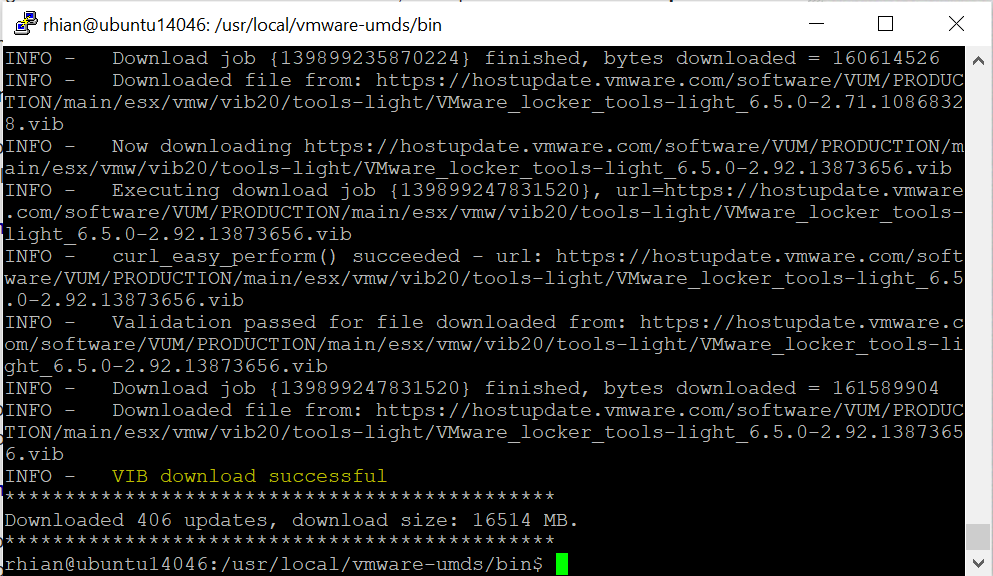
This command downloads all the upgrades, patches and notifications from the configured sources for the first time. Subsequently, it downloads all new patches and notifications released after the previous UMDS download.
vmware-umds -D
You should now see the below when it finishes
Making the Content available via a Web Server
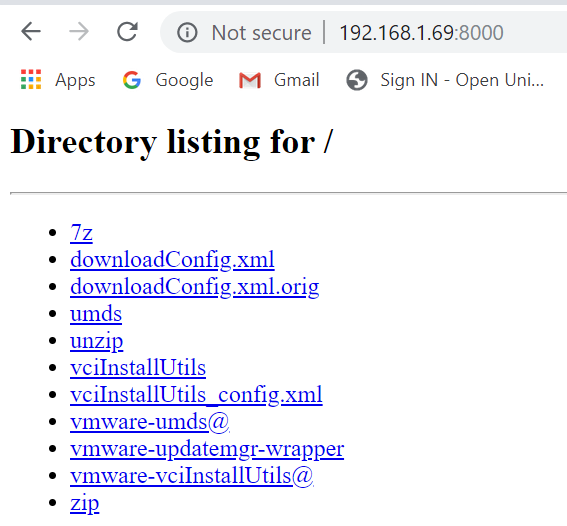
You have now successfully installed UMDS. Once you have download all of your content, you will need to setup an HTTP server to make it available to VUM instance in the vCenter Server Appliance. You can configure any popular HTTP Server such as Nginx or Apache. For my lab, I used the tiny HTTP server that Python provides.
To make the content under /var/lib/vmware-umds available, just change into that directory and run the following command:
python -m SimpleHTTPServer
Then if you navigate to a browser and type and http://192.168.1.69:8000, you should see your files
You can now add this URL into your vCenter Update Manager download settings
Thanks
Thanks to William Lam who’s blog I followed to set this up.
Previously I did a blog on an older version of HCIBench from 2017. It looks like a lot has changed and I now need to run it again for the company I’m working for to test the performance of vSphere/vSAN 6.7U3 with and without vSAN encryption. This blog details the process in my lab but I will publish the results of running the tests on an enterprise system with all flash Intel Optane SSD disks over a 25Gbps network with some of the fastest technology components currently available. Should be interesting 🙂
HCIBench stands for “Hyper-converged Infrastructure Benchmark”. It’s an automation wrapper around the open source benchmark tools: Vdbench and Fio that make it easier to automate testing across a HCI cluster. HCIBench aims to simplify and accelerate customer POC performance testing in a consistent and controlled way. The tool fully automates the end-to-end process of deploying test VMs, coordinating workload runs, aggregating test results, performance analysis and collecting necessary data for troubleshooting purposes.
HCIBench is not only a benchmark tool designed for vSAN, but also could be used to evaluate the performance of all kinds of Hyper-Converged Infrastructure Storage in vSphere environment.
This tool is provided free of charge and with no restrictions. Support will be provided solely on a besteffort basis as time and resources allow, by the VMware vSAN Community Forum.
Per the VMware EULA, users who want to publicly share their testing results are requested to submit their hardware configuration, methodology, parameter files and test results for review before publication at vsanperformance@vmware.com
Requirements
Web Browser: IE8+, Firefox or Chrome
vSphere 5.5 and later environments for both HCIBench and its client VMs deployment
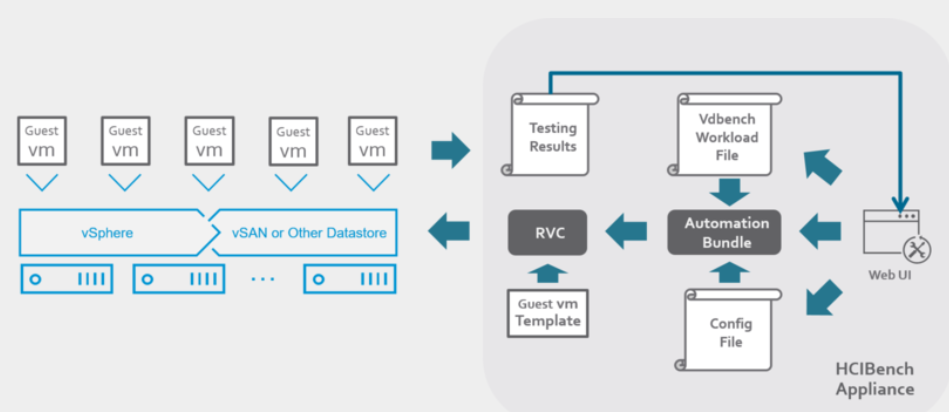
HCIBench Architecture
HCIBench is specifically designed for running performance tests against a shared datastore in VMware vSphere®. It generates a test workload using either Vdbench or Fio. HCIBench is delivered in the form of an Open Virtualization Appliance (OVA). The Controller VM contains the following components:
Ruby vSphere Console (RVC) Graphite Container
Grafana Container
vSAN Observer
Automation bundle
Configuration files
Fio binary
Linux test VM template
The Controller VM has all the needed components installed. The core component is RVC (https://github.com/vmware/rvc) with some extended features enabled. RVC is the engine of this performance test tool, responsible for deploying guest VMs, conducting Vdbench or Fio runs, collecting results, and monitoring vSAN by using vSAN Observer..
HCIBench VM Specification
Controller VM
CPU: 8 vCPU
RAM: 8GB
OS VMDK: 16GB
Operating system: Photon OS 1.0
OS Credential: user is responsible for creating the root password when deploying the VM.
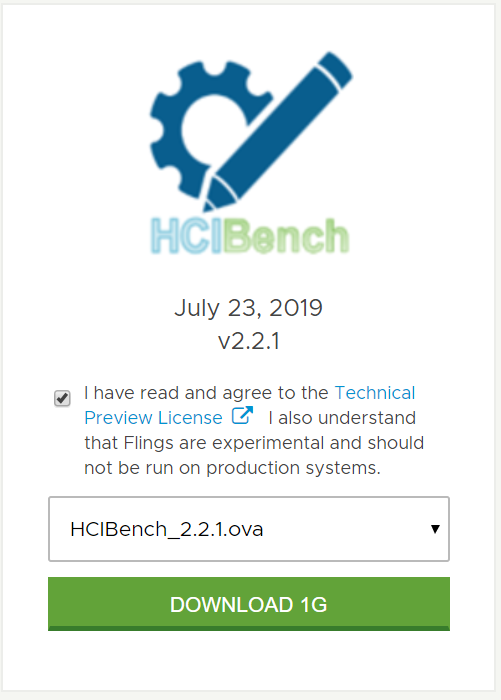
HCIBench and PDF User Guide download – Download from the webpage
Deploying the HCIBench OVF
Select a cluster or host and click Deploy OVF Template
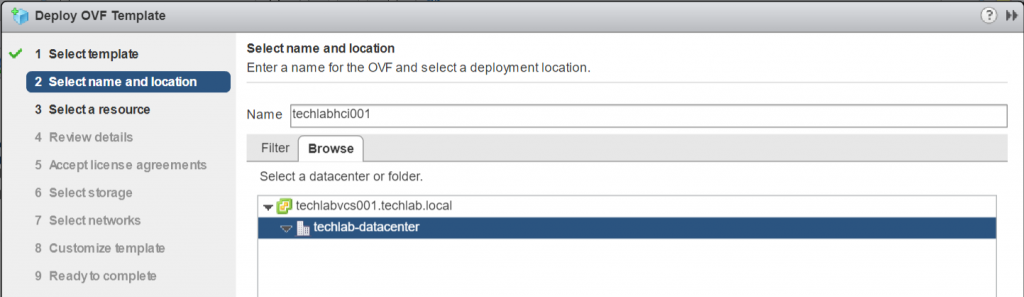
Put in a name and select Datacenter or folder
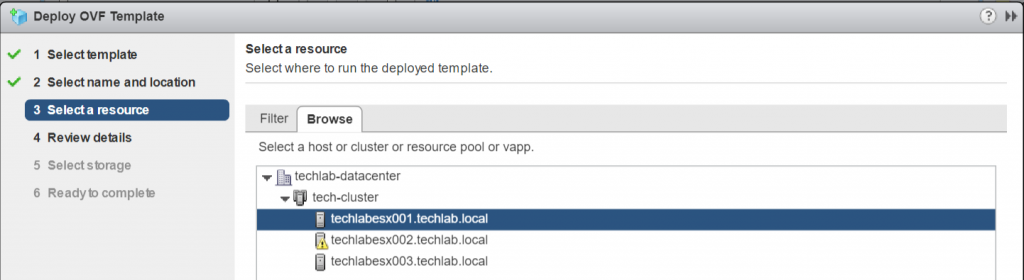
Select where to run the OVF
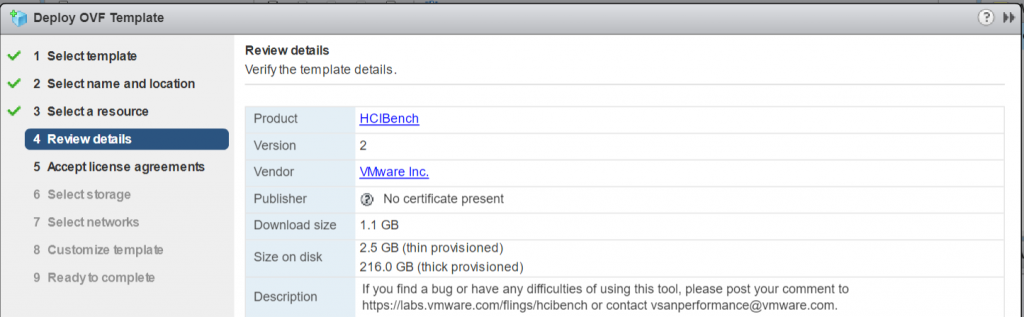
Review the details
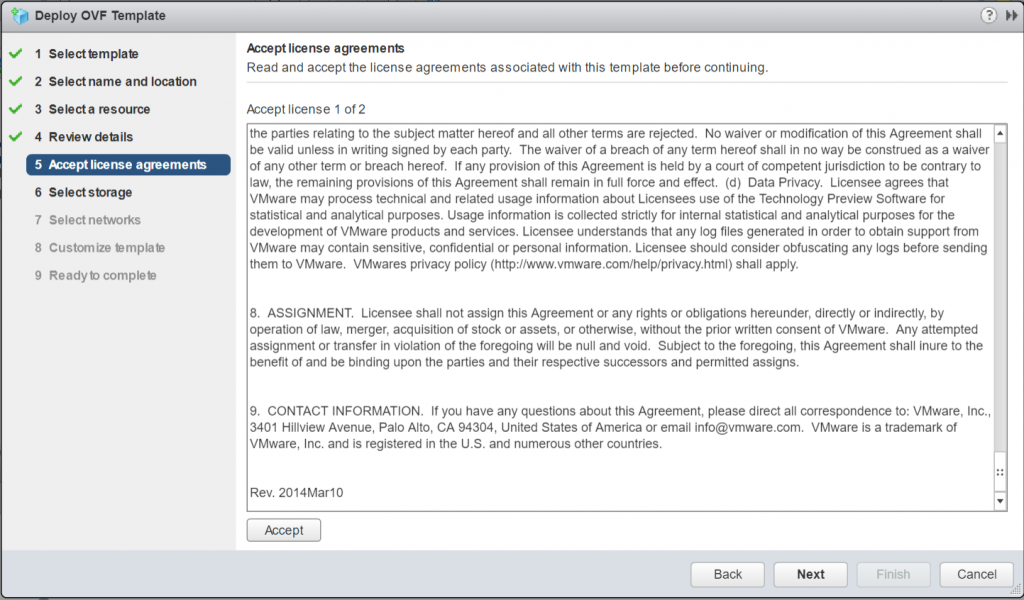
Accept the License agreement
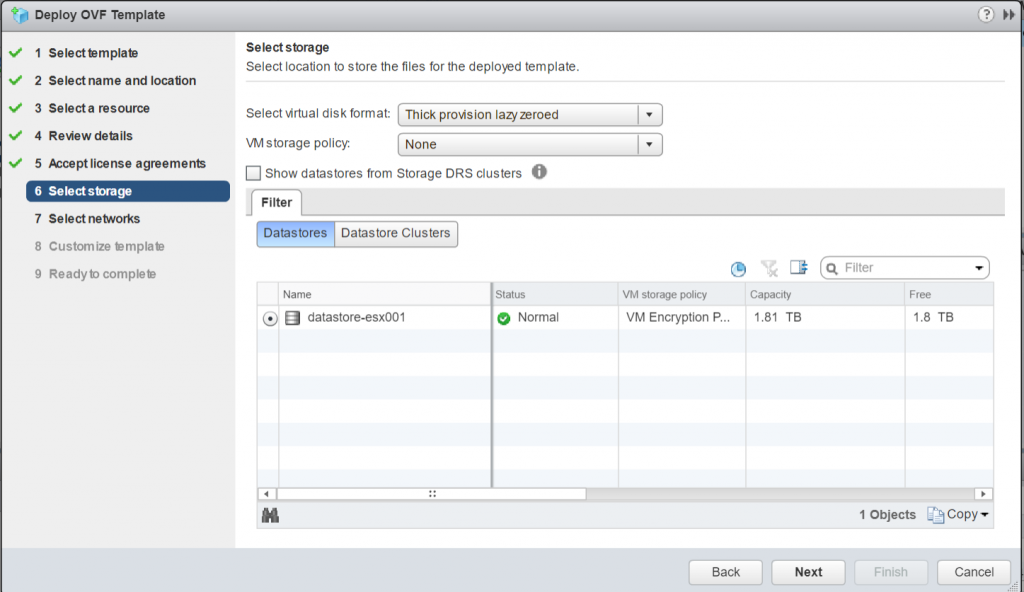
Select Storage
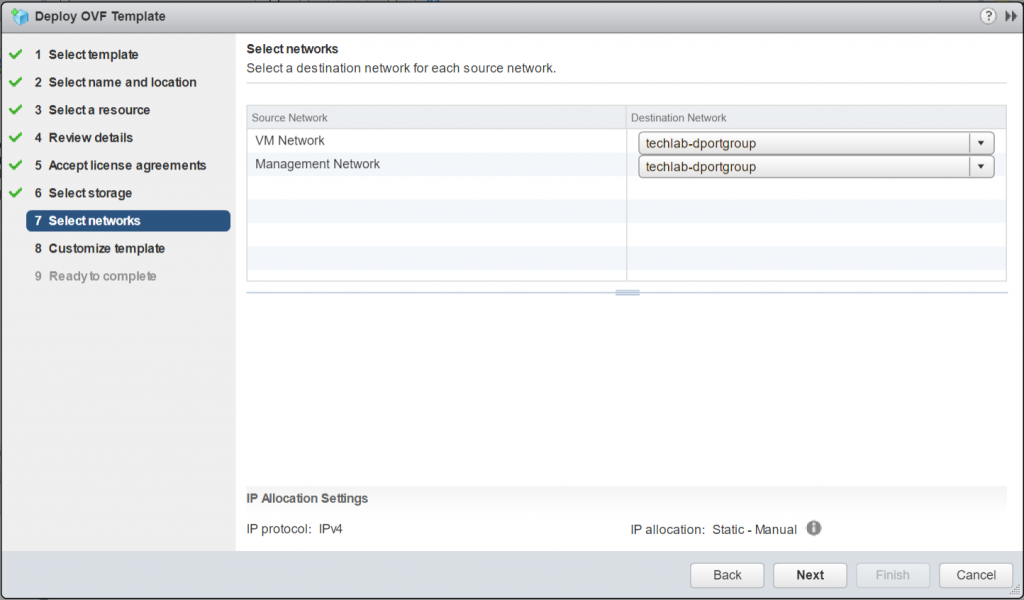
Select Networks. Map the “Management Network” to the network through which the HCIBench will be accessed. If the network prepared for Guest VM does not have the DHCP service, map the “VM Network” to the same network; otherwise, ignore the “VM Network
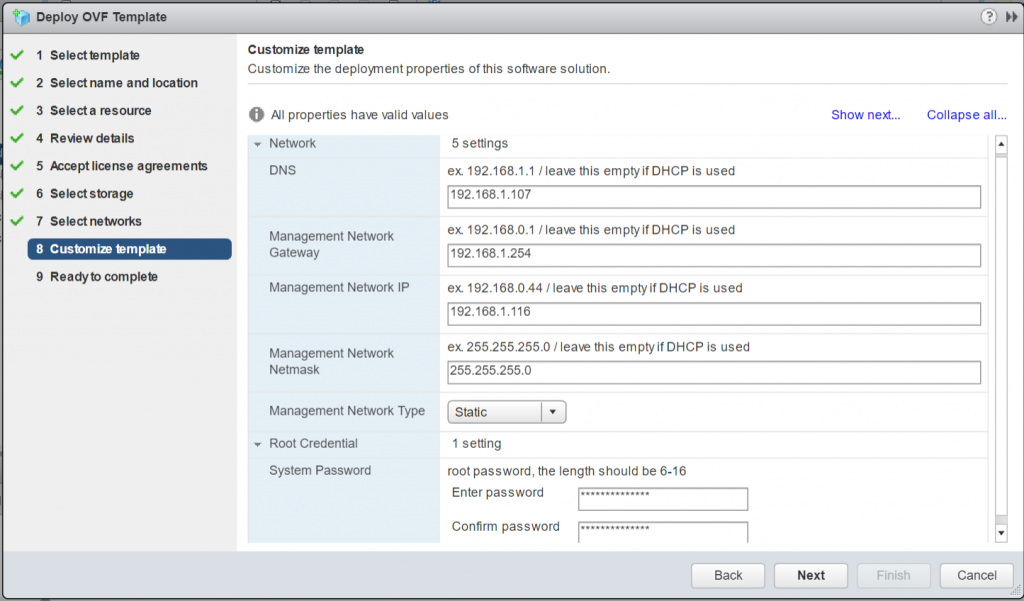
On the Customize template page, enter a system password for HCIBench. If the HCIBench management interface uses DHCP, the network information should be left blank. If HCIBench uses a specific address, select static on the management network and then enter the desired network configuration.
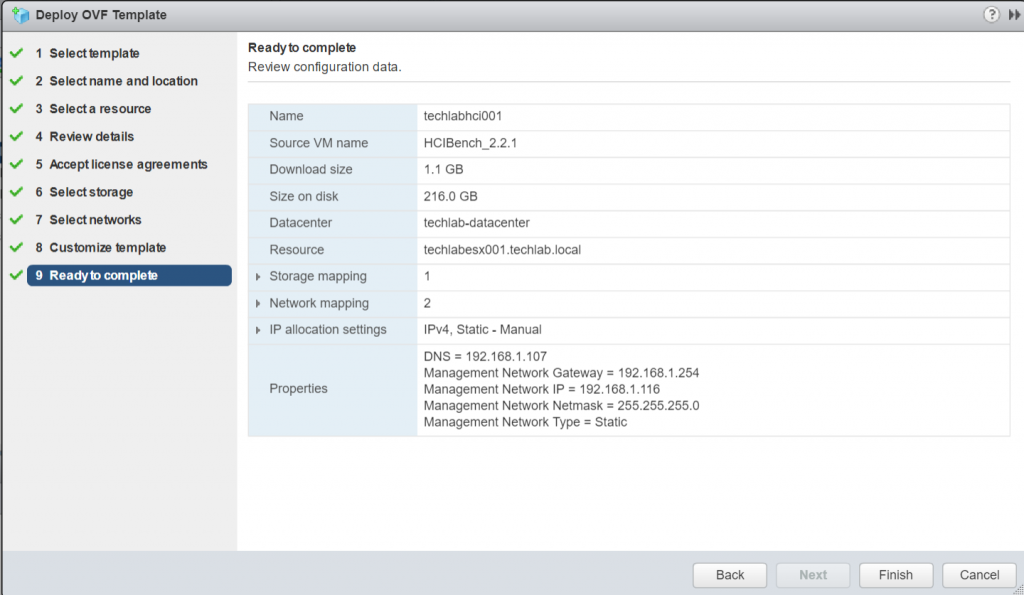
Check the final page and click Finish
Note: During the installation process, you need to download the Vdbench binaries directly from the Oracle website one time only if you choose Vdbench as the workload generator. While the use of Vdbench is unrestricted, Oracle does not provide redistribution rights in their license. If you choose to use Fio, you do not need to do anything because we already have the Fio binary included. I’m just going to leave it as Fio
Once this is deployed, navigate to https://<HCIBenchserver>:8443/ to start configuration and have a look at the tests. Before accessing the configuration page, the root user ID and password must be used to authenticate to prevent unauthorized access to HCIBench.
This will log you in to the main configuration page
There are 4 main sections in this configuration page
vSphere environment
Benchmarking Tool
Guest VM configuration
Testing Configuration
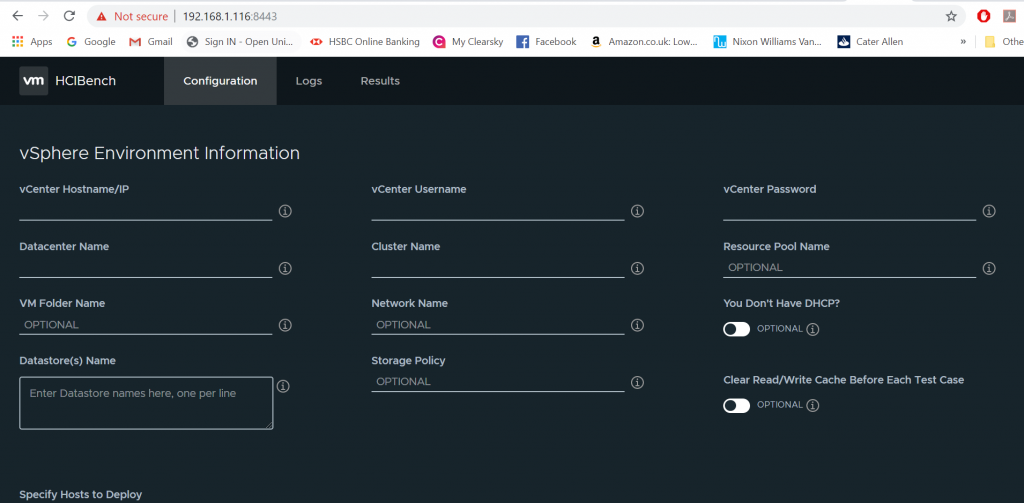
vSphere Environment Testing
In this section, all fields not marked “OPTIONAL” are required. You must provide the vSphere environment information where the target cluster is configured, including vCenter IP address, vCenter credential, name of the Datacenter, name of the target Cluster, and name of the Datastore. If you are testing on VMC environment or want to specify the resource pool or VM folder to deploy guest VMs, you should fill those fields as well.
Network Name defines which network the guest VMs should use. If not specified, the default value is VM Network.
You Don’t Have DHCP? Instructs HCIBench to set static IPs for guest VMs and use the “VM Network” NIC to communicate with the guest VMs. If it is checked, you can find a static IP prefix from the list on the right handside. Make sure the prefix you choose is NOT being used in the guest VM Network
Datastore Name specifies the datastores that are tested against and all the guest VMs are deployed on. You need to enter the name of the datastore. Testing multiple datastores in parallel is also supported. You can enter the datastore names one per line. In this cases, the virtual machines are deployed evenly on the datastores. For example, if you enter two datastores and 100 virtual machines, 50 virtual machines will be deployed on each datastore
Specify Hosts to Deploy allows you to specify particular hosts to deploy guest VMs on, when this parameter checked, you will need to fill up the host(s) in the target cluster you want to have the VMs deployed on; if this is not checked, VMs will be deployed on all the hosts in the target cluster in round-robin manner. In general, it’s only needed when you want to deploy guest VMs onto part of the hosts within the cluster
Storage Policy allows you to specify the name of a Storage Policy that is applied to the clinet VMs and all the virtual disks.
Clear Read/Write Cache Before Each Testing is the option designed for vSAN users to flush the cache tier before each test case, ESXi Host Username and Host Password must be specified if this box is checked. Also, you will need SSH access from HCIBench to all the ESXi hosts in the vSAN Cluster. This option requires that all the ESXi hosts have the same username and password.
Reuse VMs If Possible allows user to reuse the guest VMs in the cluster if they are existing and compatible with the VM specification. If not compatible, existing guest VMs will be deleted and new VMs will be deployed. Compatible means the existing VMs can be found and access from HCIBench; the specified VM Prefix is same with existing VMs; Number of VMs, Number of Disks are not greater than the existing VMs and Size of Data Disk is same with the existing VMs, Vdbench or Fio binaries installed properly
EASY RUN is specifically designed for vSAN users, by checking this, HCIBench is able to handle all the test configurations below by identifying the vSAN configuration. EASY RUN helps to decide how many guest VMs should be deployed, the number and size of virtual disks of each VM, the way of preparing virtual disks before testing. The Guest VM Configuration and Testing Configuration sections below will be hidden if this option is checked. Once EASY RUN is checked, you can select the following one to four workload profiles to run:
4K, 70% Read, 100% Random test to simulate the most common workloads.
4K, 100% Read, 100% Random test to show the best realistic I/O per second of this given configuration.
8K, 50% Read, 100% Random test to simulate the OLTP workloads.
256K, 100% Write, 100% Sequential test to show the best realistic Throughput of this given configuration
Benchmarking Tool
HCIBench can use Fio or Vdbench as the performance workload generator, if Vdbench is selected, you need to download and upload the Vdbench zip to HCIBench. To do so, click Download Vdbench. After the download is completed, you should upload the zip file. And the server will automatically put the Vdbench zip to /opt/output/vdbench-source. This step is a once-for-all action. The following screen disappears from the page after you upload the Vdbench file successfully
Guest VM Configuration
In this section, the only required parameter is Number of VMs that specifies the total number of guest VMs to be deployed for testing. If you enter multiple datastores, these VMs are deployed evenly on the datastores. The rest parameters are optional
VM Name Prefix specified the prefix of the VM Name. The default value is depending on the benchmarking tool selection, if Fio is selected, the value here will be hci-fio; when Vdbench is selected, the value will be hci-vdb. Also, you can change the prefix as you want.
The Number of Data Disk parameter specifies how many virtual disks to be tested are added to each guest VM. The default number is eight.
The Size of Data Disk parameter specifies the size (GB) of each VMDK to be tested. The total number of simulated workload instances is Number of VM * (times) Number of Data Disk. The default number is ten
Testing Configuration
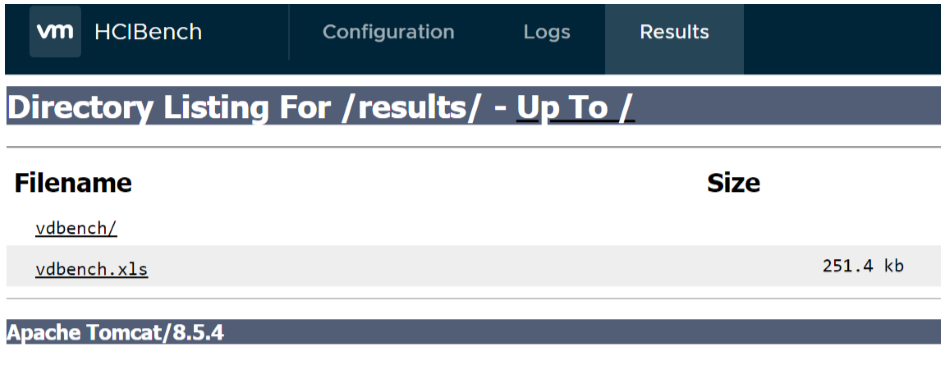
Test Name parameter is the name of the test, by specifying this parameter, for example “DemoTest”, HCIBench will create a local directory with the same name in “/opt/output/results/” on the Controller VM for storing collected results from all guest VMs and statistics produced by vSAN Observer. If not specified, a name “resultsTIMESTAMP” will be generated and the same name directory will be created under “/opt/output/results”. All the test cases results could be browsed at http://HCIBench_IP/results, or click the Results tab on the navigation bar.
For the Workload Parameter File, If a parameter file is uploaded or generated to the controller before, it already exists in HCIBench. In this case, you can select the existing Vdbench or Fio parameter file from the drop-down list depending on which workload you selected. You can also refresh the drop-down list by clicking the REFRESH button. After you finish generating a parameter file or uploading a parameter file, click the REFRESH button and it makes the file displayed in the drop-down list without refreshing the entire page to avoid user-input loss. Delete the parameter file by clicking the DELETE button.You have two options to add parameter file into the drop-down list:
Generate a Workload parameter file by yourself
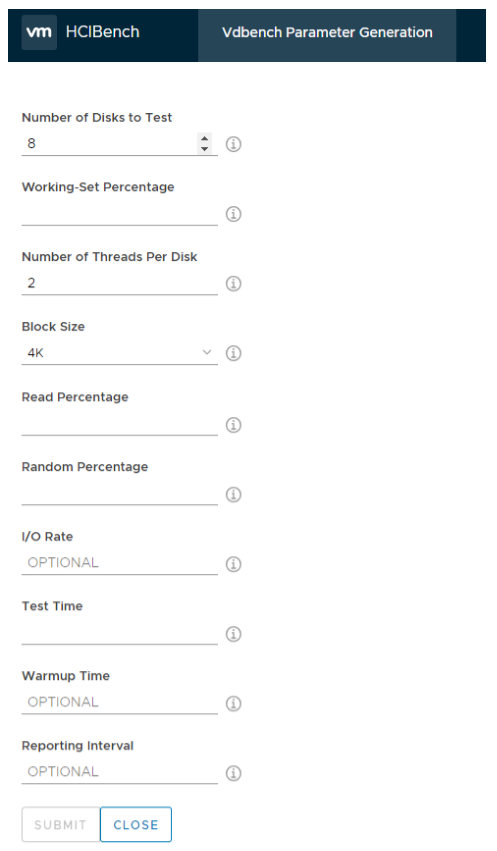
Under the section Select a Workload parameter files, click ADD, which redirects you to the workload generation page seen in the below screenprint, the title of this page is dependenton the tool selection you made earlier, if you had Fio selected, the title is Fio Parameter Generation. No matter which tool you selected, the input fields are the same. All the fields without “OPTIONAL” are required. After clicking SUBMIT, click REFRESH to update the drop-down list.
Number of Disk to Test: – Note: The value of Number of Data Disk in the guest VM Specification section must match the value of Number of Disks to Test defined in the parameter files. For example, if you specify to create 10 data disks per guest VM, 10 raw disks are created. Therefore, in the parameter files, the same number or less of disks are expected. Since we are using Photon OS, beware the first data disk starts from /dev/sda, the last disk is the OS disk
Working Set Percentage: This is the percentage of data changing
Number of Thread Per Disk: Specifies the maximum number of concurrent I/O per Disk. Usually test with 1 or 2 threads
Block Size: – vSan has a native 4k block size. If you know what is your average block size is based on some performance analysis that you have completed you can change this value.
Read Percentage: Specifies the read percentage of the workload
Random Percentage: Specifies the random percentage of the workload
I/O Rate: If not specified the rate is unlimited. If you specify 4000 I/Os then each single VM will have 4000 I//Os maximum
Test Time: How long the test will run for in seconds. This value will be overwritten by the time in the main UI if they are not the same.
Warm Up Time: HCI bench will always ignore the first interval of results from the total. If you want to add additional warm-up time to allow the cache drives to fill up sufficiently you can add additional warm-up time here. This time will be appended to test time. Workloads will take a while for the cache to warm up before achieving a consistent performance
Reporting Level: This parameter specifies the duration in seconds in each reporting interval. If you were running a particularly long Test over a number of days the amount of data that would be collected would be significant. by sampling the data at regular intervals it makes the data size more manageable
Other options
Users can choose whether to intialize the data VMDKs of guest VMs. There are two options of storage initialization, ZERO and RANDOM. RANDOM is particularly for storage that has de-duplication enabled, if the storage that is tested against does not have de-duplication enabled, use ZERO instead to initialize storage to avoid first-write penalty.
The Testing Duration parameter is for overriding the elapsed value in parameter files. This parameter defines the test duration for each run. If not specified, each test run uses its own elapsed value.
When the Clean up VMs parameter is checked, all the guest VMs are removed after all the testing is completed; otherwise, all the VMs are preserved
Options at the bottom
Save Configuration:
Press the SAVE CONFIG button to save the parameter configuration settings. If the configuration setting is not saved and the page is refreshed, the system will read the previous-saved parameter configuration. Until you successfully saved the config, the VALIDATE CONFIG and START TEST buttons are disabled to enforce you save your configuration before validating or starting testing.
Configuration Validation
After completing the tool configuration, you can validate all settings by clicking the VALIDATE CONFIG button. This step checks if all the required information is correctly provided. Additionally, it validates basic environment sanity including whether vSAN is enabled in the cluster, whether the hosts specified belong to the cluster and can access the vSAN datastore. Furthermore, this function estimates the storage usage by all guest VMs on the vSAN datastore and alert if it exceeds 80 percent of the usable capacity after deployment
Monitoring the test during the run
During the testing, you can monitor the live performance from guest VMs showed up in Grafana by clicking HERE TO MONITOR, which lands you on Grafana page: http://HCIBench_IP:3000 to monitor the live performance, and to reduce the space utilization on the disk, the graph is only available while the testing is running
Viewing Test Results
After the Vdbench or Fio testing is completed, the test results are collected from all the guest VMs. You can view the results at http://HCIBench_IP/results in a web browser, or click the Results tab to review it
Each of the subdirectories in “/opt/output/results/TestName” directory uses the name of the userdefined parameter file, and contains all original results produced by each Vdbench or Fio instance and vSAN Observer data.
The aggregated result of one test run is summarized in the text file with the name -res.txt, containing the datastore’s name and four statistics: number of VMs used for testing, IOPS, throughput, latency details, and host resource consumption. If vSAN is enable, the CPU used by vSAN will also be calculated.
You can find all of the original result files produced by Vdbench or Fio instances inside the subdirectory corresponding to a test run. In addition to the text files, there is another subdirectory named iotesthcibench/fio-vm inside, which is the statistics directory generated by vSAN Observer. Also, you should be able to find the following files: HCIBench-VERSION-logs.tar.gz: HCIBench pre-validation and testing logs. hcibench.cfg: HCIBench configuration parameters vdbench.cfg/fio.cfg: Vdbench/Fio parameter profile
performance_diag_result.html:
If testing against vSAN 6.6U1 or later and using HCIBench 1.6.6 or later releases, turning on CEIP (Customer Experience Improvement Program) and vSAN Performance Service, each HCIBench run will send the testing results as well as the testing configuration to VMware Cloud to help user to analyze the potential issue that blocks from achieving a certain goal (maximum IOPS, maximum throughput, or minimum latency). Users are able to land to the specific vCenter page and the KB article of any potential issues detected from the hyperlink provided in this file.
Open the stats.html file inside the statistics directory, you can find the vSAN performance statistics for debugging or evaluating purposes.
Downloading Test results
Download the test results by clicking the SAVE RESULT button. The latest test result details are zipped to a file and you can download the file to your local client.
Curl is available in the VMware vCenter Server Appliance command line interface. This small blog provides a simple example of using Curl to simulate a telnet connection to test port connectivity
To test port connectivity in VMware vCenter Server Appliance:
Log in as root user through the VMware vCenter Server Appliance console.
Run this command on the vCenter Server Appliance:
curl -v telnet://target ip address:port number
Example of testing port connectivity
All vCenter servers must have access to the UMDS server on port 80 (http)
The below screen-print shows a working curl test from a vCenter to a Windows UMDS Server on IP address 10.124.74.65 over port 80.
Using Netcat to test port connectivity from hosts
The telnet command is not available in any versions of ESXi and, therefore, you must use netcat (nc) to confirm connectivity to a TCP port on a remote host. The syntax of the nc command is:
Don't think about what can happen in a month. Don't think what can happen in a year. Just focus on the 24 hours in front of you and do what you can to get closer to where you want to be :-)