Archive for Group Policy

Software rollout via Group Policy

Softwareicon

How can we install software remotely from Group Policy?

  • Assigning Software

You can assign a program distribution to users or computers. If you assign the program to a user, it is installed when the user logs on to the computer. When the user first runs the program, the installation is completed. If you assign the program to a computer, it is installed when the computer starts, and it is available to all users who log on to the computer. When a user first runs the program, the installation is completed. Assigned means that the application appears on the start menu.

  • Publishing Software

You can publish a program distribution to users. When the user logs on to the computer, the published program is displayed in the Add or Remove Programs dialog box, and it can be installed from there

What type of software file can we deploy?

The Group Policy Management Console’s job is to deploy MSI files. GPMC can also deploy other kinds of files, but I’m going to skip over that for today and focus only on MSI files.

Remember: MSI files are application packages that come from manufacturers (or, you can also create them yourselves with 3rd party MSI repackaging tools.

Step 1 Create a Distribution Point

  • Log on to the server as an administrator (I am using my Test Lab)
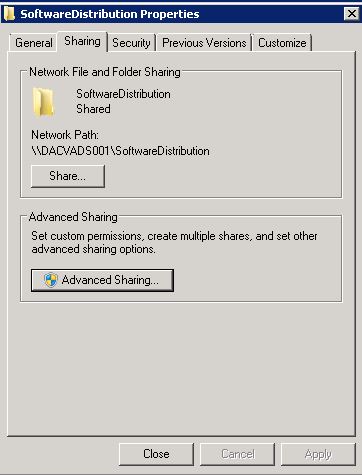
  • Create a shared network folder where you will put the Microsoft Windows Installer package (.msi file) that you want to distribute

SoftwareDistribution

  • Set permissions on the share to allow access to the distribution package.
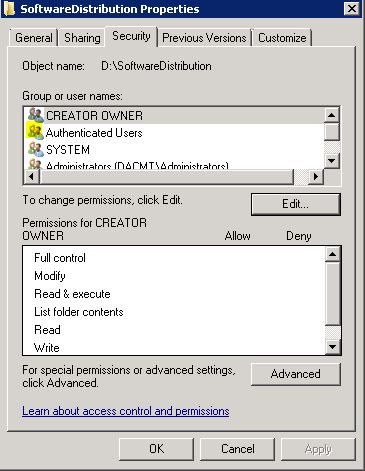
  • You must add Authenticated Users with Read Access to the Share and NTFS permissions if you are applying this to Computer OUs as Computers are Authenticated Users in AD

authusers

  • Copy or install the package to the distribution point.
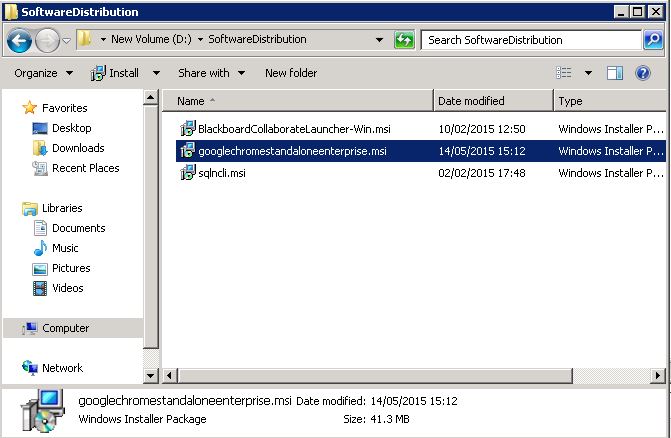
  • I’m going to use the Google Chrome 32bit .msi

Step 2 Create a Group Policy Object

  • I am just going to test this on a Windows 7 machine
  • Open Group Policy Management Console
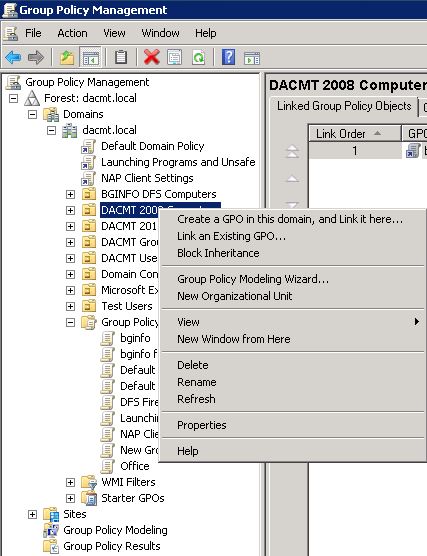
  • Find the OU which contains the computer/computers you want to apply the policy to and right click and select Create a GPO in this domain and link it here

CreateanewGPO

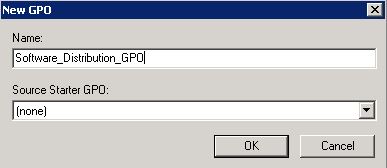
  • Put in a name. Mine is Software_Distribution_GPO

NameGPO

  • Click on the policy and select it.
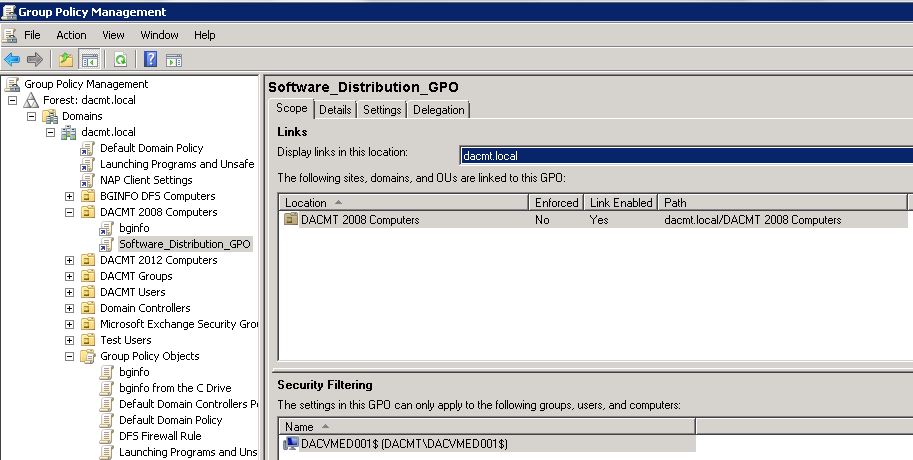
  • In my policy I am going to set the security filtering to just my Windows 7 test machine (dacvmed001)

GPOSecurityFiltering

  • Click Edit on your GPO
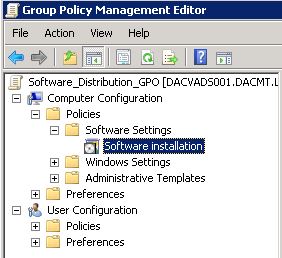
  • Under Computer Configuration expand Policies to see Software Settings

SoftwareSettings

  • Right click and select New Package
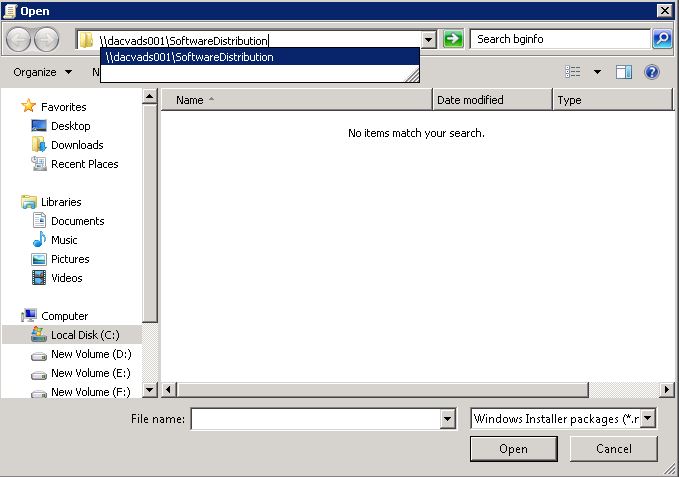
  • Type in the full (UNC) path to your Software Distribution share. In my case \\dacvads001\SoftwareDistribution

SelectSoftware

  • You should now see your .msi software

softwarerepository

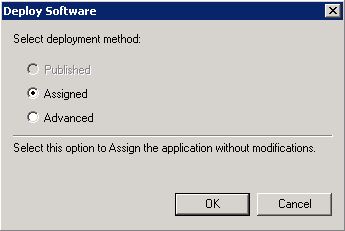
  • Click Assigned. If you click Advanced, it gives you options to configure Published or Assigned Options and to apply modifications to a package
  • NOTE: The Published option is greyed out as it is only available if I deploy my package to a User Container. Software deployed to computers does not support publishing

DeploySoftware

  • You can now see your package in your GPO

gposoftware

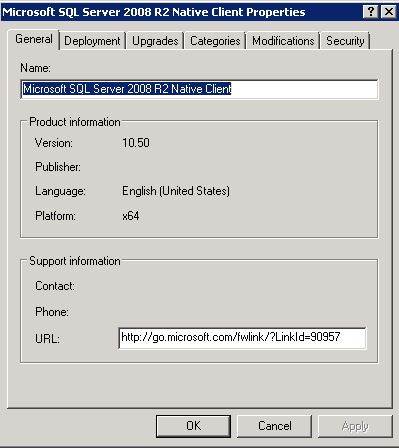
  • If you right click on your package and select Properties, you can see further information. Note I have screenprinted the properties of the SQL Client
  • The General Tab

Properties1

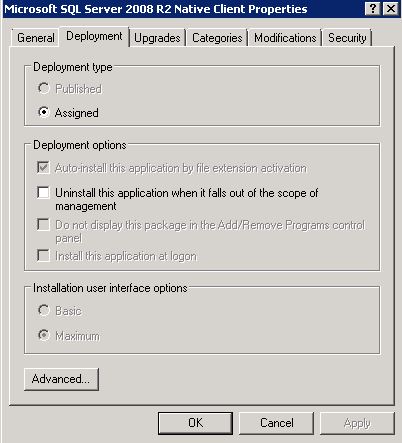
  • The Deployment tab
  • Basic means that the user will see few / no screens when the application installs.
  • Maximum means that the user will have full interaction when the application installs.

Properties2

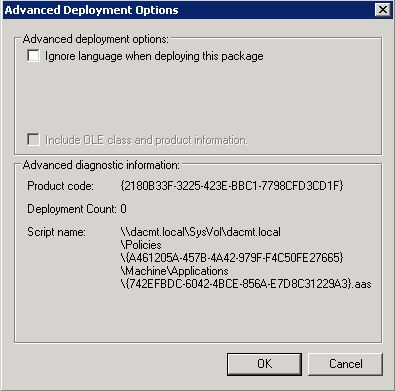
  • Advanced Options

Properties3

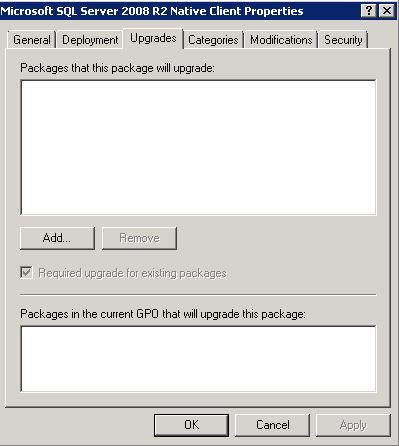
  • Upgrades

Properties4

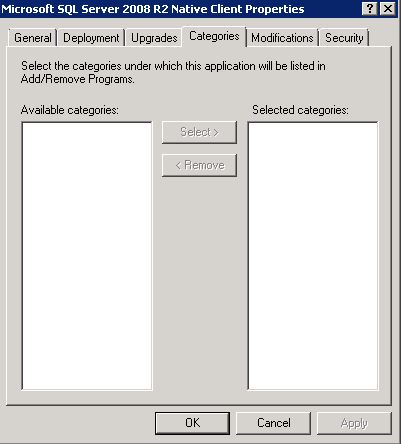
  • Categories

Properties5

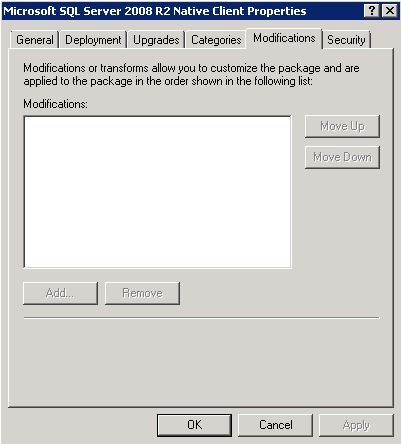
  • Modifications

Properties6

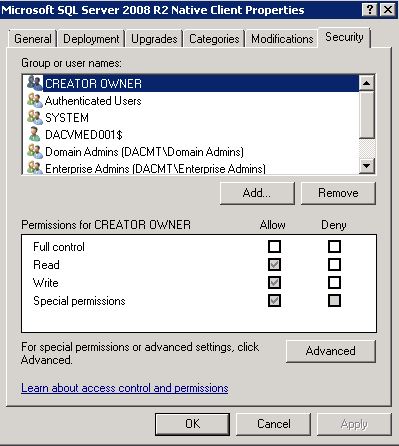
  • Security

Properties7

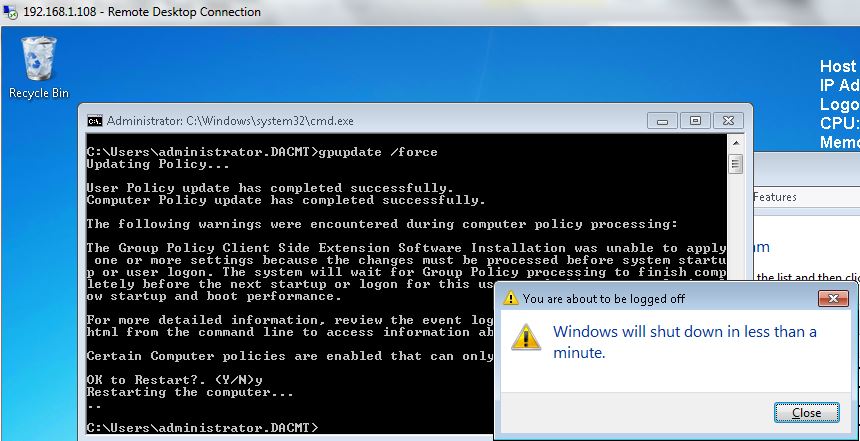
  • Next do a gpupdate /force on the Domain Controller and reboot your PC.

gpupdate

  • Check that the software has been installed in Control Panel > Programs and Features

chrome

Redeploy a MSI package

Sometimes you may need to redeploy a package (for example when doing an upgrade). For redeploying a package you can follow these steps:

  • Open Group Policy tab, select the object you used to deploy the package and click Edit
  • Expand the Software Settings element (per-user or per-machine) which contains the deployed package
  • Expand the Software Installation element which contains the deployed package
  • Right-click the package in the right pane of the Group Policy window
  • Select the All Tasks menu and click Redeploy application
  • Click the Yes button for reinstalling the application wherever it is installed
  • Close the Group Policy snap-in, click OK and exit the Active Directory Users and Computers snap-in

Remove an MSI package

Group Policy also allows you to remove packages which have been deployed in the past. Here are the steps for removing a package:

  • Open Group Policy, select the object you used to deploy the package and click Edit
  • Expand the Software Settings element (per-user or per-machine) which contains the deployed package
  • Expand the Software Installation element which contains the deployed package
  • Right-click the package in the right pane of the Group Policy window
  • Select the All Tasks menu and click Remove
  • Select from the following options:
    • Immediately uninstall the software from users and computers
    • Allow users to continue to use the software but prevent new installations
  • Click the OK button to continue
  • Close the Group Policy snap-in, click OK and exit the Active Directory Users and Computers snap-in

What can we do about .exe’s that we want to turn into usable .msi’s?

You will need to get a packaging utility to turn that .exe file into .msi file. Many of them are available for instant download from internet

One of the best one’s I have trialled is http://www.exetomsi.com/

Tips and Advice on EXE to MSI Repackaging
http://exe-to-msi.com/

Group Policy and Microsoft Office Templates on Server 2008 R2

Policy

Managing Group Policy ADMX Files

Microsoft Windows Vista® and Windows Server 2008 introduce a new format for displaying registry-based policy settings. Registry-based policy settings (located under the Administrative Templates category in the Group Policy Object Editor) are defined using a standards-based, XML file format known as ADMX files. These new files replace ADM files, which used their own markup language. The Group Policy tools; Group Policy Object Editor and Group Policy Management Console remain largely unchanged. In the majority of situations, you won’t notice the presence of ADMX files during day-to-day Group Policy administration tasks.

ADMX files provide an XML-based structure for defining the display of the Administrative Template policy settings in the Group Policy tools. The Group Policy tools will recognize ADMX files only if you are using a Windows Vista–based or Windows Server 2008–based computer.

Unlike ADM files, ADMX files are not stored in individual GPOs. For domain-based enterprises, administrators can create a central store location of ADMX files that is accessible by anyone with permission to create or edit GPOs. Group Policy tools will continue to recognize custom ADM files you have in your existing environment, but will ignore any ADM file that has been superseded by ADMX files: System.adm, Inetres.adm, Conf.adm, Wmplayer.adm, and Wuau.adm. Therefore, if you have edited any of the these files to modify existing or create new policy settings, the modified or new settings will not be read or displayed by the Windows Vista–based Group Policy tools.

The Group Policy Object Editor automatically reads and displays Administrative Template policy settings from ADMX files that are stored either locally or in the optional ADMX central store. The Group Policy Object Editor will automatically read and display Administrative Template policy settings from custom ADM files stored in the GPO. You can still add or remove custom ADM files with the Add/Remove template menu option. All Group Policy settings currently in ADM files delivered by the Windows Server 2003, Windows XP, and Windows 2000 will also be available in Windows Vista and Windows Server 2008 ADMX files.

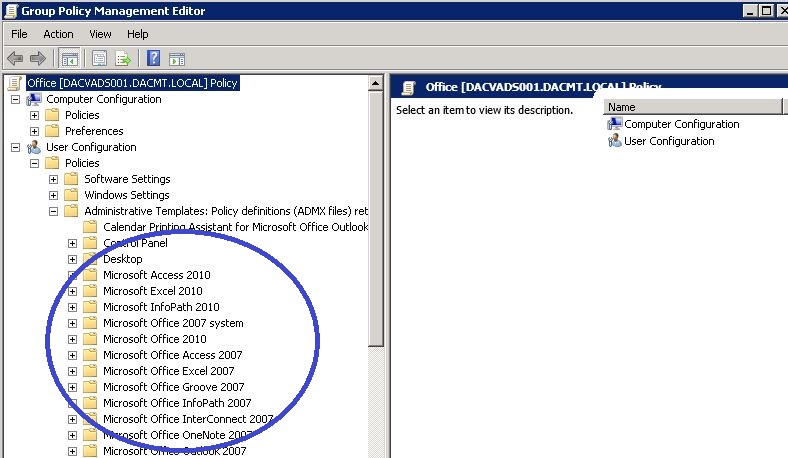
Note: I have tested the Co-Existence of the 2007 Microsoft Office Templates and the 2010 Microsoft Office Templates and they seem to work together nicely. See pic below. The same process applies to adding a second lot of templates

Office2007templates

Procedure

officegpo11

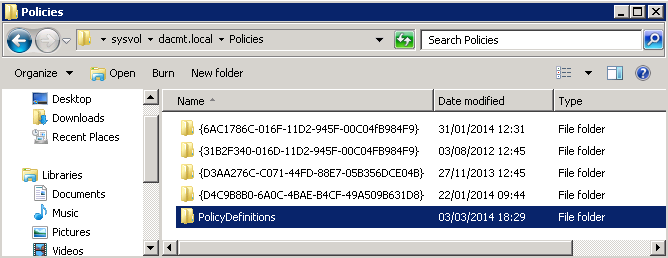
  • The central store is a folder structure created in the Sysvol directory on the domain controllers in each domain in your organization. You will need to create the central store only once on a single domain controller for each domain in your organization. The File Replication service then replicates the central store to all domain controllers in a domain. However, it is recommended that you create the central store on the primary domain controller. Group Policy Management Console and Group Policy Object Editor can use ADMX files more quickly because Group Policy tools connect to the primary domain controller by default.
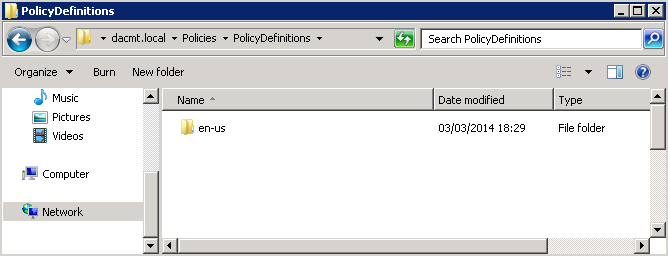
  • Create a subfolder of \\dacmt.local\sysvol\domain\Policies\PolicyDefinitions\en-us for each language your Group Policy administrators will use. Each subfolder is named after the appropriate ISO-style Language/Culture Name. E.g %domain%\sysvol\domain\policies\PolicyDefinitions\en-us

officegpo12

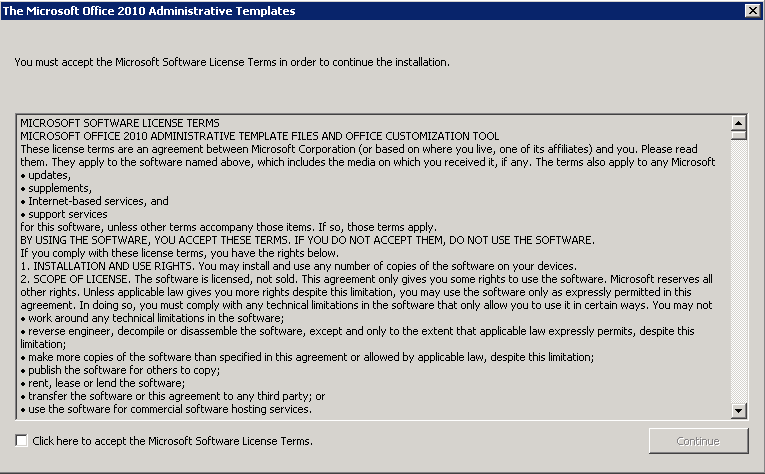
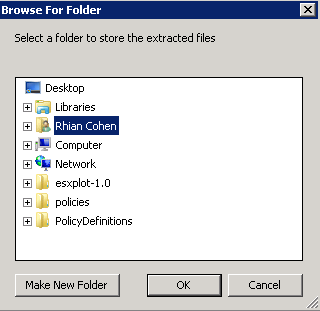
  • Run the Office 2010 Administrative Template exe as per below and save the 3 folders into a temp folder

officegpo1

  • Save into a temp folder for now

officegpo2

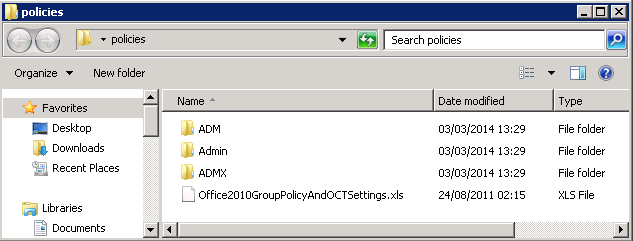
  • You should now see the following 3 folders

officegpo3

  • Go to your downloaded Office 2010 files and copy the admx files into the %domain%\sysvol\domain\policies\PolicyDefinitions folder
  • Go to your downloaded files and copy the adml files into the %domain%\sysvol\domain\policies\PolicyDefinitions\EN-US Folder
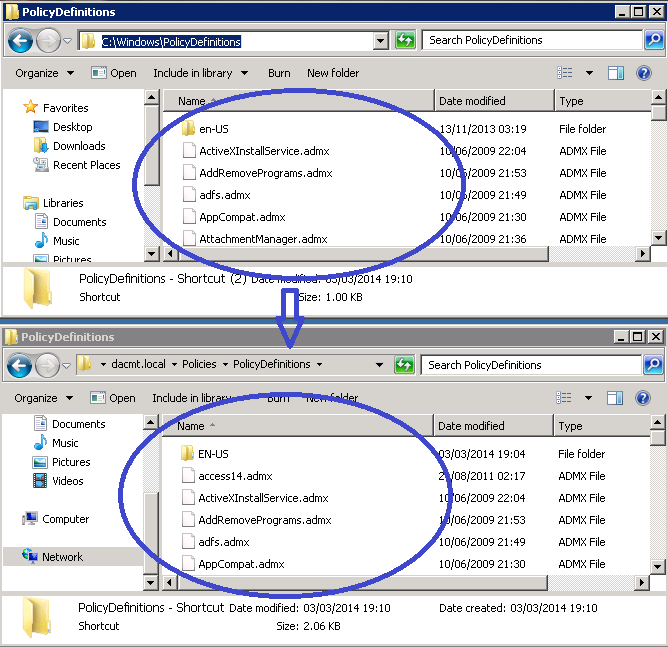
  • You now need to go to c:\Windows\Policy Definitions and copy what is in here into the \\dacmt.local\sysvol\domain\Policies\PolicyDefinitions\ folder and the \\dacmt.local\sysvol\domain\Policies\PolicyDefinitions\en-us folder as this will allow you to see the existing Administrative Templates along with the new Office ones

officegpo13

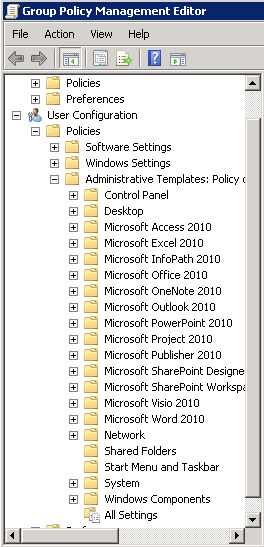
  • Open Group Policy Management console and you should now see the following

officegpo14

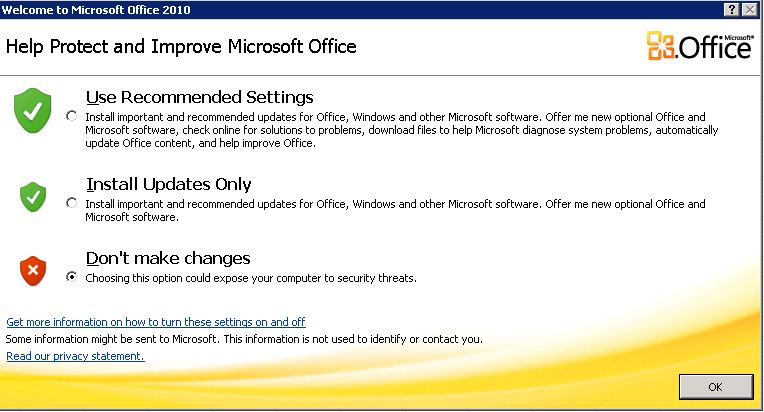
If you then navigate into each Office Setting. For example, go into Microsoft Office, you can suppress the initial box which pops up saying Welcome to Microsoft Office etc

officegpo10

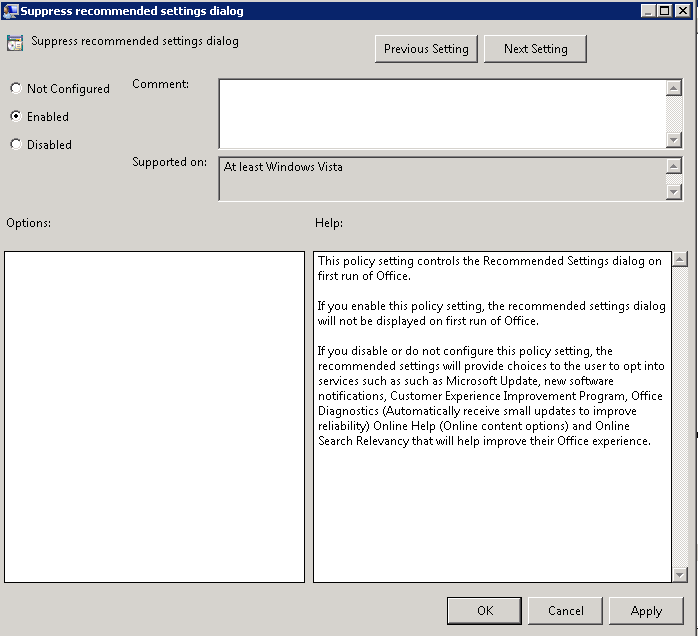
  • And this is the Group Policy below which will stop the above screen

officegpo9

  • Now you can go through any which you need to apply
  • Voila 🙂

Useful Links

http://technet.microsoft.com/en-us/library/cc748955%28v=ws.10%29.aspx

http://technet.microsoft.com/en-us/library/gg490629%28v=office.14%29.aspx

Group Policy Loopback Processing

3d key

Group Policy Processing

Group Policy Objects (GPO) are a collection of configurable policy settings that are organised as a single object and contain Computer Configuration policies which are applied to computers during Startup and User Configuration policies which are applied to users during logon.

Group Policy has 2 main configurations

  • Computer
  • User

When the computer starts, it processes all of the computer policies that are assigned to the computer object from AD in this order:

  • Local Policy
  • Site
  • Domain
  • OU
  • Child OU
  • Any startup scripts that were assigned to it in Group Policy

When a user logs in to the computer, the computer processes all of the policies assigned to that user object in this order:

  • Local Policy
  • Site
  • Domain
  • OU
  • Child OU
  • Any startup scripts that were assigned to it in Group Policy

What is Loopback processing?

The User Group Policy loopback processing mode option available within the computer configuration node of a Group Policy Object is a useful tool for ensuring certain user settings are applied on specified computers.

Essentially loopback processing changes the standard group policy processing in a way that allows user configuration settings to be applied based on the computers GPO scope during logon. This means that user configuration options can be applied to all users who log on to a specific computer.

Where is Loopback Processing found?

Loopback processing is configured in the Group Policy Management Console in Computer Configuration / Policies / Administrative Templates / System / Group Policy / User Group Policy loopback processing mode.

Modes

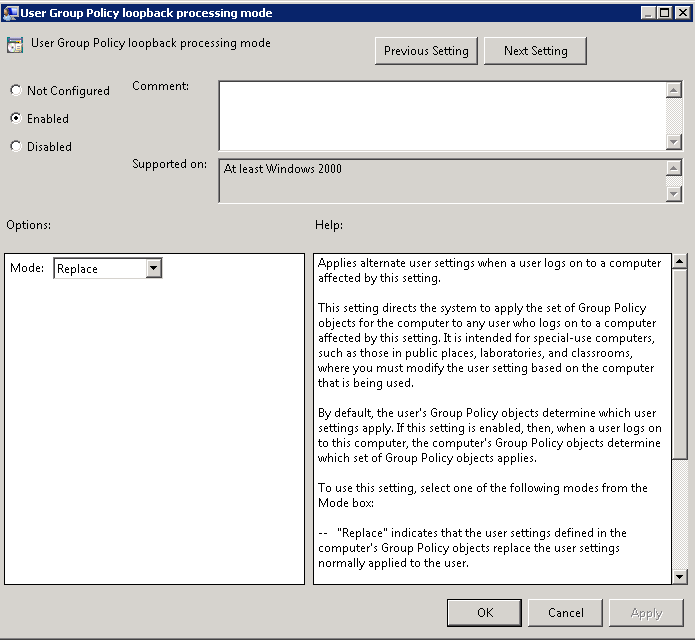
  • Replace

Replace Mode replaces the User policy that is assigned to the user. In the Computer Configuration, set the loopback processing mode to Replace. Next, assign user policies to the computer in addition to the computer polices, you would normally assign. When the computer starts, it will process the computer policies. When the user logs in, instead of processing the GPO’s assigned to the user, the computer will apply the user policies that are assigned to the computer object.

Where can it be used?

  • File, Print, and other servers that non-admin users don’t typically access via the console or Remote Desktop. When someone with admin rights logs in via the console or Remote Desktop, they only have the default policy or any other policy
  • Redirecting folders, mapping printers, or assigning software with Group Policy; you don’t want unwanted drivers or software showing up on your production server that now has to be maintained or removed.
  • Kiosk systems. An Administrator would typically have an unrestricted desktop experience. If that user logs onto a Kiosk machine, he or she would normally have a “wide open” desktop. This might be dangerous, so it may be useful to enable Replace mode to enforce a specific set of enforced settings.
  • Any other environment where the user settings should be determined by the computer account instead of the user account.
  • Terminal Servers

loopback

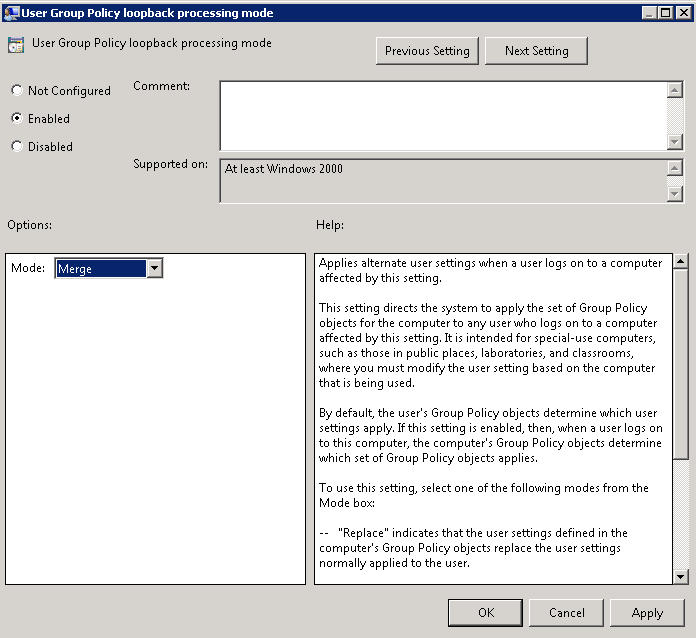
  • Merge

Merge Mode combines the policy that is assigned to the user instead of completely replacing it like in Replace Mode. When the computer starts, it will process the assigned computer policies. When the user logs in, the computer will process the user policies assigned to the user as it normally would and then processes the user policies that have been assigned to the computer object.

merge

Where can it be used?

  • Merge Mode can be useful if you need to make additions to a policy or override a general user policy that a user receives when he/she logs in to a computer

Processing order of Loopback Mode

Without Loopback

  • Computer Node policies from all GPOs in scope for the computer account object are applied during start-up (in the normal Local, Site, Domain, OU order)
  • User Node policies from all GPOs in scope for the user account object are applied during logon (in the normal Local, Site, Domain, OU order).

Loopback processing enabled (Merge Mode)

  • Computer Node policies from all GPOs in scope for the computer account object are applied during start-up (in the normal Local, Site, Domain, OU order), the computer flags that loopback processing (Merge Mode) is enabled.
  • User Node policies from all GPOs in scope for the user account object are applied during logon (in the normal Local, Site, Domain, OU order).
  • As the computer is running in loopback (Merge Mode) it then applies all User Node policies from all GPOs in scope for the computer account object during logon (Local, Site, Domain and OU),
  • If any of these settings conflict with what was applied , then the computer account setting will take precedence.

Loopback processing enabled (Replace Mode)

  • Computer Node policies from all GPOs in scope for the computer account object are applied during start-up (in the normal Local, Site, Domain, OU order), the computer flags that loopback processing (Replace Mode) is enabled.
  • User Node policies from all GPOs in scope for the user account object are not applied during logon (as the computer is running loopback processing in Replace mode no list of user GPOs has been collected).
  • As the computer is running in loopback (Replace Mode) it then applies all User Node policies from all GPOs in scope for the computer account object during logon (Local, Site, Domain and OU)

Useful Link

http://kudratsapaev.blogspot.co.uk/2009/07/loopback-processing-of-group-policy.html