What is VAAI?
VAAI helps storage vendors provide hardware assistance in the form of API components to accelerate VMware I/O operations that are more efficiently run within the storage which reduces CPU in the host
How do I know if my storage array supports VAAI?
To determine if your storage array support VAAI, see the Hardware Compatibility List or consult your storage vendor.
To enable the hardware acceleration on the storage array, check with your storage vendor. Some storage arrays require explicit activation of hardware acceleration support.
vSphere 5
With vSphere 5.0, support for the VAAI capabilities has been enhanced and additional capabilities have been introduced
- vSphere thin provisioning – Enabling the reclamation of unused space and monitoring of space usage for thin provisioned LUNs.
- Hardware Acceleration for NAS – Enables NAS arrays to integrate with VMware to offload operations such as offline cloning, cold migrations and cloning from templates
- SCSI standardisation – T10 compliancy for full copy, block zeroing and hardware assisted locking.
- Hardware assisted Full Copy – Enabling the storage to make full copies of data in the array
- Hardware assisted Block zeroing – Enabling the array to zero out large numbers of blocks
- Hardware assisted locking – Providing an alternative mechanism to protect VMFS metadata
vSphere thin provisioning
Historically the 2 major challenges of thin provisoned LUNs have been the reclamation of dead space and the challenges surrounding the monitoring of space usage. VAAI thin provisoning introduces the following. For Thin Provisioning, enabling/disabling occurs on the array and not on the ESXi host
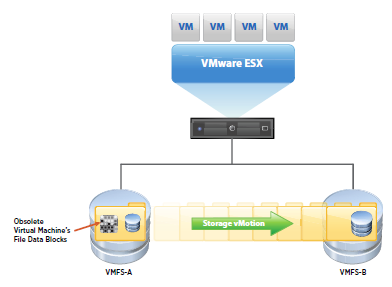
- Dead Space reclamation informs the array about the datastore space that is freed when files/disks are deleted or removed from the datastore by general deletion or storage vMotion. The array then reclaims the space
- Out of Space Condition monitors the space on thin provisioned LUNs to prevent running out of space. A new advanced warning has been added to vSphere
Hardware Acceleration for NAS
Hardware acceleration for NAS will enable faster provisioning and the use of thick virtual disks through new VAAI capabilities
- Full File Clone – Similar to Full Copy. Enables virtual disks to be cloned by the NAS Device
- Reserve Space – Enables creation of thick virtual disk files on NAS
- Lazy File Clone- Emulates the Linked Clone functionality on VMFS datastores. Allows the NAS device to create native snapshots to conserve space for VDI environments.
- Extended Statistics – Provides more accurate space reporting when using Lazy File Clone
Prior to vSphere 5, a virtual disk was created as a thin provisioned disk, not even enabling the creation of a thick disk. Starting with vSphere 5, VAAI NAS extensions enable NFS vendors to reserve space for an entire virtual disk.
SCSI standardisation – T10 compliancy for full block, block zeroing and hardware assisted locking
vSphere 4.1 introduced T10 compliancy for block zeroing enabling vendors to utilise the T10 standards with the default shipped plugin. vSphere 5 introduces enhanced support for T10 enabling the use of VAAI capabilities without the need to install a plug-in as well as enabling support for many storage devices.
Hardware-Accelerated Full Copy
Enables the storage array to make complete copies of a data set without involving the ESXi host, thereby reducing storage (and network traffic depending on your configuration) traffic between the host and the array. The XSET command offloads the process of copying VMDK blocks which can reduce the time in cloning, deploying from templates and svMotions of VMs.
Hardware-Accelerated Block Zeroing
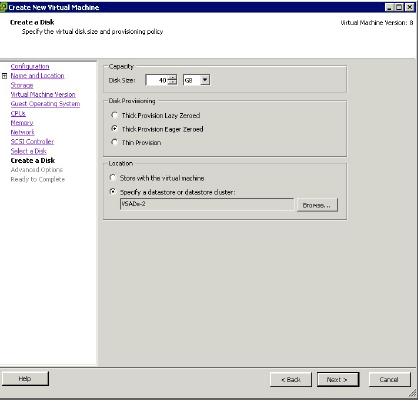
This feature enables the storage array to zero out a large number of blocks. This eliminates redundant host write commands. Performance improvements can be seen related to creating VMs and formatting virtual disks
Hardware Assisted Locking
Permits VM level locking without the use of SCSI reservations, using VMware’s Compare and Write command. Enables disk locking per sector as opposed to the entire LUN, providing a more efficient way to alter a metadata related file. This feature improves metadata heavy operations, such as concurrently powering on multiple VMs.
How do I know if VAAI is enabled through the vClient?
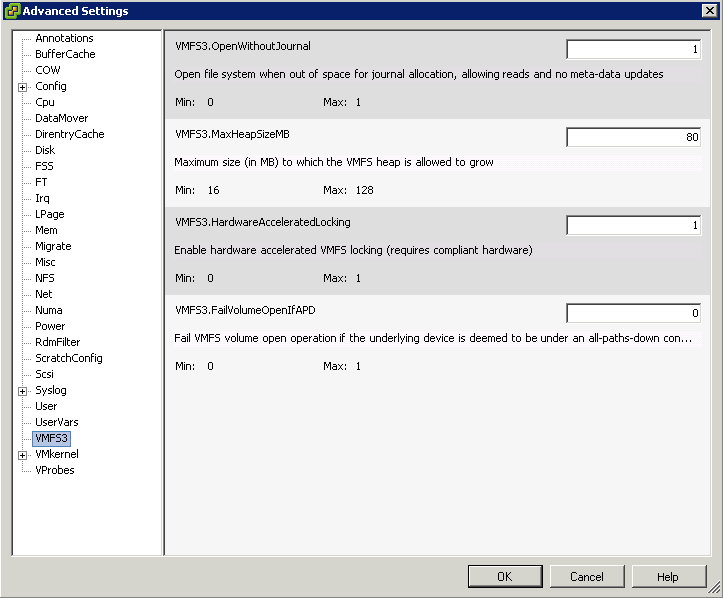
- In the vSphere Client inventory panel, select the host
- Click the Configuration tab, and click Advanced Settings under Software.
- Click VMFS3
- Select VMFS3.HardwareAcceleratedLocking
- Check that this option is set to 1 (enabled)
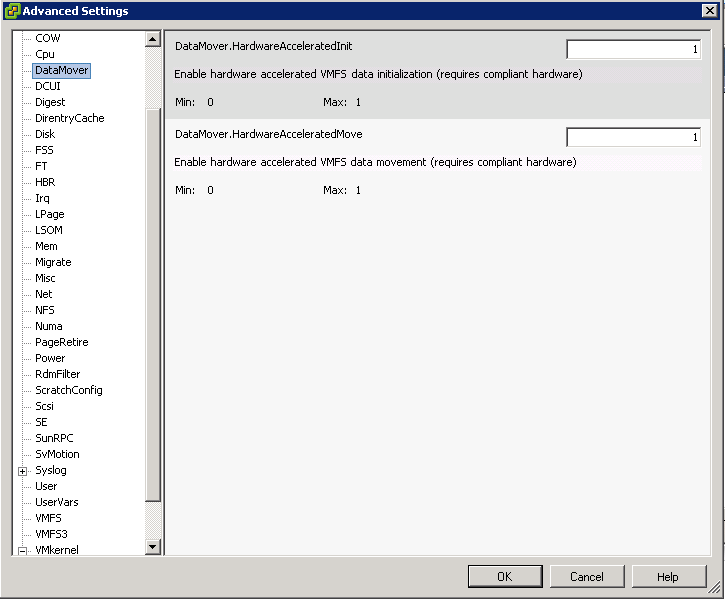
- Click DataMover
- DataMover.HardwareAcceleratedMove
- DataMover.HardwareAcceleratedInit
- Note: These 3 options are enabled by default.
How do I know if VAAI is enabled through the command line
- Type the following commands
- esxcli storage core device vaai status get -d naa.abcdefg
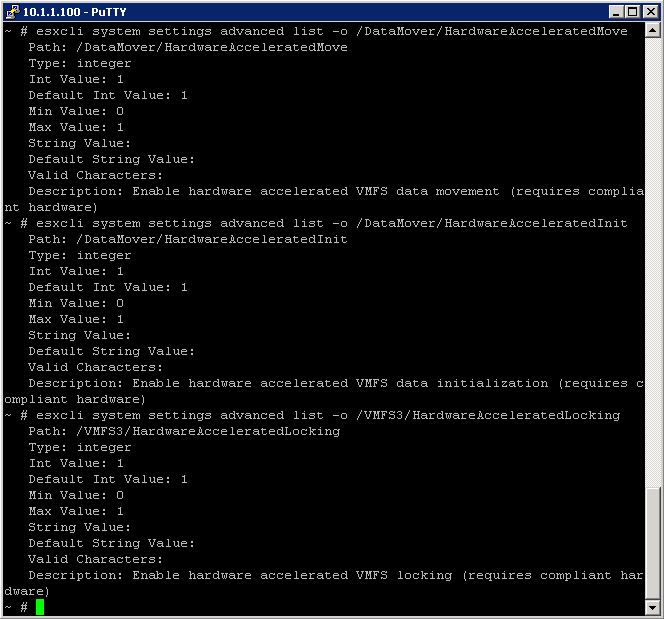
- esxcli system settings advanced list -o /DataMover/HardwareAcceleratedMove
- esxcli system settings advanced list -o /DataMover/HardwareAcceleratedInit
- esxcli system settings advanced list -o /VMFS3/HardwareAcceleratedLocking
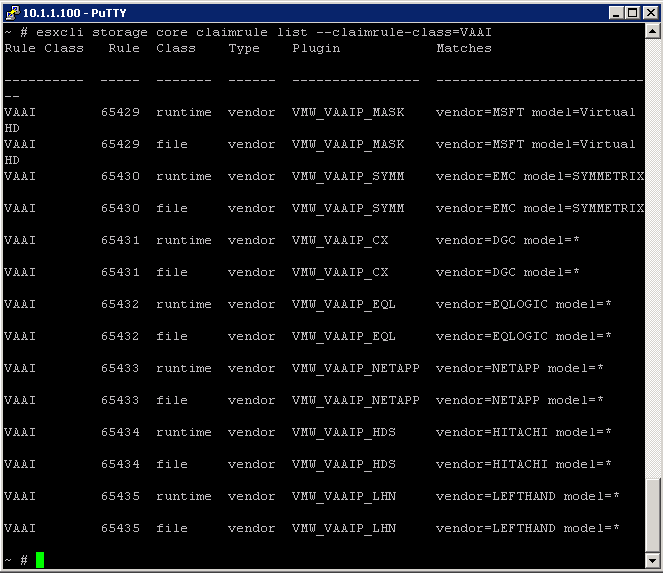
- esxcli storage core plugin list -N VAAI – displays plugins for VAAI
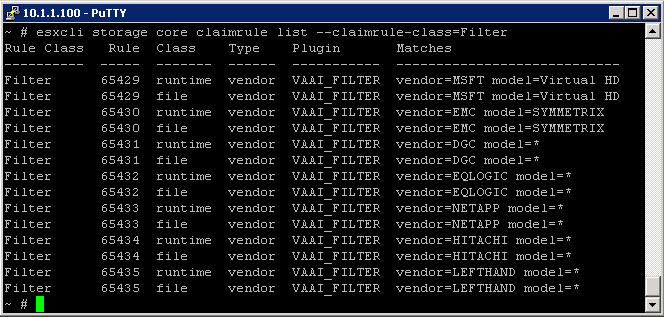
- esxcli storage core plugin list -N Filter– displays VAAI filter
Examples
To check the VAAI Status
To determine if VAAI is enabled, check is Int Value is set to 1
What happens if I have VAAI enabled on the host but some of my disk arrays do not support it?
When storage devices do not support or provide only partial support for the host operations, the host reverts to its native methods to perform the unsupported operations.
For each storage device and datastore, the vSphere Client displays the hardware acceleration support status in the Hardware Acceleration column of the Devices view and the Datastores view. The status values are
- Unknown
- Supported
- Not Supported
The initial value is Unknown. The status changes to Supported after the host successfully performs the offload operation. If the offload operation fails, the status changes to Not Supported. When storage devices do not support or provide only partial support for the host operations, your host reverts to its native methods to perform unsupported operations
How to add Hardware Acceleration Claim Rules
To implement the hardware acceleration functionality, the Pluggable Storage Architecture (PSA) uses a combination of special array integration plug-ins, called VAAI plug-ins, and an array integration filter, called VAAI filter. The PSA automatically attaches the VAAI filter and vendor-specific VAAI plug-ins to those storage devices that support the hardware acceleration
You need to add two claim rules, one for the VAAI filter and another for the VAAI plug-in. For the new claim rules to be active, you first define the rules and then load them into your system.
- Define a new claim rule for the VAAI filter
- esxcli –server servername storage core claimrule add –claimrule-class=Filter –plugin=VAAI_FILTER
- Define a new claim rule for the VAAI plug-in
- esxcli –server servername storage core claimrule add –claimrule-class=VAAI
- Load both claim rules by running the following commands:
- esxcli –server servername storage core claimrule load –claimrule-class=Filter
- esxcli –server servername storage core claimrule load –claimrule-class=VAAI
- Run the VAAI filter claim rule, Only this one needs to be loaded
- esxcli –server servername storage core claimrule run –claimrule-class=Filter
Examples
Installing a NAS plug-in
- Place your host into the maintenance mode.
- Get and set the host acceptance level
- esxcli software acceptance get
- esxcli software acceptance set –level=value
- The value can be one of the following: VMwareCertified, VMwareAccepted, PartnerSupported, CommunitySupported. Default is PartnerSupported
- Install the VIB package
- esxcli software vib install -v|–viburl=URL
- The URL specifies the URL to the VIB package to install. http:, https:, ftp:, and file: are supported.
- Verify the Plugin is installed
- esxcli software vib list
- Reboot your host

