Tag Archive for vmxnet3

Changing from e1000 NICs to vmxnet3 NICs in VMware

cable_car_icon_2

The Task

Change an E1000 NIC to a VMXNET3 NIC

Instructions

  • Add the new VMXNET3 NIC while the VM is on
  • Go to the vCenter console for the VM and log into the VM console
  • Go to the old NICS and make them DHCP. Make sure you know what they were previously set to statically before you make them DHCP!
  • On the new VMXNET3 NICs put in the correct IP address/Subnet Mask/Gateway/DNS Servers
  • Shutdown
  • Edit settings and remove E1000 Nics
  • Boot up again

What happens if you encounter ghost adapters?

Sometimes you will remove an adapter but the Windows servers will still think it is there especially if you try and rename it and it says the adapter exists but you can’t see it.

If you want to see this ghost adapter, try the following

  • Open a command Prompt and type the below

Ghostnic1

  • This will open Device Manager
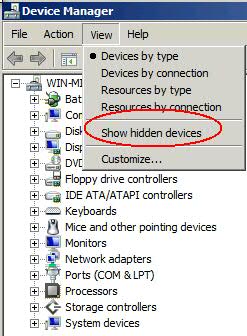
  • Click View > Show hidden devices

ghostnic2

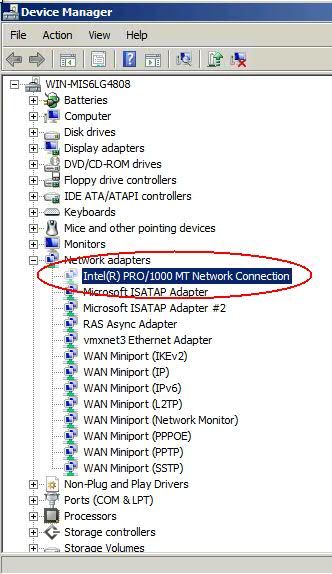
  • If you now expand the Network adapters section, you will see your hidden E1000 ghost NIC
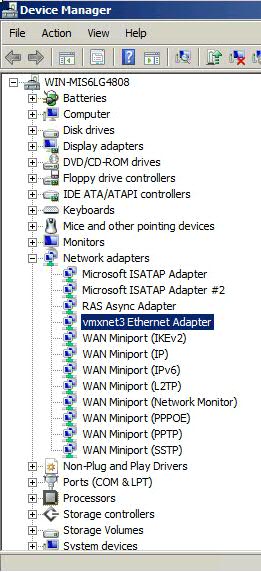
  • Hopefully you should see your new VMXNET3 NIC also

Middlesex4

  • You can now uninstall the ghost adapter just leaving your VMXNET3 adapter

Middlesex5

How To Change Virtual Machine Network Adapter Type Using vSphere PowerCLI

The Task

You want to upgrade your VM NIC from E1000 or VMXNET to VMXNET3. There is a manual way to do this but it is quicker in Powershell

Instructions

  • Power off the VM
  • Log into Powershell – Connect-VIServer – Enter credentials if required
  • Run the following command
  • get-vm vmname | get-networkadapter | set-networkadapter -type “vmxnet3”

  • If you have more than one adapter, it will ask you about all of them. Select Y or N as required
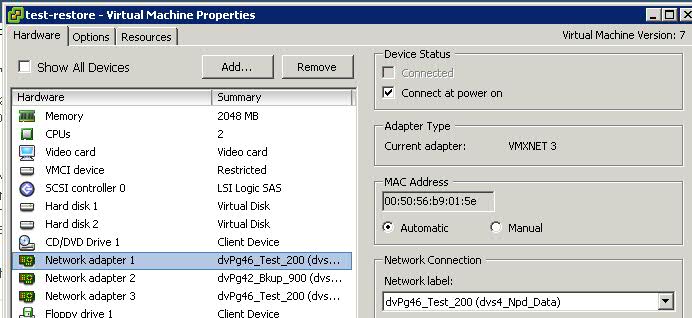
  • Check in the VM Settings that the NIC Type has changed to VMXNET3

  • Power on VM
  • The IP Address settings that were originally set should still be there

The Manual Way (Slower)

  • Power down machine
  • Right click on machine and remove from inventory
  • Go to machine VMX file in the datastore and upload to desktop
  • Edit the vm.vmx file to ethernet0.virtualDev = “vmxnet3”
  • Rename the original vm.vmx file in the datastore to vm.vmx.bak
  • Upload the edited vm.vmx file to the datastore
  • Right click and add vm.vmx file to inventory
  • Power on machine
  • Check IP Address

Qs and As

[Q]
I have run this command while the test vm is powered off and then powered up again and the NIC has changed in the VM settings and within the Wndows 2008 R2 VM however it does not retain the IP Address. Is this standard behaviour or do we need to re-enter the IP Address?

[A]
Yes this is standard behaviour as once the NIC has been changed it is seen as a new device so a new IP will need to be assigned.

[Q]
Can this Powershell command be run while the VM is running and if so will we get the same thing where it will change the NIC type fine but not retain the IP Address?

[A]
No the command will not work while the VM is running. You can “add” a new adapter while the VM is running but to change the adapter type from E1000 to VMXNET3 the VM need to be powered off