Shrinking a Virtual Disk
Shrinking a virtual disk reclaims unused space in the virtual disk and reduces the amount of space the virtual disk occupies on the host.
Shrinking a disk is a two-step process. In the preparation step, VMware Tools reclaims all unused portions of disk partitions (such as deleted files) and prepares them for shrinking. This step takes place in the guest operating system.
In the shrink step, the VMware application reduces the size of the disk based on the disk space reclaimed during the preparation step. If the disk has empty space, this process reduces the amount of space the virtual disk occupies on the host drive. The shrink step takes place outside the virtual machine.
When can you not shrink a disk?
Shrinking disks is not allowed under the following circumstances:
- The virtual machine is hosted on an ESX/ESXi server. ESX/ESXi Server can shrink the size of a virtual disk only when a virtual machine is exported. The space occupied by the virtual disk on the ESX/ESXi server, however, does not change.
- You pre-allocated all the disk space to the virtual disk when you created it. Must be Thick provisioned drive for Shrinking
- The virtual machine contains a snapshot.
- The virtual machine is a linked clone or the parent of a linked clone.
- The virtual disk is an independent disk in non-persistent mode.
- The file system is a journaling file system, such as an ext4, xfs, or jfs file system.
Prerequisites
■ On Linux, Solaris, and FreeBSD guests, run VMware Tools as the root user to shrink virtual disks. If you shrink the virtual disk as a nonroot user, you cannot prepare to shrink the parts of the virtual disk that require root-level permissions.
■ On Windows guests, you must be logged in as a user with Administrator privileges to shrink virtual disks.
■ Verify that the host has free disk space equal to the size of the virtual disk you plan to shrink.
■ Verify that all your hard disks are thick or this will produce an error when you click Shrink
Procedure
- Click the Shrink tab in the VMware Tools control panel.
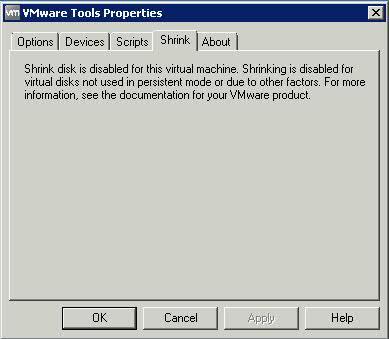
- If the disk cannot be shrunk, the tab shows a description of the reason.
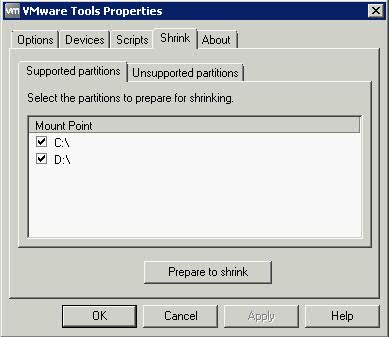
- Select the partitions to shrink and click Prepare to Shrink.
If you deselect some partitions, the whole disk still shrinks. The deselected partitions, however, are not wiped for shrinking, and the shrink process does not reduce the size of the virtual disk as much as it would with all partitions selected.
VMware Tools reclaims all unused portions of disk partitions (such as deleted files) and prepares them for shrinking. During this phase, you can still interact with the virtual machine
- When a prompt to shrink disks appears, click Yes.
The virtual machine freezes while VMware Tools shrinks the disks. The shrinking process takes considerable time, depending on the size of the disk.
- When a message box appears that confirms the process is complete, click OK
The Newer Compact Command
Some newer versions of VMware products include a Compact button or menu command, which performs the same function as the Shrink command. You can use the Compact command when the virtual machine is powered off. The shrinking process is much quicker when you use the Compact command.
Method 1 – Using VMware Converter to shrink or extend a disk
- Install VMware Converter on the machine you want to convert
- Start the VMware Converter Application
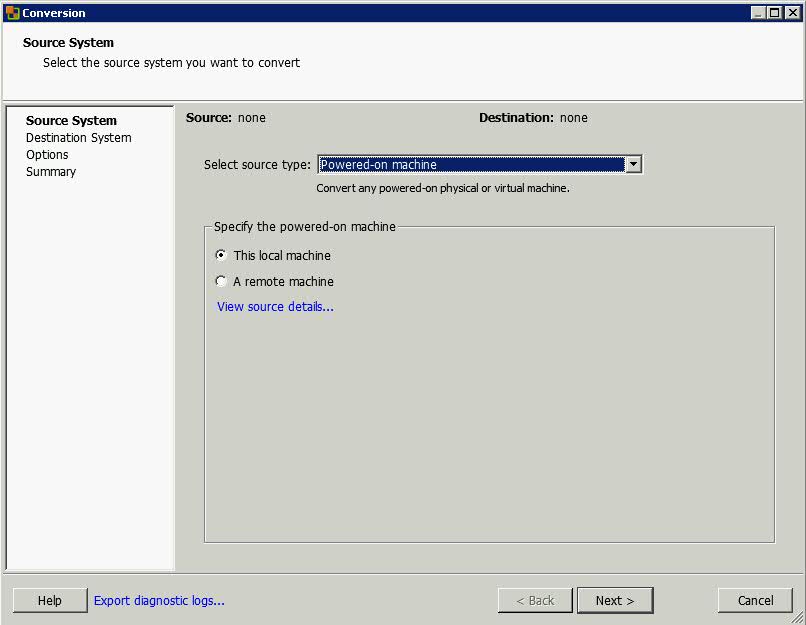
- Select File > New > Convert Machine > Select Powered on Machine
- Specify the Powered On Machine as Local Machine
- Note, you can also select File > New > Convert Machine > VMware Infrastructure Virtual Machine if you want to shrink a VM which is powered off but you will need VMware Converter installed on another machine
- Click Next
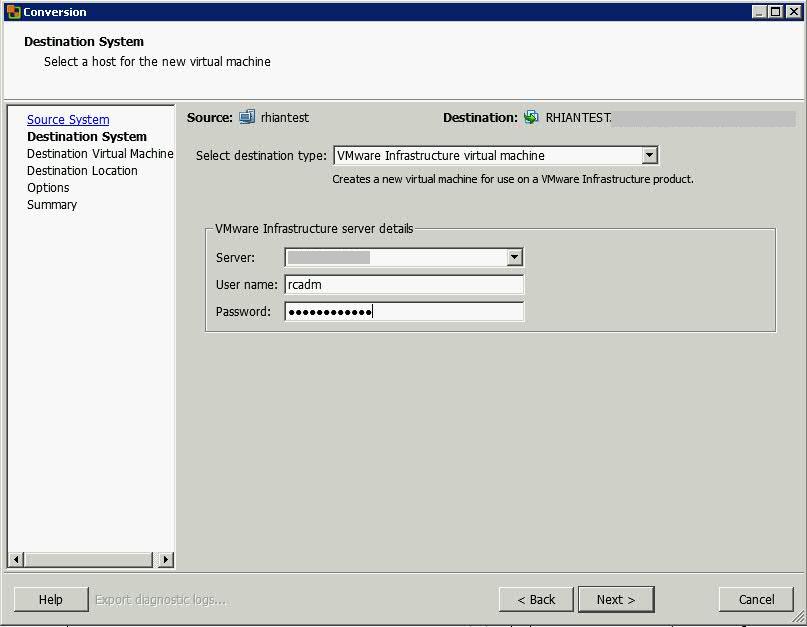
- In Destination Type, select VMware Infrastructure Virtual Machine
- Put in vCenter Server Name
- Put in User Account
- Put in Password
- Click Next
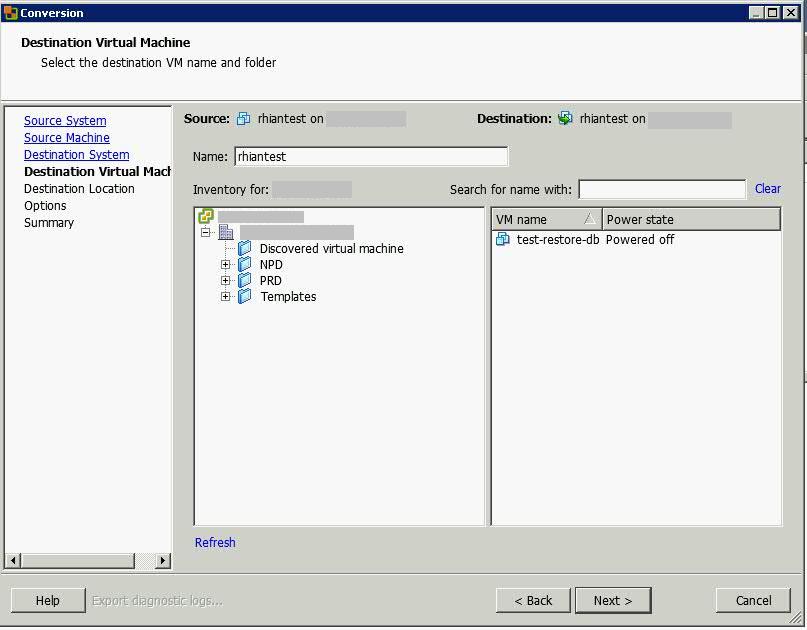
- Type a different name for your VM. You cannot use the same name
- Select the same Resource Pool you use for the machine you want to convert
- Click Next
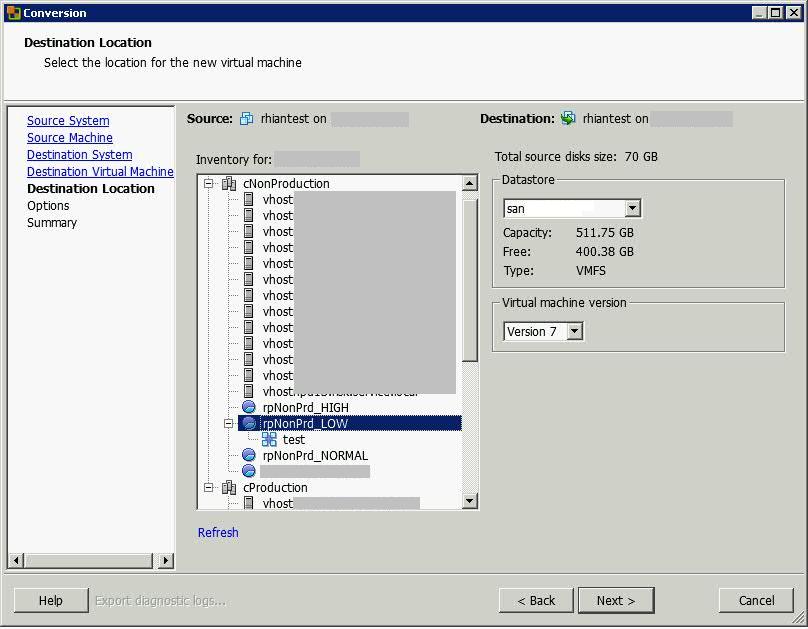
- Choose a destination Resource Pool or host
- Click Next
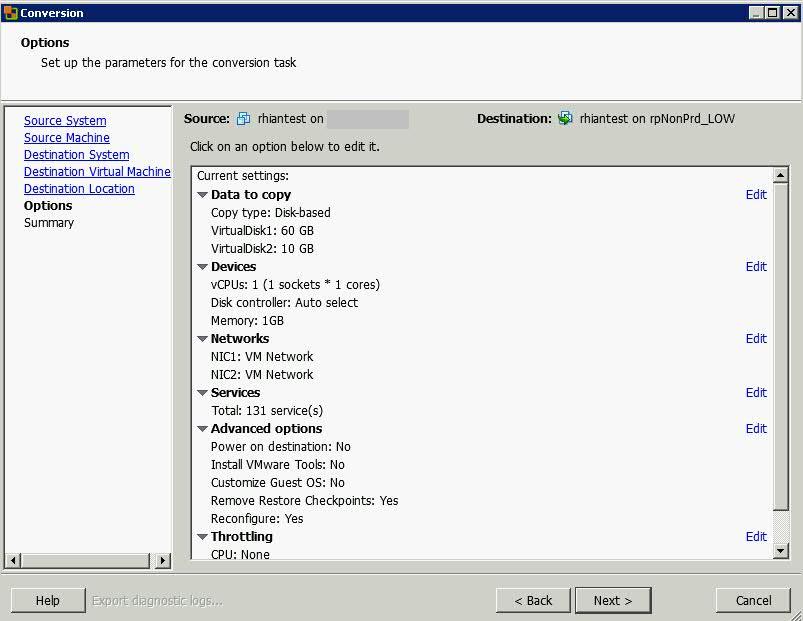
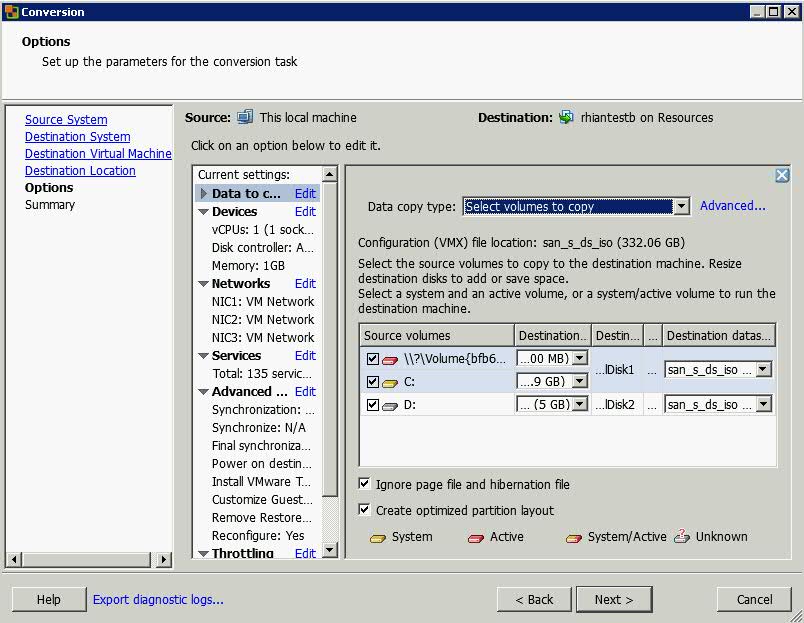
- Click Edit on Data to Copy
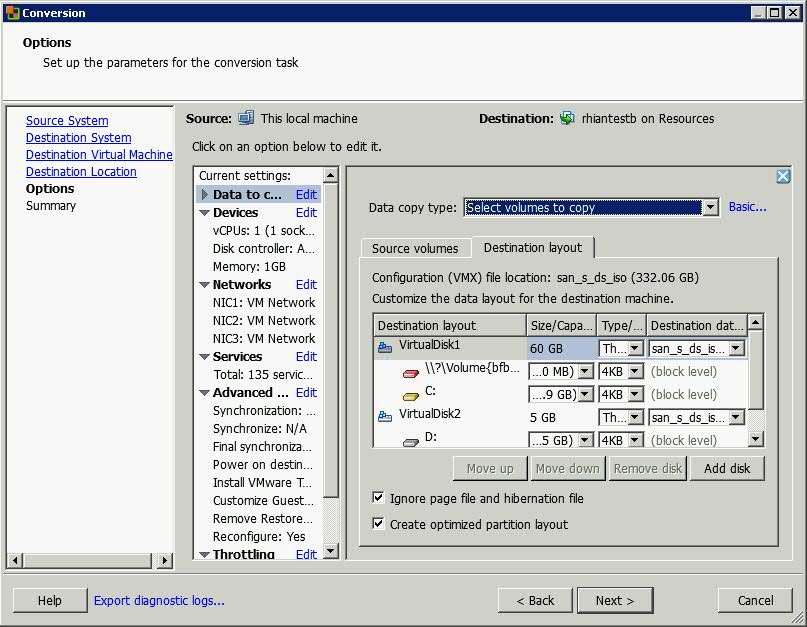
- Select Advanced
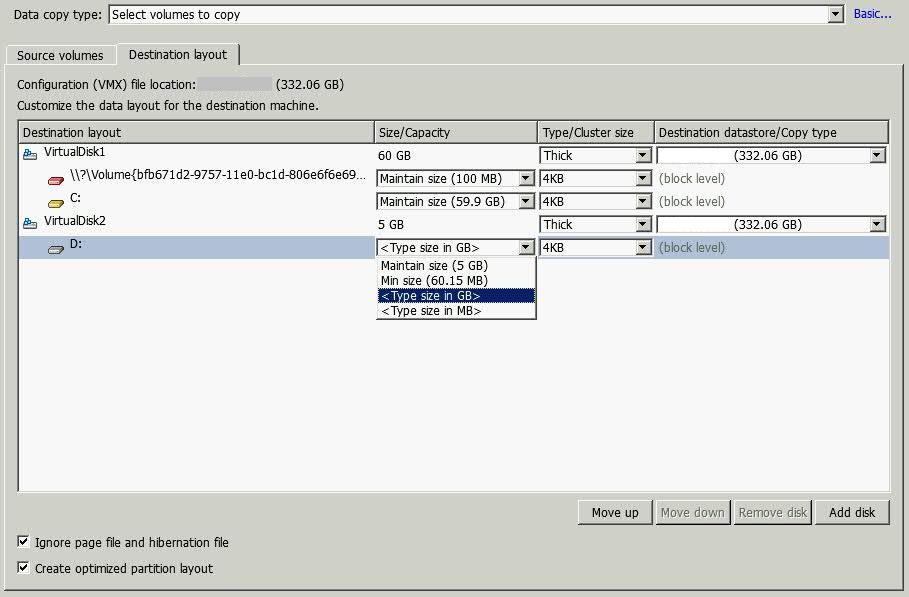
- Select Destination Layout
- Select the disk you want to change the size of by clicking the drop down button and select Change Size
- Click Next
- You will reach the Summary Page
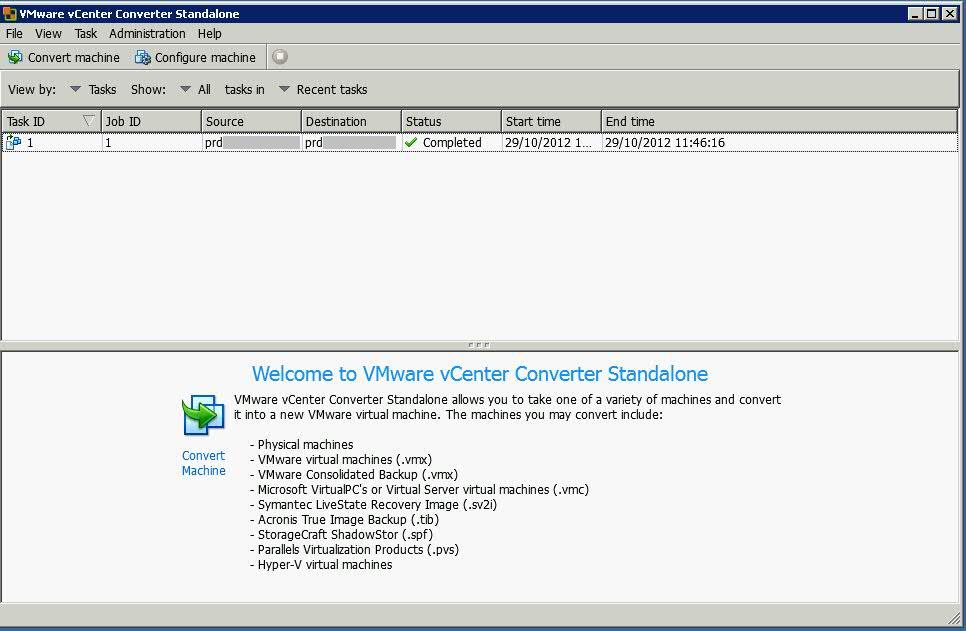
- Click Finish and the following window will open and show you the running task
- Power off the original VM
- Power up the new cloned VM and check everything works ok
- Delete the original VM
Best Practices for using VMware Converter
