What are Tags?
Tags allow you to attach metadata to objects in the vSphere inventory to make these objects more sortable and searchable. A tag is a label that you can apply to objects in the vSphere inventory. When you create a tag, you assign that tag to a category.
What are Categories?
Categories allow you to group related tags together. When you define a category, you can also specify which object types its tags can be applied to and whether more than one tag in the category can be applied to an object. For example, if you wanted to tag your virtual machines by guest operating system type, you could create a category called ‘operating system’, and specify that it applies to virtual machines only and that only a single tag can be applied to a virtual machine at any time. The tags in this category could be “Windows”, “Linux”, and “Mac OS”.
Tagging replaces the custom attributes functionality found in previous versions of vCenter Server. If you have existing custom attributes, you can convert them into tags.
Migrate Custom Attributes to Tags
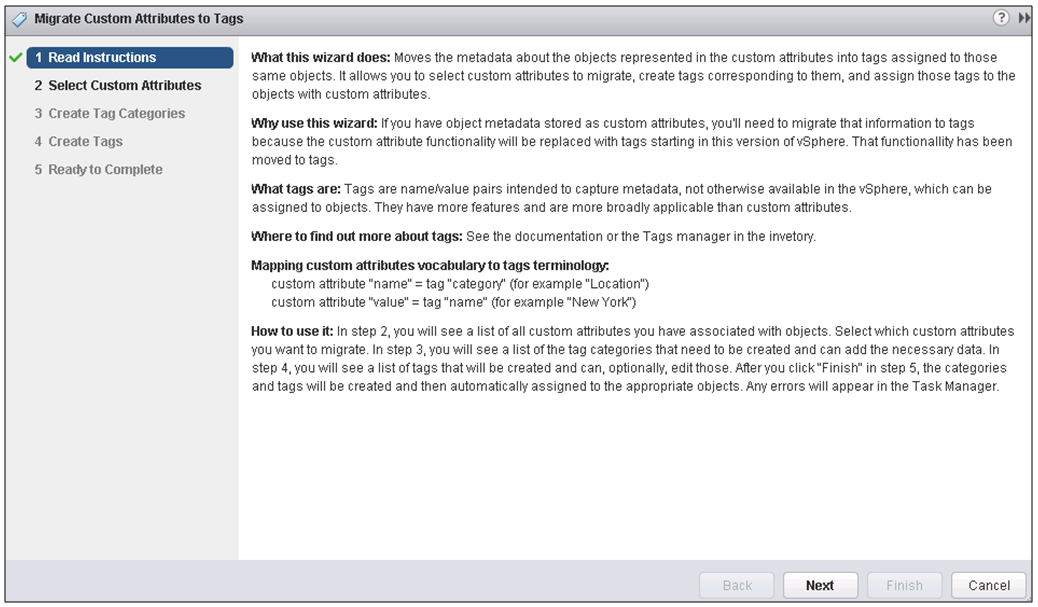
Tags replace the custom attributes functionality found in previous versions of vSphere. If you have existing custom attributes, you can migrate them to tags.
During the migration
- The custom attribute names are converted to categories.
- Custom attribute values are converted to tag names.
Procedure
- In the vSphere Web Client object navigator, browse to Home
- Click Tags
- Click Convert Custom Attributes
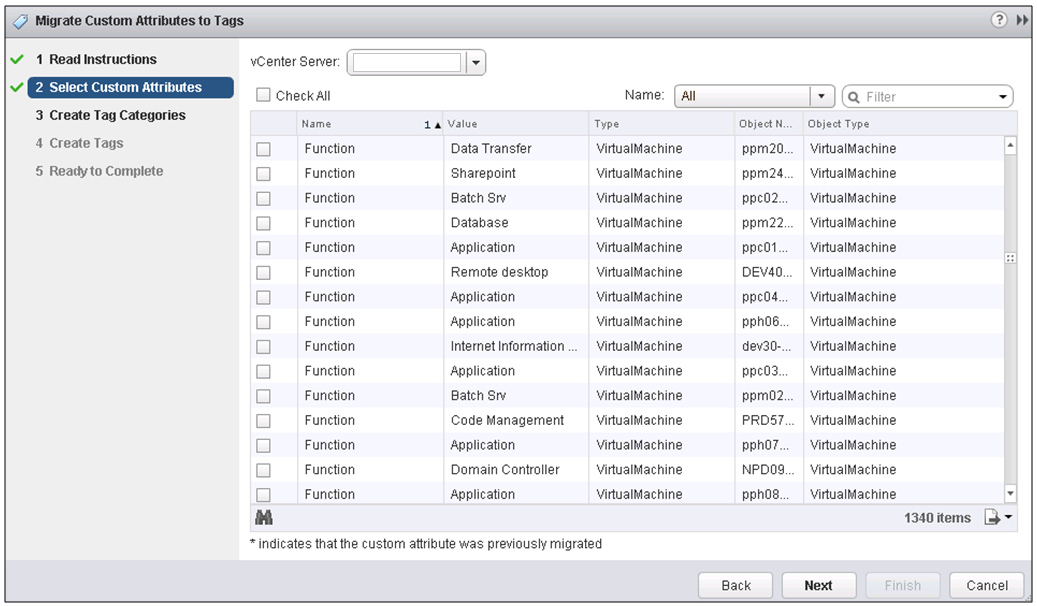
- Select the Custom Attributes you want to migrate
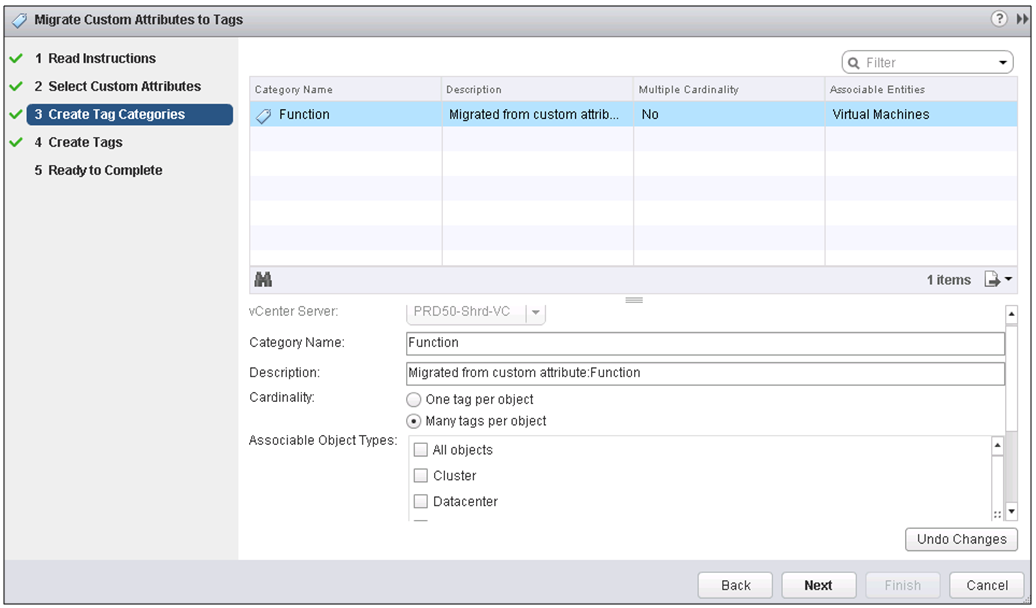
- Create Tag Categories
- You can change the Category Name
- Choose the Cardinality. For example, if you wanted to tag your virtual machines by Function, you could create a category called ‘Function’, and specify that it applies to virtual machines only and that only a single or multiple tag can be applied to a virtual machine at any time. The tags in this category could be “Application”, “Database”, “Active Directory”, “DNS” and “Web”.
- In my case, I may want to assign 2 Functions to one VM so I will choose Many Tags per object. E.g Active Directory and DNS Server
- Choose the Associable Object Types which could be anything from Datacenter, Cluster, Datastore or All Objects. In this case I would choose VM which you can see if you scroll down on this option
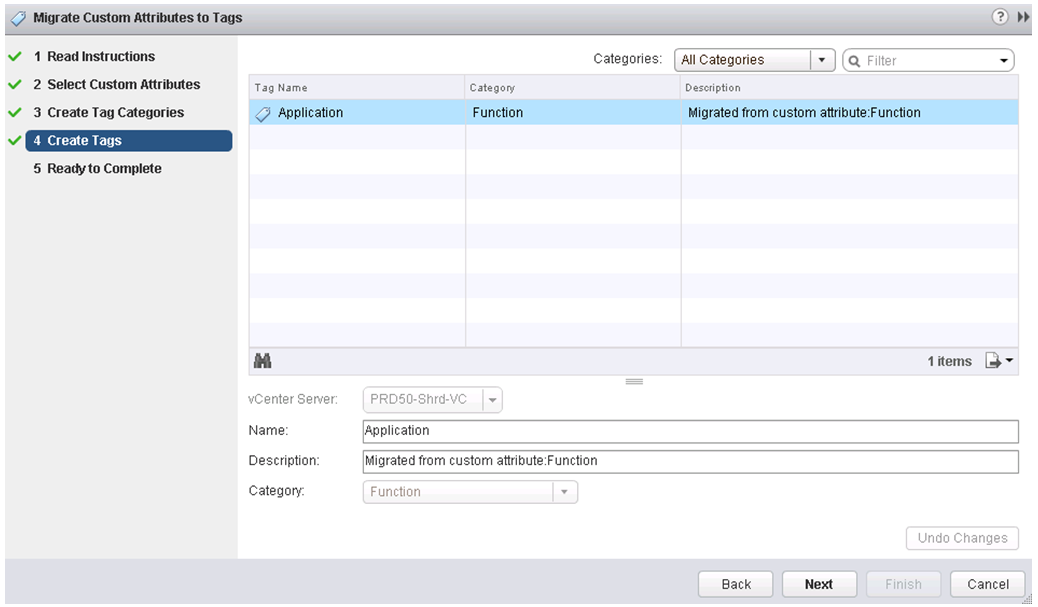
- Next Create Tags. Check you are happy with the Tag name
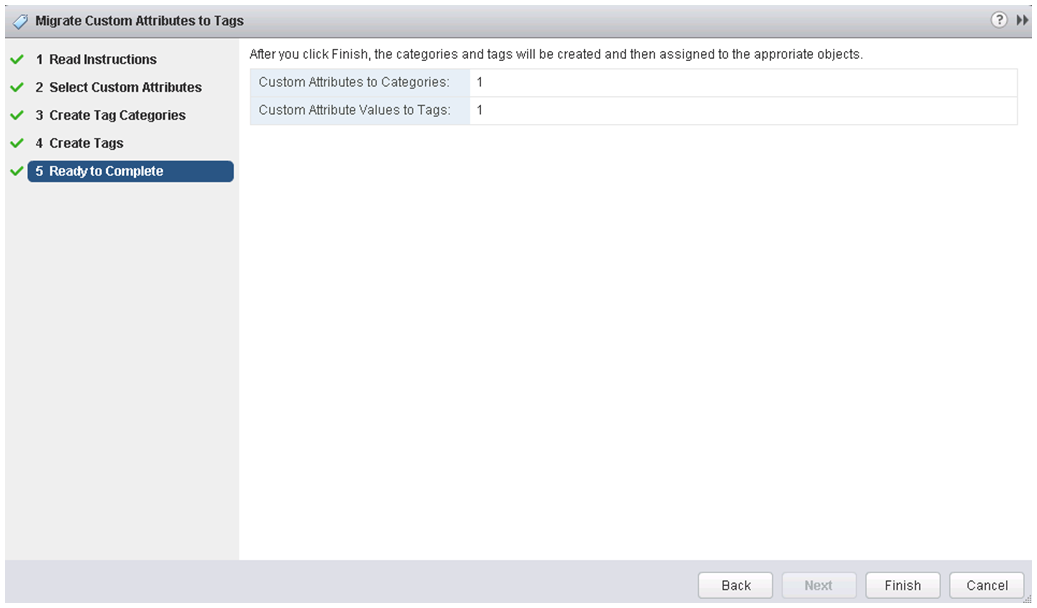
- You are now ready to complete. Click Finish
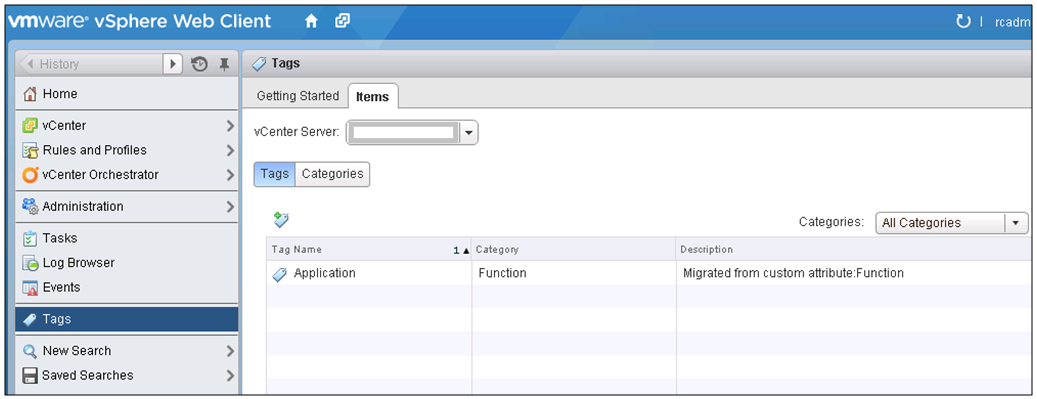
- Now if you click on Tags > Items, you should see the Migrated Custom Attribute

