Monitoring and Reclamation
In vRA we need to know what to do when we need to identify and reclaim unused or underused resources and put in an automated solution to manage these.
Reclamation stages
- Identify
Through endpoint discovery and data collection, vRA creates list of machines and their characteristics. Using filtering capabilities, administrators can identify machines for reclamation which could be machines which have been powered off, machines that average low usage and machines where the users have left or been disabled in AD
- Verify
After machines are identified, they are validated before being reclaimed. vRA use workflows to assist customers with the process along with approval processes
- Reclaim
Once machines are identified for reclamation, vRA goes through the process of reclaiming. Some machines may need to be archived before being removed completely.
- Improve
Reclamation is designed to improve efficiency and use. Reporting and cost savings are used to manage machines in order to track and monitor environments
Where is Reclamation in vRA?
Tenant Administrators perform reclamation tasks
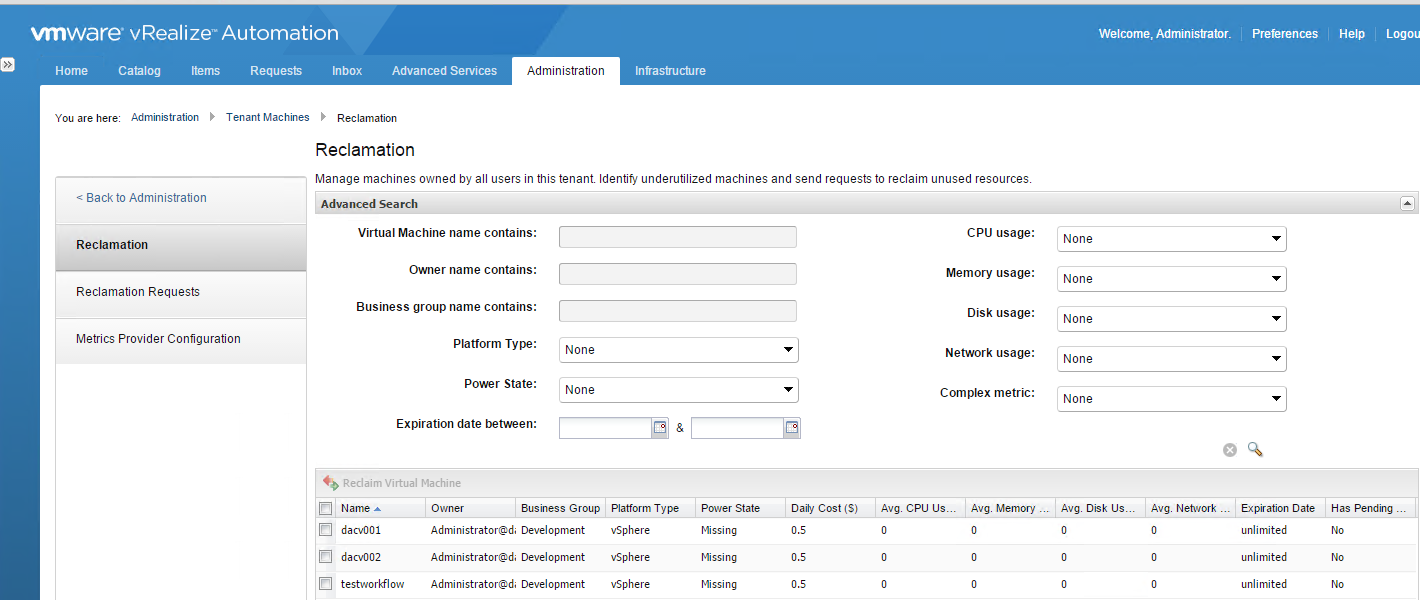
- Go to Administration > Tenant Machines > Reclamations
- The below page appears
- The tenant administrator can search for underused machines by CPU, memory, disk, network use or idle machines (Idle meaning a machine which is powered on but with no statistics)
Thresholds
Reclamation Requests and Notifications
The tenant administrator submits a reclamation request specifying the lease length and reason for the request which can then be monitored
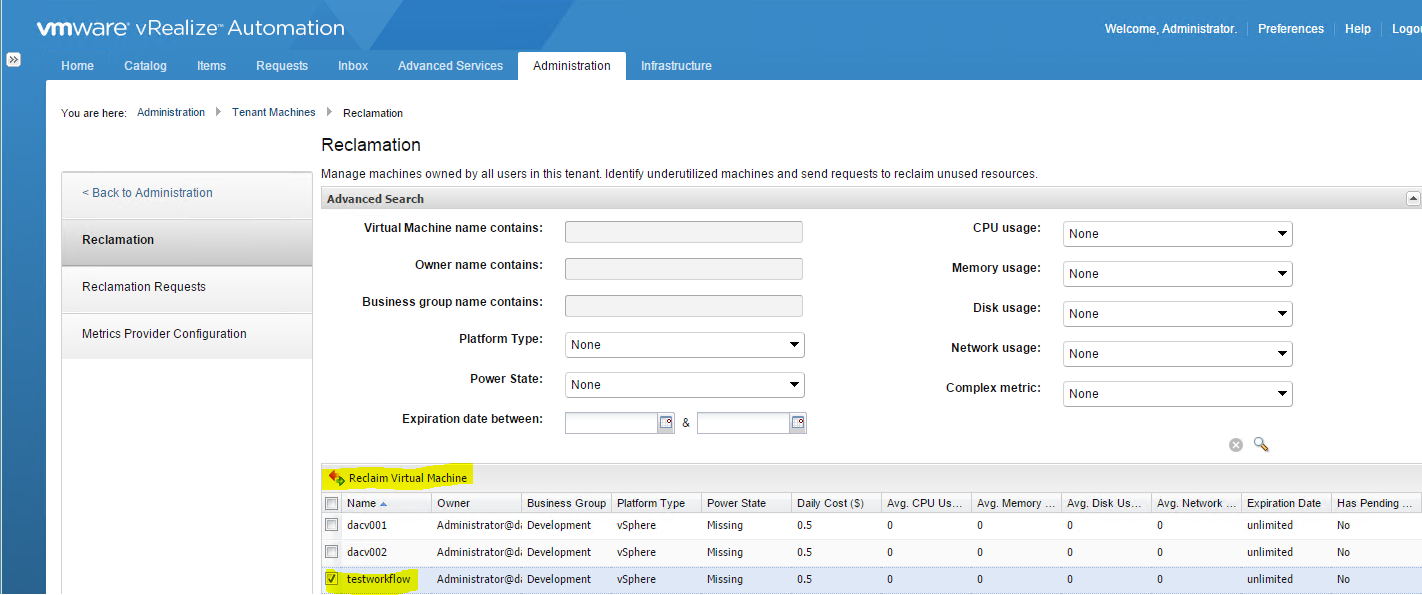
- Go to Administration > Tenant Machines > Reclamations
- Select the machine you want to use
- Click Reclaim Virtual machines
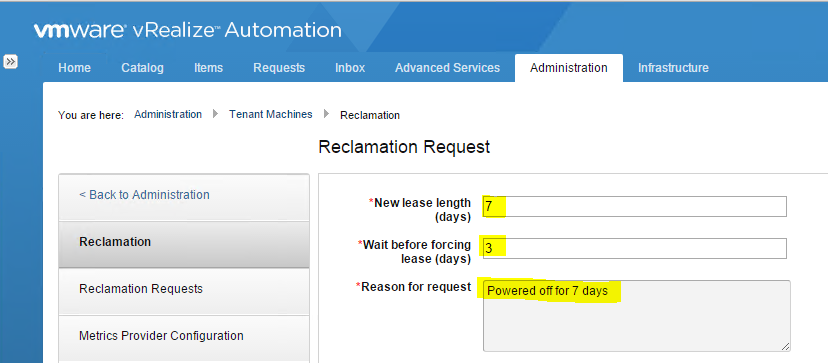
- The next screen has 3 options
- New lease length (A new amount of lease time is assigned to the machine where if the owner does not respond to the lease request, the machine is powered off an destroyed, if no archive period was set in the blueprint)
- Wait before forcing lease (days) (This is the time within which the owner of a machine must respond to prevent a new lease from being applied to the machine)
- Reason for request
- If an archive period was set, the machine is expired and cannot be powered on until the lease is reset
- If the lease is not reset at the end of the archive period, the machine is destroyed and the resources are reclaimed
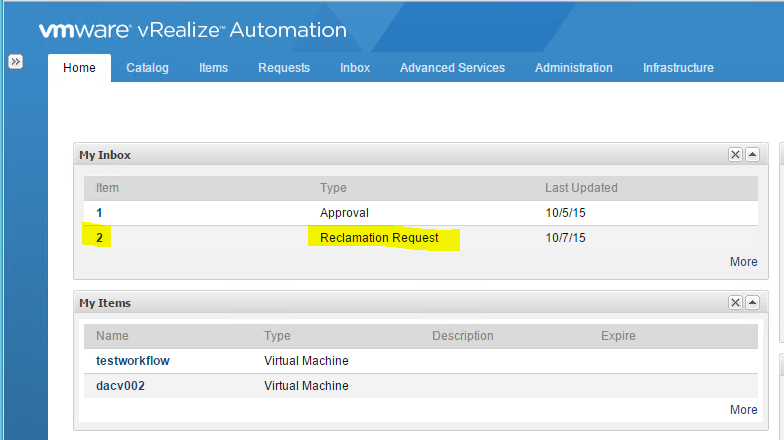
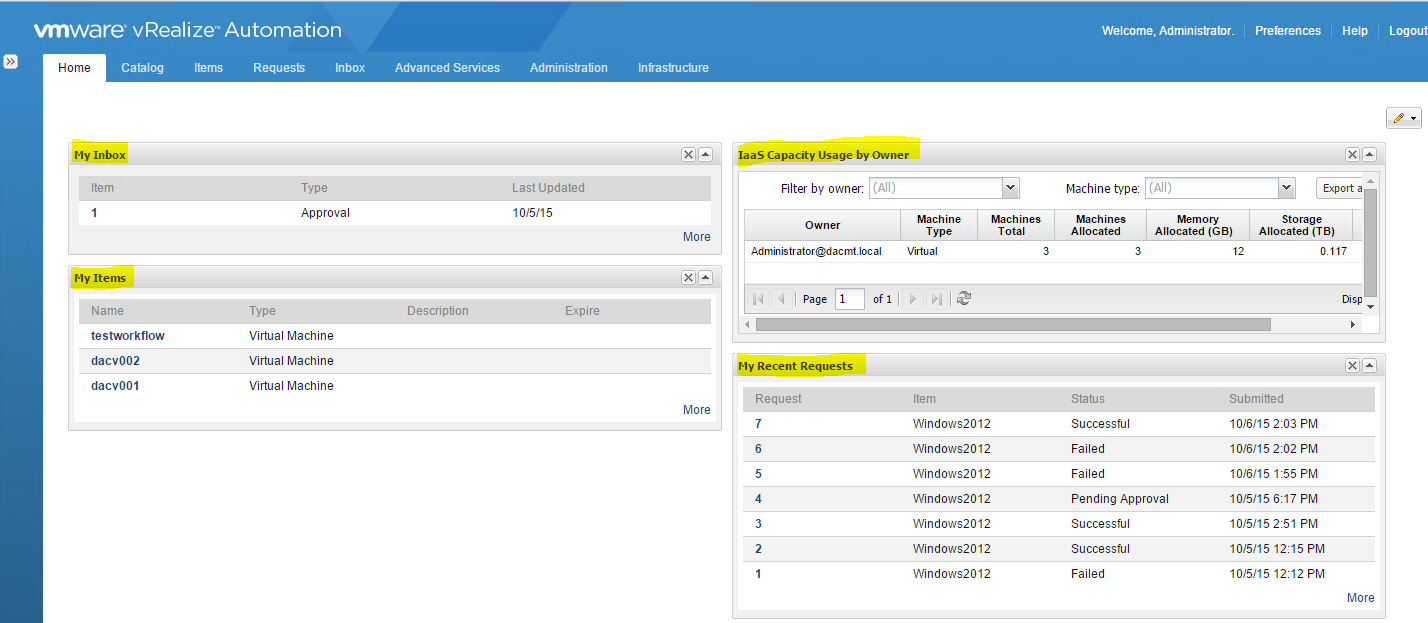
- Go to the Inbox of the owner. As this is me, I just click Home > My Inbox and I can see the reclamation request which has come in to me
- Click on this request and select an option
- One of 3 actions can be taken on a reclamation request
- The machine owner can select Release for reclamation where the machine is reclaimed and immediately destroyed if no archival period was specified in the blueprint
- The machine can select item in use. No action is taken and the administrator is notified that the machine should still be used
- The machine owner can take no action. In this case the machine is assigned a new lease based on the reclamation request. If the owner does not respond, it is powered off and destroyed if no archival period was set. During the archival period, the machine cannot be powered on until the lease is reset
There are 3 states of reclamation requests
- Pending (Request submitted to the machine owner)
- Approved (The machine owner has released the machine for reclamation)
- Rejected (The machine owner has responded that the machine is still in use)
Machine Leases
These are the time periods given to a machine which determine how long they should be active for. Machine leases are used by tenant admins and business group managers
- Leases can be assigned to blueprints
- Leases can be assigned to a machine after it is provisioned
- Leases can be changed after a machine is provisioned
- if a lease is not assigned then the machine does not have an expiration date
- Multimachines have one lease date which is applied to all machines in the service
Home Page Portlets
Tenant Administrators can monitor and report reclamation savings by adding portlets to the home page
- Log into https://vRA_Apppliance.FQDN/shell-ui-app
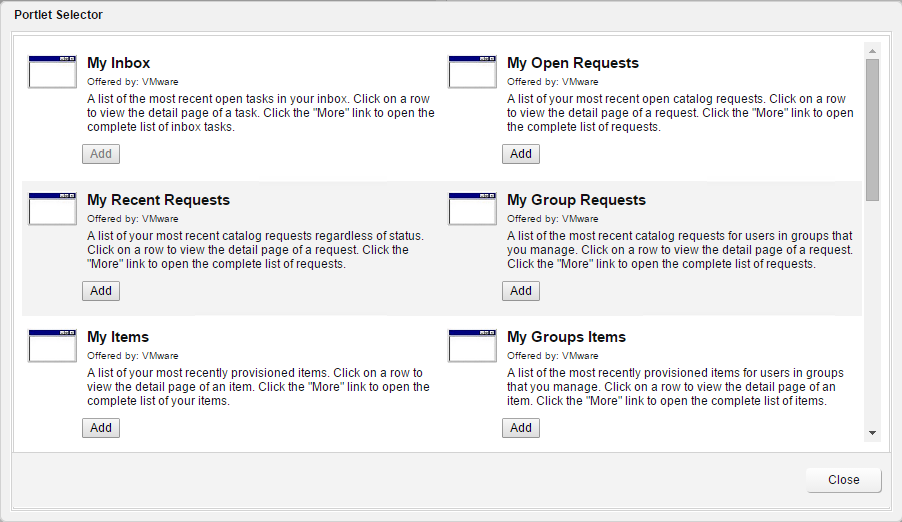
- Click Home and at the right side of the screen, click the pencil icon and select Add Portlets
- Choose the portlets you want
- They can then be dragged and re-arranged on your home page
- Users can add portlets but if they don’t have permissions then no data will appear
- You can also export data as a .csv file

