Archive for VMware

Backup and Restore of VCSA 6.5

Backing up and Restoring VCSA

Backup steps

  • Log into the VCSA appliance screen. In my case https://192.168.1.106:5480
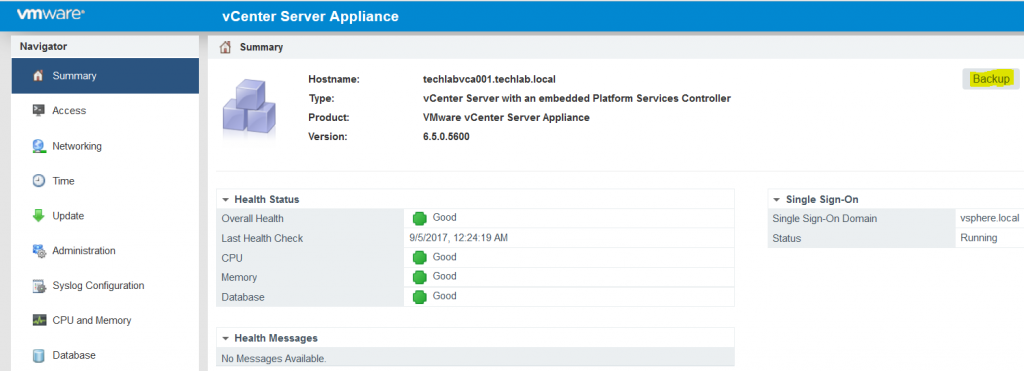
  • Select Backup from the Summary Screen

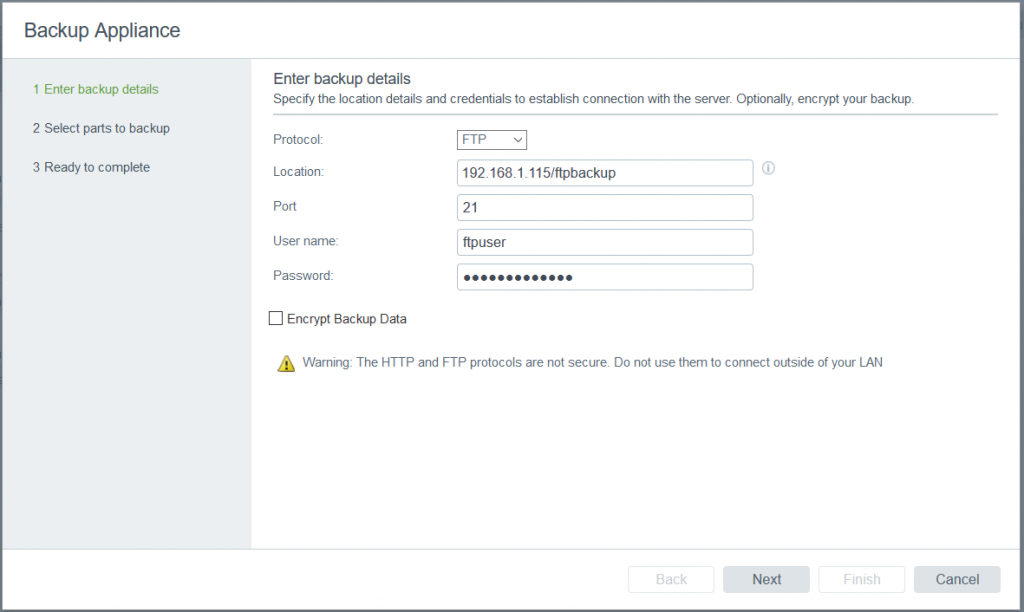
  • Put in the backup details. As a test I have set up a Filezilla FTP server on a Windows box to use as my backup location

You can choose to optionally encrypt the backup with a password. This uses AES256 encryption

  • Click Next and it will validate the inputs

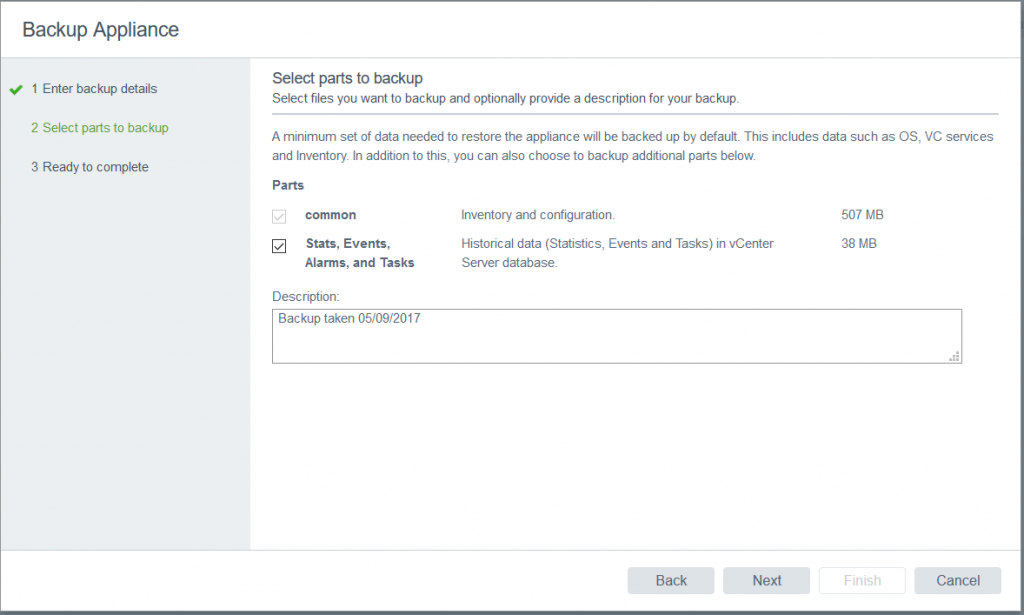
  • Choose what to backup

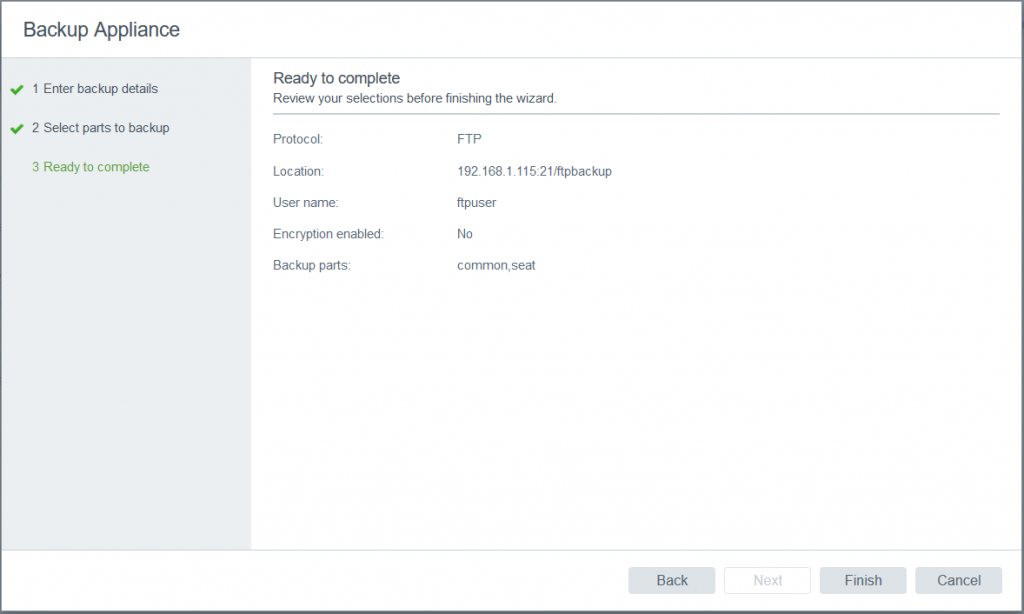
  • Click Next and Complete the Backup

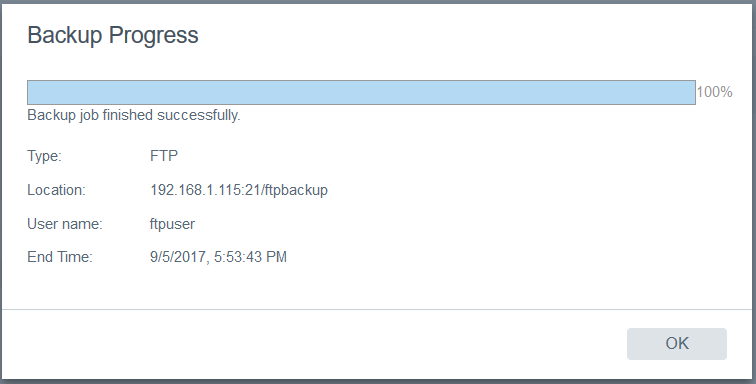
  • The Backup should run and complete successfully

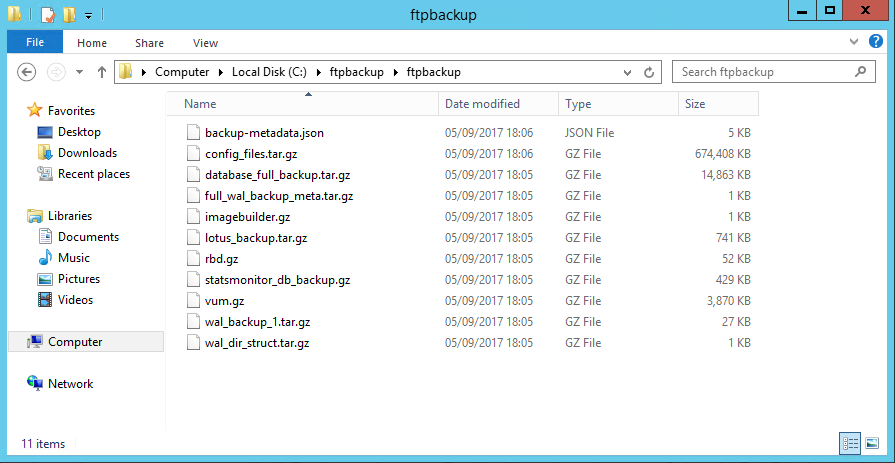
  • Check the backup files exist in the ftp directory you specified

Restoring a VCSA 6.5 appliance

The one thing to remember is that is my lab environment. I am going to power off and unregister my current VCSA to simulate that there has been an unrecoverable failure as I am going to need to restore an identical named and IP addressed machine. Obviously you can’t have 2 VMs registered with the same name in the inventory or the same IP address so I have temporarily shutdown and unregistered my current VCSA.

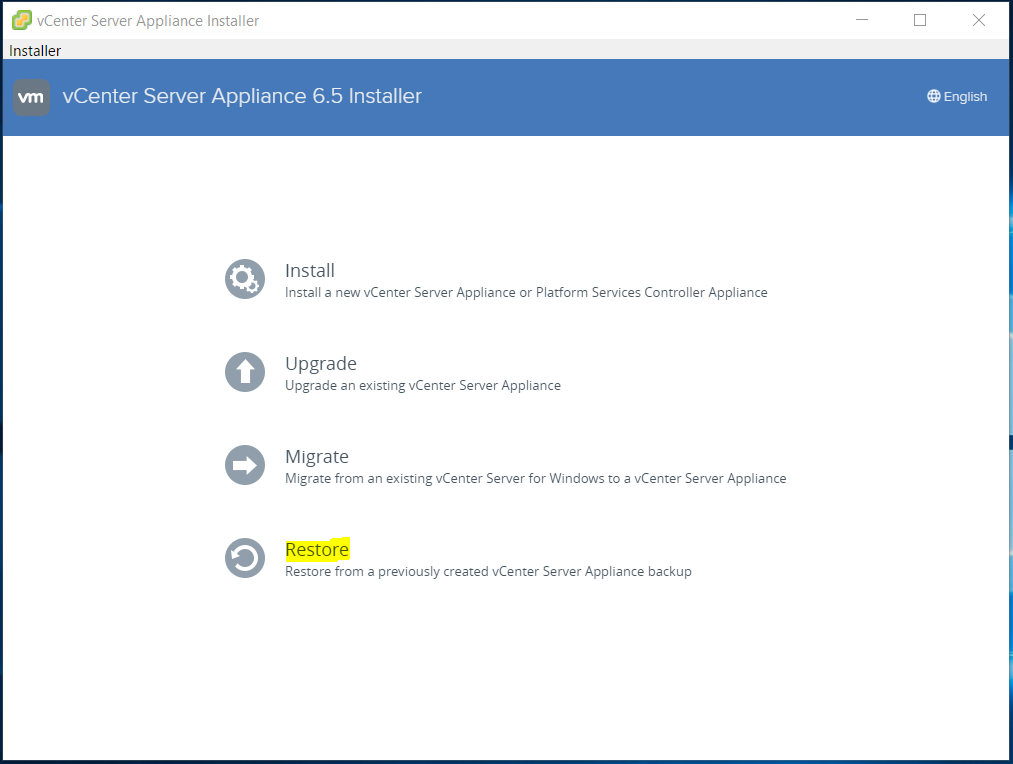
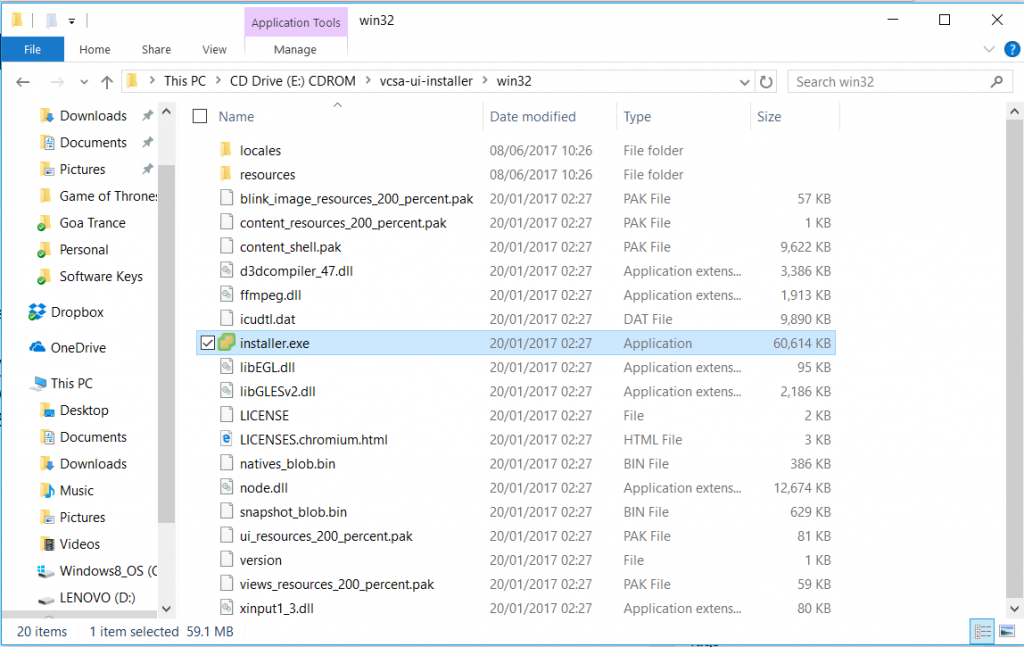
  • Mount the vCSA installer ISO and run installer.exe from \vcsa-ui-installer\win32 assuming you’re running this on Windows.
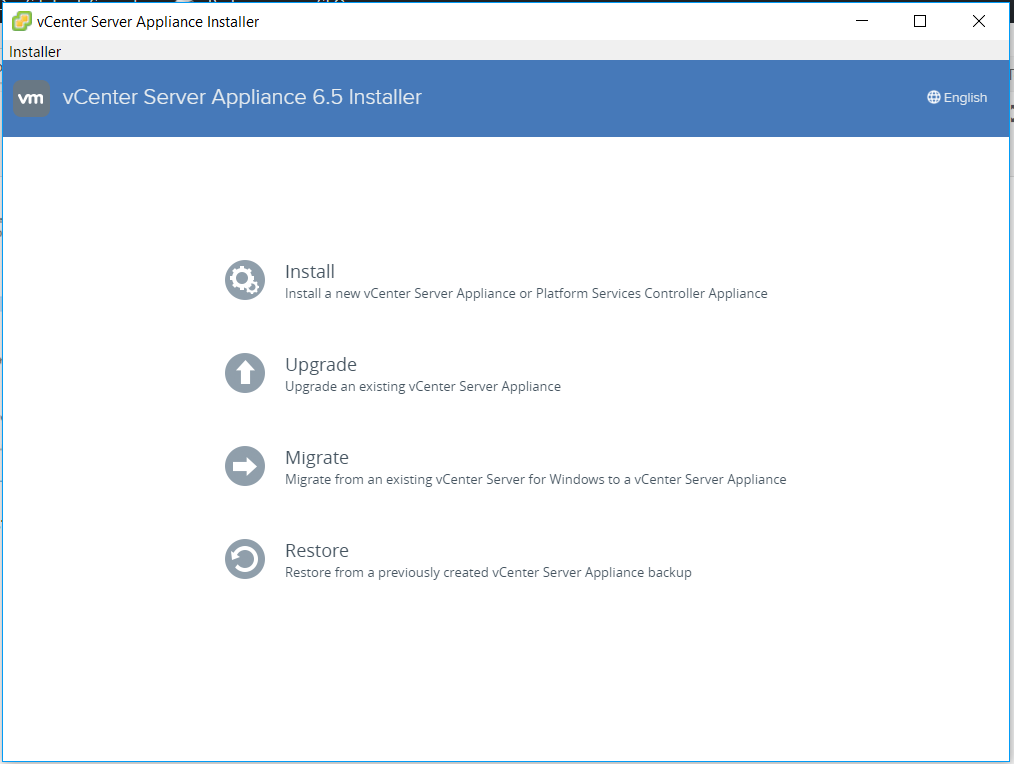
  • Click Restore

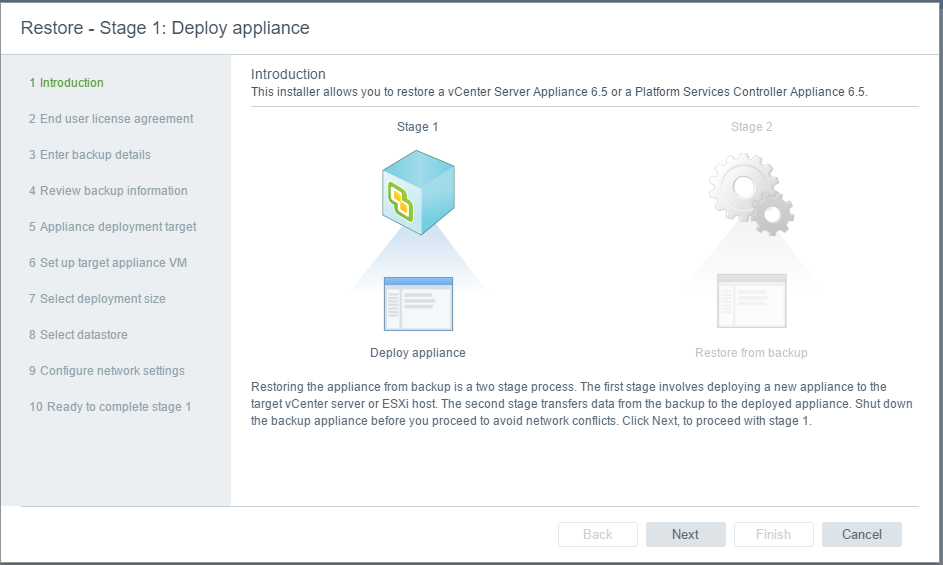
  • The Restore Wizard will start and you will see the below screen
  • Click Next

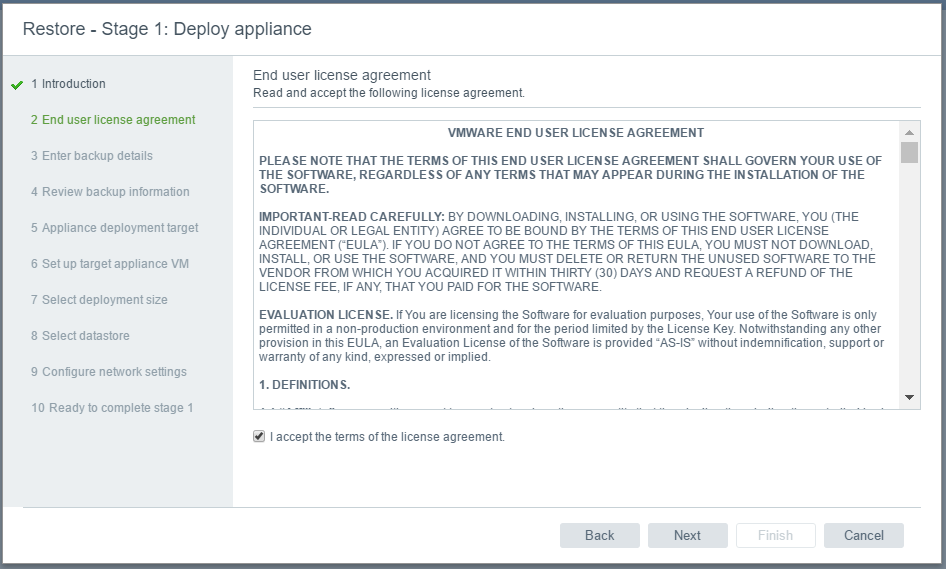
  • Accept the License Agreement

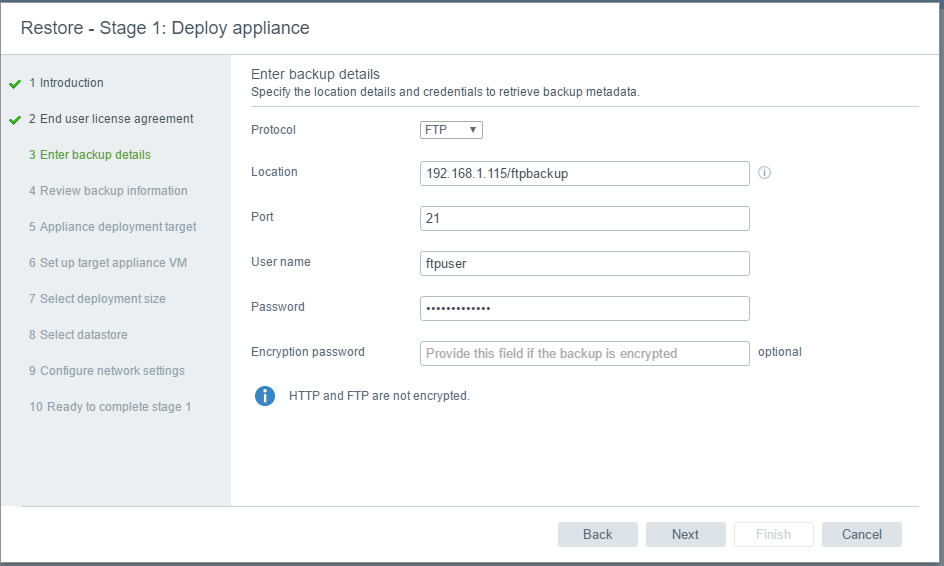
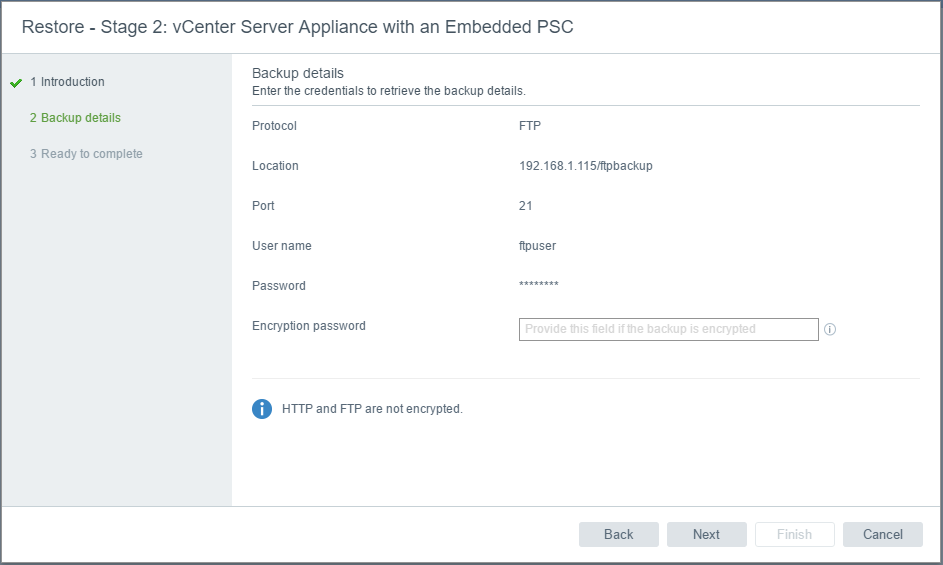
  • Fill in the details for the backup file

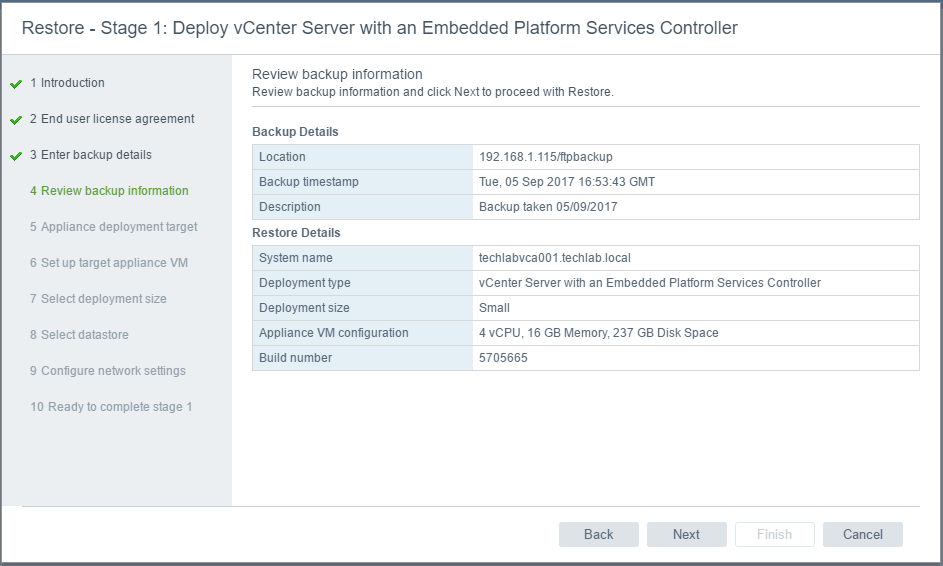
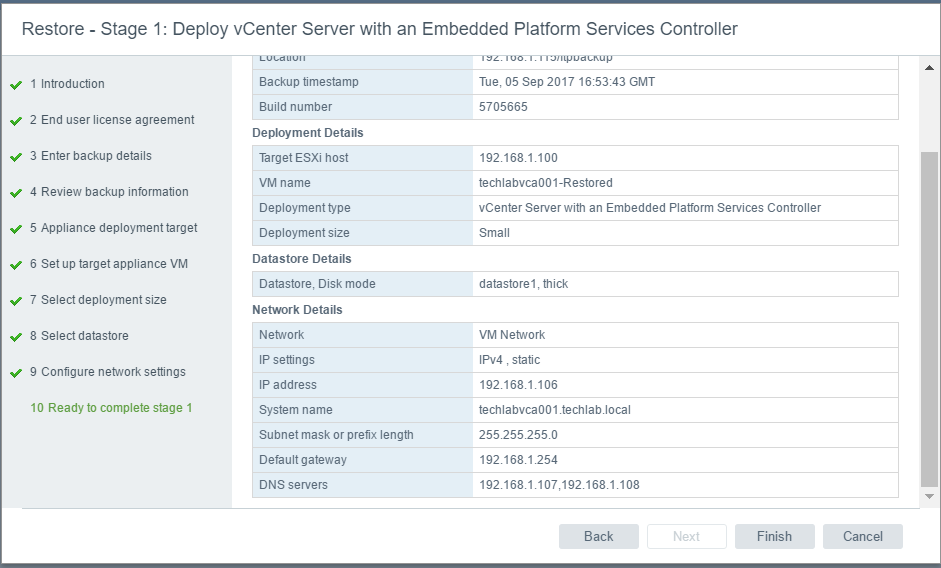
  • Check the details

  • Click Next
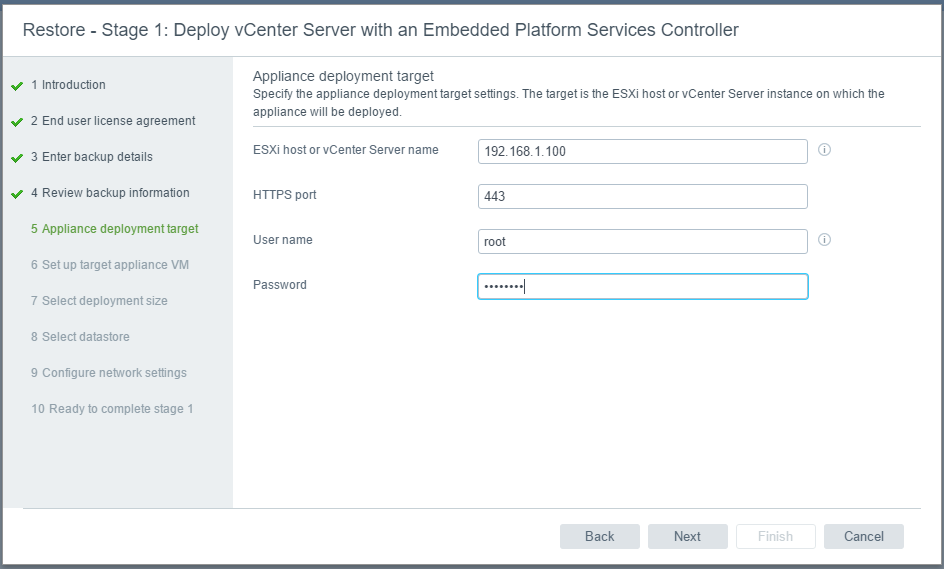
  • Put in the host details for deploying the new VCSA

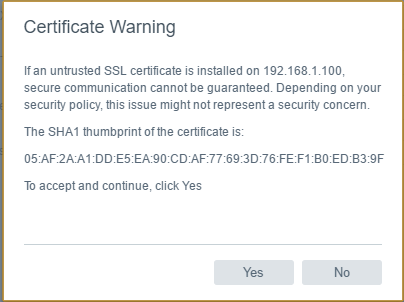
  • Accept the Certificate

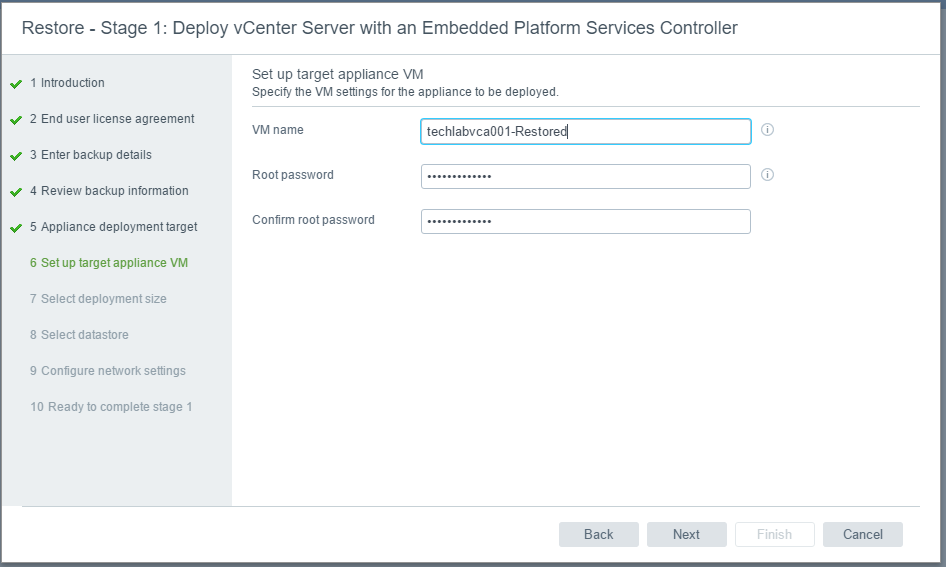
  • Set up the target appliance VM

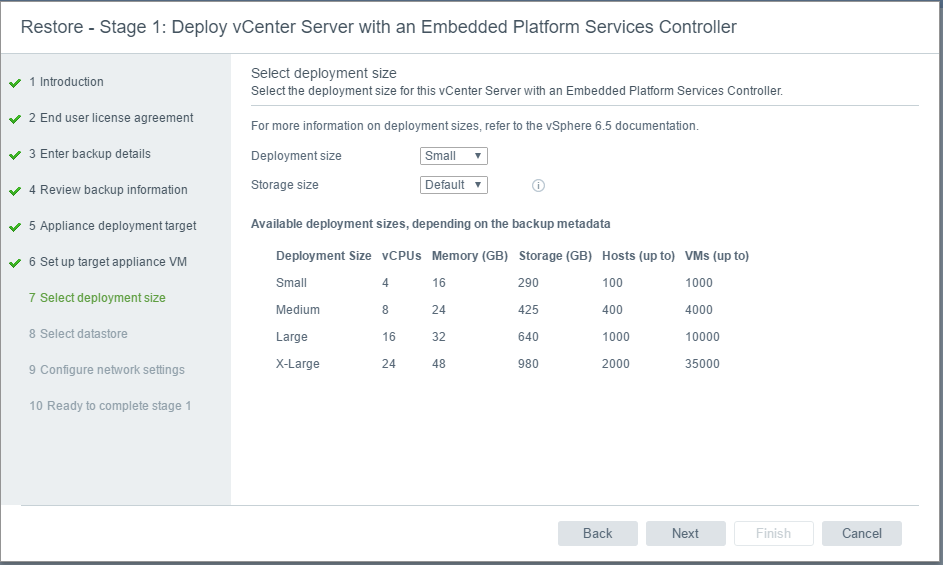
  • Set the deployment size

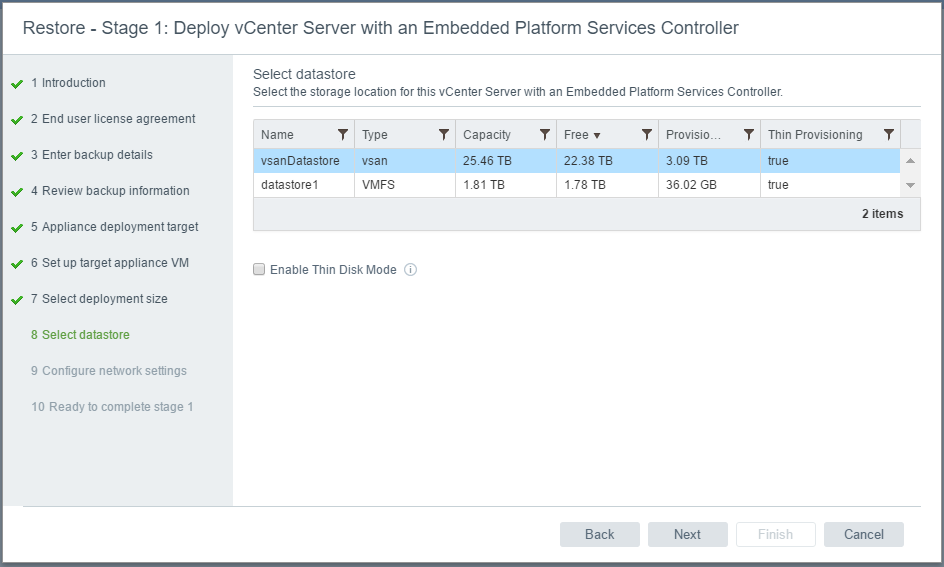
  • Select the datastore to restore to. In my case I have a vSAN or a Local datastore to restore to

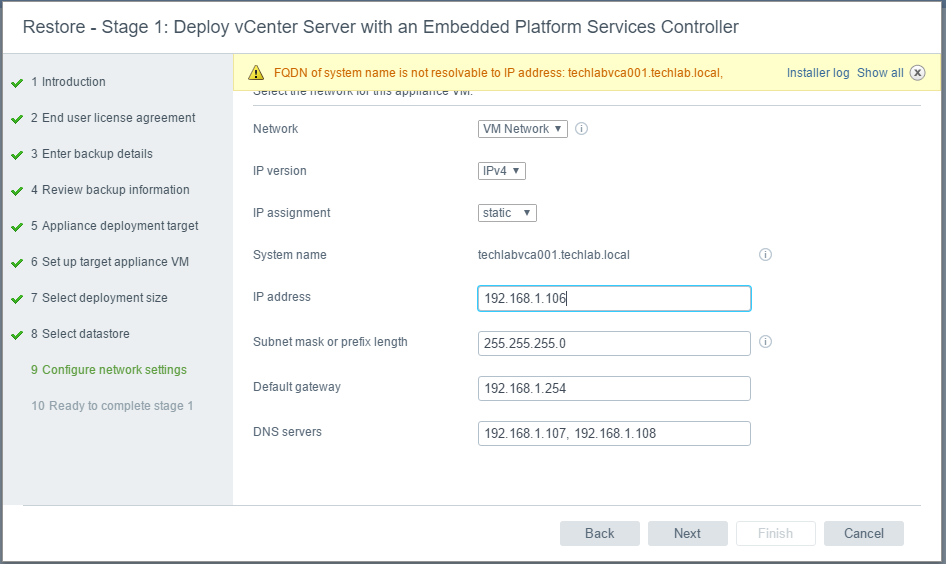
  • Enter the IP Address details.

  • Click Next
  • Check the Details and click Ready to Complete

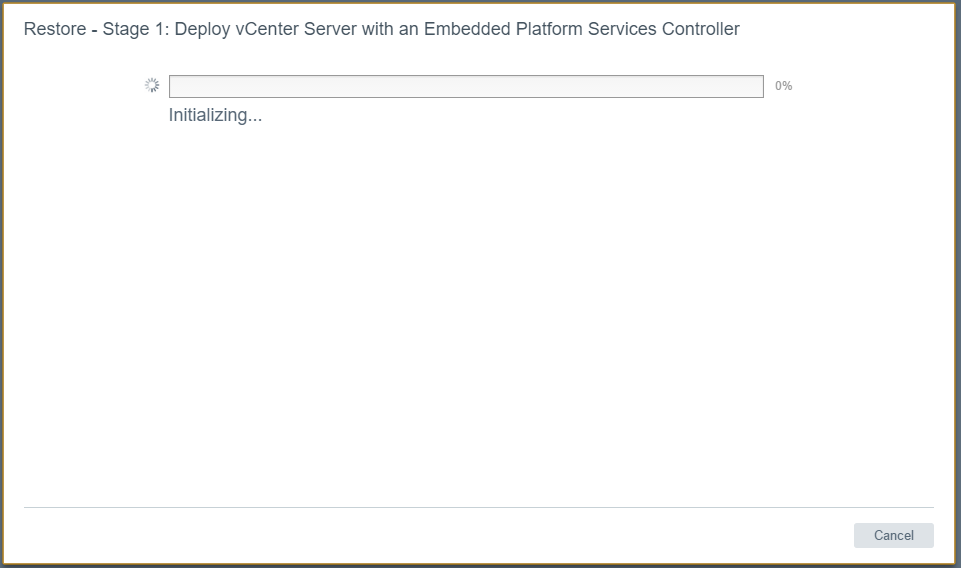
  • It will say initializing

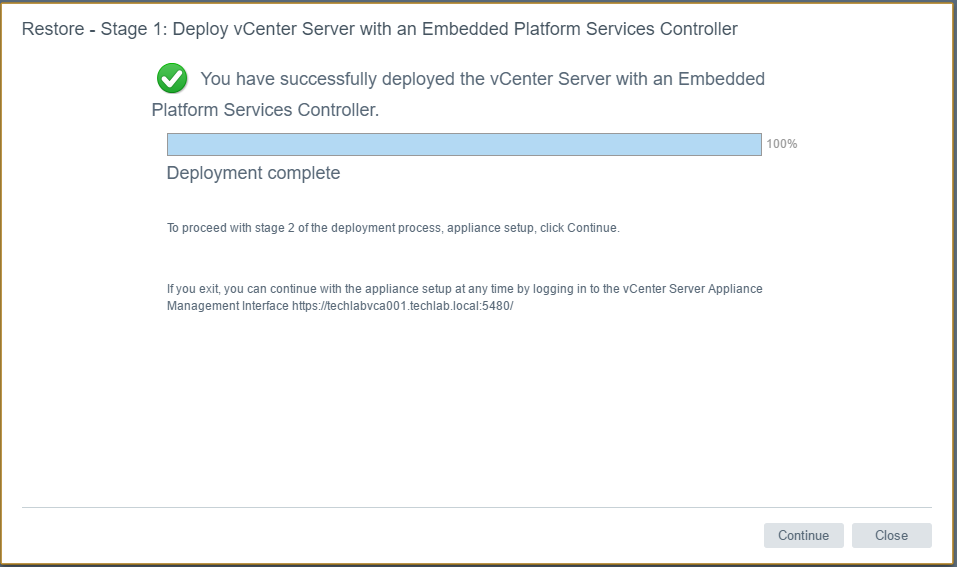
  • It will finally complete and should say

  • Click Continue

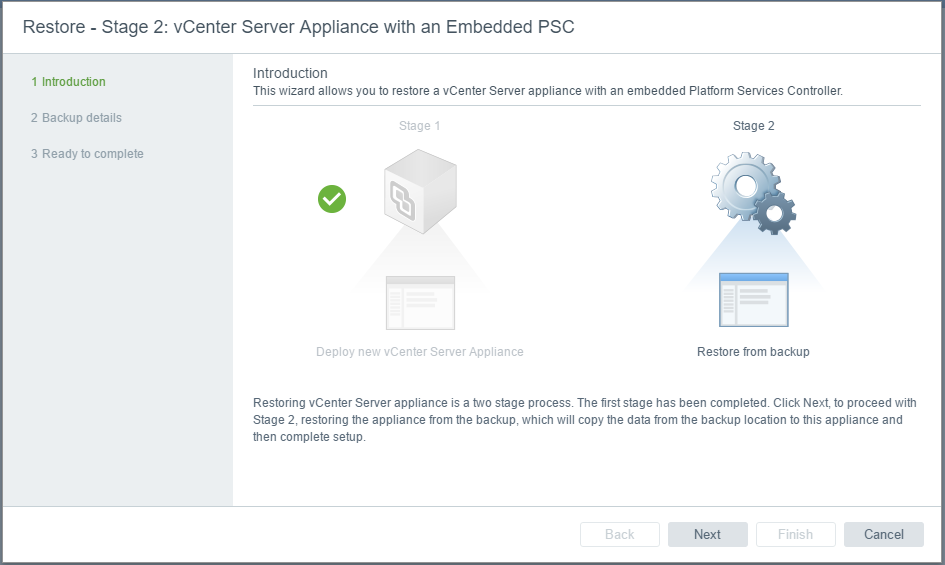
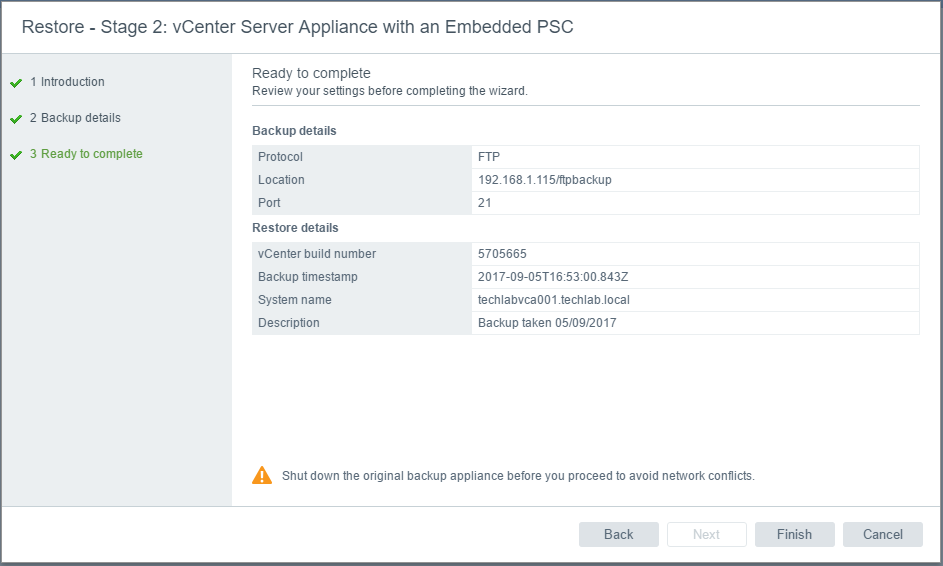
  • Check the details

  • Complete the second stage of the restore

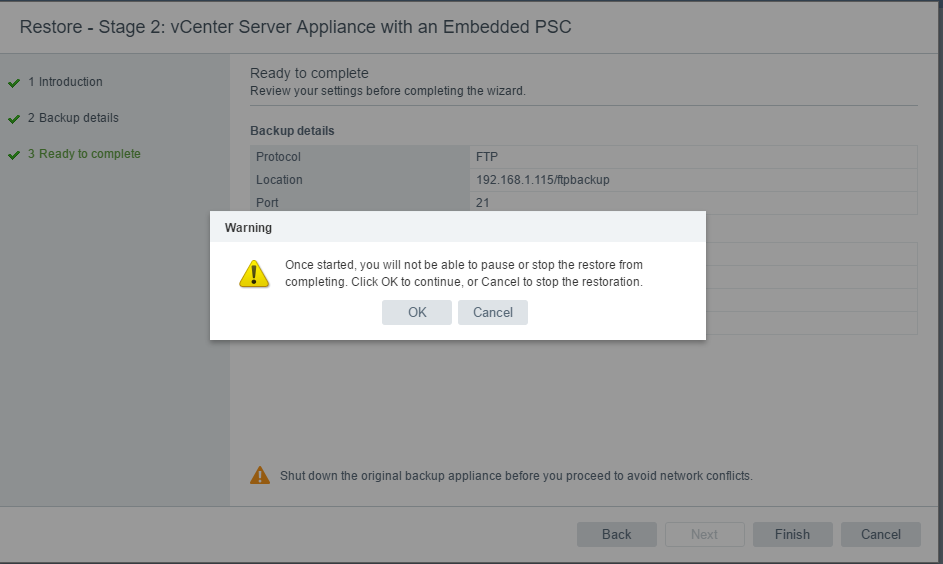
  • Take note of the warning

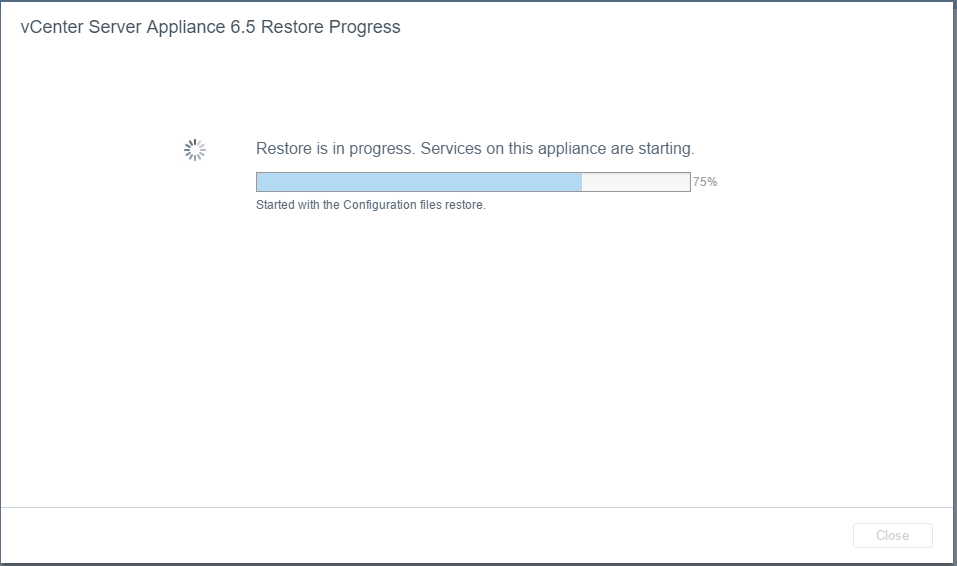
  • The restore should start

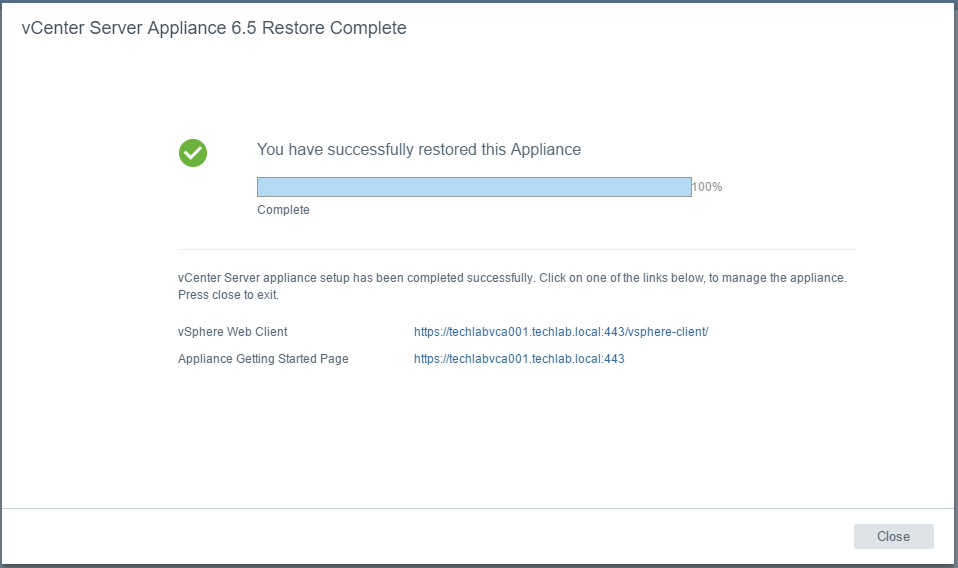
  • Once the restore has fully finished, you should see the below screen

  • Check the host for the newly restored VCSA

Useful Links

3 x Dell Poweredge T710 lab with a bootstrapped install of vCenter 6.5, embedded PSC and vSAN 6.6

vCenter 6.5/vSAN 6.6 new install

This is a blog based on my Dell Poweredge T710 lab which I’ve set up to take advantage of testing vSphere 6.5 and vSAN 6.6 as a combined install of a new installation which should bootstrap vSAN, create a vCenter and then place the vCenter on the vSAN automatically.

Note: vSAN will be a hybrid configuration of 1 x SSD and 6 SATA hot plug drives per server.

New integrated bootstrapping feature explained

In some environments where new hardware being deployed, high availability shared storage may not be accessible during day-zero installation meaning if you were building a greenfield deployment, it was almost a catch 22 scenario. How did you build your vSAN with a vCenter server when you only had the disks for a vSAN deployment. There were ways around this via command line but it has now been built into the functionality of vSphere 6.5/vSAN 6.6.

Local disk, if available, can be used as a temporary location for vCenter installation, but vCenter migration after bringing up the cluster could be time consuming and error prone. Bootstrapping vSAN without vCenter can solve this problem and remove the requirement to have high availability storage or temporary local disk at day-zero operations. This could be applicable to a greenfield deployment scenario. With the Bootstrapping vSAN method, a vSAN based datastore can be made available at day-zero operation to bring-up all management components.

Lab Setup

3 x Dell Poweredge T710 servers each with

  • 2 x 6 core X5650 2.66Ghz processors
  • 128GB RAM
  • 6 x Dell Enterprise 2TB SATA 7.2k hot plug drives
  • 1 x Samsung 256GB SSD Enterprise 6.0Gbps
  • Perc 6i RAID BBWC battery-backed cache
  • iDRAC 6 Enterprise Remote Card
  • NetXtreme II 5709c Gigabit Ethernet NIC

Initial Steps for each 3 hosts

  • The Perc 6i controller is not on the vSAN HCL but vSAN can still be setup using RAID0 passthrough which involves configuring a RAID0 volume for each drive in the BIOS (Ctrl + R at bootup) Always make sure the drive is initialized in the BIOS which clears any previous content because vSAN requires the drives to be empty. Press Control > R during boot up and access the Virtual Disk Management screen to create disks as RAID0. See the link below for full information

https://community.spiceworks.com/how_to/8781-configuring-virtual-disks-on-a-perc-5-6-h700-controller

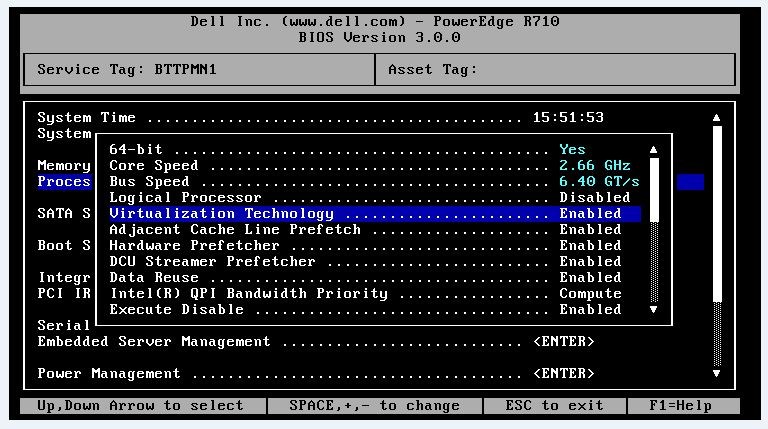
  • In the System Setup BIOS screen you will need to enable Virtualization Technology.  Not enabled by default and will stop any VMs from powering on if not enabled

  • Make sure you have an AD/DNS Server with entries for your hosts and vCenter
  • Put in your license keys
  • Disks may not come up marked as SSD. In this case I had to run the following commands on each server (Replace your disk naa id with yours and the SATP Type)

Find your disk information as per below command but you can also find the disk ID’s in the host client

https://kb.vmware.com/selfservice/microsites/search.do?language=en_US&cmd=displayKC&externalId=2013188

  • Your SSD disks should then come up marked as SSD. I didn’t have to reboot.

Install the vCenter Appliance

  • Make sure you have the software downloaded. I’m using the VMware-VCSA-all-6.5.0-5705665.iso
  • On another machine, mount the VMware-VCSA-all-6.5.0-5705665.iso. I connected this to my Windows 10 laptop as a virtual drive. Start the vCenter Server Appliance 6.5 installer located at \vcsa-ui-installer\win32

  • Select Install from the VMware vCenter Server Appliance 6.5 Installer.

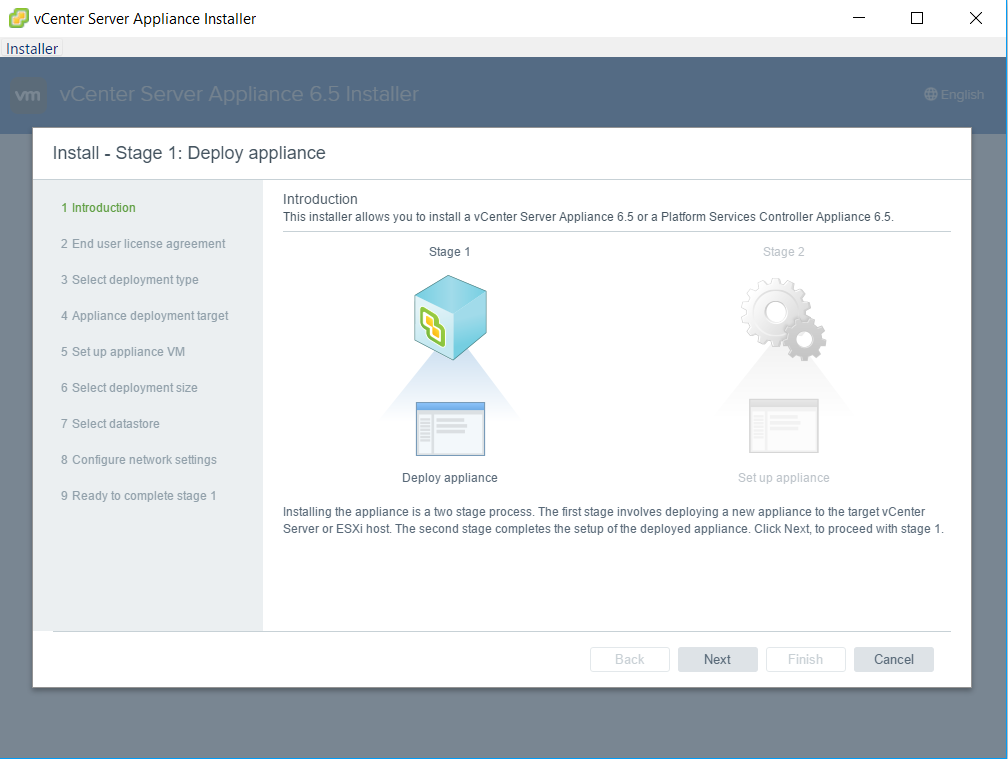
  • You will see the Introduction screen

  • Accept the License Agreement
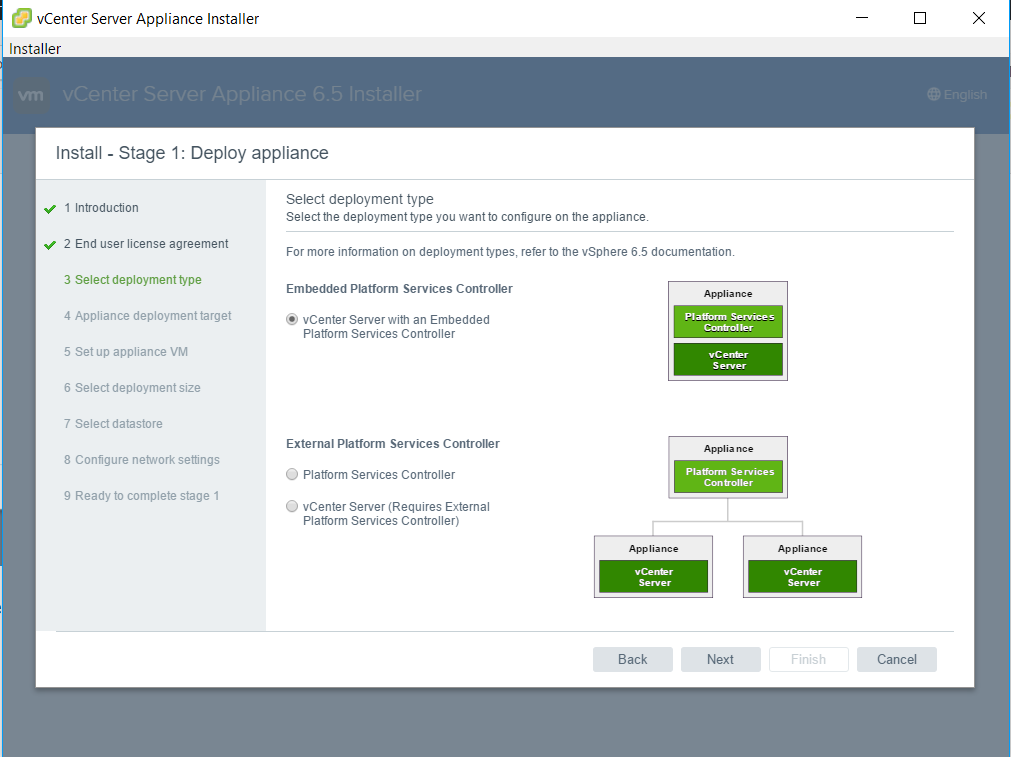
  • Select Deployment Type. For now I’m going to use an embedded Platform Service Controller

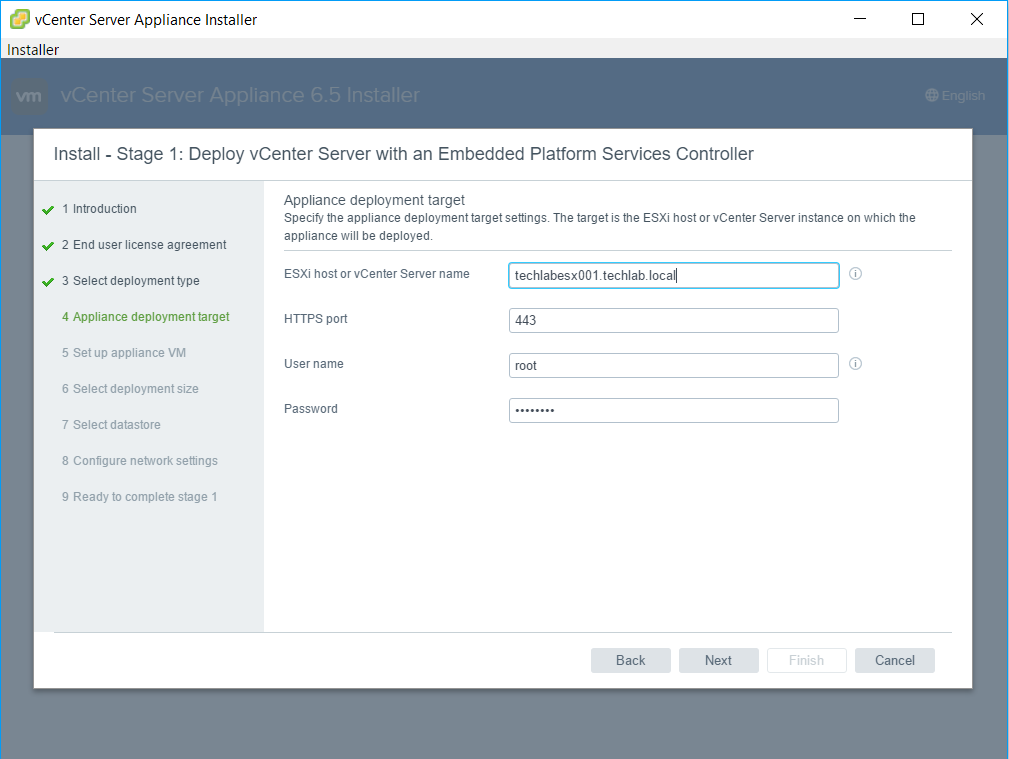
  • Enter the details for the appliance target. Try an IP Address if a FQDN doesn’t work.

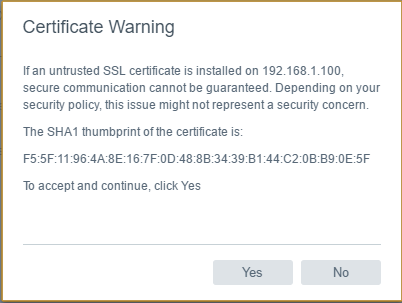
  • Accept the certificate

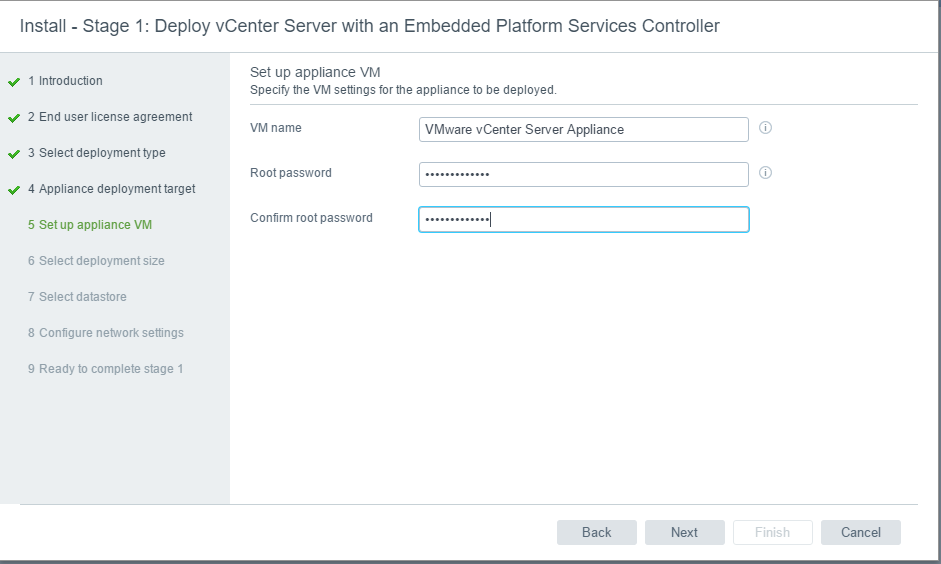
  • Put in a root password for the vCenter Server Appliance

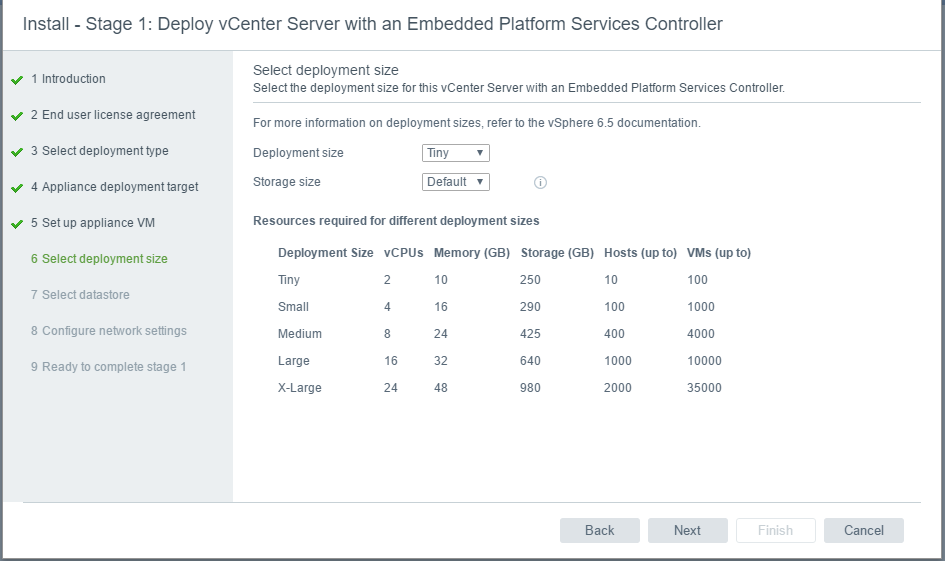
  • Select a deployment size

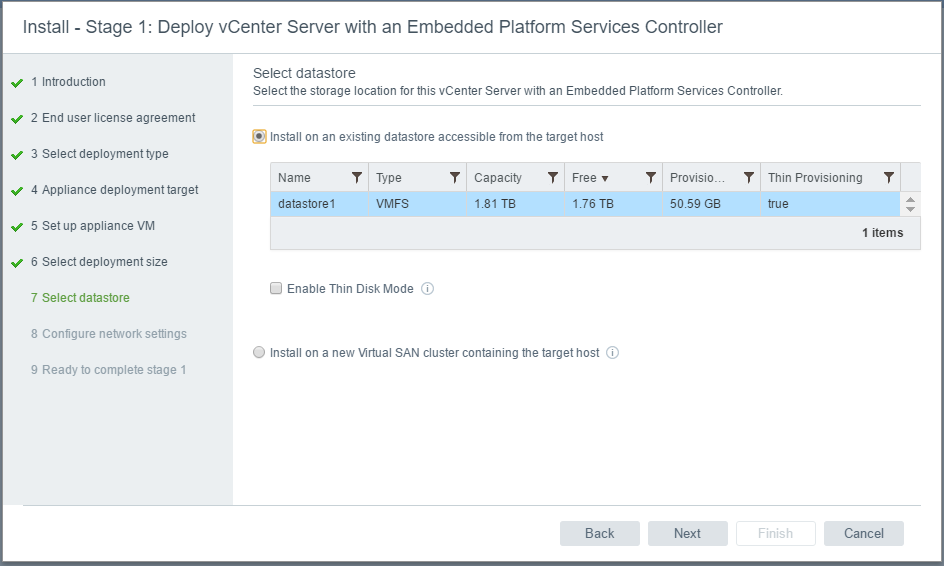
  • There are now 2 deployment types. You can install as normal or you can “Install on a new Virtual SAN cluster containing the target host”

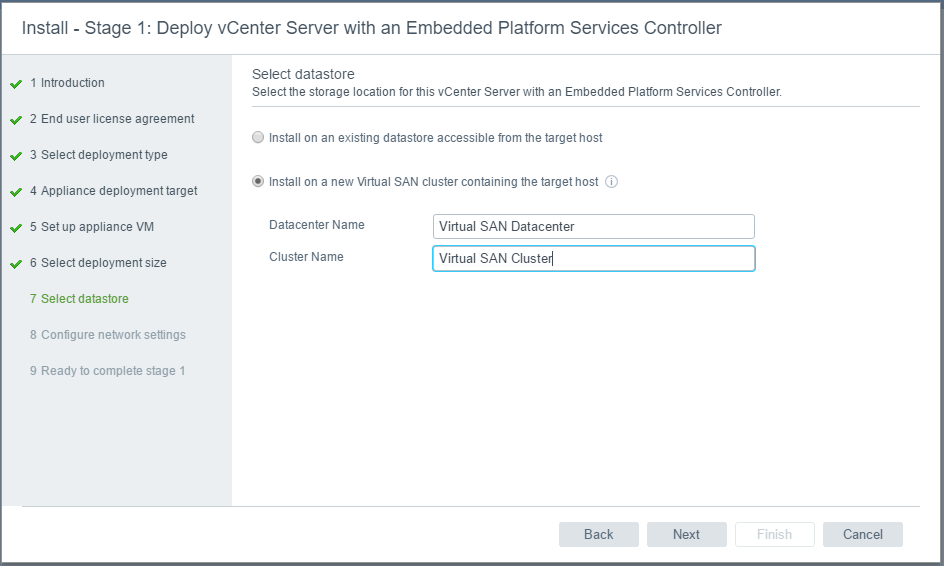
  • I am going to test this new feature of a combined install of vCenter and vSAN placing the vCenter on vSAN
  • Put in a name for your Datacenter and Cluster and click Next. It will say Loading

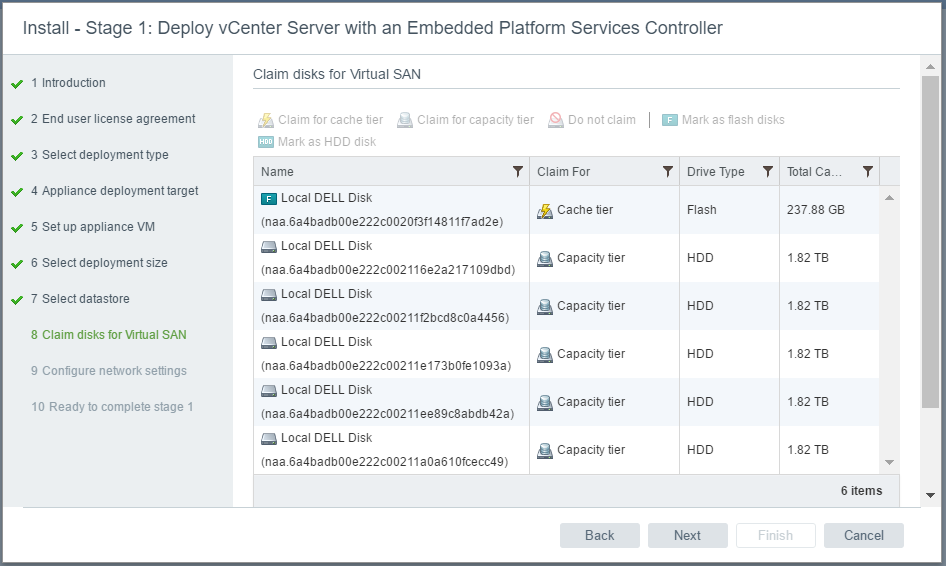
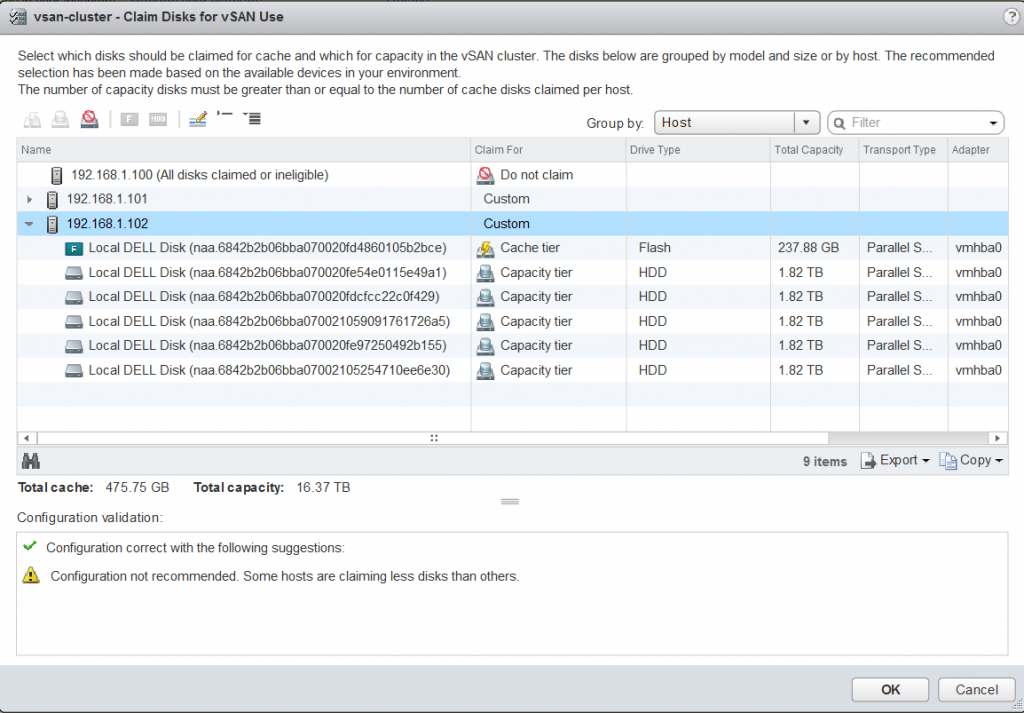
  • Claim disks for Virtual SAN. You can see it has picked up all my disks on my first host and recognizes the SSD and sets it as a cache Disk while the other non SSD Disks are set as Capacity Disks

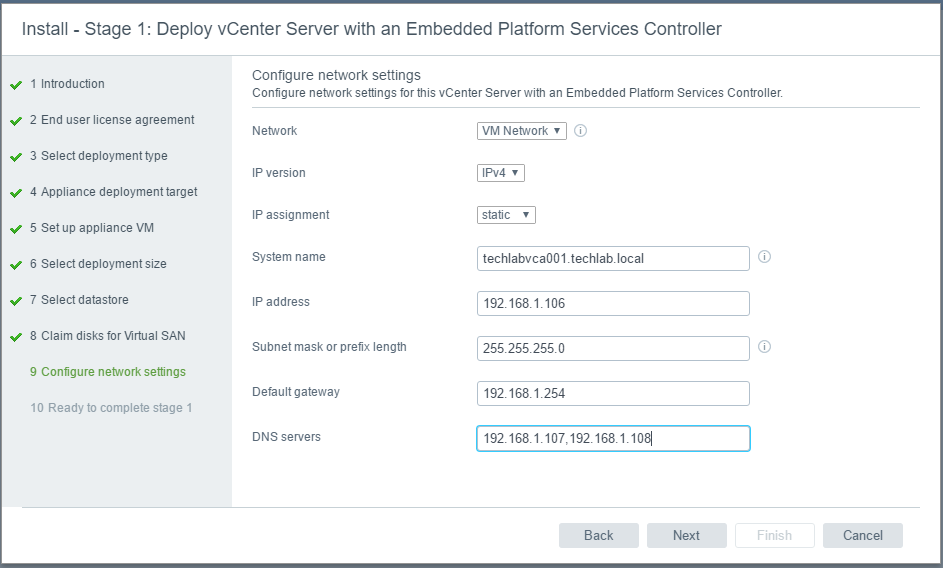
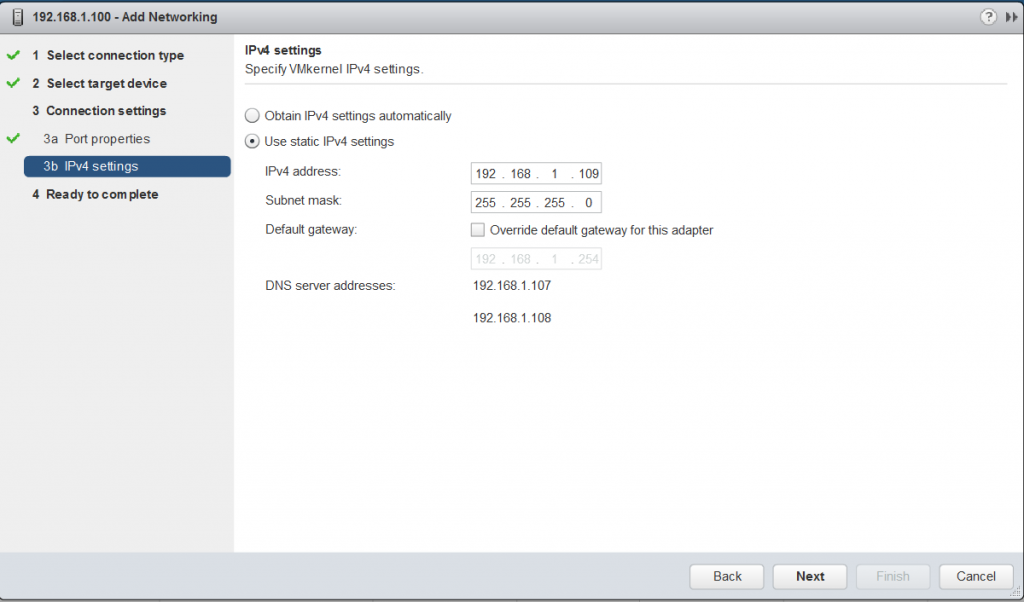
  • Next enter your network settings

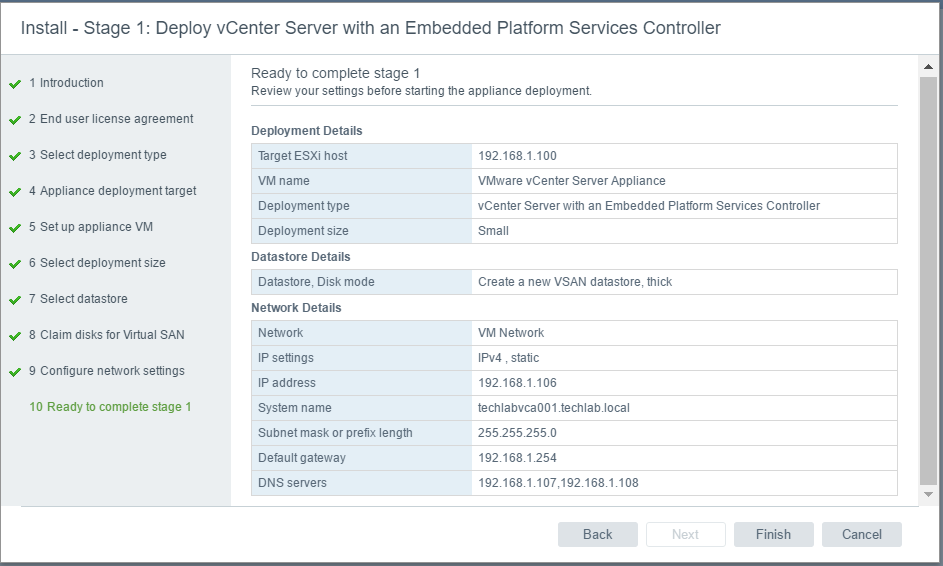
  • You are now ready to complete at Stage 1. Check the settings and click Finish

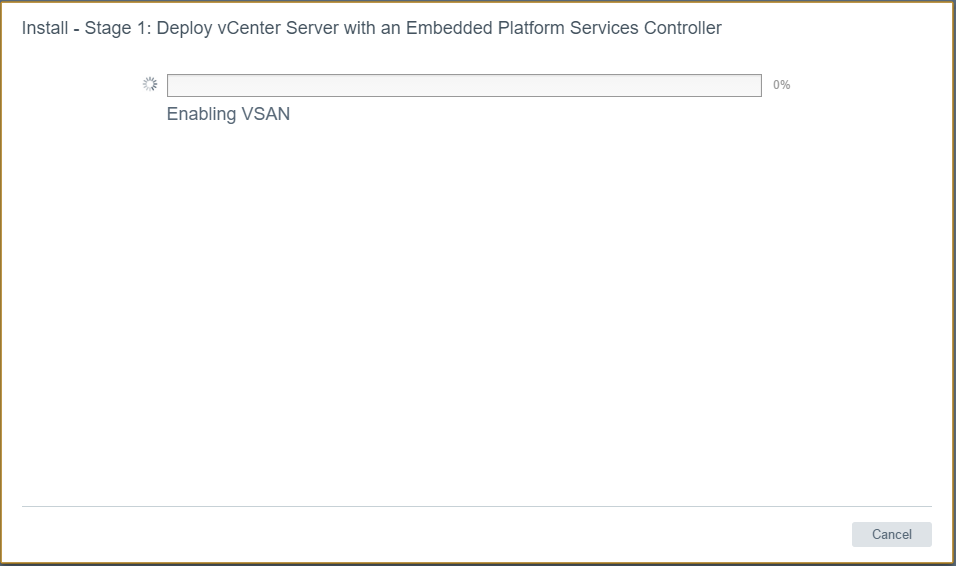
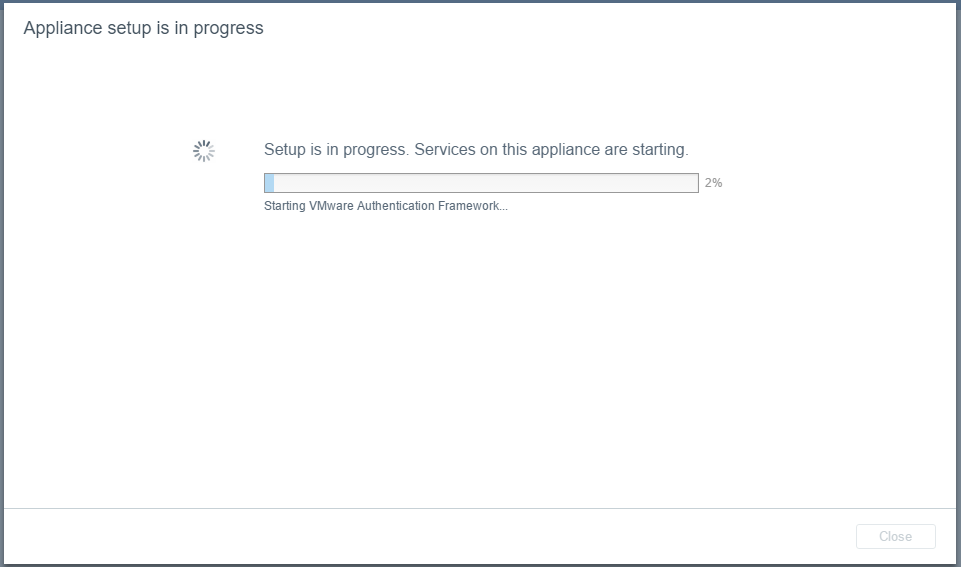
  • It will now show the following screen

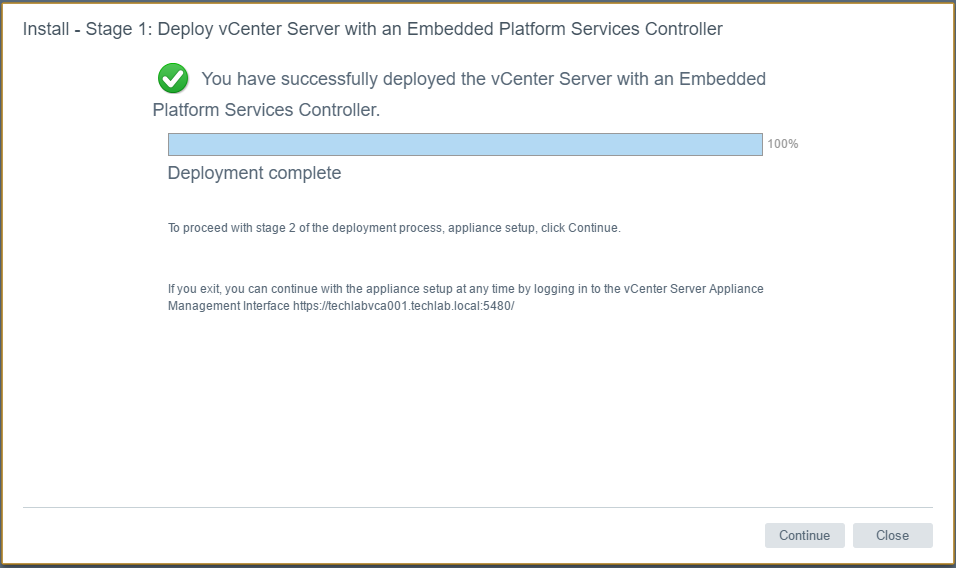
  • When it has finished you should see the below screen

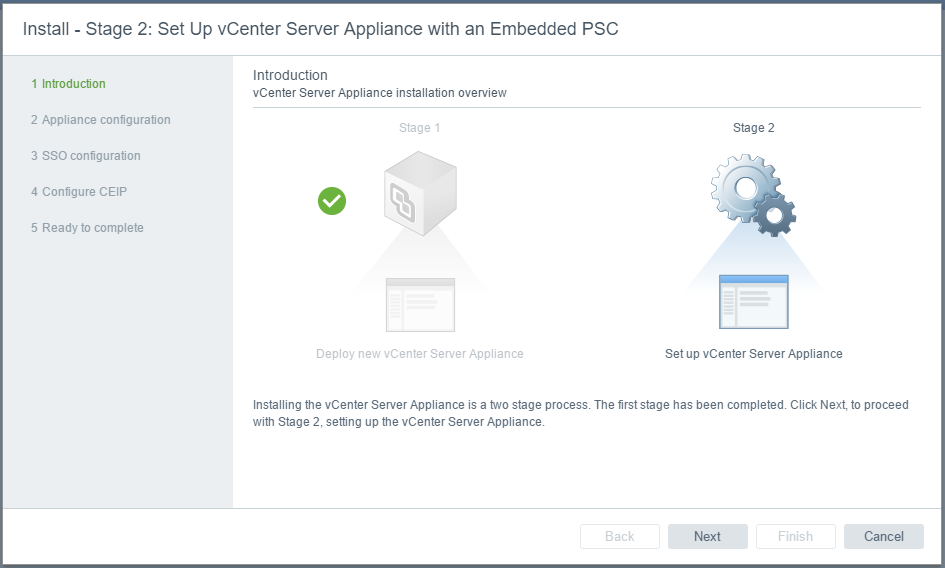
  • Click Continue and we will be on to Stage 2

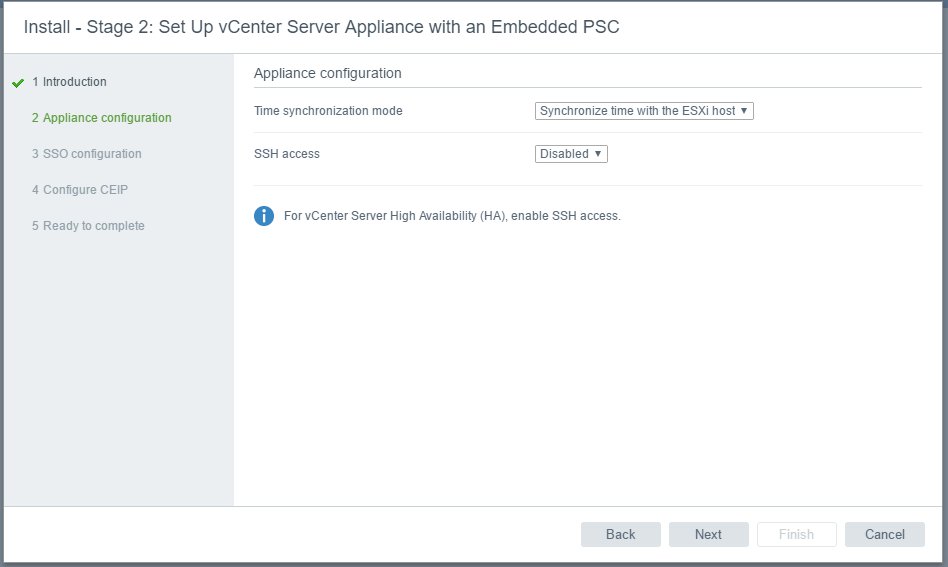
  • Next Enter the time settings. You can use NTP Servers or sync with the local host. You can also enable SSH

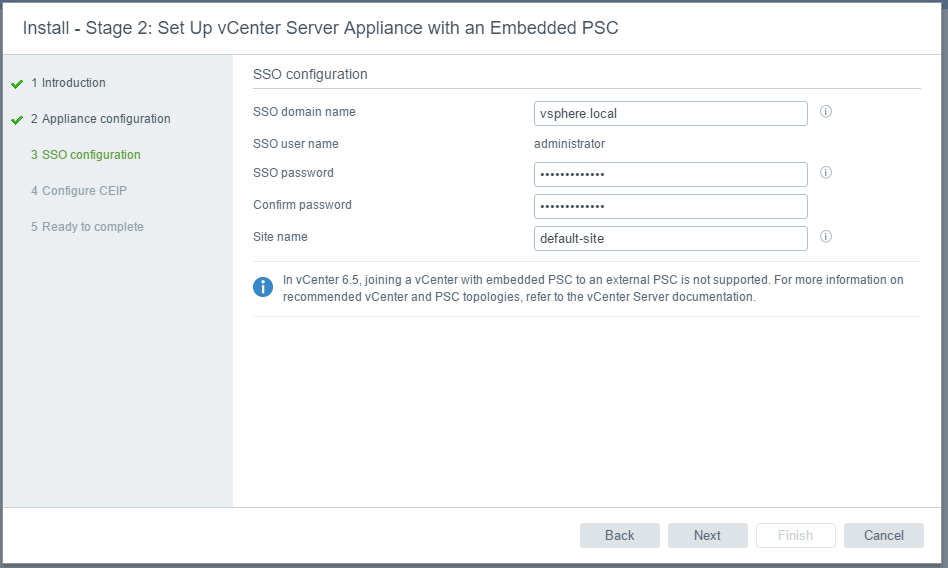
  • Next set up the embedded PSC

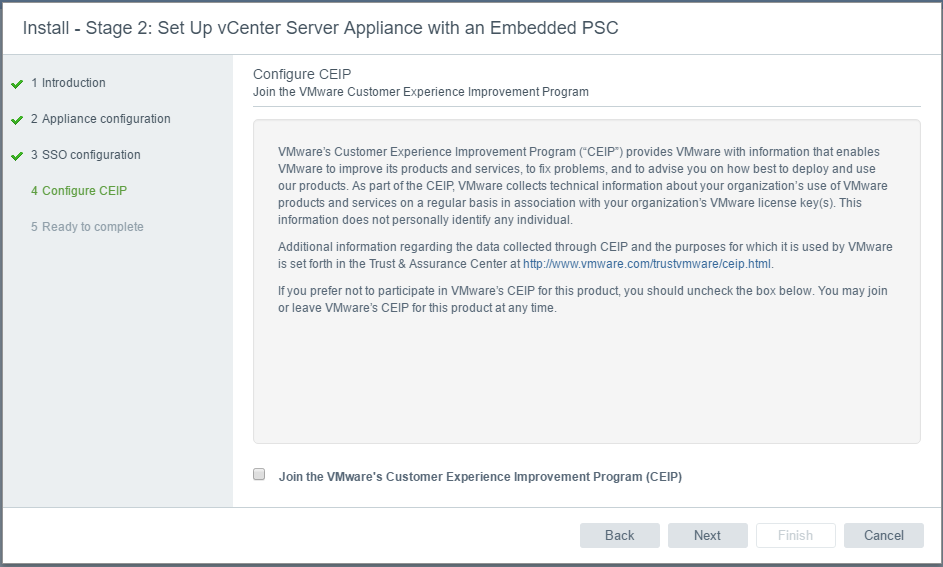
  • Next decide if you want to join the Customer Experience Program

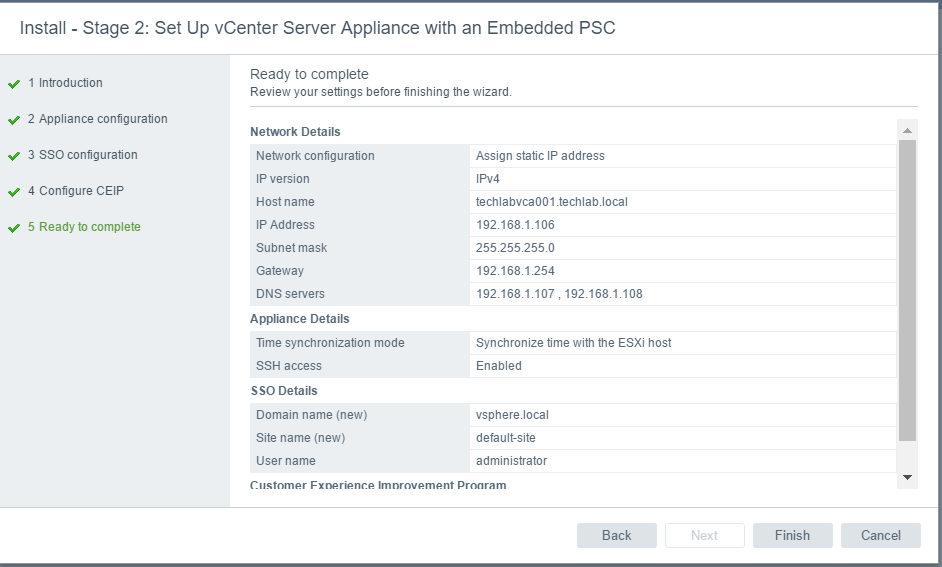
  • Finish and check the config

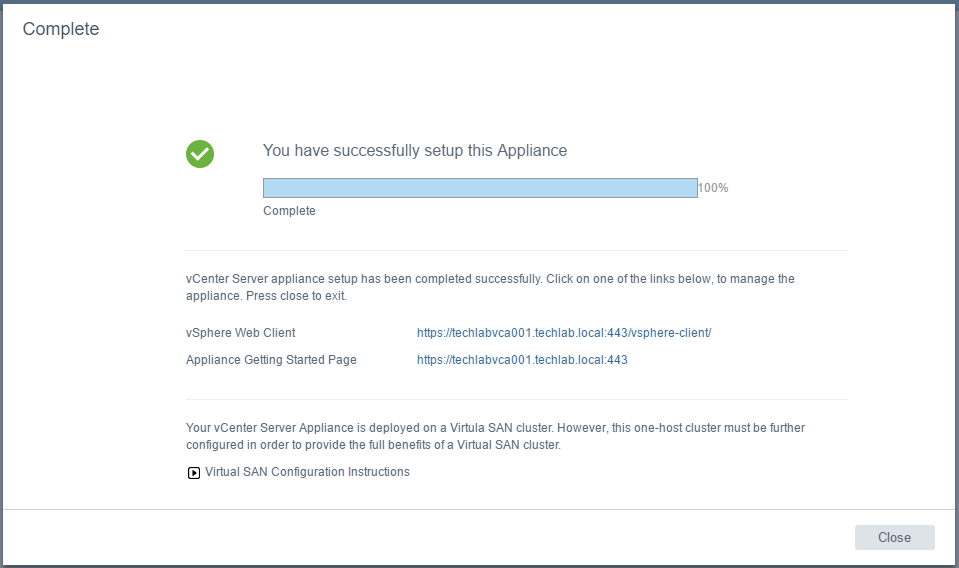
  • You should now see the below screen

  • When it has finished you will see the below screen

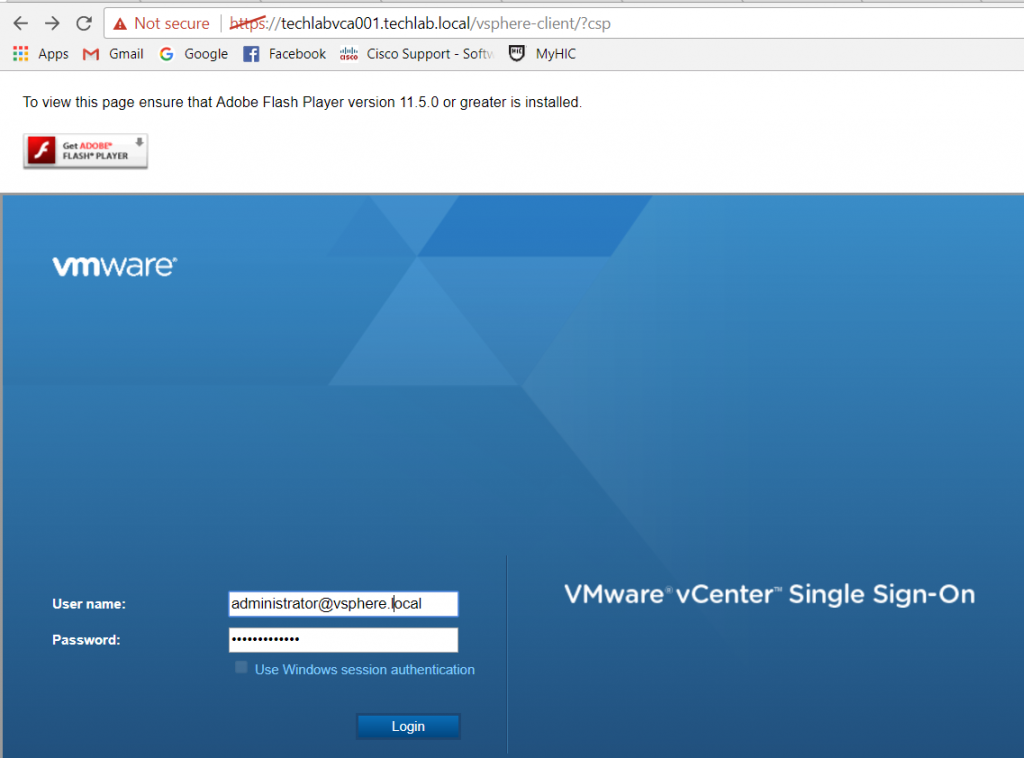
  • Next connect to the vCenter appliance with the administrator@vsphere.local account and the password you set up previously

https://techlabvca001.techlab.local/vsphere-client/

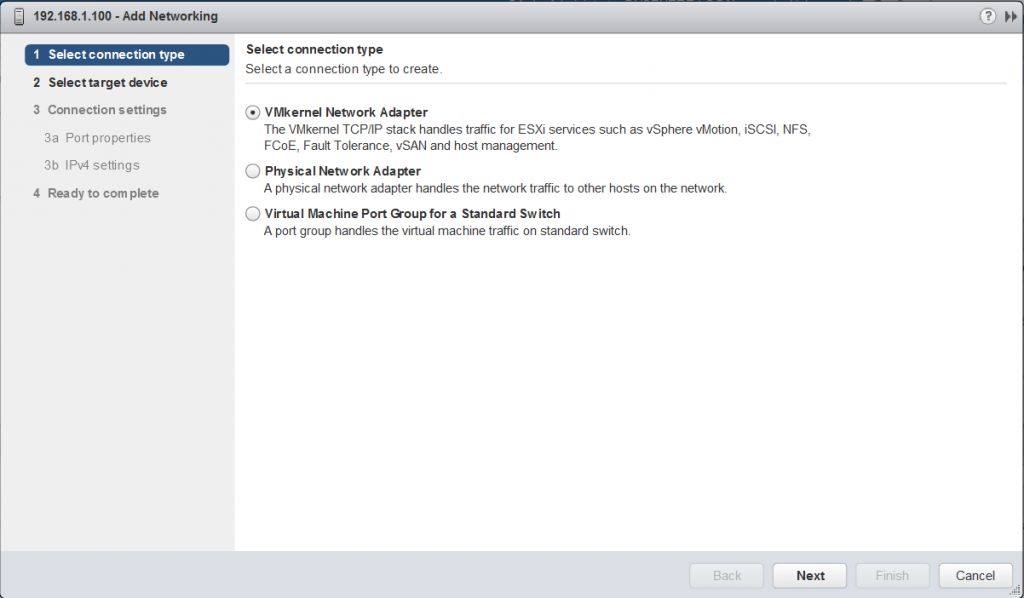
  • Select the Host > Select Configure > Select Networking > VMkernel Adapters

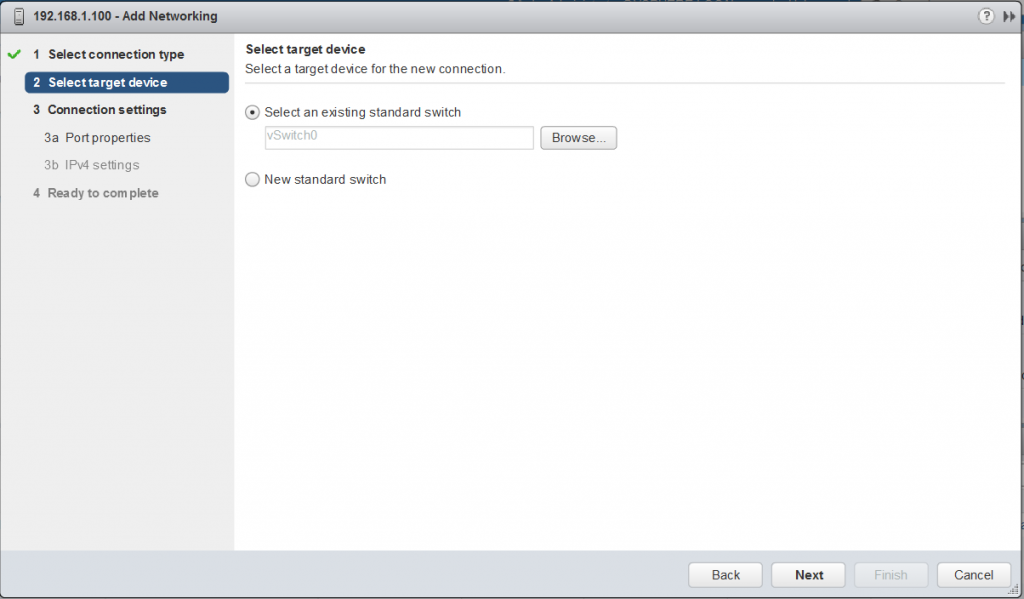
  • Select a switch

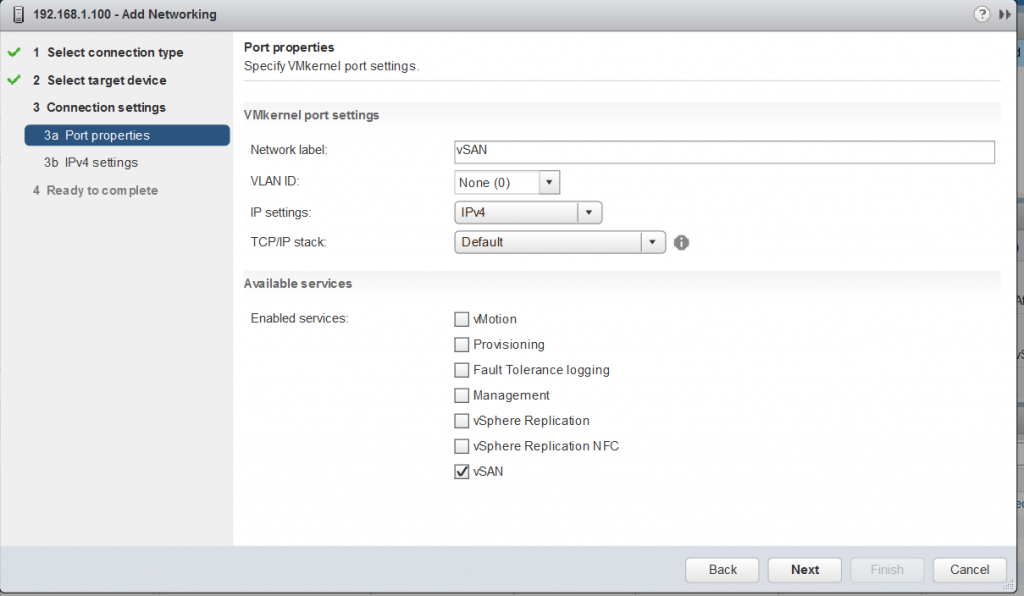
  • Add a VMkernel adapter for vSAN

  • Specify VMkernel networking drivers

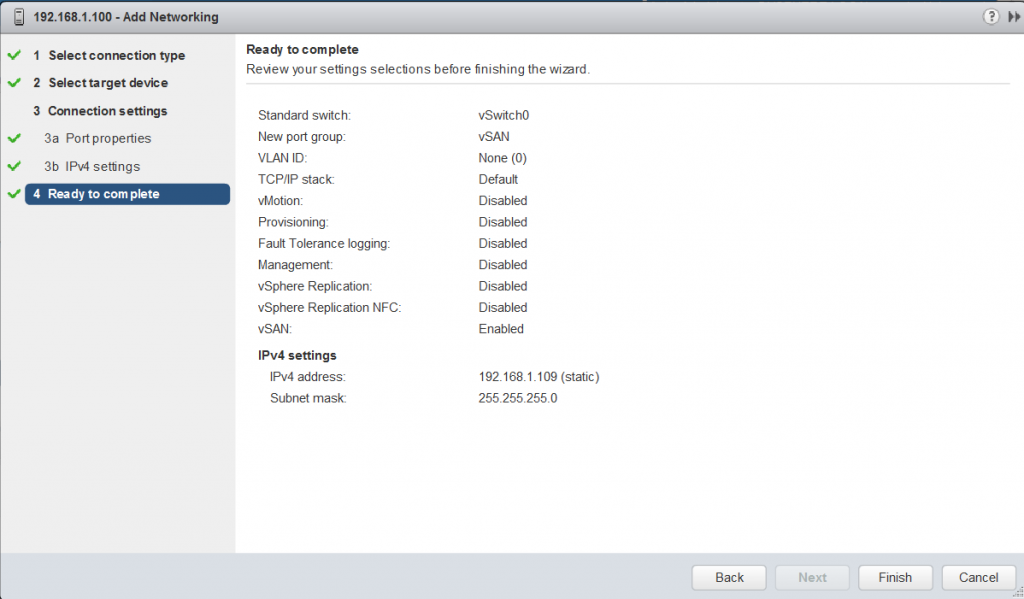
  • Check Settings and Finish

  • Next I need to add my other 2 hosts to the Datacenter and create a vSAN VMkernel port on each host followed by adding them into the cluster

  • Click on the cluster > Select Configure > vSAN > Disk Management and select your disks on the other servers and make them either the cache disk or capacity disk

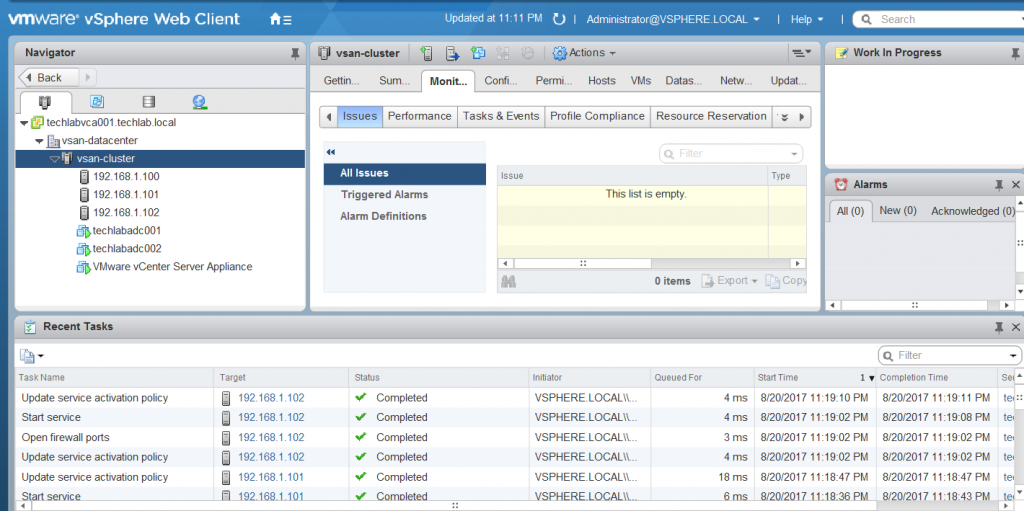
  • This process is normally quite quick and once complete you should have your vSAN up and running!

  • Click on the cluster > Select Configure > Services and Edit Settings to turn on HA and DRS

  • Once everything is looking ok click on the cluster > vSAN > General > Configuration Assist to check any errors or warnings about any issues so you can fix these.

Procedure to shutdown the vSAN cluster and start it up again.

So it crossed my mind that as this is my lab, it is not going to be running 24×7 or my house is going to be rather warm and my electricity bill will definitely rise! I need to power it off therefore what is the correct way to shut everything down and power up again?

Normally to shutdown an ESXi Cluster, using vCenter Webclient, ESXi hosts have to be put into maintenance mode and then ESXi hosts are powered off. Also to start ESXi Cluster, vCenter Server is used to remove them from maintenance mode after powering on the hosts. However if the VSAN cluster is running management components such as vCenter Server and other management VMs, the ESXi host that is running vCenter Server cannot be put into maintenance mode. So vSAN Cluster shutdown and starting procedures have to be properly sequenced.

VMware KB

https://kb.vmware.com/selfservice/microsites/search.do?language=en_US&cmd=displayKC&externalId=2142676

Steps for Power Off

  • Start by powering off all virtual machines on ESXi cluster except the vCenter Server. If your Management cluster has ActiveDirectory which provides services to vCenter Server, then do not power off Active Directory VM as well
  • Migrate the vCenter Server VM and ActiveDirectory VM(s) to a single ESXi Host
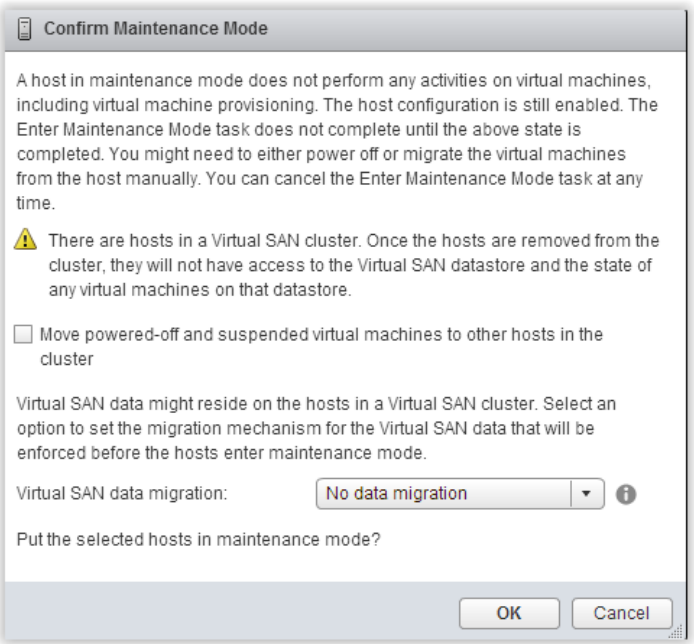
  • Place all the remaining hosts in the cluster into maintenance mode. When confirming the maintenance mode for ESXi Host, ensure the following selection is made ( deselect checkbox for Move powered-off VMs and “No data migration” is chosen for Virtual SAN data migration)
  • You can put the hosts in Maintenance Mode manually as per the baove step or you can use a command line command. You can run the ESXCLI command below to put a host in Maintenance mode. However, you must perform this operation through one of the CLI methods that supports setting the VSAN mode when entering Maintenance Mode. You can either do this by logging directly into the ESXi Shell and running ESXCLI.

esxcli system maintenanceMode set -e true -m noAction

other options are

esxcli system maintenanceMode set -e true -m ensureObjectAccessibility

esxcli system maintenanceMode set -e true -m evacuateAllData

  • Power off the vCenter Server VM and Active Directory VM. At this point, the vSphere WebClient access is lost.
  • Shutdown all ESXi Hosts. This will complete the Shutdown procedure for VSAN Cluster.

Starting the ESXi Hosts and the vSAN back up

The procedure to start a vSAN Cluster begins with the ESXi host where vCenter Server and Active Directory VMs are running.

  • Power on all ESXi hosts in the cluster.
  • Take the hosts out of maintenance mode
  • Identify ESXi host where vCenter Server and Active Directory VMs are located
  • Power on AD servers
  • Power on vCenter server
  • Note: If the vCenter Server VM has a vmnic that is tied to a VDS  network, then vCenter Server can’t be powered on because VM power-on operation on VDS requires vCenter Server to be running. So it is recommended to move any vmnic on vCenter Server to a vSwitch-based network. This can be moved back to the VDS Network afterwards
  • Log into vCenter and check vSAN

Useful Troubleshooting Tools

  • rvc console on vCenter
  • Putty
  • esxcli commands

I had an issue at a customer site where they had put some hosts in Maintenance Mode and when they brought them out again, the hosts came out of Maintenance Mode but the vSAN didn’t resulting in the misreporting of storage in your cluster. As a result storage policies will error and you won’t be able to put any more hosts in maintenance mode if there isn’t the visible storage to move them. Note: you won’t have lost any storage. The system will just think it’s not there until you put the host into Maintenance Mode and take it out again for a second time! VMware are aware of this issue which seems to be present in 6.5U1 however this was a customers automated system. I haven’t seen this happen in my home lab!

By running the command vsan.cluster_info 0 in rvc, you are able to see for every disk whether the node is evacuated or not. If you have taken the host out of Maintenance Mode and the vSAN has also come out of Maintenance Mode then it will say Node evacuated: no. If it hasn’t come out properly it will say Node evacuated: yes (won’t accept any new components)


Rolling back and recovering from failed vSphere 6 and external multisite PSC upgrades

Recovering from failed vSphere 6 and external multisite PSC upgrades 

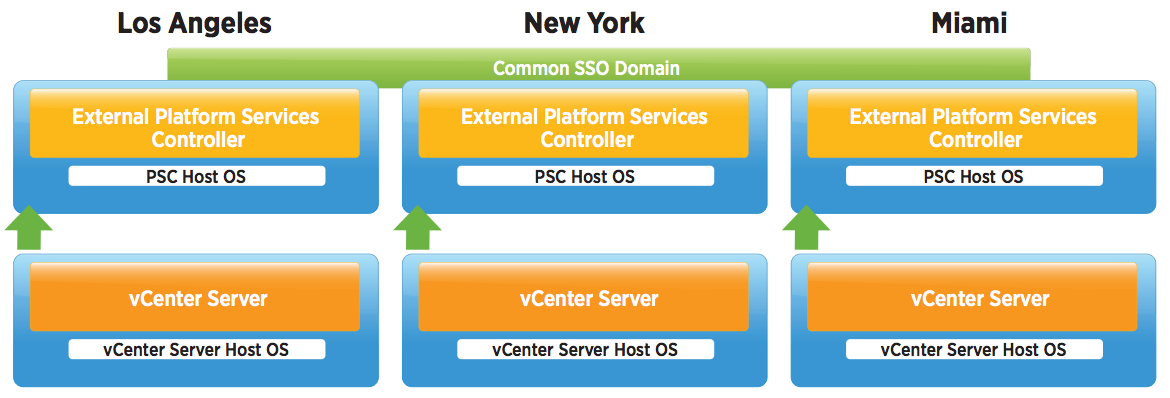
So what happens if you have the following situation within a failed vSphere upgrade with a multi-site system?

The Scenario

The requirement was to upgrade 3 vCenters from 5.1U3 to 6.0U2. The vCenter servers previously had embedded SSO but have been repointed to the external 6.0 U2 PSCs. Note, we had an intermediary stage of repointing to 5.5U3 external SSOs first before we could upgrade the PSCs to 6.0U2. So once the PSCs are in a multisite 6.0U2 configuration, the upgrade of the vCenters can start and this is where we need to take care as the systems are interlinked at this point.

So we now have

  • 3 x vSphere 6.0U2 PSCs set up in a multisite configuration
  • 3 x 5.1 U3 vCenters pointing to a vSphere 6.0U2 PSC
  • 3 x SQL 2008 R2 Databases running the vCenter Databases and the Update Manager Databases. Not seen in the example above

Why did it fail initially?

Never assume anything. We had already upgraded 2 environments without any issue so we overlooked checking the SQL environments which were meant to be a replica but clearly weren’t!

  • DB password had special characters in the password.
  • Needed to give db owner rights on the vCenter DB and the MSDB database prior to upgrading
  • The ODBC Connection was not the right version. We needed SQL Native Client 10 or 11.
  • Additional Database Permissions for VMware (Can be seen in the vSphere 6.0 Documentation Center
  • SQL Server 2008 R2 needed Service Pack 2 installing. (No problem with this)
  • An informational messages regarding the vCenter FQDN
  • An informational message about the ALL_SERVICES accounts. (New in vSphere. Depends if you want to use Local System for all your vCenter Services or use the multiple vSphere accounts for individual services

So how do you recover from one failed vCenter Upgrade in this scenario?

We do need to take into account at what step has it failed and check the logs to verify this. Can it be an issue that can be worked though and fixed forward or do you need to rollback and depending on how far the installer has got before failing, it might open variations in the options for a rollback.  For example, if it fails to authenticate to the database, then it is unlikely it would have made any DB changes. The installer logs will give us this information.

You can retrieve the installation log files manually for examination.

Procedure

1

Navigate to the installation log file locations.

%PROGRAMDATA%\VMware\vCenterServer\logs directory, usually C:\ProgramData\VMware\vCenterServer\logs

%TEMP% directory, usually C:\Users\ username\AppData\Local\Temp

The files in the %TEMP% directory include vminst.log, pkgmgr.log, pkgmgr-comp-msi.log, and vim-vcs-msi.log.

2

Open the installation log files in a text editor for examination.

Steps

  • Make sure you have been through all the pre-requisites prior to starting the upgrade and test in a lab as well. Give yourself the best start at not failing.
  • Snapshot the whole environment (All VCs, All DBs and all All PSCs) Make sure the environment is quiesced or if you want a more consistent image vs crash consistent, shutdown the whole environment and snapshot it cold
If the upgrade of any VC 5.x to 6.0 fails in this environment, you must roll back ALL PSC.  The reason is that the solution user format differs between 5.x and 6.x. During the upgrade of the VC, the VC 5.x solution users will be removed from the PSC and replaced with 6.x solution users early in the VC 6.x upgrade (during vmafd firstboot I believe). If you have a failure and only roll back the VC then you have a VC with 5.x solution users talking to a PSC that no longer is aware of those users. You must roll back ALL PSCs in the SSO Domain as they replicate.
  • If you encounter an unrecoverable upgrade installer error then in the event of rolling back to snapshots, the order will be all PSCs, the vCenter DB and vCenter Server
  • In the event the rollback above fails, all servers should be rolled back again with the order of power on being all PSCs, all vCenter DBs and all vCenter servers

Questions we have been asked

During an upgrade, could we stop/break the multisite replication agreements between PSCs to avoid any replication of issues in the event of an upgrade problem on one vCenter? 

There’s no issue with breaking replication agreements generally but it not something that should be done for an upgrade. The vdcrepadmin command line tool does allows the breaking and creating of agreements and it actually protects the customer by not allowing them to delete the only agreement available. This prevents a customer from inadvertently creating an isolated PSC. What you would do is go through and create the new agreements and once they are in place just delete the extra ones. There is nothing special about the replication agreements that are created during PSC deployment. They are the same as ones created with vdcrepadmin.


PSC 6 Replication for multi-site setups

PSC 6 Replication 

VMware Validated Designs

First of all I’d like to talk about VMware Validated Designs before going on to talk about how these can be incorporated into replicated PSC designs.

VMware Validated Designs deliver holistic data center-level designs that span compute, storage, networking and management, defining the gold standard for how to deploy and configure the complete VMware SDDC stack in a wide range of use cases. VMware Validated Designs include detailed guidance that combine with best practices on how to operate a VMware SDDC optimally. The benefits are

  • Accelerate time to market
  • Increase efficiency
  • De risk deployments and operations
  • Drive agility
  • Repeatable proven solutions

When looking to implement any software from the SDDC suite, we are now referring to the VMware Validated Designs for a repeatable proven solution. Of course there may always be modifications required to fit customers environments but the idea going forwards is to maintain the same standards of installation and configuration

Platform Services Controller Topology Decision Tree

Adam Eckerle from VMware has very kindly designed a poster containing a decision tree for anyone thinking of deploying PSCs and guides you through a set of decisions before deployment

https://kb.vmware.com/selfservice/microsites/search.do?language=en_US&cmd=displayKC&externalId=2113115

PSC and Replication Points

  • All PSC replication is bi-directional but ring topology setups have to be manually created
  • Ring topology is now the recommended method, not mesh as it was previously
  • By default each PSC is replicating with only a single other PSC (the one you select when installing the additional secondary or tertiary PSC)
  • Site names do not have anything to do with replication today they are a logical construct for load balancers and future usage
  • Changes are not unique to a site but to a domain assuming they are part of the vsphere.local domain
  • vCenter only points to one PSC at a time or a load balanced address
  • PSC’s have to be part of the same domain together to use enhanced linked mode

Why Ring Topologies and not Mesh Topologies?

  • Ring Topologies allow for easier scaling out
  • They are easier to set up and maintain. There’s no issue with breaking and recreating replication agreements. vdcrepadmin does this and it actually protects the customer by not allowing them to delete the only agreement available. This prevents a customer from inadvertently creating an isolated PSC. What you would do is go through and create the new agreements and once they are in place just delete the extra ones. There is nothing special about the replication agreements that are created during PSC deployment. They are the same as ones created with vdcrepadmin
  • The failure of any one component in a ring does not cause replication partitions
  • Minimal links can be created for maximum redundancy which is increased when load balancers are used.

2 Site VVD Design

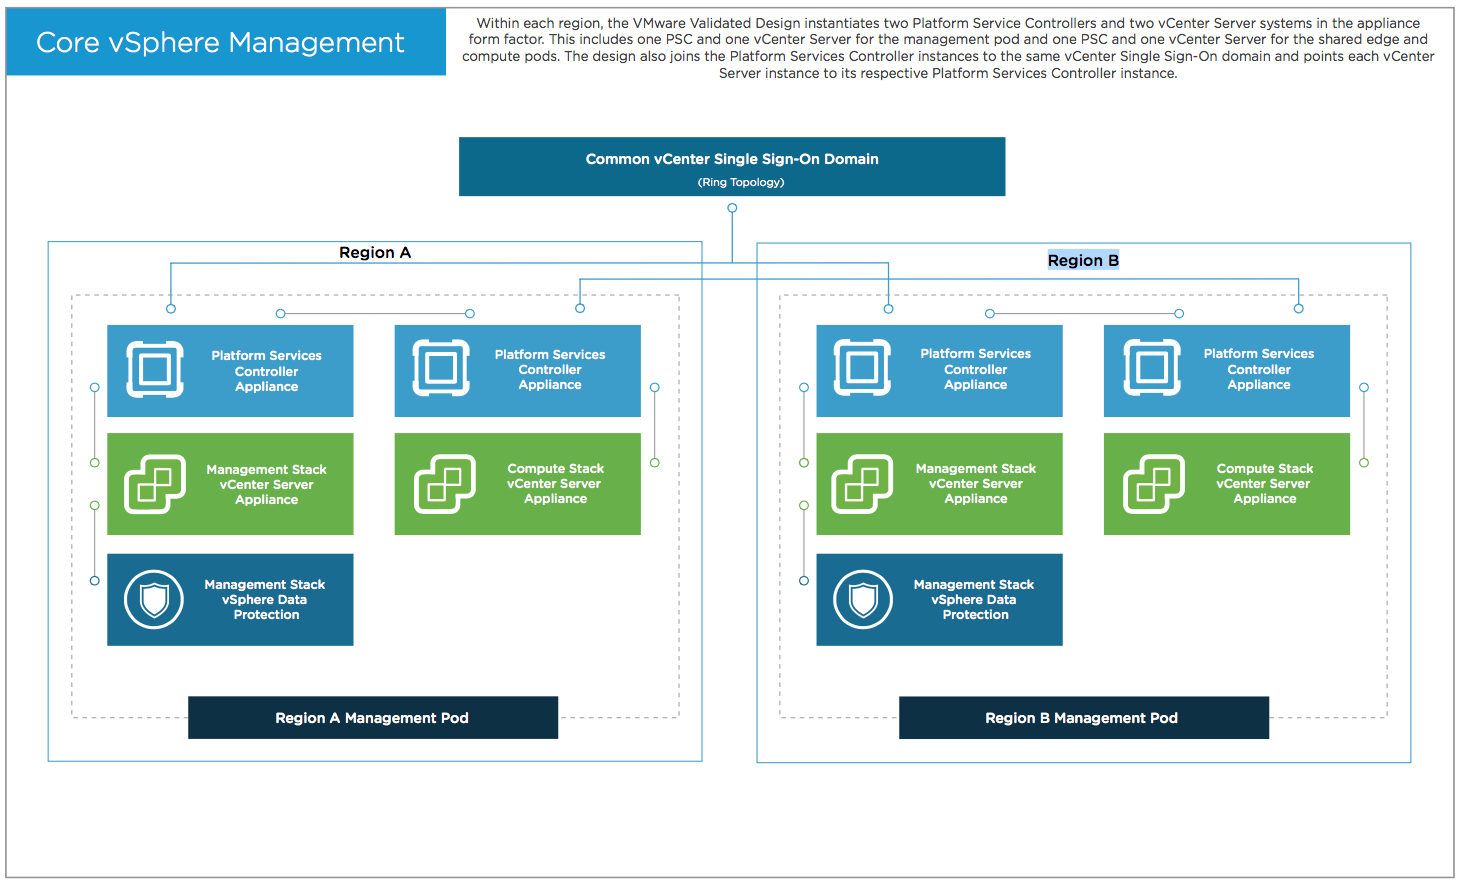
In the diagram below, you can see within each region/site, the VMware Validated Design instantiates two Platform Services Controllers and two vCenter Server systems in the appliance form factor. This includes one PSC and one vCenter for the management pod and one PSC and one vCenter for the shared edge and compute pod. The design also joins the Platform Services Controller instance to its respective Platform Services Controller instance.

3 Site VVD Design

When we start getting into a 3 site multisite design, we can then see how keeping it simple makes life a great deal easier. Below is a series of diagrams which show how this can be set up with a recommended ring topology.

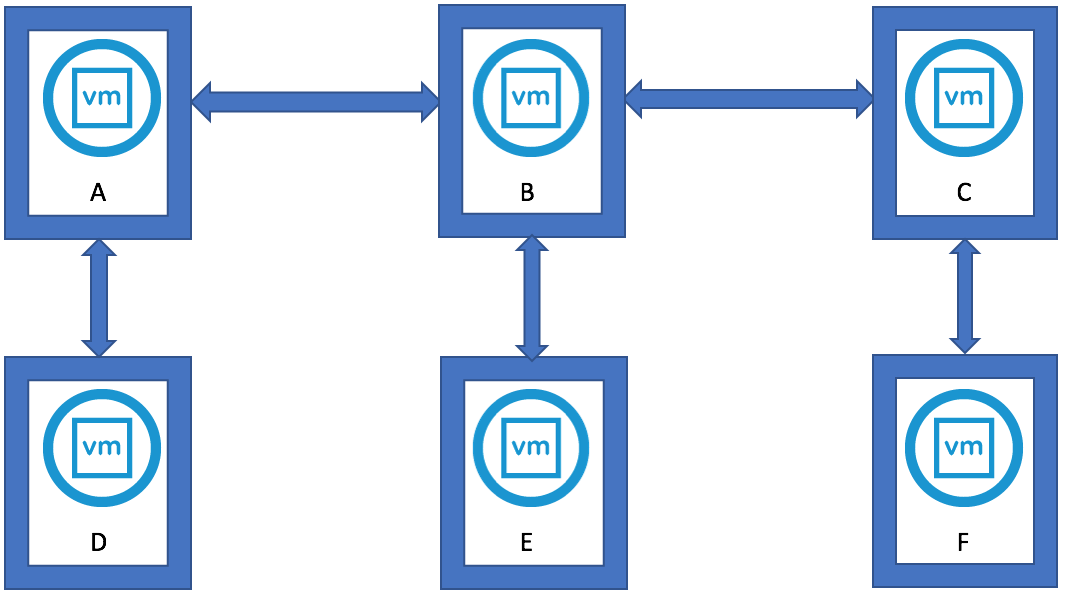
This particular example uses 3 sites with 2 PSCs in each. There is no load balancer.

Steps

  • When initially installing the external PSCs, PSCA will be the first standalone PSC. PSCB will be installed next and partnered with PSCA. PSCC is then installed and partnered with PSCB. This is 2 way automatic replication in an inline configuration

  • If we wanted to make it a ring topology with just these 3 servers we could do the following and create a replication agreement between PSCA and PSCC

  • Now we add the second PSCs into each site and we get the following scenario. 2 way automatic links are created between the first and second PSC in each site (A and D) (B and E) and (C and F)

  • Now we see we have kind of lost our inline topology and how do we create a ring now? We want an inline topology of D > A > B > E > C > F
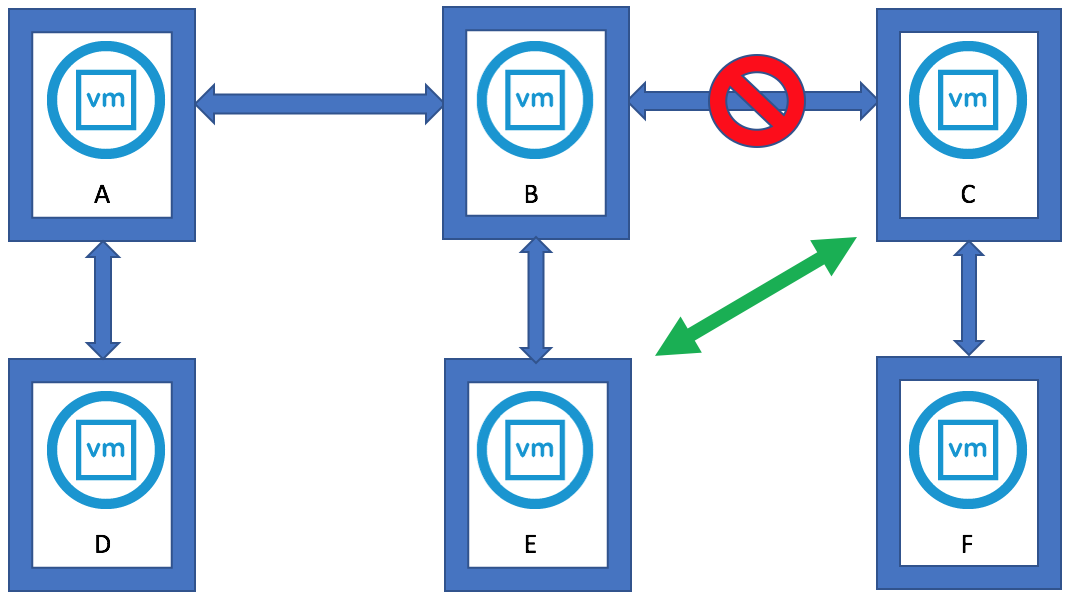
  • We actually need to create a new agreement between PSCE and PSCC followed by breaking the link between PSCB and PSCC. Remember the system will not let us break a replication agreement which would leave a PSC isolated so we need to create a link first

  • We will now get the following inline configuration

  • Next we want to create our ring topology. A replication agreement is created between PSCD and PSCF to create the ring


Replacing vROps 6.4 self signed certificates

Replacing vROps 6.4 self signed certificates

Certificate requirements – Click the link

  • File encoded in PEM format
  • Certificate is valid for Server Authentication
  • All certificates in the chain are included
  • The private key is included (2048 bit RSA or higher)
  • The private key is not secured with a password

VMware KB 2046591 Link – Click here

Step 1

  • To create the Certificate Request first download OpenSSL for Windows and install it in the default location – C:\OpenSSL-Win64
  • Note: Path and name may be slightly different depending on the version
  • I used Win64OpenSSL_Light-1_1_0e.exe

Step 2

  • Copy and paste the following into a text file and save as vrops.cfg in a folder called c:\OpenSSL-Win64\Certs. You will need to create the certs folder. You will be able to place other certs, keys and requests in here also

  • Customize the bold fields.

[ req ]

default_md = sha512
default_bits = 4096
default_keyfile = vropsprivate.key
distinguished_name = req_distinguished_name
encrypt_key = no
prompt = no
string_mask = nombstr
req_extensions = v3_req

[ v3_req ]
basicConstraints = CA:FALSE
keyUsage = digitalSignature, keyEncipherment, dataEncipherment
extendedKeyUsage = serverAuth, clientAuth
subjectAltName = DNS: Loadbalancedfqdn, IP: Loadbalancedip, DNS: Loadbalancedshortname, DNS: FirstNodeFQDN, IP: FirstNodeip, DNS: FirstNodeShortname, DNS: SeondNodeFQDN, IP: SecondNodeip, DNS: SecondNodeShortName

[ req_distinguished_name ]
countryName = countryName
stateOrProvinceName = stateOrProvinceName
localityName = localityName
0.organizationName = organizationName
organizationalUnitName = organizationalUnitName
commonName = Loadbalancedfqdn

In my case I don’t have a load balancer. I just have a Master node, a Replica Node and a Remote Collector Node so it looks like this

[ req ]

default_md = sha512
default_bits = 4096
default_keyfile = vropsprivate.key
distinguished_name = req_distinguished_name
encrypt_key = no
prompt = no
string_mask = nombstr
req_extensions = v3_req

[ v3_req ]
basicConstraints = CA:FALSE
keyUsage = digitalSignature, keyEncipherment, dataEncipherment
extendedKeyUsage = serverAuth, clientAuth
subjectAltName = DNS: techlabops001.techlab.local, IP: 192.168.1.160, DNS: techlabops001, DNS: techlabops002.techlab.local, IP: 192.168.1.161, DNS: techlabops002, DNS: techlabops003.techlab.local, IP: 192.168.1.162, DNS: techlabops003

[ req_distinguished_name ]
countryName = UK
stateOrProvinceName = London
localityName = Norfolk
0.organizationName = Techlab
organizationalUnitName = vROps
commonName = techlabops001.techlab.local

Step 3

Open a command prompt and change directory to where OpenSSL is installed.  You need to first generate a new key pair with a 2048 or 4096 key length. Leave this file in the path you specify here for later

openssl genrsa -out key_filename.key 4096

c:\openSSL\bin>openssl.exe genrsa -out c:\openSSL\certs\vropsprivate.key 4096

Step 4

Use the key to generate a certificate signing request by running this command. I have added -sha512 but this is optional

openssl req -new -key key_filename.key -out certificate_request.csr -config config_file.cfg

openssl req -new -key c:\certs\vropsprivate.key -out c:\certs\vropscsr.csr -config C:\OpenSSL\certs\vrops.cfg -sha512

Step 5

  • Click Windows Start > Run, enter certtmpl.msc, and click OK.
  • Follow the below link to create a certificate template (If you haven’t got one already)

vCSA (vCenter Server Appliance) – Part 4 – Deploy CA-signed certificates

Step 6

Submit the CSR file to your Certificate Authority (CA) to obtain a signed certificate

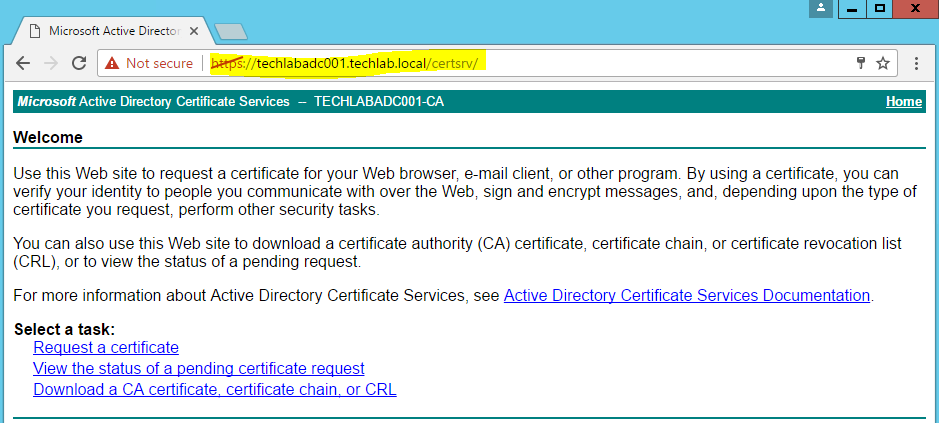
  • Browse to your CA – https://servername/certsrv – Request a certificate. In my case I have a Microsoft CA installed on my Domain Controller
  • Choose Request a Certificate

  • Chose Request a Certificate

  • Open the request file in a notepad and copy the contents into the request box, In my case this is the vropscsr.csr file.
  • Select a certificate template that meets the requirement. In this case vROps Template
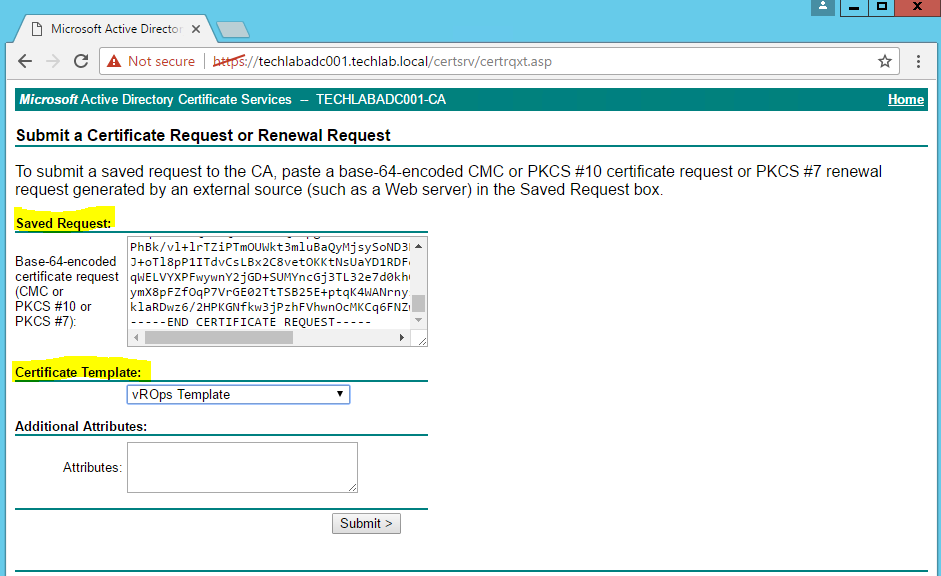
  • Submit the request and download as Base 64 Encoded

  • Download certificate and save it locally to your machine as “certnew.cer”

Step 7

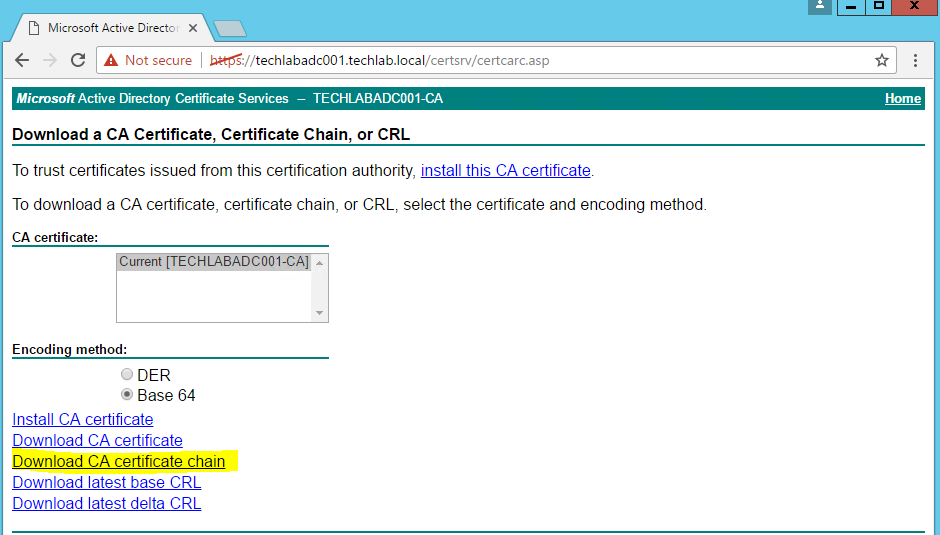
Now we need to download the certificate chain from our CA

  • Browse to your CA – https://servername/certsrv
  • Select Download a CA certificate, certificate chain or CRL
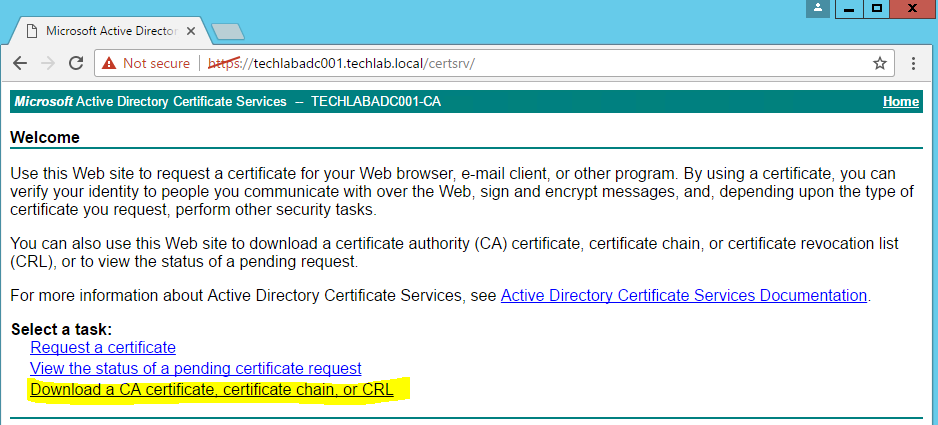
  • Click Download CA certificate chain

  • It will download a certnew.p7b file or if it downloads a .cer file then use this
  • Change the name to root64.p7b and Click Open or save it and then open it. The Certificate manager Console will open

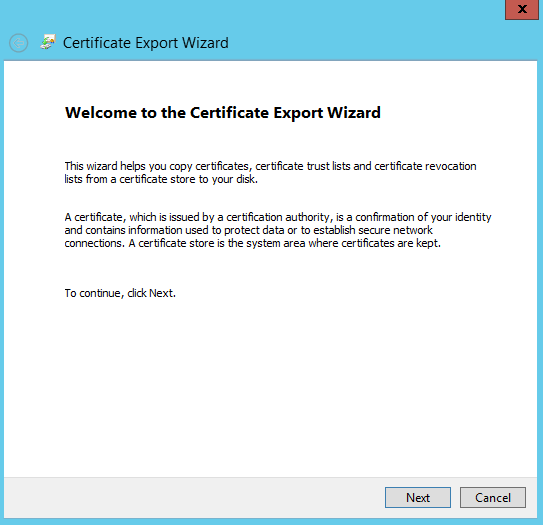
  • We now need to extract the certificates for the root and all intermediate authorities in the certificate chain. For each CA, export the certificate to a file.
  • Right click on the root certificate and select Export

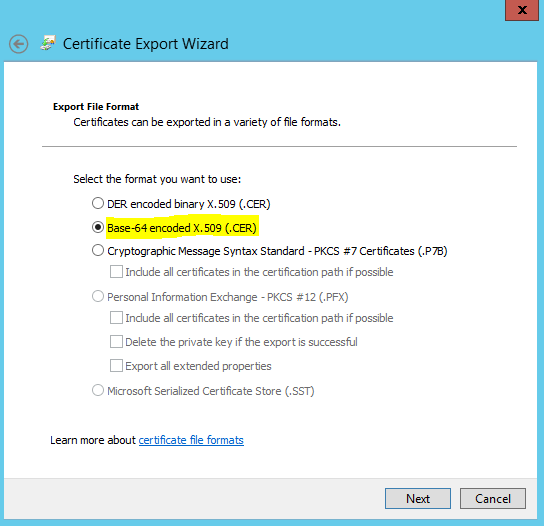
  • In the export wizard, select Base-64 and save the file to the same folder as vrops.cfg. Do that for each authority!
  • Once you receive the certificate you have all the components needed to create the required .pem certificate.
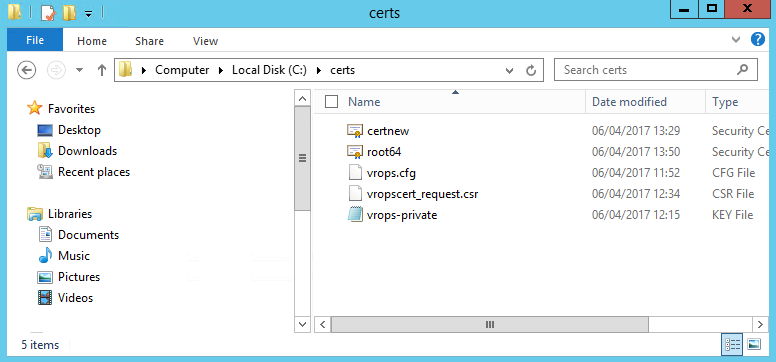
Note: The order of CA’s certs in the .PEM file: Private Key, Cert, Intermediate Cert and then Root Cert which can seen above and described below

  • Private Key = vropsprivate.key
  • Cert = certnew.cer
  • Intermediate Cert – I don’t have one
  • Root CA – root64.cer

Step 8

  • Check you have all your certs in C:\OpenSSL\Certs. Note I already have a .pem file from other testing so ignore this as you won’t have one yet.

Step 9

Next go back to SSL and generate the .pem certificate. Example below

type key_filename.key server_cert.cer cacerts.cer > multi_part.pem

  • Change directory to where you saved your certificates
  • Type the following (including the word type!)

type vropsprivate.key certnew.cer root64.cer > vrops.pem

  • You should now see your .pem file which in my case is vrops.pem

  • If you open it, it will look something like this
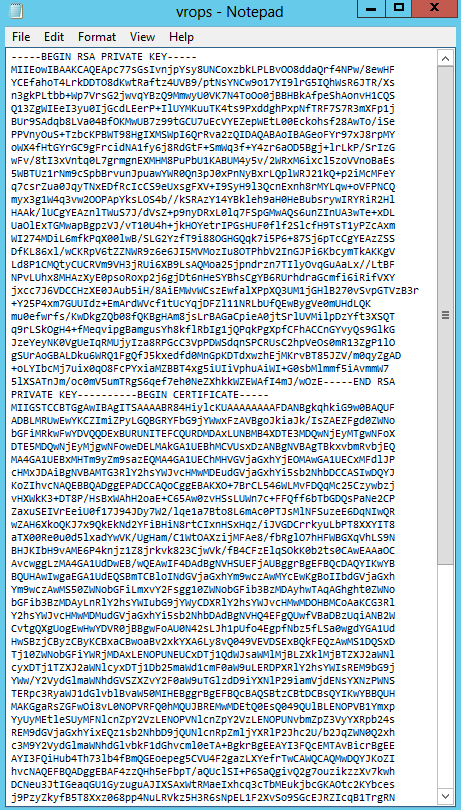
Step 10

We can now navigate to the vROps page and upload the .pem file into the system

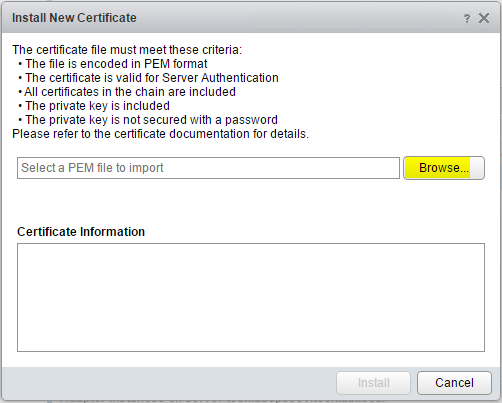
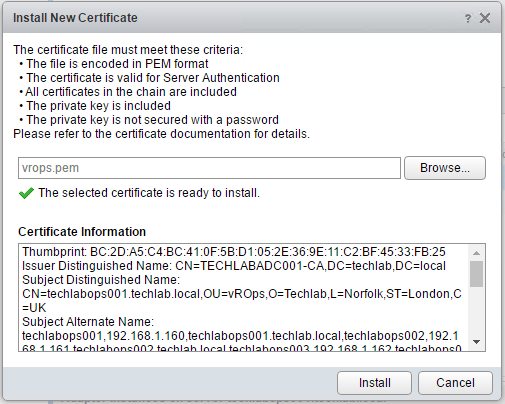
  • You have to log in specifically to the small administration website (https://vrops-server/admin), and click on the small icon on the top right of the screen as seen below. Then you can choose to Install new certificate.

  • When you click Install, you will be disconnected and reconnected. Better close the tab and reopen it to check that the custom certificate has been imported properly.
  • You should be able to open the vROps web pages without any certificate errors 🙂 See the green lock on the Firefox browser.

  • If it is still saying it is insecure then you may have to import the root64.cer into the Firefox browser. Go to Options > Advanced > Certificates > View Certificates and import the root64.cer
  • You can see my Microsoft CA Authority here which is now trusted

  • Note: I couldn’t get this working in Chrome even after importing the root CA certificate. I think Google have locked down their websites for vulnerabilities in the SHA1 algorithm however I haven’t figured out a way to get around this yet

If you do have problems and cannot get into the vROps webpages for any reason, VMware has KB2144949 which will allow you to revert back to the default certificates.

https://kb.vmware.com/selfservice/microsites/search.do?language=en_US&cmd=displayKC&externalId=2144949

Using JXplorer to connect to vSphere PSC Servers

Using JXplorer to connect to vSphere PSC Server

JXplorer is a cross platform LDAP browser and editor. It is a standards compliant general purpose LDAP client that can be used to search, read and edit any standard LDAP directory, or any directory service with an LDAP or DSML interface.

Note: Please take extreme care when connecting to the vmdird database. This is not a recommended way of viewing this data but it can be very useful

JXplorer Download Location

I installed this on a Windows 10 workstation which had connectivity to my PSC Servers

http://jxplorer.org/

Configuration Steps

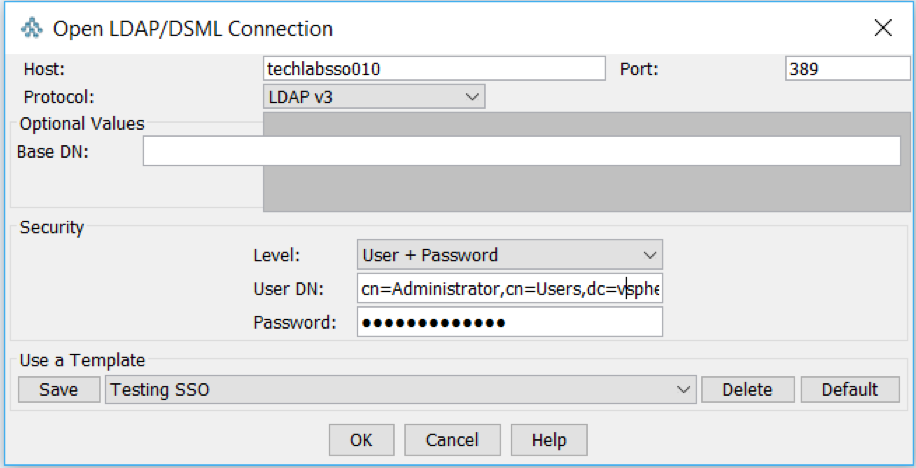
  • Open JXplorer and open a new Connection
  • In the Host field put in the same of your PSC/SSO Server
  • Don’t put anything in Base DN. It will let you connect if you do put a Base DN in but will error when you try and expand the tree
  • In Security Level, choose User + Password
  • In User DN, type CN=Administrator,CN=Users,DC=vsphere,DC=local
  • Put in your PSC/SSO password
  • Save the template

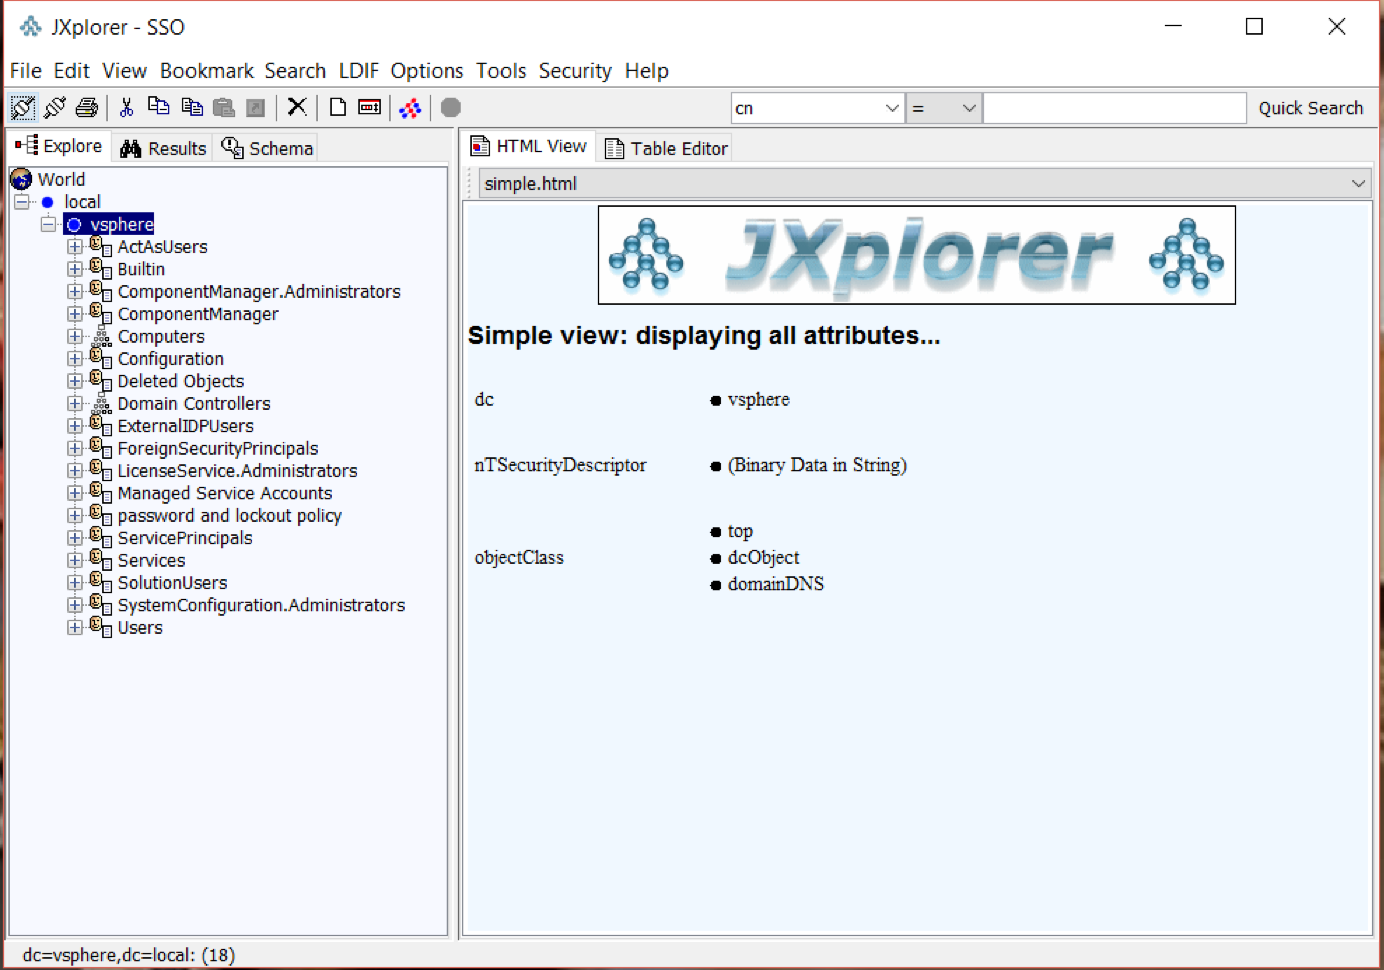
  • You should now see the following screen

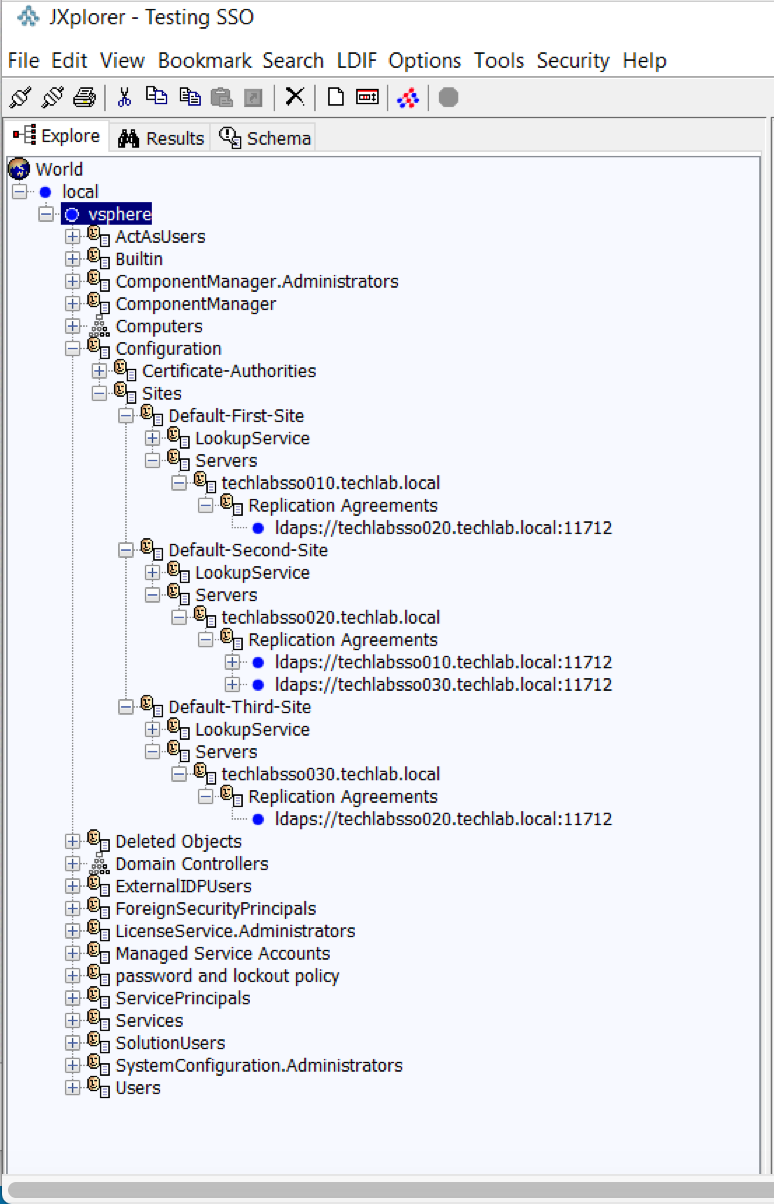
  • Expand vSphere > Configuration > Sites and you should be able to see all the replication agreements.
  • I’ve been playing around with multi-site scenarios which is why you can see Default-First-Site, Default-Second-Site and Default-Third-Site which are my 3 PSCs in a multisite scenario.

Other Observations

Information from Sung Rao (VMware) Thank Q

In 5.5. the only secure LDAP communication between SSO/PSC nodes are via LDAPS.  Thus in automatic replication agreements establishment, LDAPS is used.

In 6.0 and after, we introduced LDAP SASL/SRP binding which go through port 389. LDAP SASL/SRP (or KRB) is the simple and safe to manage between LDAP nodes. This binding mechanism is preferable to LDAPS as the SSL port is difficult to manage/deploy correctly as it depends on PKI. Also, LDAP layer sites below certificate. You need an ID before you can get a cert

Regardless, in 6.0 and after, the server will try SASL/SRP first and fall back to LDAPS if necessary regardless of LDAP/LDAPS in the labeledURI in the replication agreement definition. You also cannot force the replication agreements to use LDAPS in 6.0 and after

Decommissioning a Windows 2012 vCenter 6 Server and a Windows 2012 PSC 6 Server

Decommissioning a vCenter 6 Server and a PSC 6 Server

After you deploy a vCenter Server with an embedded Platform Services Controller or a vCenter Server with an external Platform Services Controller, if you no longer need any of the appliances or if an appliance stops responding, you can decommission and delete the appliance from vSphere inventory and domain.

Note
: The process for removing a vCenter Server or a Platform Services Controller from the vSphere domain is irreversible. After you remove an appliance from the domain, you cannot rejoin it to the same domain. You must perform a re-install or a re-deploy of  vCenter Server or Platform Services Controller system in order to re-join it to the domain.

Infrastructure

In my scenario I have 2 PSCs in multisite mode and 1 vCenter connected to each PSC. Note: These are Windows Server 2012 servers. The link at the bottom of the page details the process for the VCSA appliance

  • techlabsso002.techlab.local (Windows 2012 PSC)
  • techlabsso003.techlab.local (Windows 2012 PSC)
  • techlabvcs002.techlab.local (Windows 2012 vCenter connected to techlabsso002)
  • techlabvcs003.techlab.local (Windows 2012 vCenter connected to techlabsso003)

I am going to remove 1 vCenter and 1 PSC from this scenario which will be techlabsso003.techlab.local and techlabvcs003.techlab.local.

Step 1 Decommission the vCenter Server

First of all I want to decommission my vCenter Server from the Platform Services Controller

  • Log into the first PSC server; in my case techlabsso003
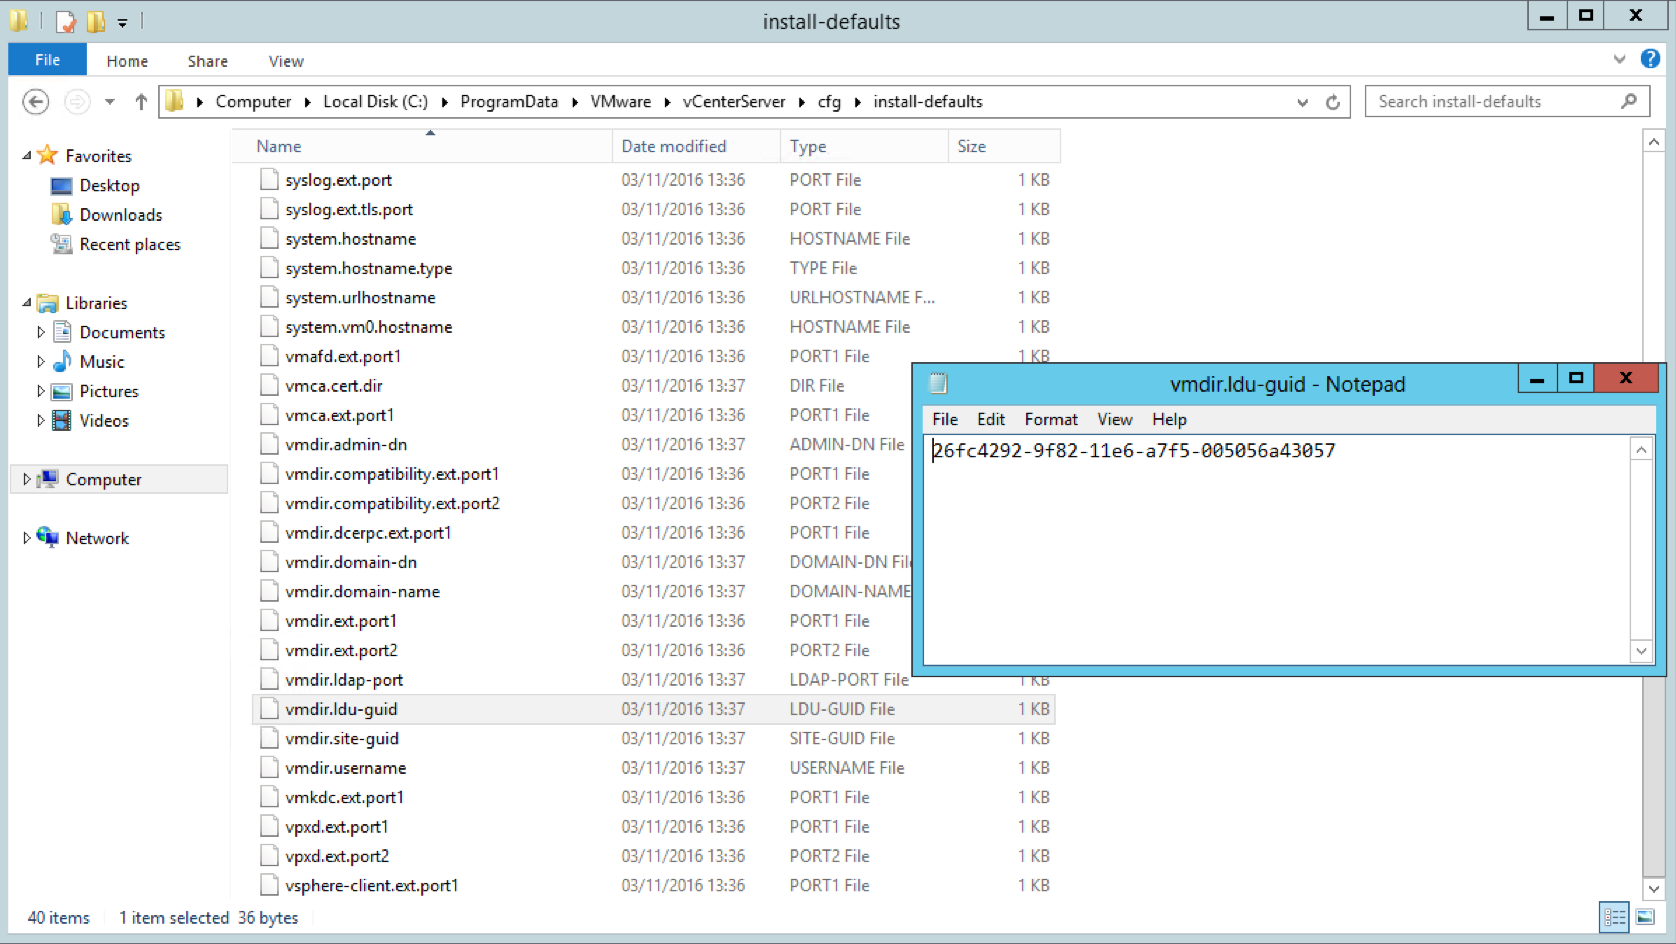
  • Browse to C:\ProgramData\VMware\vCenterServer\cfg\install-defaults.
  • Open the vmdir.ldu-guid file to find the hostid.

  • On the Platform Service Controller, click Start > Run, type cmd.exe, and click OK. The Command Prompt window open.
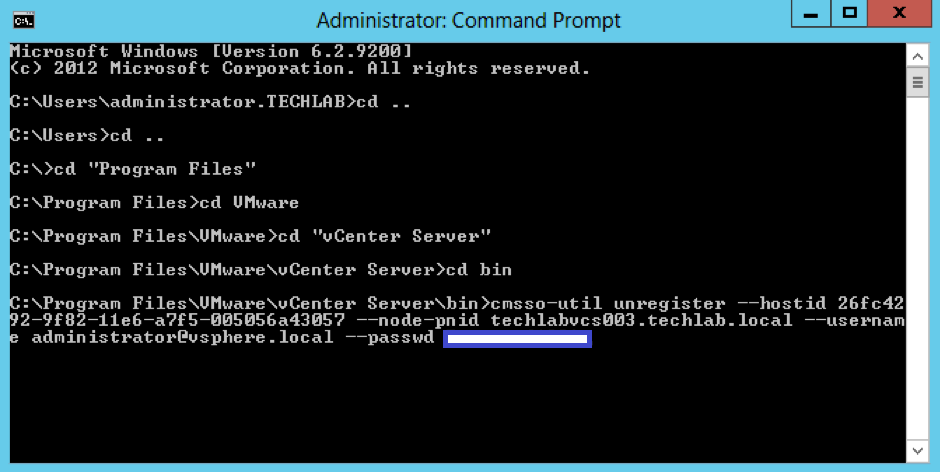
  • Navigate to C:\Program Files\VMware\vCenter Server\bin
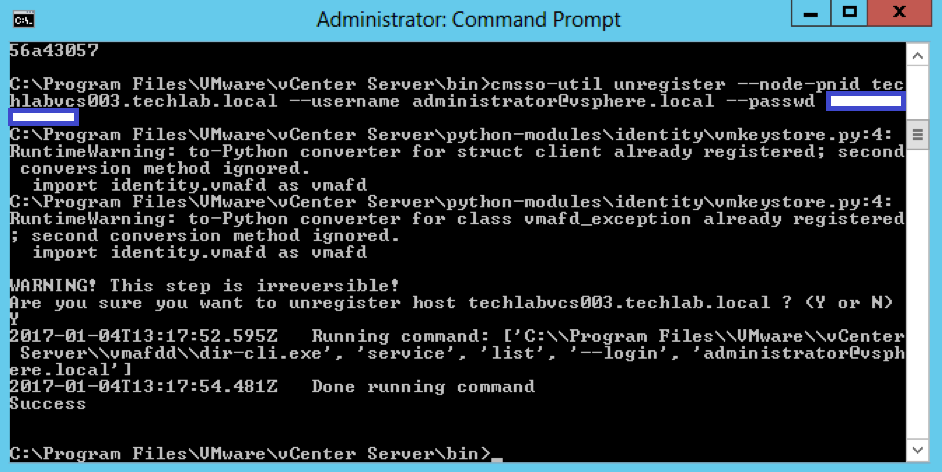
  • Run the cmsso-util unregister command to unregister the vCenter Server. Where, vCenter_Server_System_Name is the FQDN or IP address of vCenter Server that you want to decommission. You must run this command only on the Platform Services Controller which your vCenter Server is registered.

cmsso-util unregister --hostId host_Id --node-pnid vCenter_Server_System_Name --username administrator@your_domain_name --passwd vCenter_Single_Sign_On_password

  • You should see the following asking you to confirm you want to unregister the vCenter Server. Note I had to remove the –hostid argument as the command didn’t recognise it

  • You should then see it say Success

  • Power off the vCenter Server

Step 2 Decommission the PSC Server

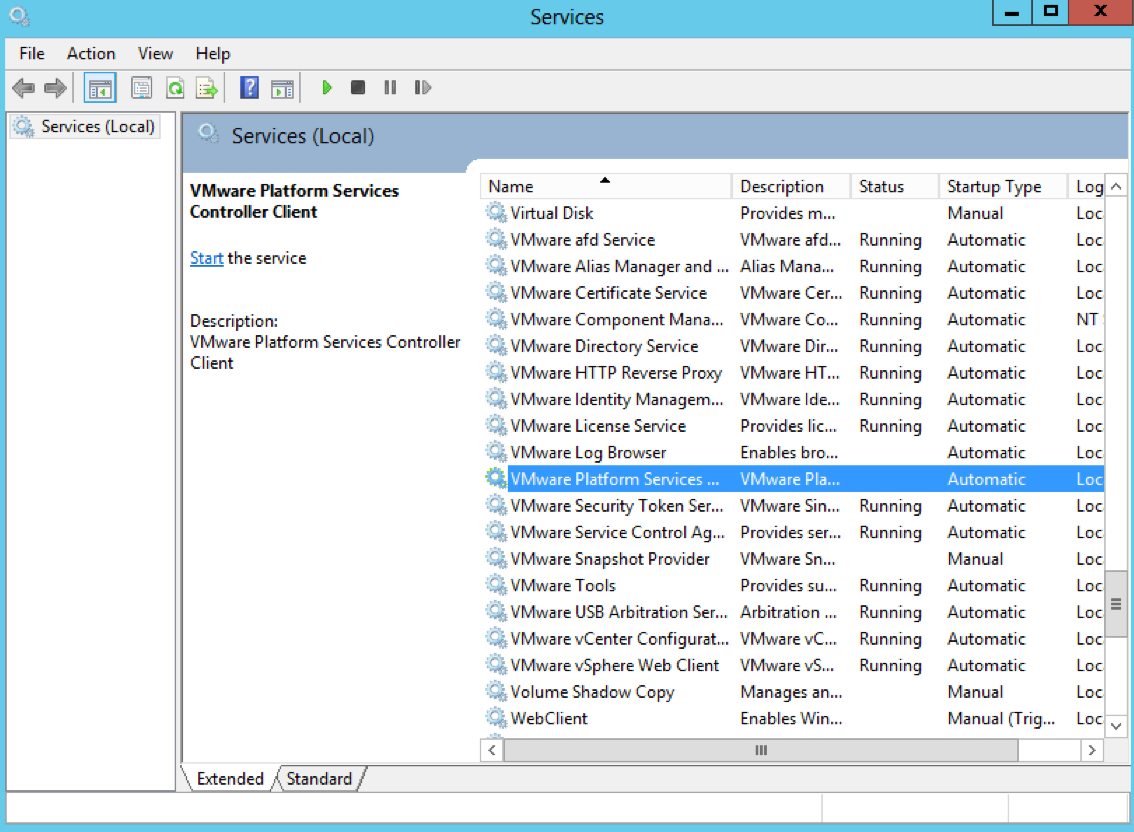
  • Personally I would shut down the PSC or simply stop the Platform Services Controller services. Note below that I’ve only stopped the Platform Service but all services would need stopping

  • On the PSC to be decommissioned, browse to C:\ProgramData\VMware\vCenterServer\cfg\install-defaults.
  • Open the vmdir.ldu-guid file to find the hostid.

  • On one of the other Platform Service Controllers, click Start > Run, type cmd.exe, and click OK. The Command Prompt window open.
  • Navigate to C:\Program Files\VMware\vCenter Server\bin
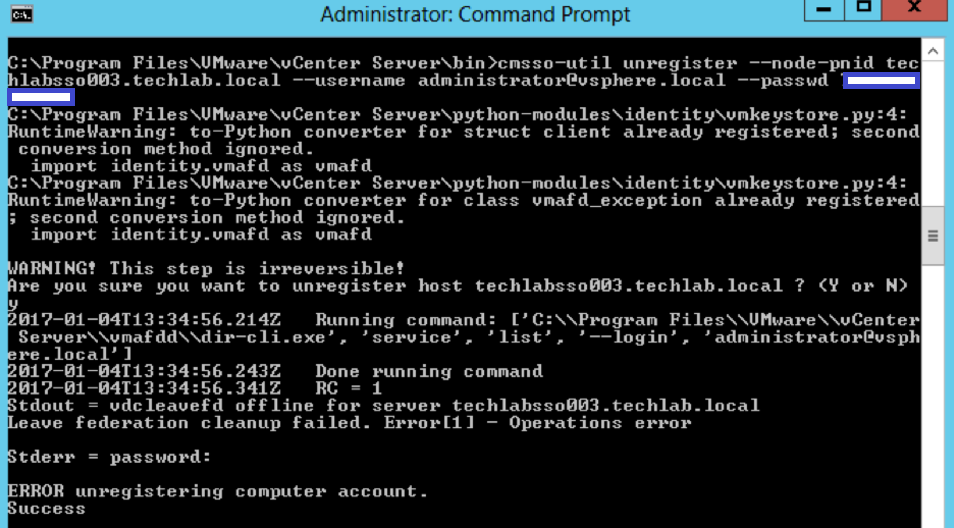
  • Run the cmsso-util unregister command to unregister the stopped Platform Services Controller
  • Where, Platform_Services_Controller_System_Name is the FQDN or IP address of the Platform Services Controller that you want to decommission. You must run this command only on one of the Platform Services Controller replication partners, as the synchronization removes the entries from all other Platform Services Controller replication partners.

cmsso-util unregister --hostId host_Id --node-pnid PSC_System_Name --username administrator@your_domain_name --passwd vCenter_Single_Sign_On_password

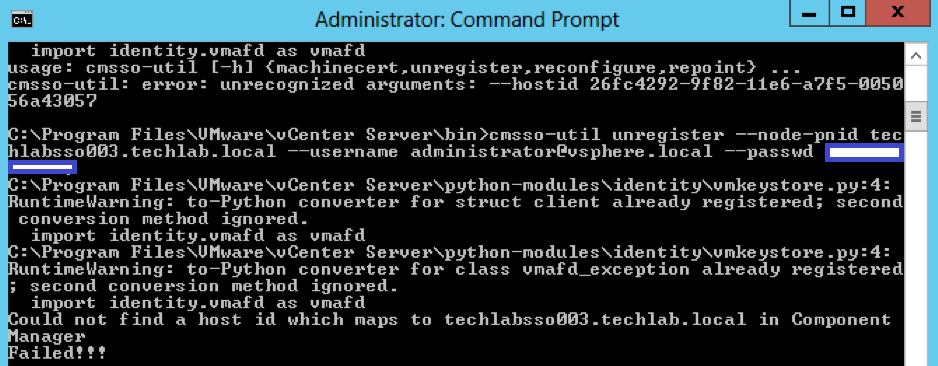
  • Now you may get errors such as the below

Could not find a host ID which maps to “Servername” in Component Manager

Leave federation cleanup failed. Error [1] – Operations error and Error registering Computer account

  • If either of these occur then make sure you have switched off the PSC to be decommissioned
  • Navigate to C:\Program Files\VMware vCenter Server\vmdird and run the below command

.\vdcleavefed -h -u administrator -w

  • If you get a message to say Leave Federation cleanup done then you can then go ahead and delete the Platform Services Controller appliance that you no longer need from the vSphere inventory.
  • Reviewing the Nodes > Objects tab in the Web Client successfully removed the object from inventory.

Notes on vdcleavefed

cmsso-util leverages vdcleavefed to clean up the machine account, but also goes through and cleans up the solution users and anything else that may have been registered in component manager. It also has some pre-flight checks involved. vdcleavefed on its own will just rip out the machine account, and really should not be used unless in case of an emergency where we are in such a state where cmsso-util will not suffice (e.g. doesn’t work). cmsso-util is the preferred method of cleanup.

Link

https://kb.vmware.com/selfservice/microsites/search.do?language=en_US&cmd=displayKC&externalId=2106736


Deploying Orchestrator 6.0.3 into vSphere 6

vRARobot2

Deploying Orchestrator 6.0.3 into vSphere 6

Software versions in my lab environment

  • vCenter v6.0.0, 3018524
  • vSphere Hosts v6.0.0, 3029758
  • VMware-vCO-Appliance-6.0.3.0-3000579_OVF10.ovf

and

screen-shot-2016-11-23-at-11-01-06

Instructions

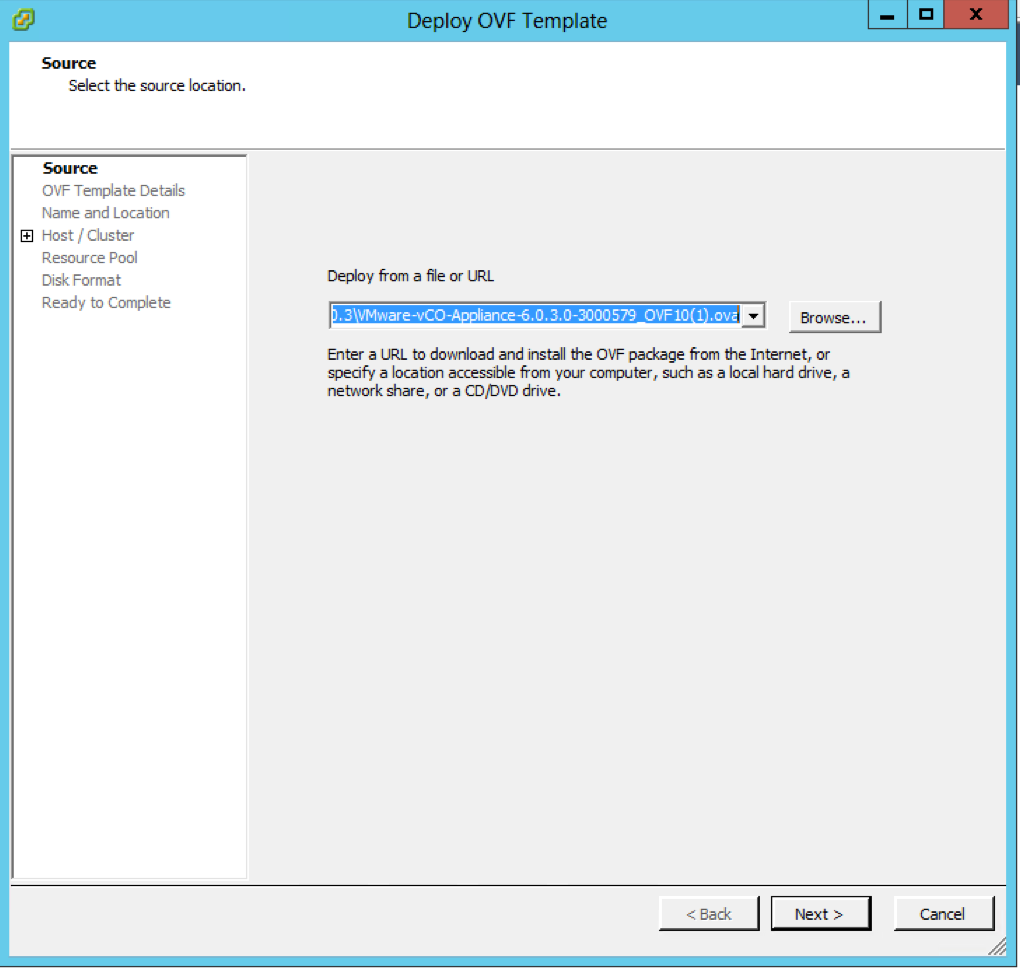
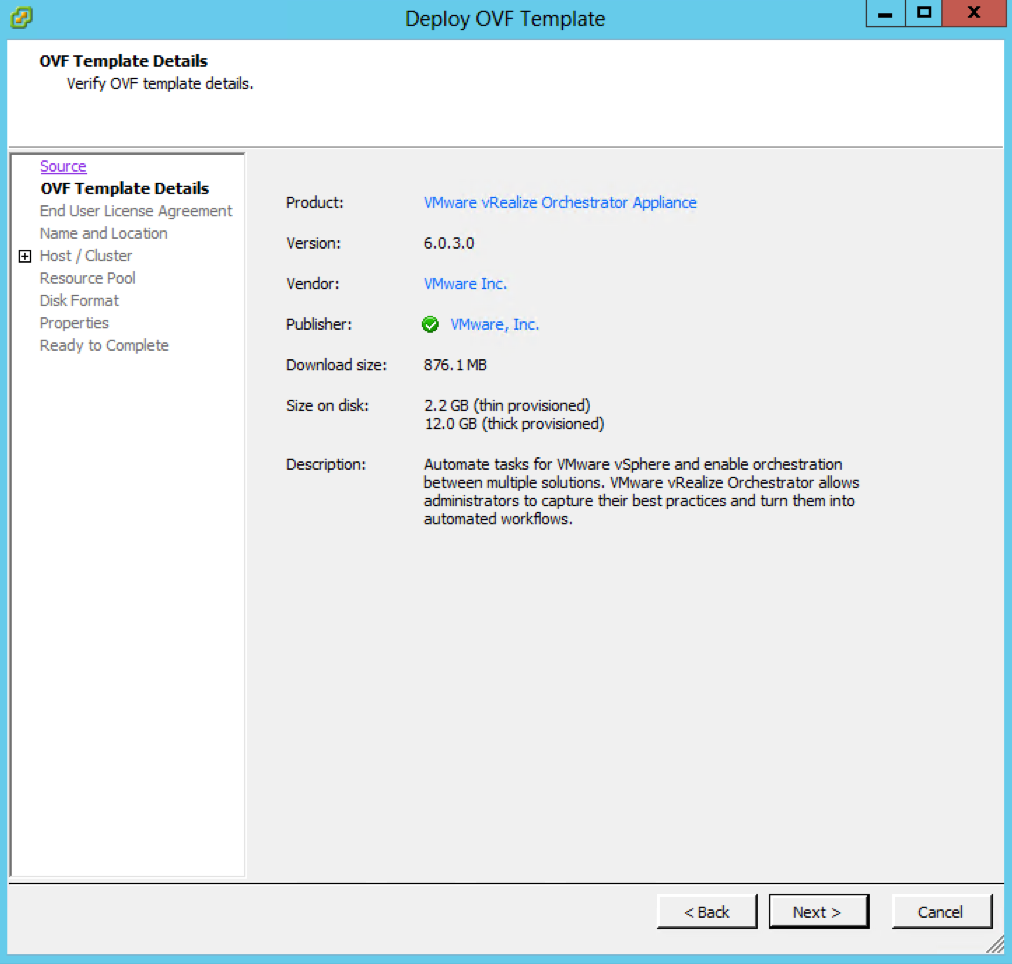
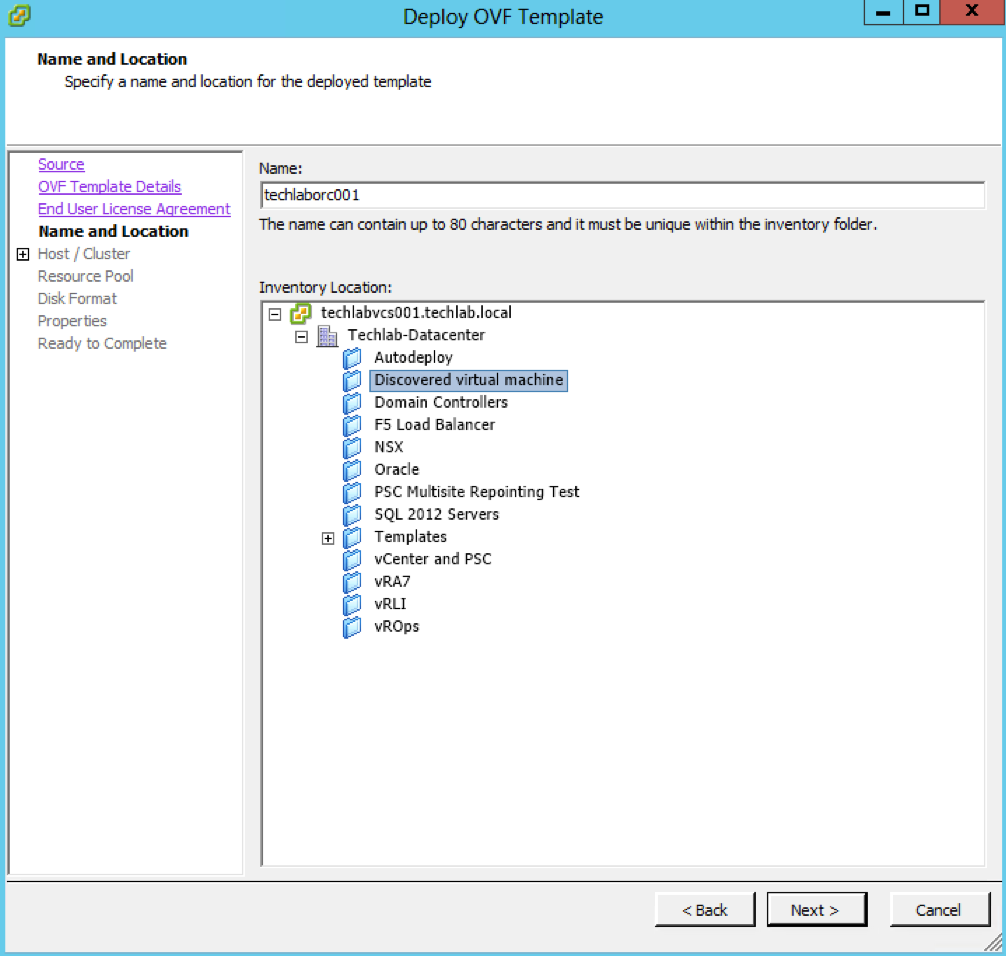
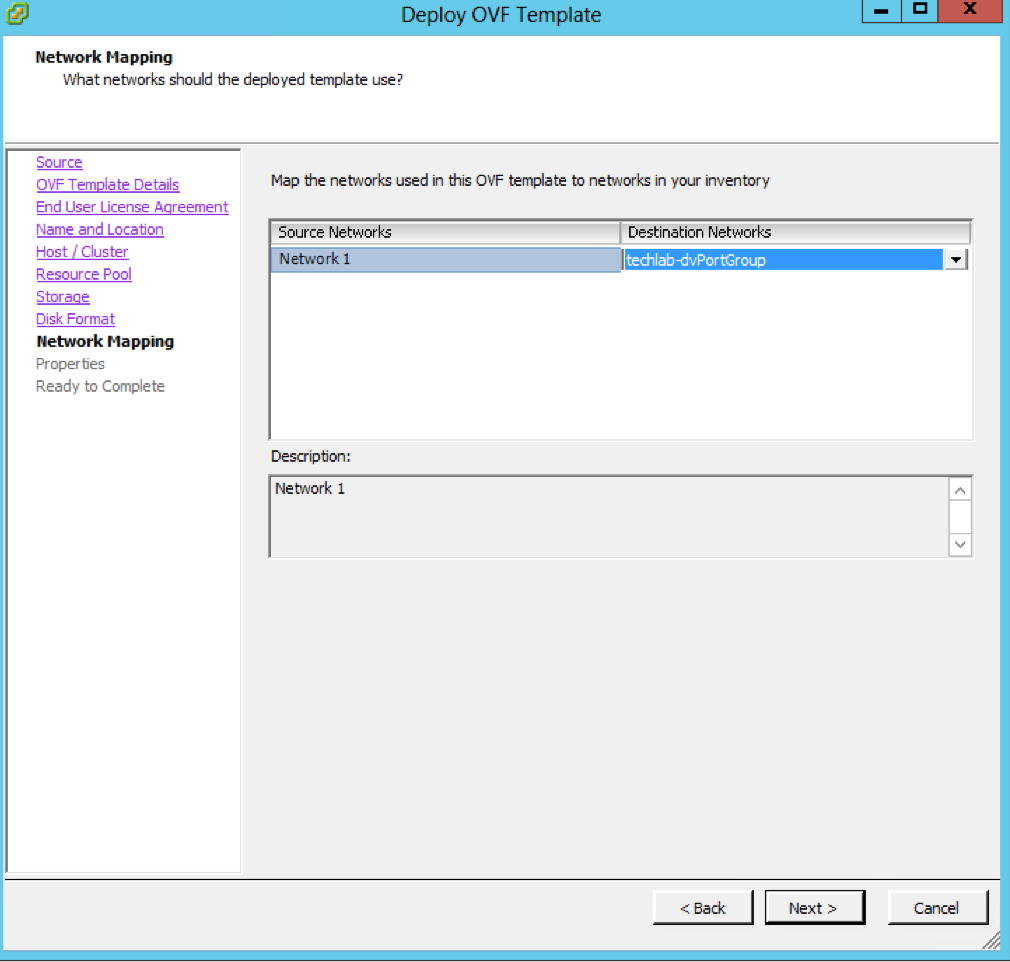
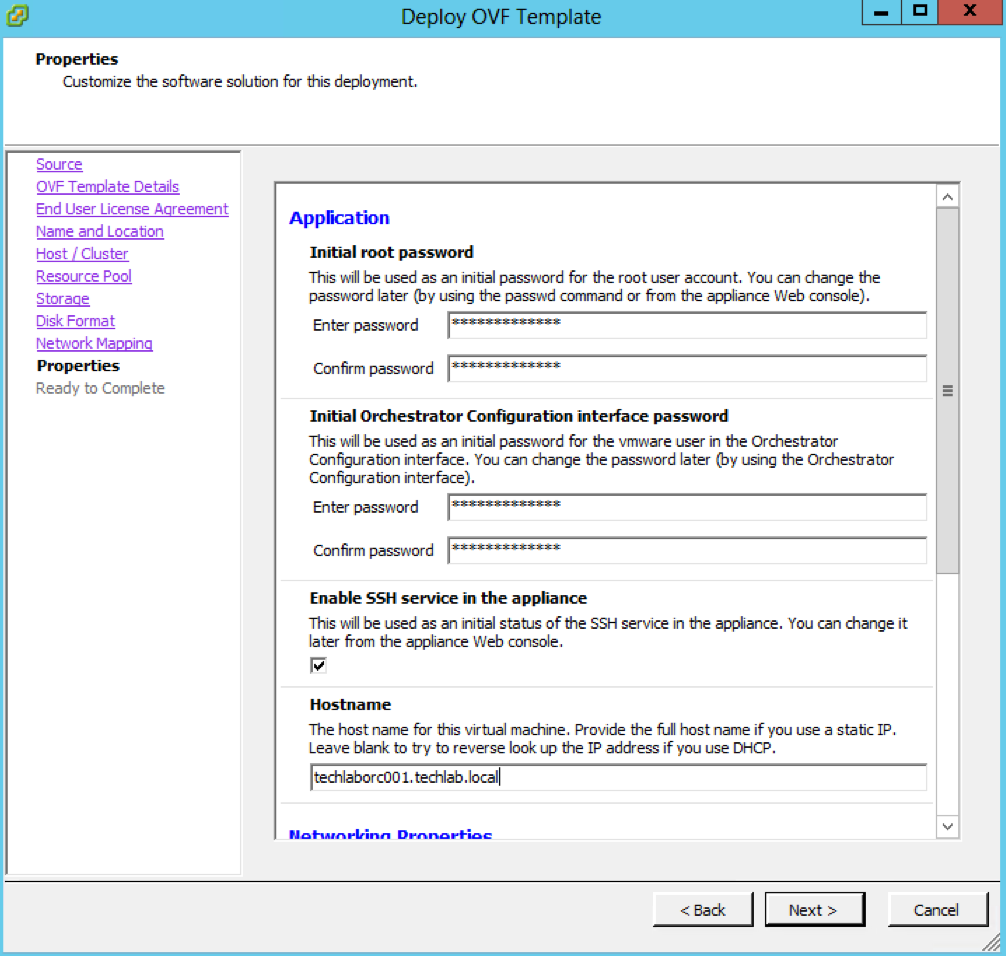
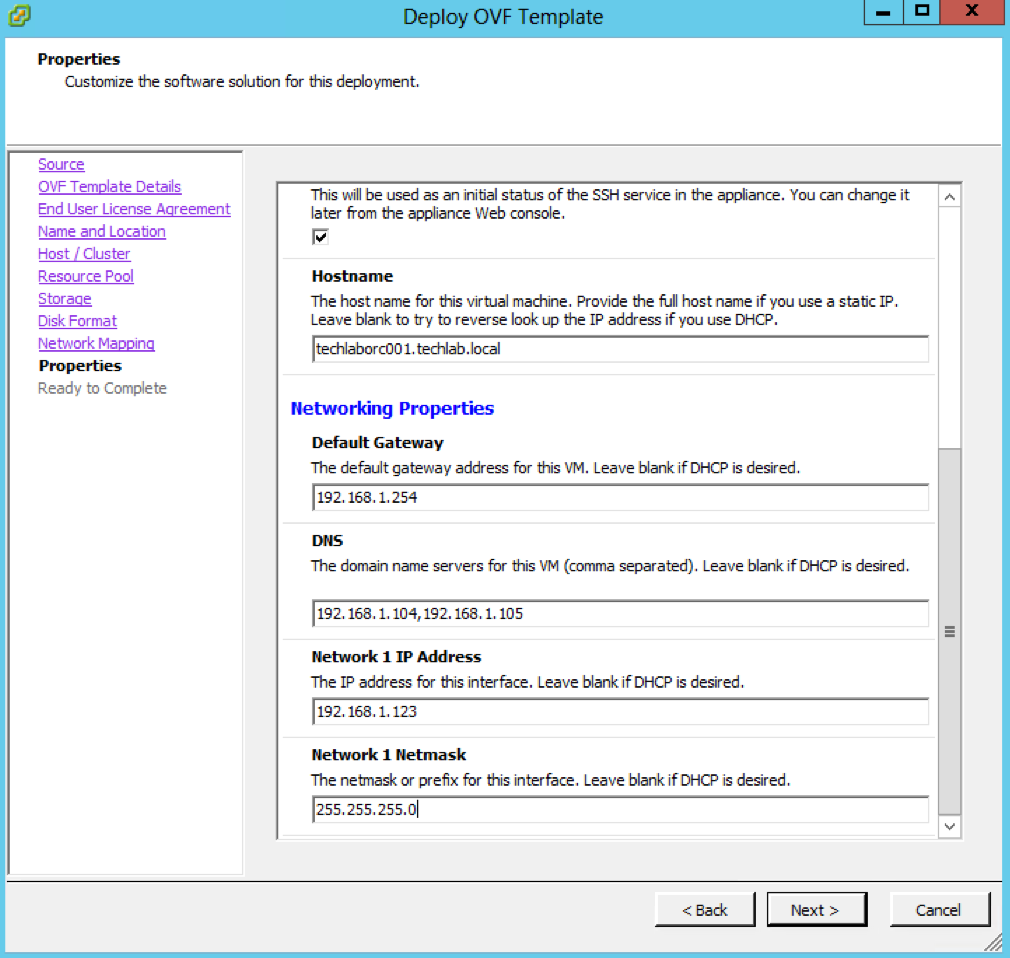
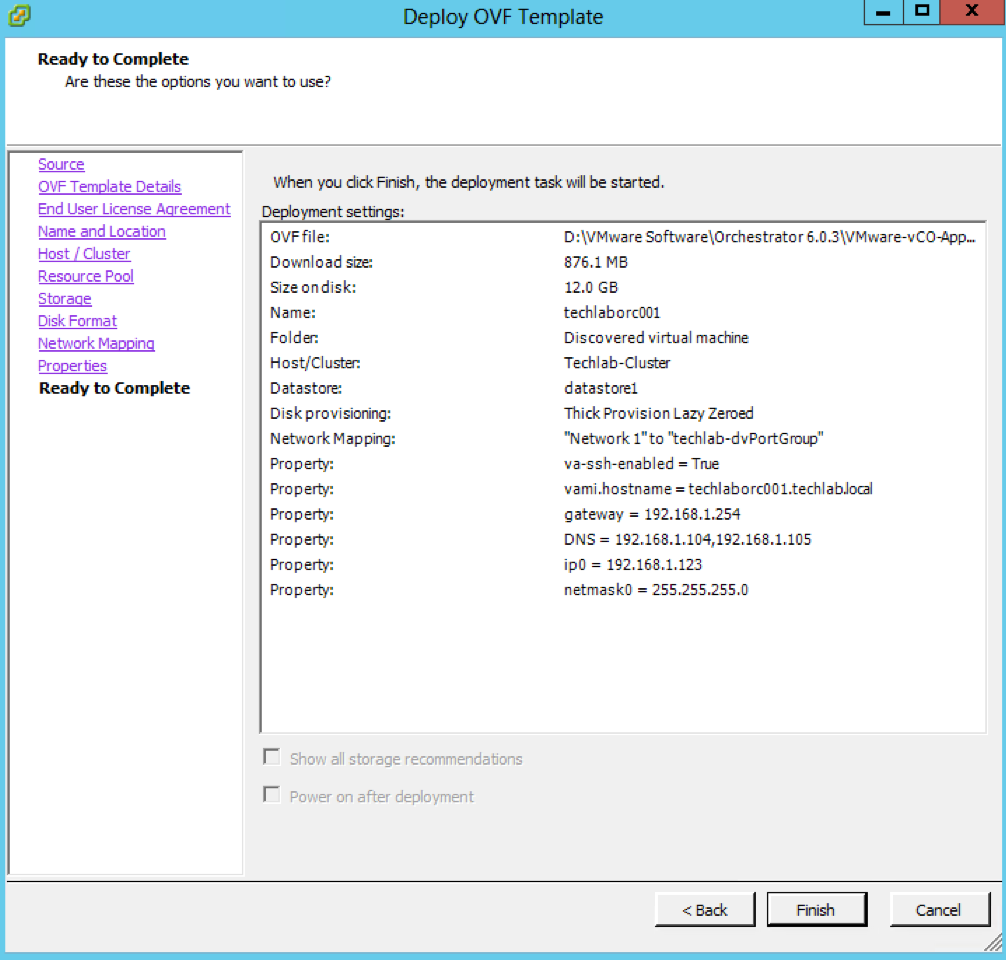
  • Download and deploy VMware-vCO-Appliance-6.0.3.0-3000579_OVF10.ovf into vCenter – File > Deploy ovf template

screen-shot-2016-11-22-at-20-26-33 screen-shot-2016-11-22-at-20-26-47 screen-shot-2016-11-22-at-20-28-11 screen-shot-2016-11-22-at-20-28-35 screen-shot-2016-11-22-at-20-29-07 screen-shot-2016-11-22-at-20-29-36 screen-shot-2016-11-22-at-20-29-59 screen-shot-2016-11-22-at-20-30-47 screen-shot-2016-11-22-at-20-31-58 screen-shot-2016-11-22-at-20-35-35 screen-shot-2016-11-22-at-20-37-18

  • Power on the VM
  • Log into a web browser using the Orchestrator appliance web address. In my case https://192.168.1.123:5480

screen-shot-2016-11-22-at-20-52-23

  • Change the time zone to Europe/London or whichever your timezone is and click Save Settings

screen-shot-2016-11-22-at-20-53-03

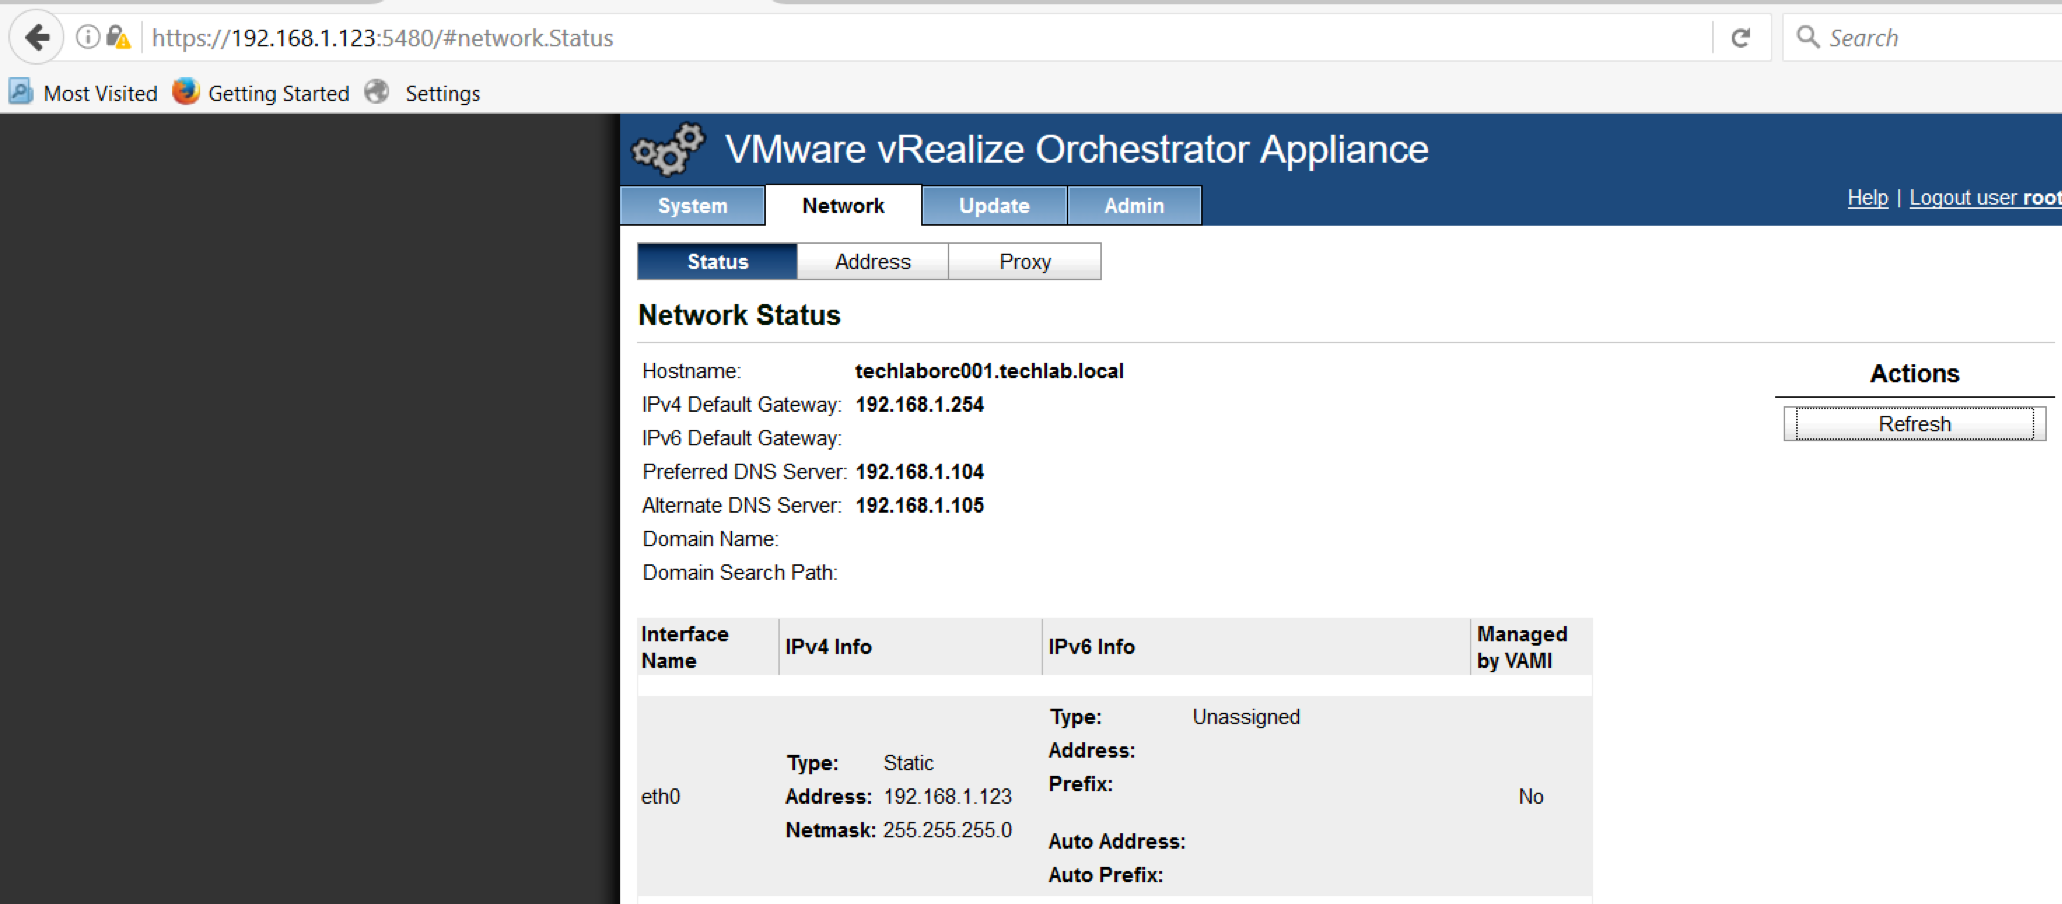
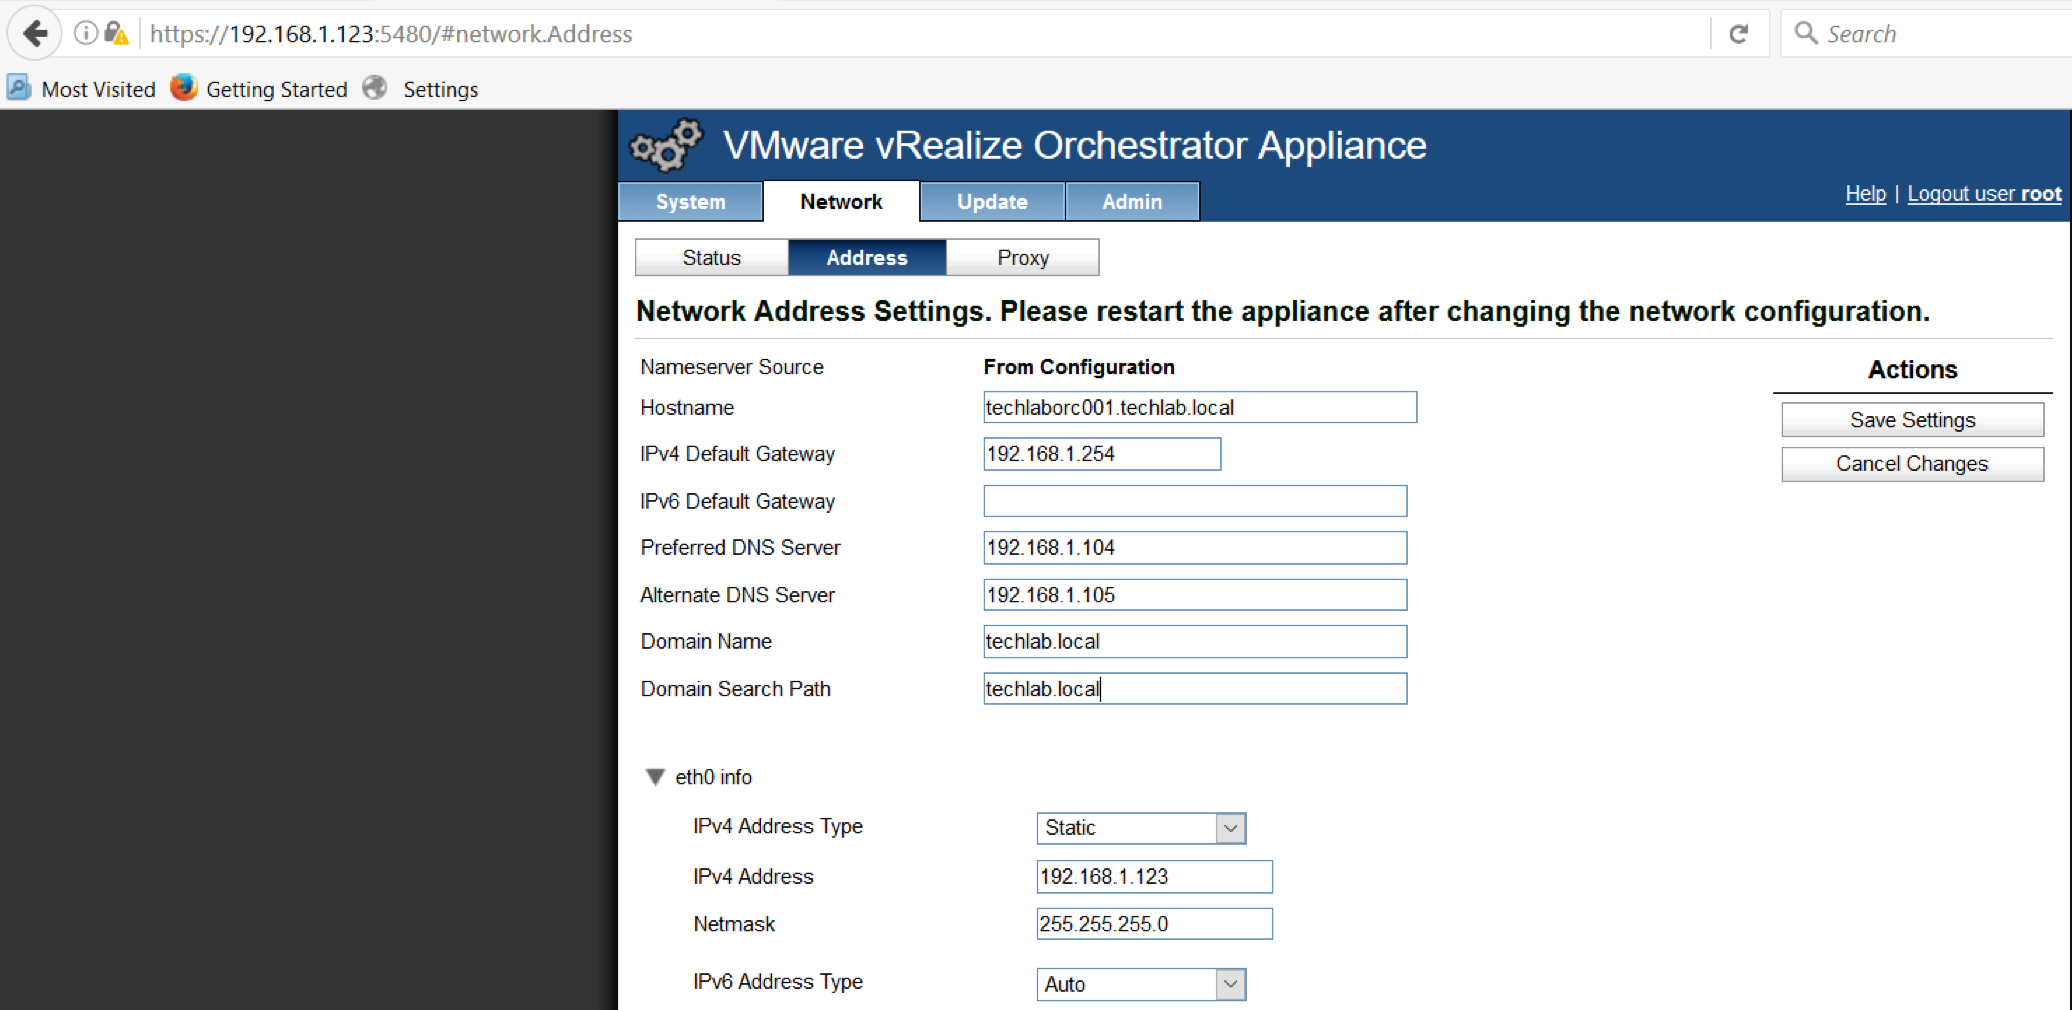
  • Click the Network tab and check the settings on the 3 tabs

screen-shot-2016-11-22-at-20-54-10 screen-shot-2016-11-22-at-20-56-20 screen-shot-2016-11-22-at-20-57-02

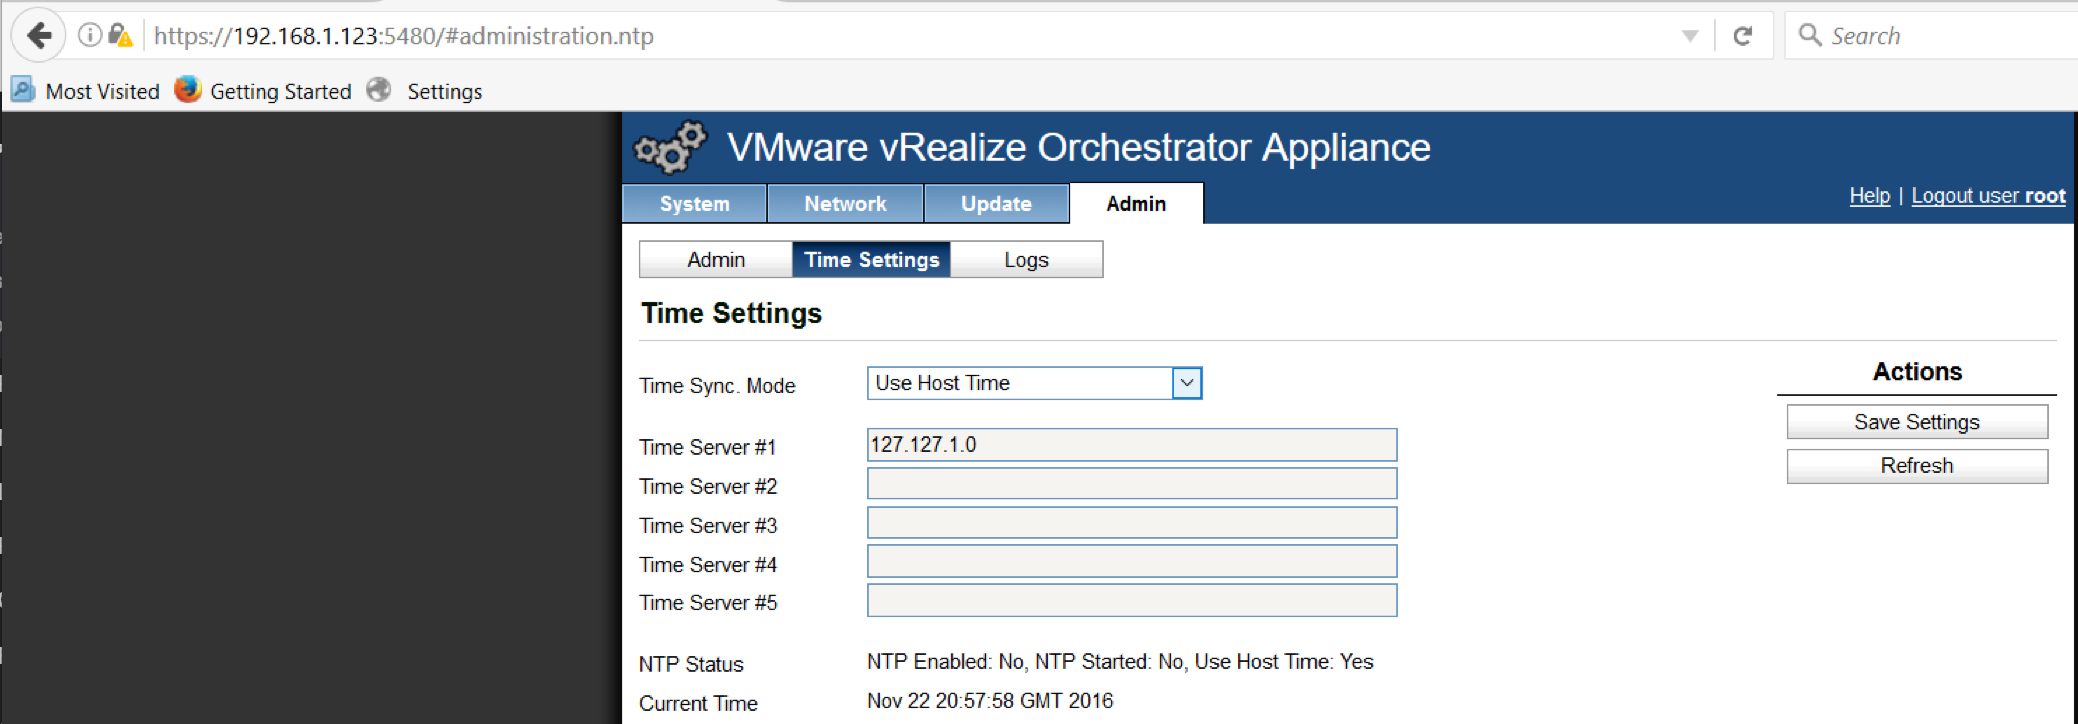
  • Click the Admin tab and click Time Settings are correct. I have Use Host Time but you can use Time Server

screen-shot-2016-11-22-at-20-57-49 screen-shot-2016-11-22-at-20-58-59
  • Click Save Settings

NEXT

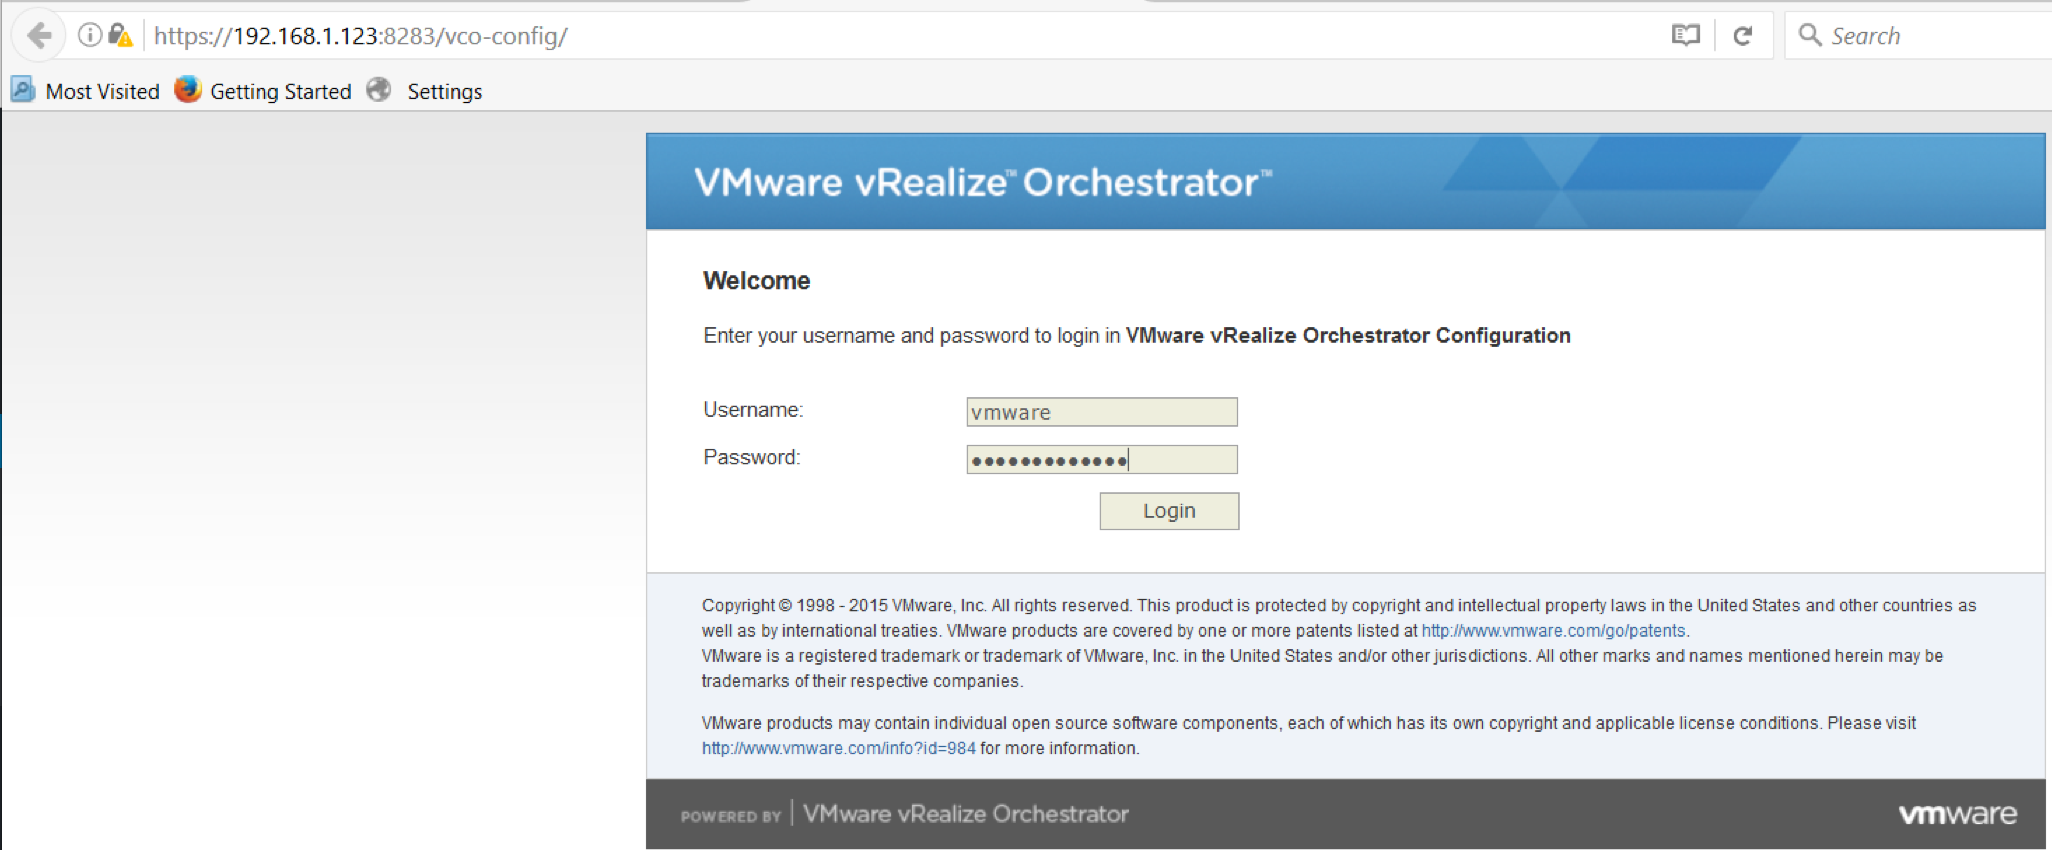
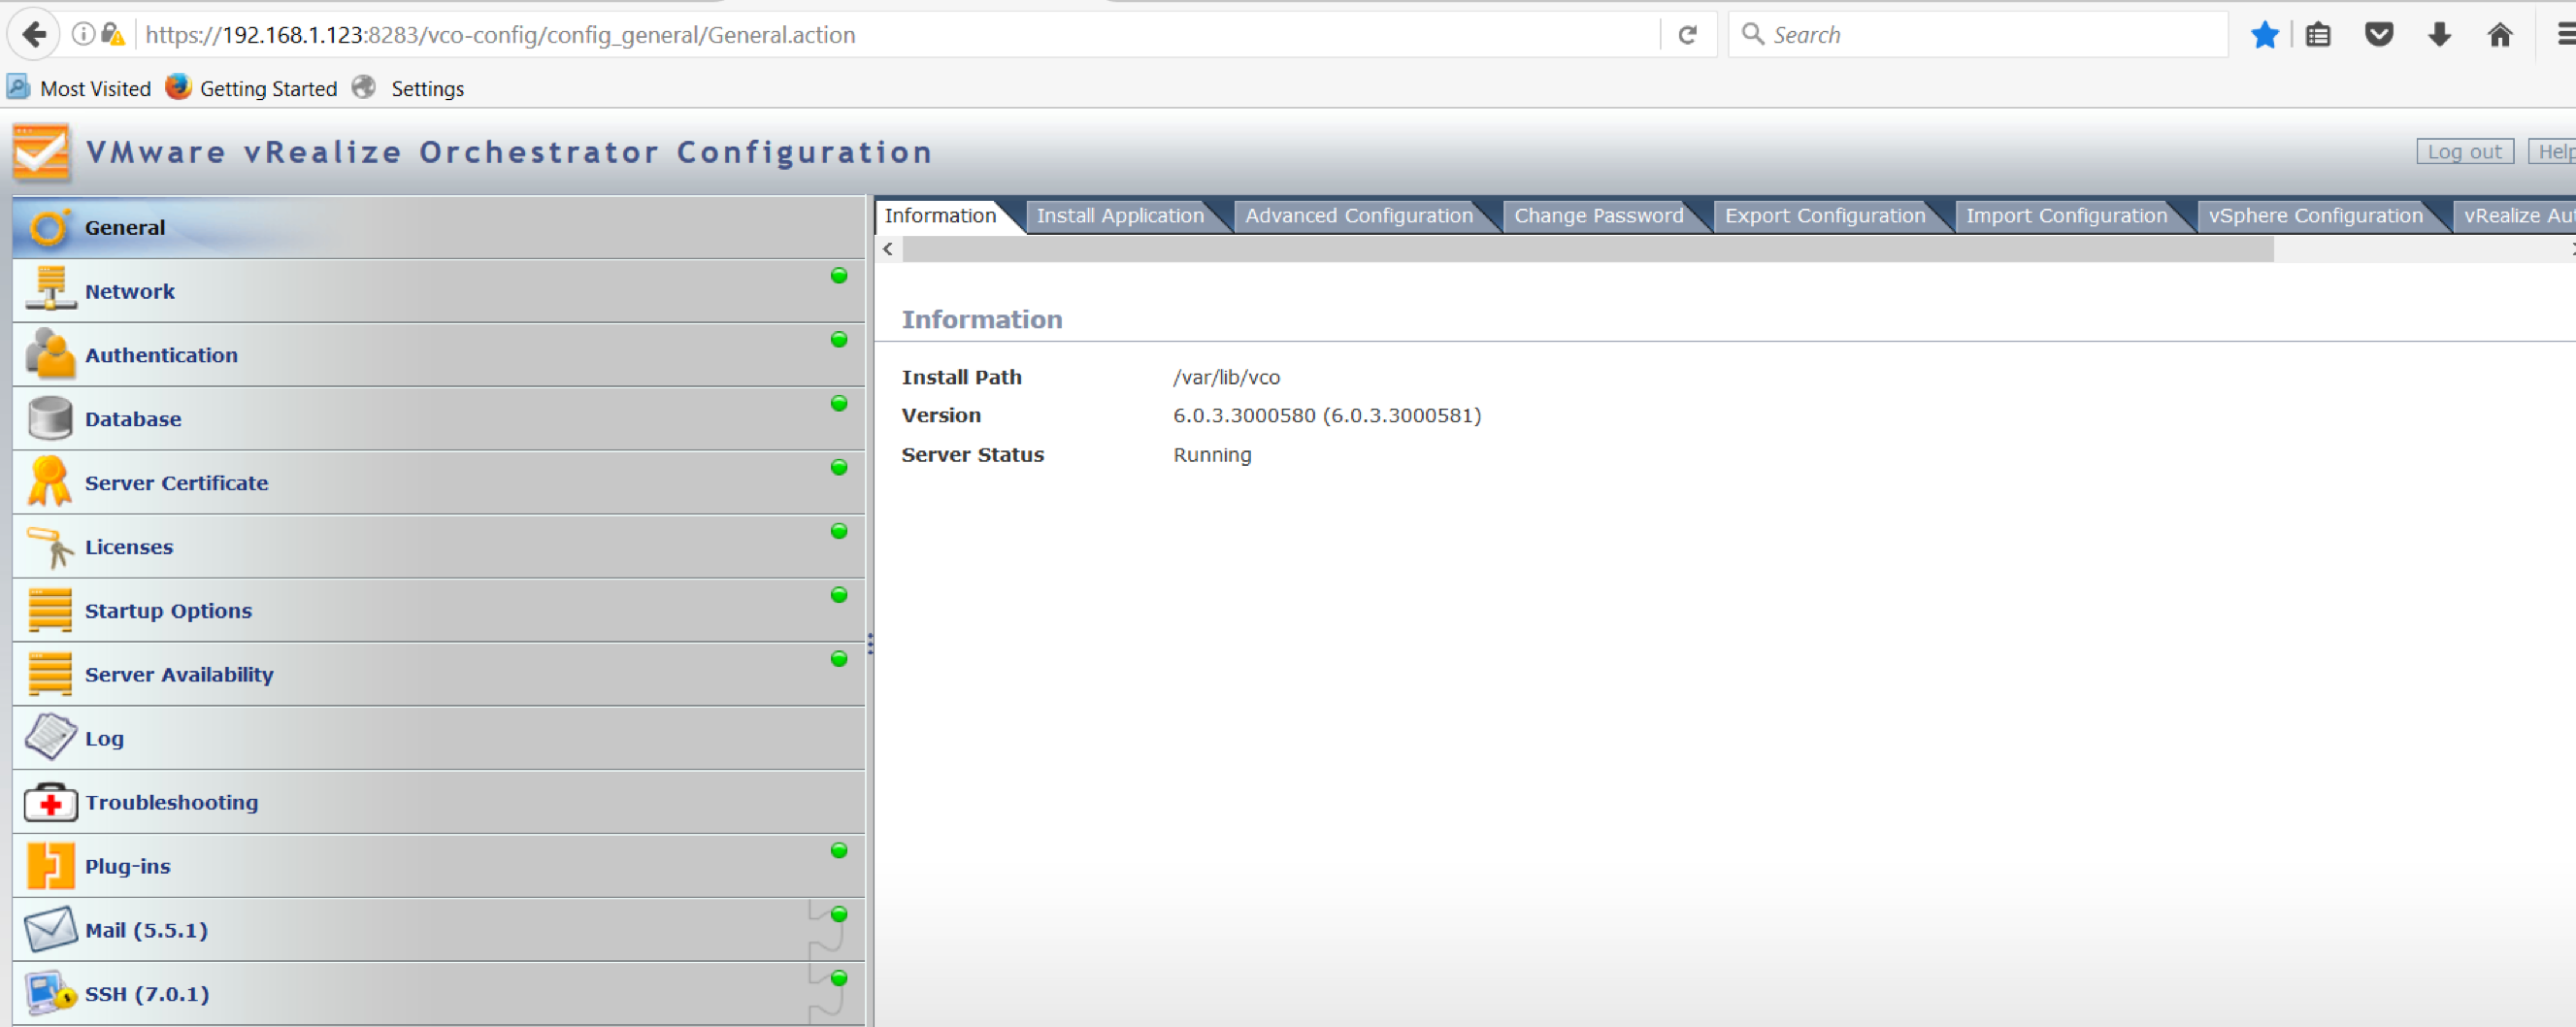
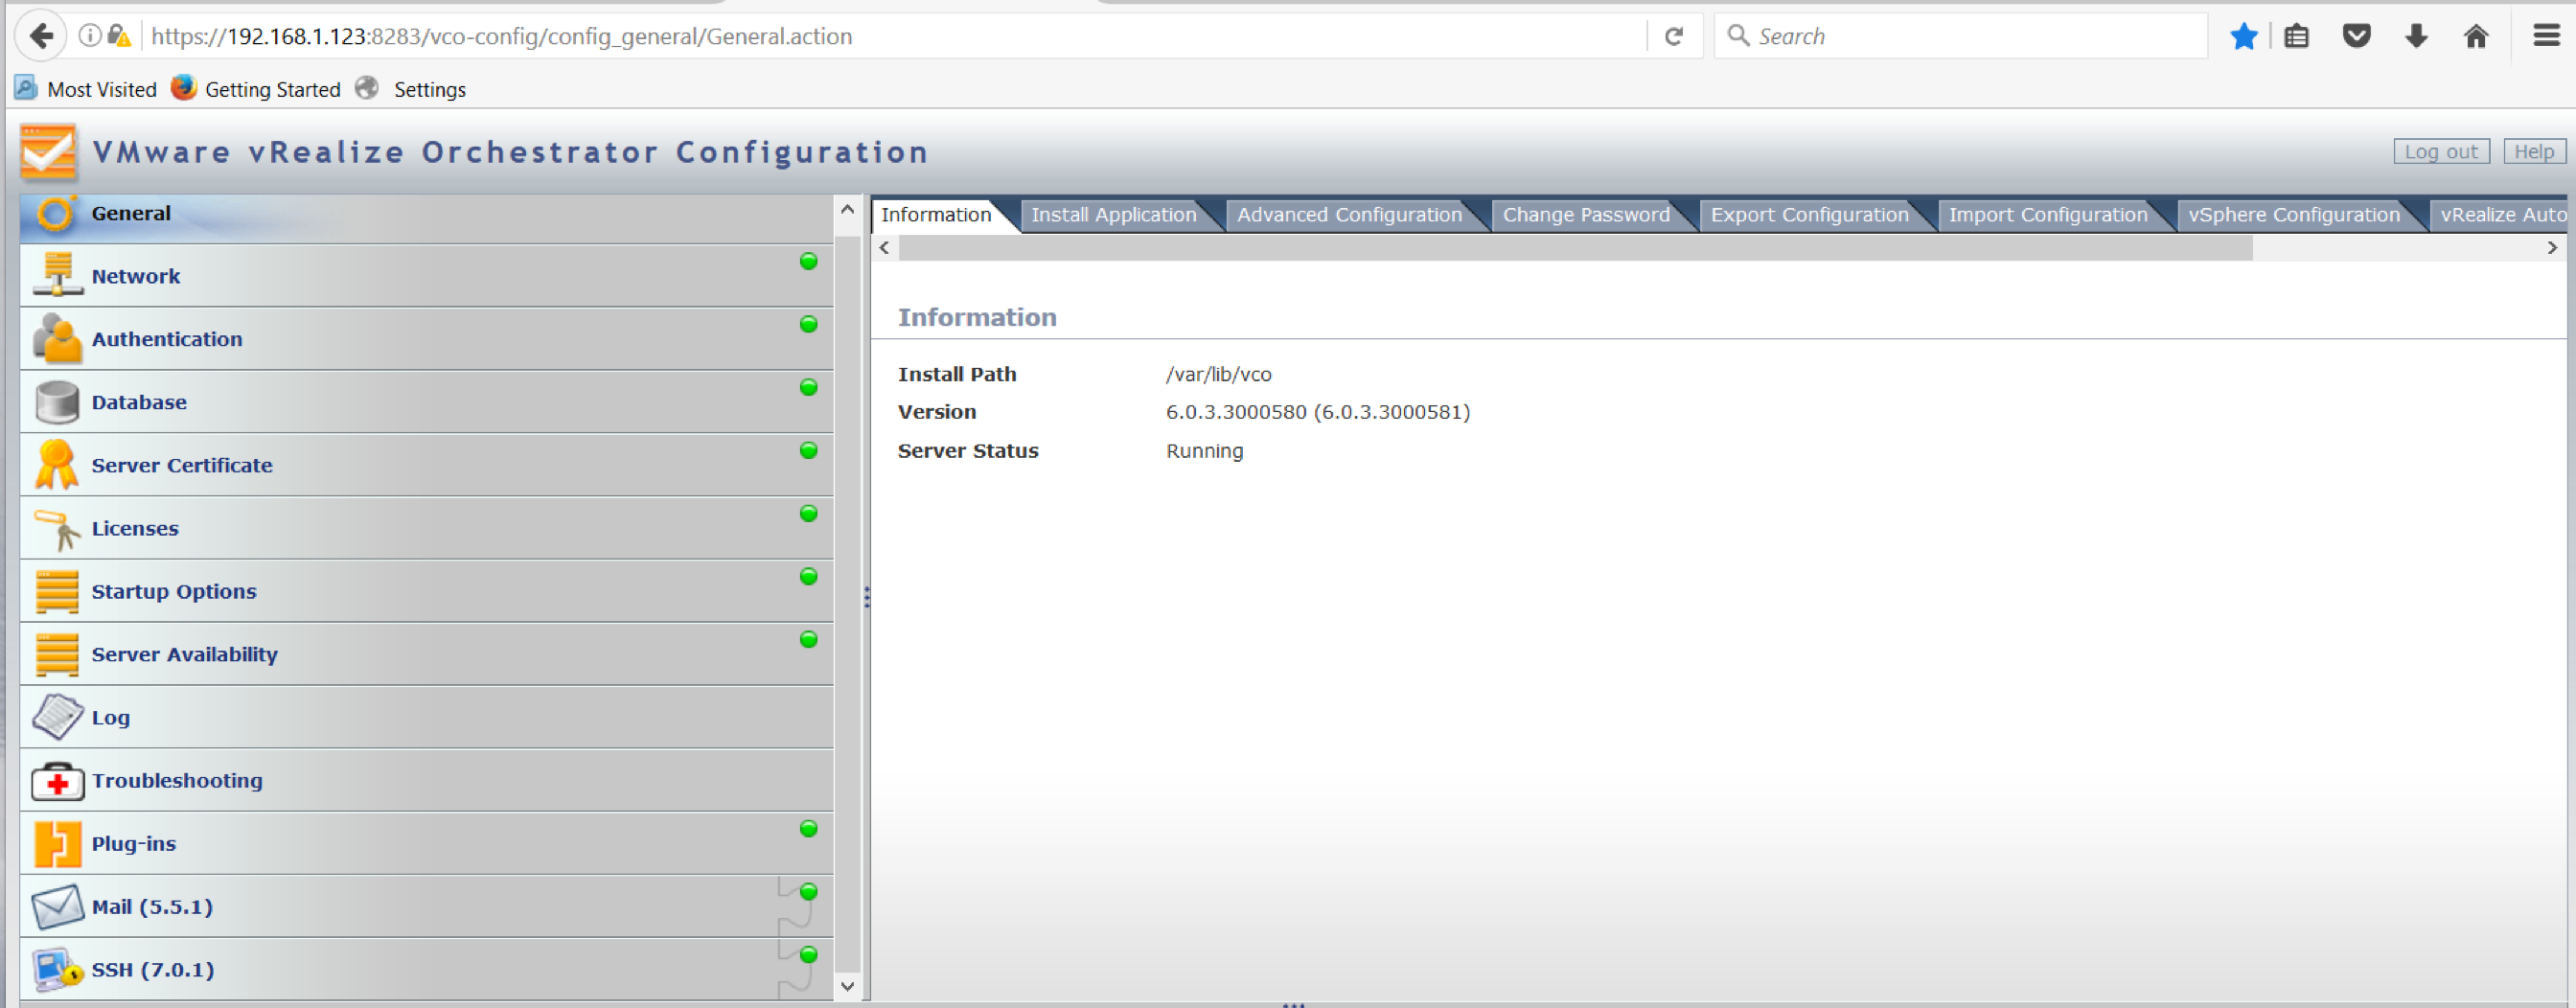
  • Log into a web browser using the Orchestrator web address. In my case https://192.168.1.123:8283
  • Use the vmware username and the password you set up in the OVF deployment

screen-shot-2016-11-22-at-21-01-17

  • You will reach the below screen

screen-shot-2016-11-22-at-21-02-27

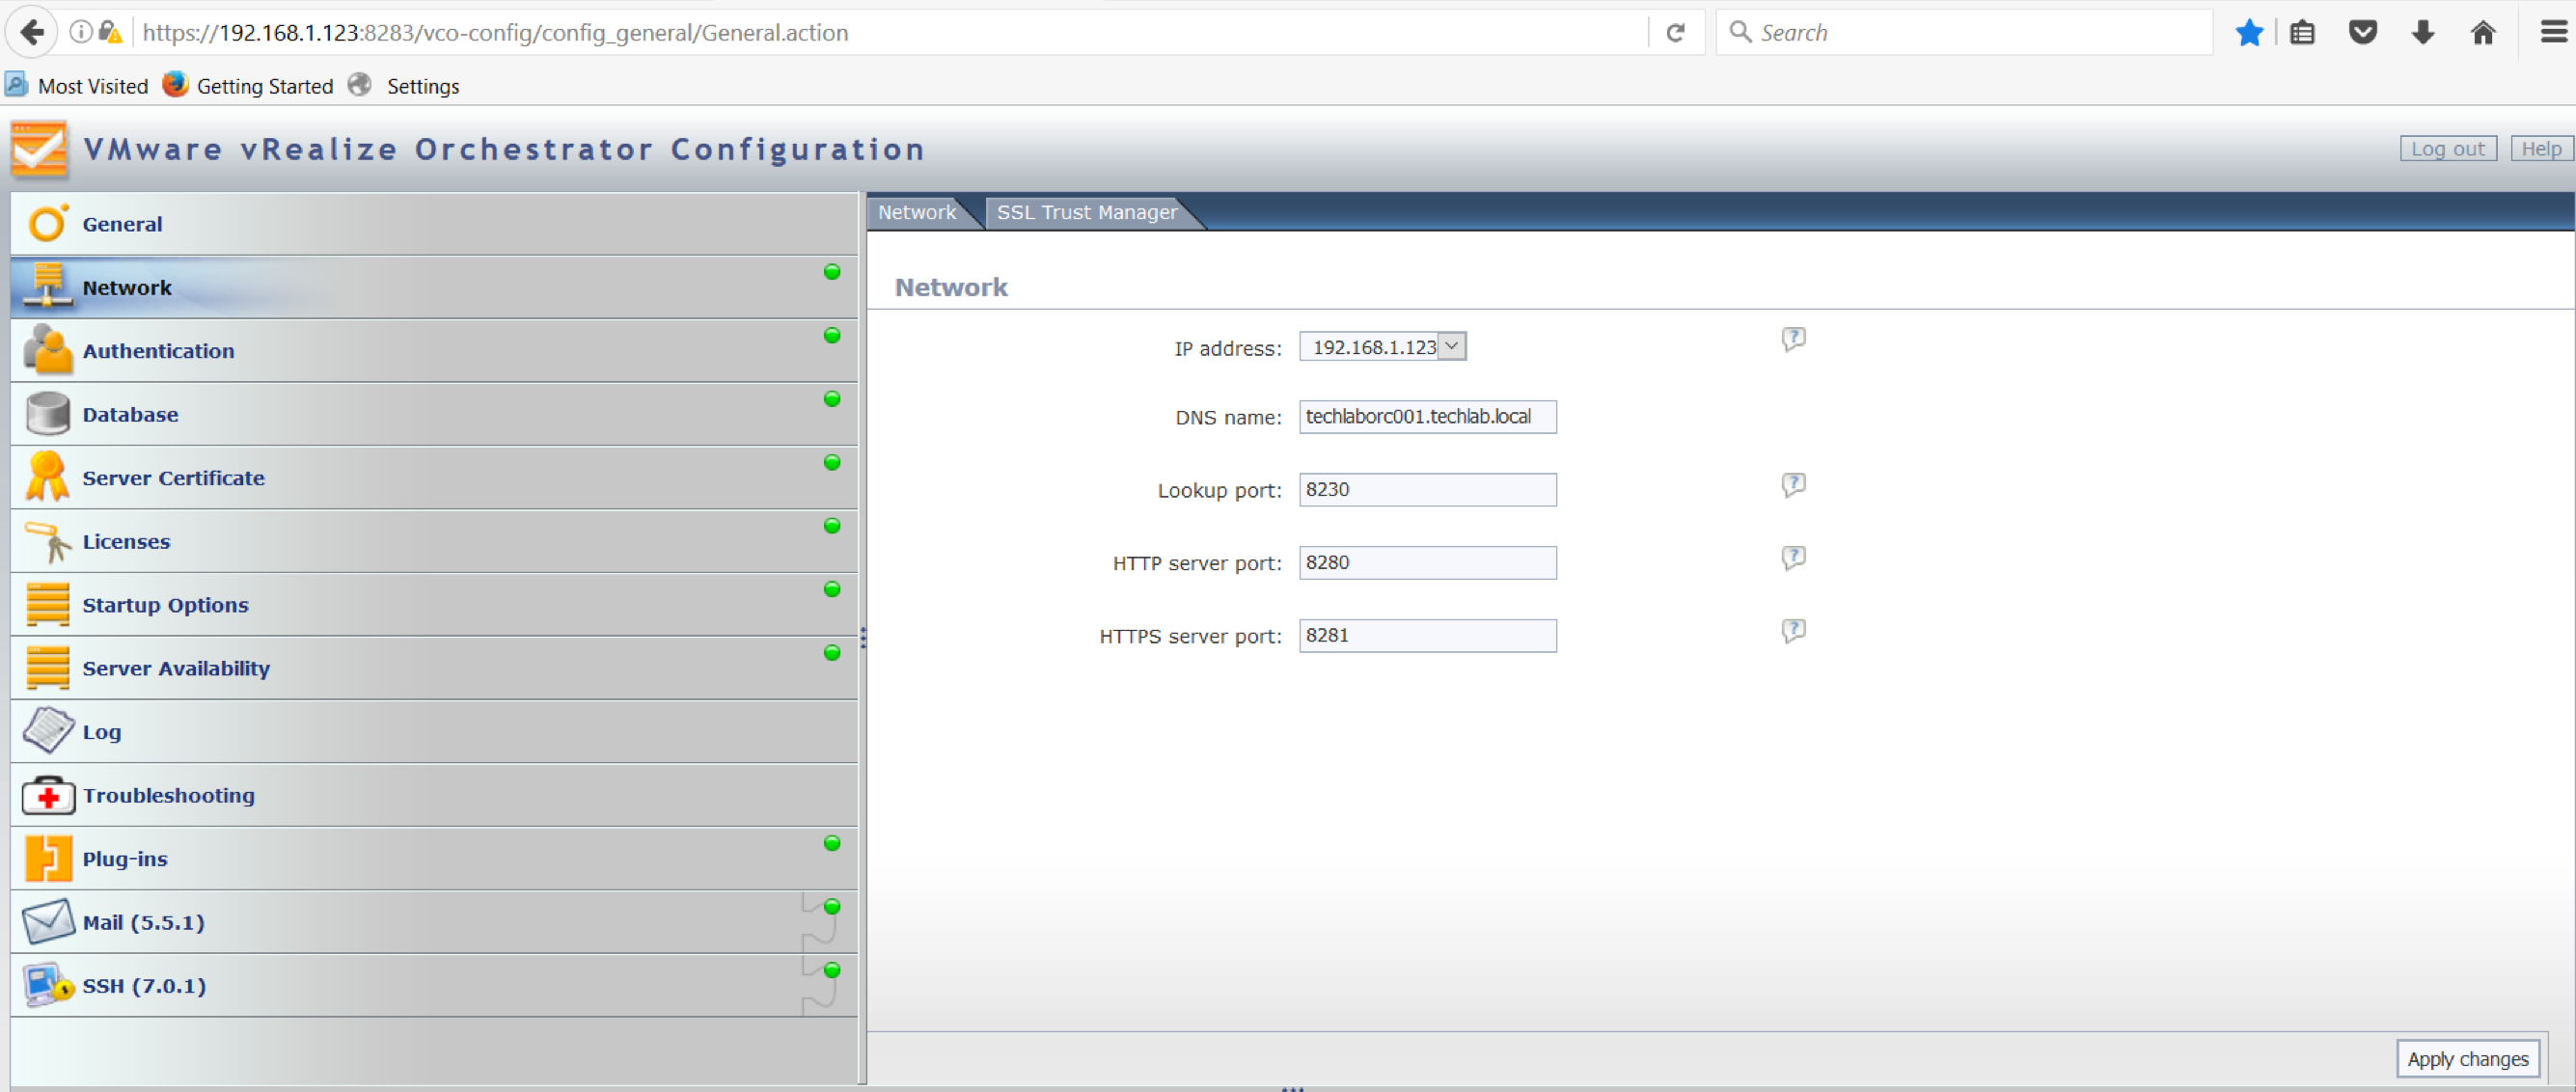
  • Click on the Network tab on the left hand side and select your IP Address and check all other details are correct. Click Apply Changes at the bottom right of the screen

screen-shot-2016-11-22-at-21-03-40

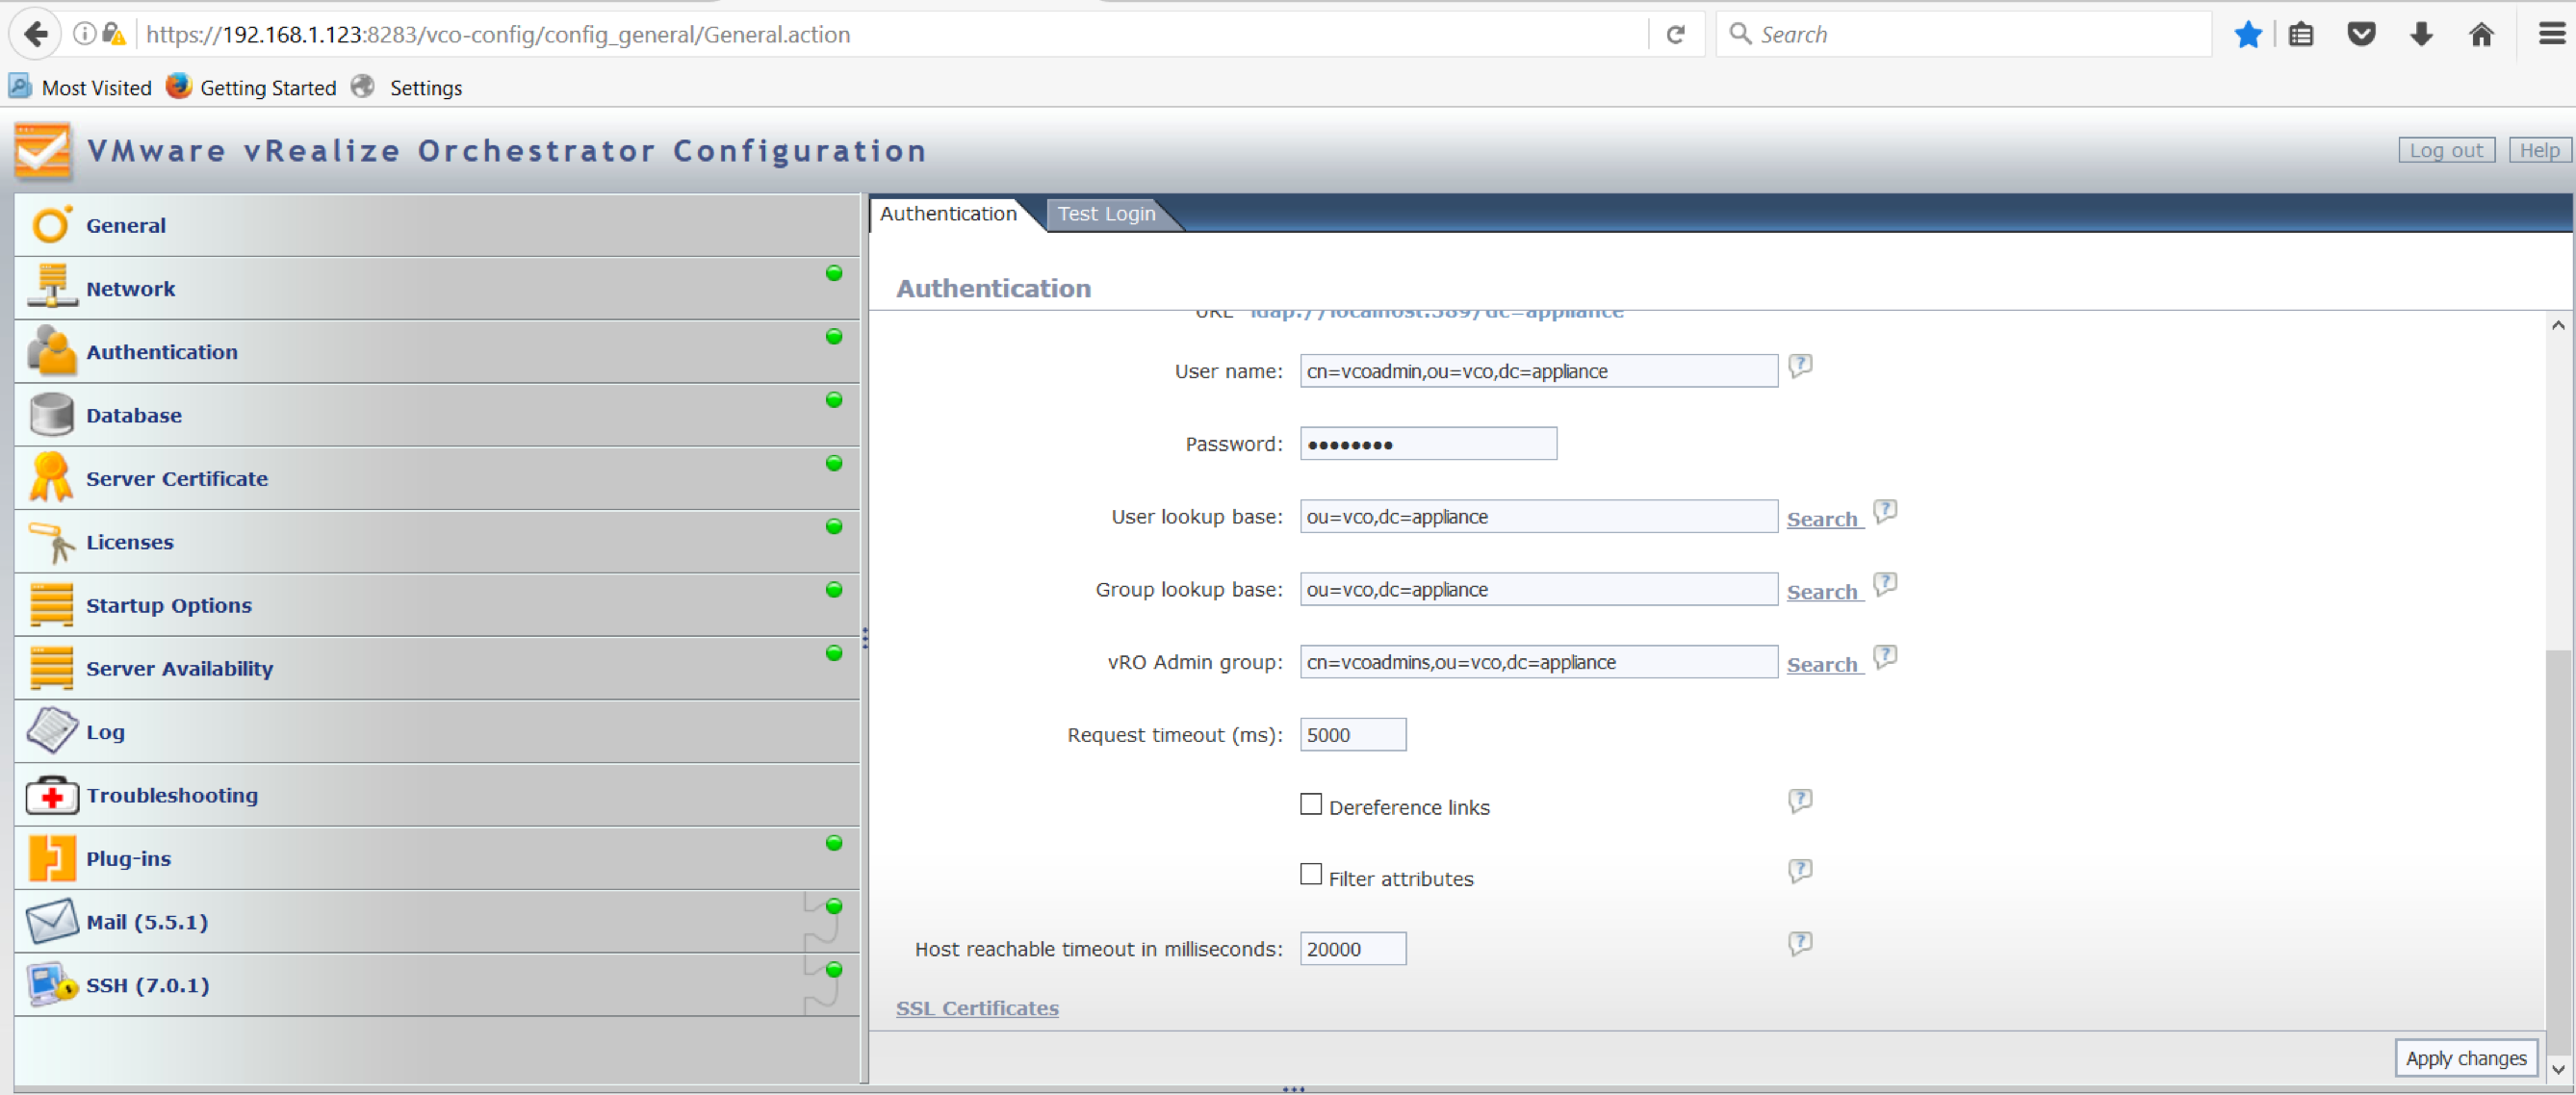
  • Click on Authentication and scroll down the screen until you see a link for SSL Certificates. Click on this link

screen-shot-2016-11-22-at-21-05-05

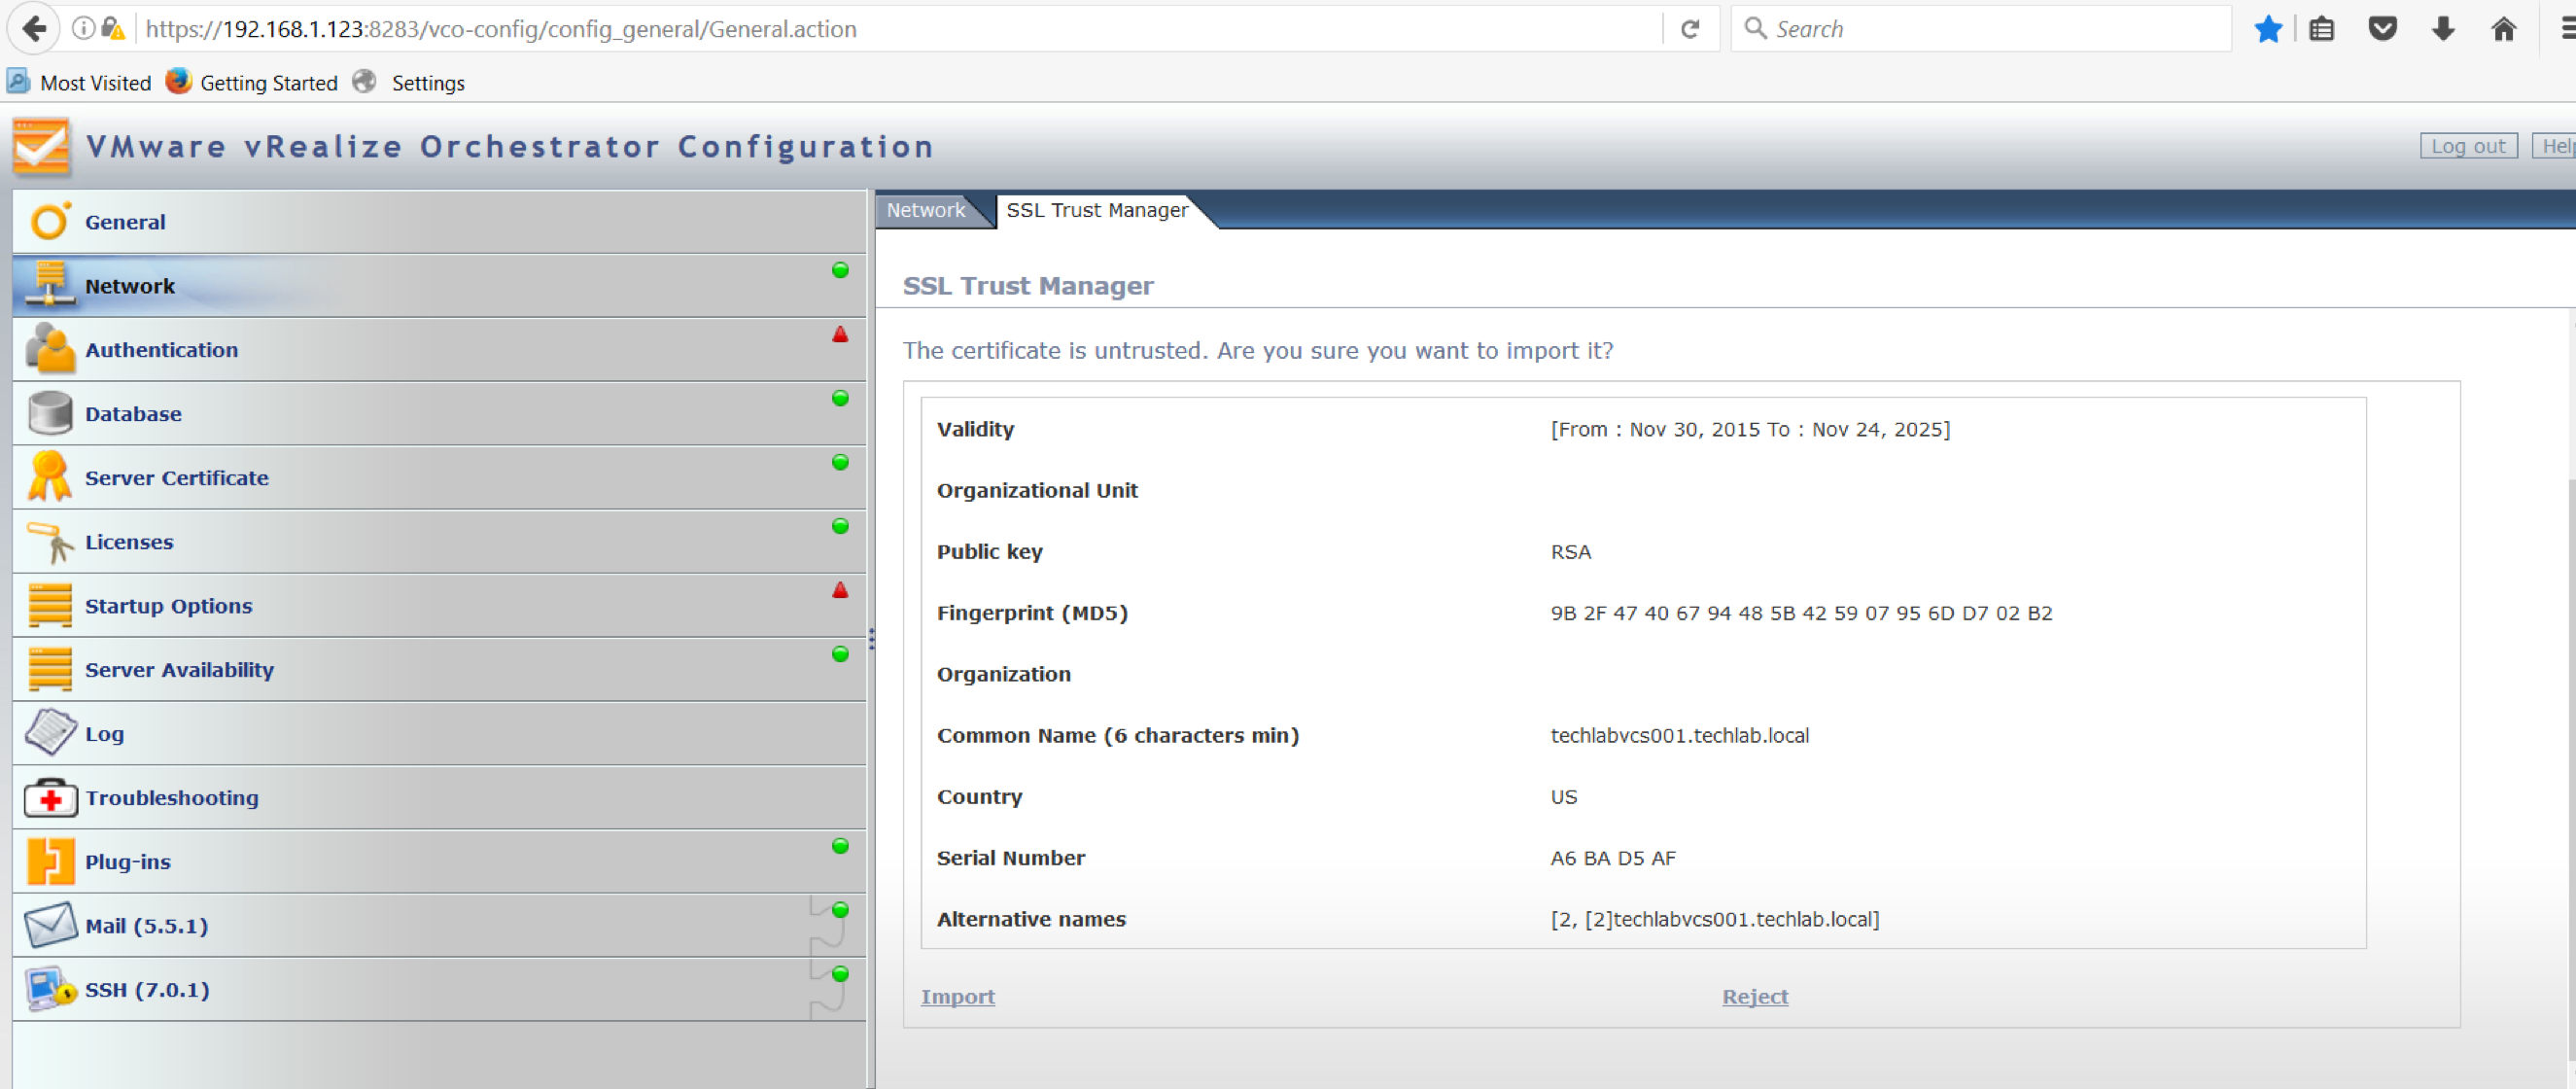
  • Put in your vCenter server in the following format – techlabvcs001.techlab.local:7444 and click Import

screen-shot-2016-11-22-at-21-08-01 screen-shot-2016-11-22-at-21-21-36

  • Put in your Single Sign On/PSC server in the following format – techlapsc001.techlab.local:7444 and click Import

screen-shot-2016-11-22-at-21-12-04 screen-shot-2016-11-22-at-21-14-28

  • Go back to the Authentication tab
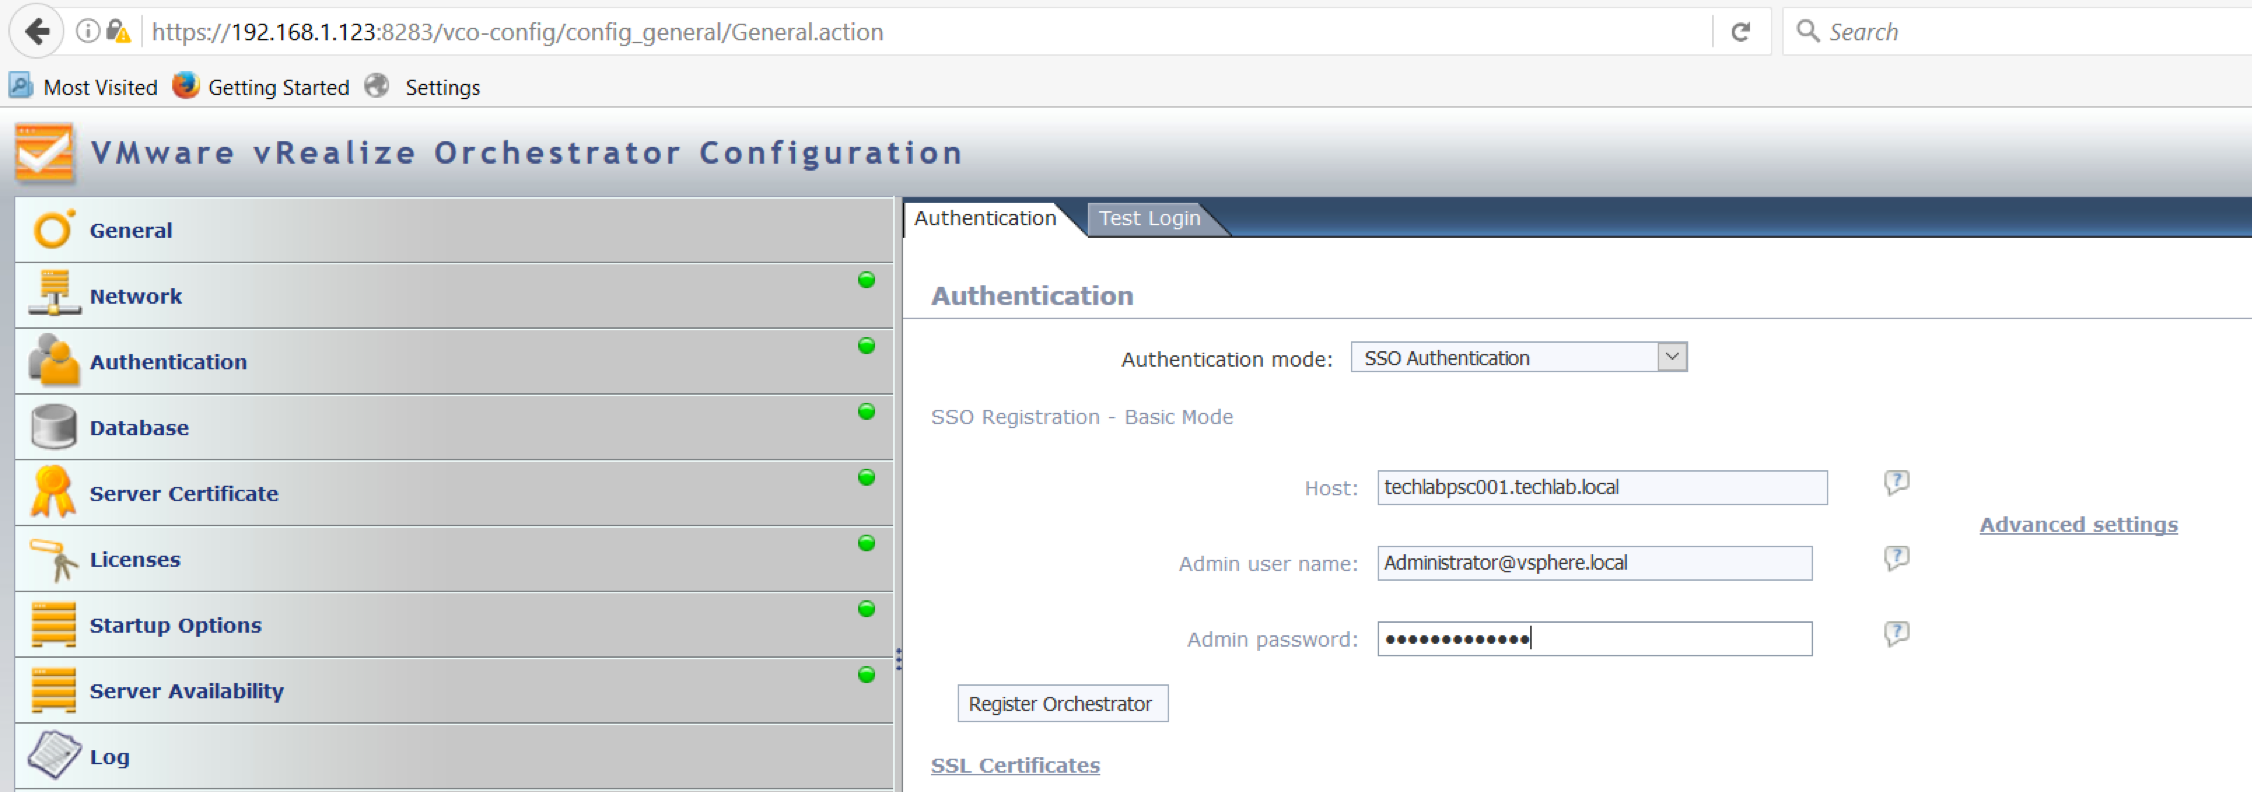
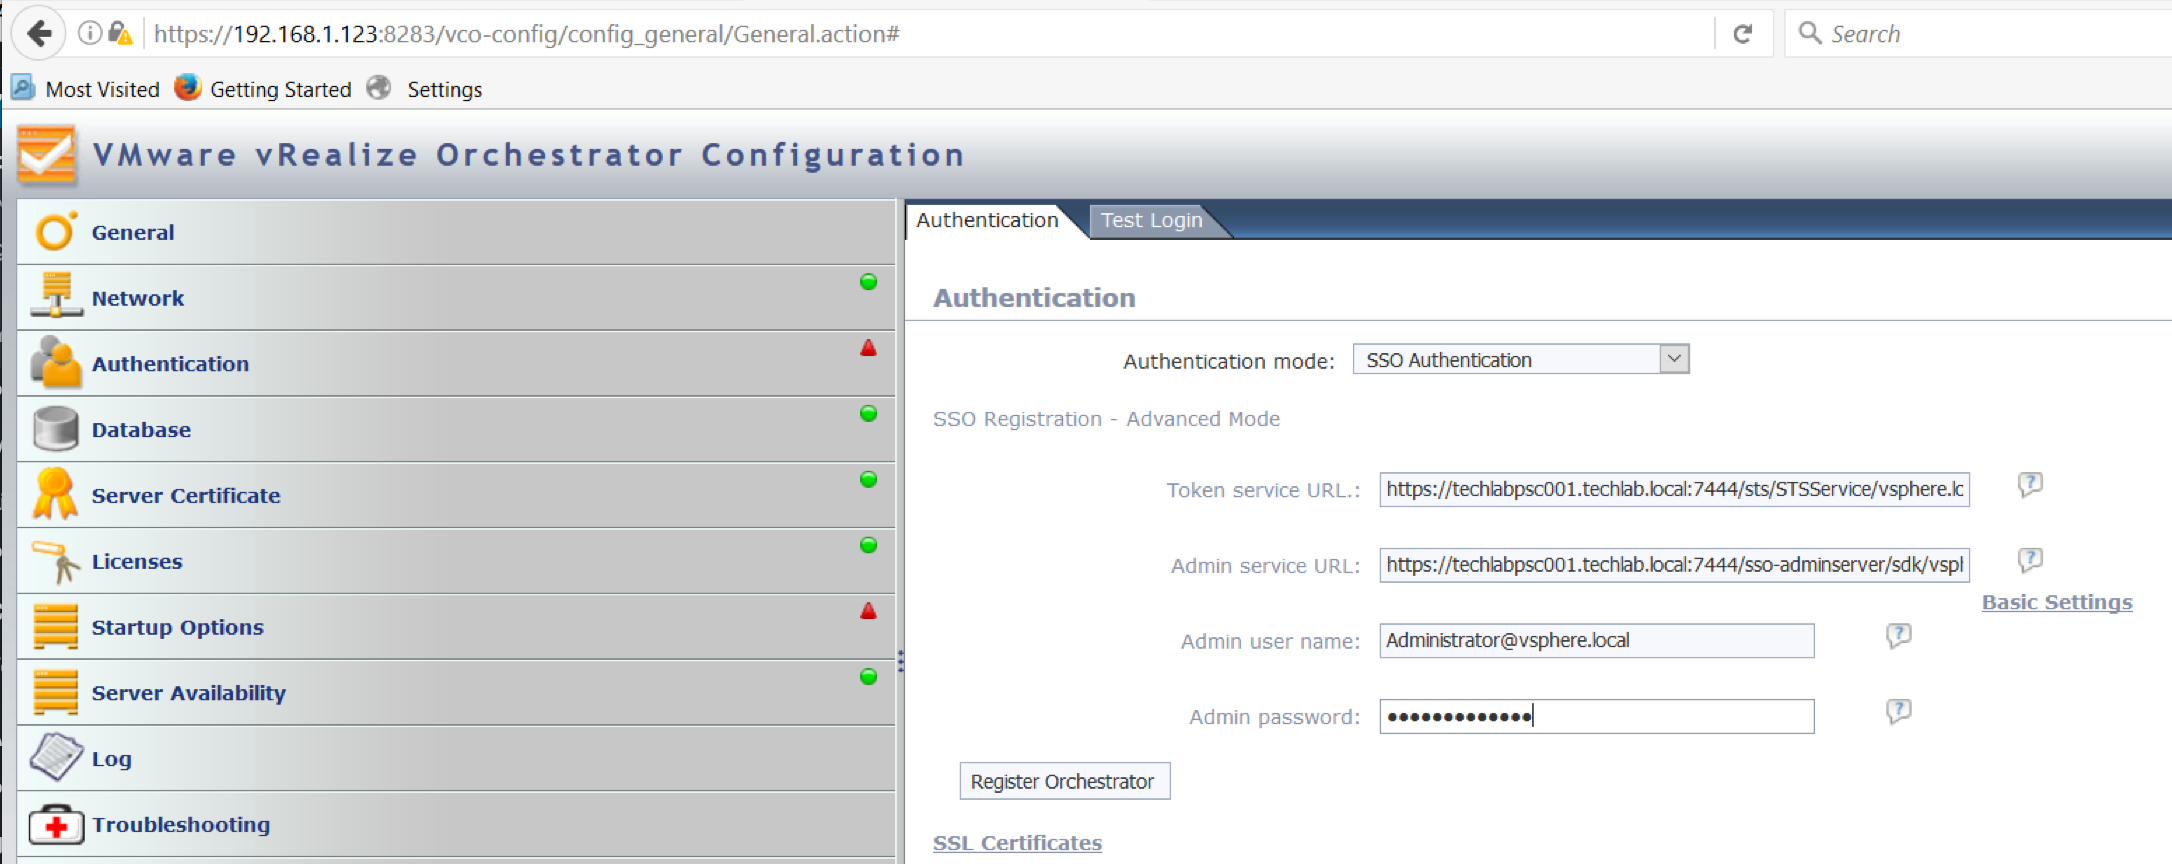
  • Put in your Single Sign On server and click Advanced
  • put in your Admin username and password
  • Click Register Orchestrator

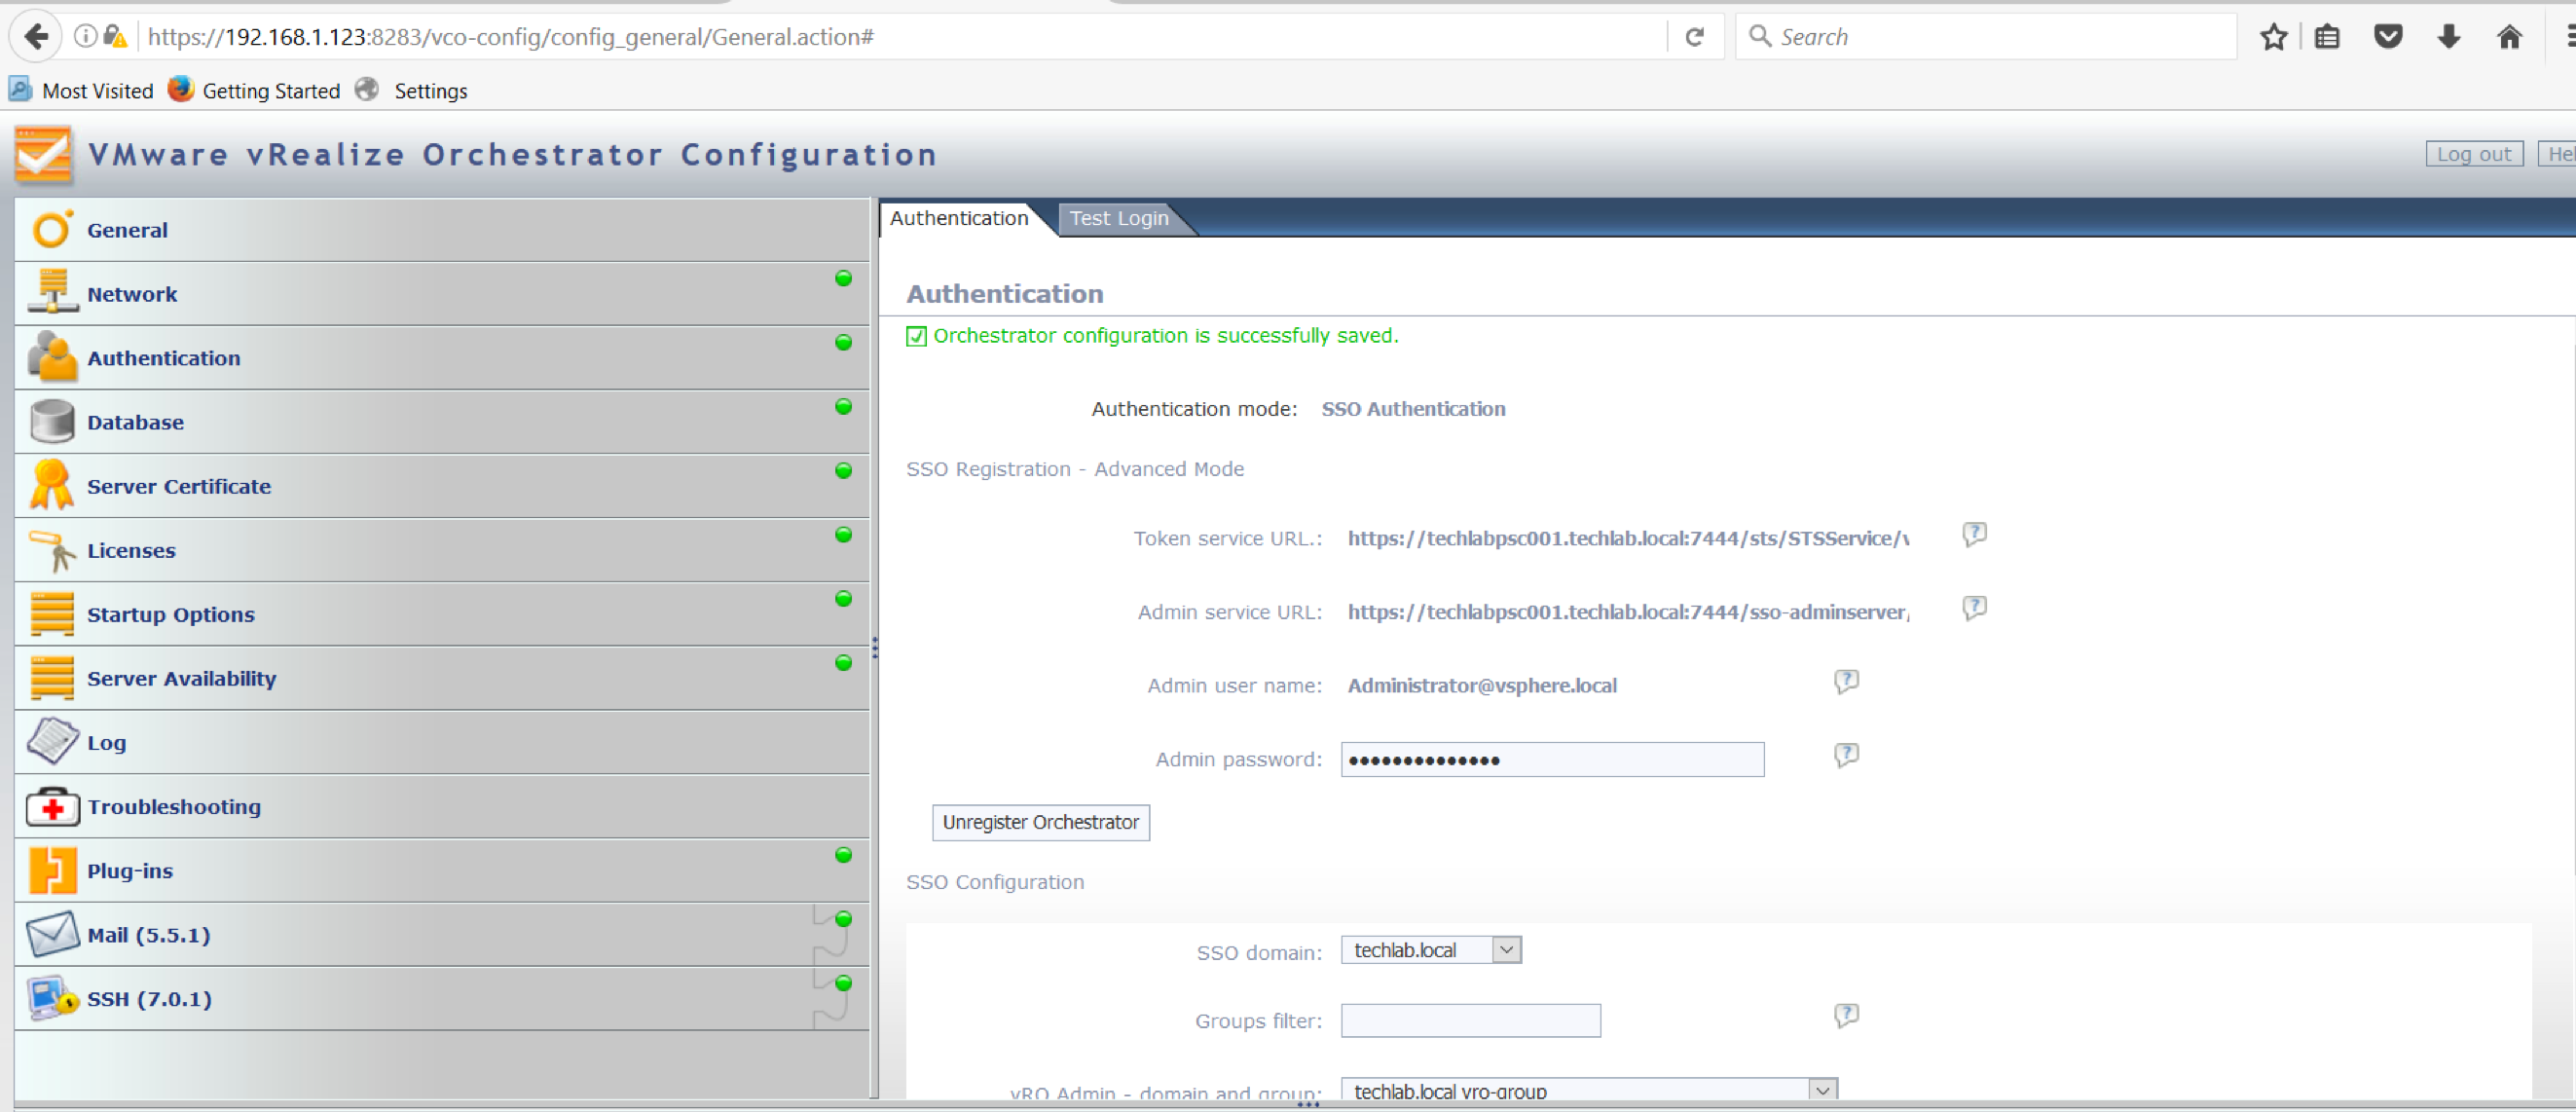
screen-shot-2016-11-22-at-21-23-15

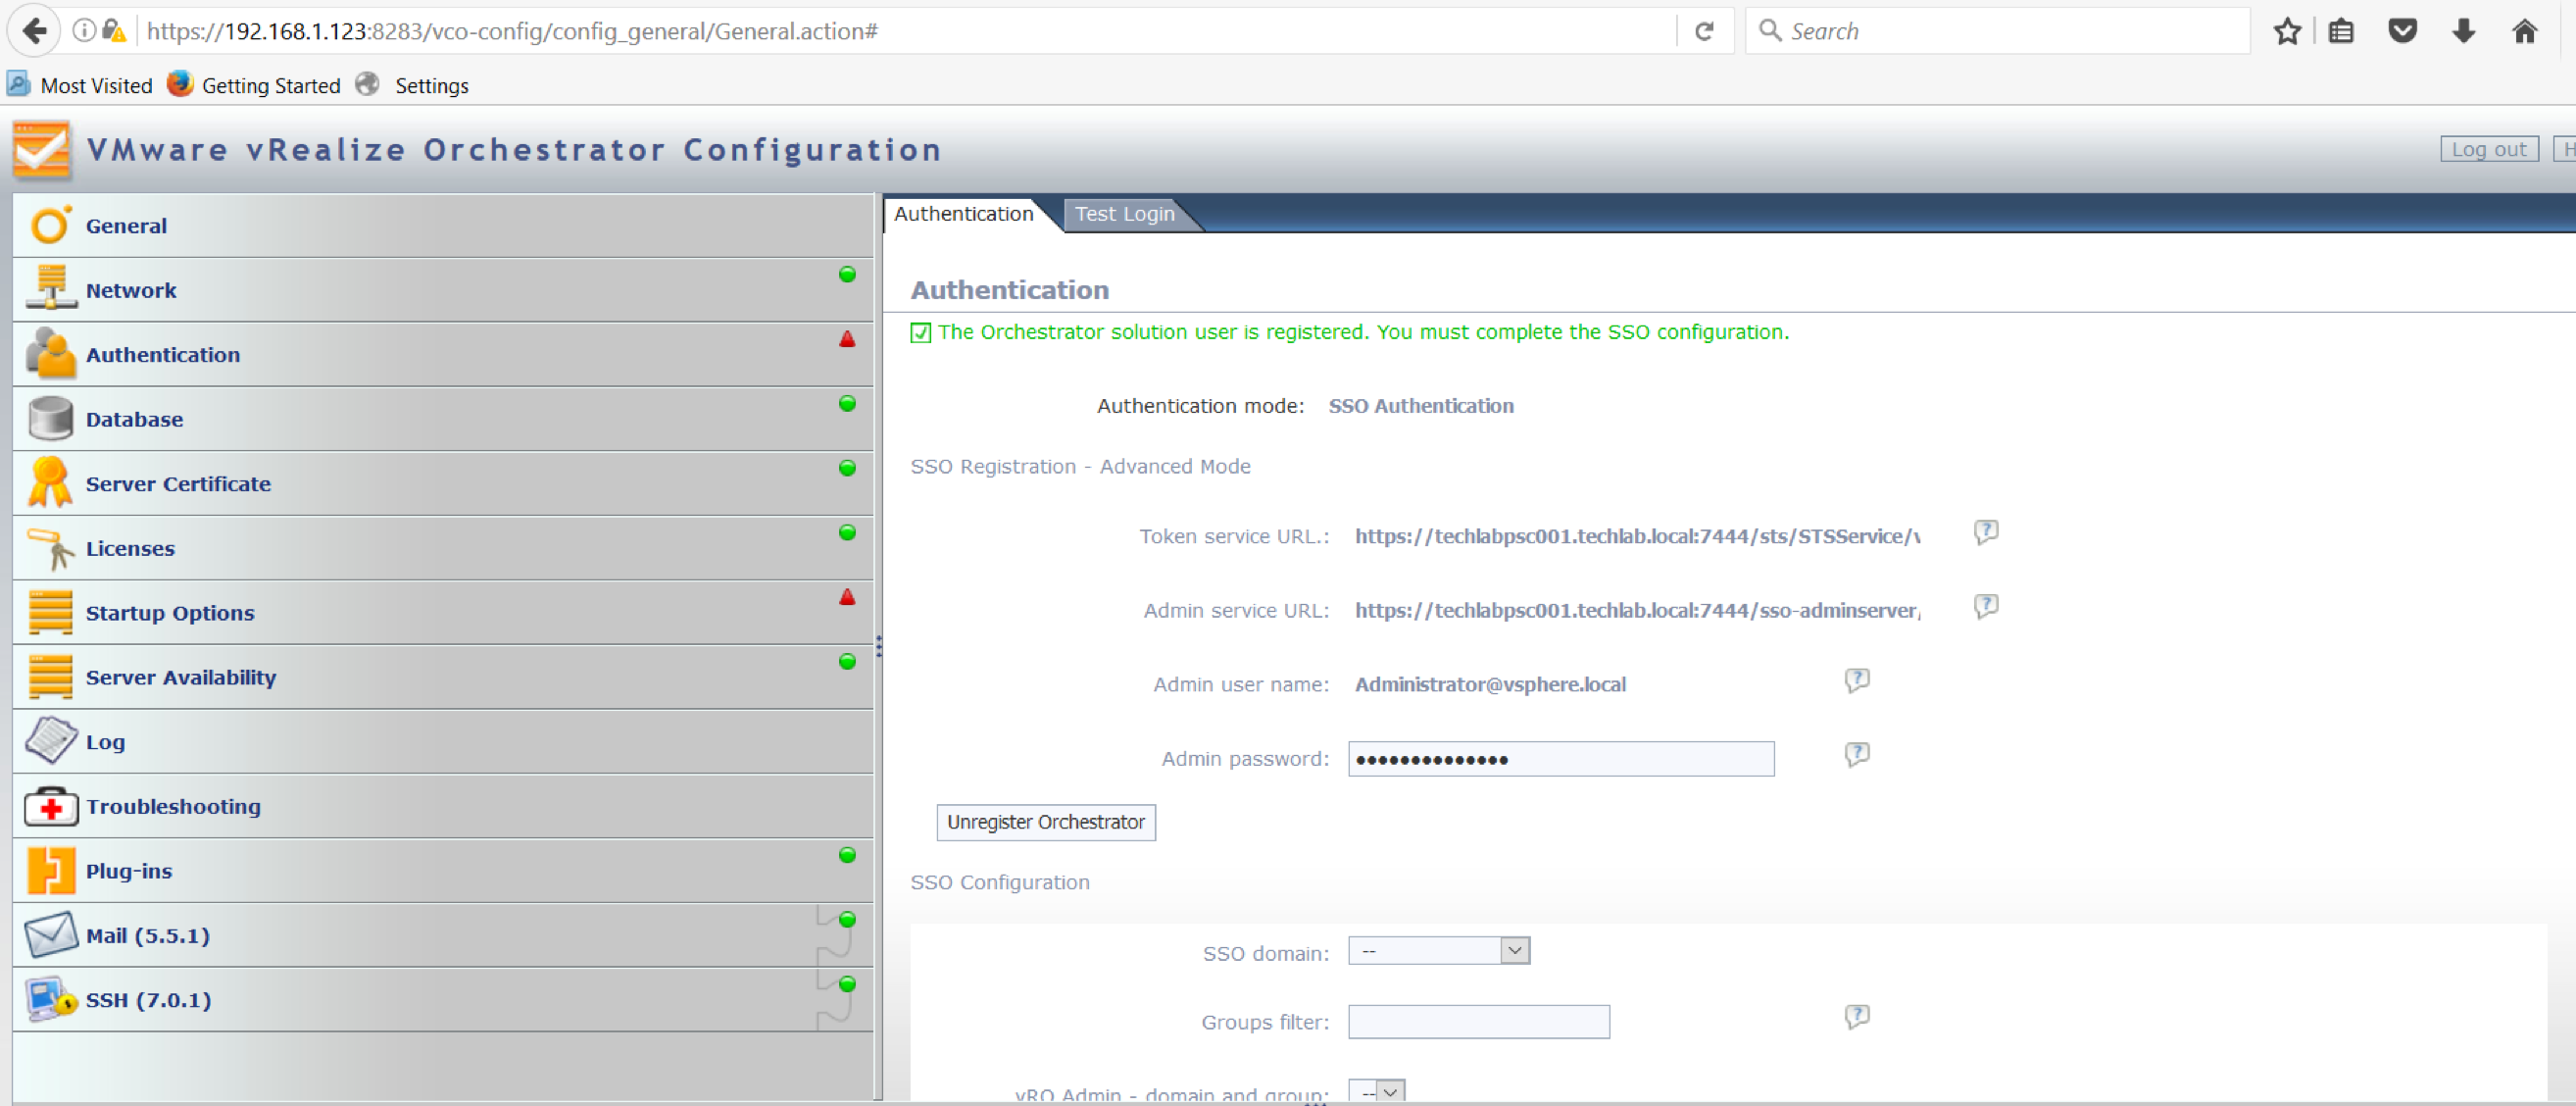
  • It should look like the below with further configuration to do

screen-shot-2016-11-22-at-21-24-52

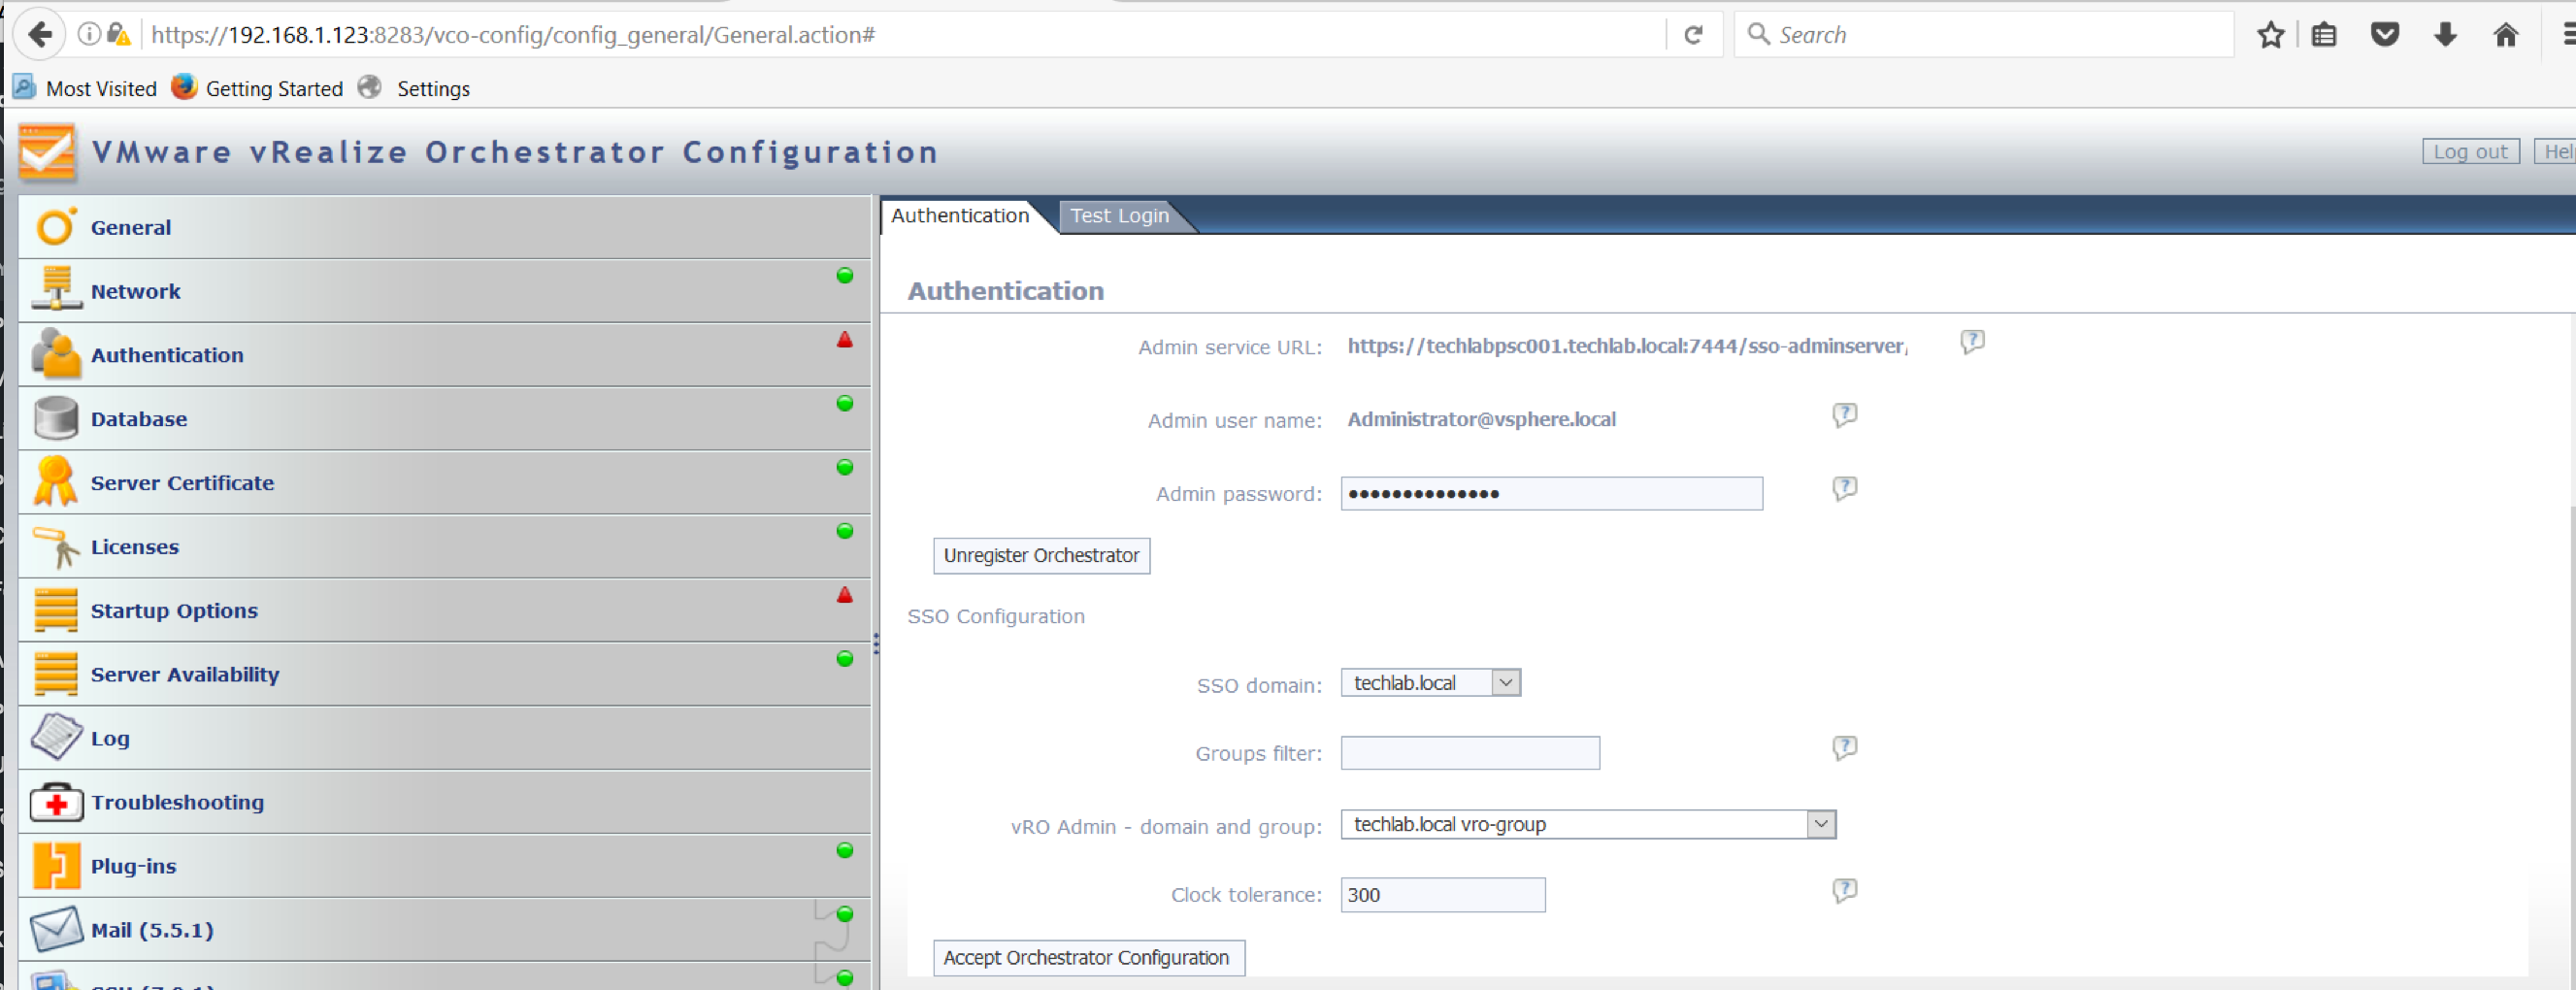
  • Choose your SSO Domain which can be the local domain, LAN domain or the vsphere.local domain.
  • In my case I chose my main domain techlab.local where I have set up a group called vro-group which contains user accounts I want to use as Admins

screen-shot-2016-11-22-at-21-26-22

  • Click Accept Orchestrator Configuration

screen-shot-2016-11-22-at-21-28-40

  • Click Test login and try one of your users

screen-shot-2016-11-22-at-21-30-20

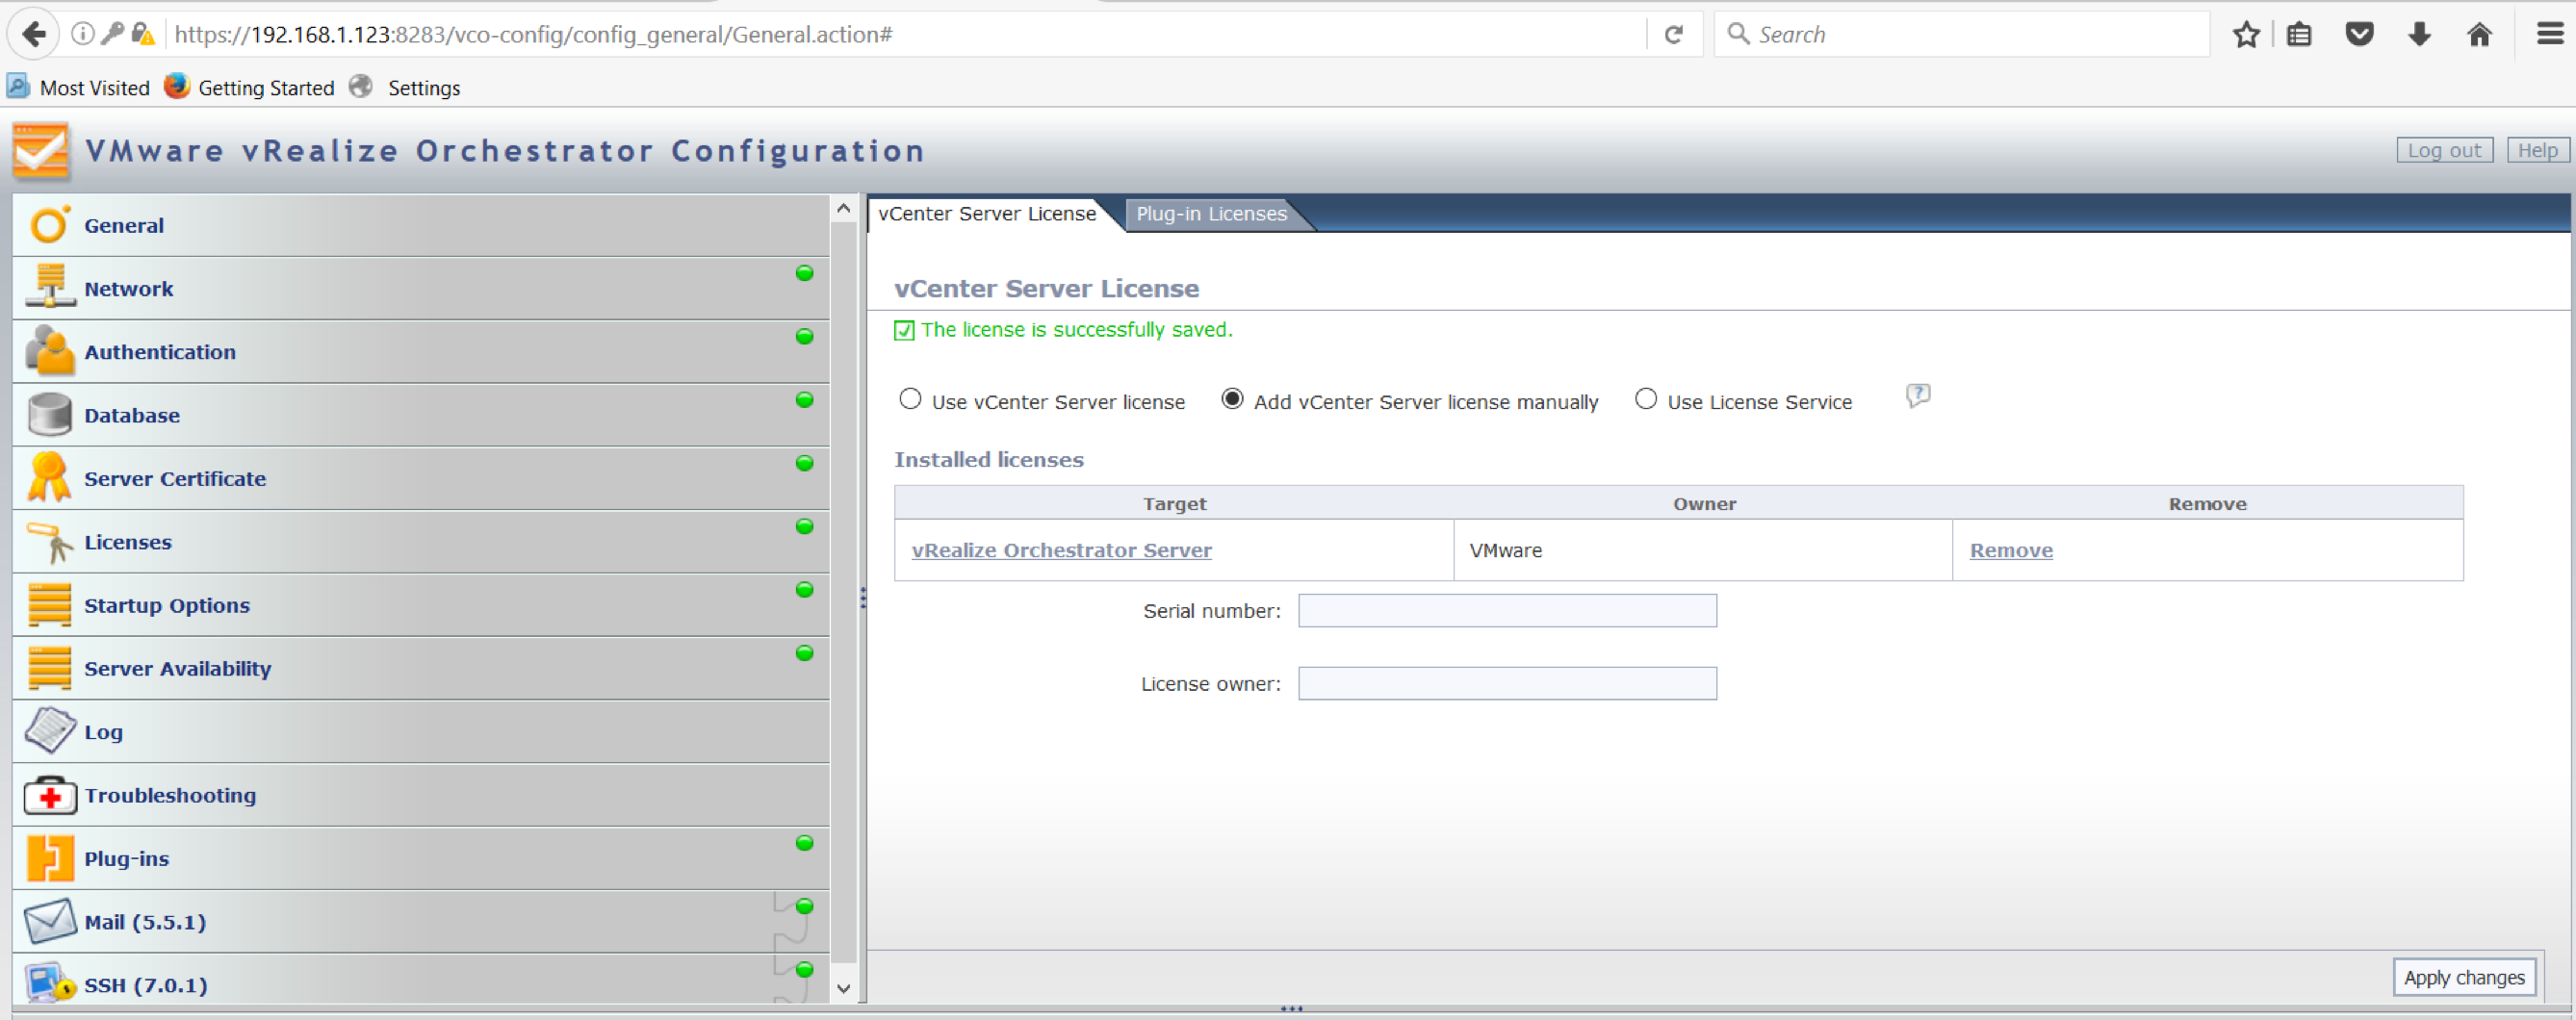
  • Check your license

screen-shot-2016-11-22-at-21-33-50

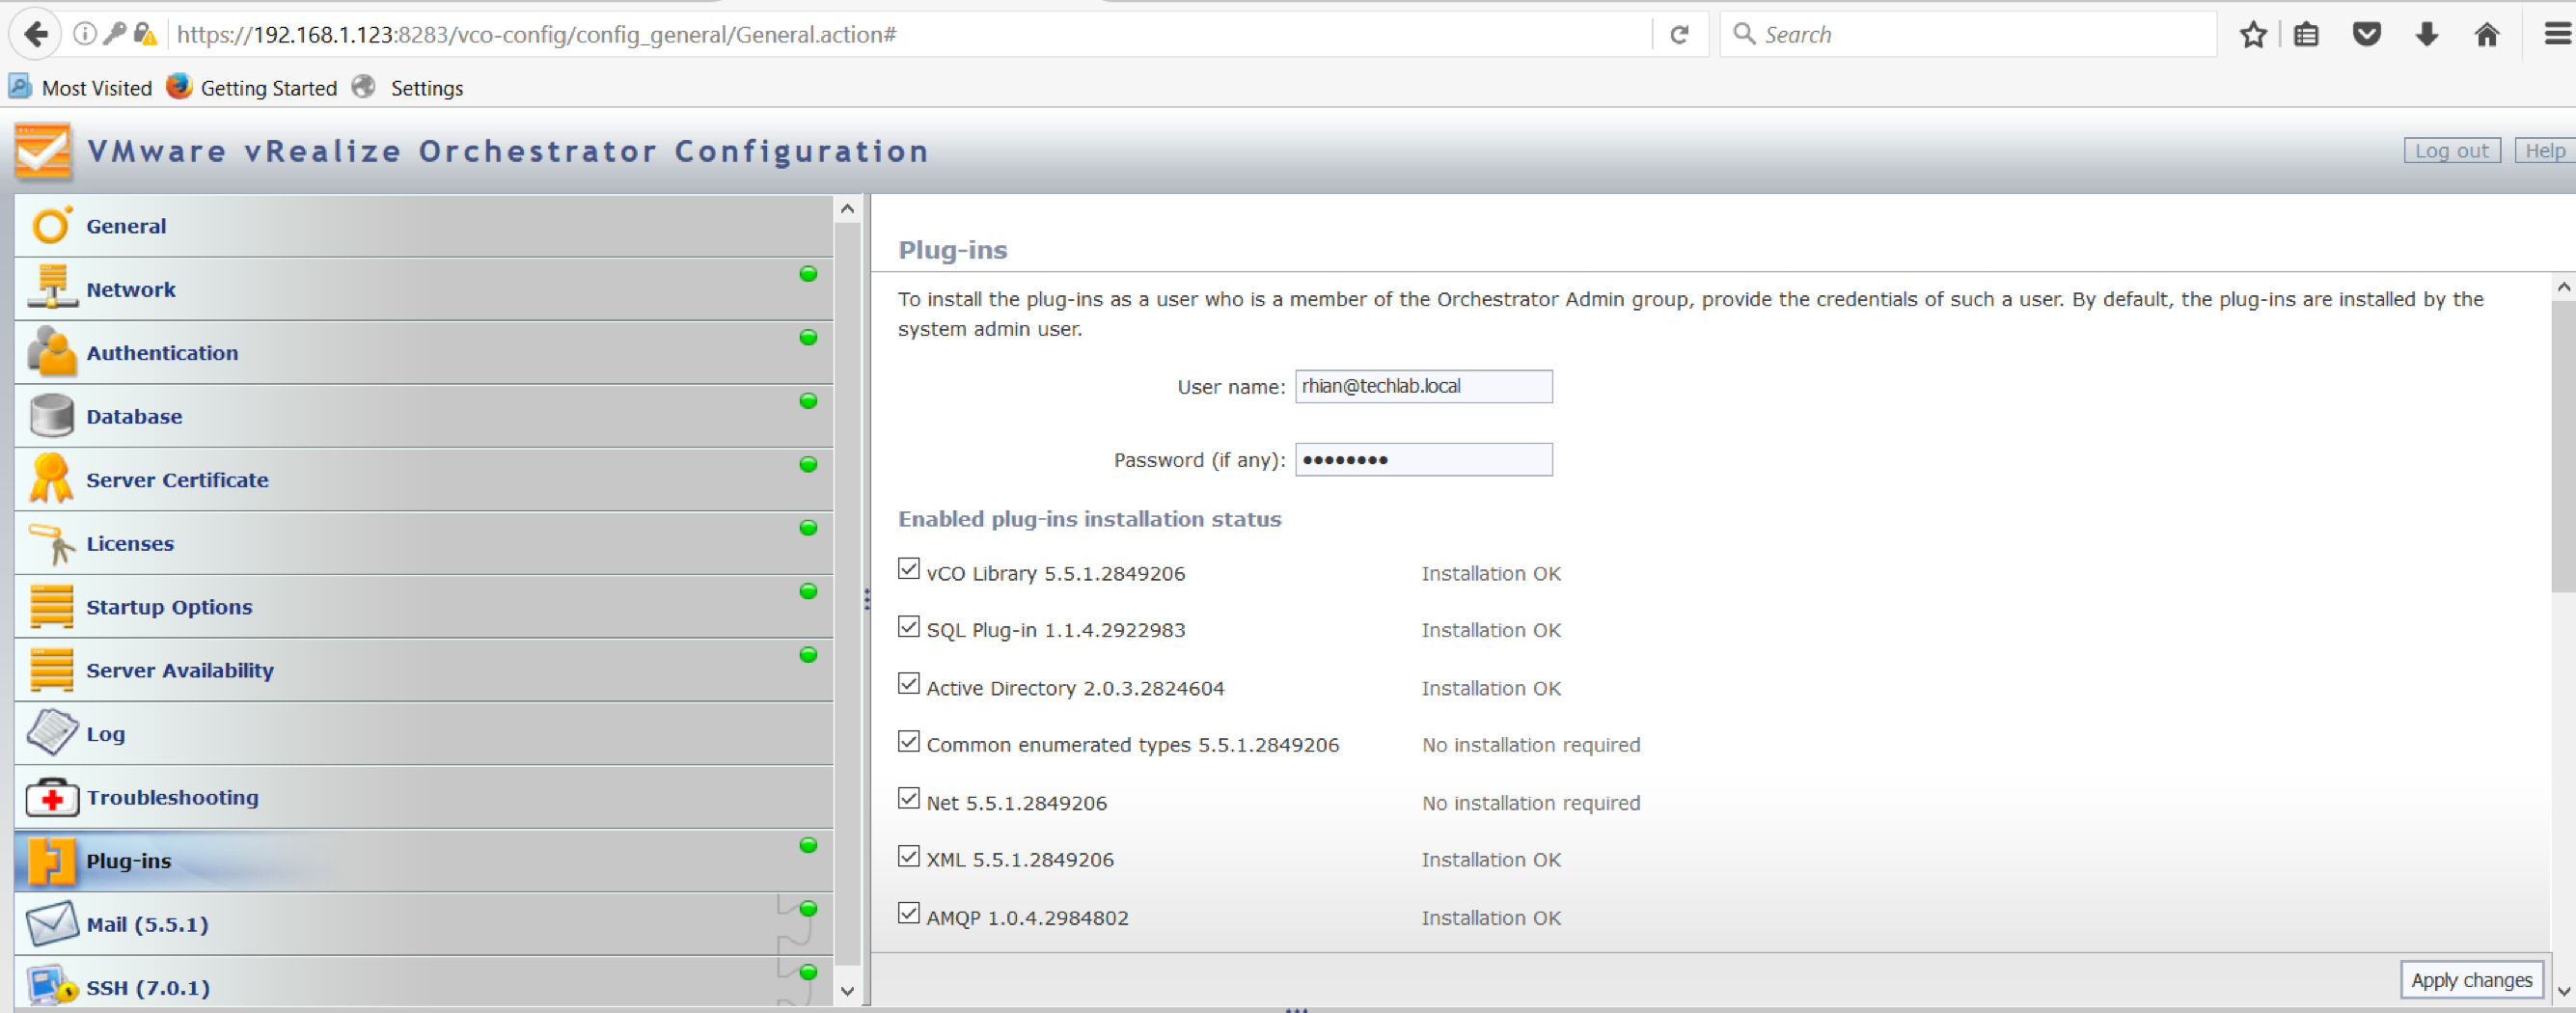
  • Check the Plugins are all ok

screen-shot-2016-11-22-at-21-34-50

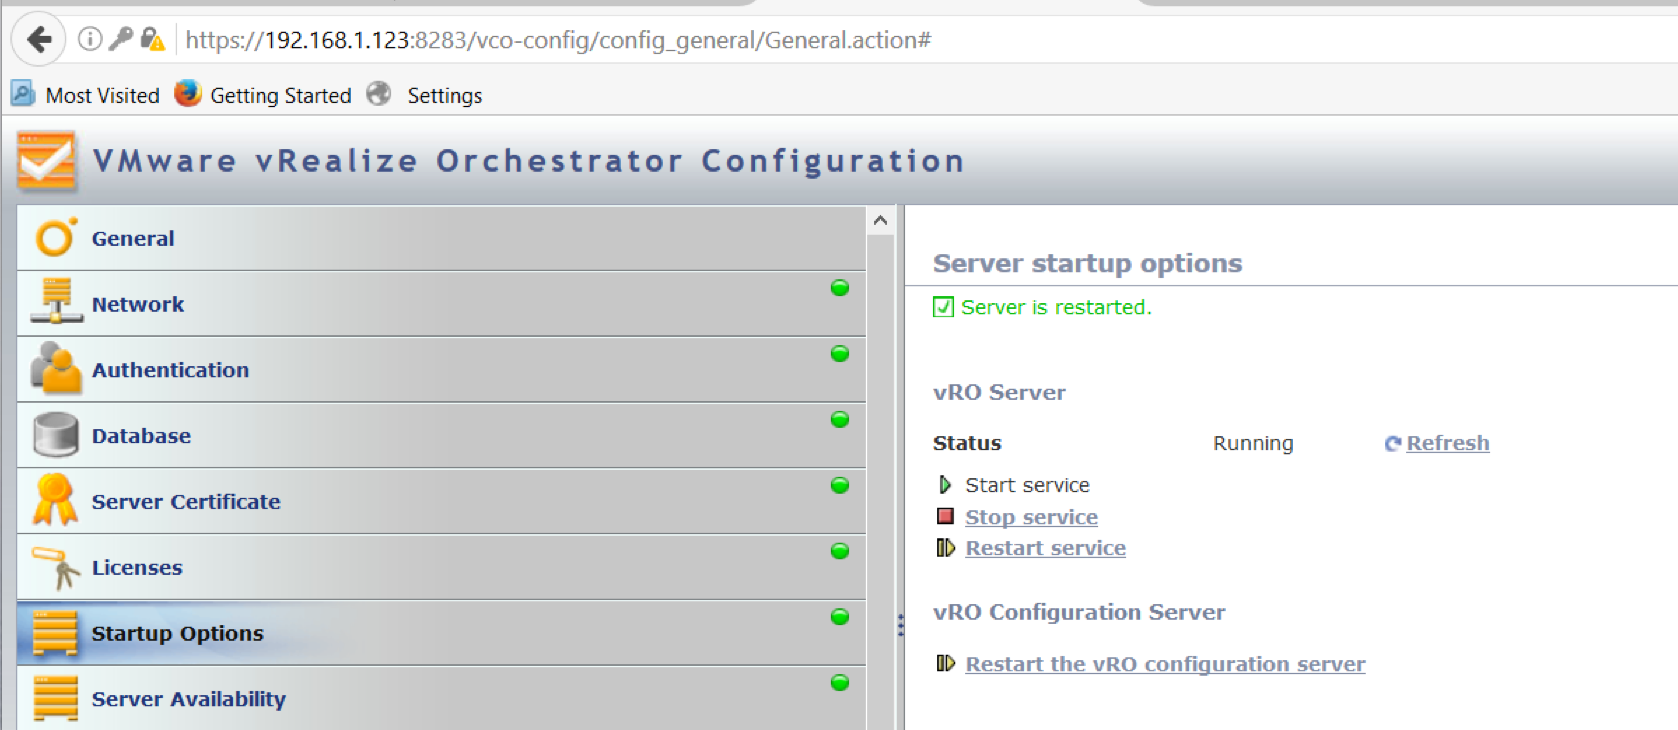
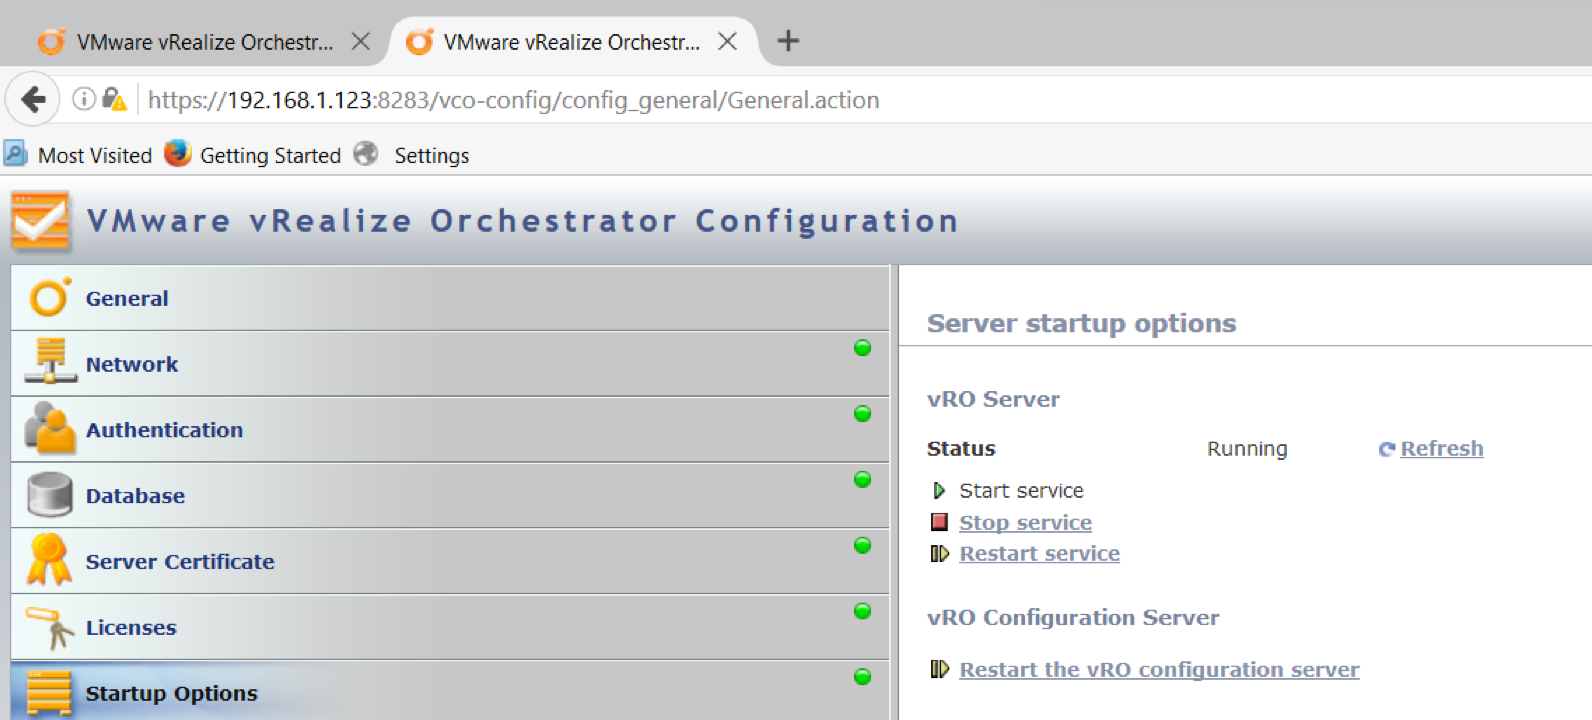
  • Click Startup options and restart both services
  • Log back in and check everything is green

screen-shot-2016-11-22-at-21-36-17 screen-shot-2016-11-22-at-21-37-48 NEXT

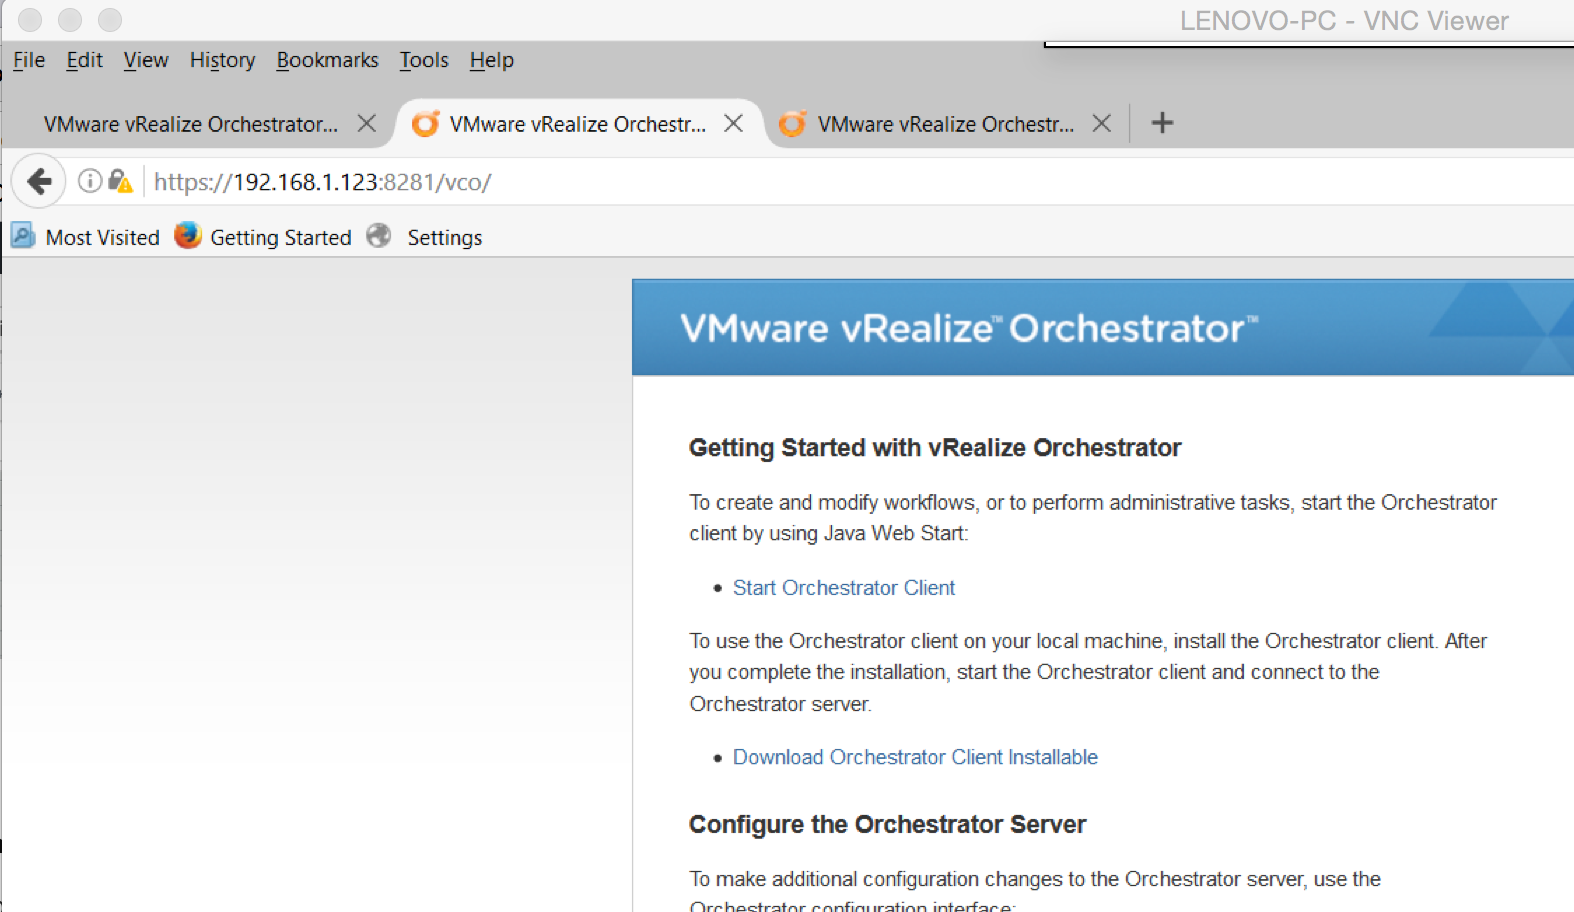
  • Open a web page and navigate to your Orchestrator configuration page which in my case is https://techlaborc001.techlab.local:8281
  • Click on Start Orchestrator Client

screen-shot-2016-11-22-at-23-17-55

  • Click on the drop down to Design
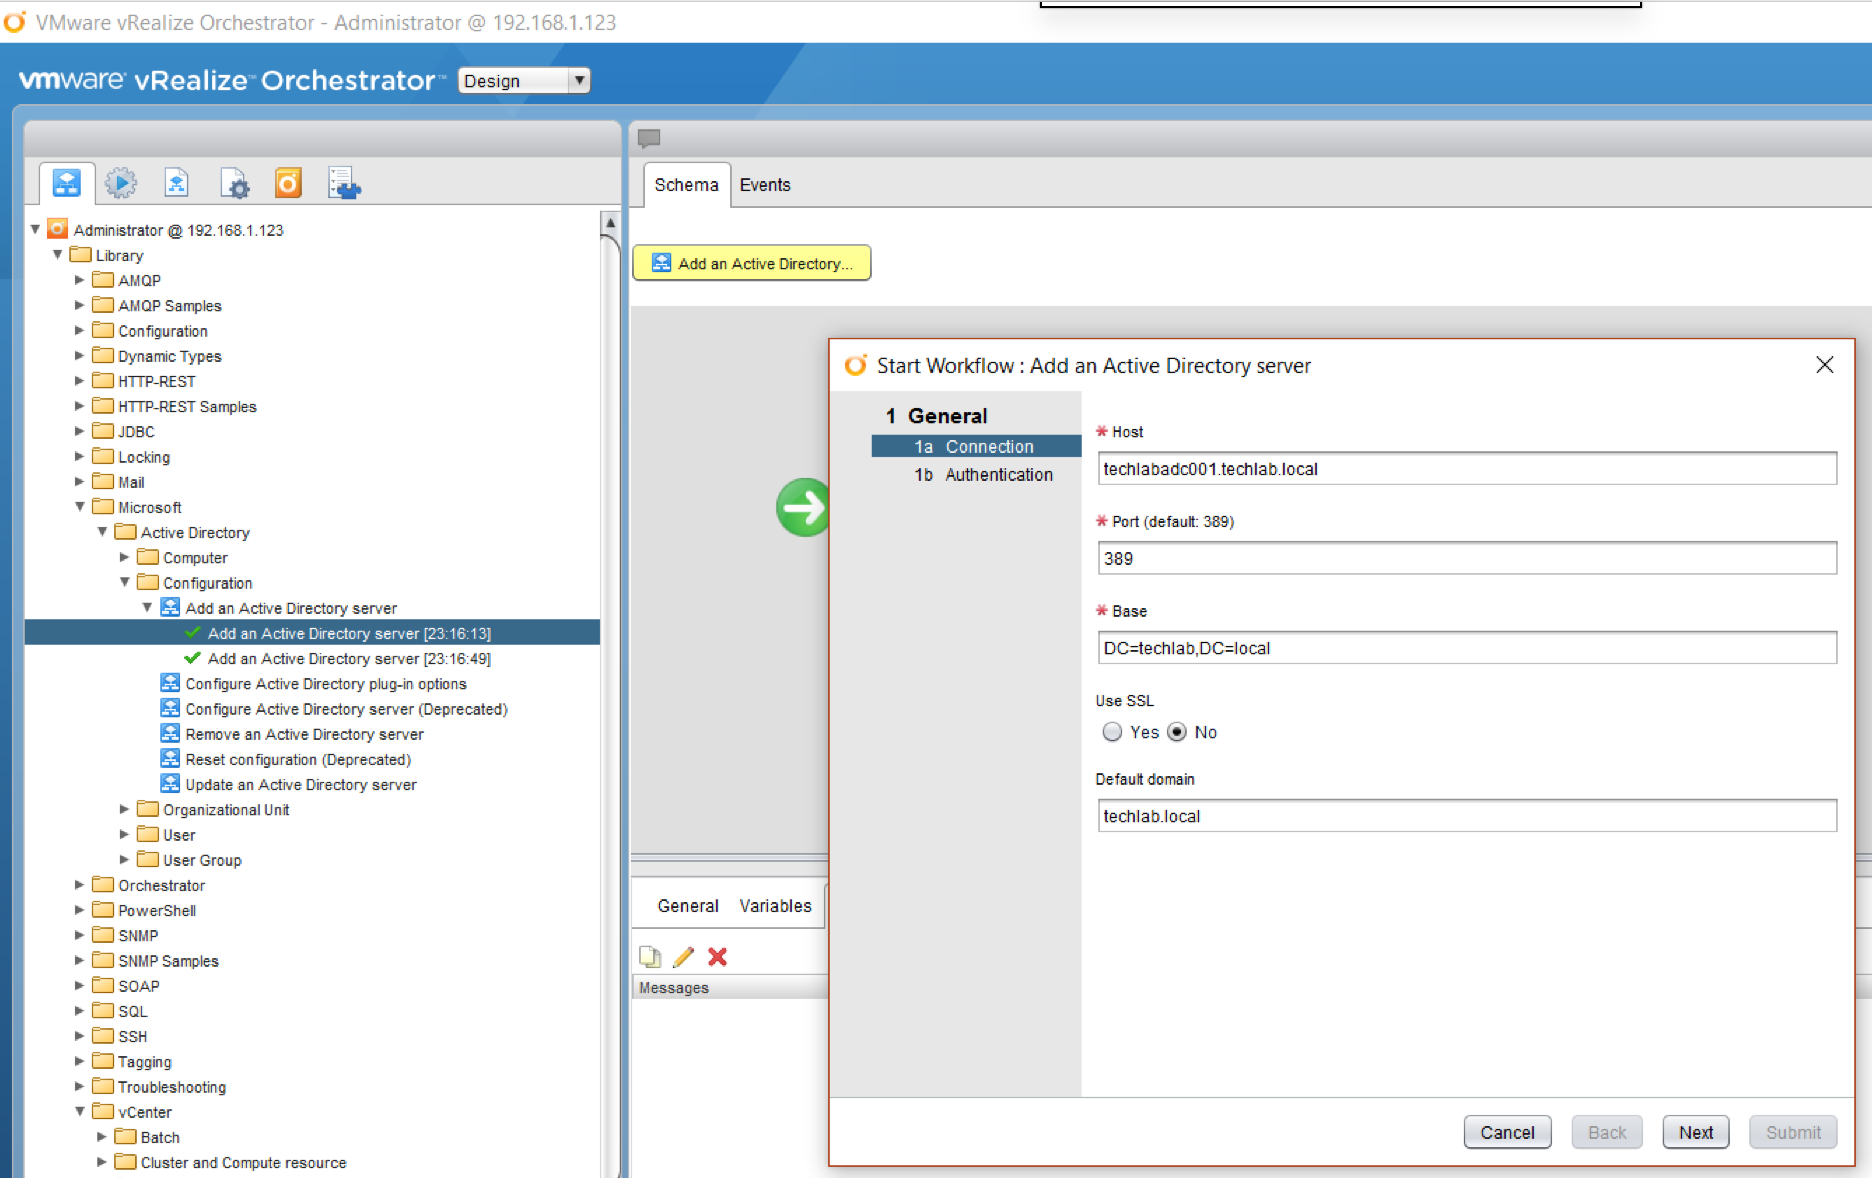
  • Navigate to Library > Microsoft > Active Directory > Configuration > Add an Active Directory server
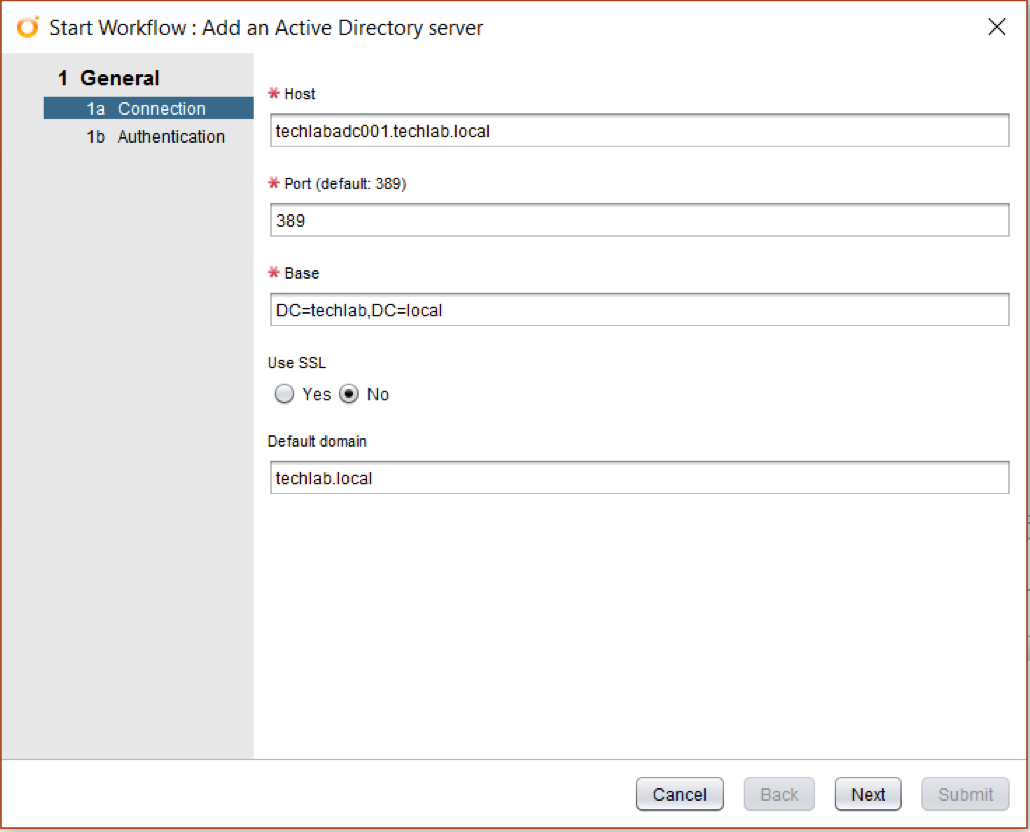
  • Add in the relevant details for your AD server and add others as necessary

screen-shot-2016-11-22-at-23-19-53 screen-shot-2016-11-22-at-23-17-19

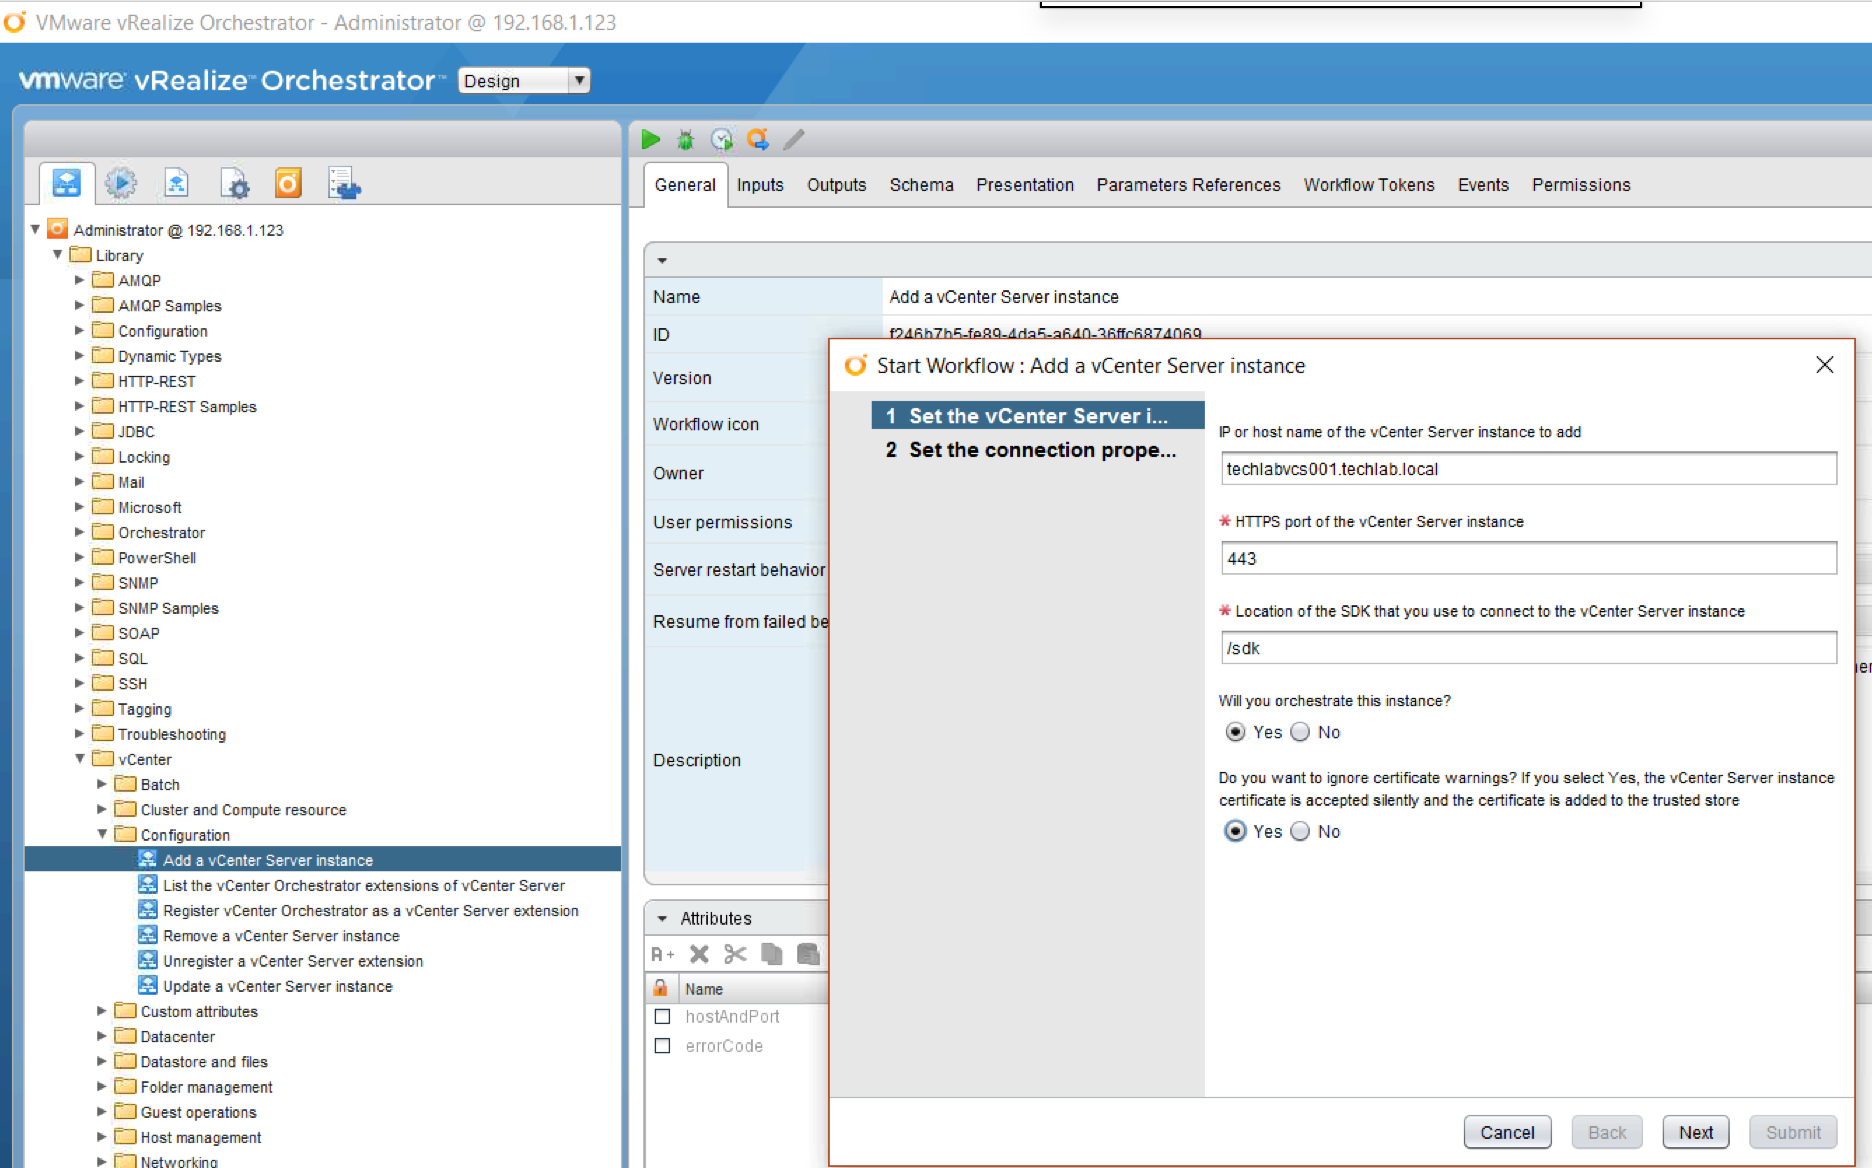
  • Next navigate to Library > vCenter > Configuration > Add a vCenter Instance

screen-shot-2016-11-22-at-23-23-34

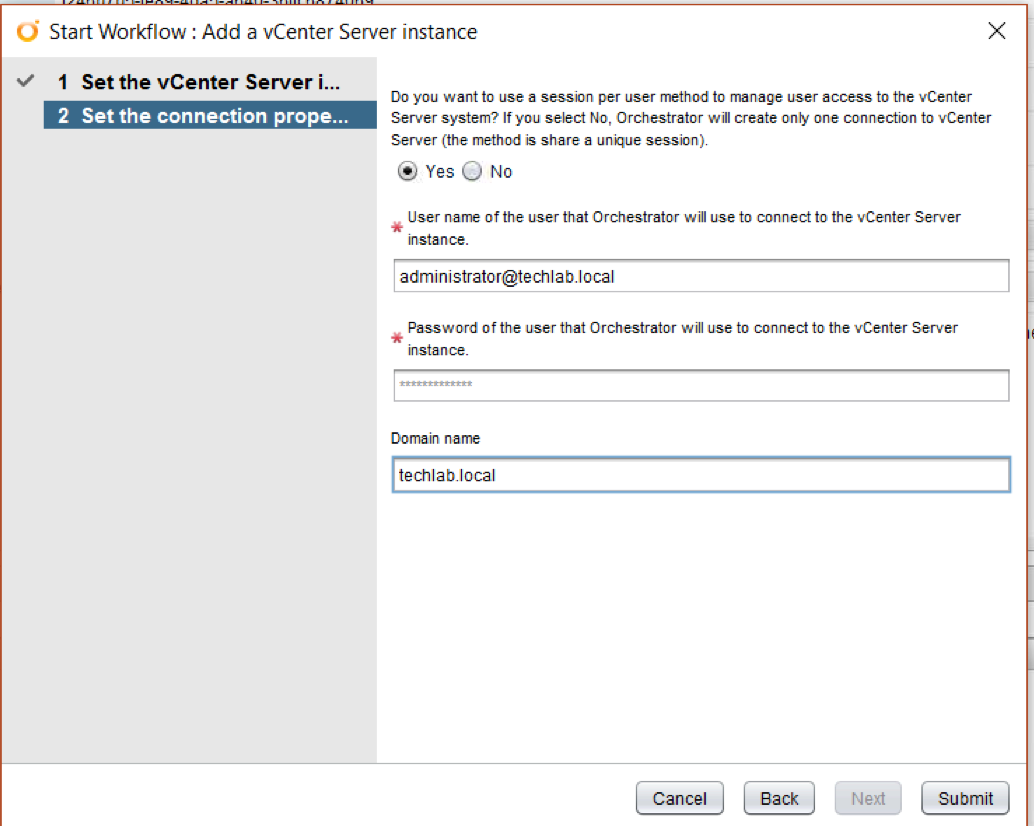
  • Click Next and fill in the next screen

screen-shot-2016-11-22-at-23-24-27

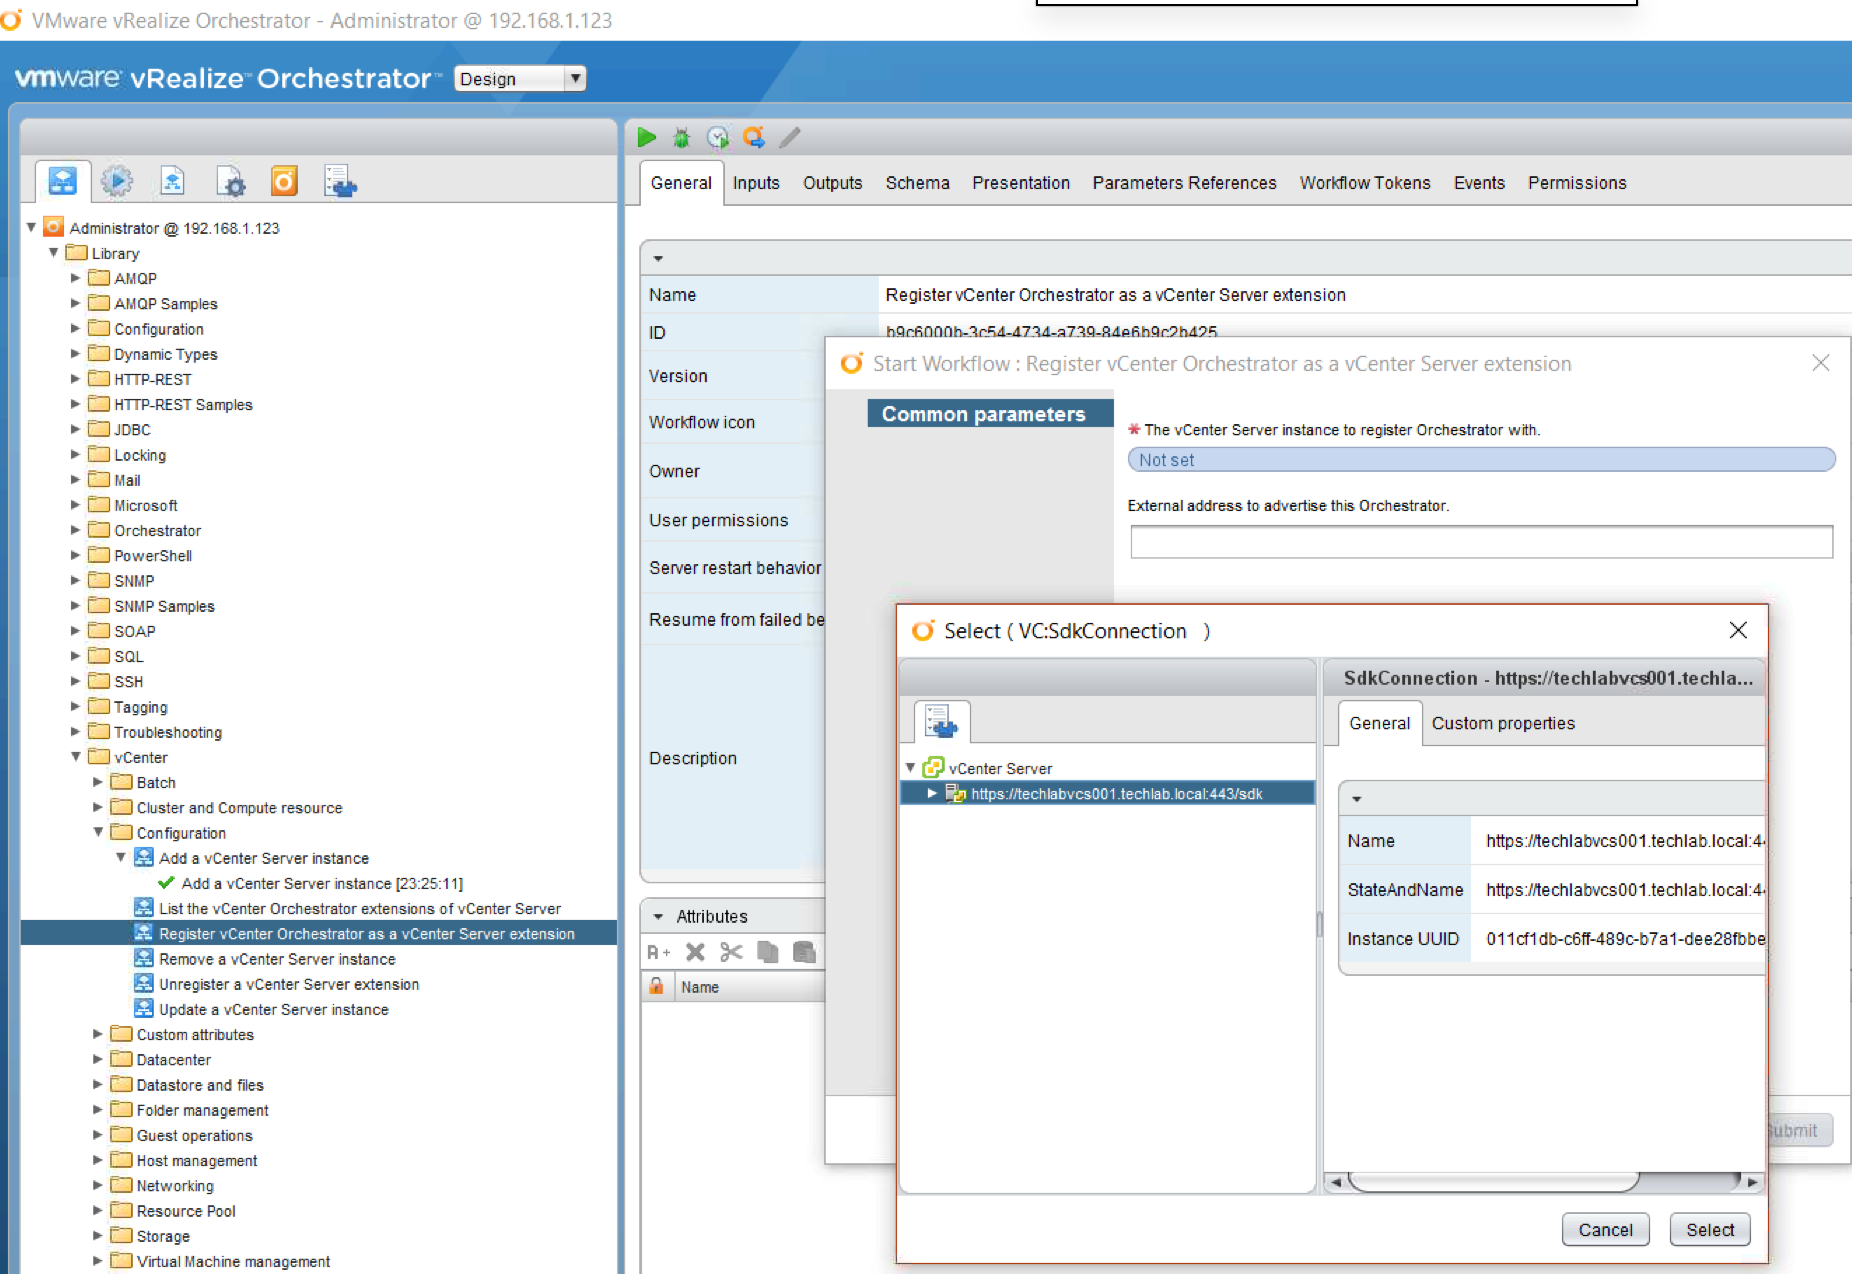
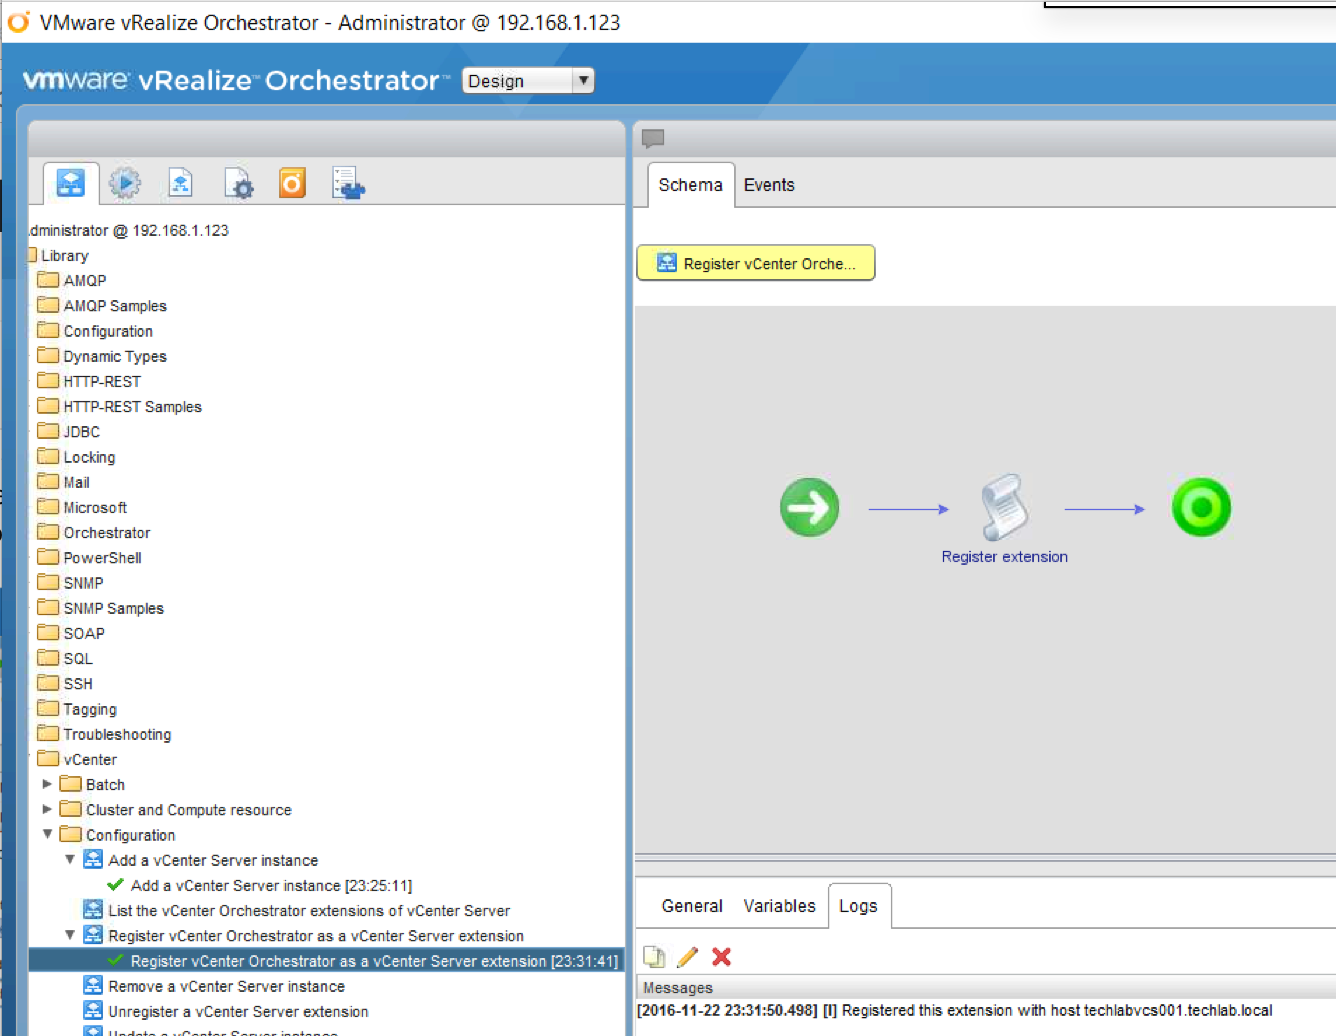
  • Next we need to run the workflow Register vCenter Orchestrator as a vCenter extension

screen-shot-2016-11-22-at-23-27-40

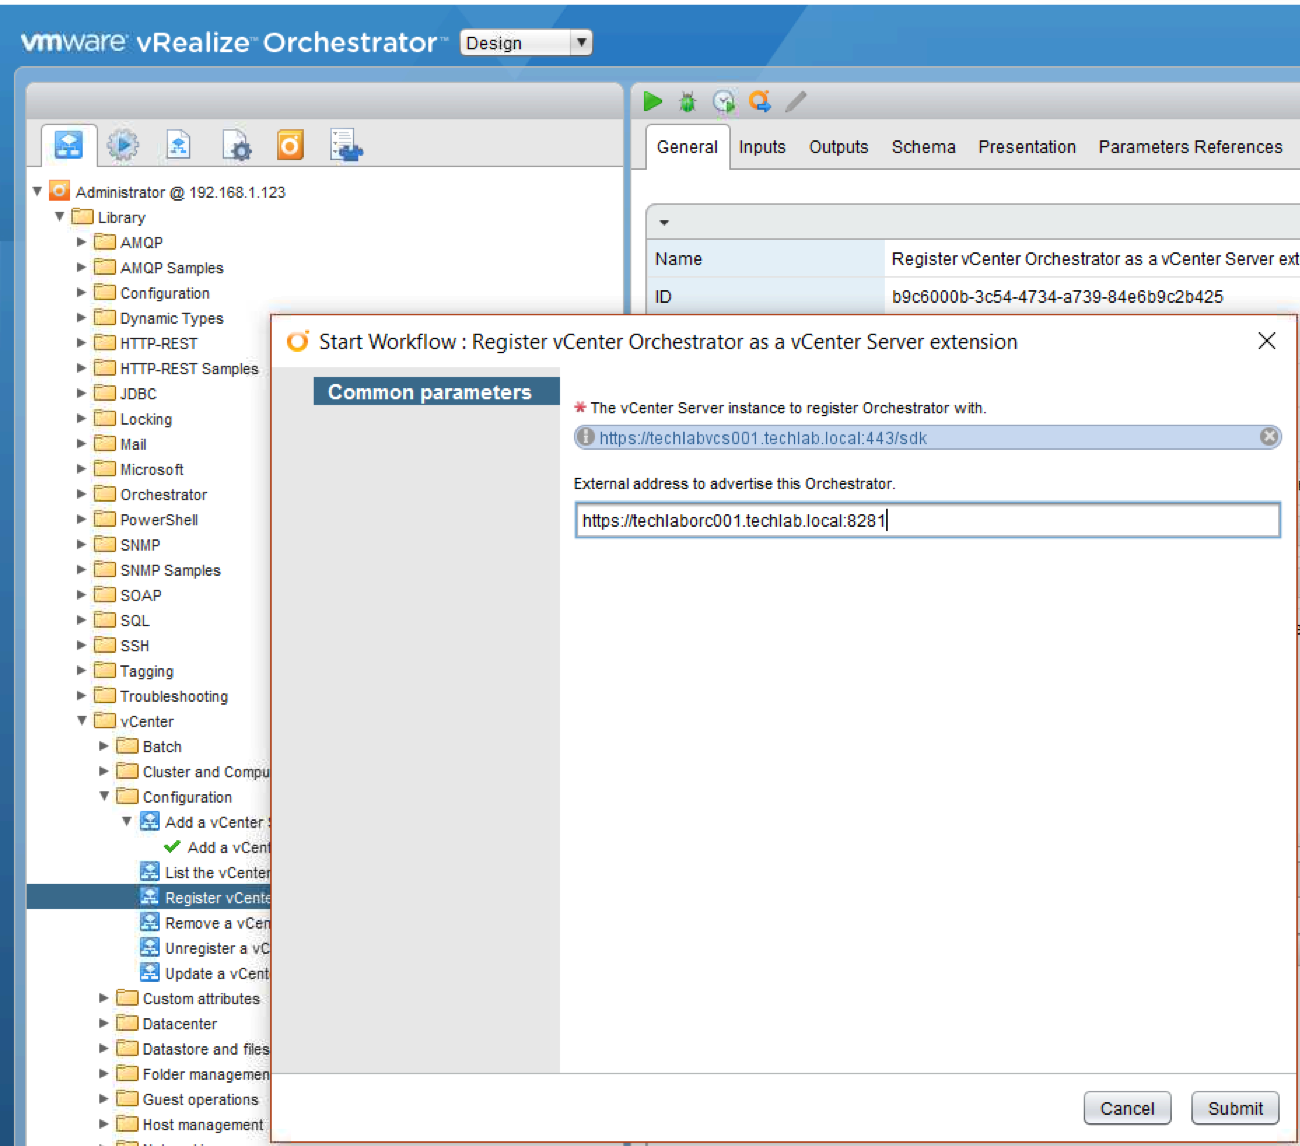
  • Next type in the external address to advertise this Orchestrator
  • this needs to be for example https://techlaborc001.techlab.local:8281

screen-shot-2016-11-22-at-23-30-38

  • It should say it has been registered as per below

screen-shot-2016-11-22-at-23-32-04

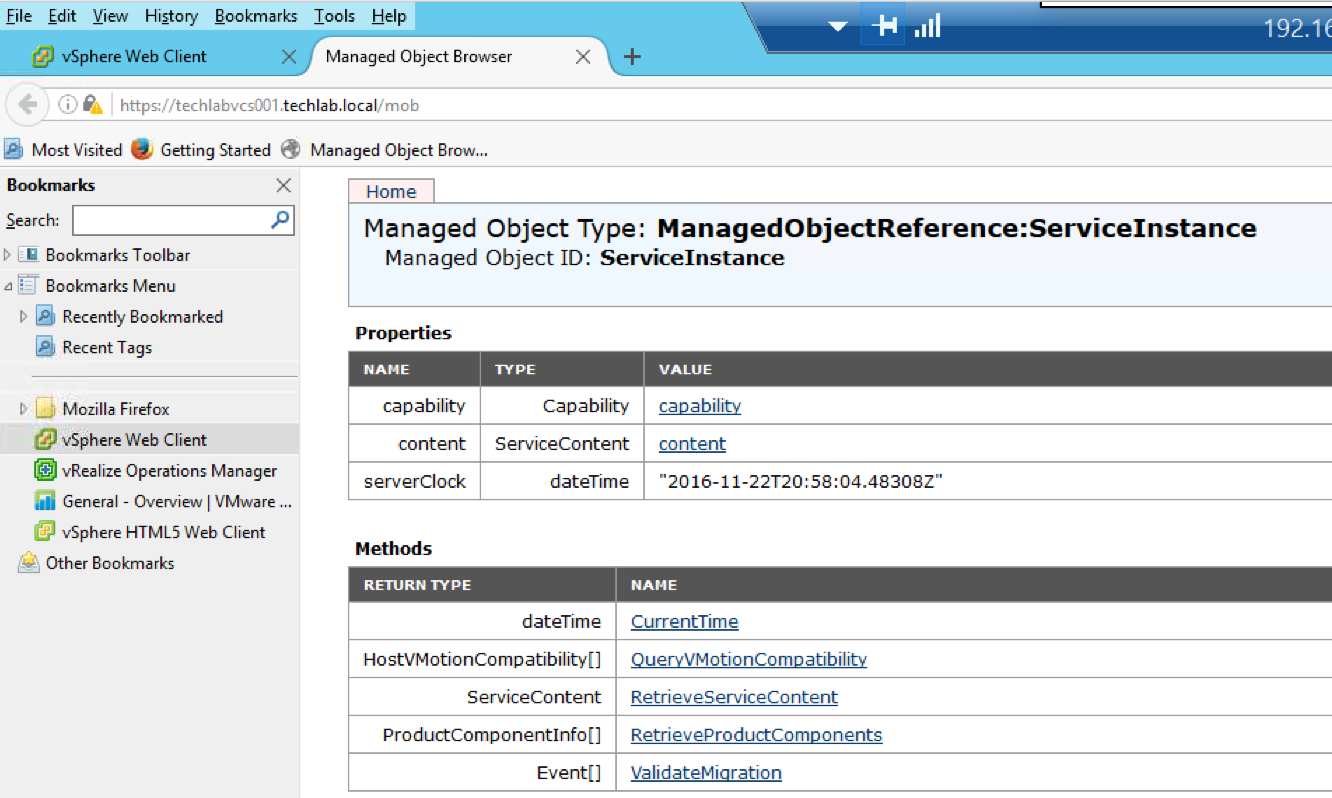
  • We can check it has been registered by opening a web browser and putting in the vCenter server address as per below
  • https://techlabvcs001.techlab.local/mob
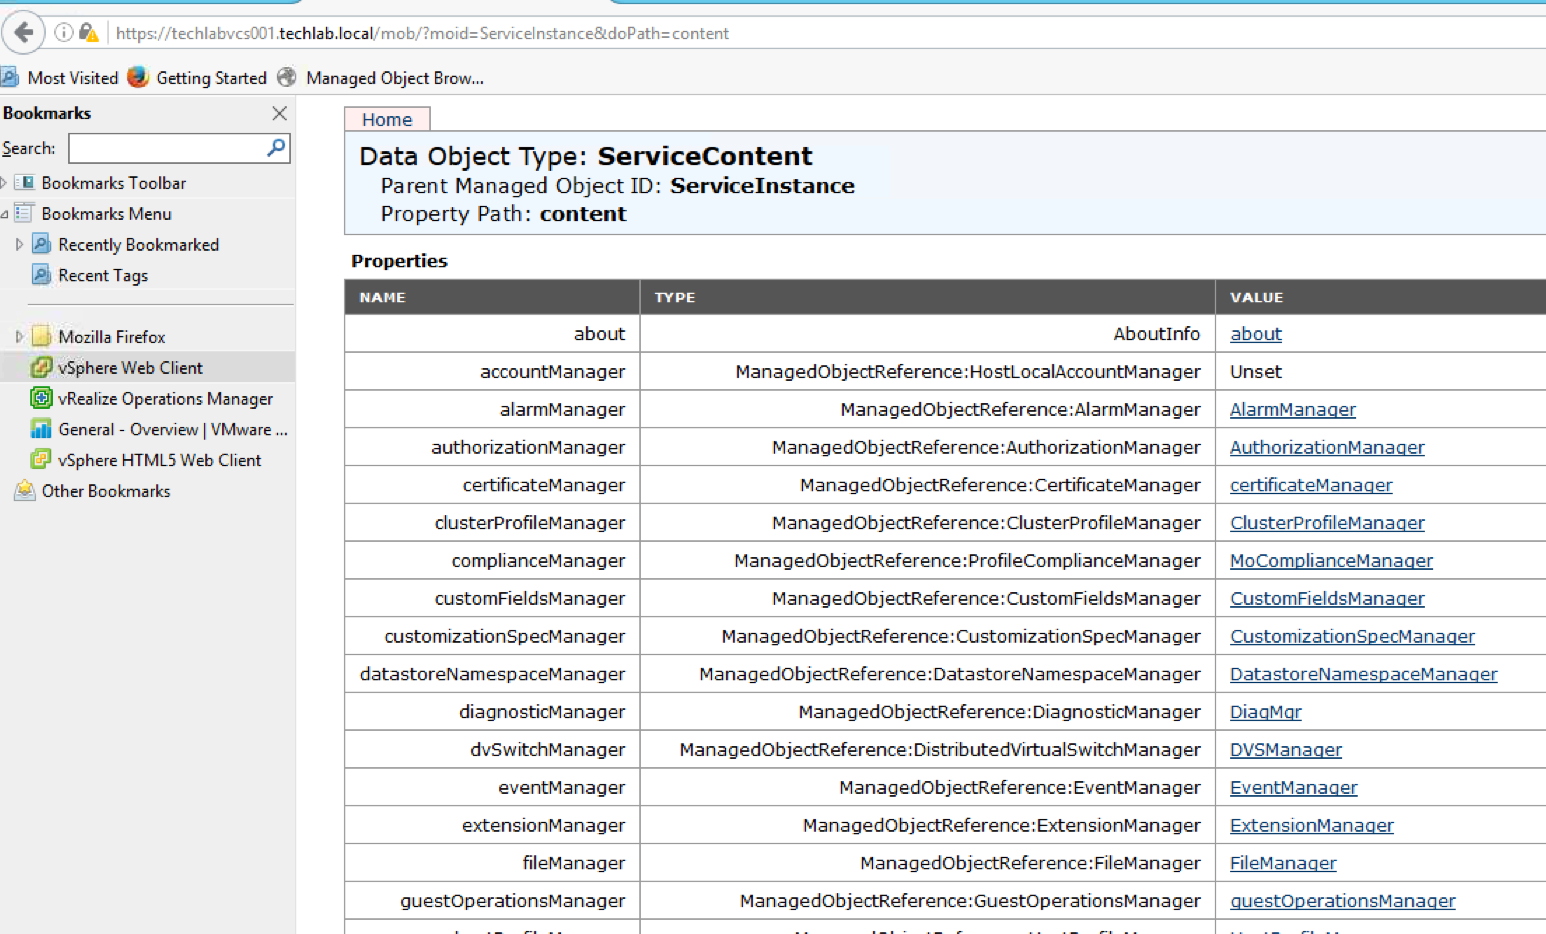
  • Click on Content

screen-shot-2016-11-22-at-23-34-17

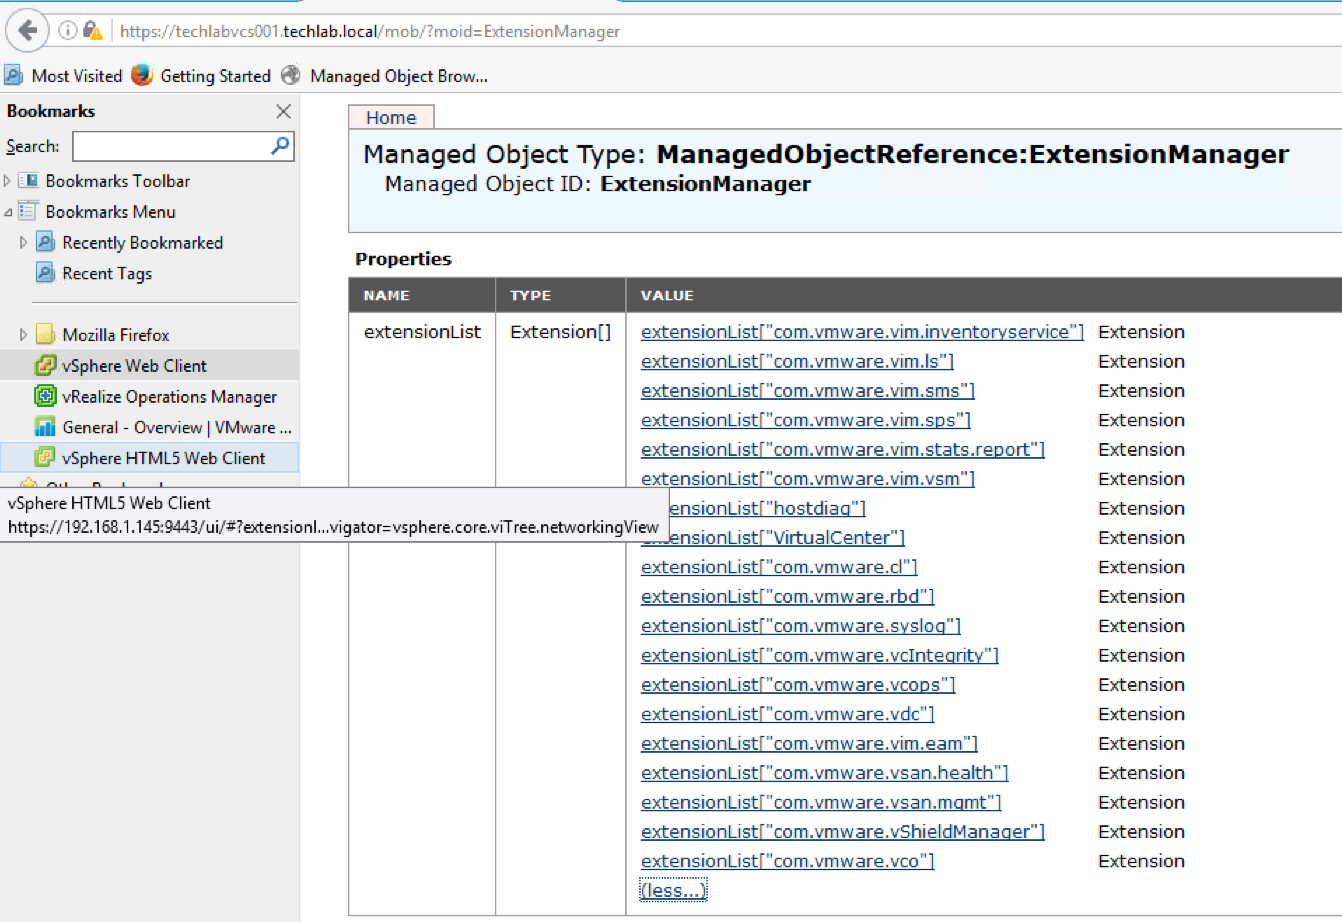
  • Click on ExtensionManager

screen-shot-2016-11-22-at-23-34-51

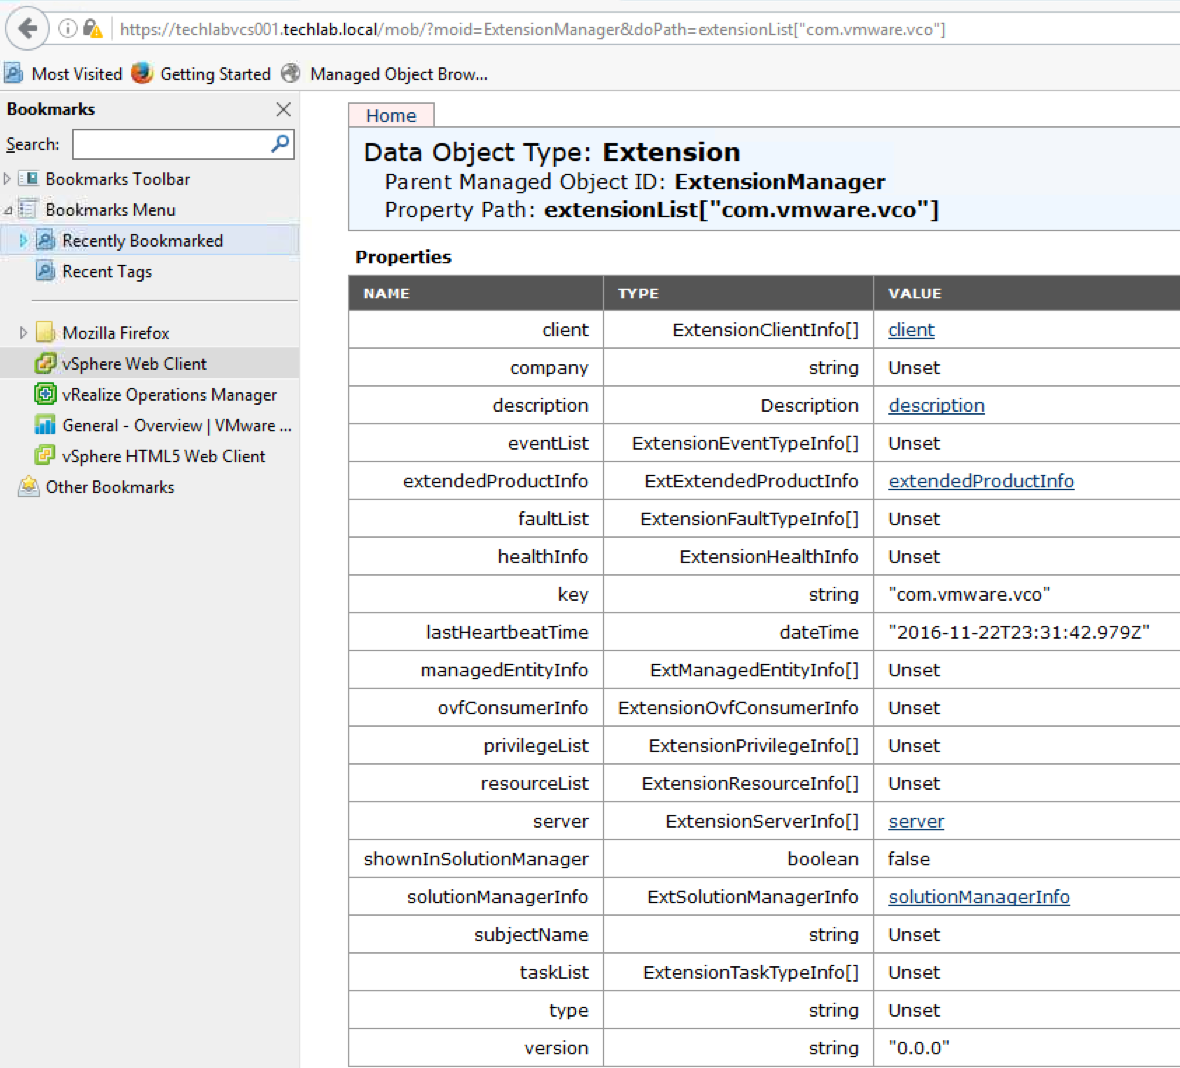
  • Look for extensionList[“com.vmware.vco”] which should only exist when the workflow has run correctly.

screen-shot-2016-11-22-at-23-35-44

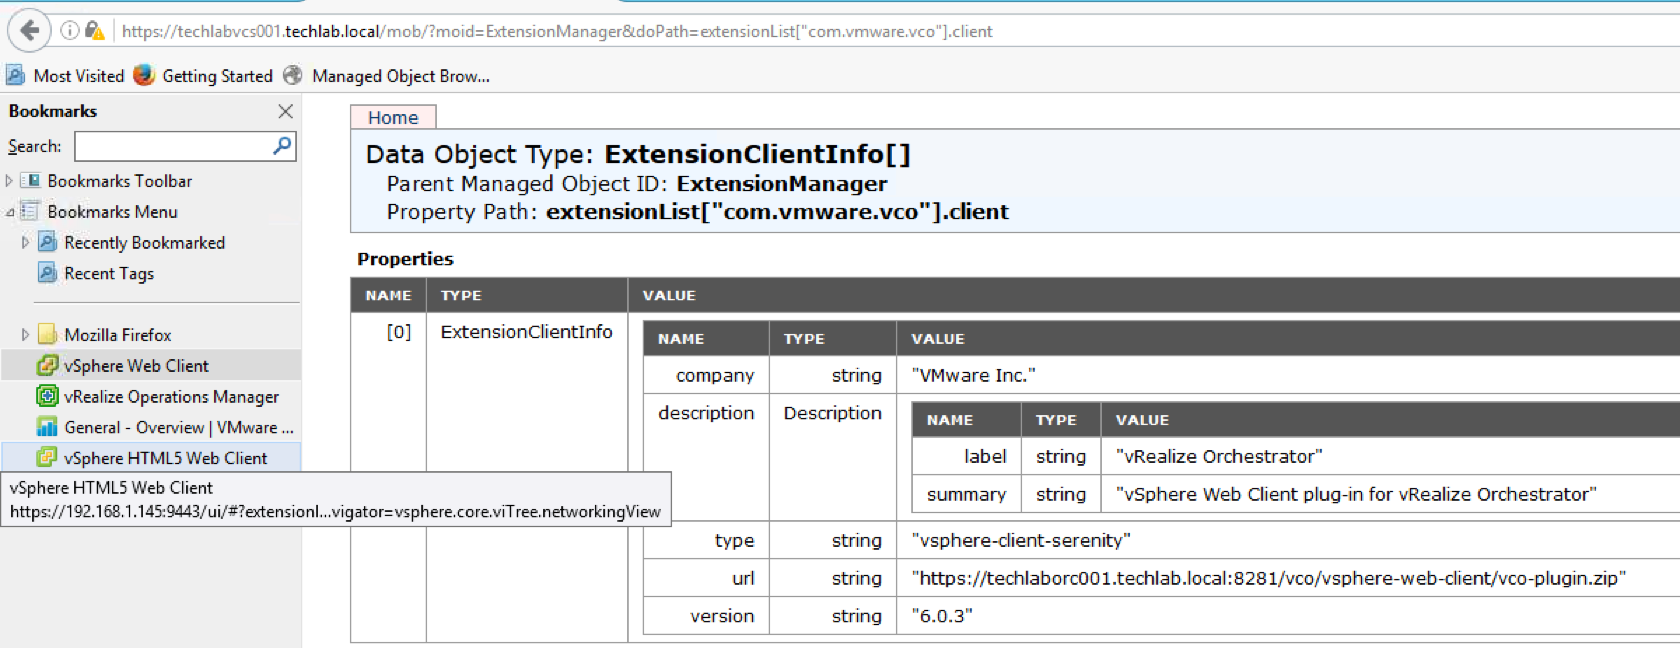
  • Click on Client

screen-shot-2016-11-22-at-23-37-23

  • You should see the below in url string. This will also appear in the Web Client which we’ll see further on in the instructions
  • You can put this link into a web browser and it should try and download the zip

screen-shot-2016-11-22-at-23-38-00

  • If you need to remove an extension, follow this useful blog below

Removing extensions link http://blog.mwpreston.net/2014/05/02/to-the-point-removing-stranded-vcenter-orchestrator-servers-from-vcenter

  • You now need to restart the web client
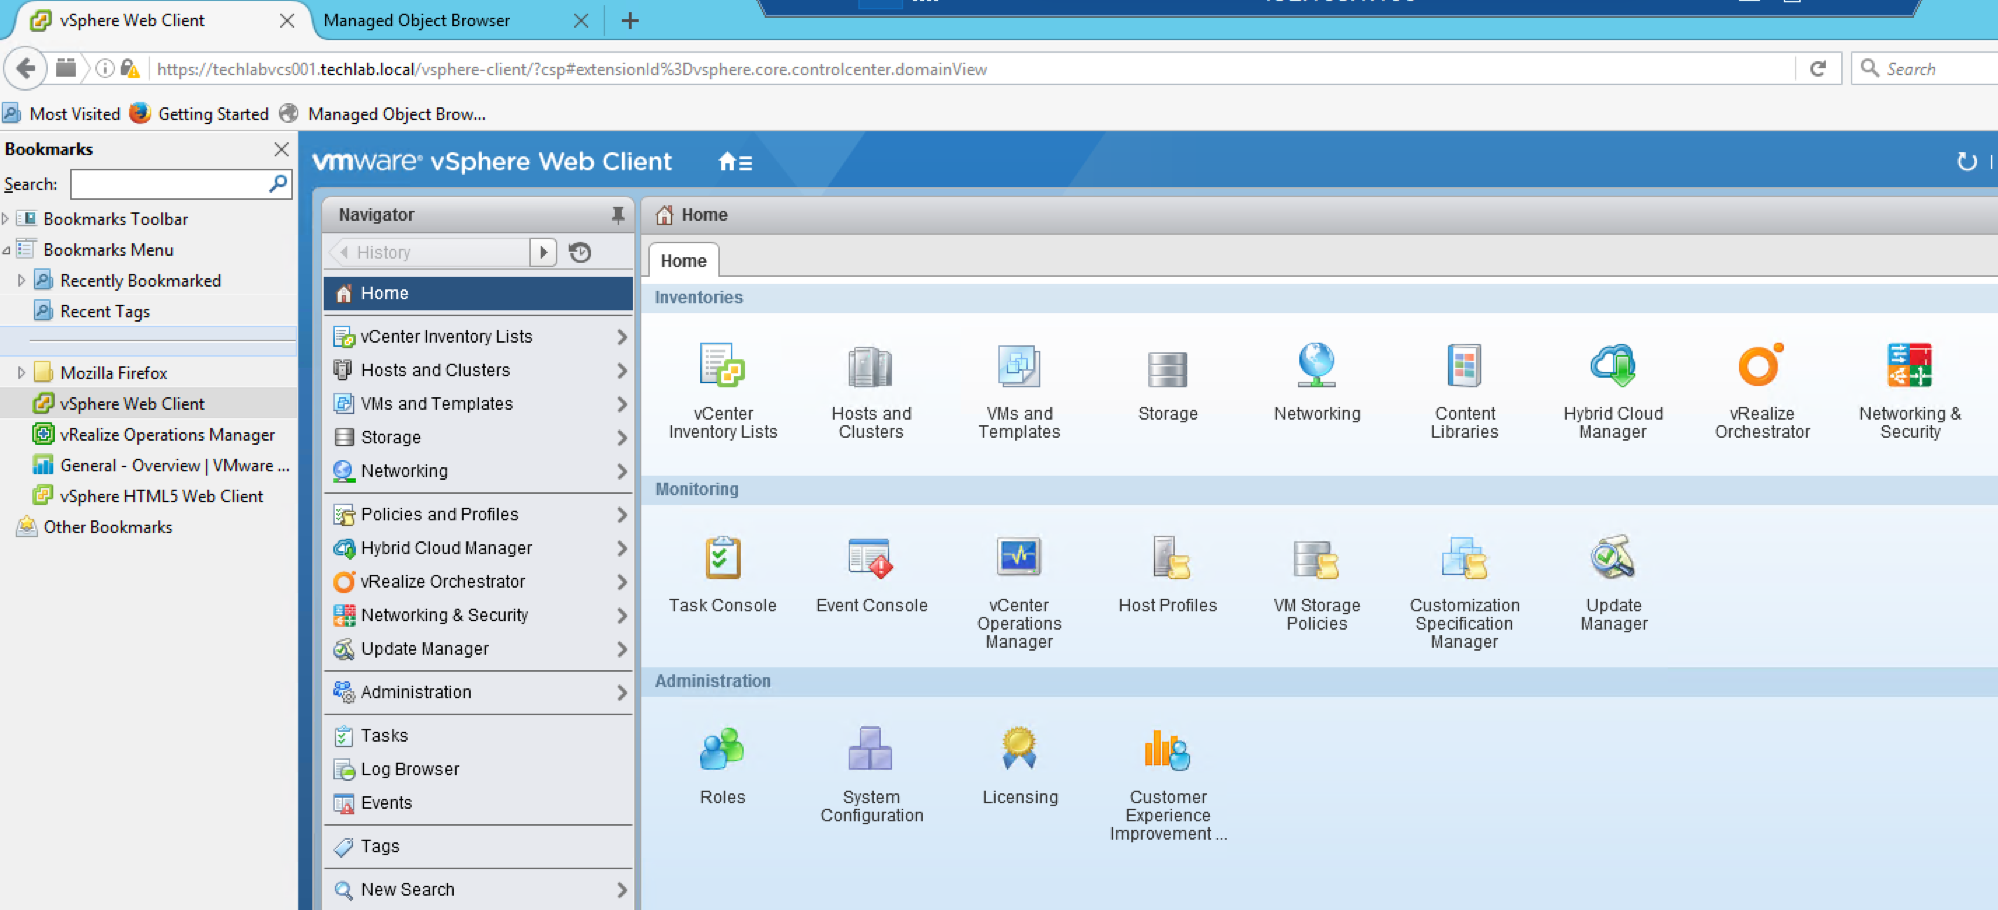
  • When the Web Client has restarted and come up again, Go to the Home screen and select the Orchestrator icon

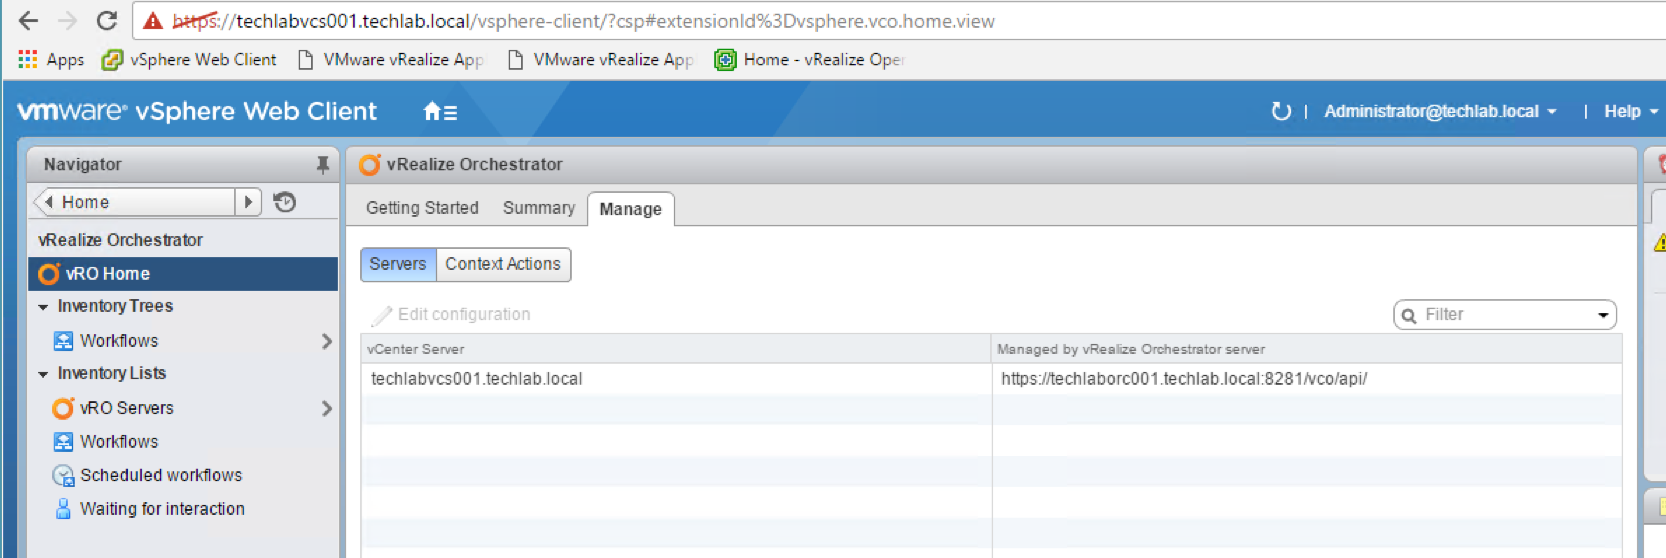
screen-shot-2016-11-22-at-23-53-49

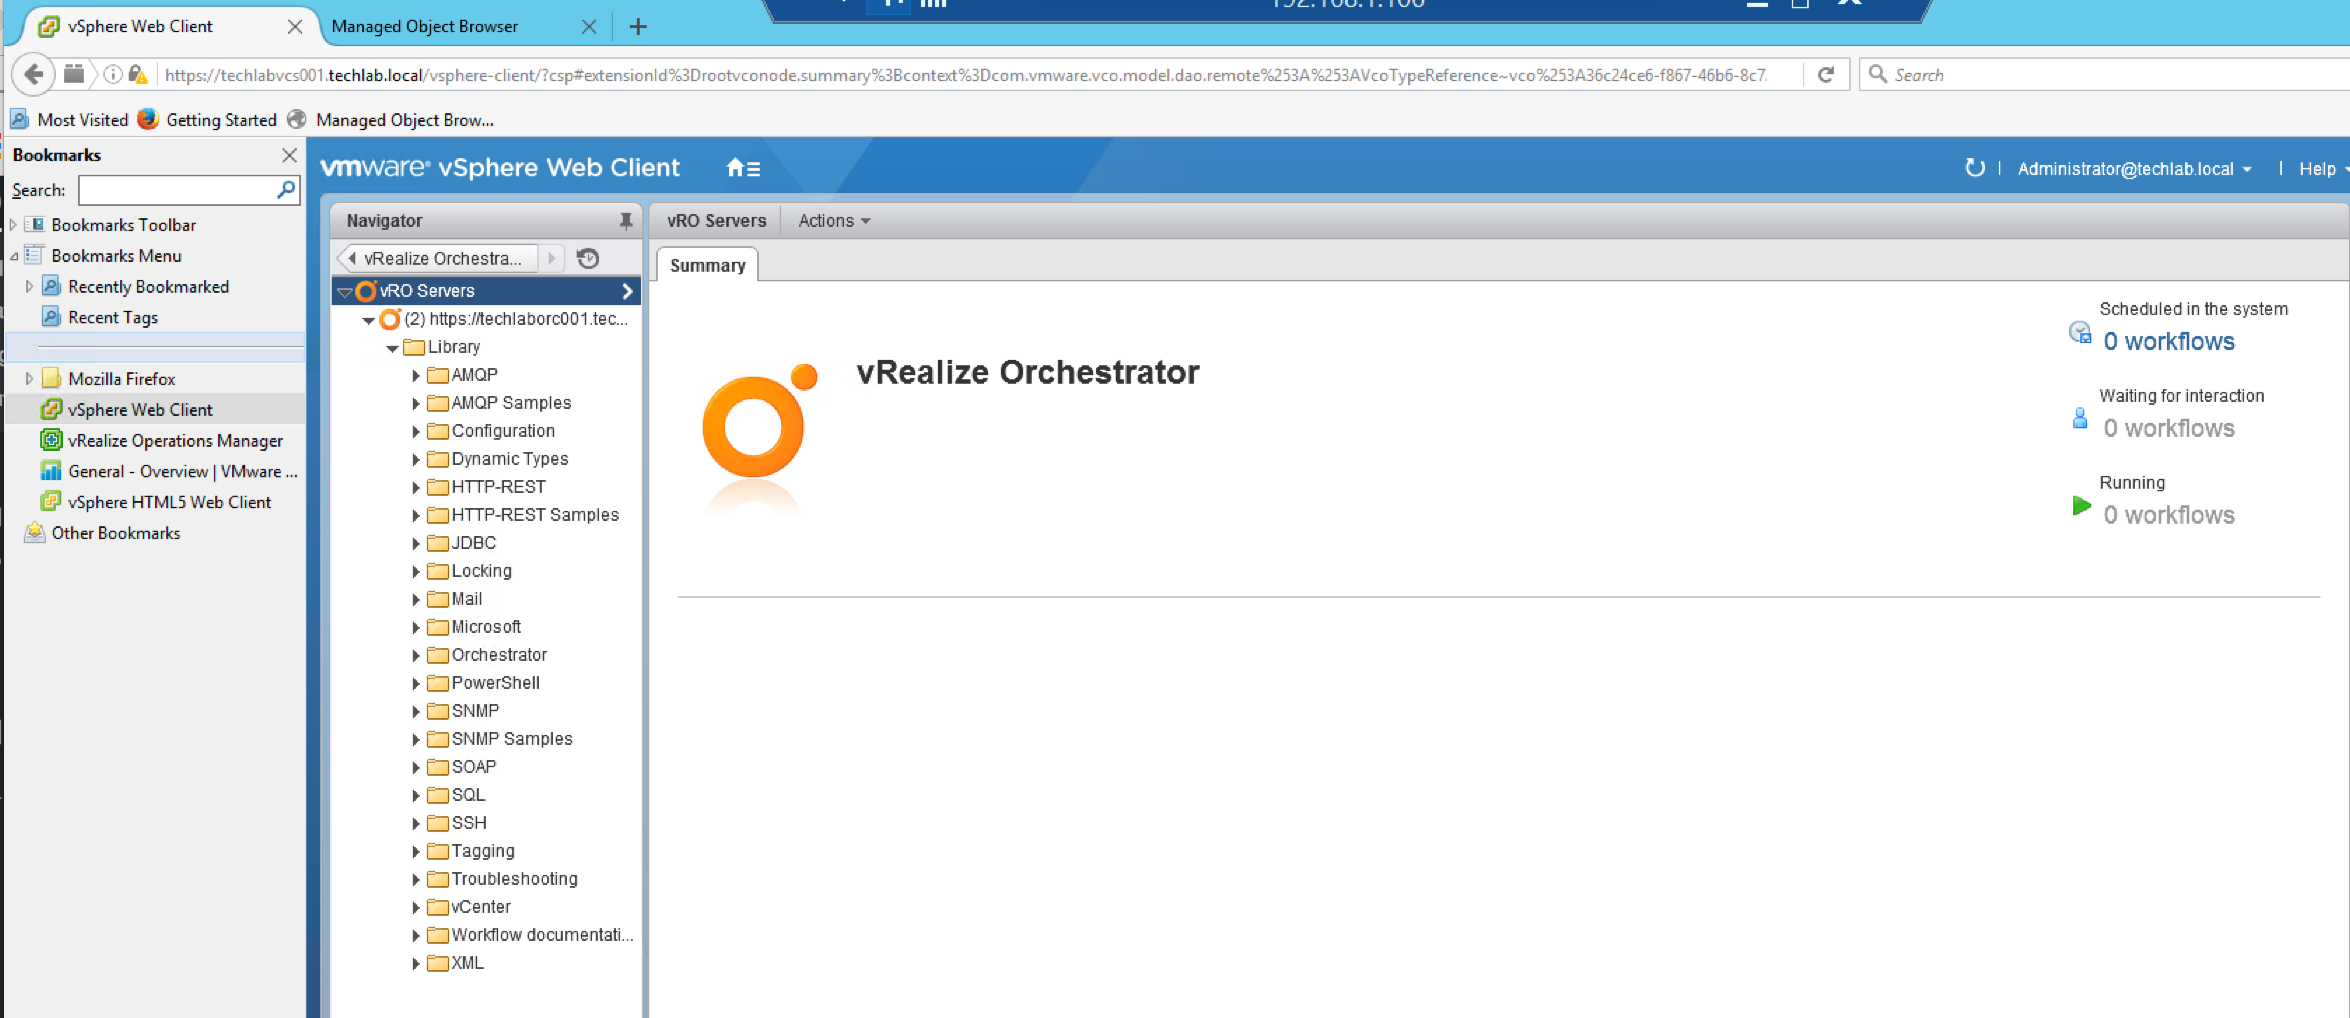
  • You should now see the vCenter and the Orchestrator server listed and you’ll see the information which we saw in the mob web page

screen-shot-2016-11-22-at-23-56-07

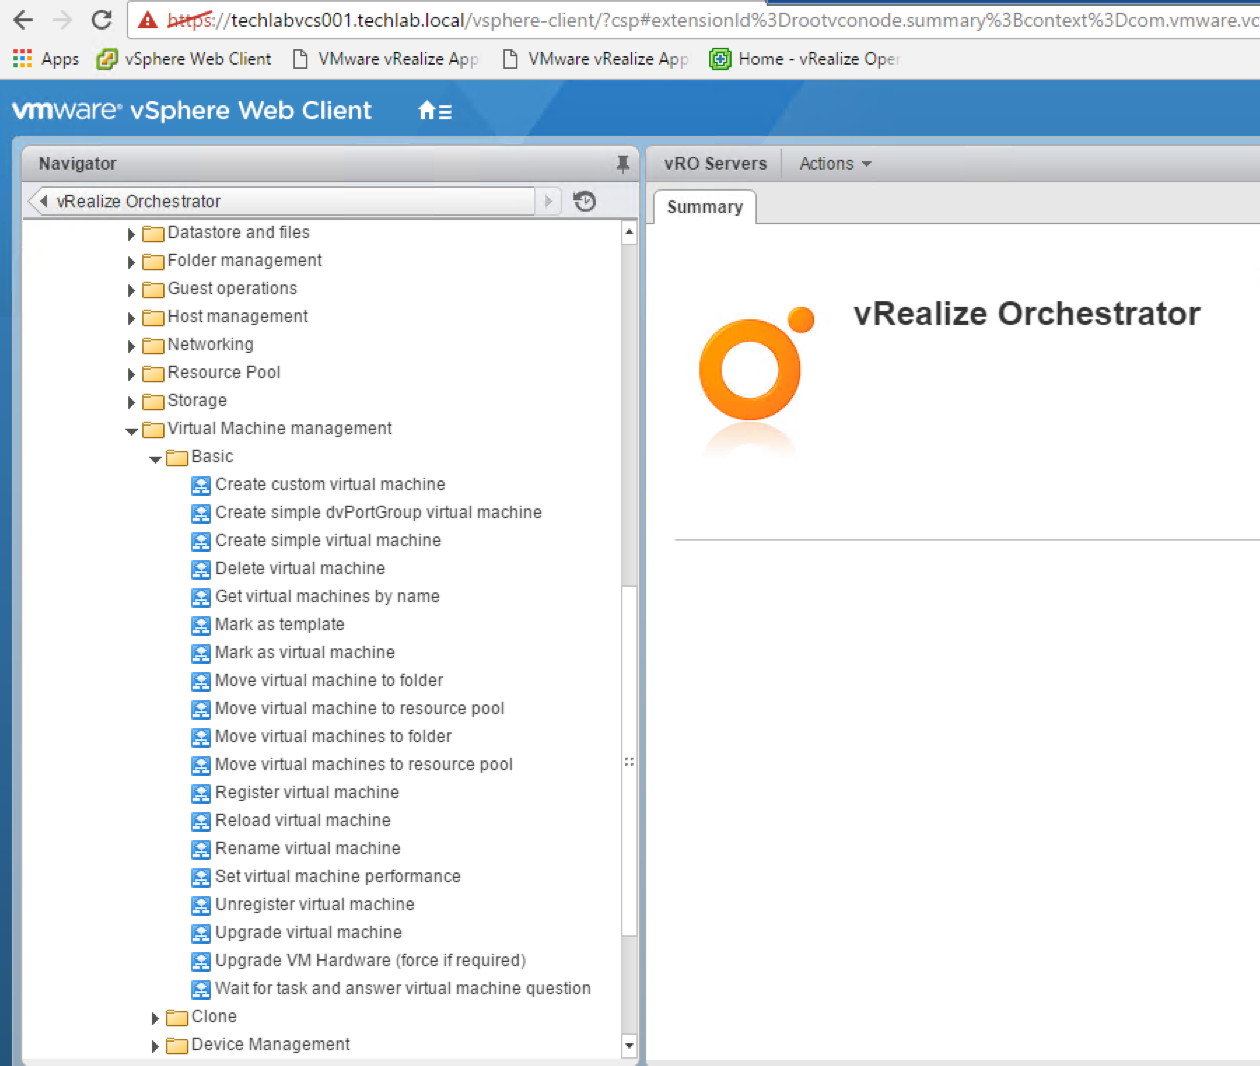
  • If you click on Workflows under Inventory trees, you will see the whole library of workflows

screen-shot-2016-11-22-at-23-57-45

  • You can then use the inbuilt workflows or create your own in Orchestrator
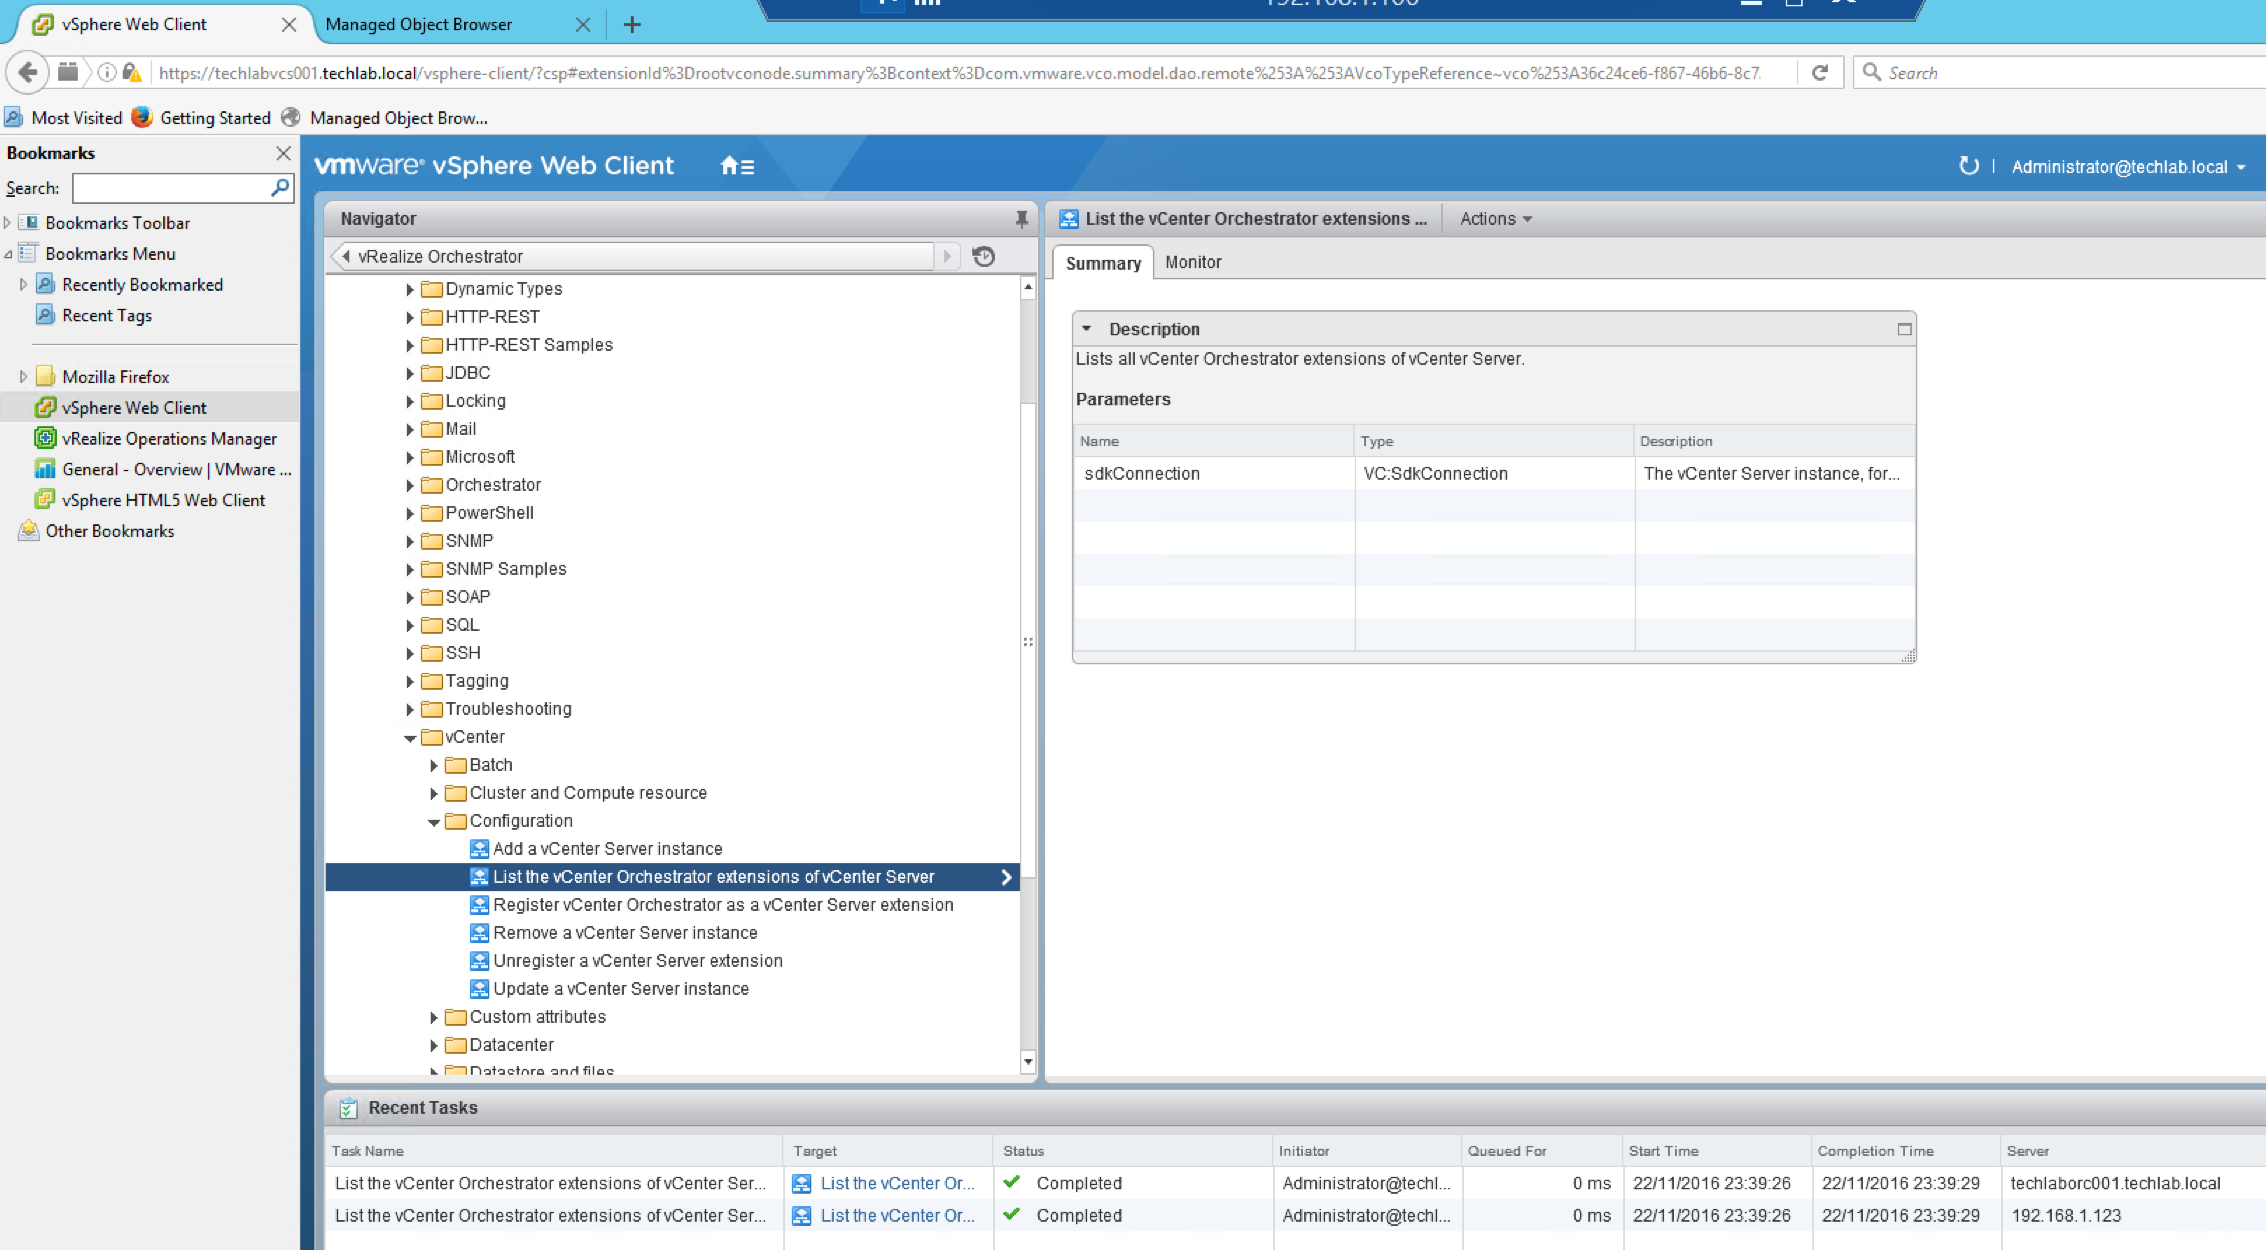
  • If you run the List the vCenter Orchestrator extensions of vCenter server, you will see it will pop up in the Recent Tasks list at the bottom of vCenter

screen-shot-2016-11-22-at-23-59-13

  • Pretty funky stuff 🙂

Next

  • In the vSphere Web Client > Click Home > Orchestrator, click on the Workflow icon and expand vCenter > Virtual Machine Management > Basic

screen-shot-2016-11-28-at-14-24-30

screen-shot-2016-11-28-at-14-25-38

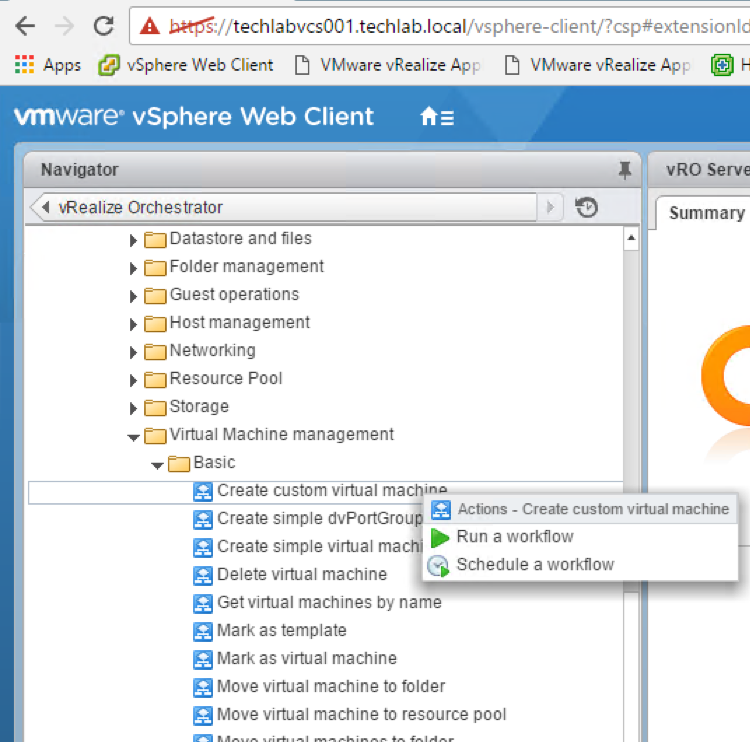
  • Right click “Create simple virtual machine”, here is where you can run a workflow directly from within vSphere Web Client.

screen-shot-2016-11-28-at-14-27-55


Installing the Linux Log Insight agent on the vCenter Orchestrator appliance

vRARobot2

Installing the Linux Log Insight agent on vCenter Orchestrator

The Log Insight agent now gets pre-installed on some of the vRealize appliances which is very useful which means there is no need to install agents manually.  Some of the VMware products which have the agent pre-installed:

vRealize Business
vRealize Operations Manager (beginning from 6.1)
vRealize Orchestrator (beginning from 7.0.1)
vRealize Automation (beginning from 7.0.1)
vRealize Log Insight

However this version of Orchestrator is 6.0.3 due to work testing so we need to install the agent manually.

vCO Details

  • Name = techlabvco001.techlab.local
  • IP Address = 192.168.1.123/24
  • SSH enabled
  • vCO Config Page = https://192.168.1.123:8283
  • vCO Getting started page and Orchestrator client download = https://192.168.1.123:8281/vco
  • vCO Appliance login = https://192.168.1.123:5480

Log Insight Details

  • Name = techlabvrl001.techlab.local
  • IP Address = 192.168.1.122/24
  • SSH enabled
  • Log Insight Configuration = https://192.168.1.122

Useful link to Log Insight Documentation Center

http://pubs.vmware.com/log-insight-30/index.jsp#com.vmware.log-insight.agent.admin.doc/GUID-04892000-72C6-4227-BB37-6A2271E03B8C.html

Steps

Note: You may already have Orchestrator installed. If so go from connecting WinScp to the Orchestrator appliance.

  • Download and install the vCenter Orchestrator OVF. In my case this was version 6.0.3 as I was doing some testing for work.
  • Import the OVF into vCenter and follow the wizard to set all the relevant configuration information. Note: You will need to set a root password and a default password for the vmware user account in the wizard in order to access the configuration page
  • Power on the vCO appliance
  • Navigate to the vCO Config Page = https://192.168.1.123:8283 and log in with the account vmware and the password you set during installation
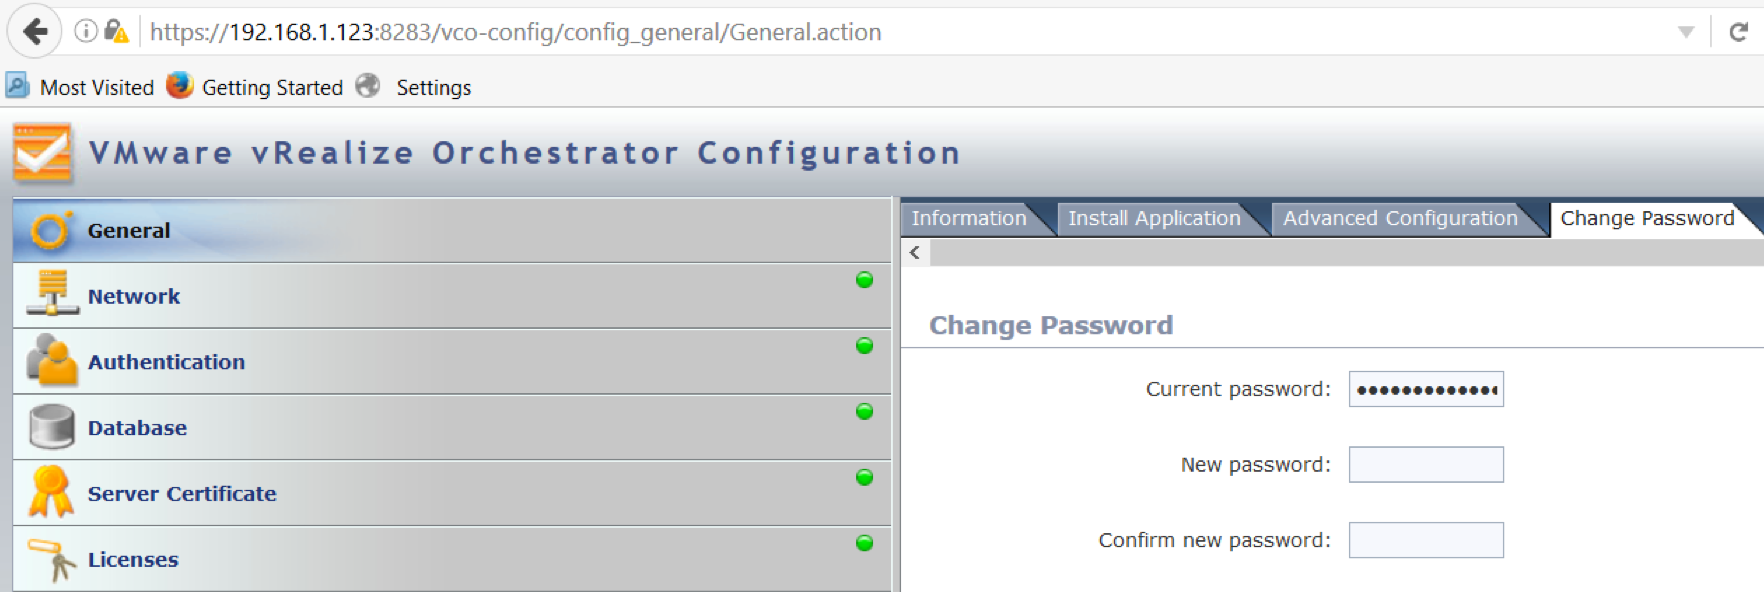
  • In the General Page you can reset the vmware account password if you wish

screen-shot-2016-11-14-at-11-22-37

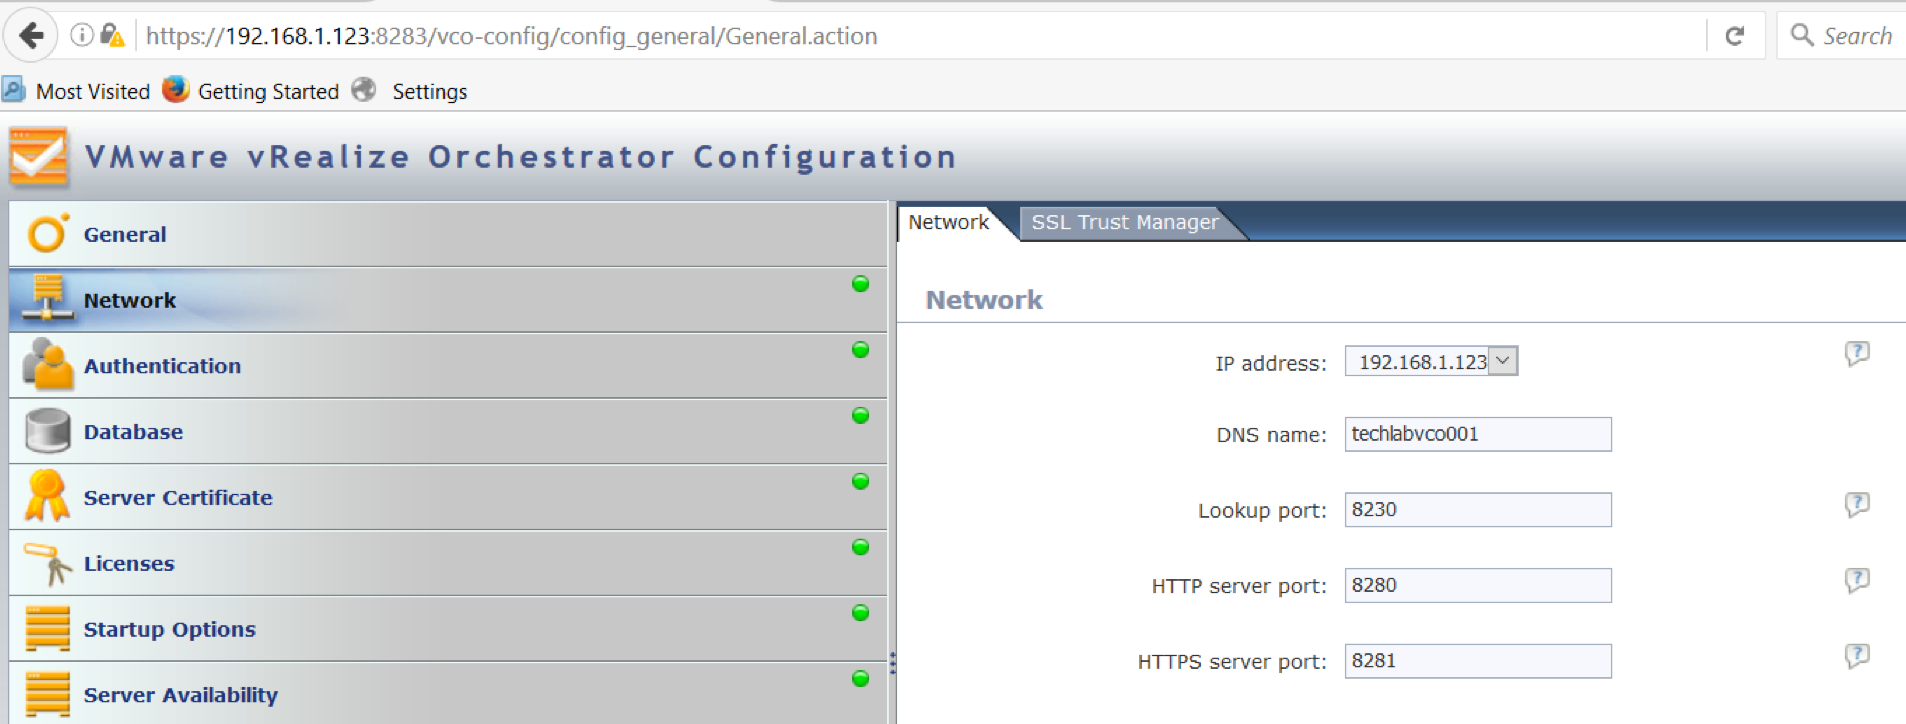
  • Click on Network and check all the details are correct

screen-shot-2016-11-14-at-11-23-57

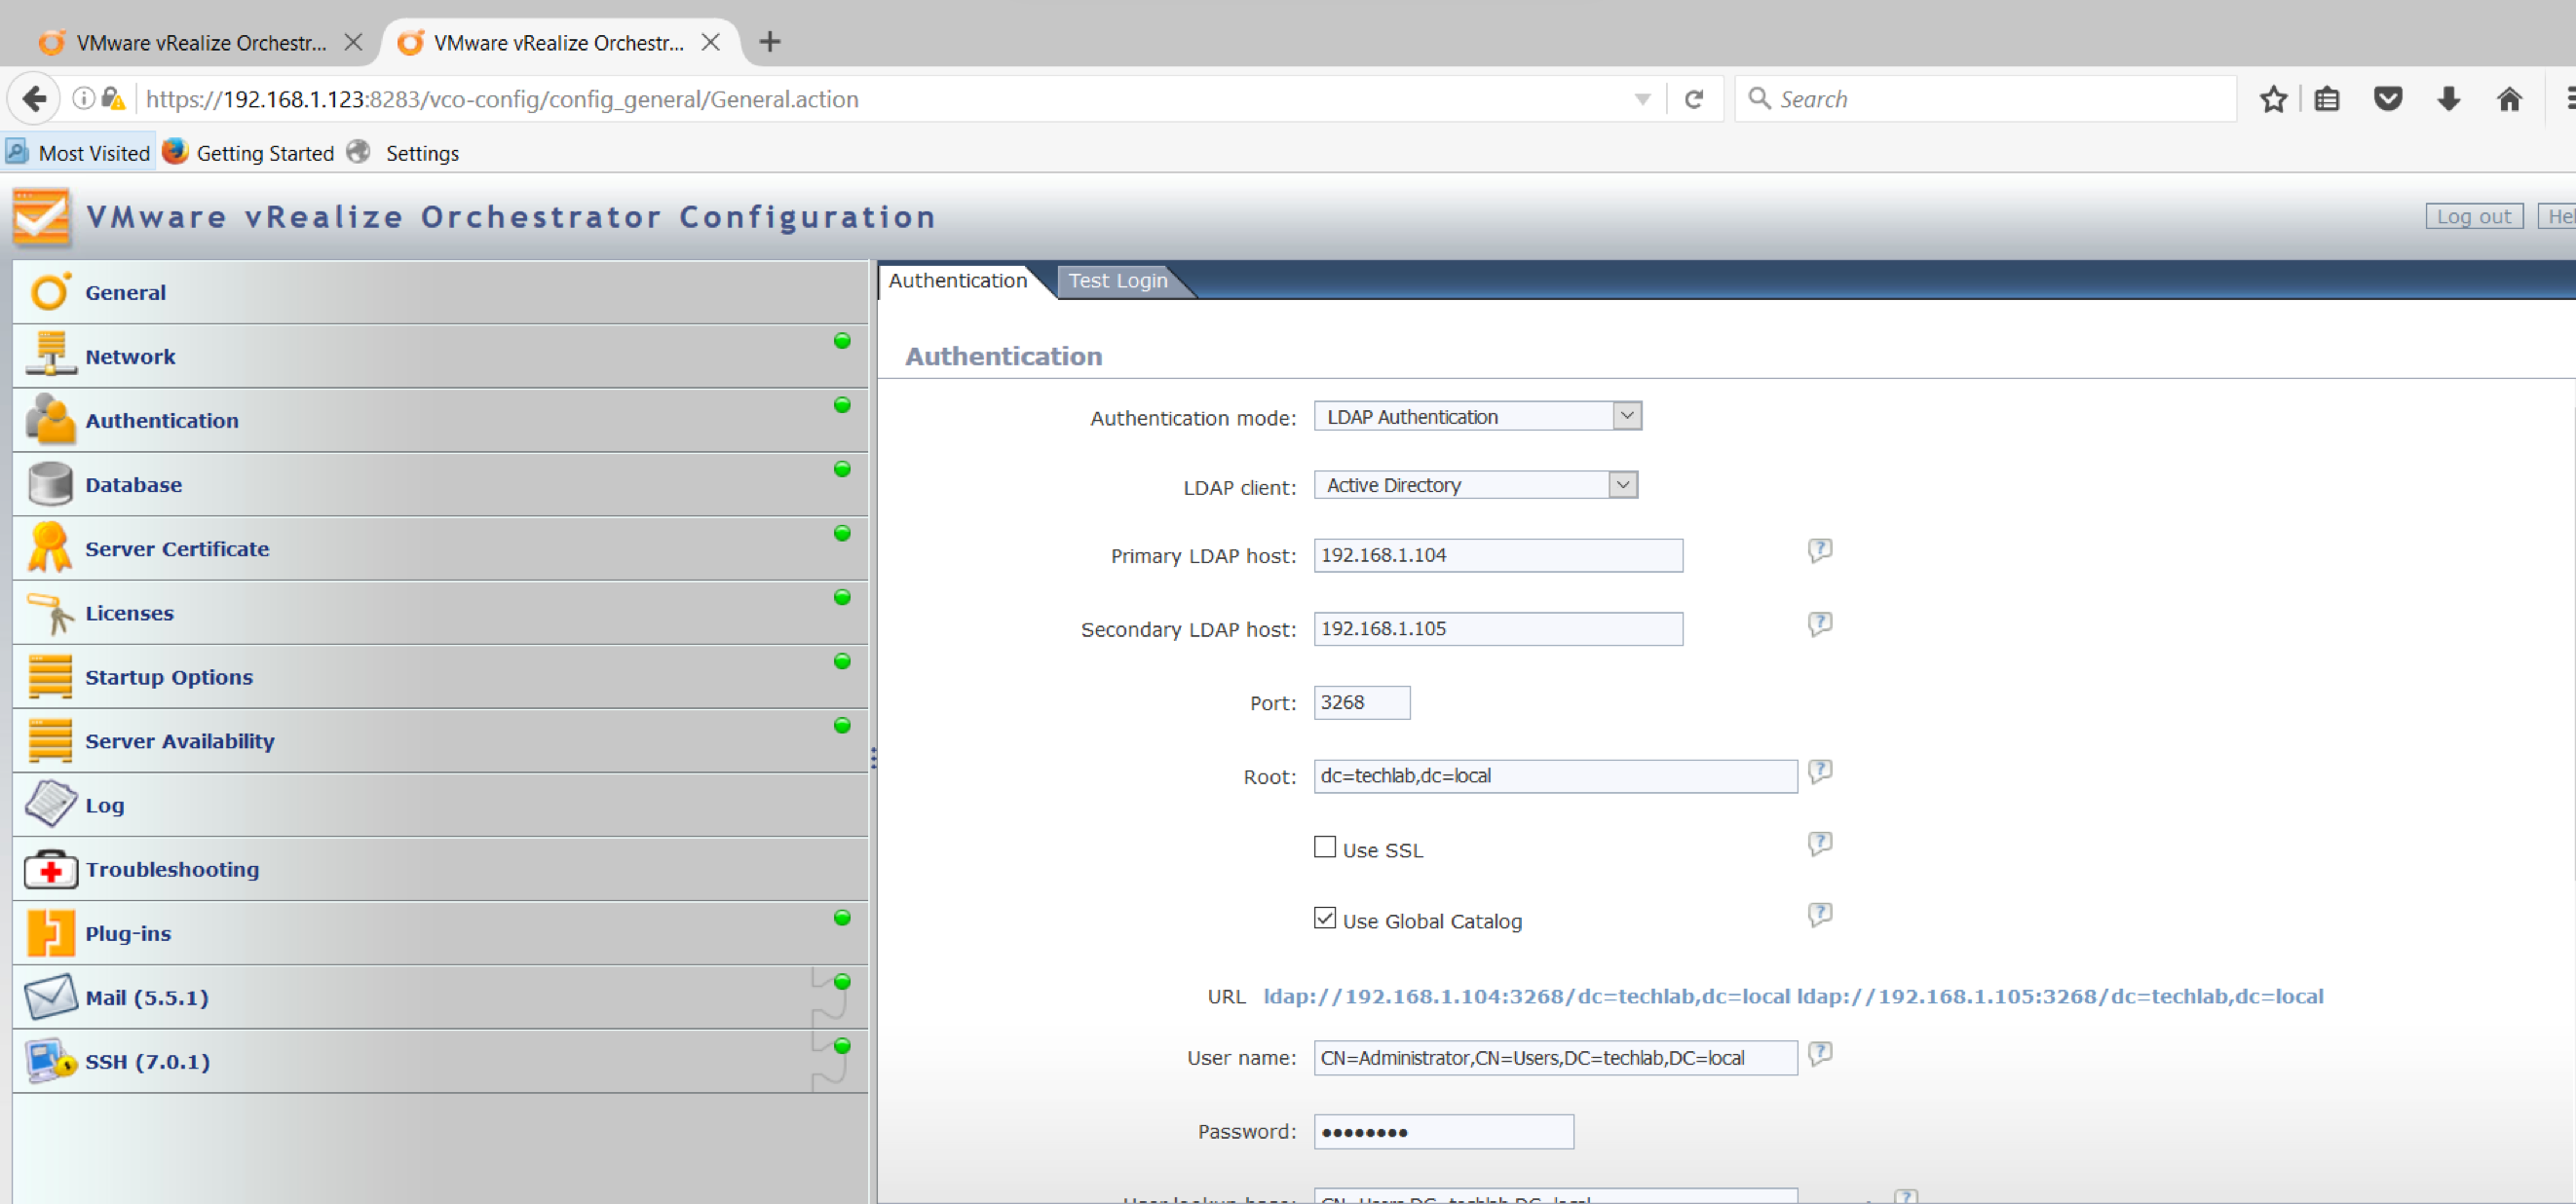
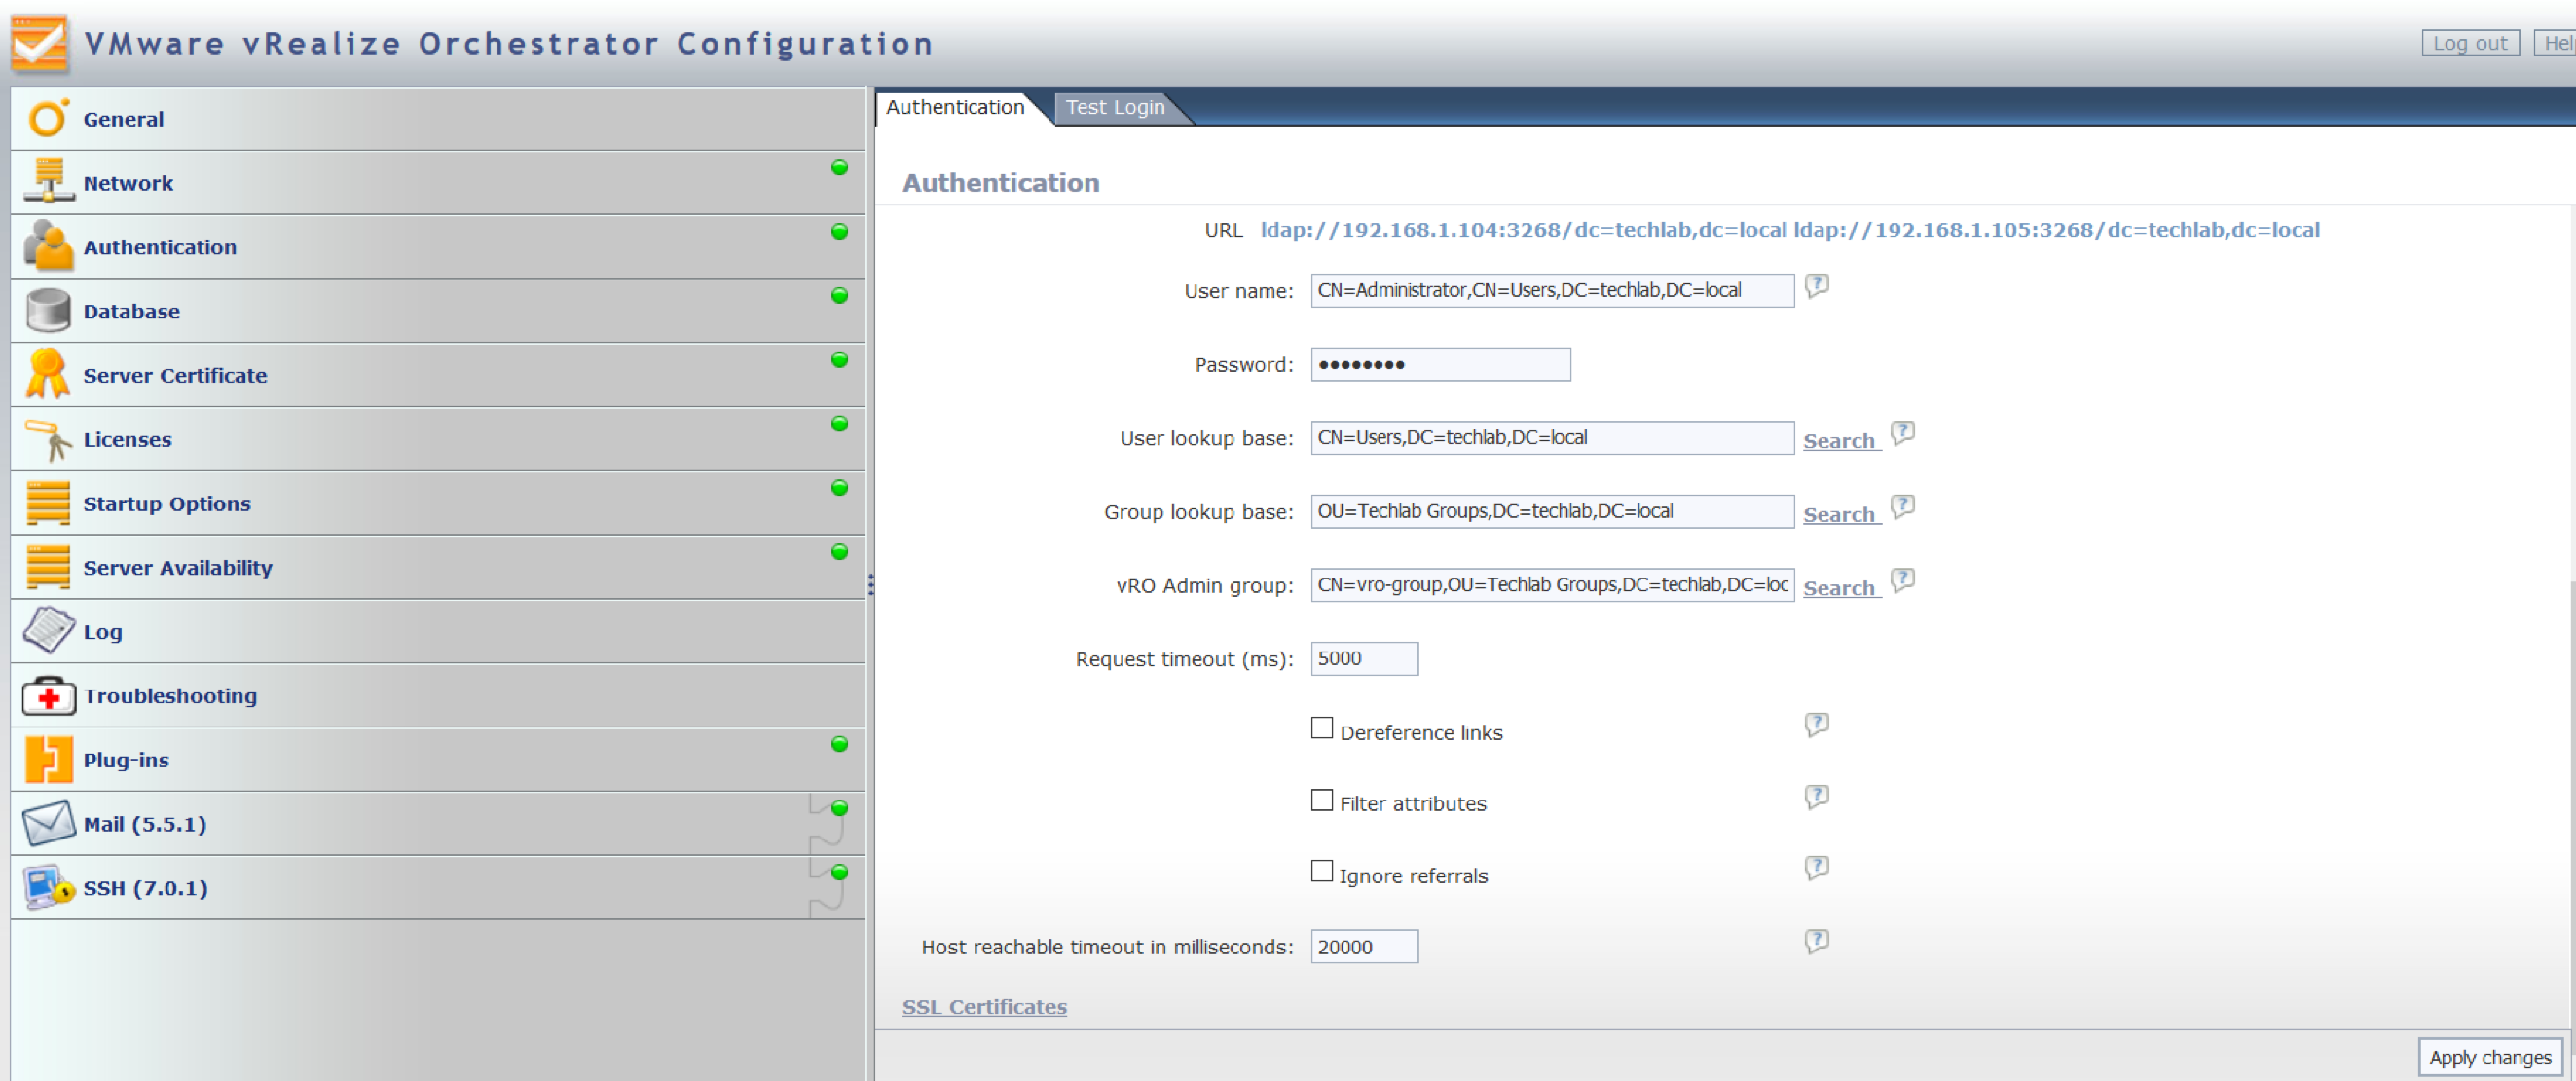
  • You will need to put in an authentication source (LDAP, Active Directory etc) This is required as you will need to have authentication sources to log in to the Orchestrator client

screen-shot-2016-11-14-at-11-24-54

screen-shot-2016-11-15-at-09-09-24

  • After configuring an authentication source, you may need to restart the vRO Server and the vRO Configuration Server.

screen-shot-2016-11-14-at-11-26-36

  • Add your license in. Options are below

screen-shot-2016-11-14-at-11-34-05

  • Check all other options and configure as relevant. Basically everything should look green.
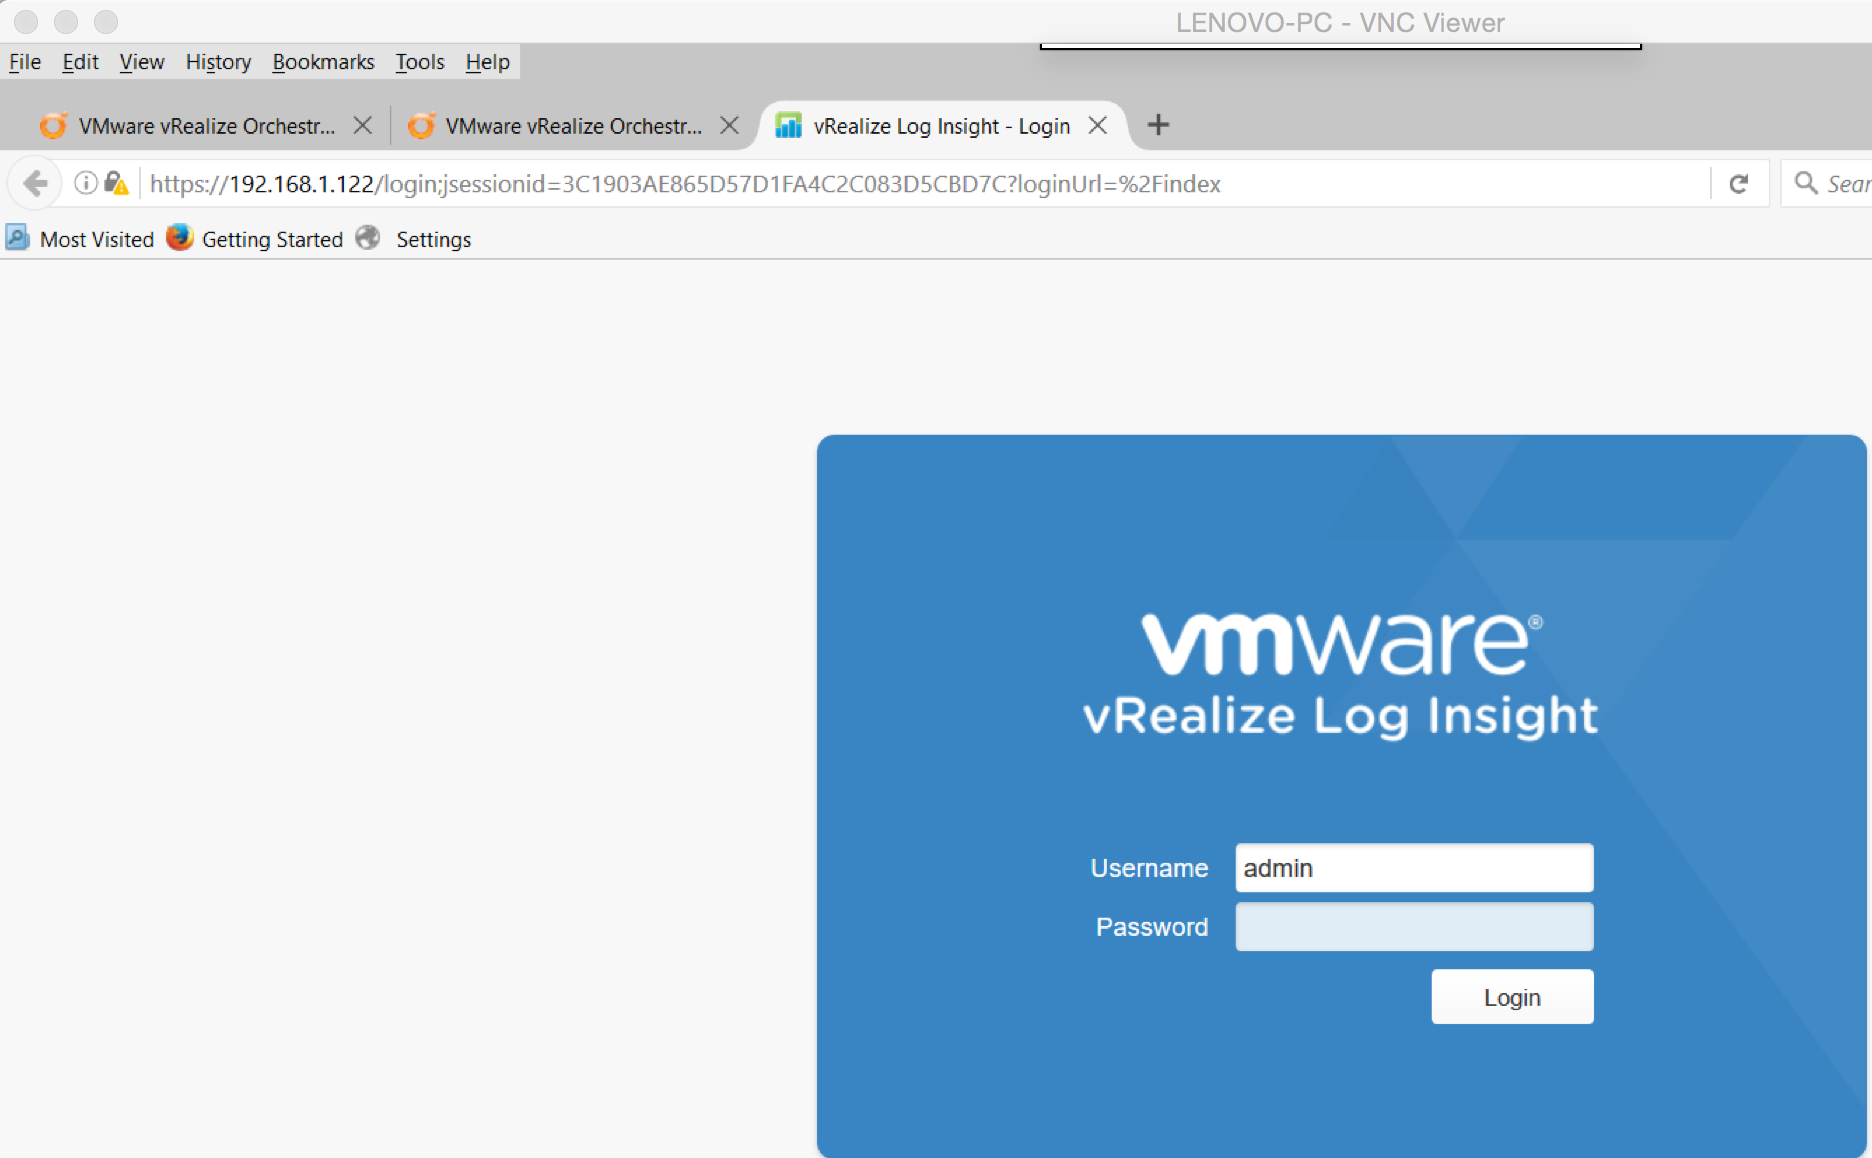
  • Next Log into Log Insight

screen-shot-2016-11-14-at-11-38-08

  • Click on the Administration icon (Top right in Log Insight)

screen-shot-2016-11-14-at-11-44-31

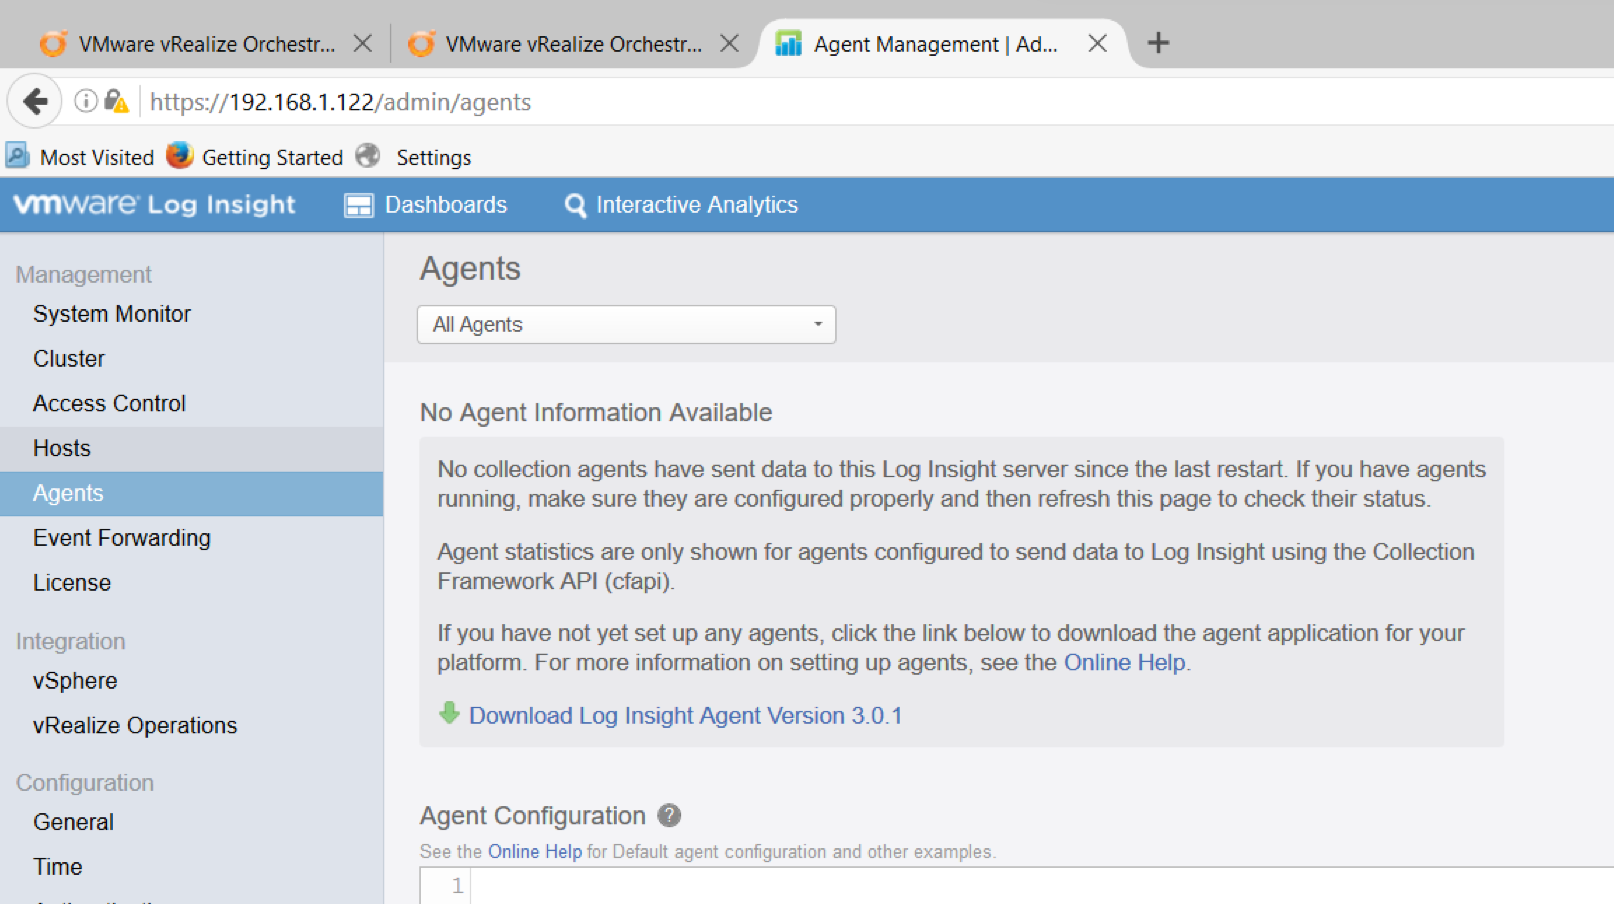
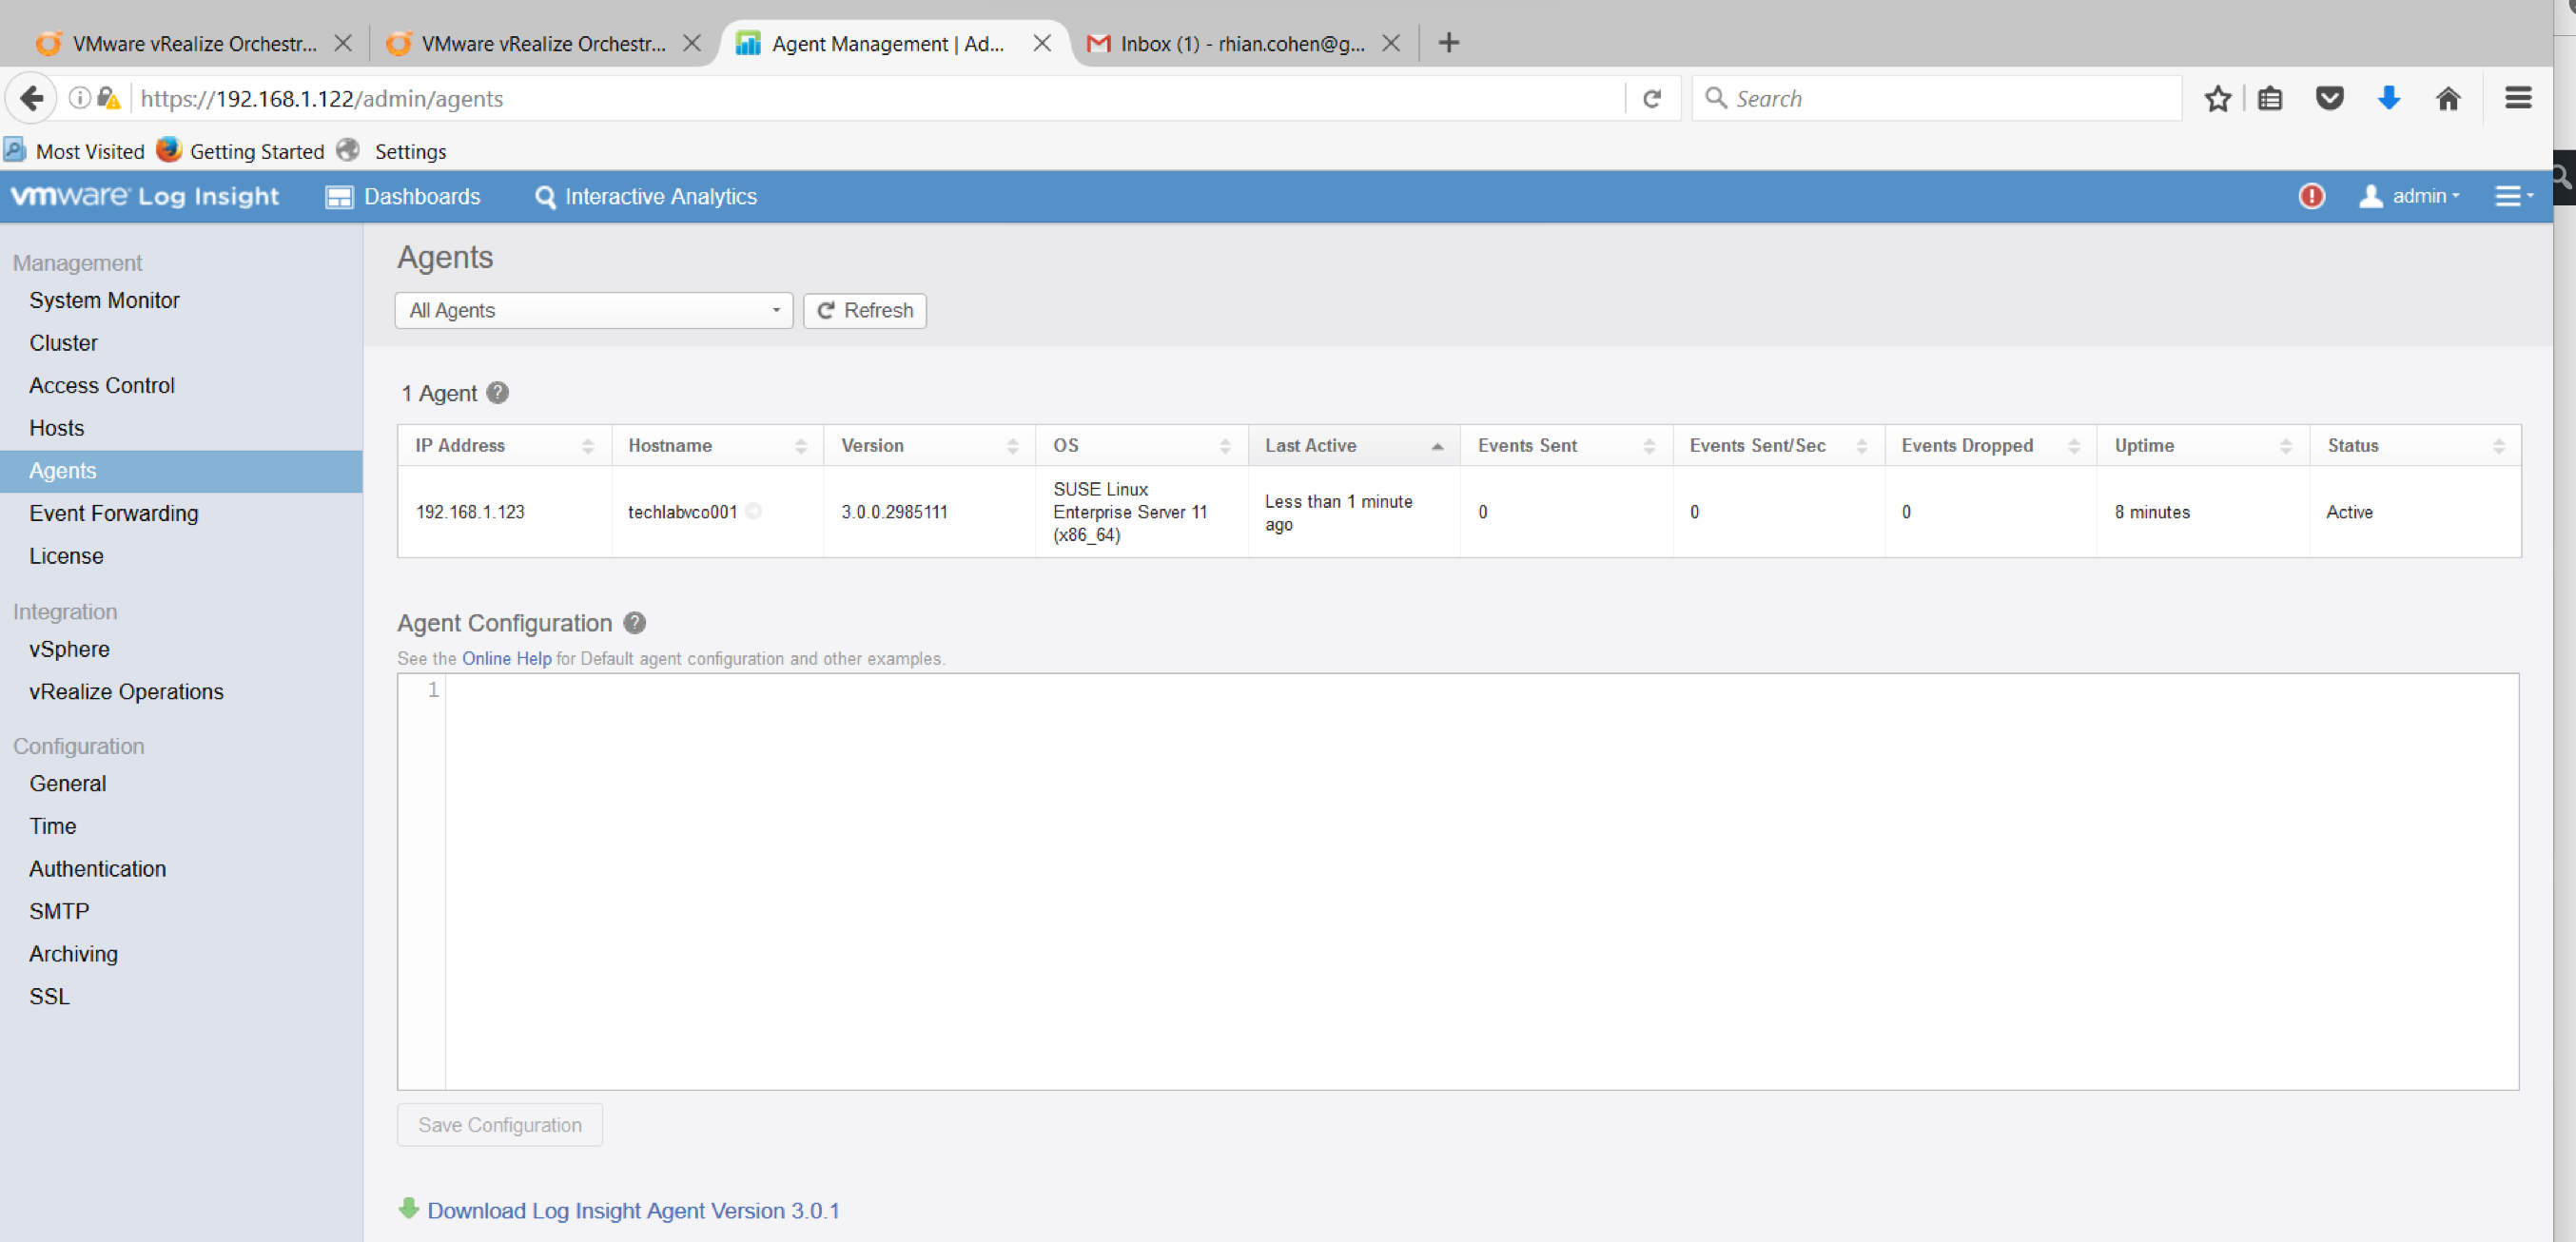
  • Click on Agents

screen-shot-2016-11-14-at-13-15-50

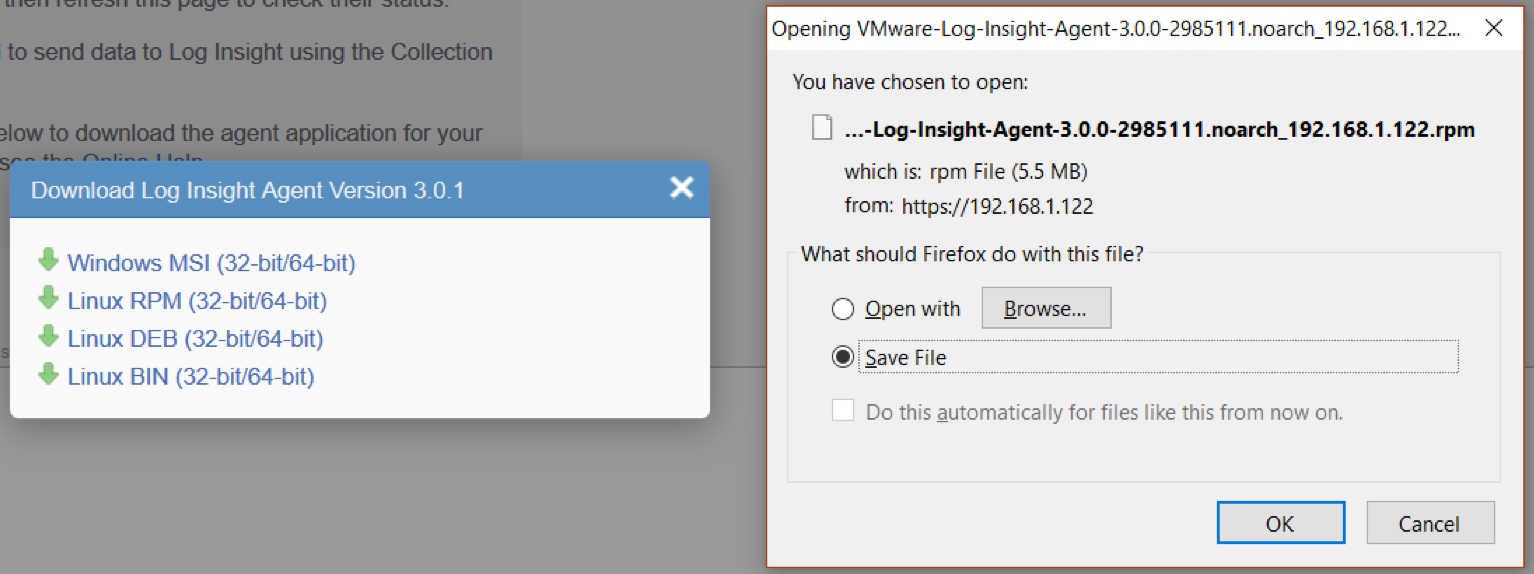
  • Click on Download Log Insight Agent Version 3.0.1
  • Choose Linux RPM

screen-shot-2016-11-14-at-13-17-11

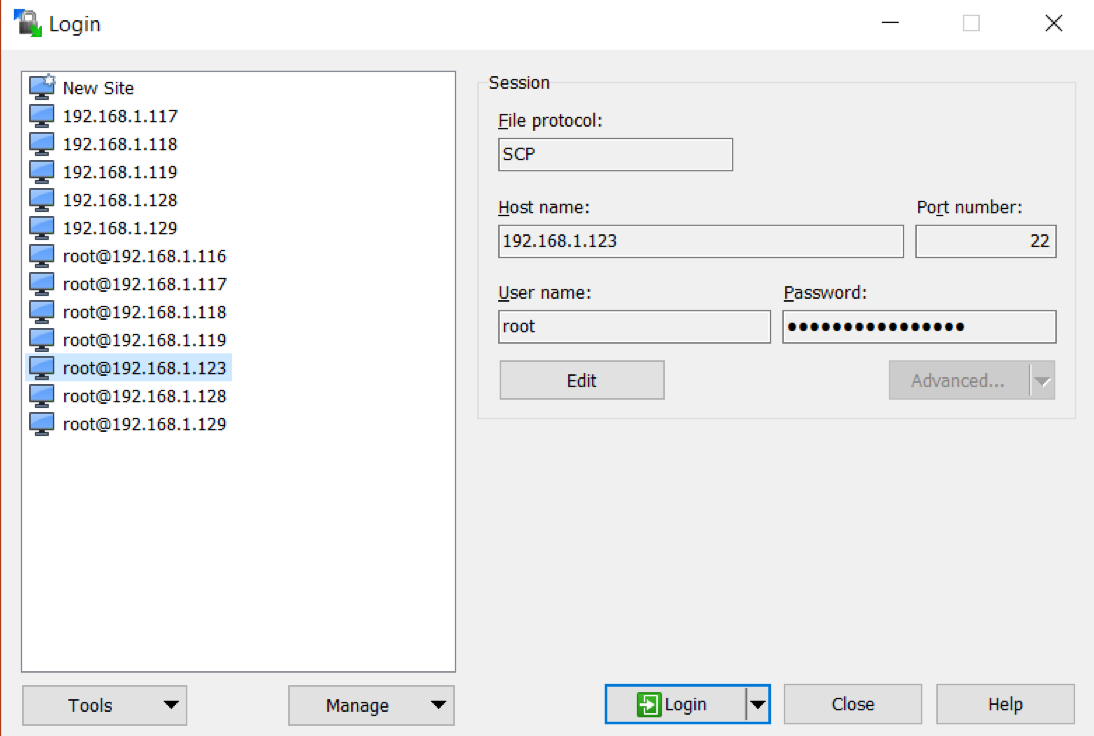
  • Using Winscp, log into the vCO appliance

screen-shot-2016-11-14-at-13-21-03

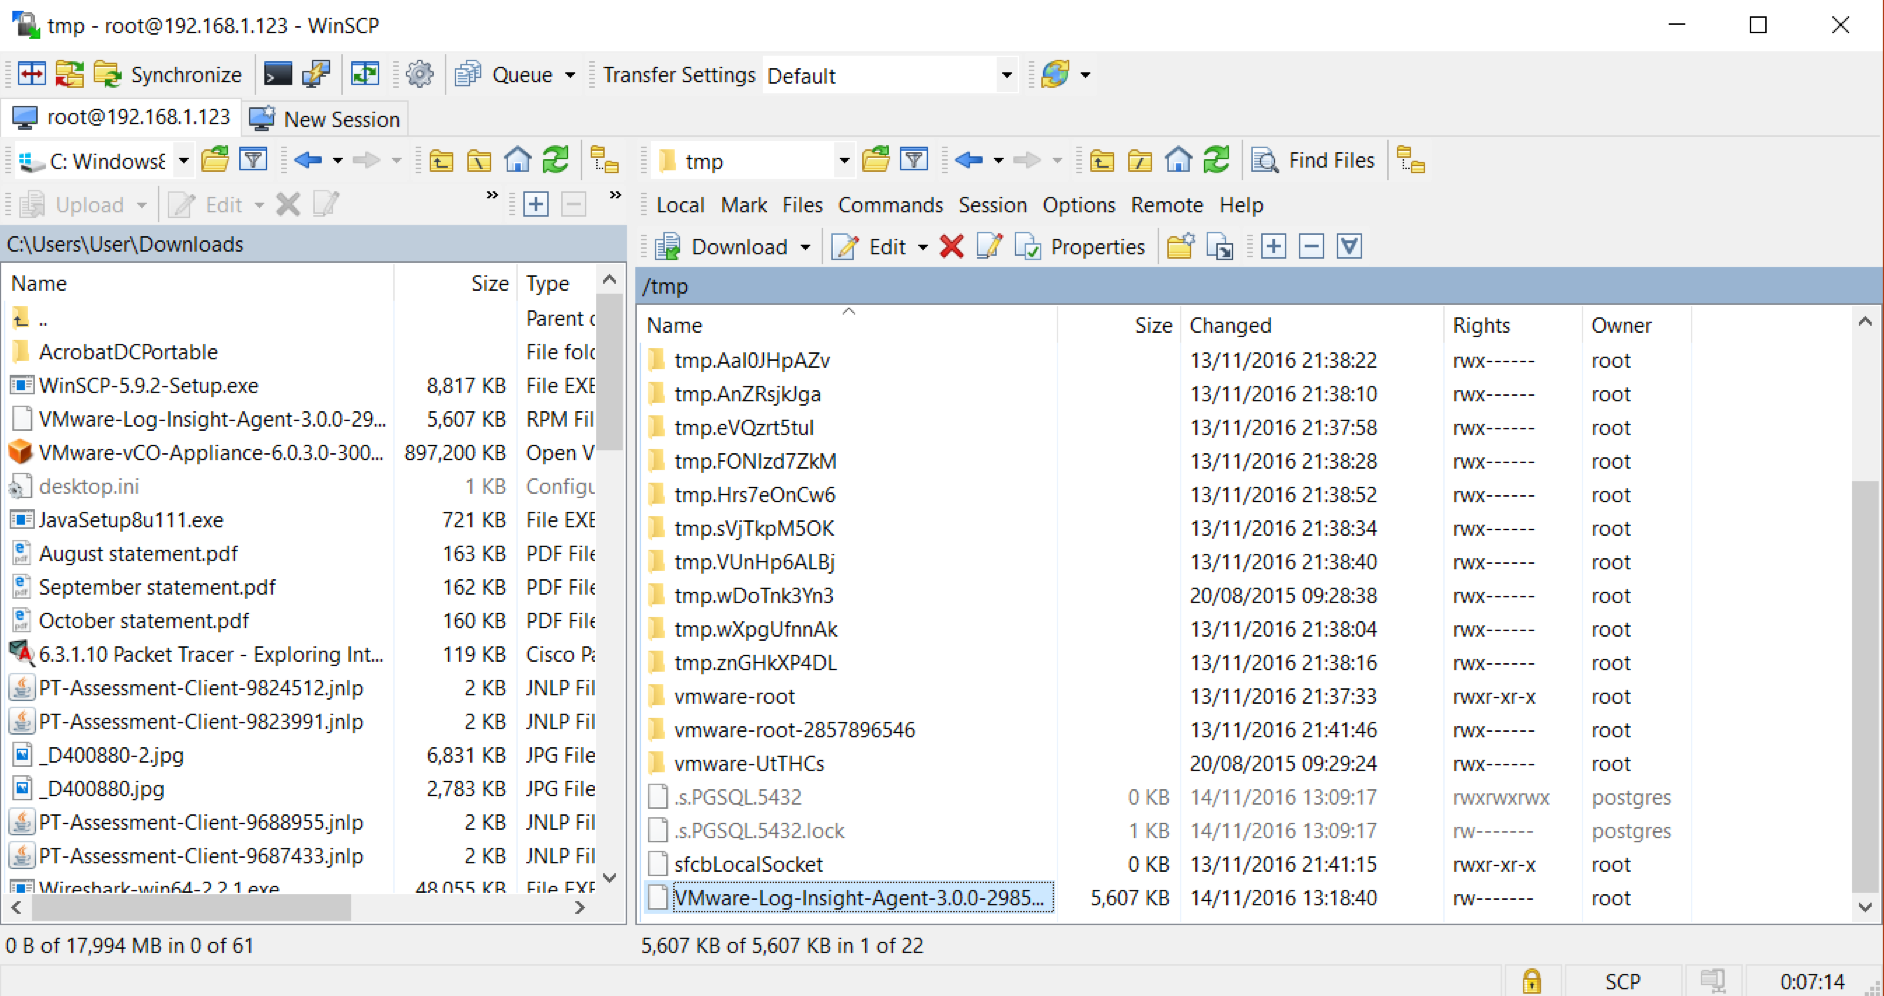
  • We now need to copy the Linux Log Insight agent to a directory on the vCO server
  • Copy the agent to the /tmp folder

screen-shot-2016-11-14-at-13-29-06

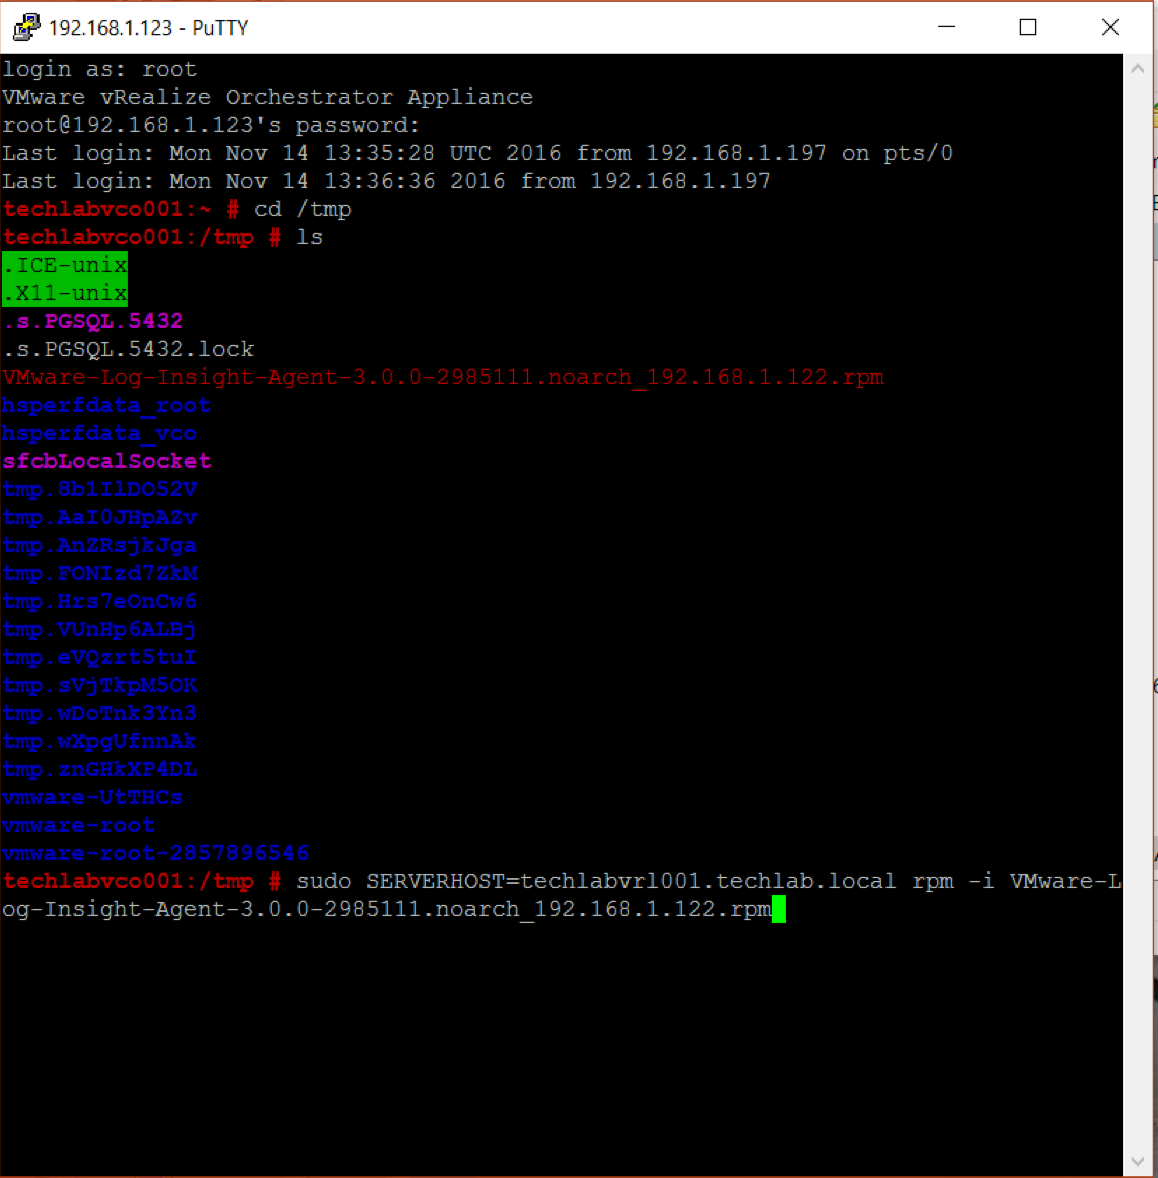
  • Putty in to the vCO box
  • Switch to the /tmp folder – cd /tmp
  • To set the target vRealize Log Insight server during installation run the sudo command and replace hostname with the IP address or hostname of the vRealize Log Insight server.
  • sudo SERVERHOST=hostname rpm -i VMware-Log-Insight-Agent-VERSION-BUILD_NUMBER.rpm
  • In my case
  • sudo SERVERHOST=techlabvrl001.techl;ab.local rpm -i VMware-Log-Insight-Agent-3.0.0-2985111.noarch_192.168.1.122.rpm

screen-shot-2016-11-14-at-13-39-25

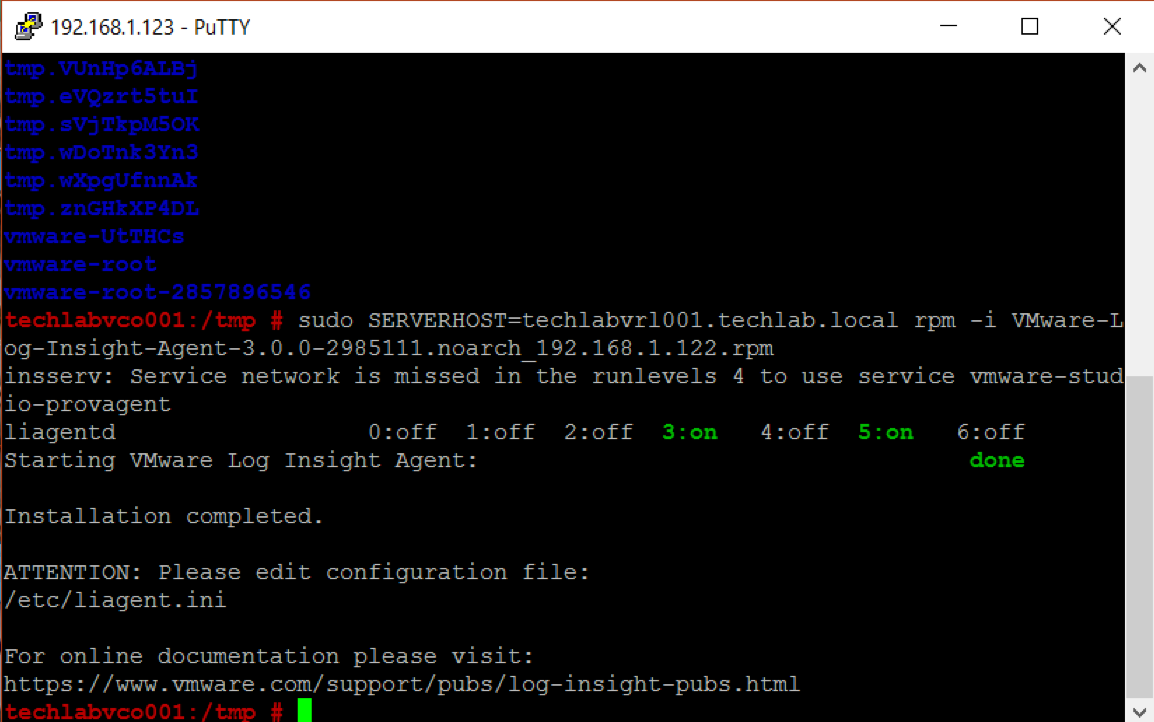
  • You should see the following

screen-shot-2016-11-14-at-14-03-03

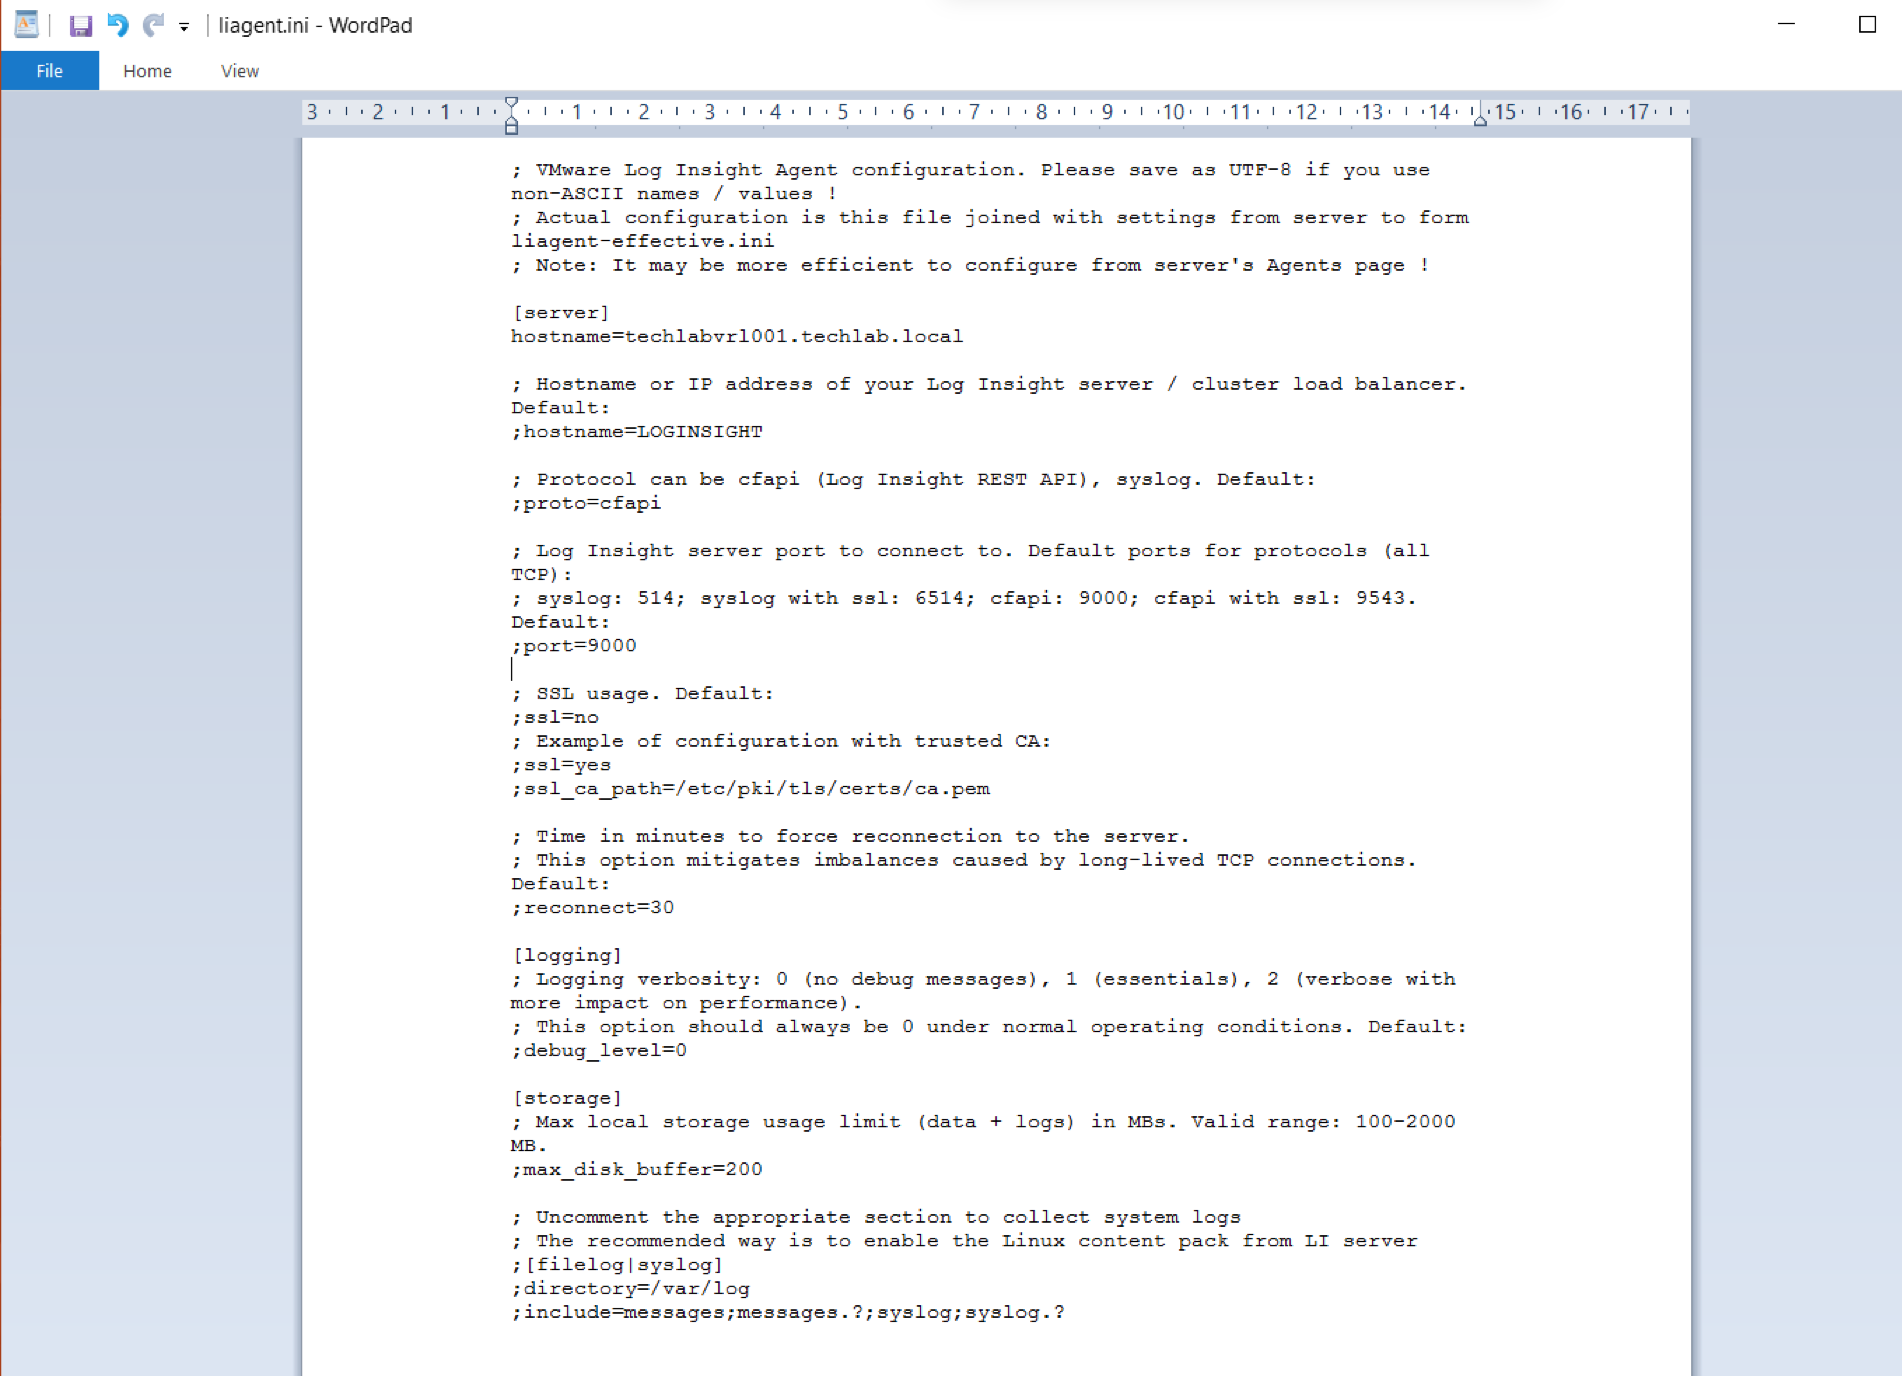
  • Go back into WinSCP and open the file liagent.ini from /etc/liagent.ini
  • Check the LogInsight hostname has been added in and check all other options. We will not be modifying this liagent file as the recommended way to modify these settings is via the Linux Content Pack which needs to be imported into Log Insight and configured from within here. Instructions below in further steps

screen-shot-2016-11-14-at-14-22-57

  • Go back into Log Insight and refresh the page and check the agent has been picked up.

screen-shot-2016-11-14-at-14-24-08

Next we need to install the Linux Content Pack – Linux__v1.0.vlcp currently

  • Go to the Administration icon and click on Content Packs

screen-shot-2016-11-14-at-14-34-25

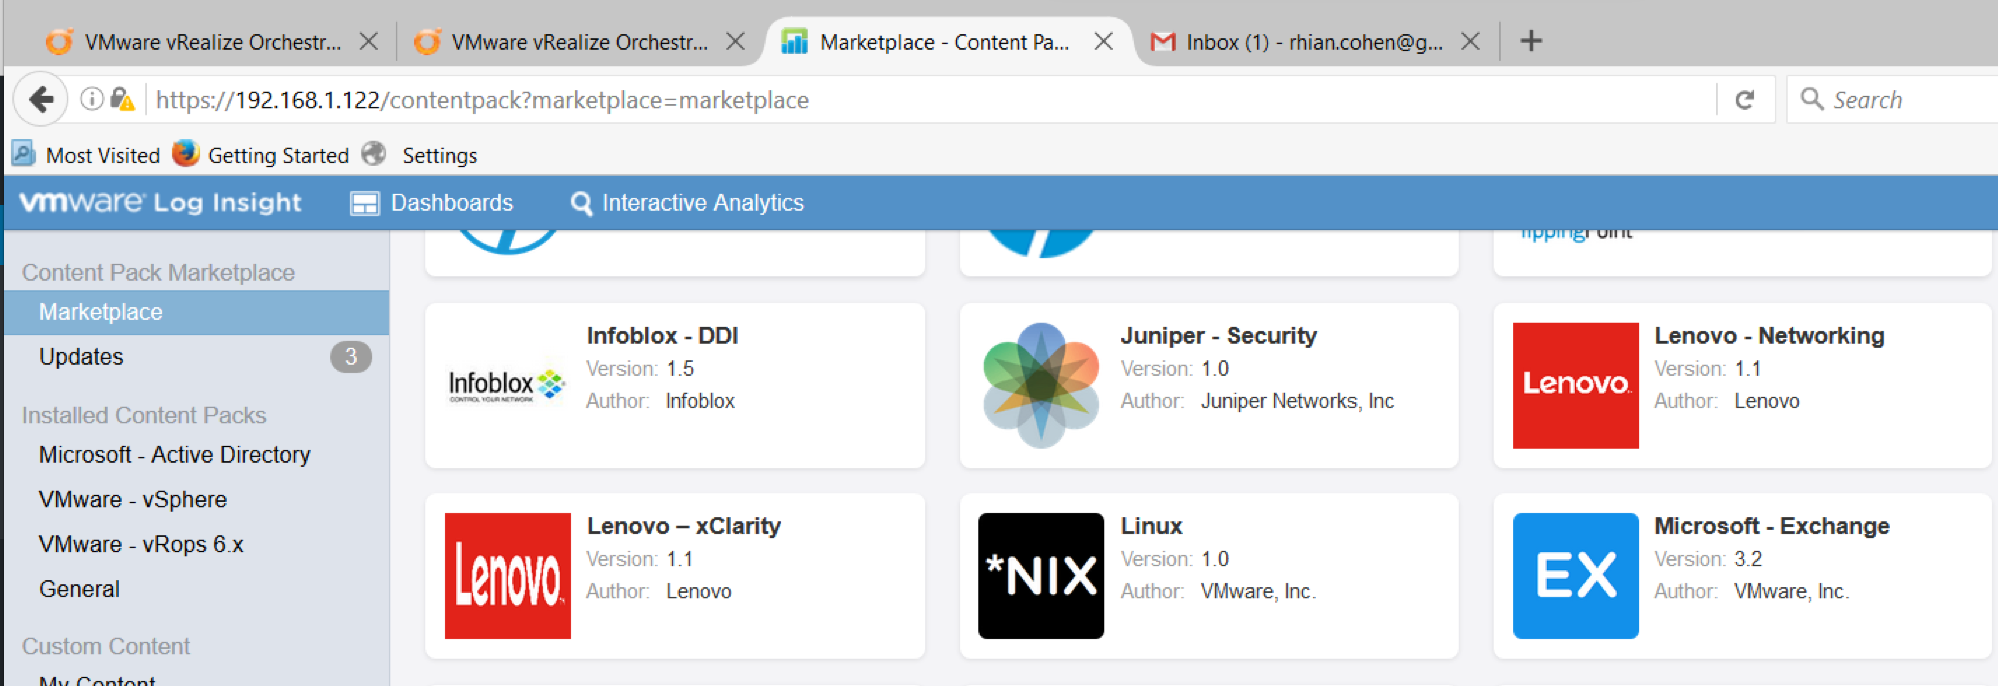
  • Find the Linux Content Pack

screen-shot-2016-11-14-at-14-36-40

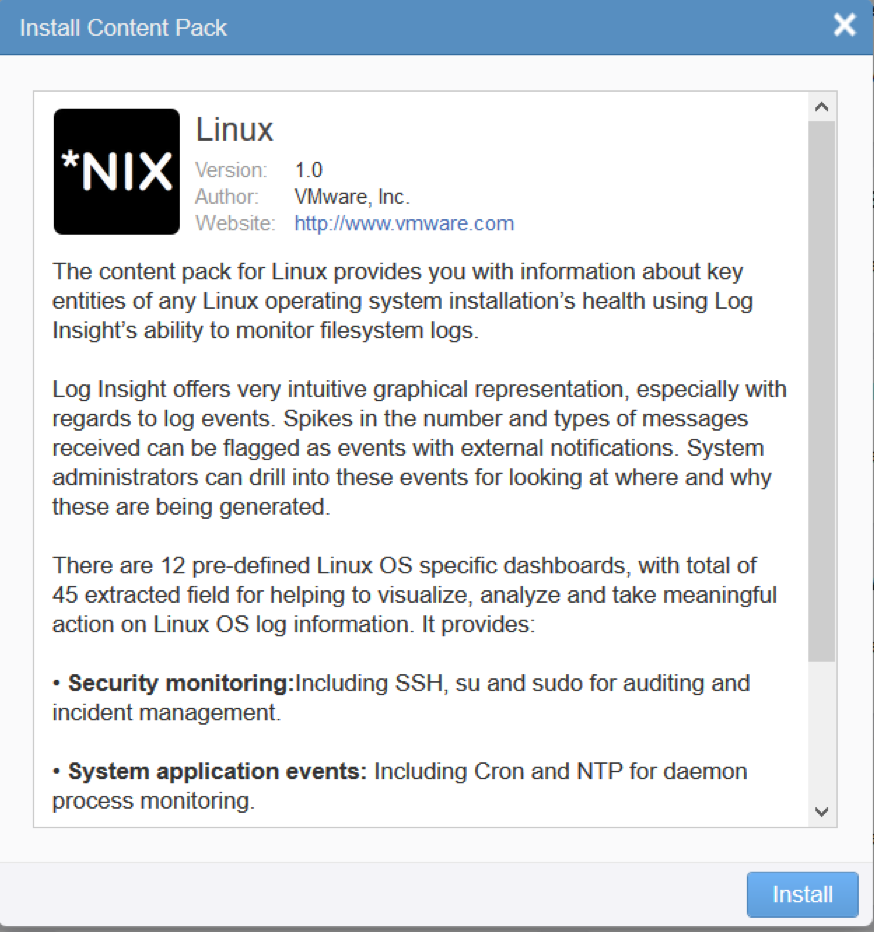
  • When you click on the Content Pack, the below information will come up

screen-shot-2016-11-14-at-14-37-30

  • Click Install and the below message will come up

screen-shot-2016-11-14-at-14-39-31

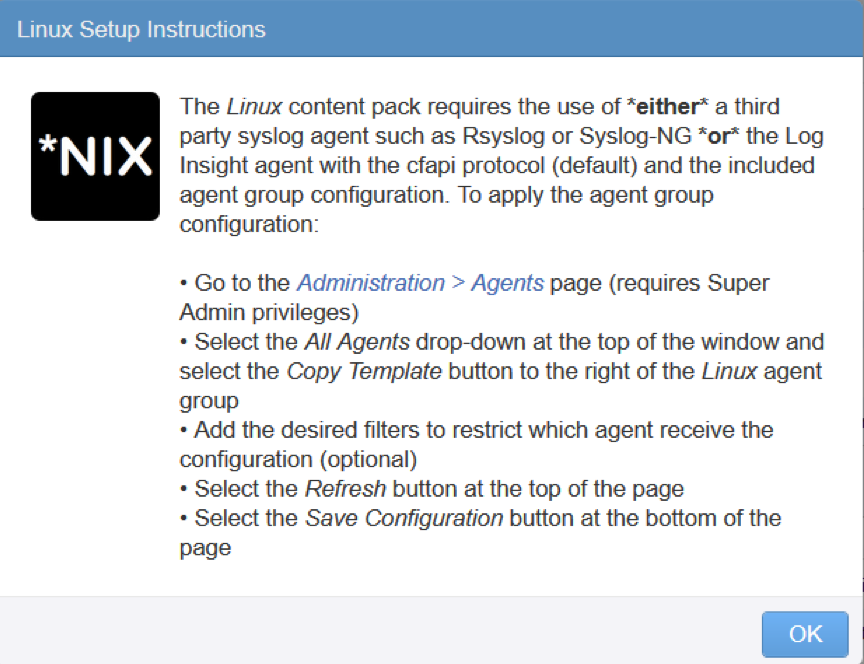
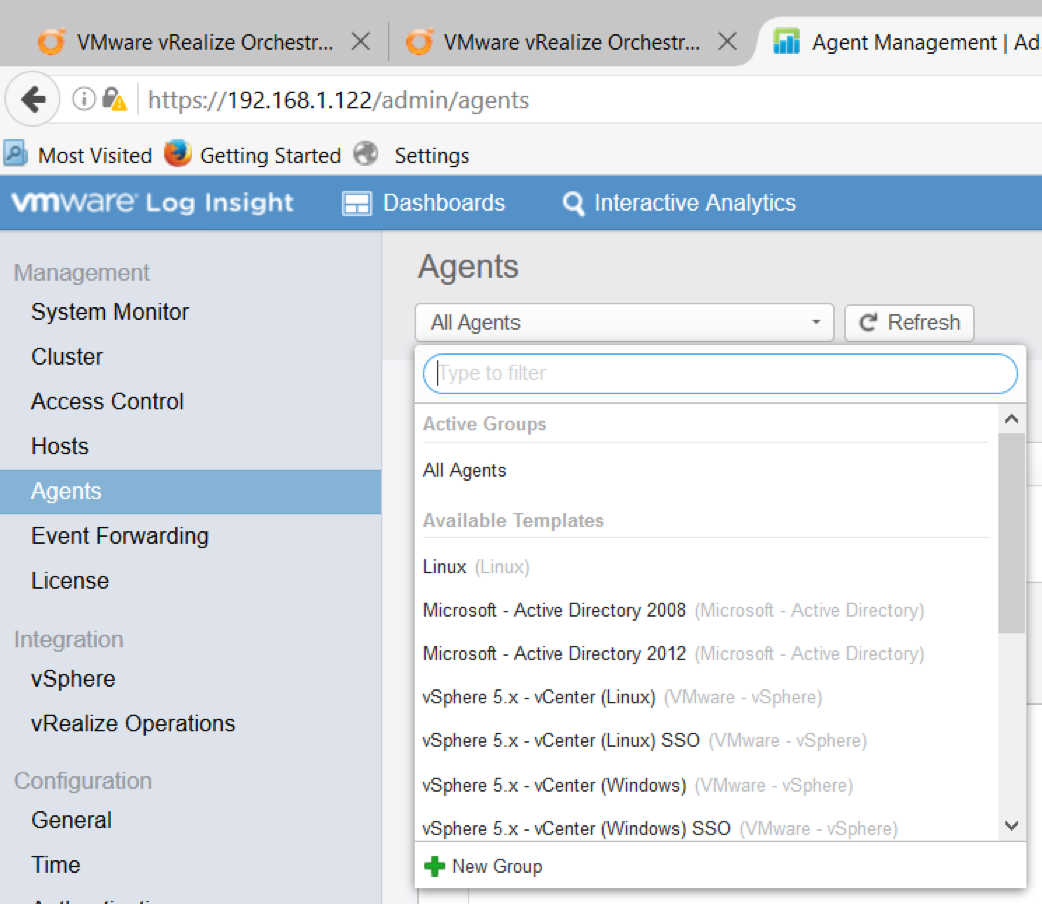
  • Now that you have installed the content pack you can create groups with specific configurations. Go back to Administration > Agents and create your first group for Linux computers.
  • Select Linux in the pull-down menu and click on the copy template button (2 rectangles). (Note you can’t see the 2 triangles until you hover over the agent)

screen-shot-2016-11-14-at-14-45-06

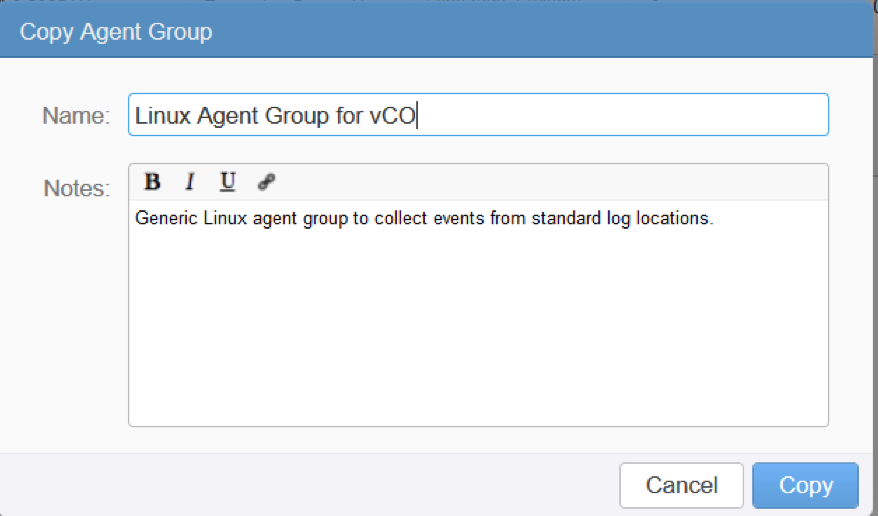
  • Put a name in for the agent group

screen-shot-2016-11-14-at-14-46-49

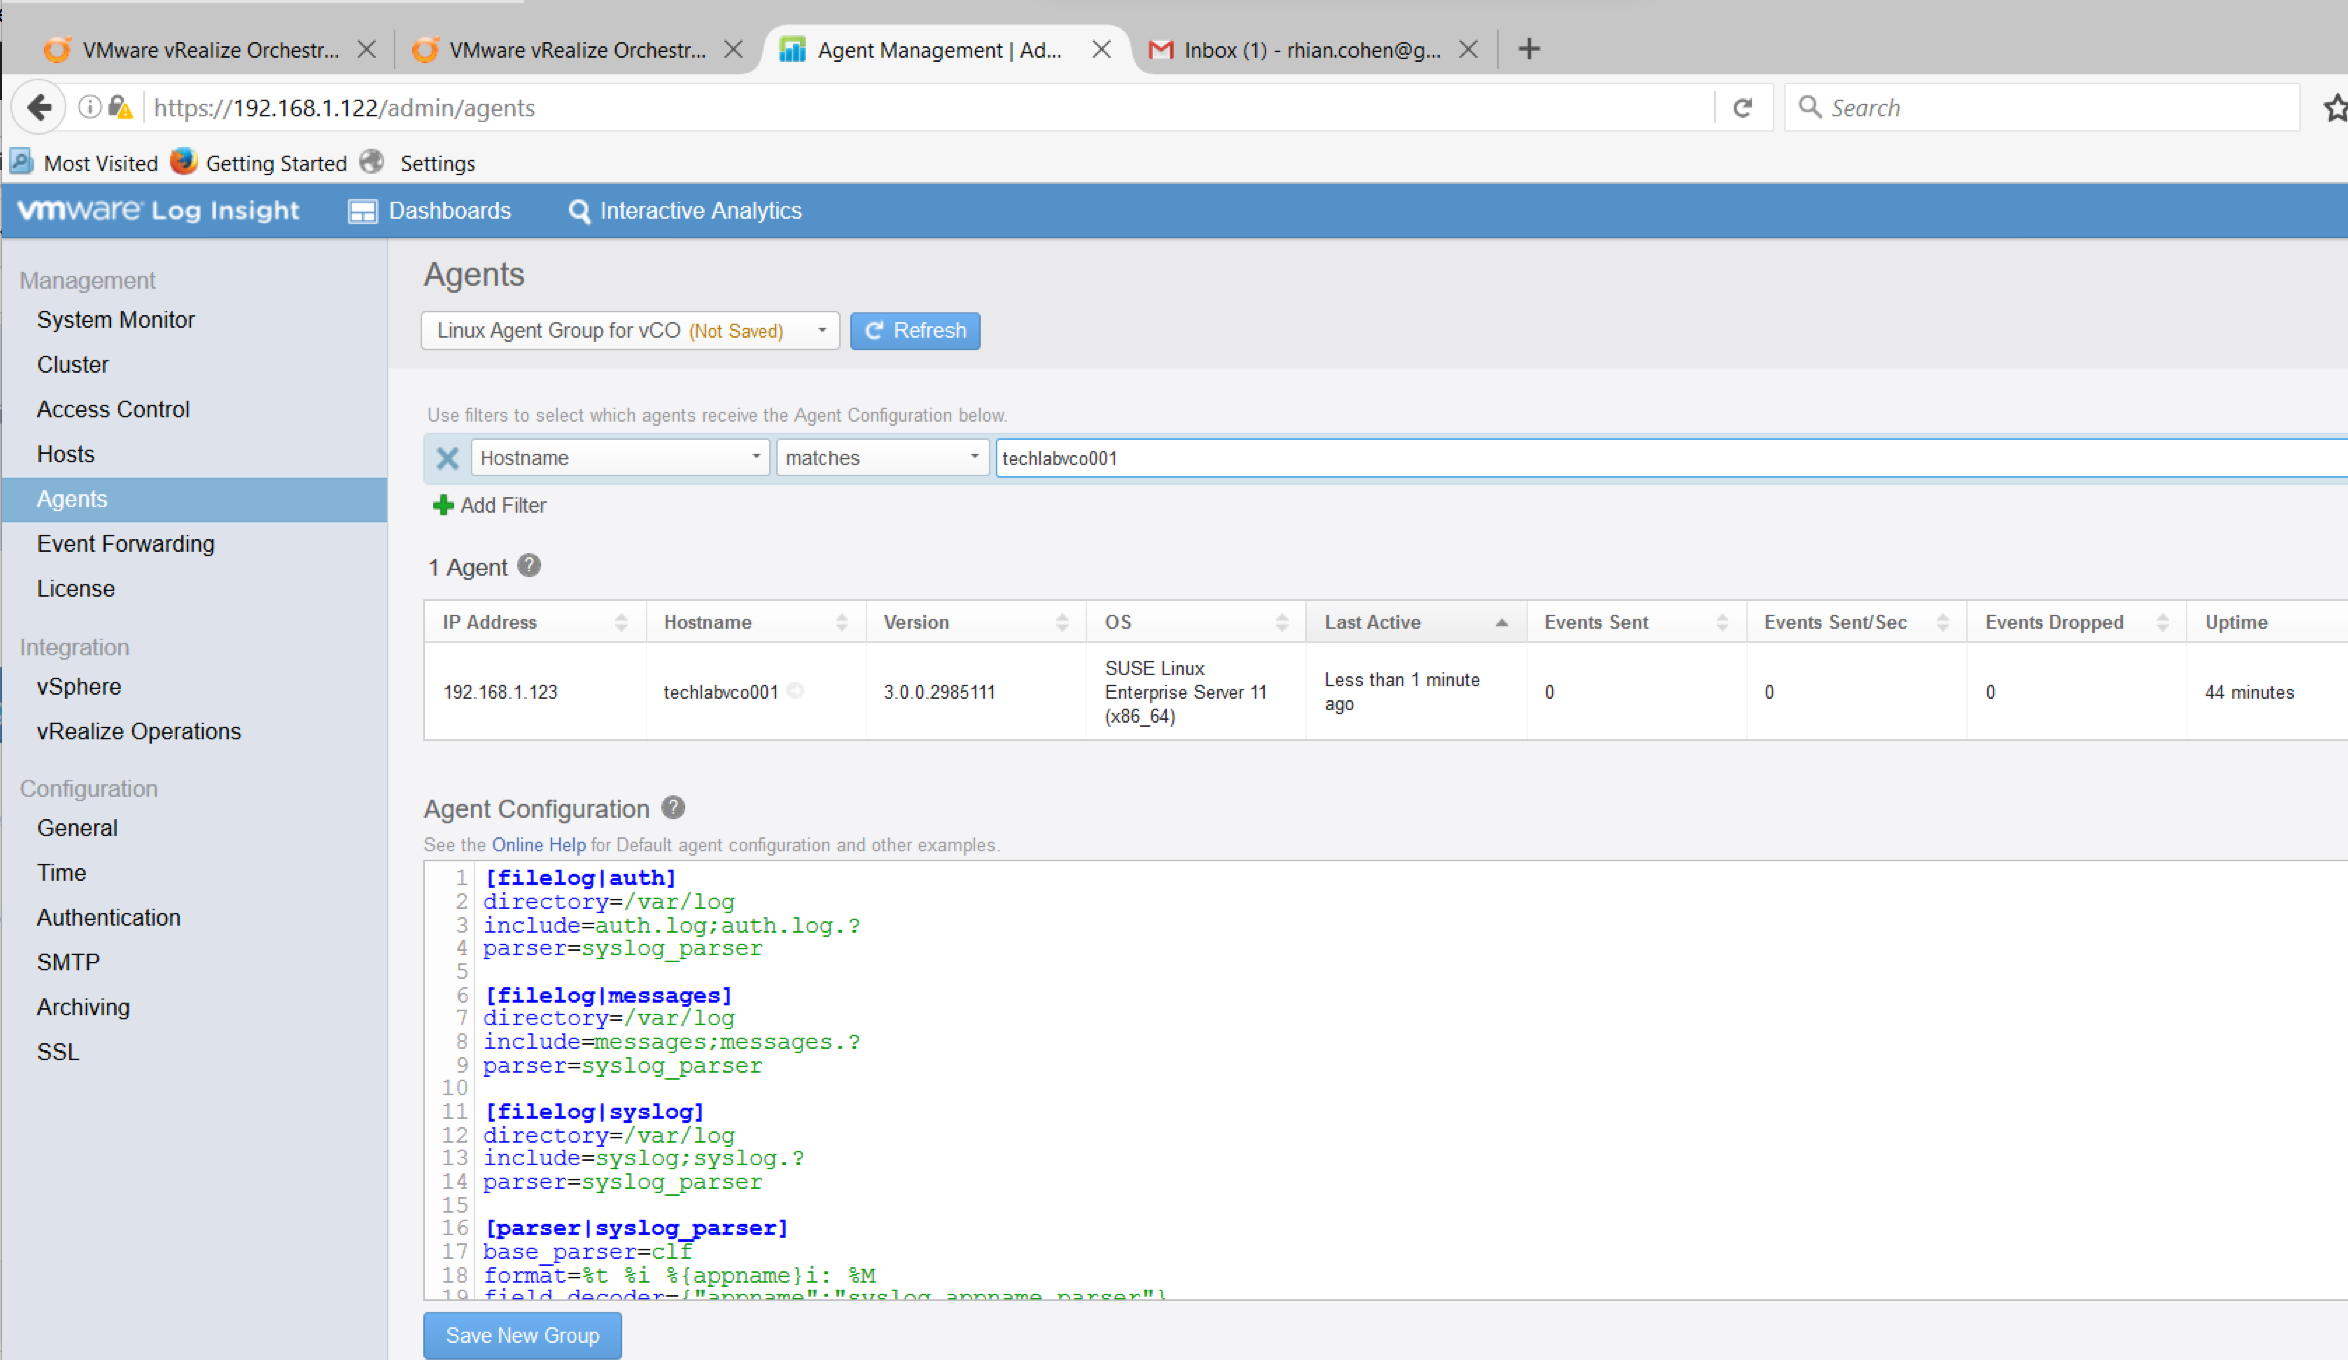
  • Adjust the filter to reflect what machine/machines you want to use
  • In this case I have just added a filter for the hostname of my vCO server

screen-shot-2016-11-14-at-14-48-11

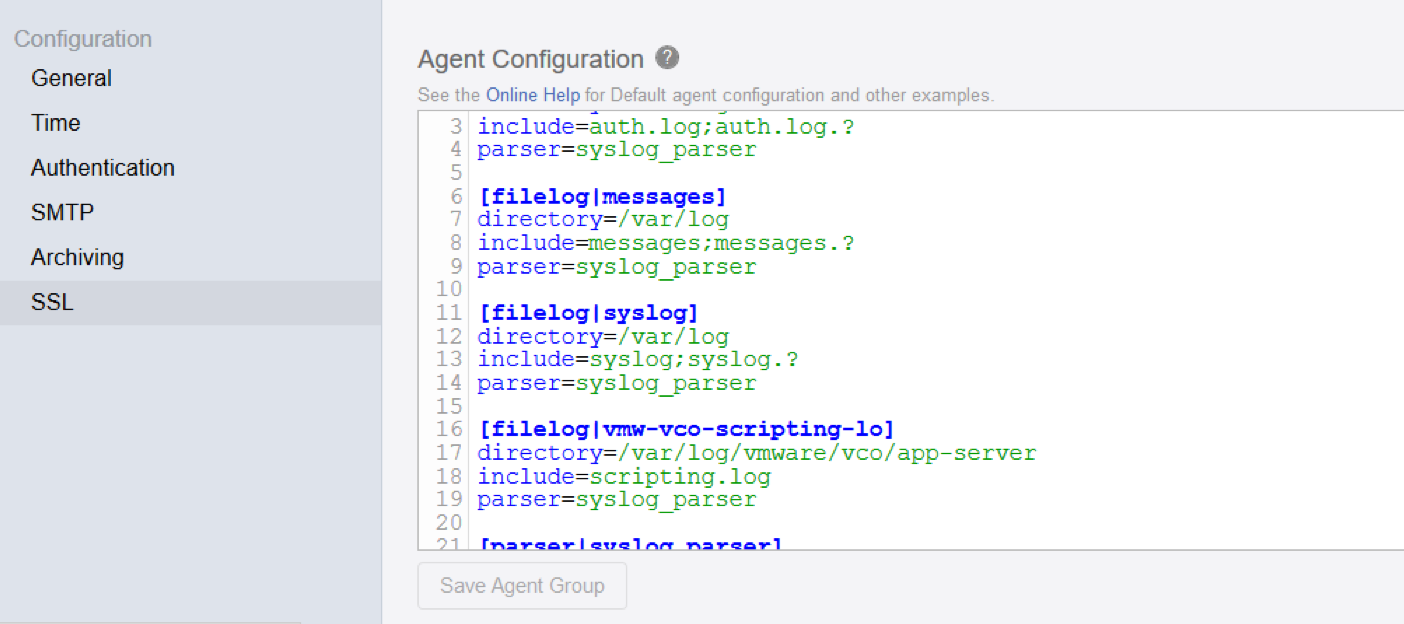
  • This adds the following to the Agent Configuration for the agent on your Linux machines.
  • If you want to view the Orchestrator Workflow Information then you need to add another section in the Agent Configuration (

[filelog|vmw-vco-scripting-lo]
directory=/var/log/vmware/vco/app-server
include=scripting.log
parser=syslog_parser

screen-shot-2016-11-14-at-17-07-48

  • Click Save New Group
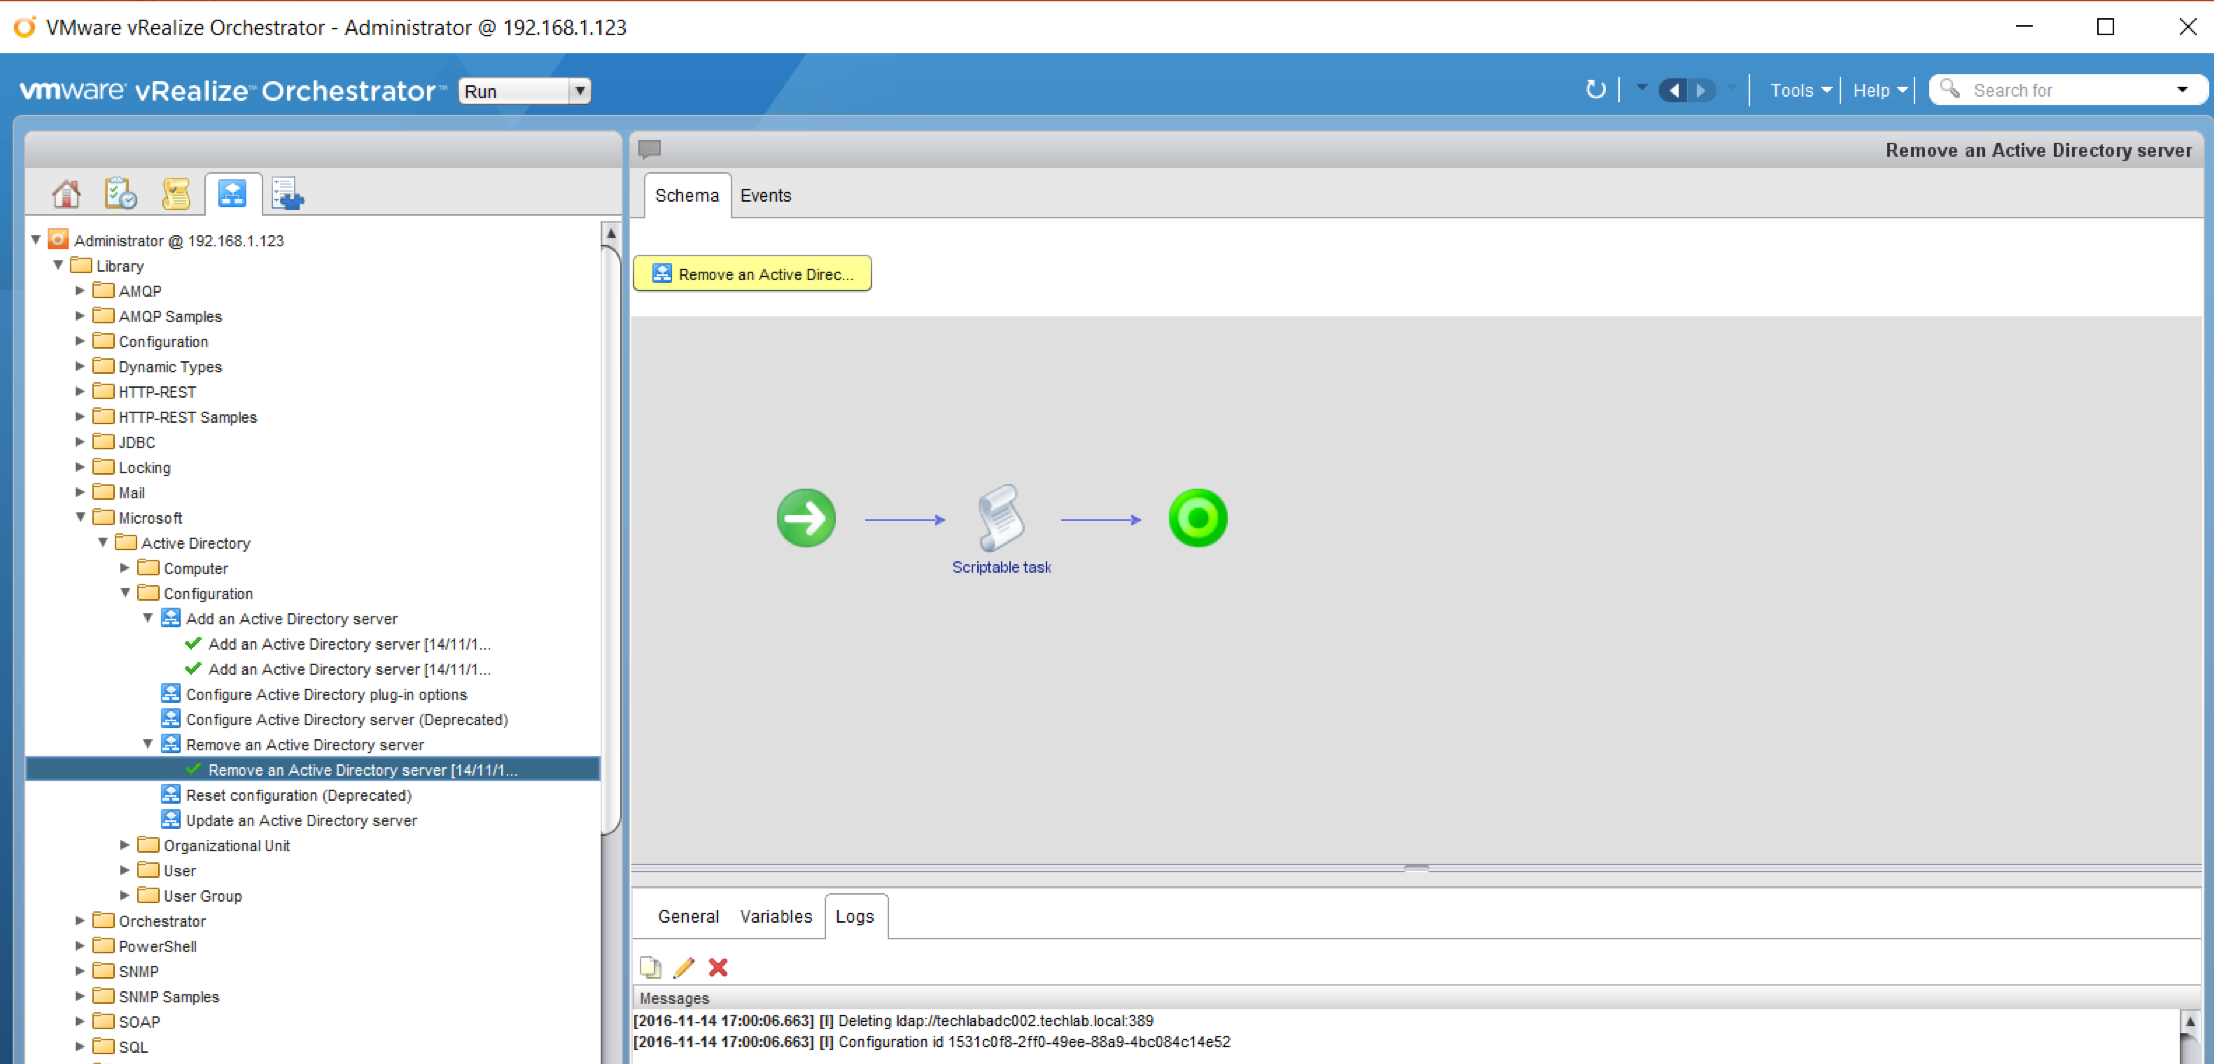
  • Log into the Orchestrator client and test a Workflow (I used Add an Active Directory Server and Remove an Active Directory Server but you could try anything)

screen-shot-2016-11-15-at-09-17-19

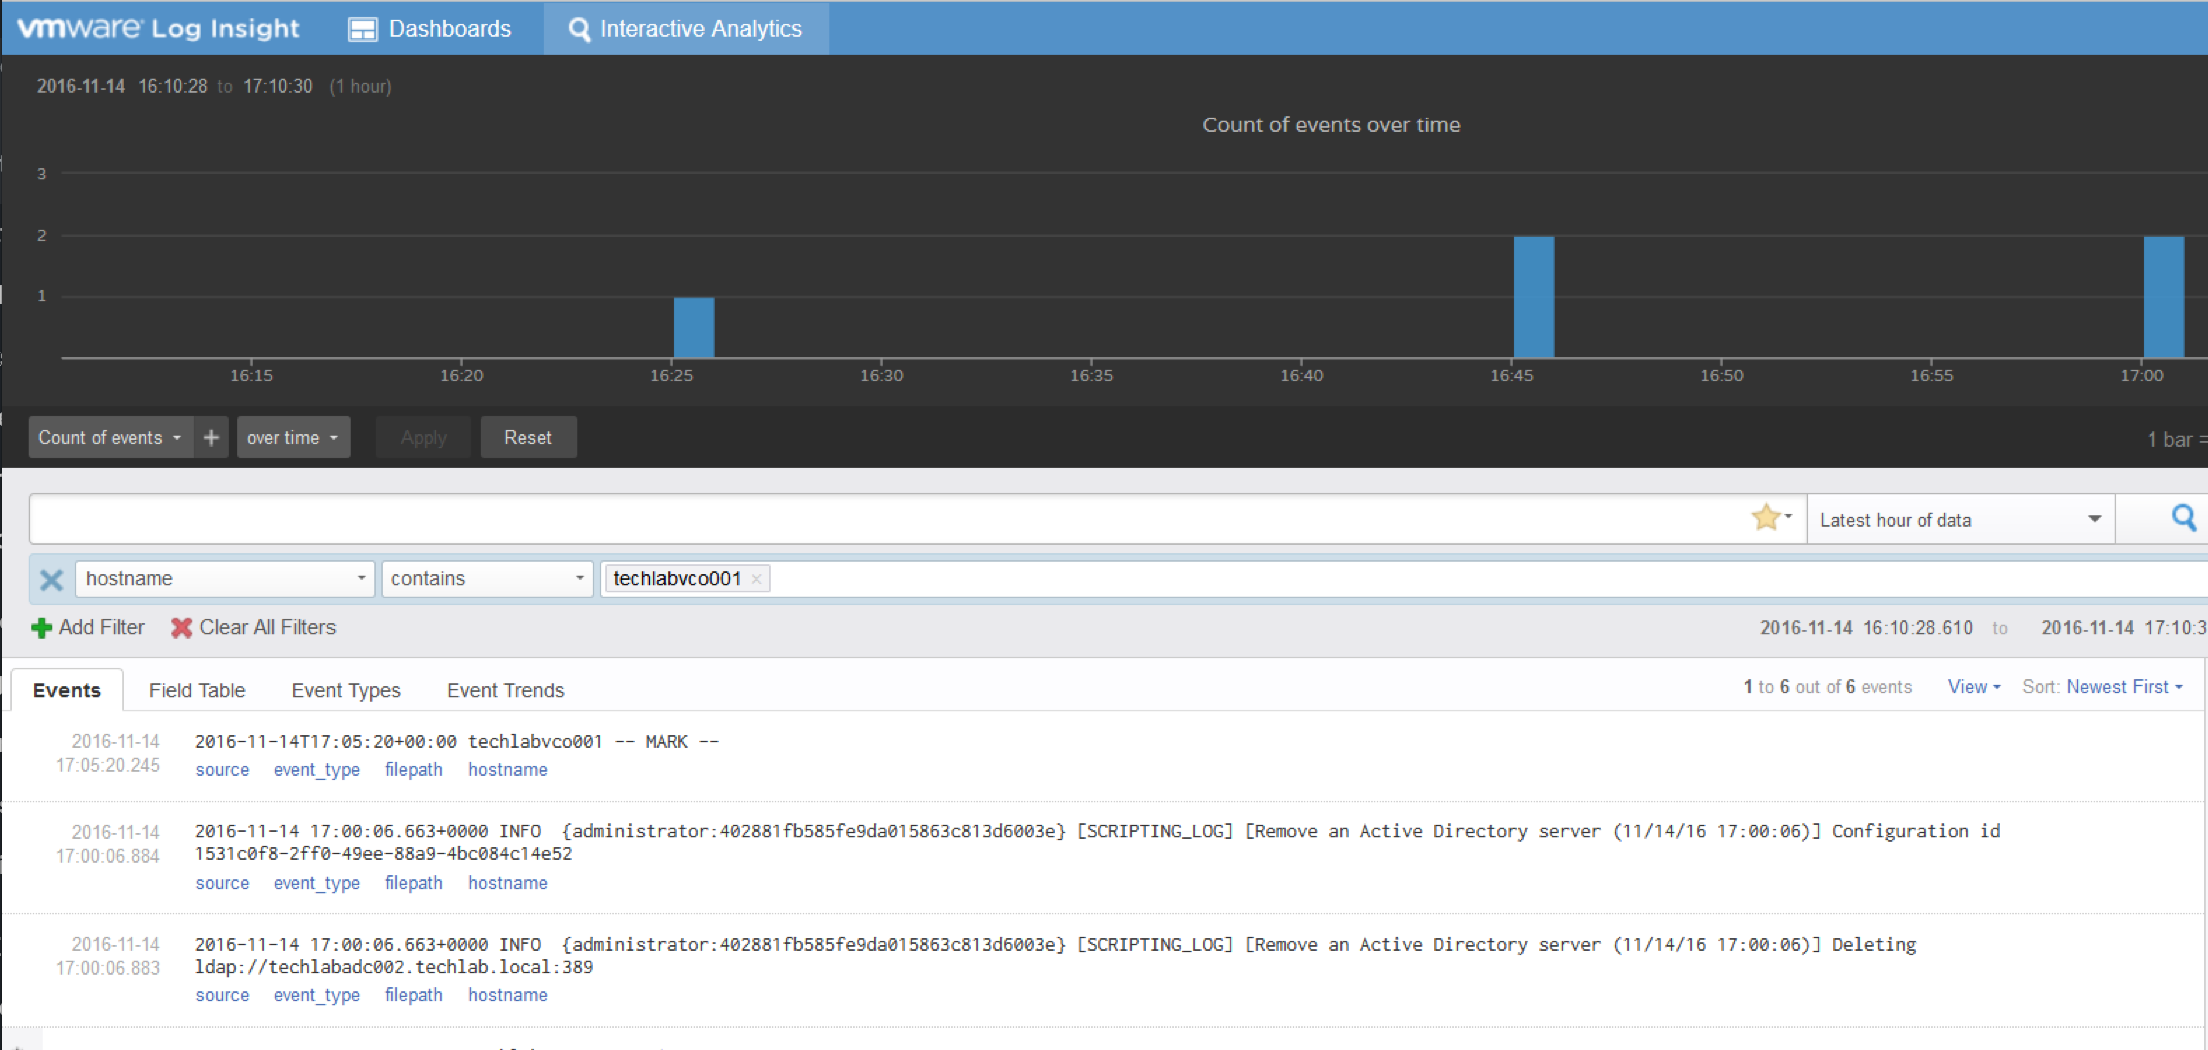
  • You should then see the below Workflow being logged in log Insight if you filter by vCO hostname

screen-shot-2016-11-14-at-17-10-37

  • Voila, you have logging set up for the vCO in Log Insight

Adding queries to Dashboards

  • We were using a Workflow which changed VM vDS Port Groups. Within this Workflow, it is set to output a string to the scripting log called PORTGROUP Change – Update completed successfully
  • We can create a favourite query using this query text contains PORTGROUP Change – Update completed successfully – See highlighted below
  • You can now add this query to a Dashboard. Whilst in the query, you can click on the icon to the right (highlighted in yellow) which means Add current query to dashboard

dashboard

  • Fill in the Dashboard details and then you should be able to view this anytime and adjust the time over which work has taken place

dashboard2

vSphere HTML 5 Web Client Fling

tools-icon

vSphere HTML 5 Web Client

The vSphere HTML5 Web Client is here! It is written using HTML5 and Javascript

The following features are available at the moment

  • VM Power Operations (common cases)
  • VM Edit Settings (simple CPU, Memory, Disk changes)
  • VM Console
  • VM and Host Summary pages
  • VM Migration (only to a Host)
  • Clone to Template/VM
  • Create VM on a Host (limited)
  • Additional monitoring views (Performance charts, Tasks, Events)
  • Global Views (Recent tasks, Alarms–view only)

This Fling has been designed to work with your existing vSphere 6.0 environments. The new client is deployed as a new VM from the downloadable OVA.  Currently the installation instructions are command line-based, but VMware are working on a GUI installation and plan to release it as an update to this Fling once it is ready.

Download and Information

https://labs.vmware.com/flings/vsphere-html5-web-client

System requirements

  • 2 vCPU, 4 GB RAM, 14 GB
  • An existing VC6.0 installation (VCSA or Windows). The H5 client appliance will need 4 GB RAM, 2 vCPUs and the hard disk will grow up to 14 GB
  • Recommended browsers: Chrome, Firefox, IE11. Others may work, with some functional or layout issues.
  • Windows vCenter: Was tested with a vCenter on Windows Server 2012 R2, but should work with other versions as well.

Instructions

Note: I have a Windows 2012 R2 server running vCenter Server 6 and a Windows 2012 R2 server running an external PSC version 6. There are different instructions for running different vCenter/PSC setups.

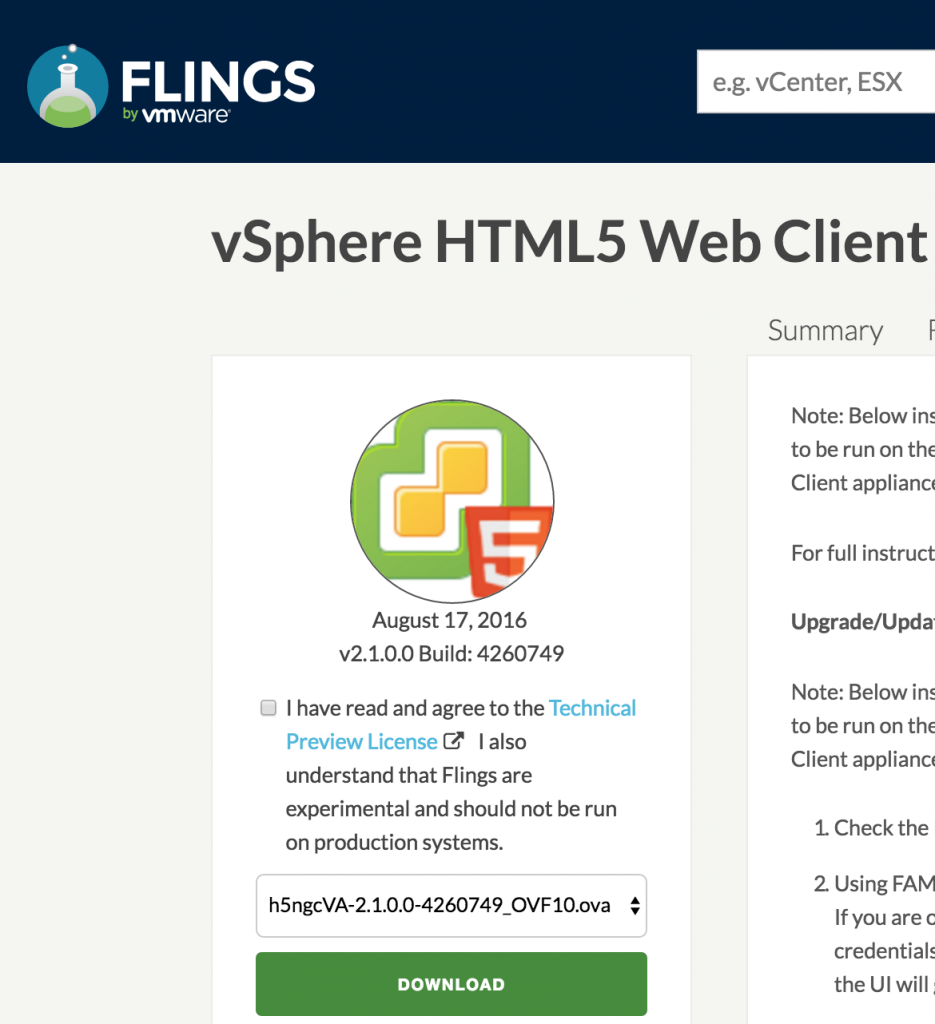
First of all download the H5 Client Deployment Instructions and Helpful Hints.

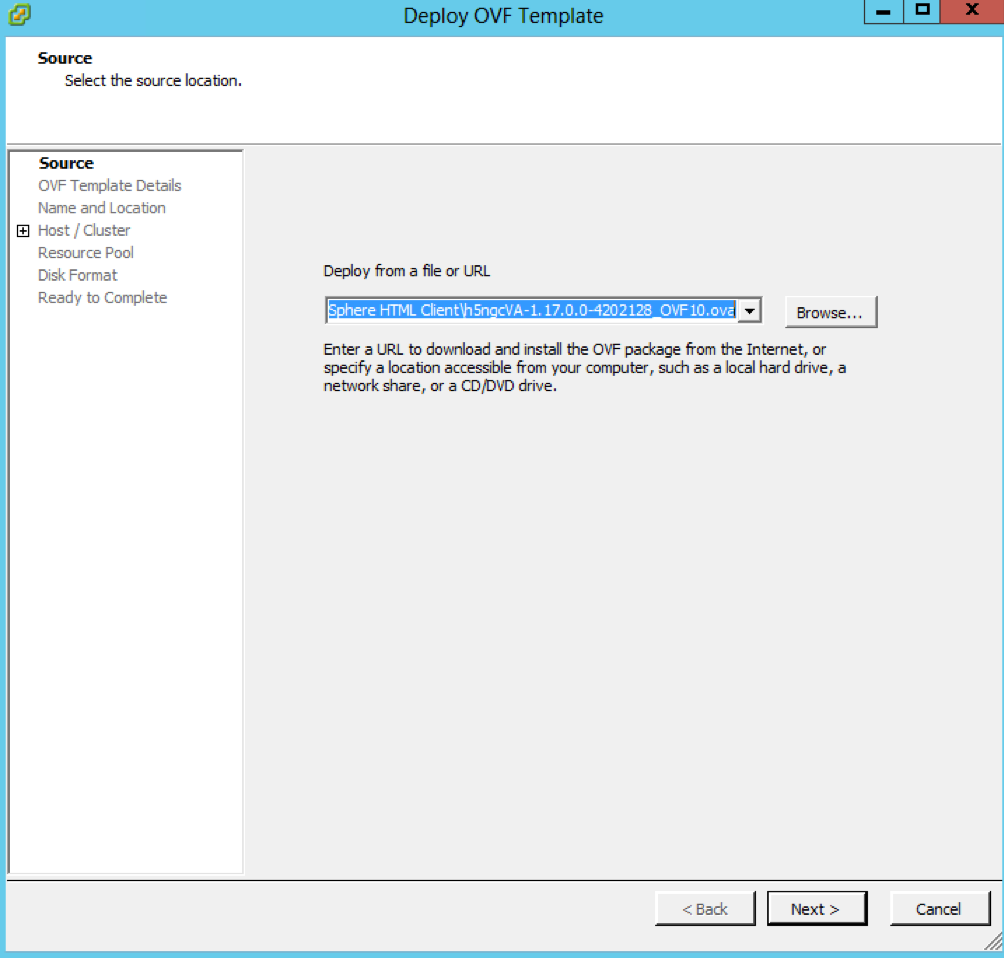
  • Download the OVA and server-configure.bat

Screen Shot 2016-08-23 at 11.35.34

  • In vCenter, go to File > Deploy OVF Template

Screen Shot 2016-08-23 at 12.07.38

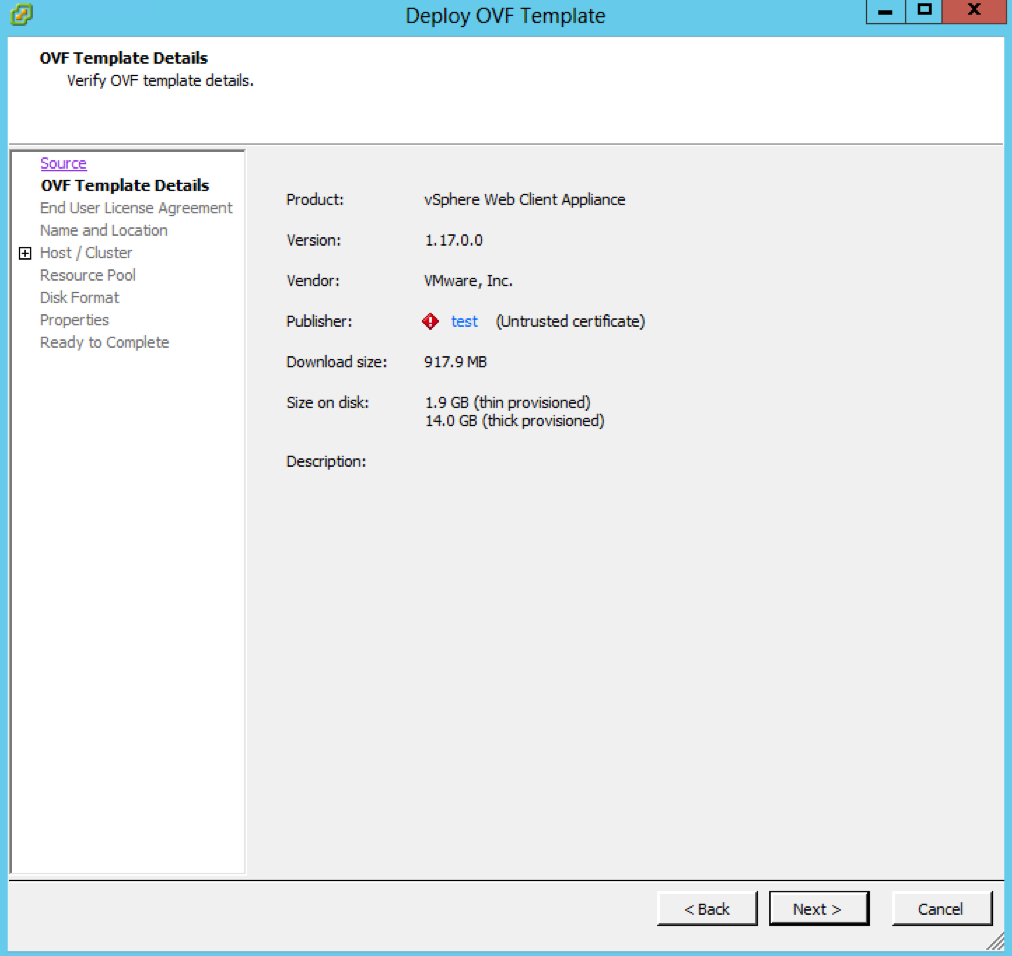
  • Check OVF Template details

Screen Shot 2016-08-23 at 12.08.37

  • Accept the License Agreement
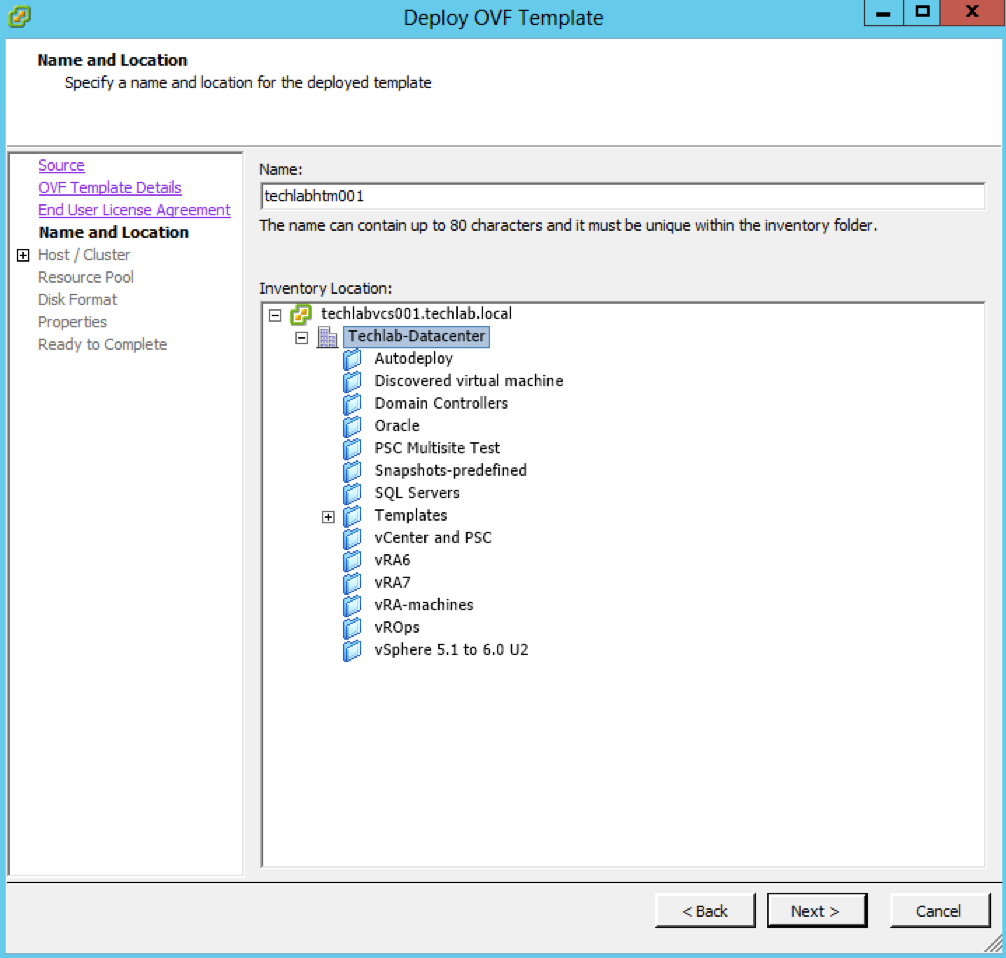
  • Put in a name and Location

Screen Shot 2016-08-23 at 12.09.30

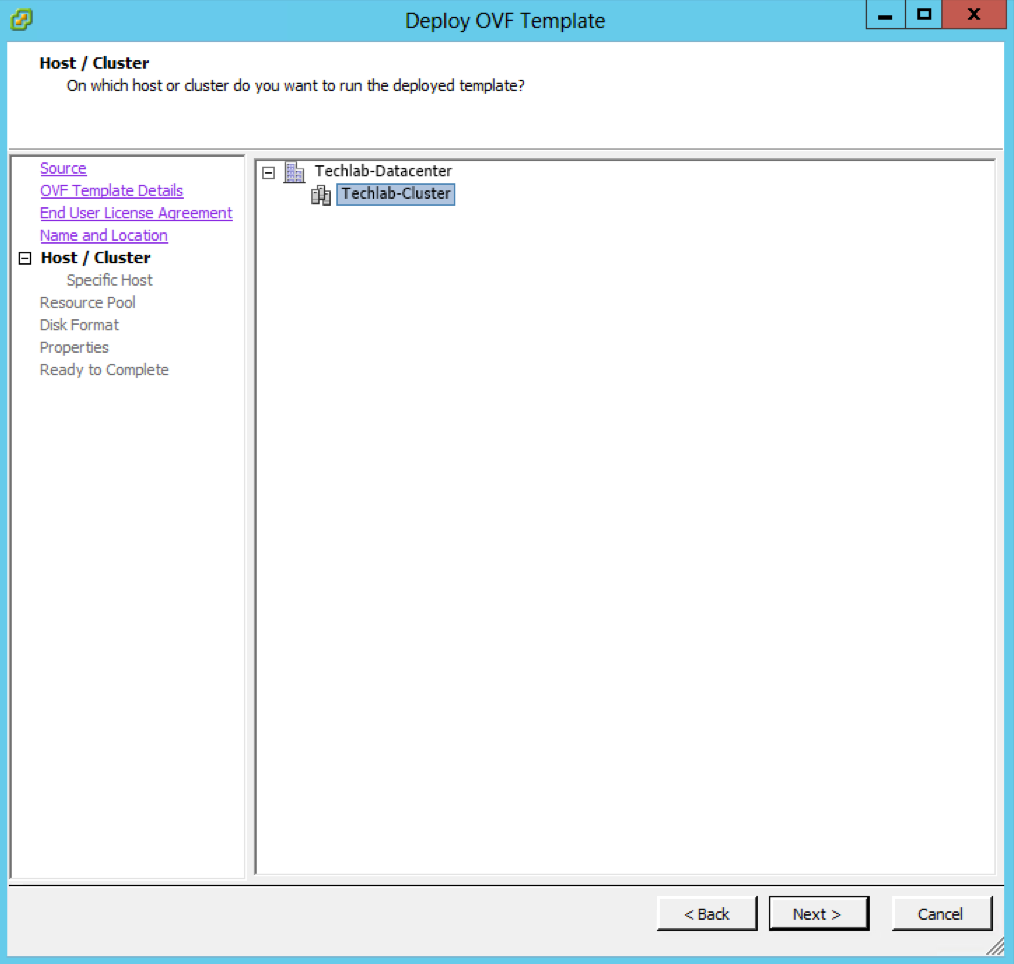
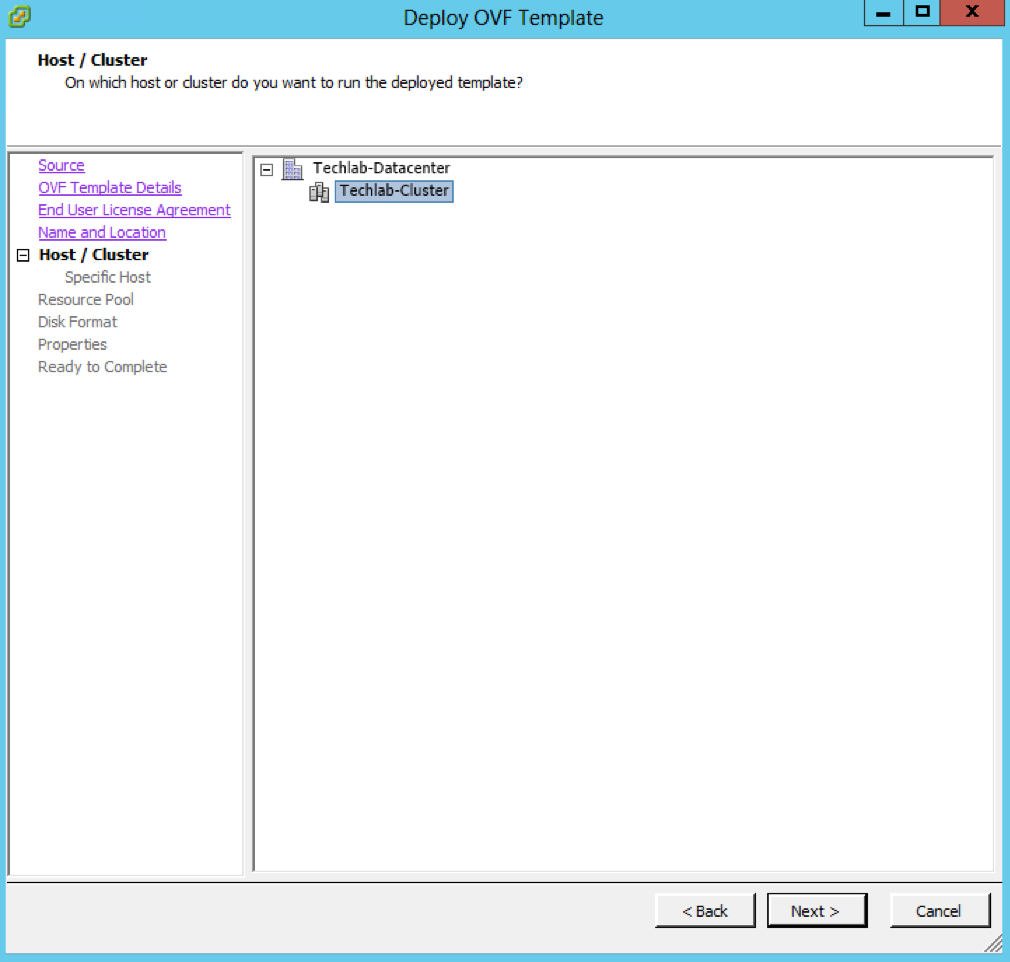
  • Choose a host and cluster

Screen Shot 2016-08-23 at 12.10.15

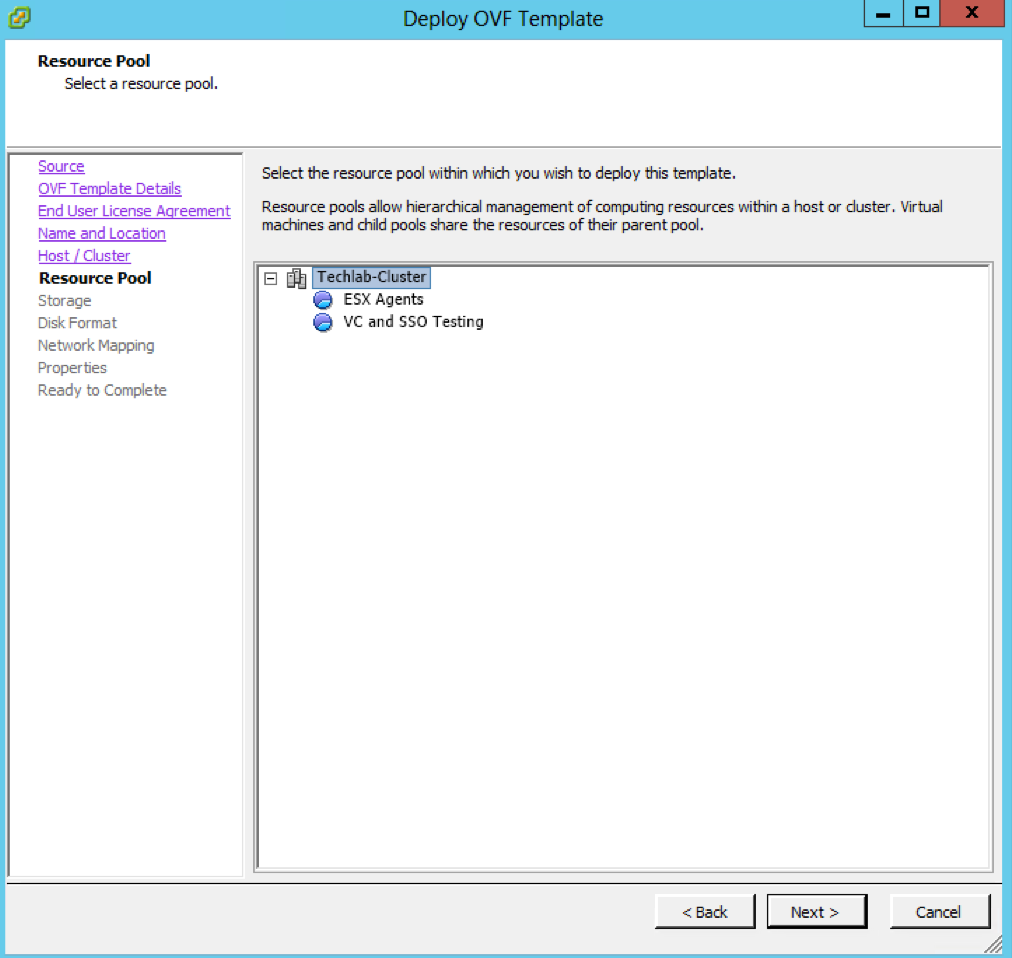
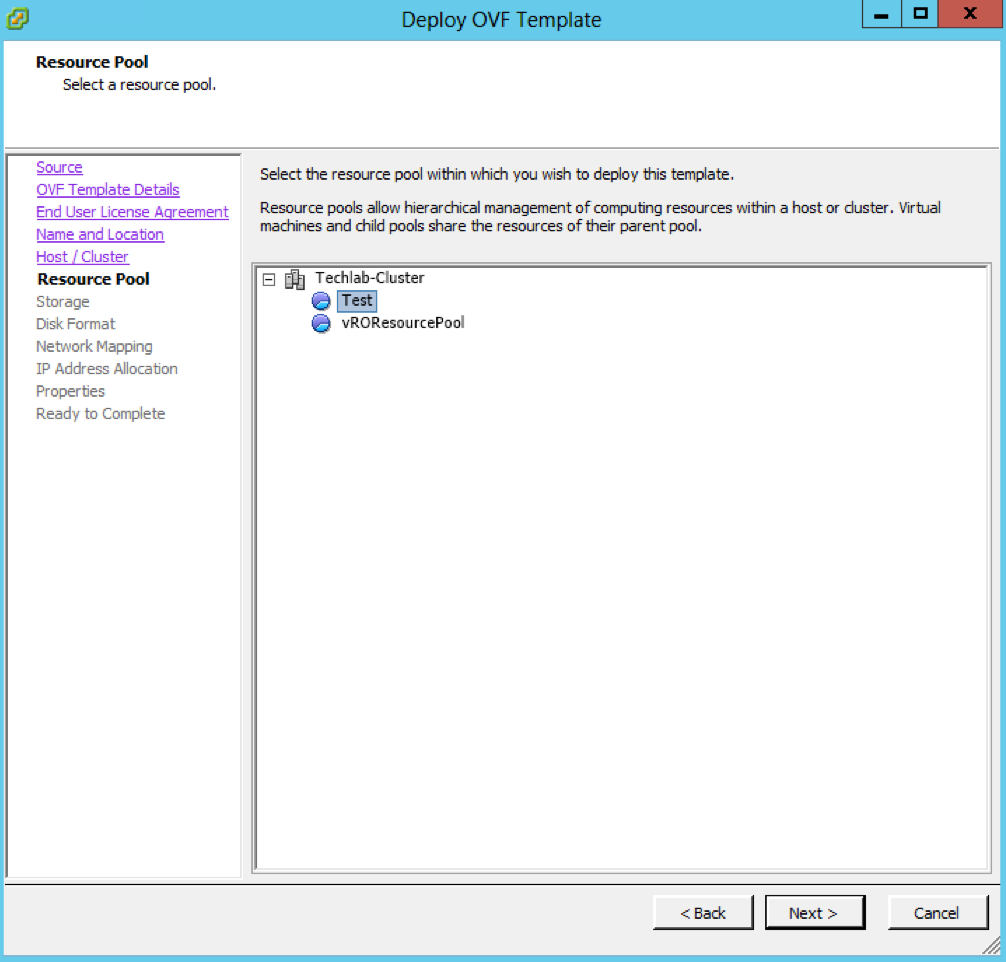
  • Select the Resource Pool if any

Screen Shot 2016-08-23 at 12.11.03

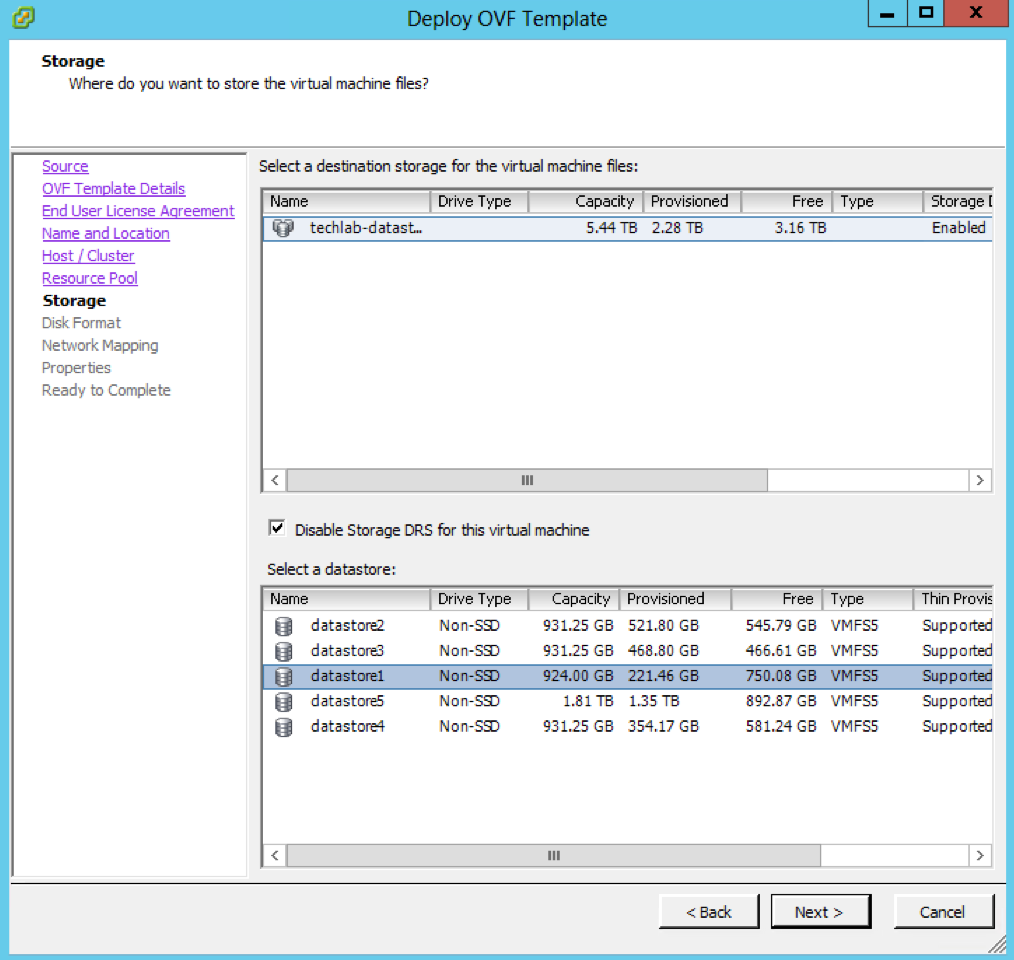
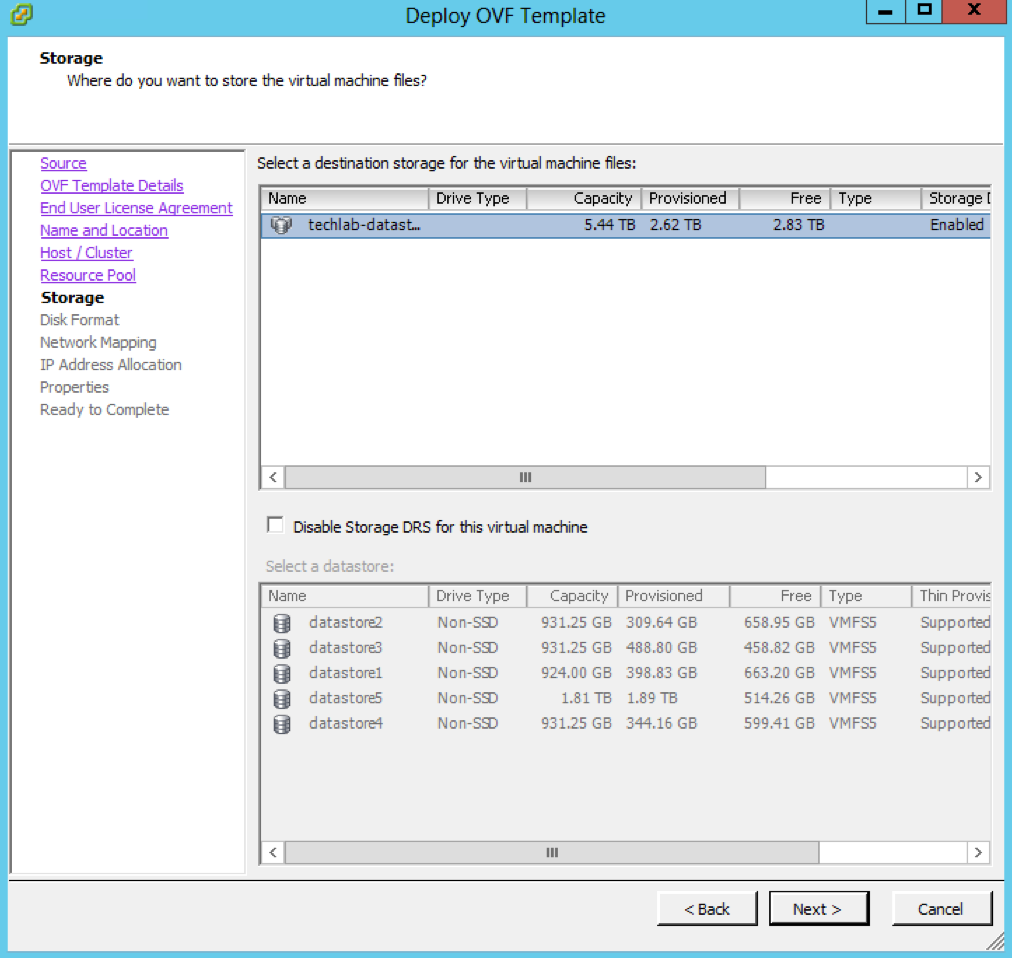
  • Choose your storage

Screen Shot 2016-08-23 at 12.11.43

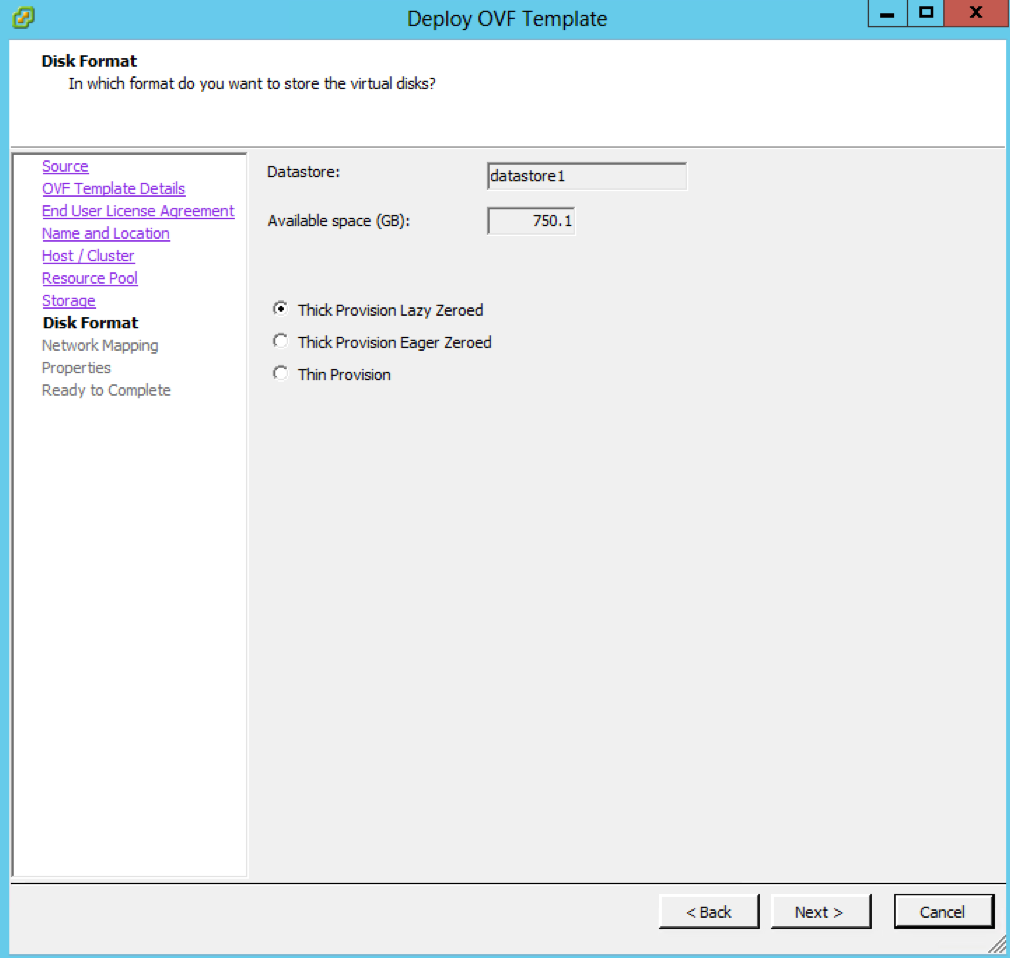
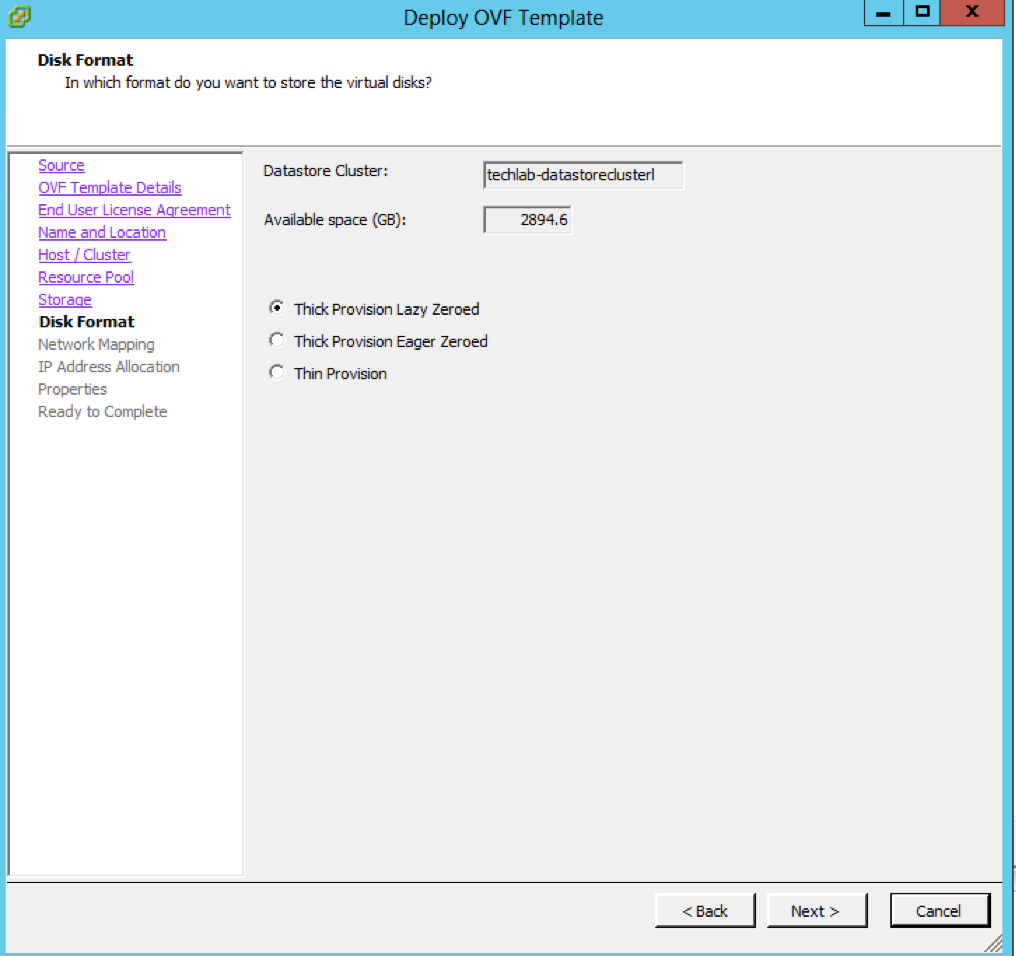
  • Check Disk Format

Screen Shot 2016-08-23 at 12.12.24

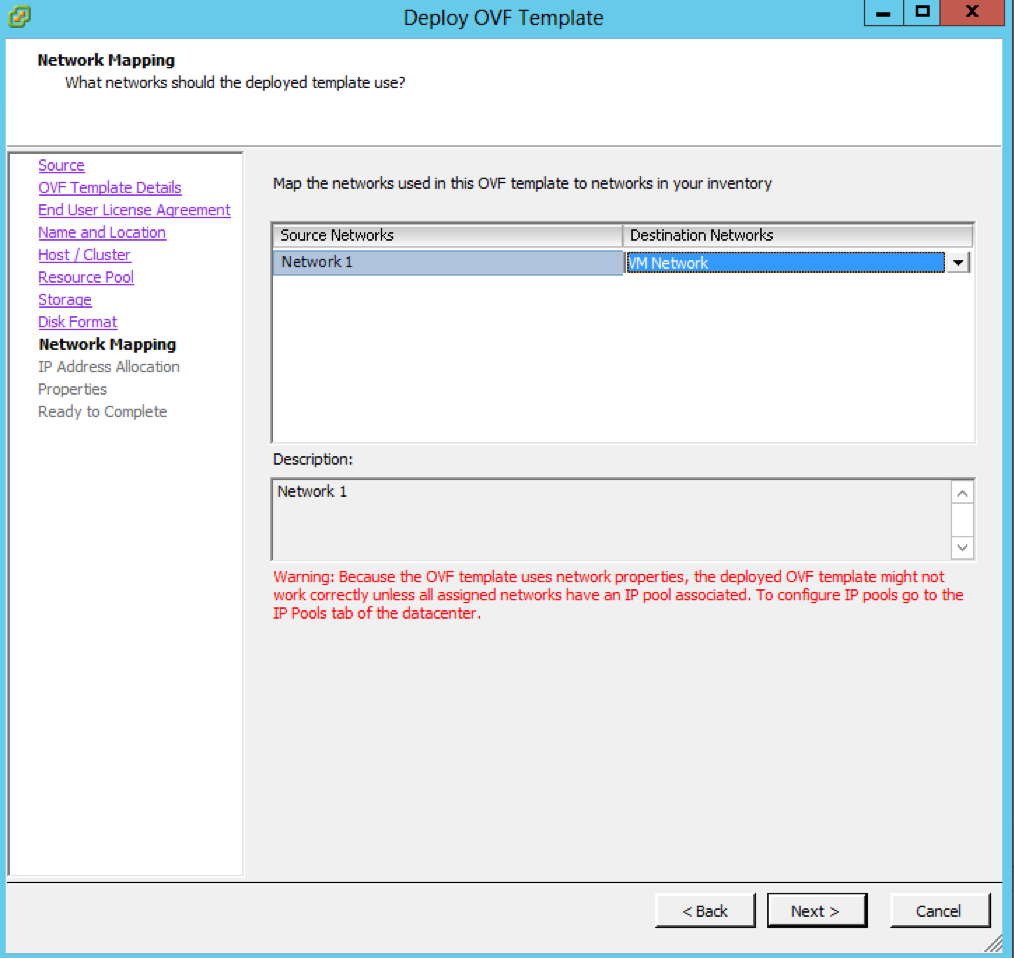
  • Check VM Networking and choose a Port Group

Screen Shot 2016-08-23 at 12.13.03

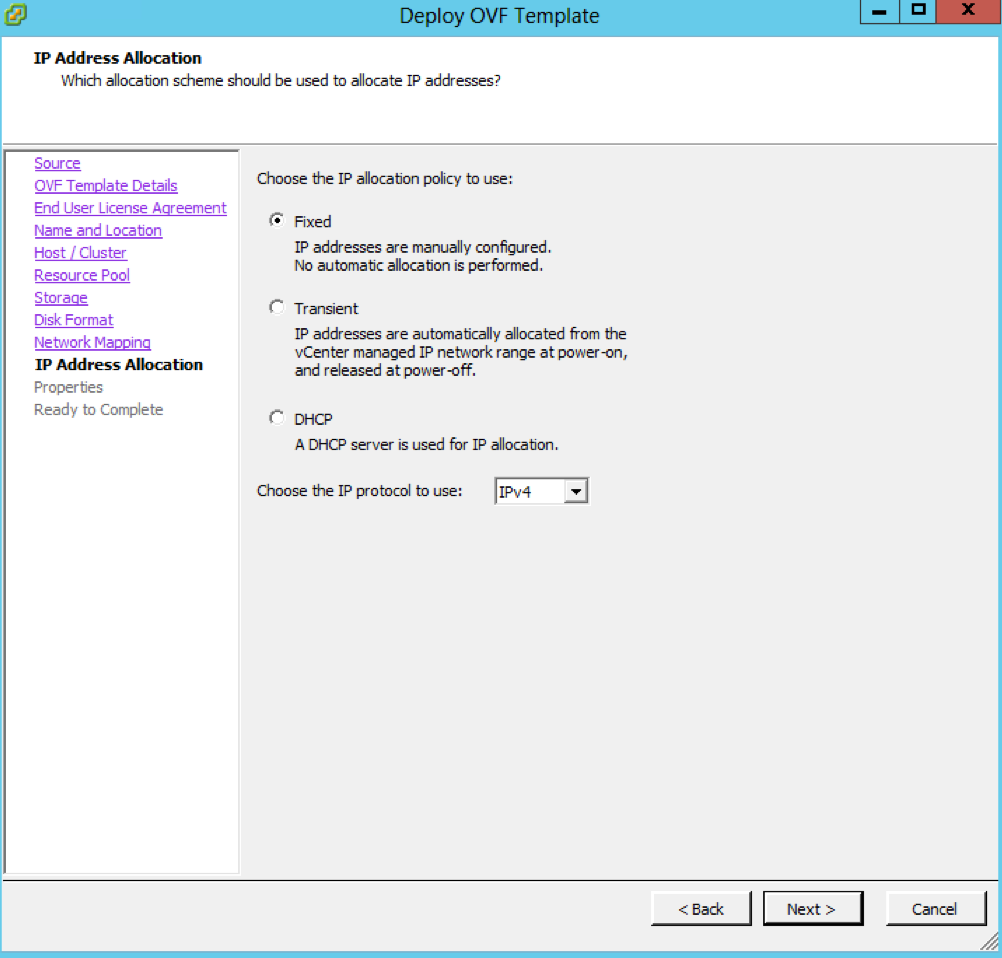
  • Choose IP Address allocation

Screen Shot 2016-08-23 at 12.13.45

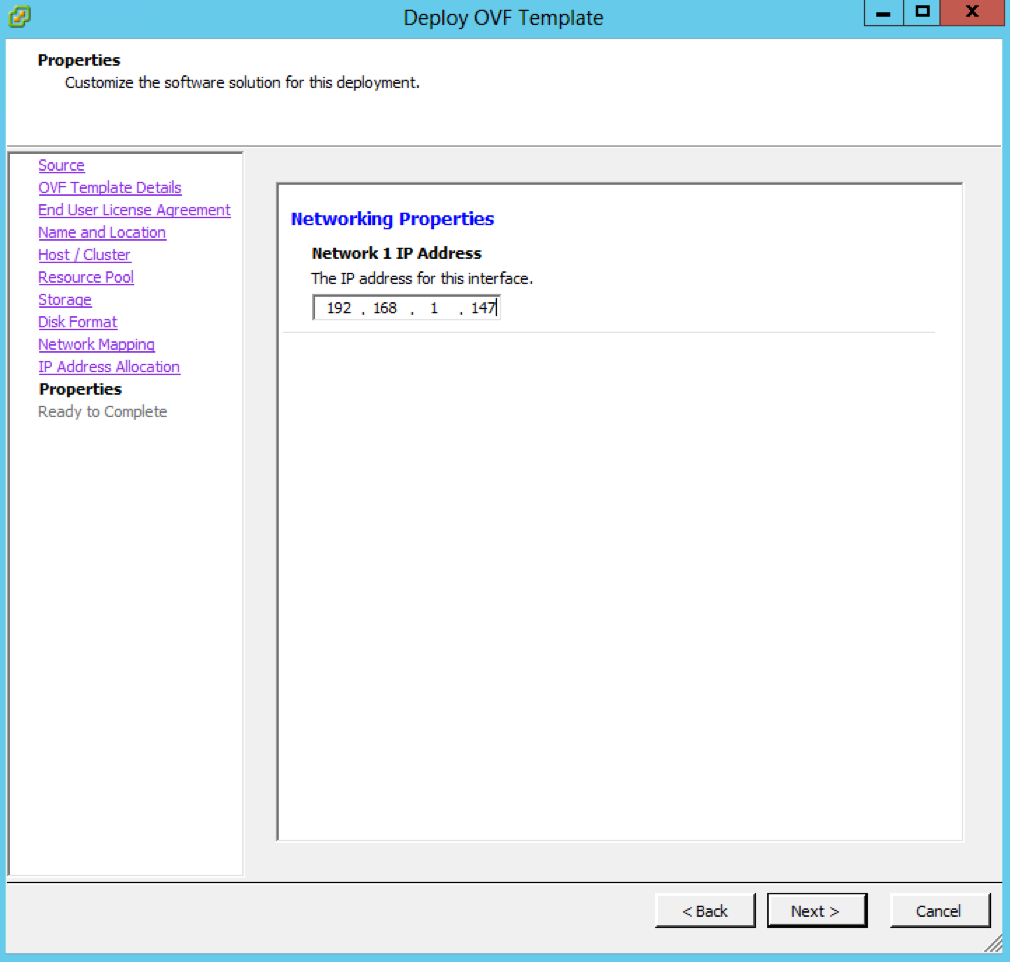
  • Put in an IP address

Screen Shot 2016-08-23 at 12.14.28

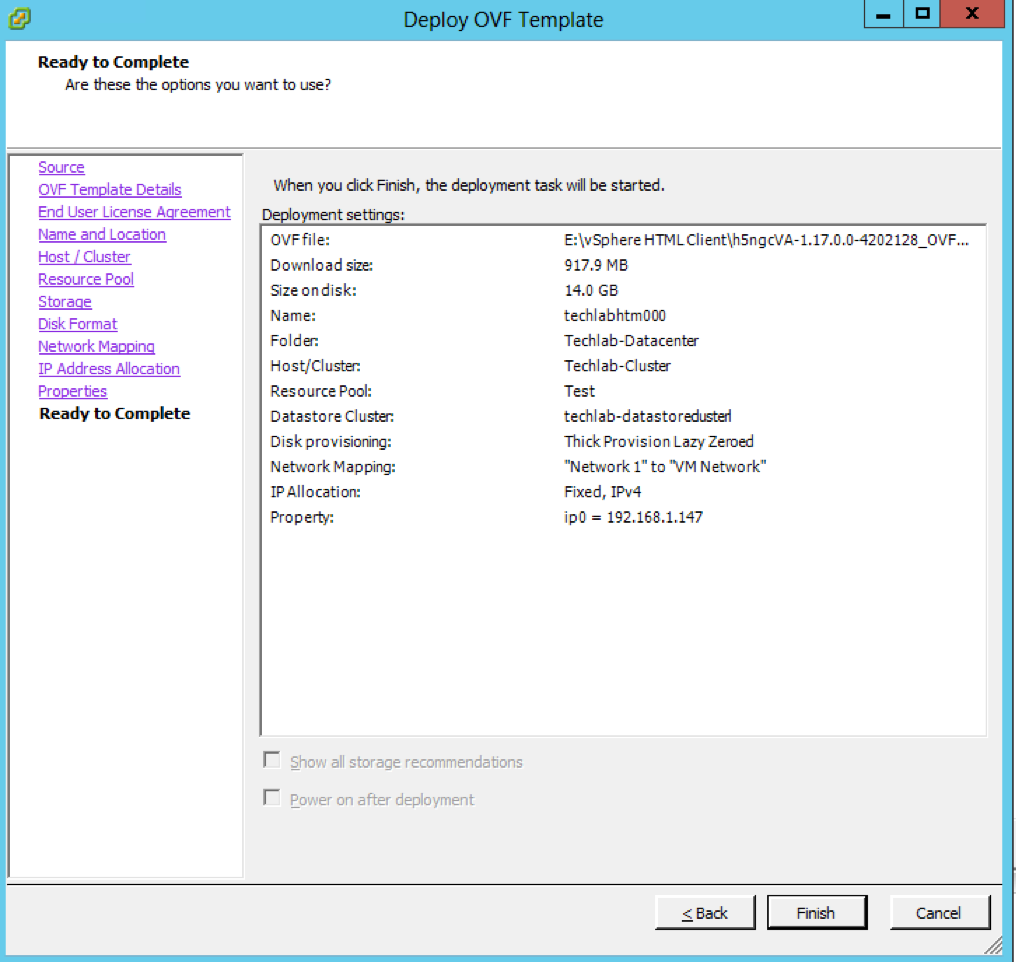
  • Click Finish

Screen Shot 2016-08-23 at 12.15.34

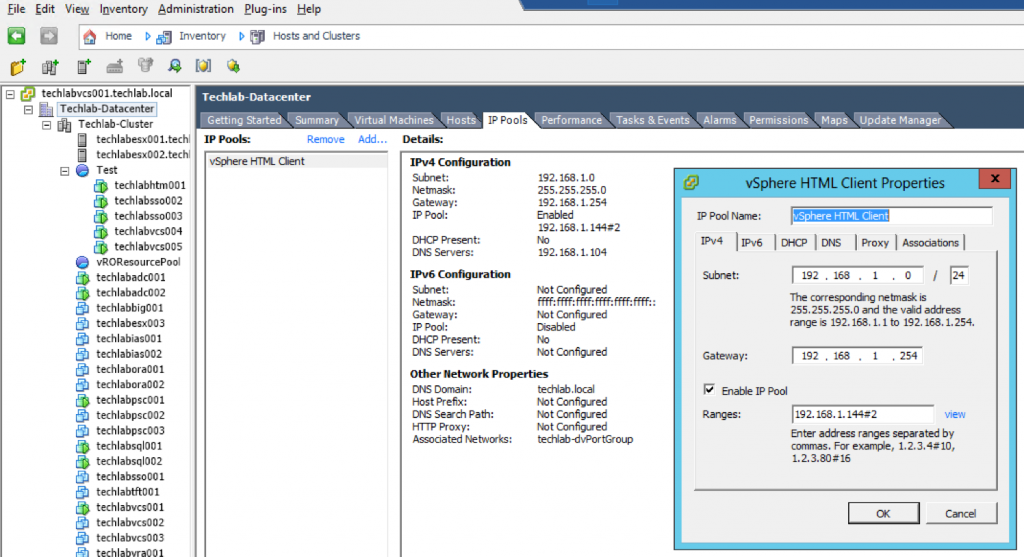
  • I then had to create an IP Pool in vCenter
  • Click on the Datacenter object > IP Pools

Screen Shot 2016-08-23 at 12.17.09

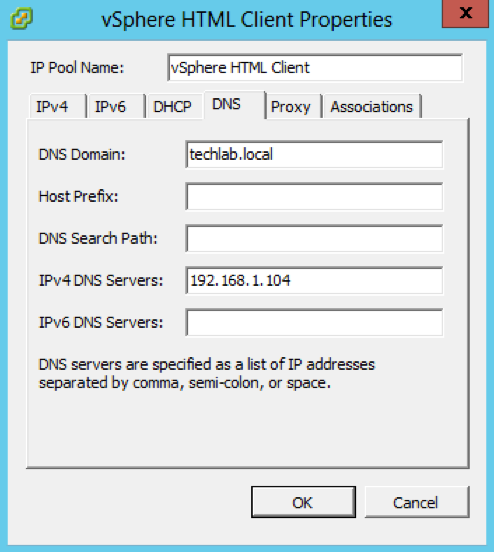
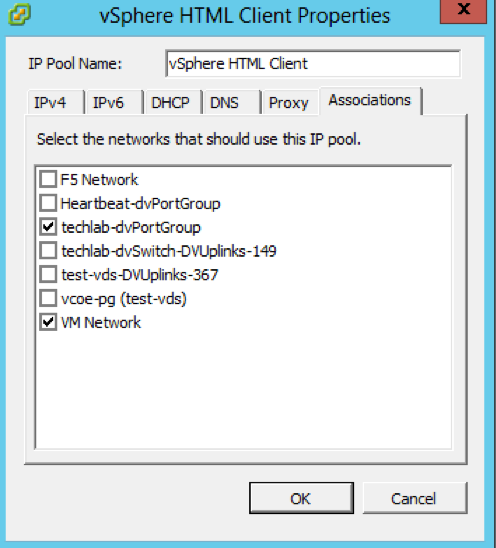
  • Click on the tabs and fill in the relevant information. In my case I needed to add some DNS and Association information to associate this resource pool with my networks and in particular the network my HTML 5 client is going to be on

Screen Shot 2016-08-23 at 12.18.27

Screen Shot 2016-08-23 at 12.19.26

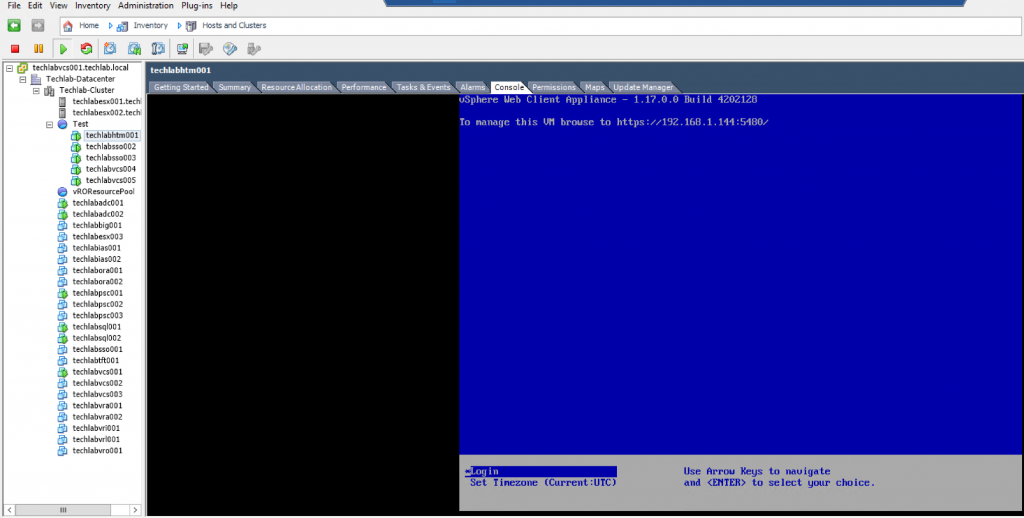
  • Power on the VM
  • If you click on the console, you should see the below screen

Screen Shot 2016-08-23 at 14.09.20

  • SSH or WINScp as root into the H5 client appliance VM (Note: Username is root and password is demova)
  • Create the following folders

Screen Shot 2016-08-23 at 12.37.00

Screen Shot 2016-08-23 at 12.36.19

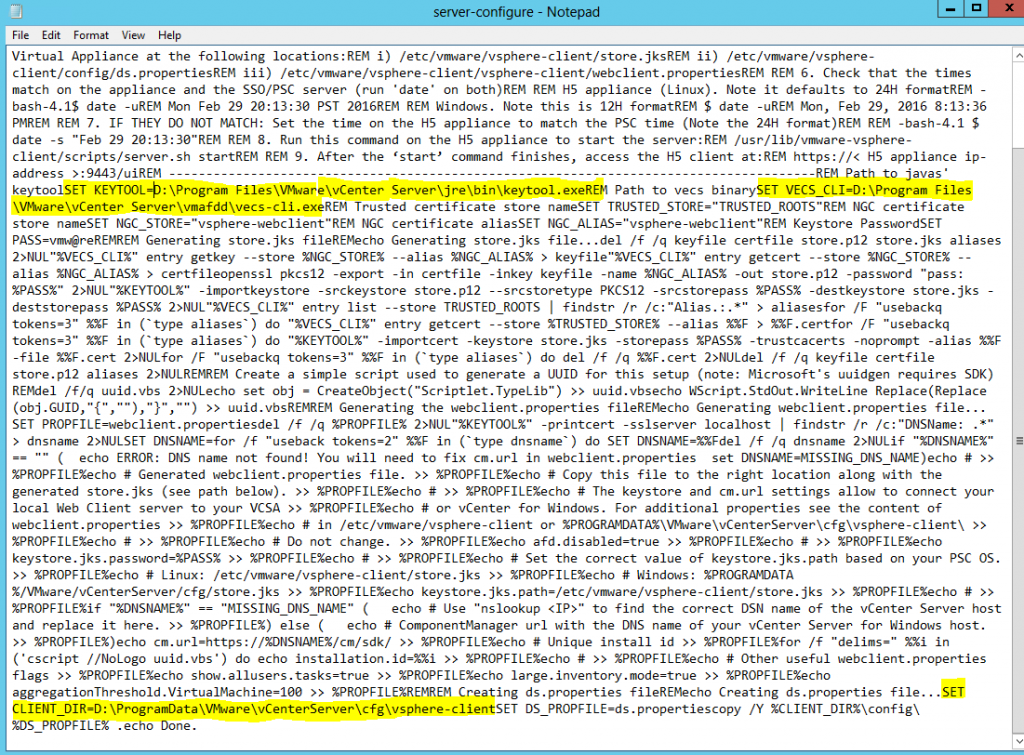
  • Copy the provided ‘server-configure.bat’ to any directory on the vCenter and PSC for Windows. (This file is one of the Fling downloads on the top left) NOTE: If you have installed vCenter into any folder other than default (%PROGRAMFILES%), the script may not find the appropriate files. You will need to edit the file and replace the two references to %PROGRAMFILES% with the appropriate path so that the “KEYTOOL” and “VECS_CLI” paths line up. These two variables are at the top of the file.
  • You may also need to change this at the end of the file to the correct path (this is for the ds.properties file): SET CLIENT_DIR=%PROGRAMDATA%\VMware\vCenterServer\cfg\vsphere-client
  • My PSC was all installed on the C Drive but I had my vCenter installed on the D Drive so I had to change the file below which is highlighted in yellow to my correct path

html5fling1

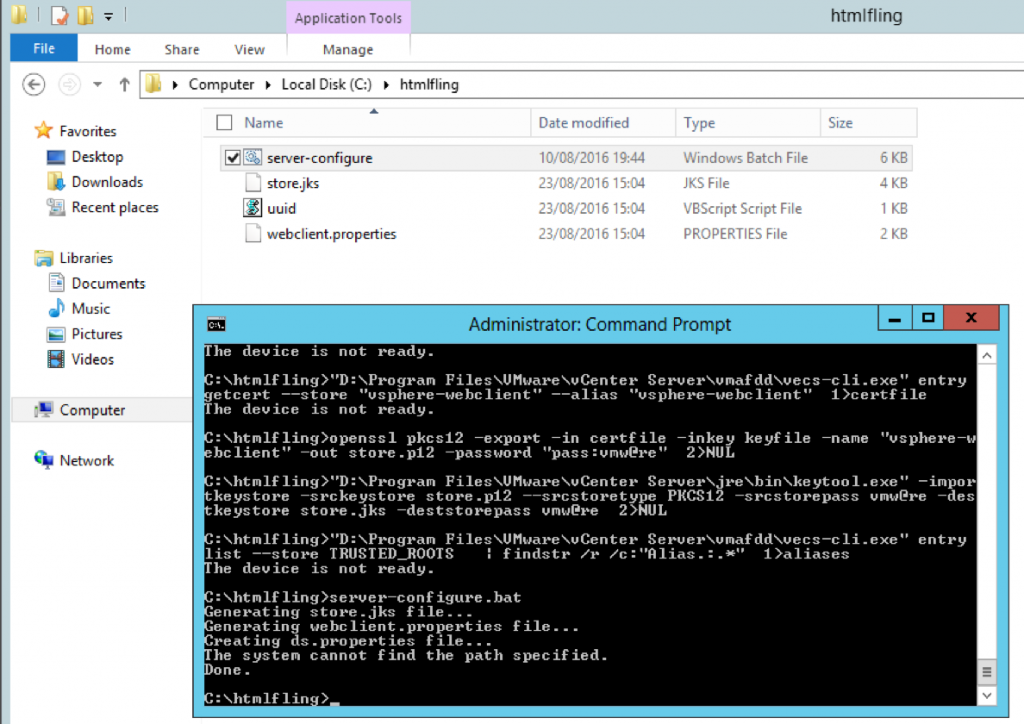
  • Run the server-configure.bat on your PSC server as Administrator
  • The store.jks and webclient.properties file will be created
  • Ignore the Creating ds.properties error message

Screen Shot 2016-08-23 at 15.11.17

  • Copy the files store.jks and webclient.properties which are generated to the below locations
  • /etc/vmware/vsphere-client/store.jks
  • /etc/vmware/vsphere-client/vsphere-client/webclient.properties
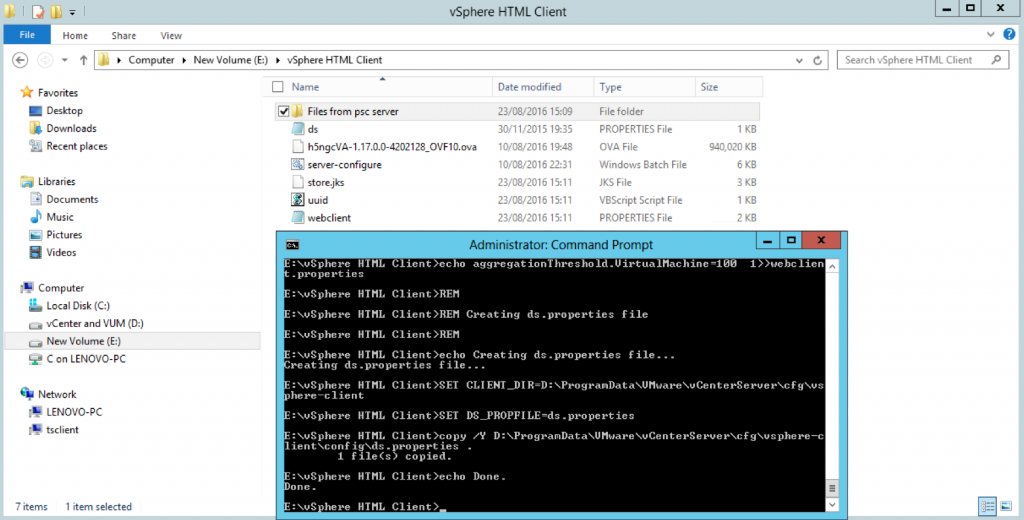
  • In the Windows VC machine, open an Administrator Command Prompt and run the ‘server-configure.bat’ script. The following files will get generated:

Screen Shot 2016-08-23 at 15.18.12

  • Copy the ds.properties file to H5 client virtual appliance at the following location
  • /etc/vmware/vsphere-client/config/ds.properties
  • Log into the H5 appliance and run this command to start the server:
  • /etc/init.d/vsphere-client start

Screen Shot 2016-08-23 at 15.23.06

  • It should come up and say started in xxx seconds

Screen Shot 2016-08-23 at 15.27.14

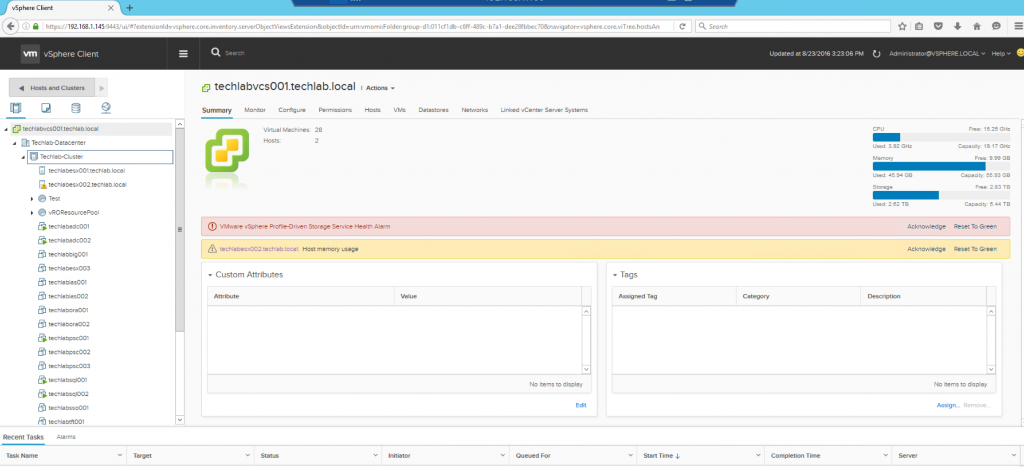
  • Once the installation steps above are completed, point your browser to this URL, and log in with your normal vCenter credentials:
  • https://H5_Appliance_Address:9443/ui

Screen Shot 2016-08-23 at 15.30.15