Summary
vCheck.ps1 is a vCenter checking script, the script is designed to run as a scheduled task before you get into the office to present you with key information via an email directly to your inbox in a nice easily readable format. This script picks on the key known issues and potential issues of the virtual infrastructure and reports it all in one place so all you do in the morning is check your email. One of they key things about this report is if there is no issue in a particular place you will not receive that section in the email, for example if there are no datastores with less than 5% free space (configurable) then the disk space section will not show in the email, this ensures that you have only the information you need in front of you when you get into the office. This script is not to be confused with an Audit script, It doesn’t want to remind you that you have 5 hosts and what there names are and how many CPU’s they have each and every day as you don’t want to read that kind of information unless you need it, this script will only tell you about problem areas with your infrastructure.
Instructions
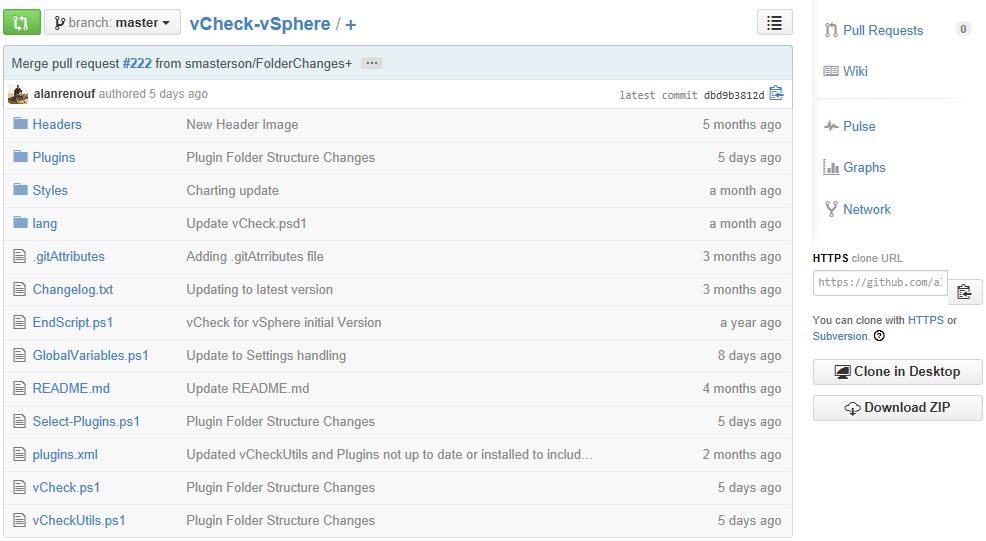
- Download the script where it says Download ZIP and copy to say c:\vCheck folder
- Run through the wizard which will go through the interactive install
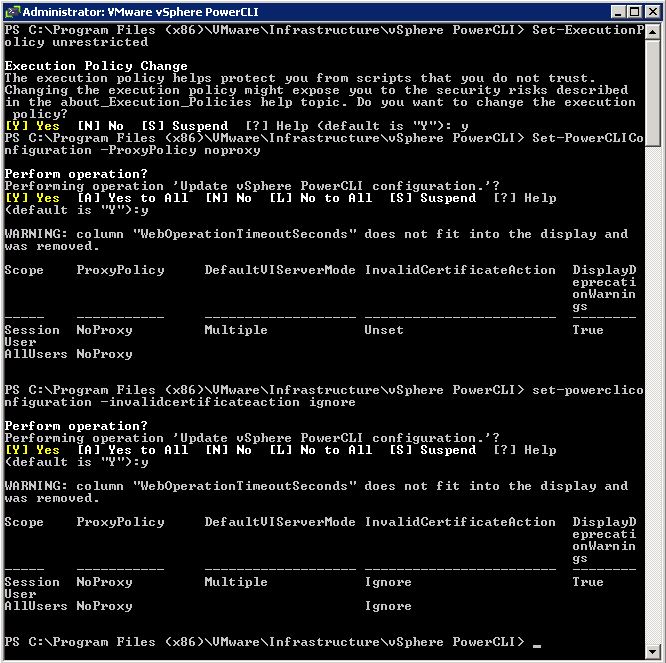
- Open Power CLI as an Administrator
- Type Set-ExecutionPolicy RemoteSigned or unrestricted depending on how secure you want to be
- Type set-powercliconfiguration -invalidcertificateaction -ignore
- Type set-powercliconfiguration -proxypolicy no proxy
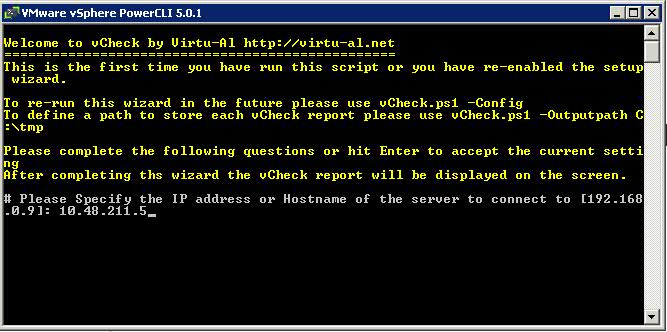
- Navigate to the C:\vCheck folder and run .\vCheck.ps1. By default on the first run, it will guide you through setting all your settings
- If you need to rerun the wizard after configuring the furst time use vCheck.ps1 -config
- To define a path to store each vCheck report in select .\vCheck.ps1 -Outputpath c:\vCheck\Reports
- First you should see a screen prompting you for some information
- Note: I was running this from a test vCenter Server which had a proxy server added in Internet Options. I didn’t need to add the Proxy Server into the script as it stopped the script from running or you can run Set-PowerCLIConfiguration -ProxyPolicy NoProxy as per first notes above
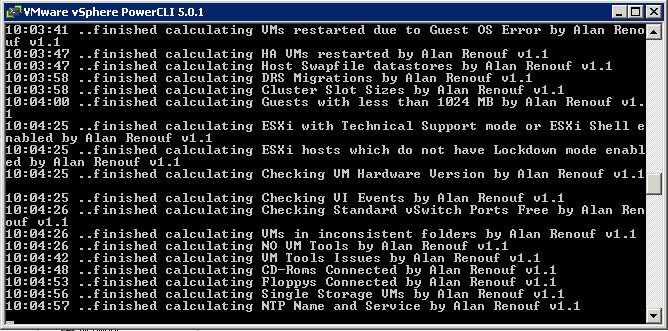
- The script should start running and look like the below screen
- By default, because I didn’t specify an output folder for my script, it saved the html output file in the following location
- C:\Users\%username%\AppData\Local\Temp
Running as a Scheduled Task in Windows Server 2008 R2
- Click Start > Administrative Tools > Task Scheduler
- Right click Task Scheduler Library and select New Task
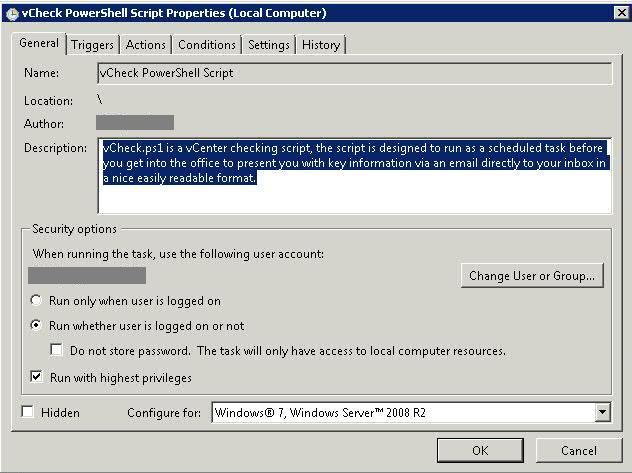
- Put in a name and a description and choose how you want the script to be run
- Tick Run with Highest Privileges
- We are running Windows 2008 R2 so I changed the Configure for to Windows 7,Windows 2008 R2
- Choose Triggers – How often the task will run. We like ours to run once a week when everything is quieter not that it takes up much resource to run!
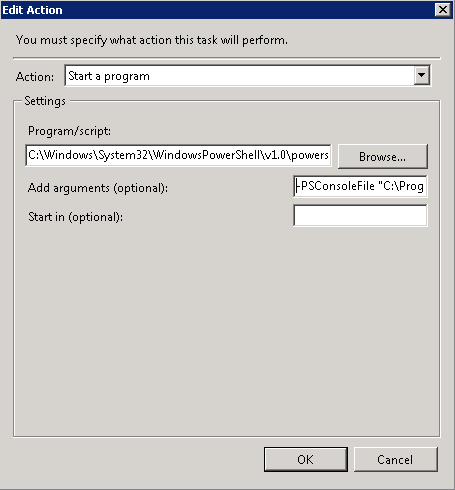
- Choose Actions and Edit – This will be where you will need to put your schedule in
- In Action, choose Start a Program
- In Program/Script type C:\Windows\System32\WindowsPowerShell\v1.0\powershell.exe
- In Add Arguments type -PSConsoleFile “C:\Program Files (x86)\VMware\Infrastructure\vSphere PowerCLI\vim.psc1” “& ‘C:\vCheck\vCheck.ps1′”
- You don’t need to put anything in Start In (optional)
- This is what worked for us but other people have probably slightly different ways of doing this
- Conditions as per below screen print
- Settings as per below screenprint
- History will show you everything which has happened associated with the tasks
- Click Ok and it will prompt you for the password for the User Account. Choose a generic user account or group as you don’t want to restrict people from running this or be left with an account who leaves the company as the user for this task.
- If you want to check the Task is running in Task Scheduler, you can do the following
- Click Display all Running Tasks and the below screeprint shows you what is running
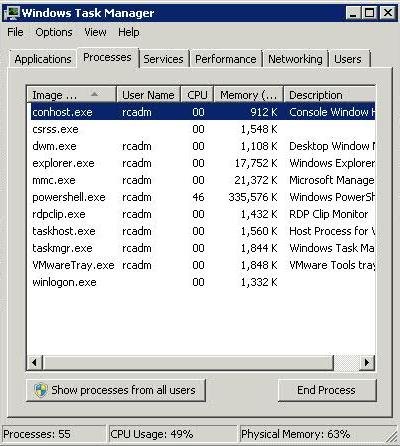
- You should also be able to see Conhost and PowerShell.exe running in Task Manager if everything has kicked off correctly
- When I ran this with previous version, it took nearly 2 hours on a VMware 4.1 system with 26 Hosts and 350-400 VMs but the latest version which I have updated today 23-06-14 runs really fast in around 15 minutes which is fantastic 🙂
To add Multiple emails for receiving the report
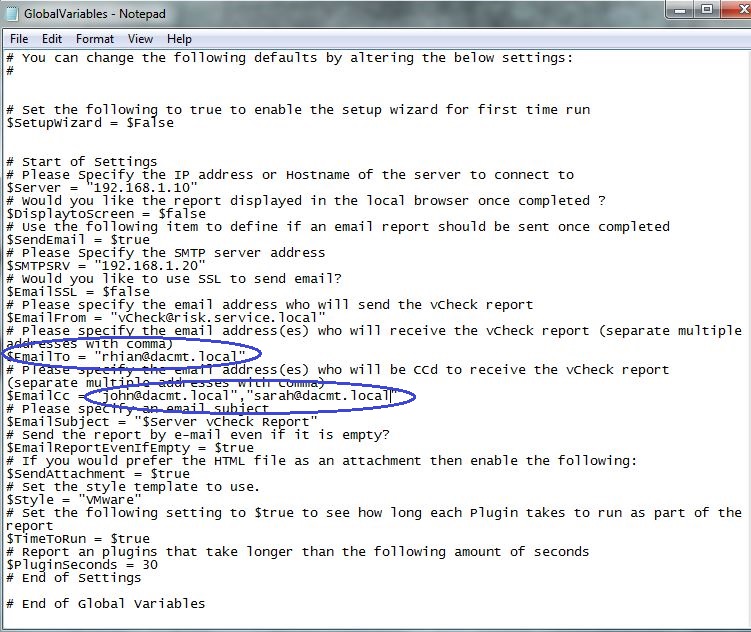
- Go to the c:\vCheck folder and open GlobalVariables.ps1 in Notepad
- Edit the following fields – $EmailTo = with the below
- You can now also edit the following fields $Emailcc
- All settings below are made up but just so you get the gist
Task Scheduler Error Messages
- Check no-one has changed your account password that you use to run this script
- Check no-one has deleted your account that you use to run this script
- Check no-one has disabled your task in the Task Scheduler
What’s new?
The best place to check for any updates and logged issues is Alan Renouf’s Github Page below as this is the main site for this community based script now
https://github.com/alanrenouf/vCheck-vSphere







Leave a Reply