Archive for January 2016

vRealize Automation large scale deployment Part 1 Identity and vRA appliance install

vRARobot2

vRA Distributed deployment.

This series will cover a larger distributed deployment of vRealize Automation 6.2.3

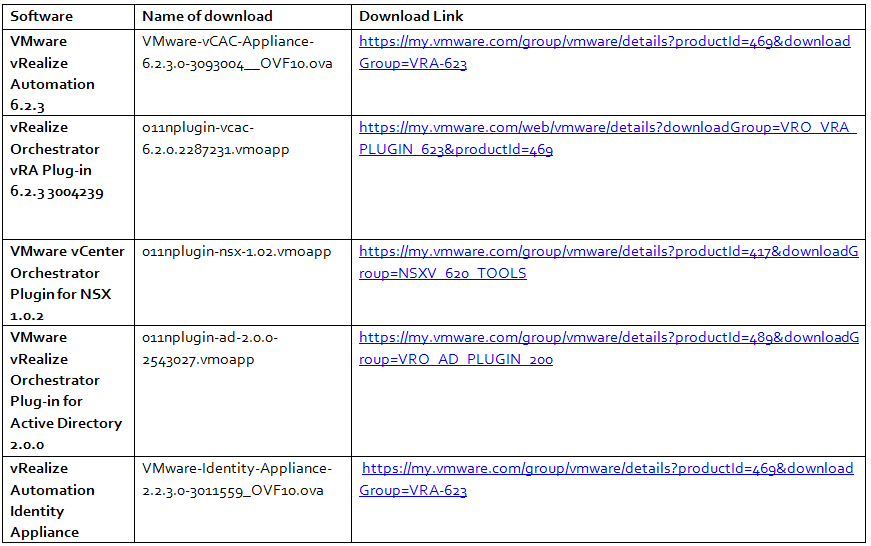
Software required

vRAD1

Components

Only the Identity and vRA appliances are covered in this blog. The rest will be covered in the series to follow.

  • 1 x Identity appliance
  • 2 x vRA appliances (Postgres Database only)
  • 2 x IaaS servers
  • 2 x Manager Servers
  • 1 x Orchestrator appliance
  • 1 x F5 Load Balancer

Important

  • DNS must be configured for all servers/appliances you use and test it
  • Whatever you use for time sync must be identical for all servers/appliances you use

F5 Load Balancer setup and information

  • http://kaloferov.com/blog/configuring-vrealize-automation-load-balancing-using-f5-big-ip/

Certificates

Please follow one of my other blogs for generating and importing certificates into vRA appliances and servers

http://www.electricmonk.org.uk/2015/12/03/installing-vra-6-x-certificates/

Step 1 – Deploying the Identity Appliance

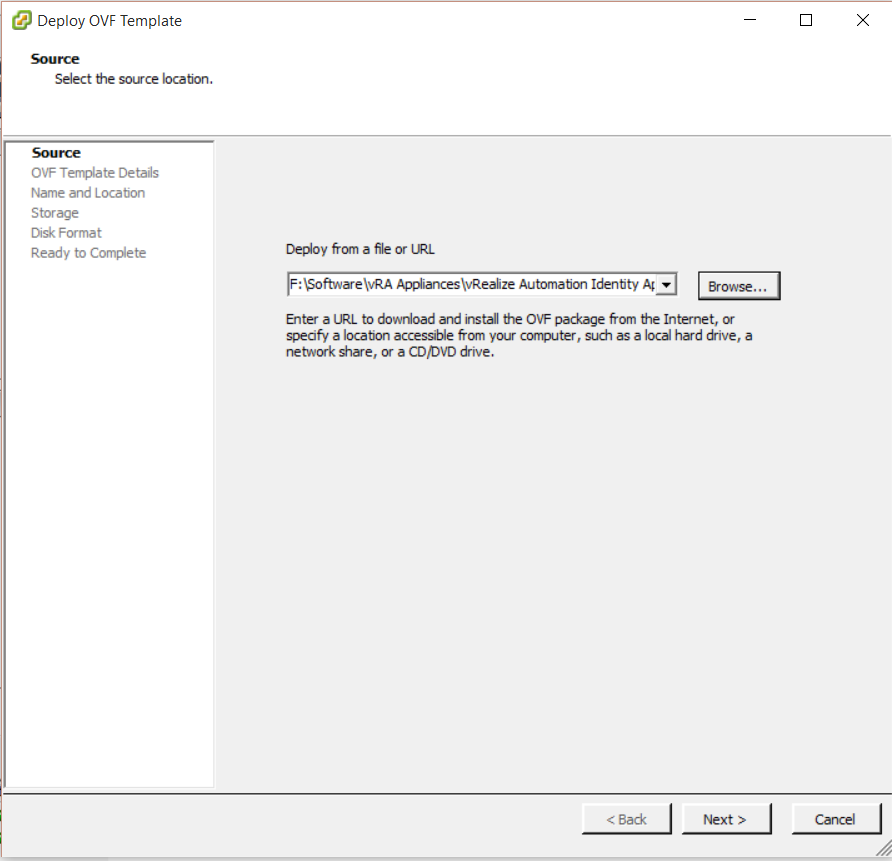
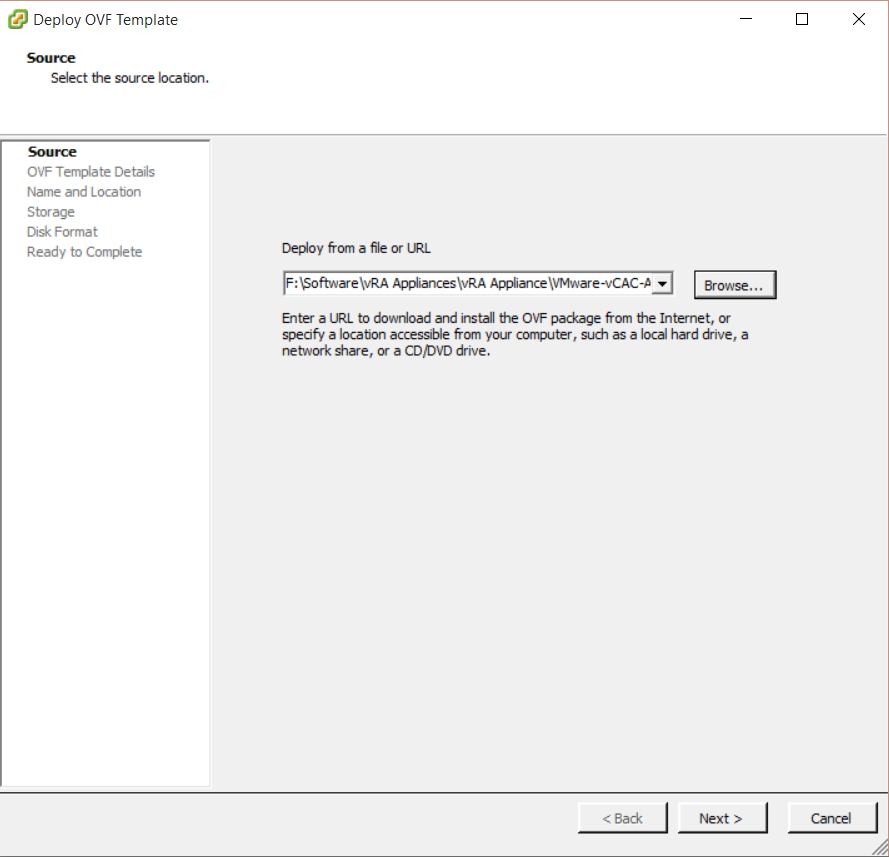
  • In the vSphere client or web client select File > Deploy OVF Template

vRAD2

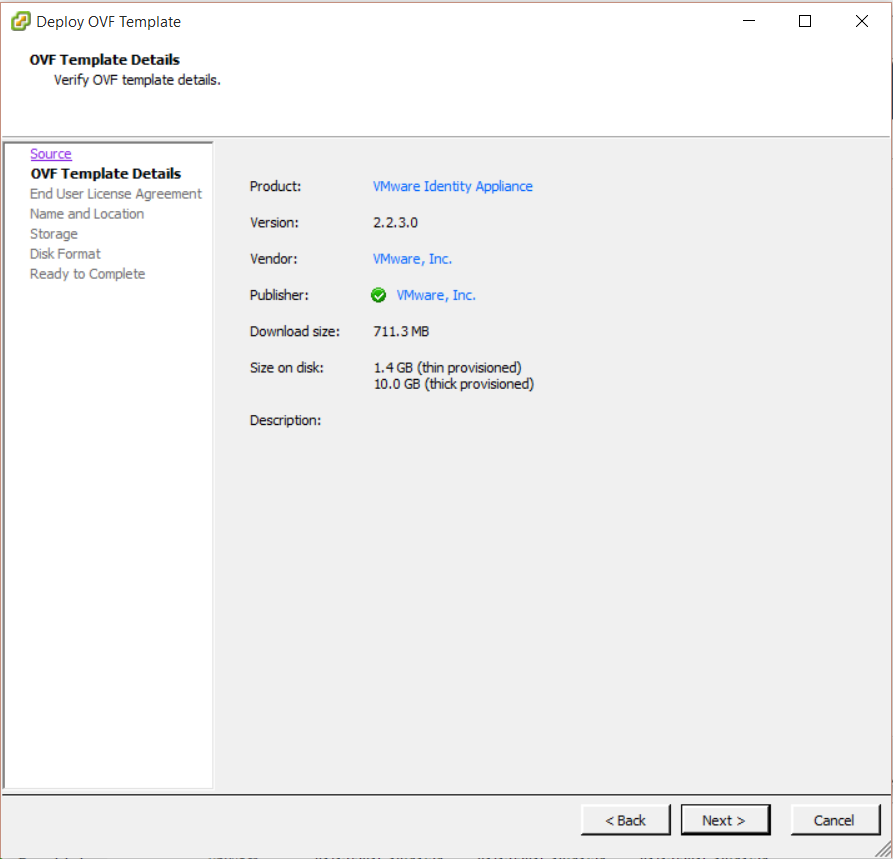
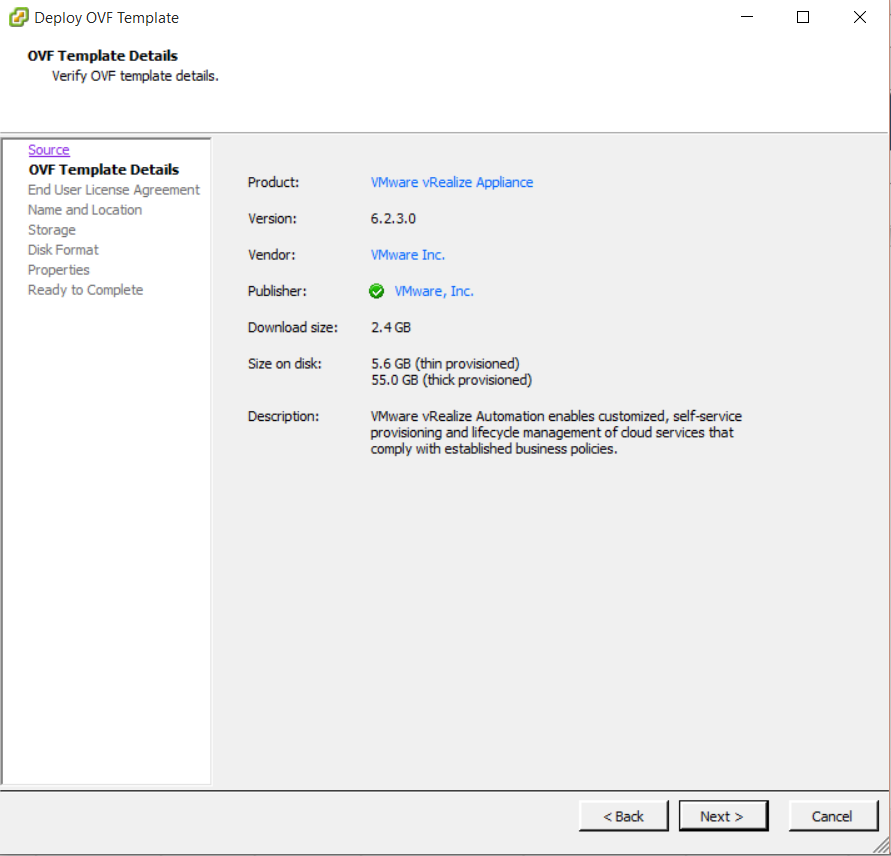
  • Check the details

vRAD3

  • Accept the license agreeement
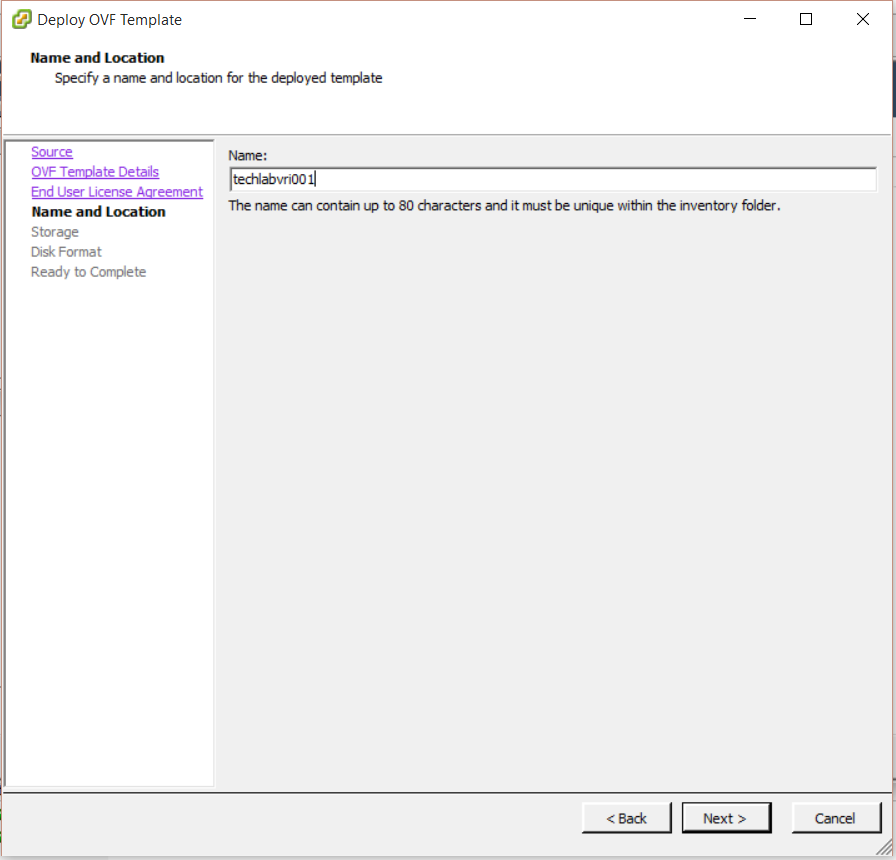
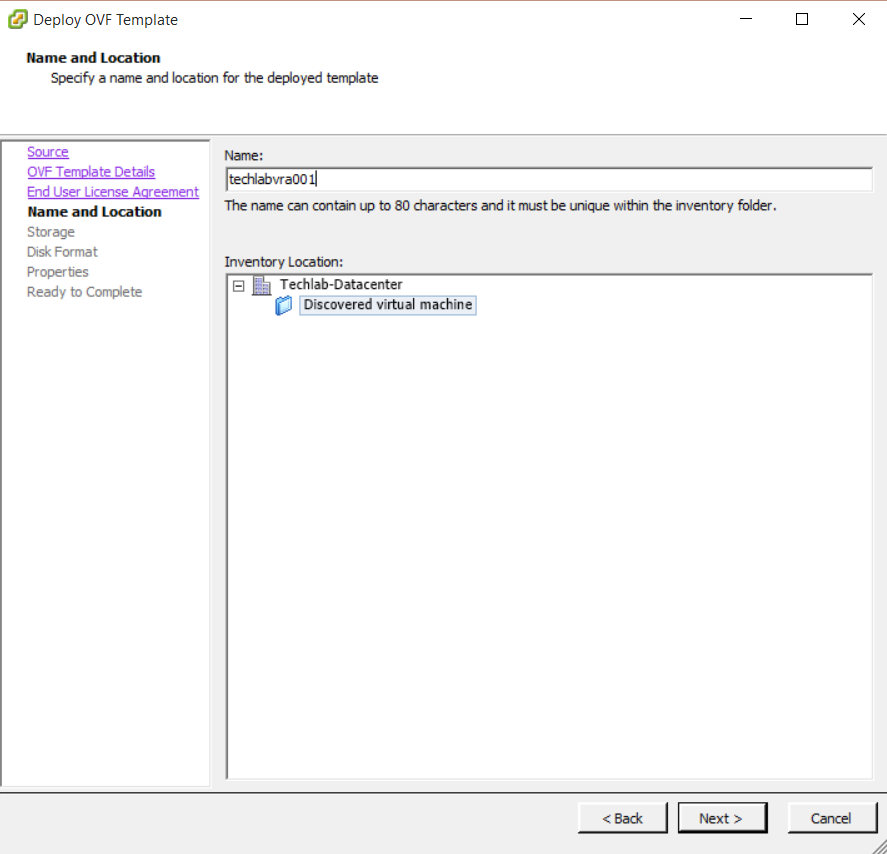
  • Put in a name for the vRA Identity appliance

vRAD4

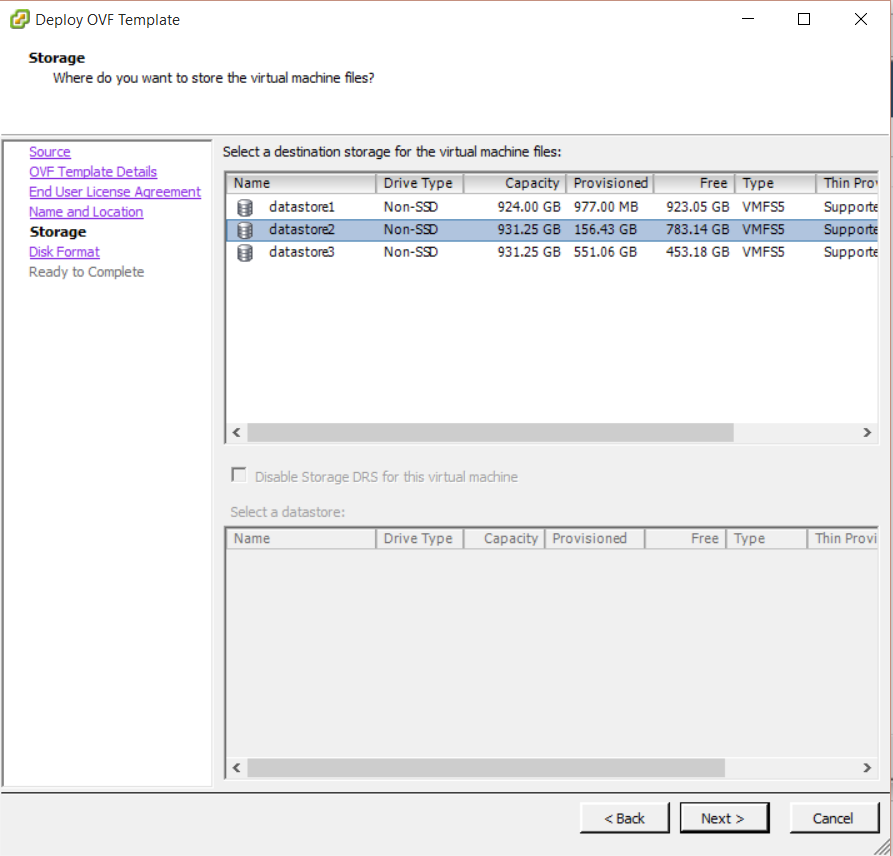
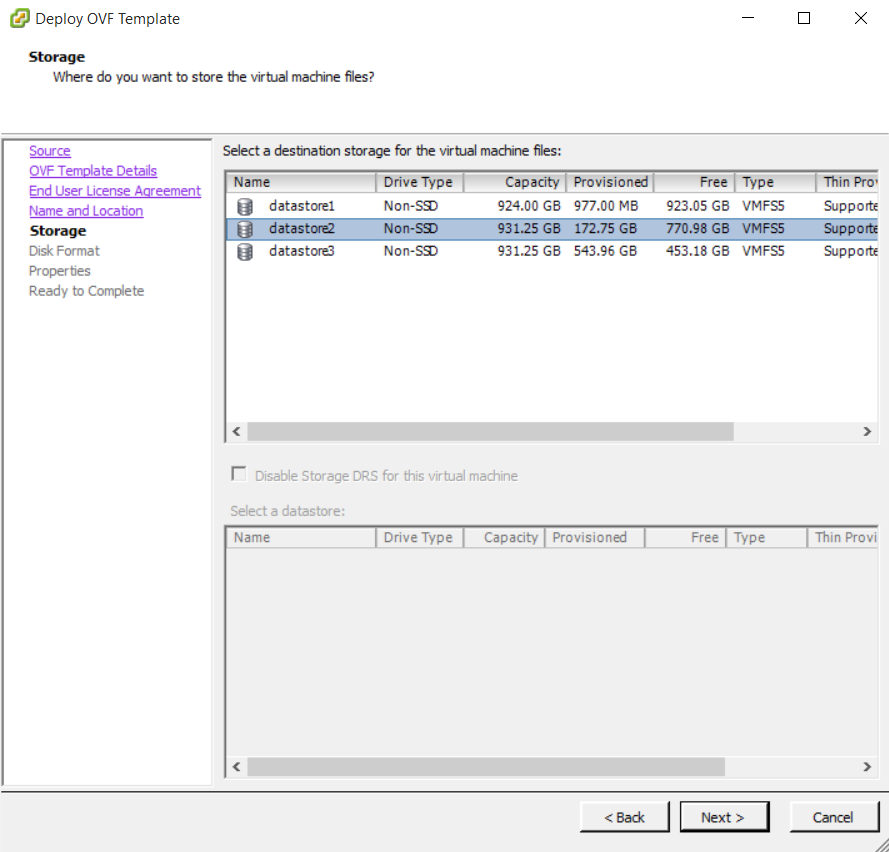
  • Choose your storage

vRAD5

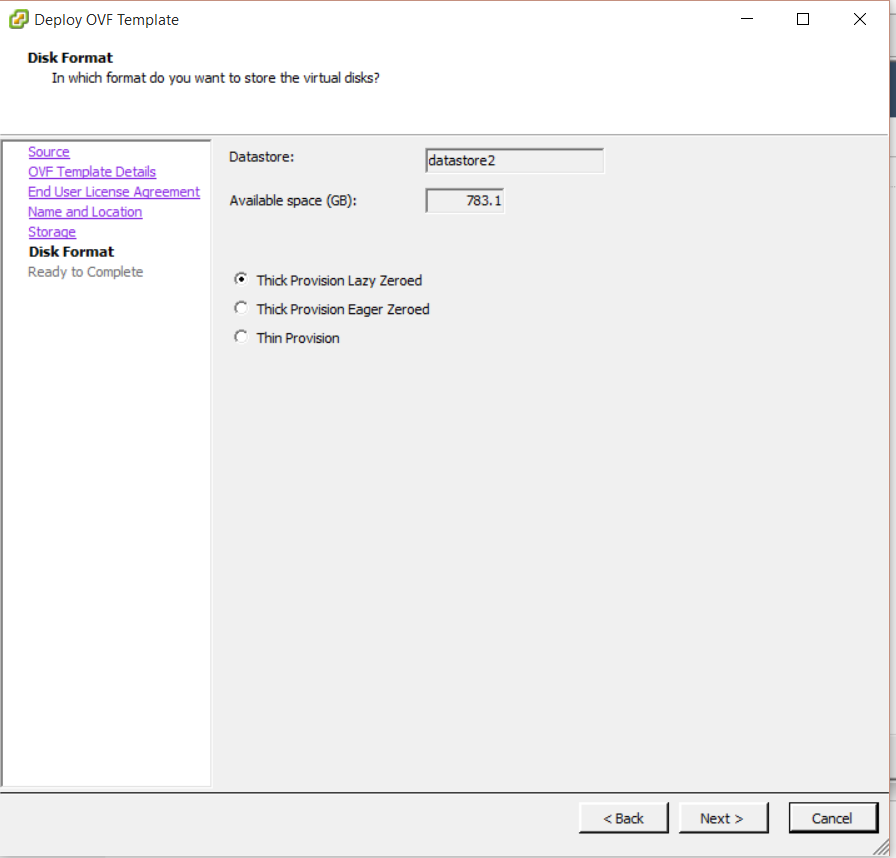
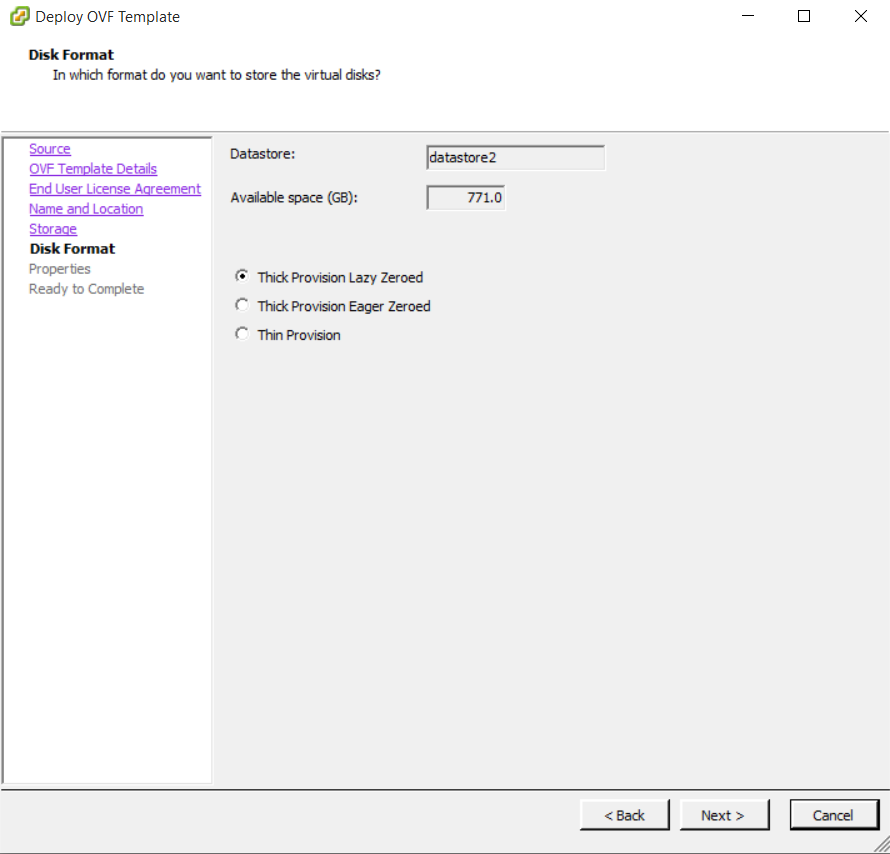
  • Leave the defaults for storage

vRAD6

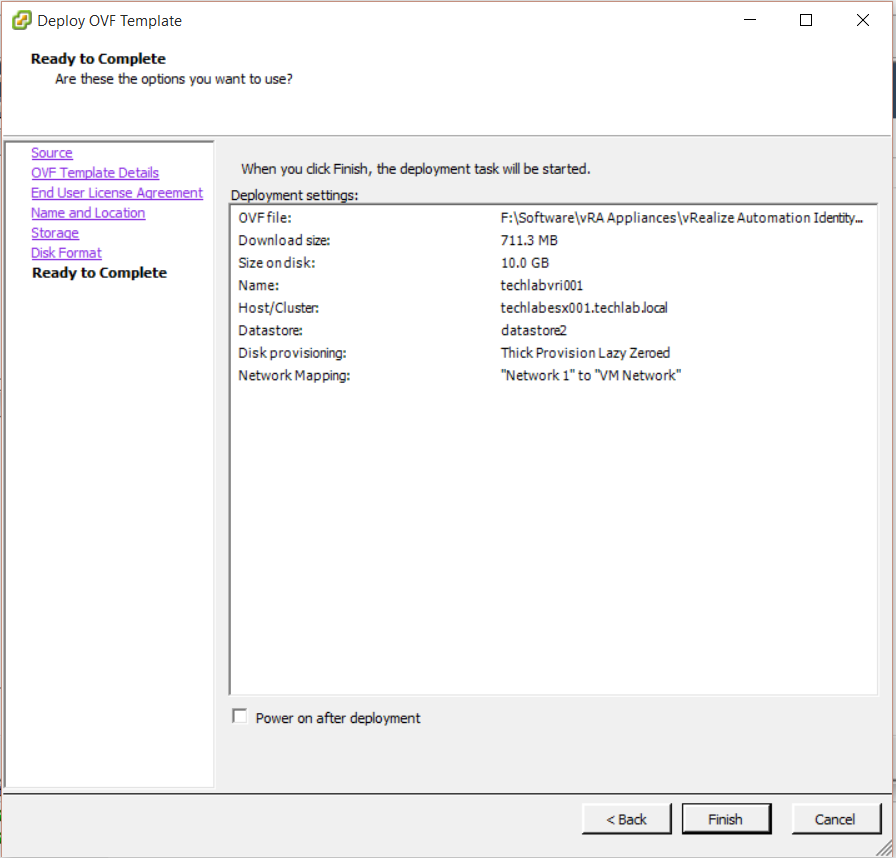
  • Check the details and click Finish

vRAD7

  • Note: The identity appliance cannot be clustered but can be put on a vSphere HA cluster to provide redundancy in the event of hardware failure but not in the event of the Identity appliance having an issue.
  • You may need to go into the vCenter console for the machine and set a root password
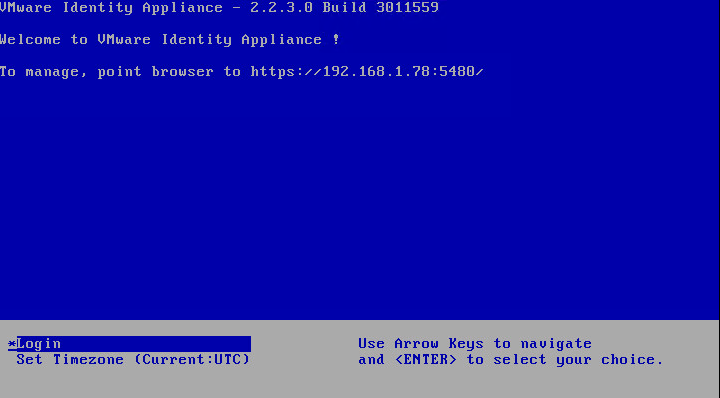
  • You will then see this screen where you can see the web browser link to log into the Identity appliance

vRAD8

  • Log into the web link

vRAD9

  • Set the time zone

vRAD10

  • Set the SSO password

vRAD11

  • It should then look like the below screenprint

vRAD12

  • Click on host settings and put in the name of the identity appliance
  • Make sure there is a DNS entry for the identity appliance

vRAD14

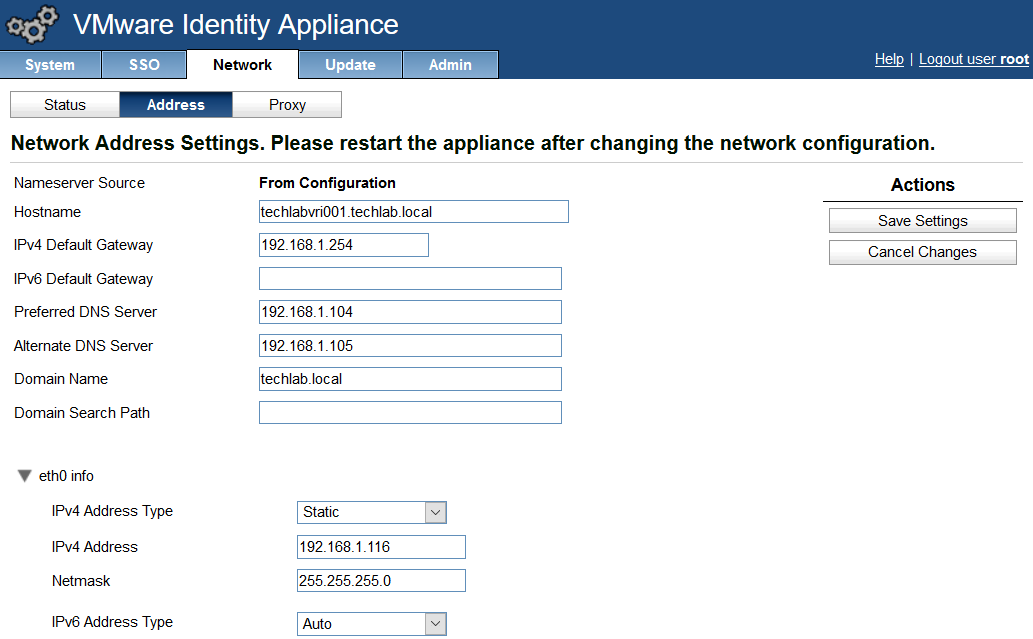
  • Click on Network then the Address tab and put in the relevant details

vRAD16

  • You will then need to reboot and relogin
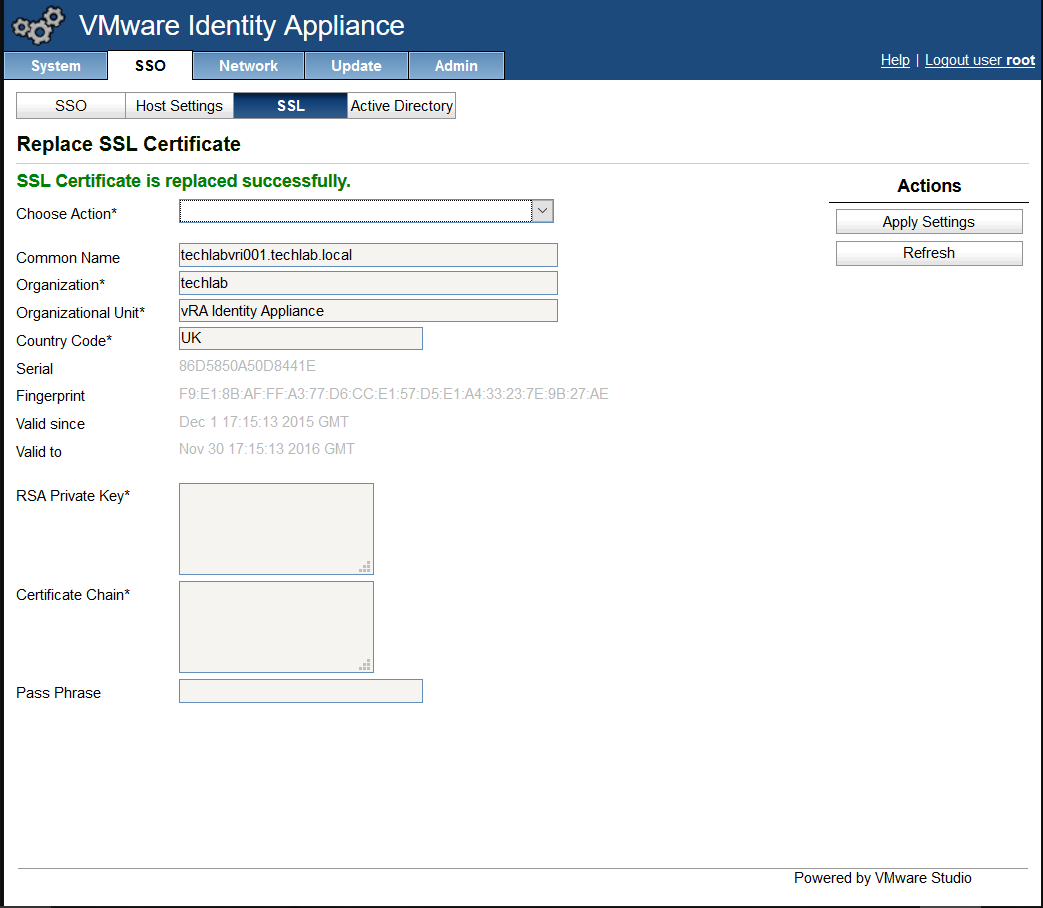
  • Next click on SSO > SSL
  • Generate a certificate for now. Example below

vRAD39PNG

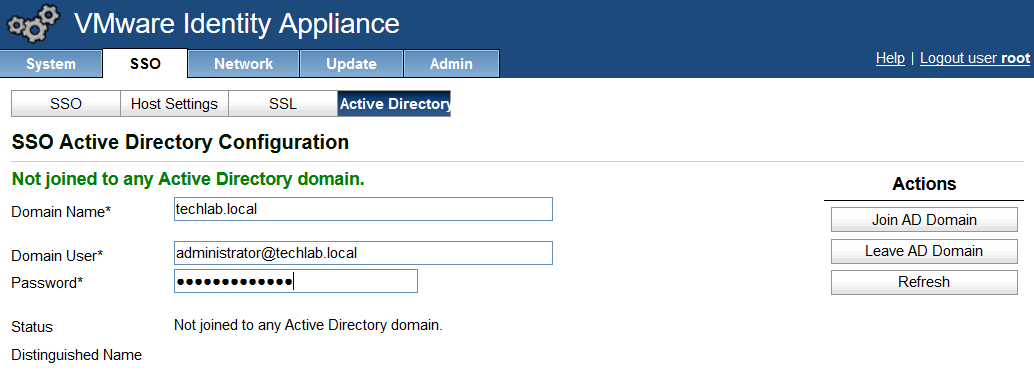
  • Click on Active Directory and put in your details

vRAD15

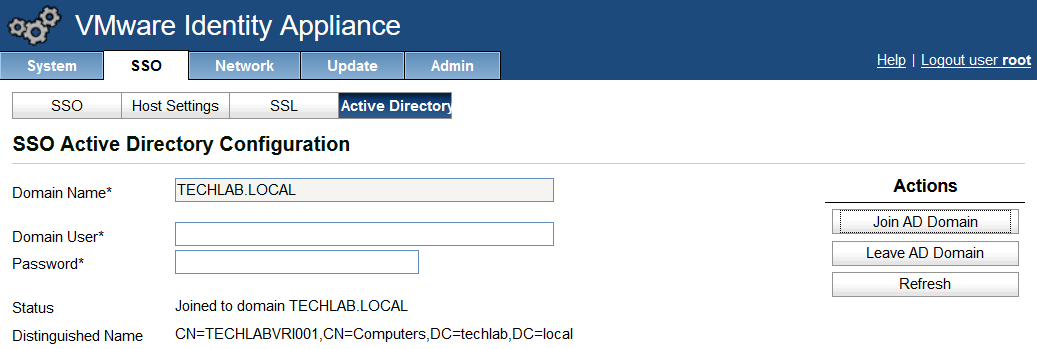
  • It will then look like the below

vRAD17

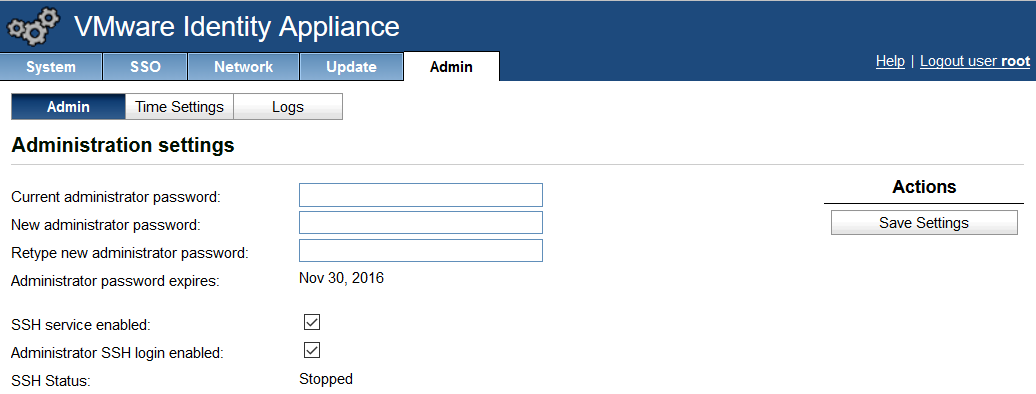
  • Go to the Admin tab and click Admin
  • Tick SSH service enabled and Administrator SSH login enabled

vRAD18

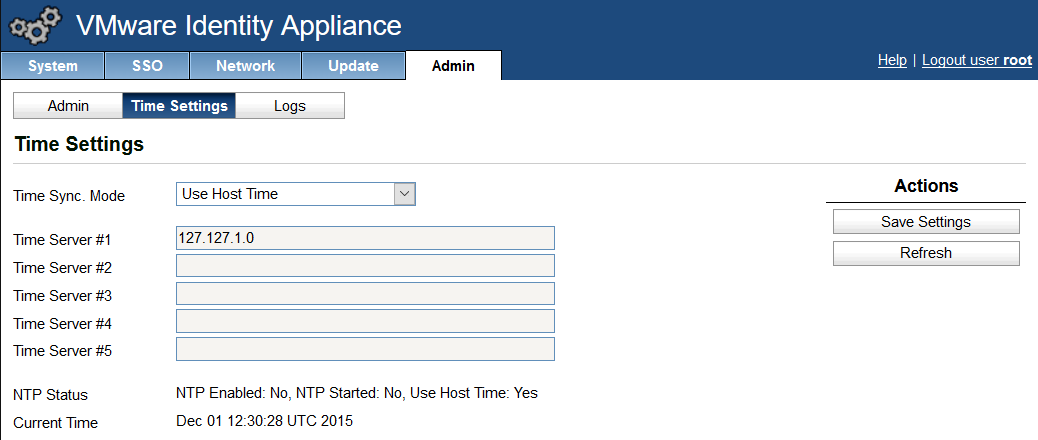
  • Click on Time settings and adjust if you have a time server. I left mine on Use host time

vRAD19

  • This should now be complete.
  • Note: You may want to adjust the CPU and RAM depending on customer requirements
  • Note. It might be wise at this point to shutdown the appliance and take a snapshot

Step 2 Deploy 2 vRealize Automation Appliances

Note: Follow the below steps for each appliance

  • In the vSphere client or vSphere Web Client click File > Deploy OVF template

vRAD20

  • Check the details

vRAD21

  • Accept the license agreement
  • Put in a name

vRAD22

  • Choose your storage

vRAD23

  • Choose your storage options

vRAD24

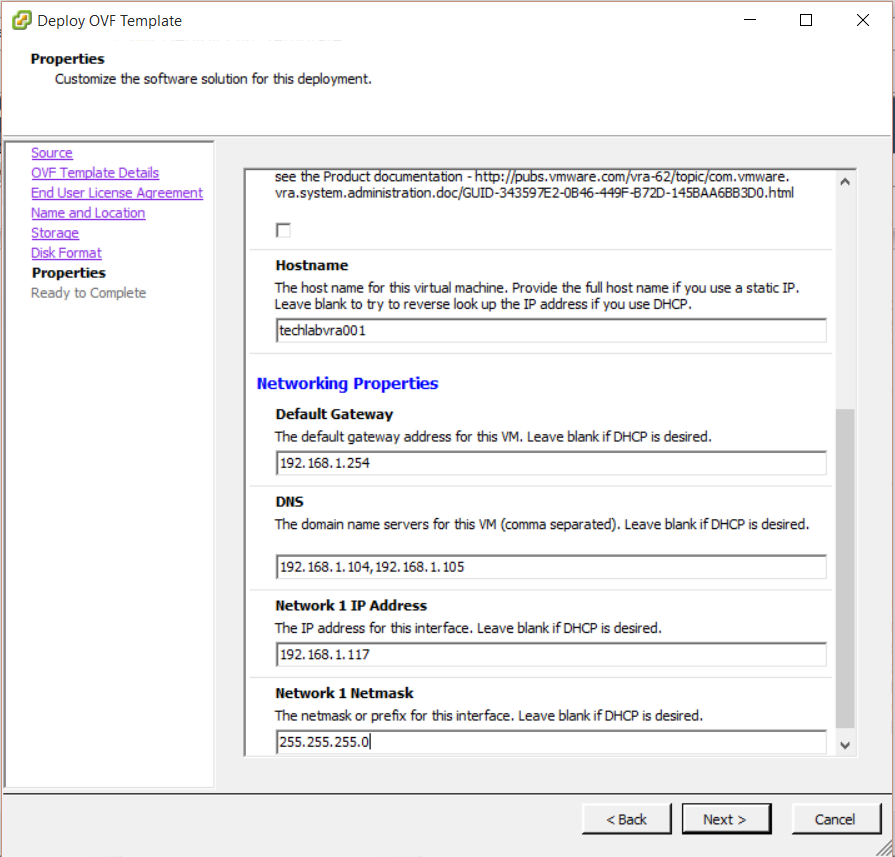
  • Next you will need to type in the hostname, ssh enabled, IP address, subnet mask, gateway and DNS servers

vRAD25

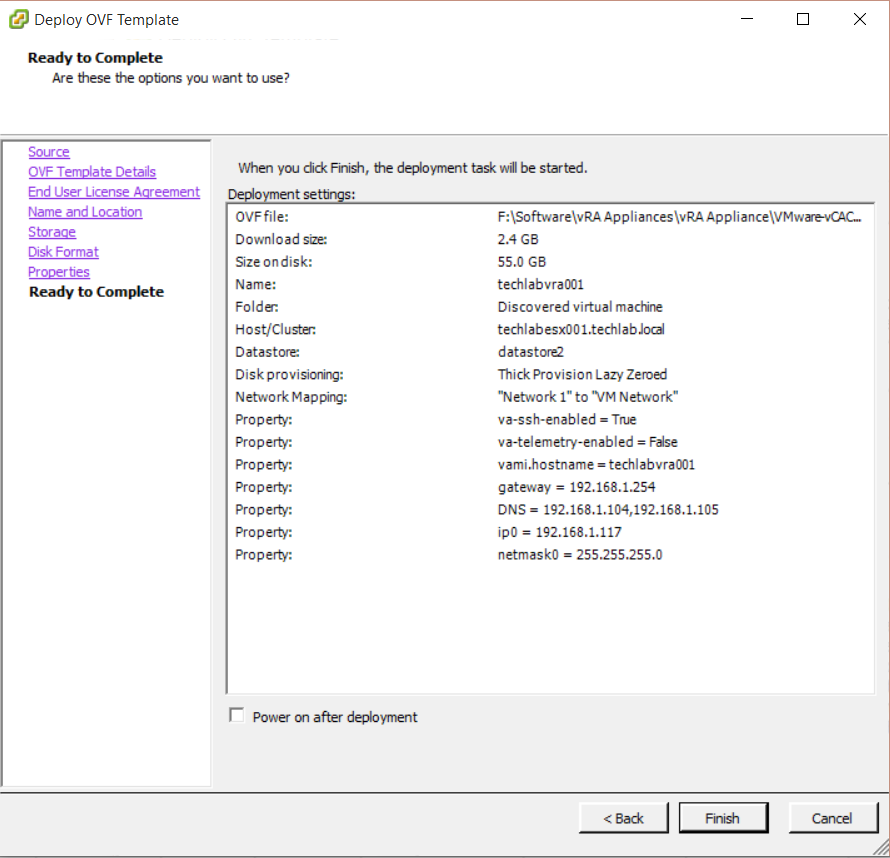
  • Click Next and check all your details

vRAD26

  • Once this is deployed, make sure you have a DNS entry added
  • Log into the appliance
  • Change the time settings first

vRAD27

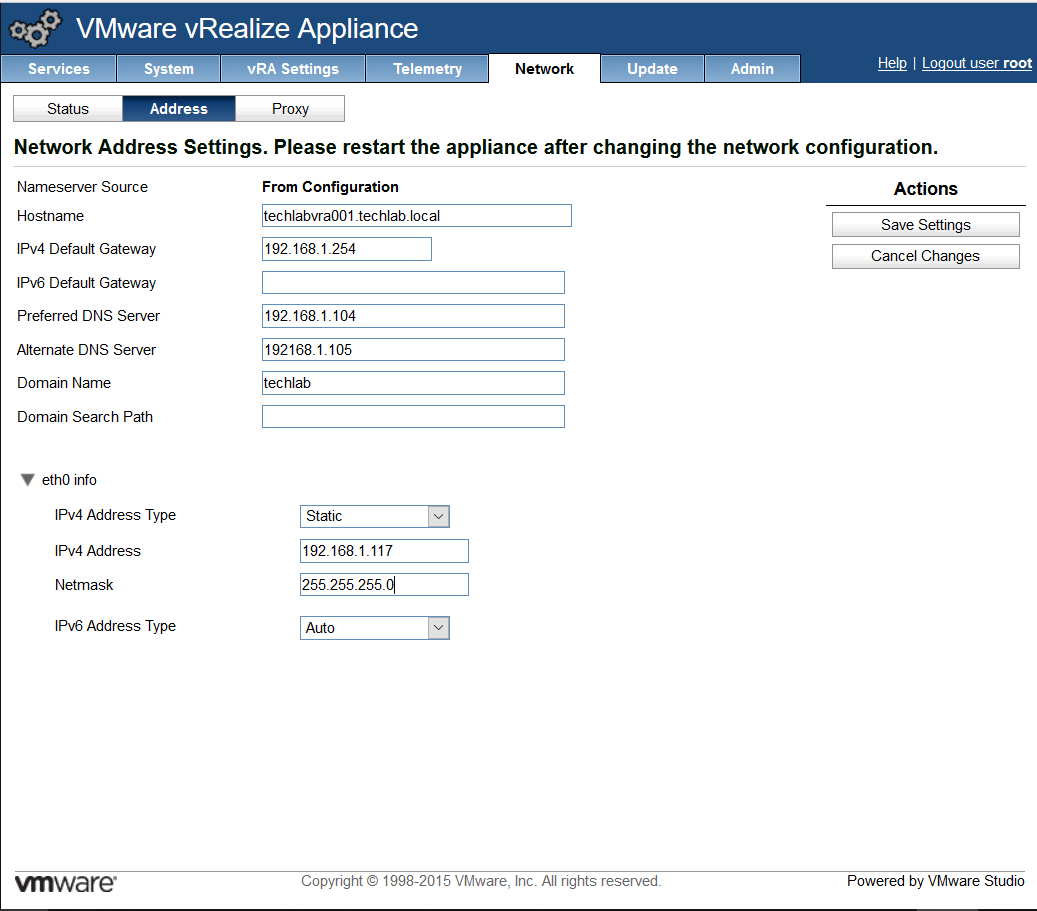
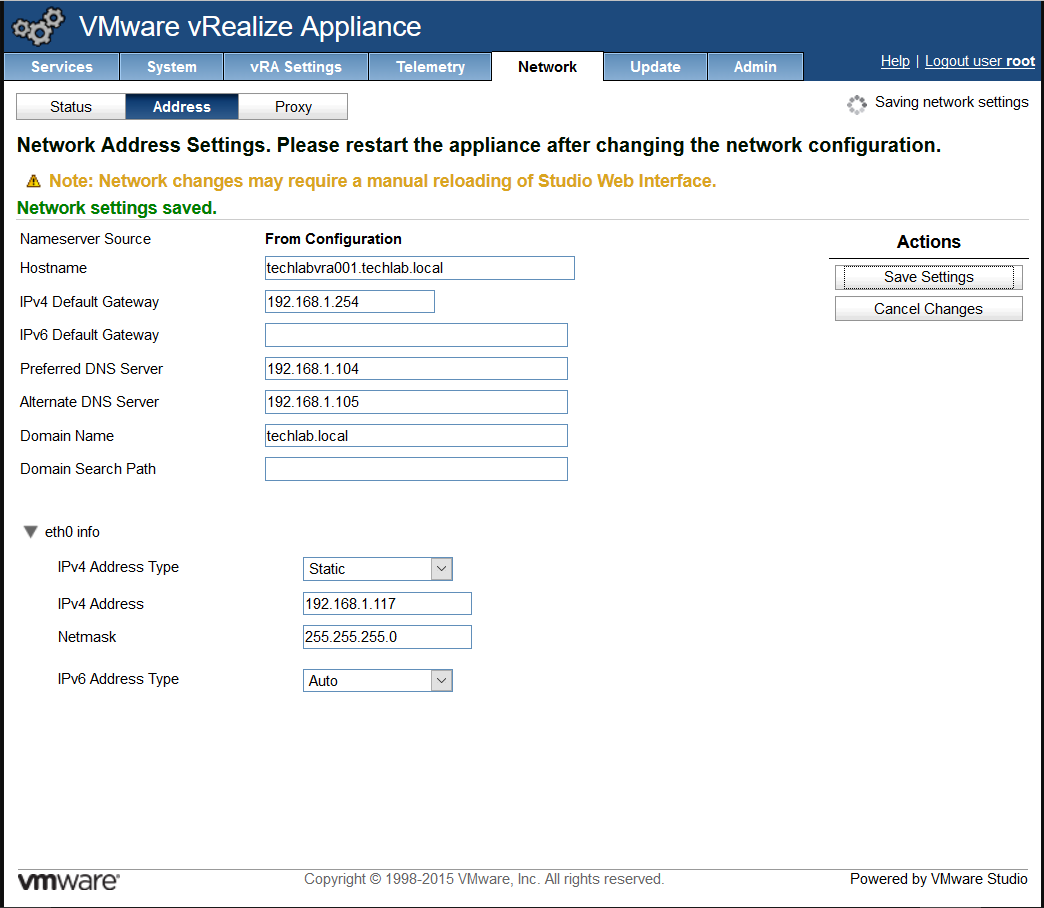
  • Click on the Network tab and select Host Settings.
  • Fill in your details

vRAD36PNG

  • Reboot the appliance

vRAD37PNG

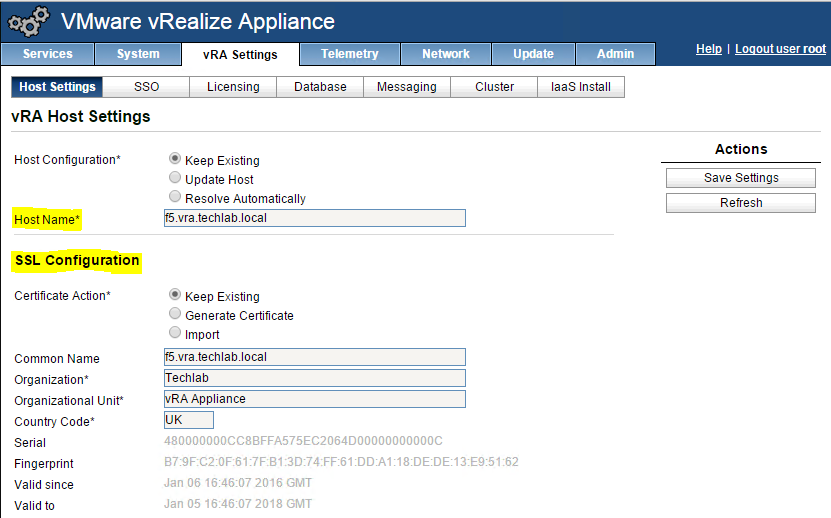
  • Click on the vRA Host Settings
  • Add in your host settings – this should be your load balanced name
  • Import your certificate in which should have been pre-created from the instructions in my previous vRA certificate blog

vRA233

  • Click on SSO
  • Put in the SSO details (The identity appliance details)
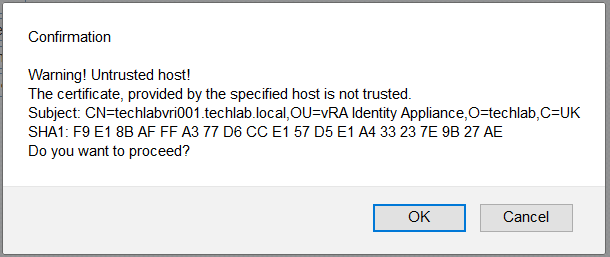
  • If everything is ok then you will see a certificate message

vRAD40PNG

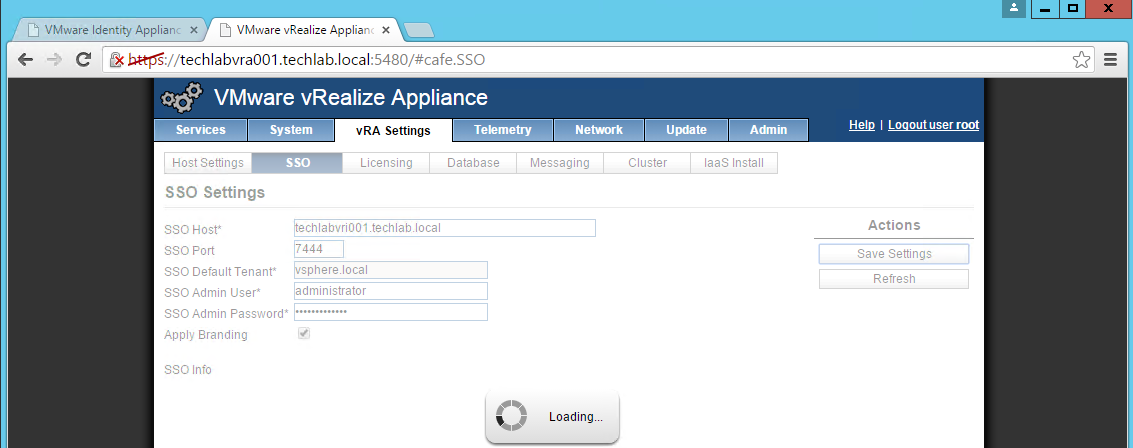
  • Click Save Settings and note the SSO seems to take a long time

vRAD50

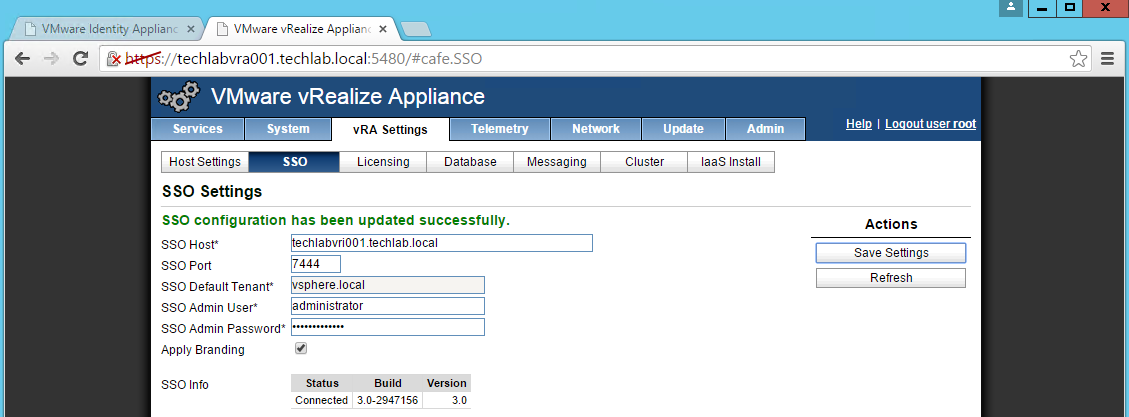
  • You should see the following

vRAD51

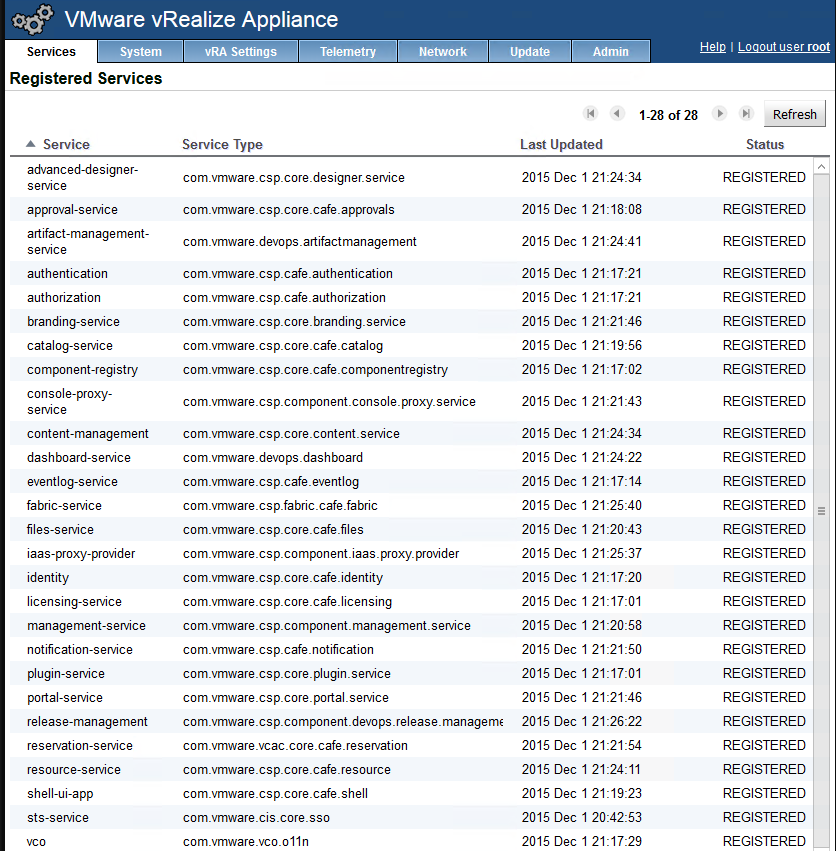
  • You should slowly see the services begin to come up
  • Note:  To monitor service startup run the following command:
  • tail -f /var/log/vcac/catalina.out

vRAD52

  • Do exactly the same process on the second appliance
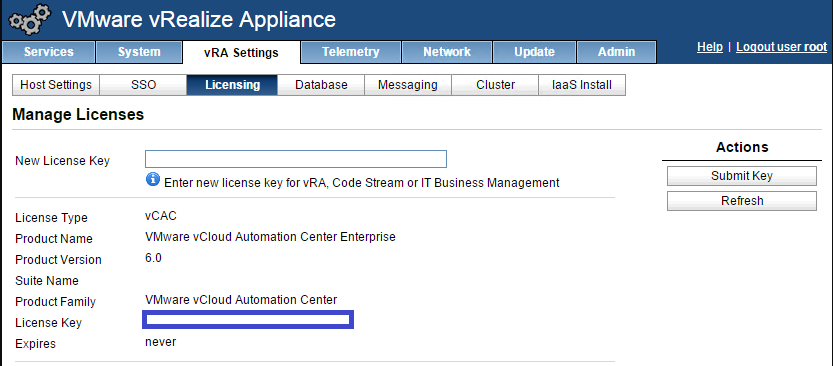
  • Add your license in – Go to vRA Settings > Licensing

vRA234

  • Next please go to Part 2 for the Postgres clustering of the vRA appliances

http://www.electricmonk.org.uk/2016/01/07/vrealize-automation-large-scale-deployment-part-2-clustering-the-postgres-databases-on-the-vra-appliances-v6-0-2/

Licensing Problems

I had an issue where my license suddenly became invalid which was a little bizarre as it is test non expiring one.

However I followed the steps in the below article on both appliances and it came back fine

Thanks @ vmguru 🙂

https://www.vmguru.com/2015/09/downgrade-the-vrealize-automation-license/


vRealize Automation large scale deployment Part 2 Clustering the Postgres Databases on the vRA Appliances v6.2.3

vRARobot2

Configuring the vRA Appliances

VMware vRealize Automation Center documentation recommended the utilization of an external instance of VMware vFabric Postgres when setting up a high availability (HA) environment. However, since the release of VMware vRealize Automation standalone, VMware vFabric Postgres is End Of Availability and no longer available as a standalone product. To address customers needs, VMware developed a way to utilize the database instance located in the VMware vRealize Automation appliance in a high availability (HA) mode, without having to incur additional licensing.

Useful Links

http://pubs.vmware.com/vra-62/index.jsp#com.vmware.vra.install.doc/GUID-8E631C5E-97D7-4D2B-945A-33B5DDBA452F.html

http://kb.vmware.com/selfservice/microsites/search.do?cmd=displayKC&docType=kc&externalId=2108923

Instructions Part 1

Follow the below instructions for both appliances until you get to Part 2

  • Shutdown both vRA appliances and snapshot in vCenter
  • Download the 2108923_dbCluster.zip file from the VMware Knowledge Base.
  • Add a 20GB disk to the primary vRA appliance and secondary appliances
  • Power on the primary and secondary vRA appliances
  • Log into both vRA_Appliance:5480 in a web browser
  • Log into both vRA appliances in Putty and WinSCP
  • Extract the tar file from the 2108923_dbCluster.zip file attached to this article to both the appliances (I created a /tmp/prostgres folder)
  • Using winscp copy the 2108923_dbcluster.tar file to a tmp folder on both appliances
  • In Putty (See screen below) extract the .tar file on both appliances
  • tar xvf 2108923_dbCluster.tar

vRA235

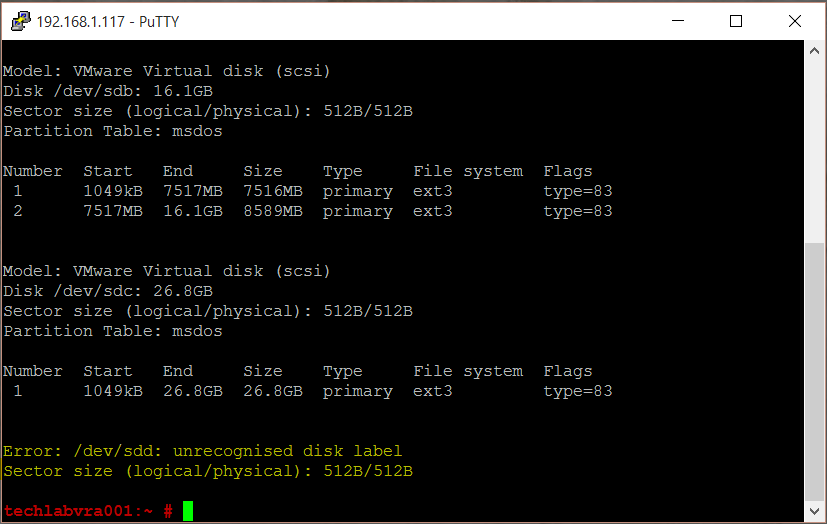
  • type parted -l on both appliances
  • You should see Error: /dev/sdd: unrecognized disk label. See the bottom of the screen

vRA236

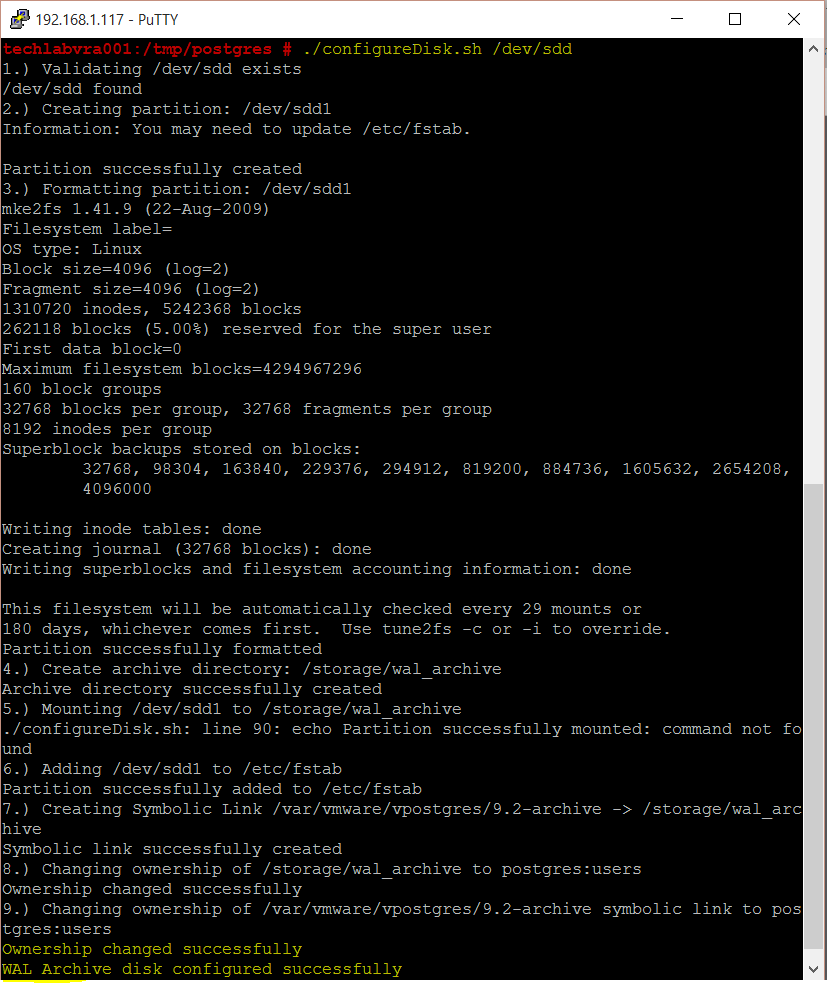
  • Run ./configureDisk.sh /dev/sdd

vRA237

  • At this point it is normally a good idea to snapshot both appliances as they seem to be sensitive to the password you use especially the special characters. Do not use = anywhere in the password
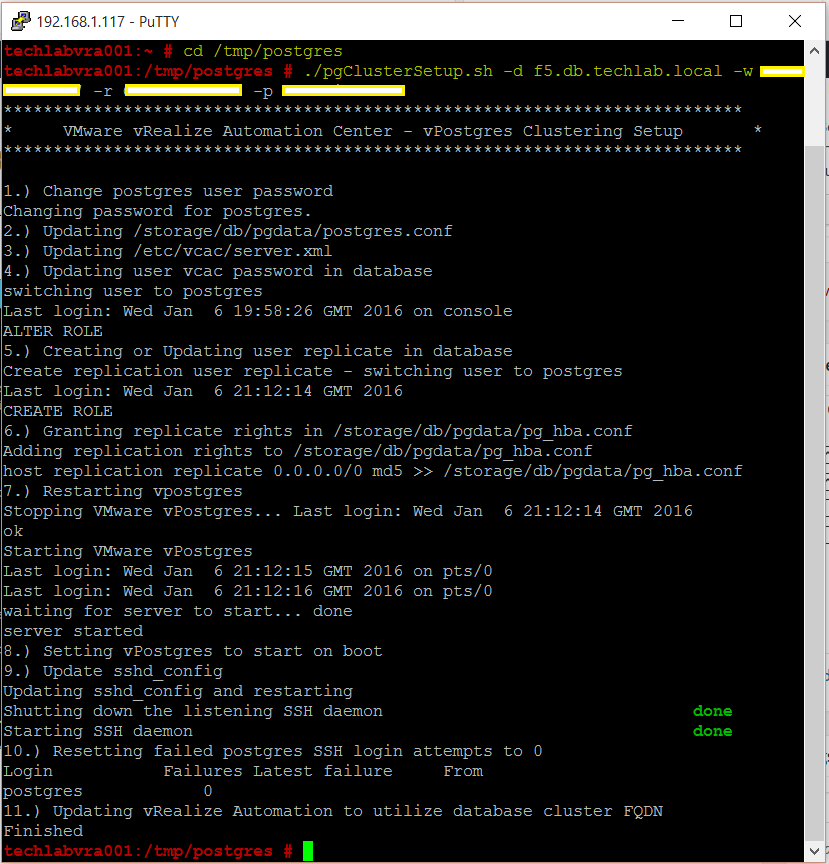
  • Run the pgClusterSetup.sh script to prepare the appliance databases for clustering
  • Note: In our case the db_fqdn was the Load balanced DB FQDN for the Postgres database

./pgClusterSetup.sh [-d] db_fqdn [-w] db_pass [-r] replication_password [-p]postgres_password

[-d] Database load balancer fully qualified domain name
[-w] Database password (will set password to this value)
[-r] Replication password (Optional: will use Database password if not set)
[-p] Postgres password (Optional: will use Database password if not set

  • cd /tmp/postgres
  • ./pgClusterSetup.sh -d f5.db.techlab.local -w password -r password -p password

vRA238

  • This is the end of configuration on both appliances

Instructions Part 2

Configuring the database replication on appliance B

  • Type su – postgres
  • Type cd /opt/vmware/vpostgres/current/share/
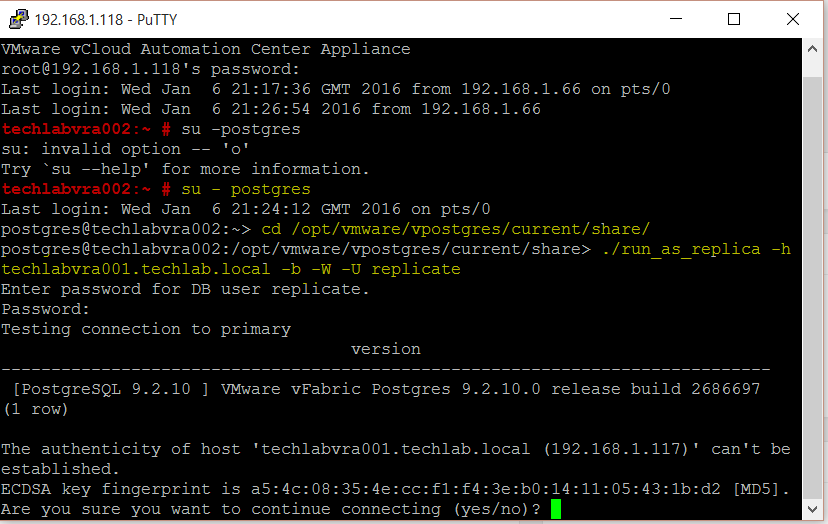
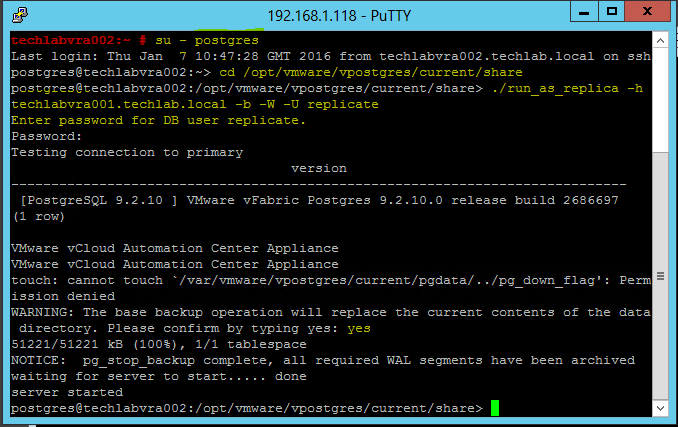
  • Type ./run_as_replica -h vRA_FQDN -b -W -U replicate (Note don’t copy and paste as needed typing in manually)

./run_as_replica –h Primary Appliance -b -W -U replicate
[-U] The user who will perform replication. For the purpose of this KB this user is replicate
[-W] Prompt for the password of the user performing replication
[-b] Take a base backup from the master. This option destroys the current contents of the data directory
[-h] Hostname of the master database server. Port 5432 is assumed

  • Enter the same password which was created previously
  • It should now look like the below
  • Type yes

vRA239

  • Type yes

Screen Shot 2015-11-25 at 14.54.23

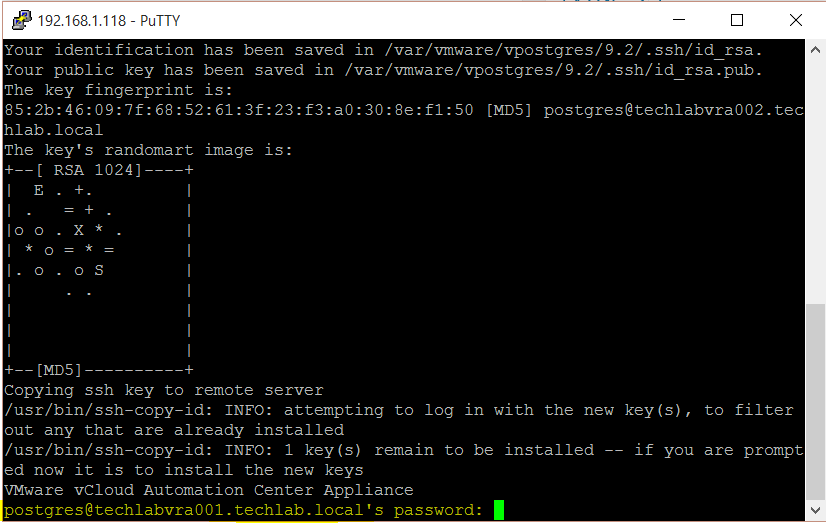
  • Type the password

vRA240

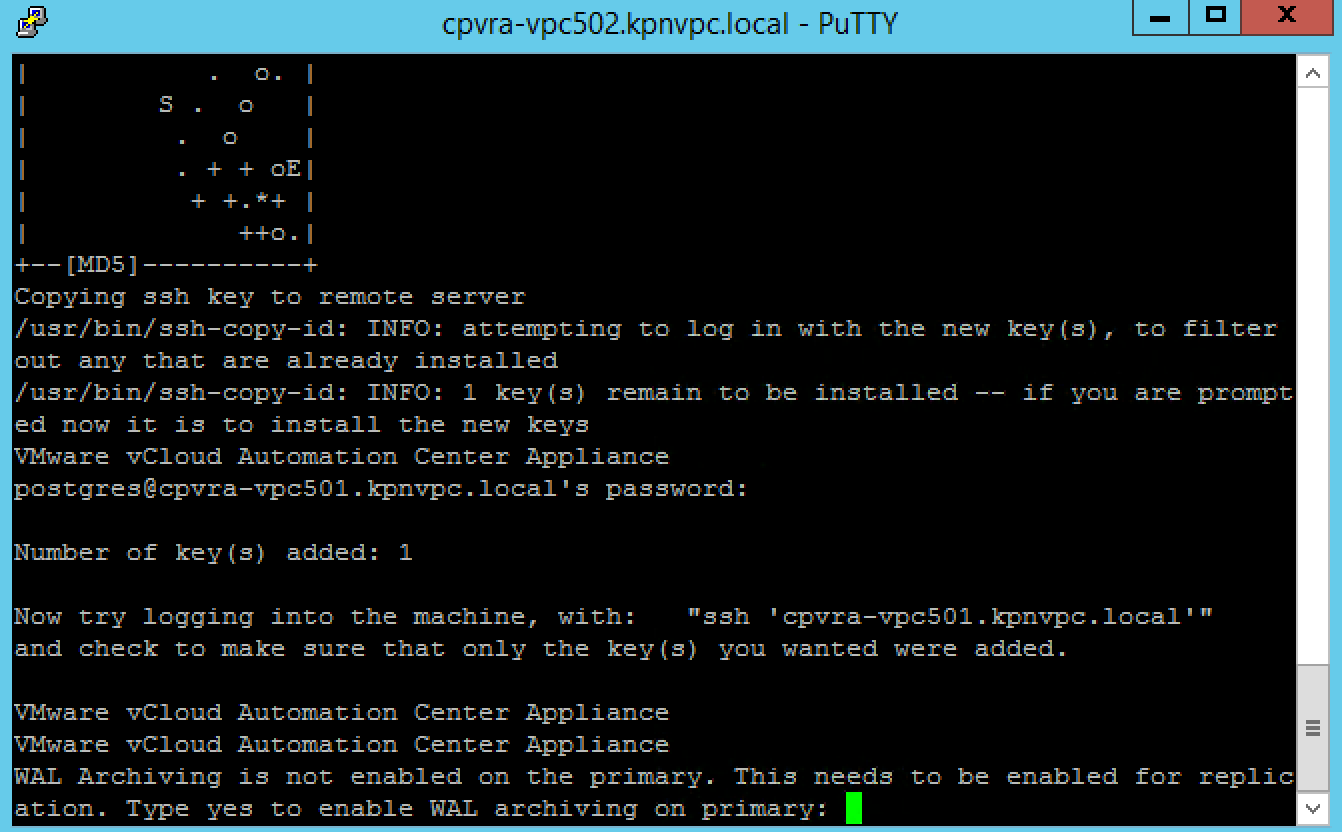
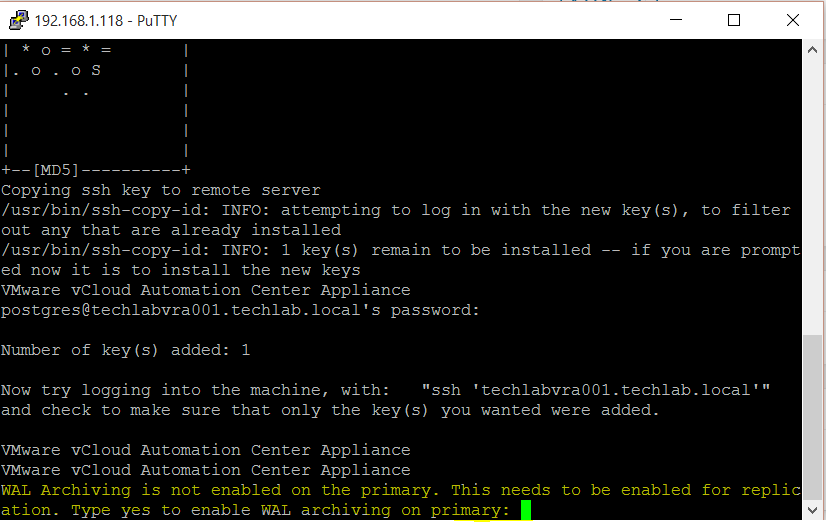
  • Type yes to enable WAL archiving on the primary

vRA241

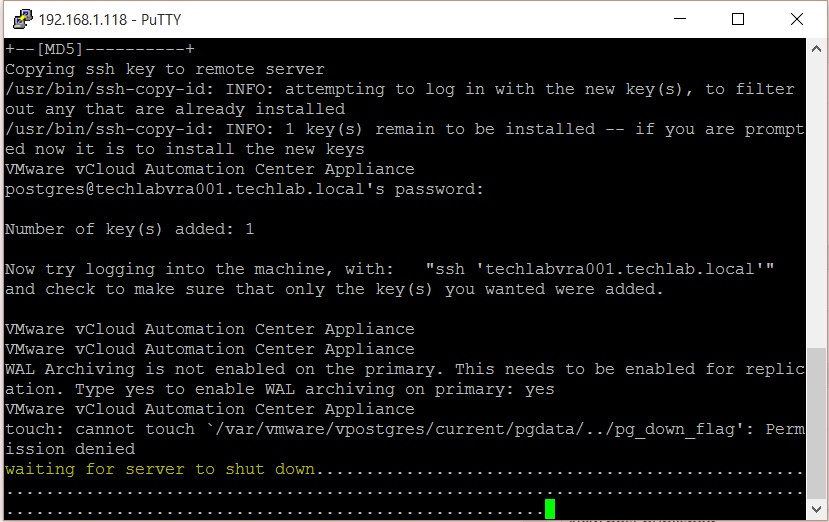
  • It will now say shutting down and ignore the error message

vRA242

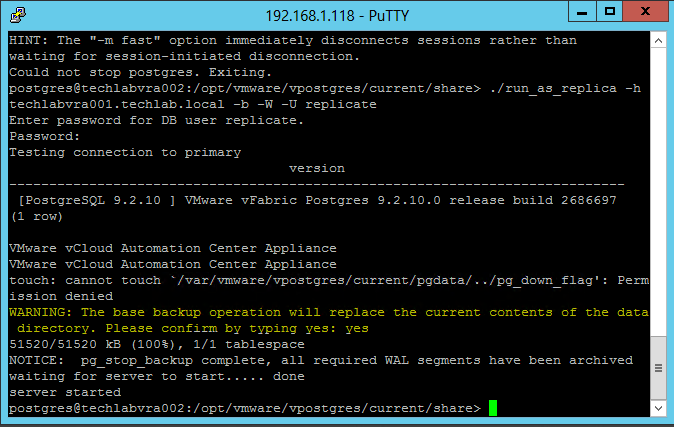
  • Type yes to the base backup message
  • Note to myself really, I had an issue where I needed to run a command as root on the second vRA appliance to stop the vpostgres service (service vpostgres stop) to get the installer to finish!

vRA243

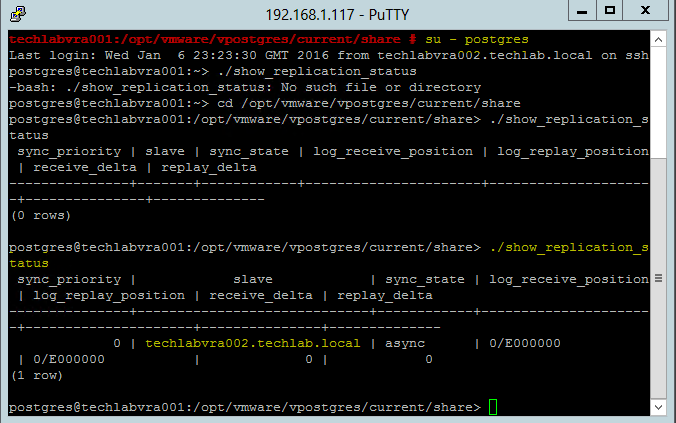
  • Next test replication
  • cd /opt/vmware/vpostgres/current/share/
  • Type ./show_replication_status

vRA244

Validate replication

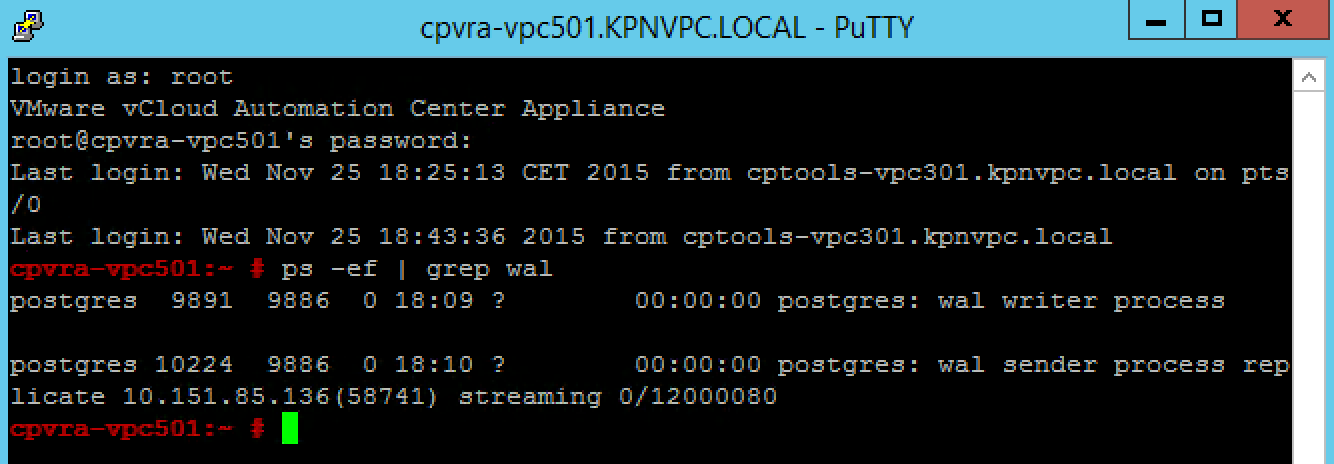
  • Connect to the appliance with the primary (master) database using SSH.
  • Validate if the WAL process is running. You should see the WAL process by running this command:
  • ps -ef | grep wal

Screen Shot 2015-11-25 at 17.44.06

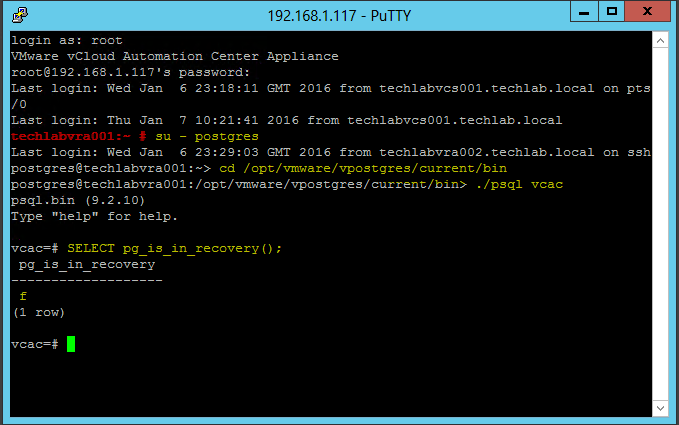
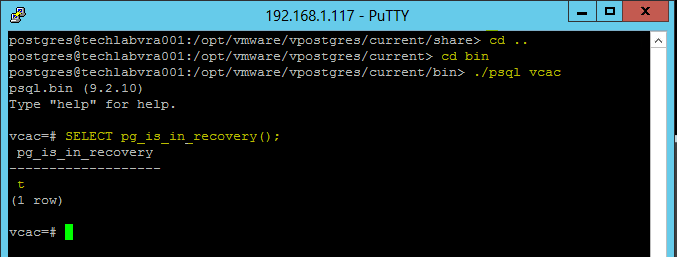
Validate if the master is ready for read-write connections by running these commands:

  • su – postgres
  • cd /opt/vmware/vpostgres/current/bin
  • ./psql vcac
  • SELECT pg_is_in_recovery();

vRA248

  • You see output similar to the above
  • Quit psql by running \q
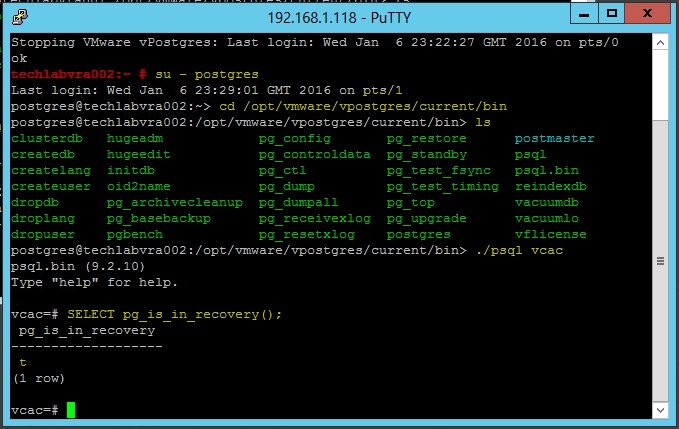
  • Connect to the appliance with the replica database using SSH.
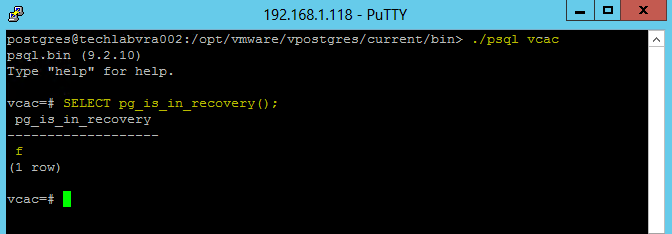
  • Validate if the replica is read only using these commands
  • su – postgres
  • cd /opt/vmware/vpostgres/current/bin
  • ./psql vcac
  • SELECT pg_is_in_recovery();

vRA247

  • Quit psql by running \q

Instructions Step 3

Testing Failover between the Postgres Databases. Performing a test failover (appliance A to appliance B)

  • Validate if the WAL process is running. You should see the WAL process by running this command:
  • Type ps -ef | grep wal

vRA245

  • Connect to appliance A using SSH as root
  • Stop the vpostgres service by running service vpostgres stop

vRA249

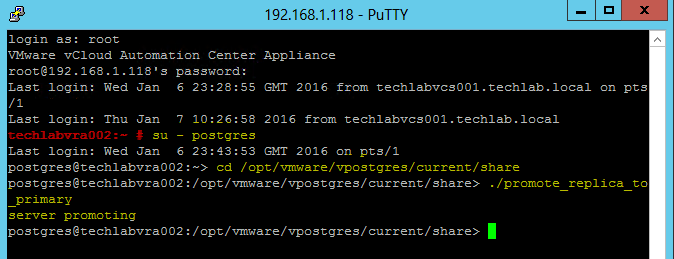
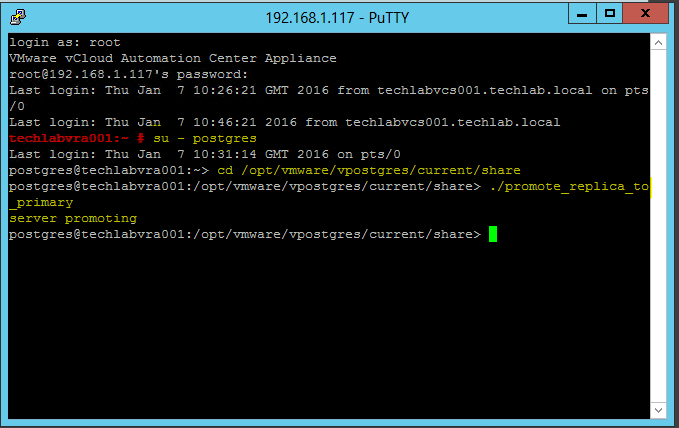
  • Connect to appliance B using SSH as root.
  • Promote the replica database to master as the postgres user by running these commands
  • su – postgres
  • cd /opt/vmware/vpostgres/current/share
  • ./promote_replica_to_primary

vRA250

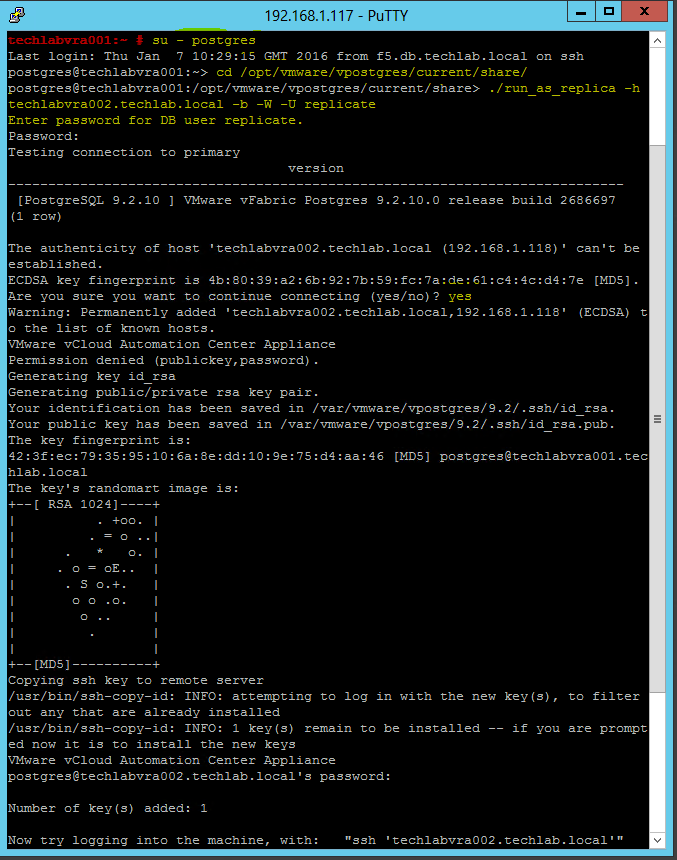
  • SSH into appliance A as root.
  • Configure database replication as user postgres by running these commands
  • su – postgres
  • cd /opt/vmware/vpostgres/current/share/
  • ./run_as_replica -h FQDNofServer -b -W -U replicate
  • Note the FQDN of the server was the second node which was been promoted to primary

vRA251

  1. Enter the replicate users password when prompted.
  2. Type yes after verifying the thumbprint of the primary machine when prompted.
  3. Enter the postgres users password when prompted.
  4. Type yes when prompted with Warning: the base backup operation will replace the current contents of the data directory. Please confirm by typing yes
  5. Do a quick check to test which machine is the primary and which is the secondary

vRA252

vRA254

Instructions Step 4

Perform a test failback (appliance B to appliance A)

  • Connect to appliance B using SSH as root.
  • Stop the vpostgres service by running this command:
  • service vpostgres stop

vRA256

  •  Connect to appliance A using SSH as root.
  • Promote the replicate database to master as user postgres by running these commands
  • su – postgres
  • cd /opt/vmware/vpostgres/current/share/
  • ./promote_replica_to_primary

vRA255

  • Connect to appliance B using SSH as root.
  • Configure database replication as user postgres by running these commands:
  • su – postgres
  • cd /opt/vmware/vpostgres/current/share
  • ./run_as_replica -h FQDNofServer -b -W -U replicate
  • Enter the replicate users password when prompted
  • Type yes when prompted with:WARNING: the base backup operation will replace the current contents of the data

vRA257

Validate replication

  • Connect to the appliance with the primary (master) database using SSH.
  • Validate if the WAL process is running. You should see the WAL process by running this command:
  • ps -ef | grep wal
  • Validate if the master is ready for read-write connections by running the commands below
  • It should say f indicating it is the master

vRA258

  • You see output similar to the above
  • Quit psql by running \q
  • Connect to the appliance with the replica database using SSH.
  • Validate if the replica is read only using these commands:

vRA259

  • Quit psql by running \q
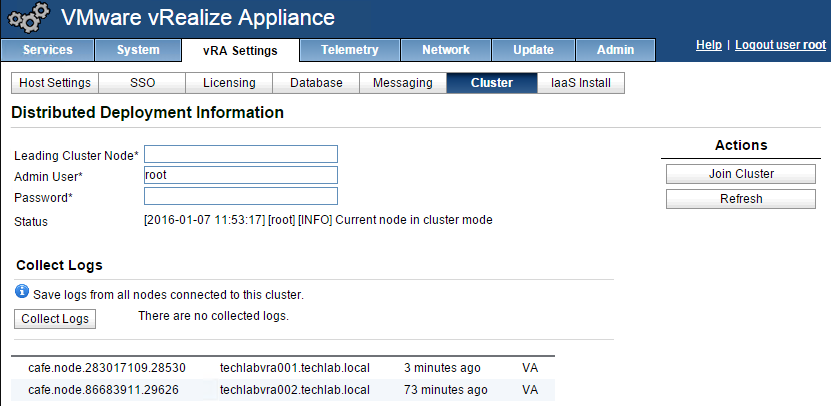
  • If you now log into the VAMI page of the vRA appliances and check the database and cluster page you should see the following

vRA260

Configuring monitoring of the VMware vRealize Automation appliance databases

http://kb.vmware.com/selfservice/microsites/search.do?language=en_US&cmd=displayKC&externalId=2127052