What is WSUS?
The Windows Server Update Service (WSUS) enables information technology administrators to deploy the latest Microsoft product updates. By using WSUS, administrators can fully manage the distribution of updates that are released through Microsoft Update to computers in their network. This blog shows an overview of this server role and more information about how to deploy and maintain WSUS via Microsoft Virtual Machine Manager 2012. The WSUS server provides the features that administrators need to manage and distribute updates through a management console. In addition, a WSUS server can be the update source for other WSUS servers within the organization. The WSUS server that acts as an update source is called an upstream server. In a WSUS implementation, at least one WSUS server in the network must connect to Microsoft Update to get available update information. The administrator can determine, based on network security and configuration, how many other servers connect directly to Microsoft Update
Installing WSUS
- You can choose to install WSUS on a Remote Server
- You can choose to install WSUS on a VMM Server which is what we are going to do
Installation Considerations:
During the installation process, WSUS will install the following by default:
- .NET API and Windows PowerShell cmdlets
- Windows Internal Database (WID), which is used by WSUS unless you configure WSUS to connect to another DB Instance on a separate server to the VMM Server
- Services used by WSUS, which are:
- Update Service
- Reporting Web Service
- Client Web Service
- Simple Web Authentication Web Service
- Server Synchronization Service
- DSS Authentication Web Service
By default, the WSUS server uses port 8530 for HTTP protocol and port 8531 for HTTPS protocol to obtain updates from Microsoft. If there is a corporate firewall between your network and the Internet, you will have to open these ports on the server that communicates directly to Microsoft Update. If you are planning to use custom ports for this communication, you open those ports instead
Pre Requisites
- The database server cannot be configured as a domain controller.
- The WSUS server cannot run Remote Desktop Services.
- The database server must be in the same Active Directory domain as the WSUS server, or it must have a trust relationship with the Active Directory domain of the WSUS server.
- The WSUS server and the database server must be in the same time zone or be synchronized to the same Coordinated Universal Time (Greenwich Mean Time) source
- Check server hardware requirements to enable WSUS role are bound to hardware requirements.
- Check if you install roles or software updates that require you to restart the server when installation is complete, restart the server before you enable the WSUS server role.
- Microsoft .NET Framework 3.5/4.0 must be installed on the server where the WSUS server role will be installed. Can be selected when you go through adding roles
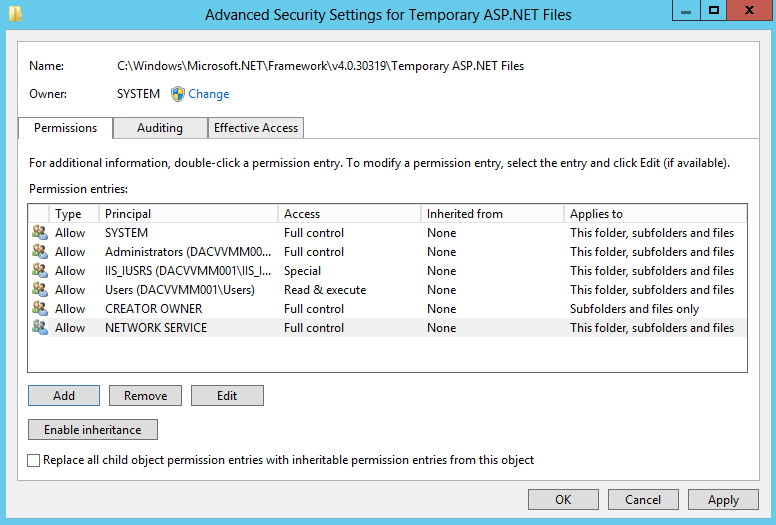
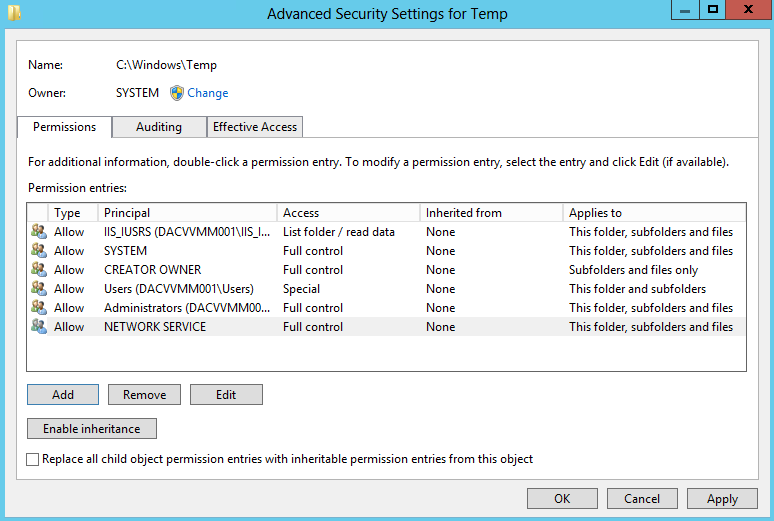
- The NT Authority\Network Service account must have Full Control permissions for the following folders so that the WSUS Administration snap-in displays correctly: This path may not exist until you have installed the IIS role
- %windir%\Microsoft.NET\Framework\v4.0.30319\Temporary ASP.NET Files
- %windir%\Temp
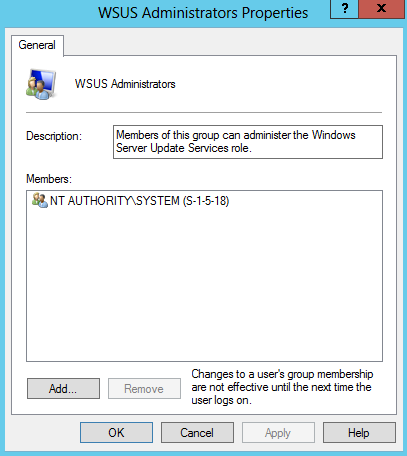
- Assign the Local System account to the WSUS Administrators Group
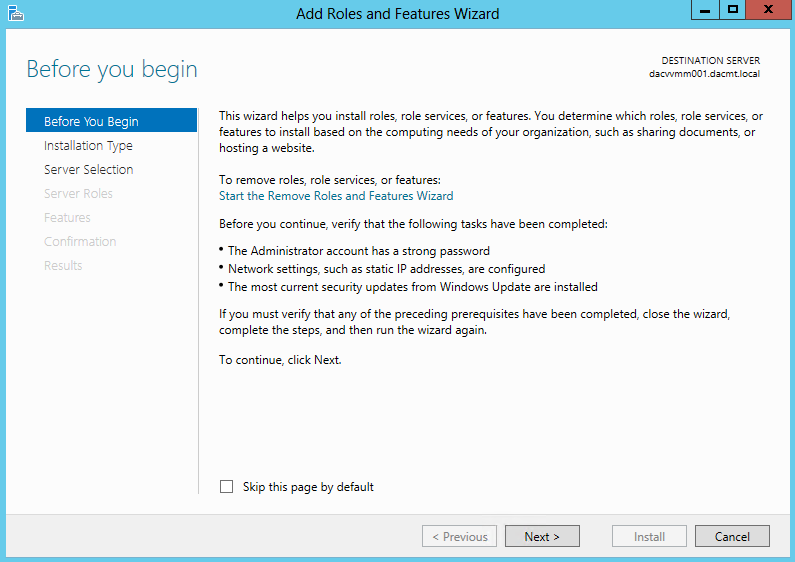
- Open Server Manager and click Add Roles
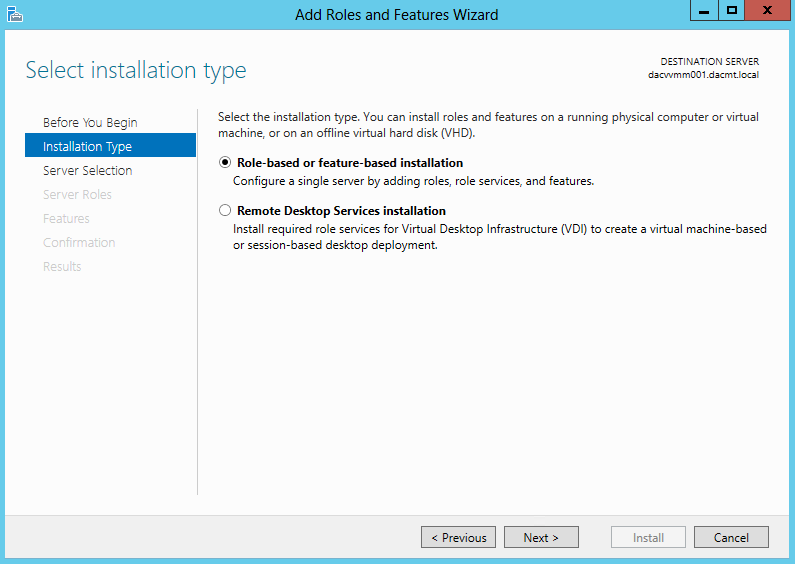
- Select Role based or feature-based installation
- Select your destination server
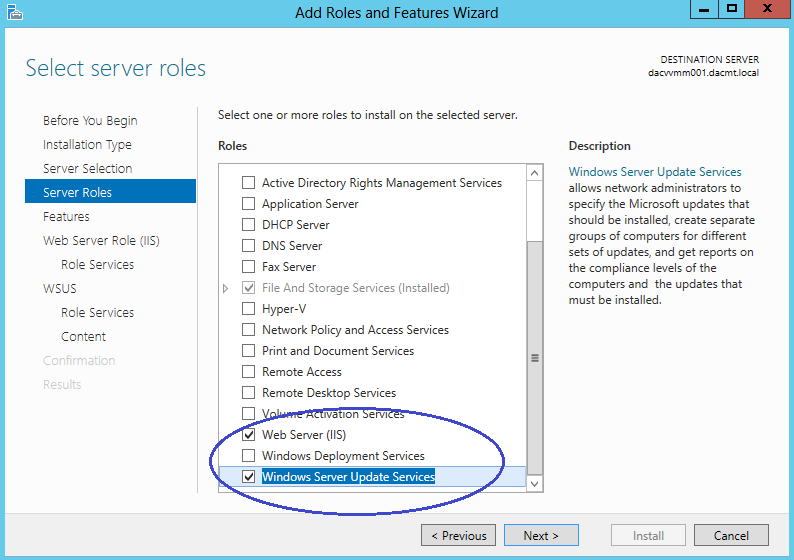
- Put in tick in Windows Server Update Services. It will automatically tick IIS as well
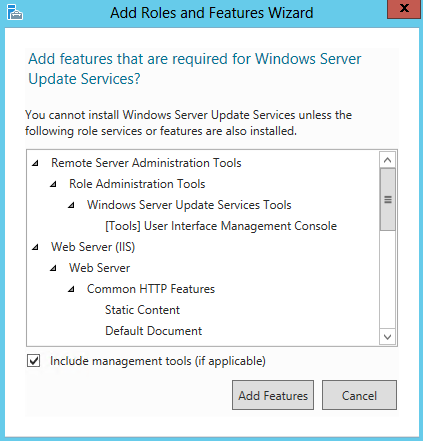
- Accept the default feature install
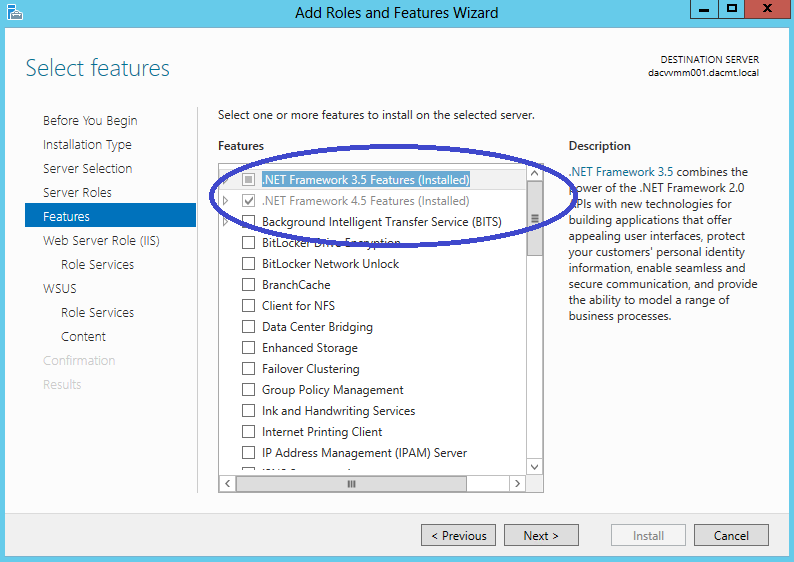
- Make sure you also tick .NET Framework 3.5 Features
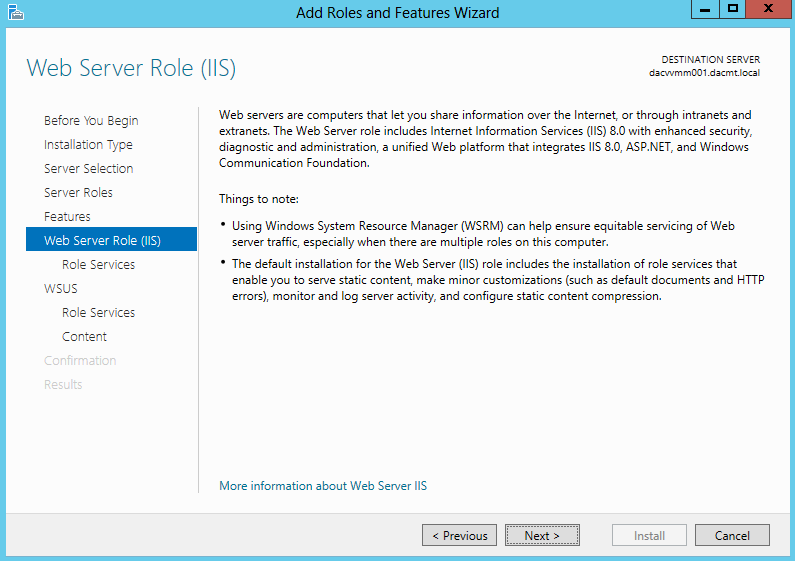
- Click Next on Web Server Role (IIS)
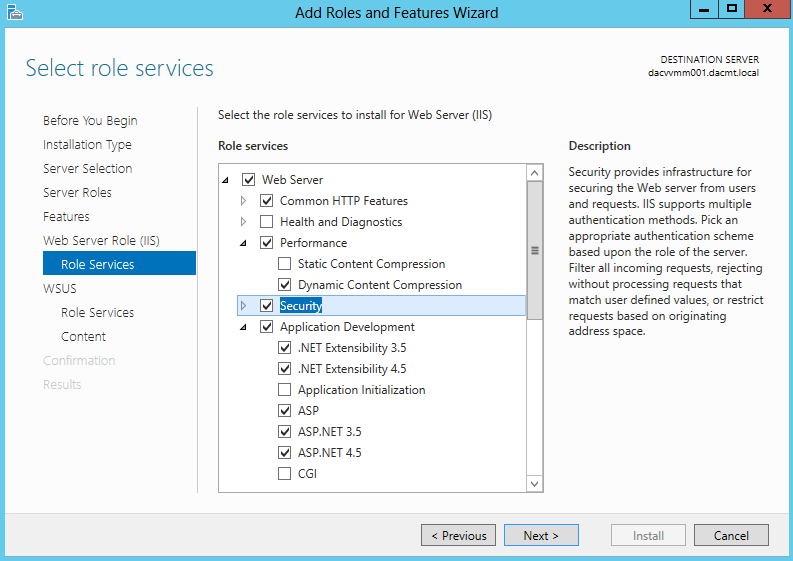
- On Select Role Services you will need the following
- Performance > Dynamic Content Compression
- Security > Windows Authentication
- Application Development > All ASP’s selected
- Management Tools > IIS6 Management Compatibility
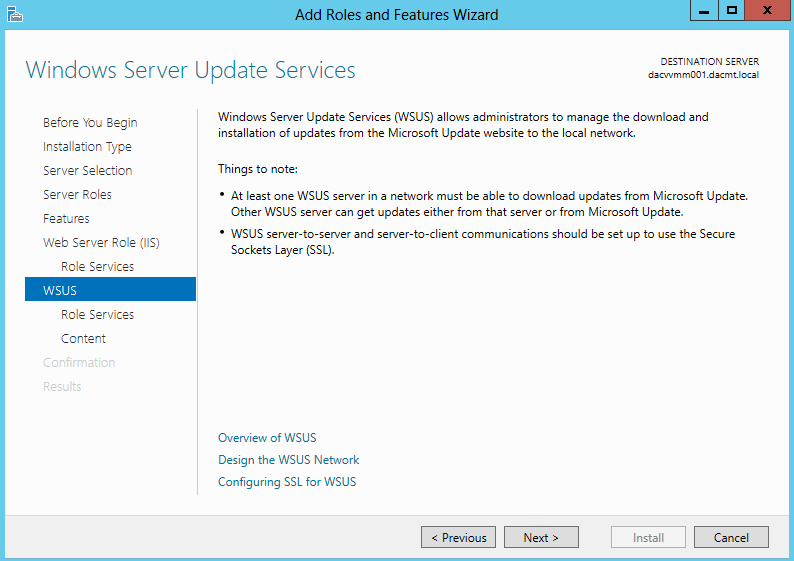
- Click Next on the Windows Server Update Services Page
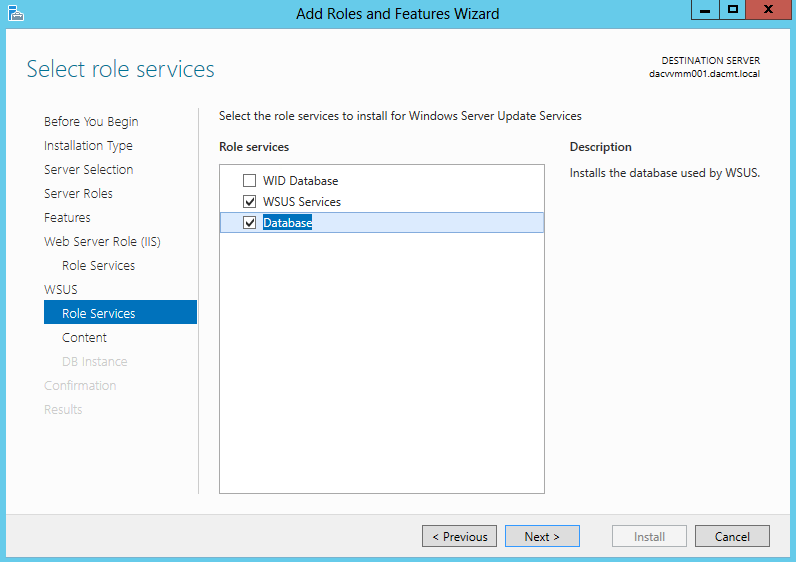
- Untick WID Database and tick WSUS Services and Database
- I chose Database as I have set up an instance on a separate Windows Server 2012 SQL Server and I am interested in testing the connectivity!
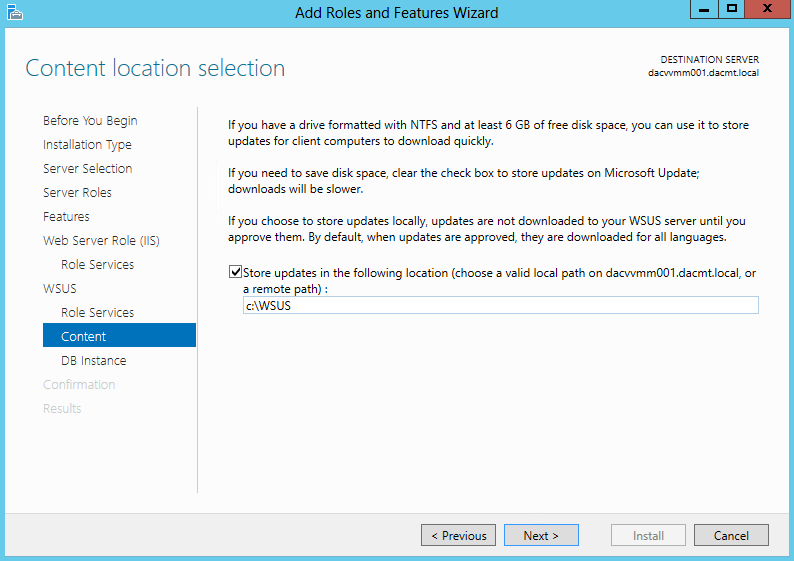
- You will need to create a folder for the WSUS Downloads then enter the path
- In my case I just chose c:\WSUS
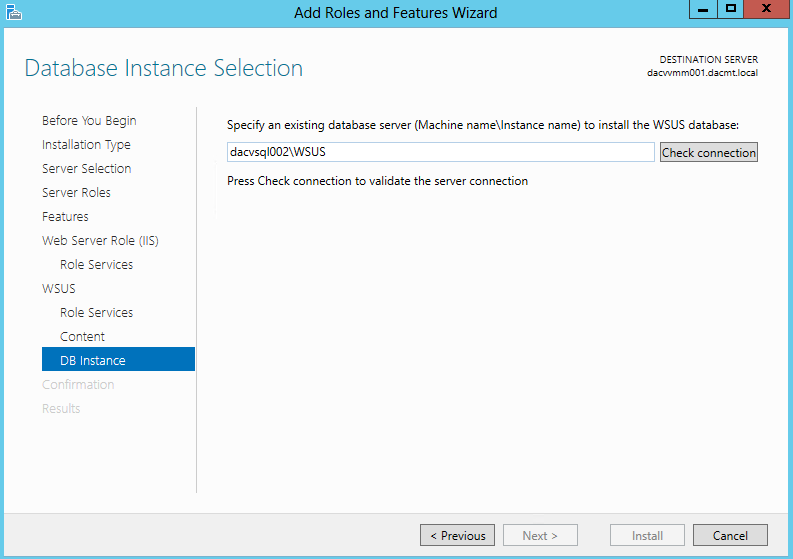
- Put in your SQL Database Server name and Instance.
- In my case this is dacvsql002\WSUS
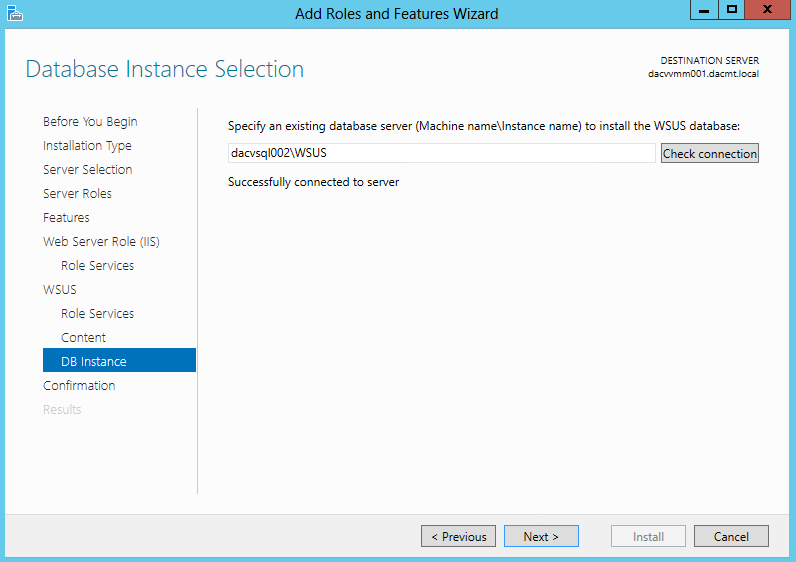
- Click Check Connection. Hopefully it should say Successfully connected to server
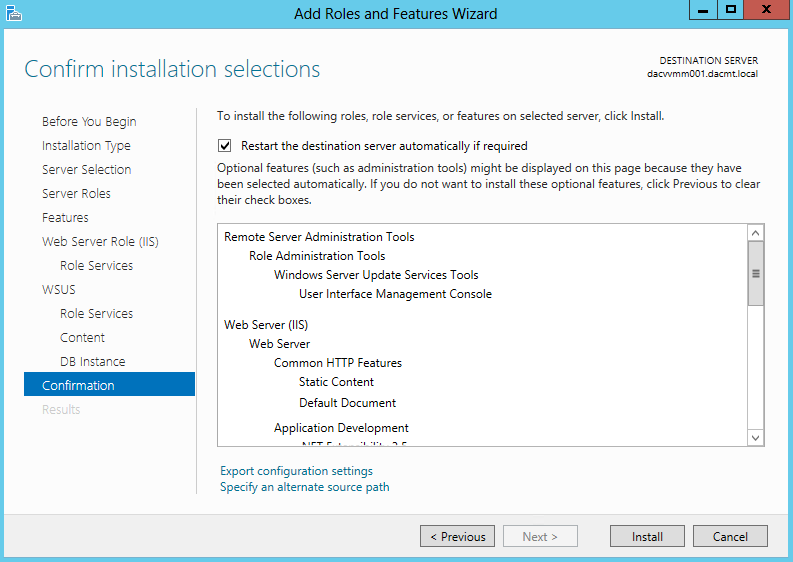
- Check the final summary and put a tick in Restart Destination Server
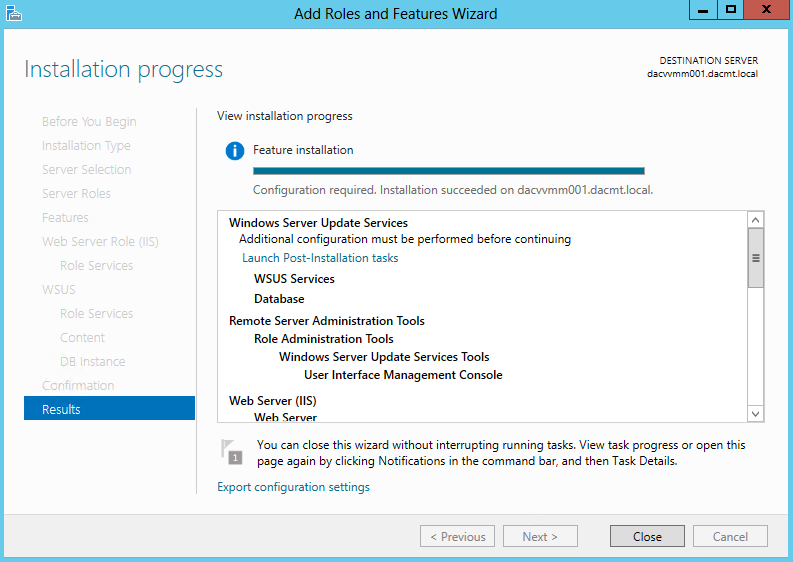
- Click Install and wait for it to finish and you should see the below screen
- Note it says Further Configuration is required
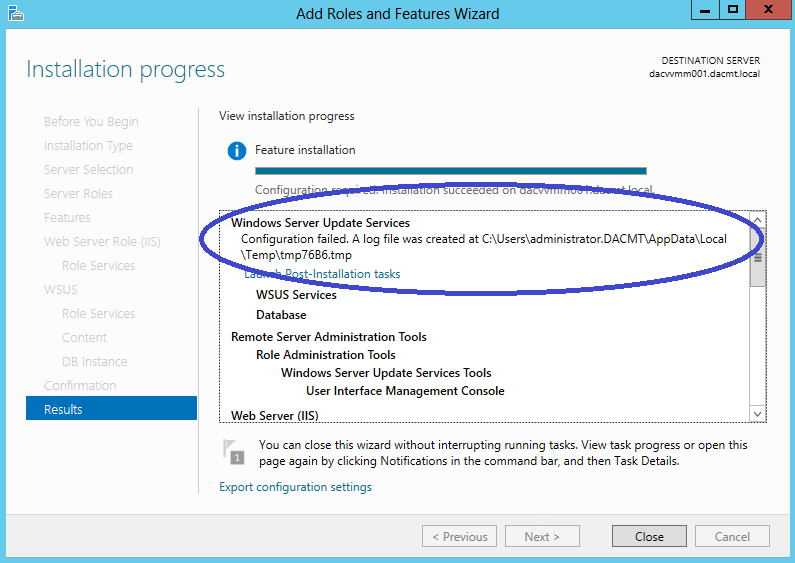
- Click on Launch Post Installation Tasks and you will likely get an error message as per below
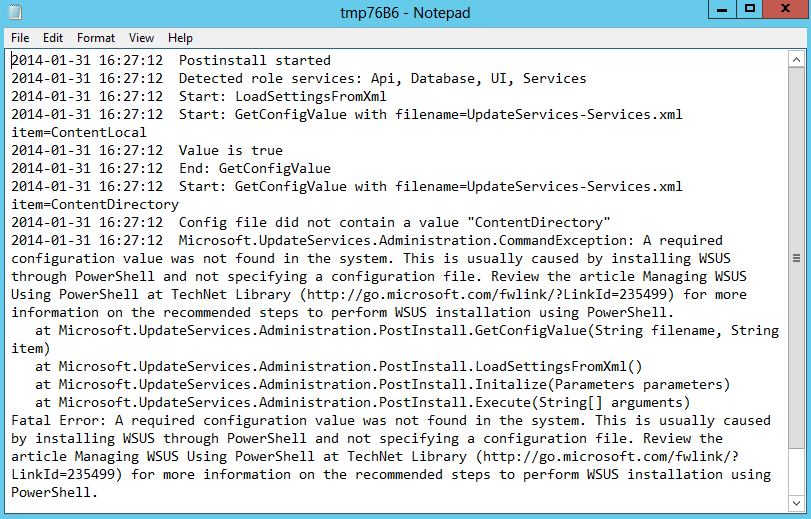
- The Log file says
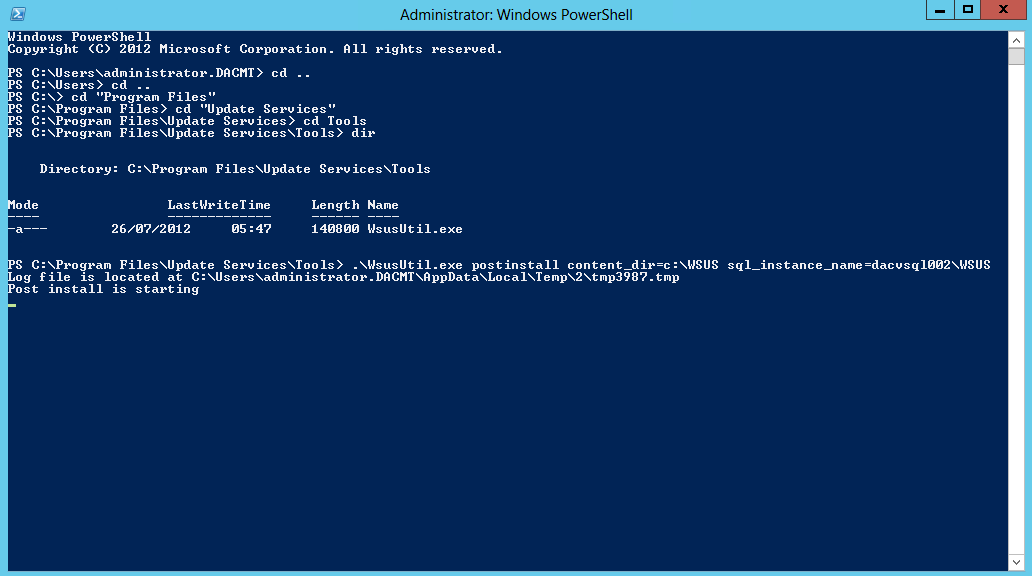
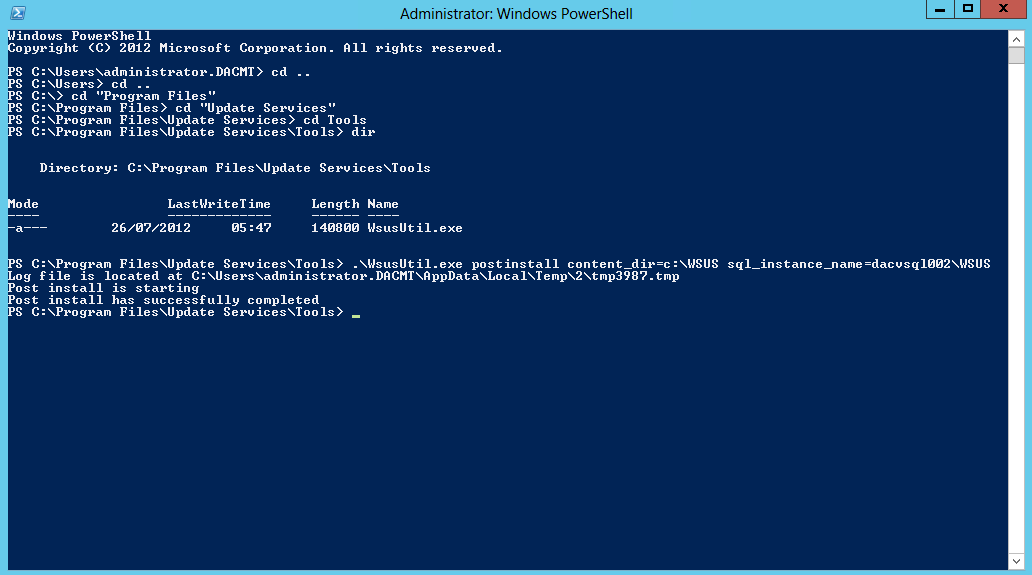
- In order to resolve this, you need to open PowerShell as an Administrator and change to the directory where WSUSUtil is typically located in c:\Program Files\Update Services\Tools and run the following command
- Once complete you should see the below screen
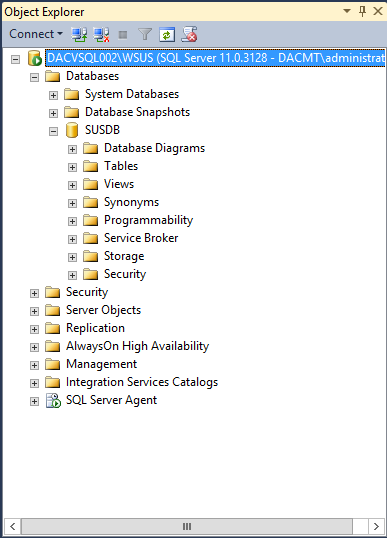
- I then rebooted at this point and in this time, I logged into my SQL Server to check the Database had been created under my instance dacvsql002\WSUS
- When the server is back up, click the Windows Key and Q and click on Windows Update Services
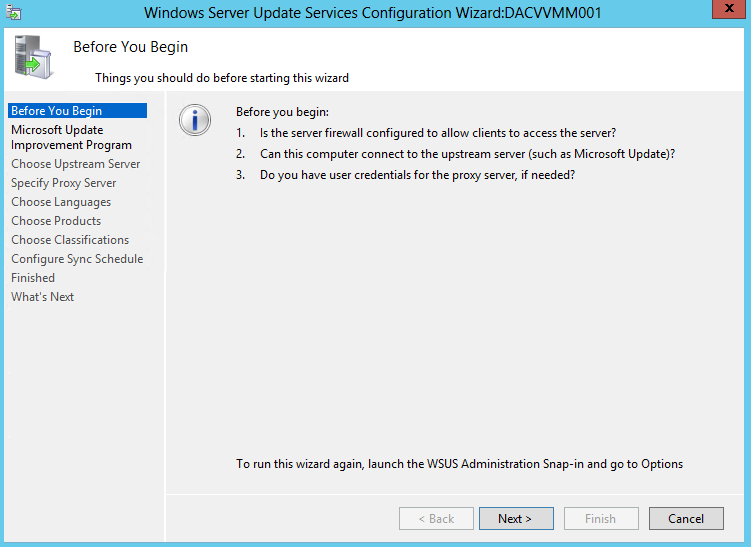
- You can now configure WSUS by using the WSUS Configuration Wizard or you can cancel this and open the WSUS Console and configure the Options
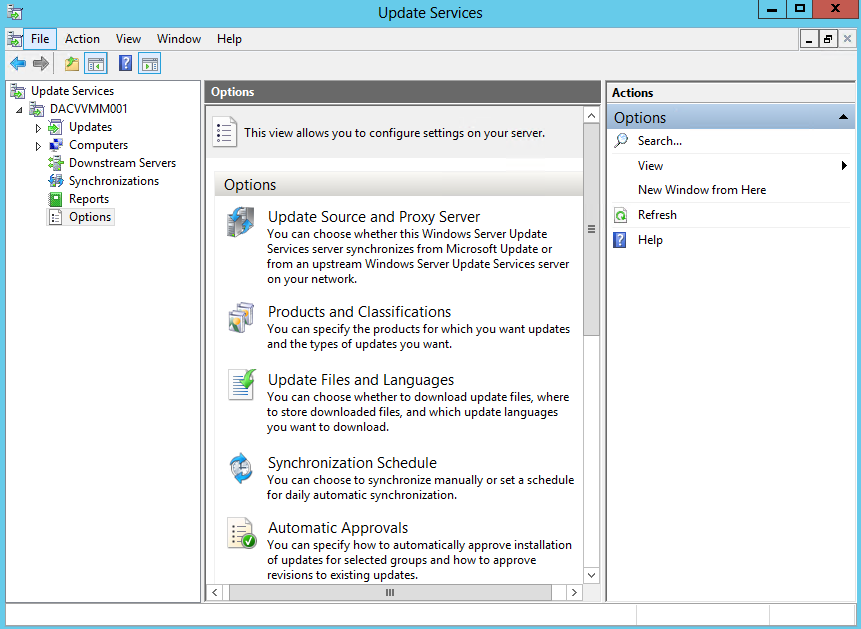
- I cancelled and went through the options as per below
- Click Options
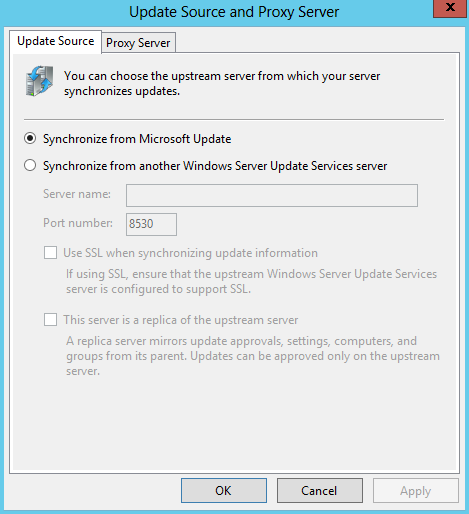
- Update Source and Proxy Server
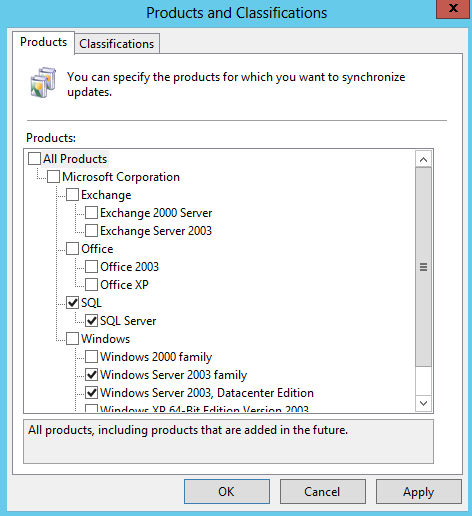
- Products
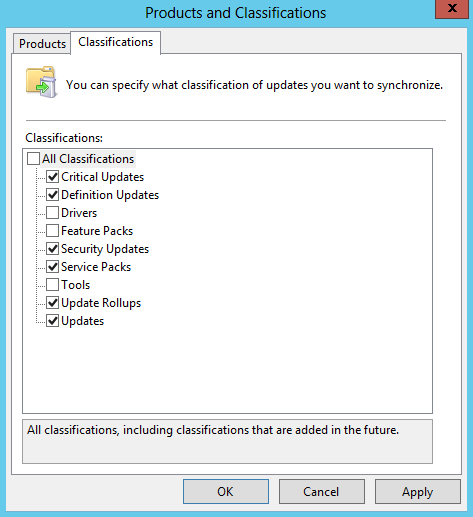
- Classifications
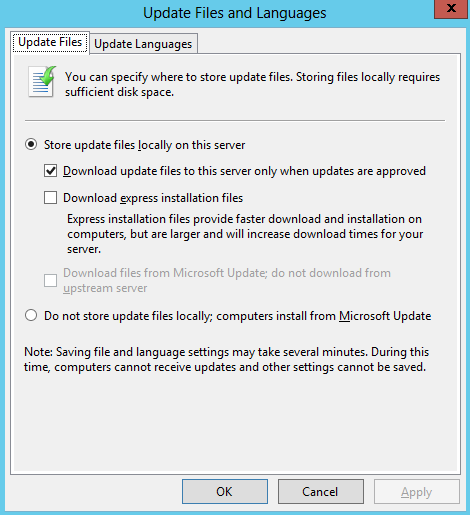
- Update Files
- Update Languages
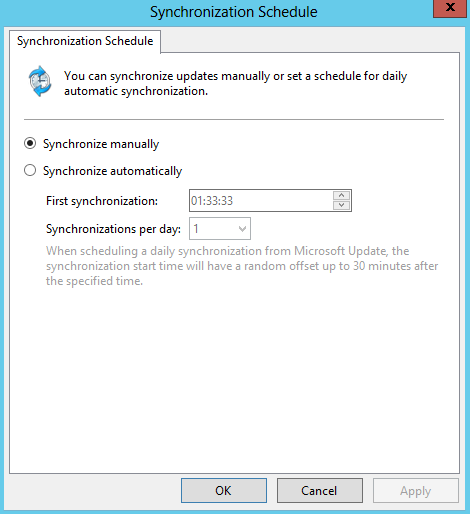
- Synchronisation Schedule
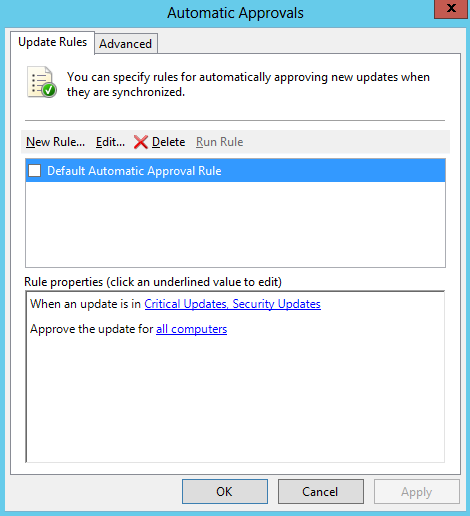
- Update Rules
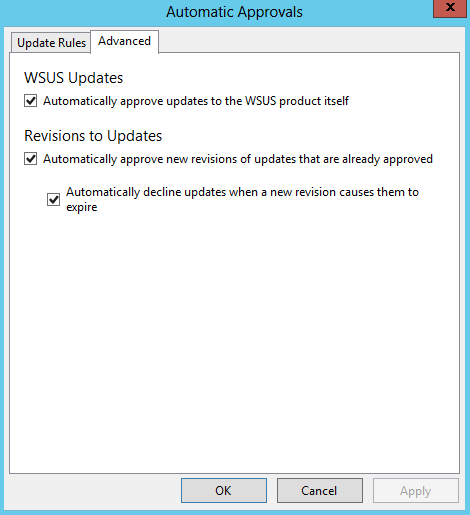
- Advanced
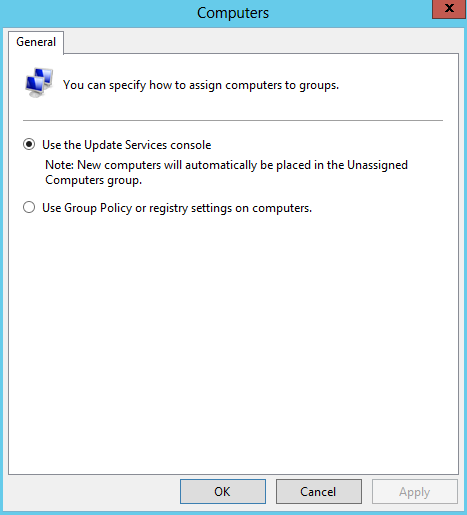
- Computers
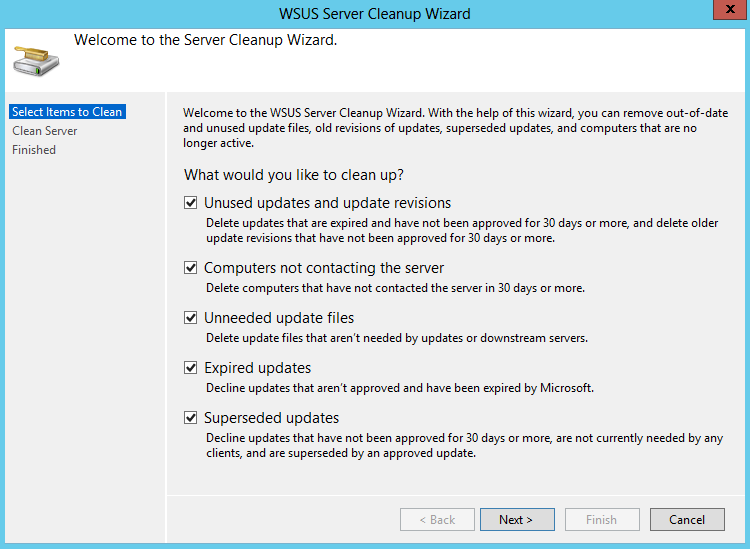
- Server Cleanup Wizard
- Reporting Rollup
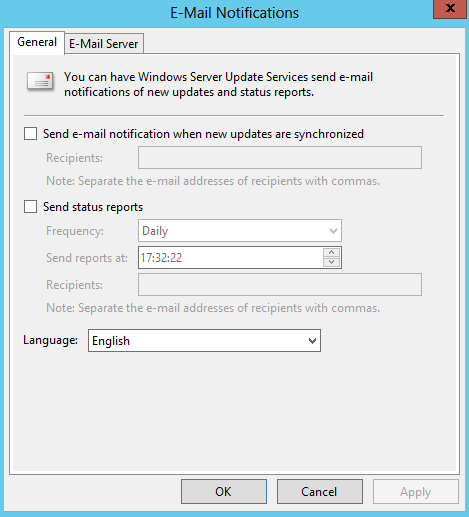
- Email Notification
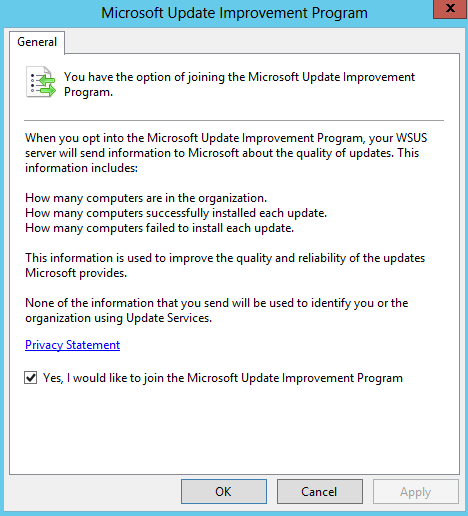
- Microsoft Update Improvement Program
- Personalization
- And finally you have the option here to run through the configuration wizard which you have seen in an earlier screenprint
- Now we need to add the Windows Server Update Server to VMM
- In the VMM Console, open the fabric workspace
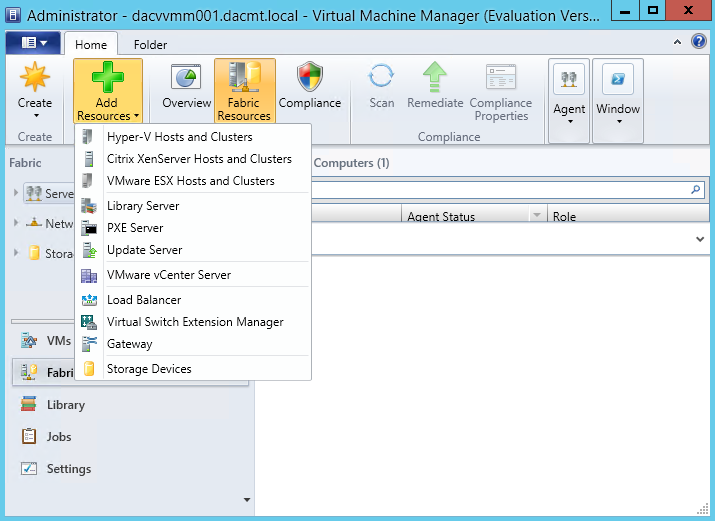
- Click Add Resources > Update Server
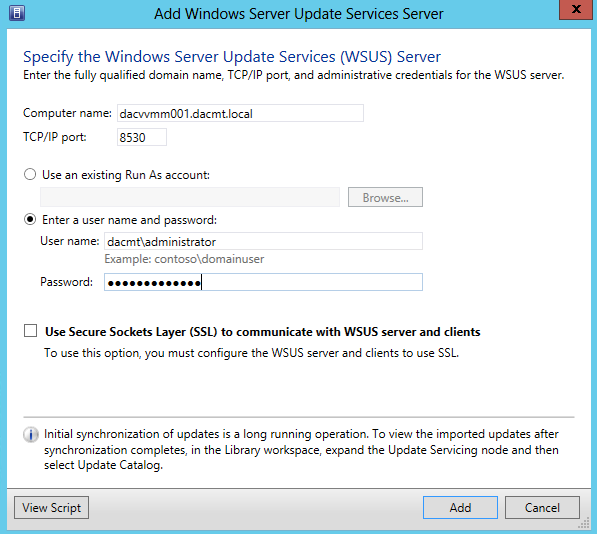
- Add Windows Server Update Services (WSUS) Server
- Enter in the relevant details as per below
- It will let you know if you can’t use a User Account
- Click Add when complete
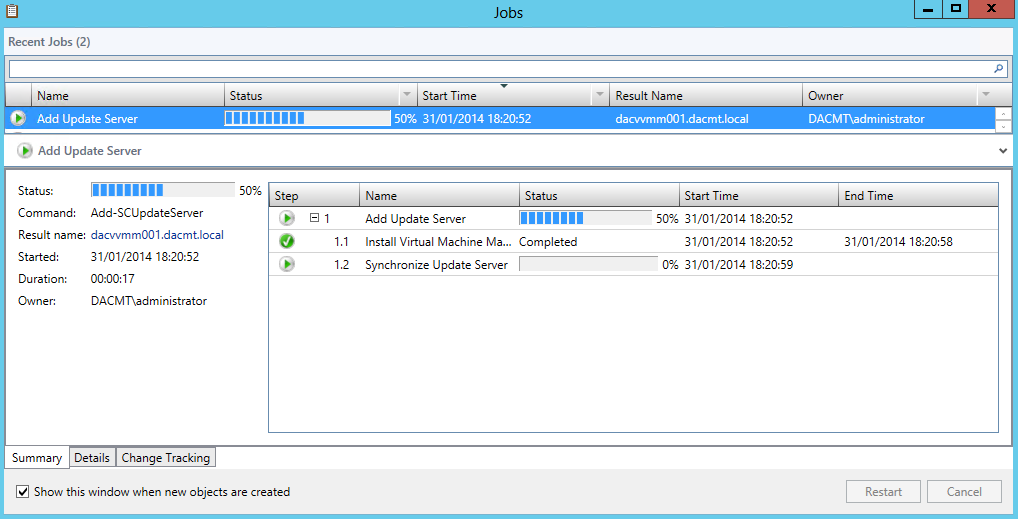
- A job window will then pop up showing you what’s going on
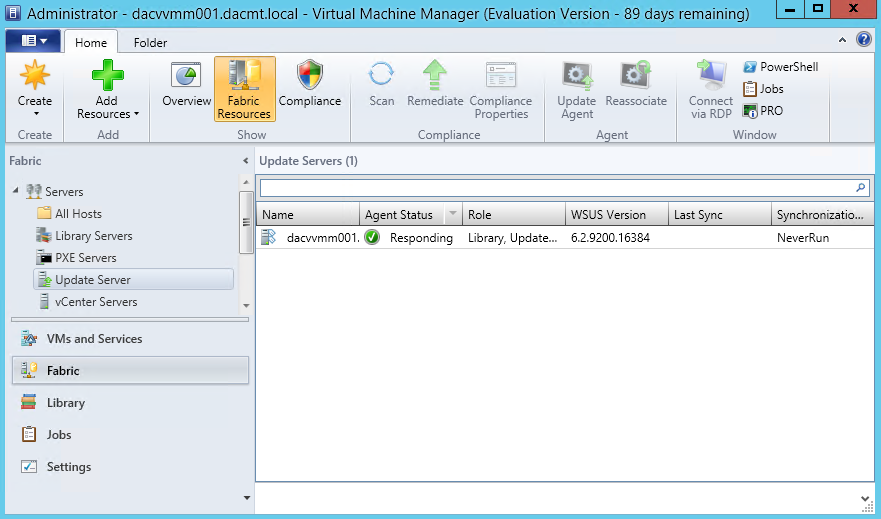
- To verify that the WSUS Server was added to VMM successfully go to the Fabric Workspace > Expand Servers > Click Update Server.
- The Results pane should show the WSUS Server
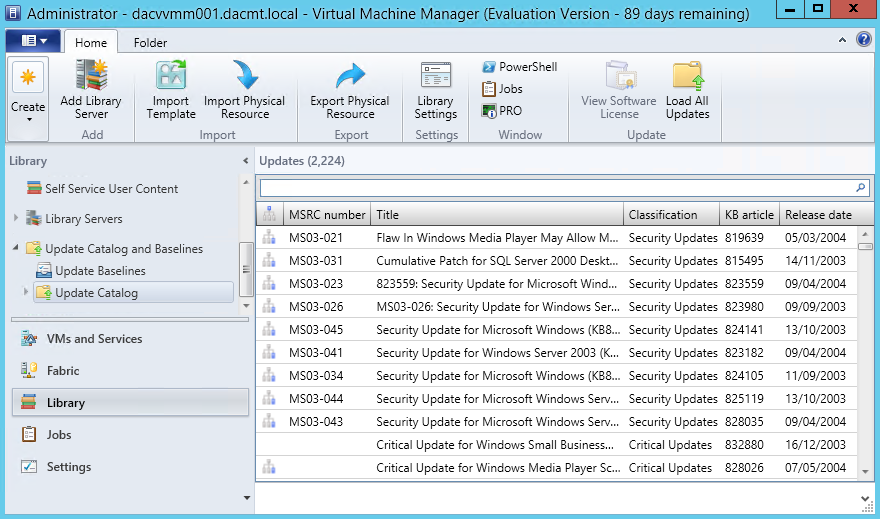
- In the library workspace, on the library pane, expand Update Catalog and Baselines and then click Update Catalog. The results pane displays all the available updates
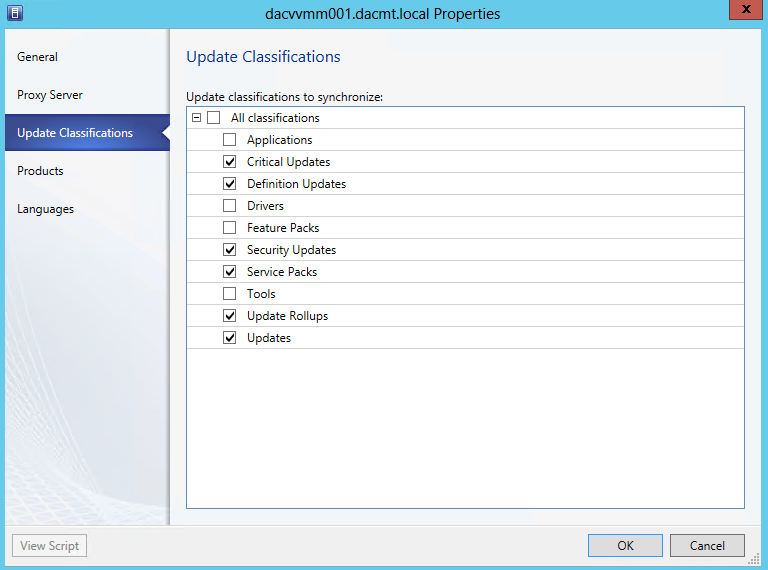
- After you add the Update Server to VMM, you can configure a proxy server for synchronisation and change the update categories, products and supported languages that WSUS synchronises by updating the properties of the update server in VMM.
- Open the Fabric Workspace > Expand Servers > Click Update Server
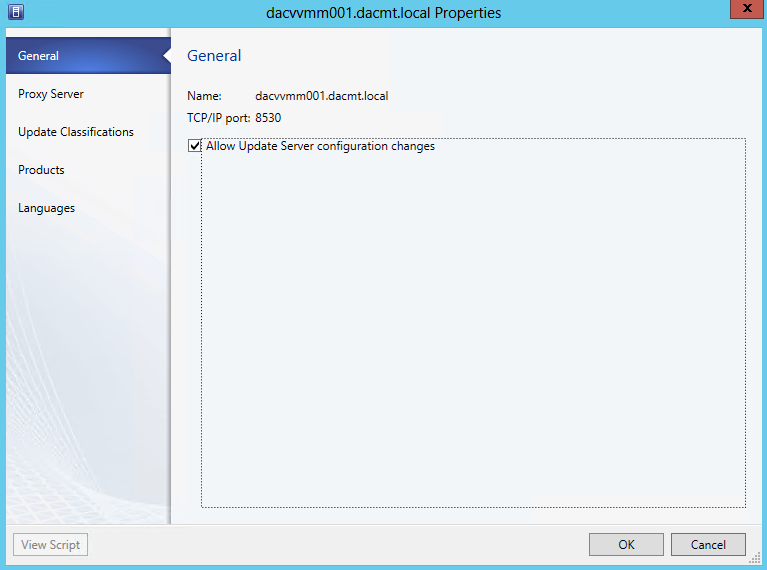
- Right click on the Update Server in the results pane and select Properties
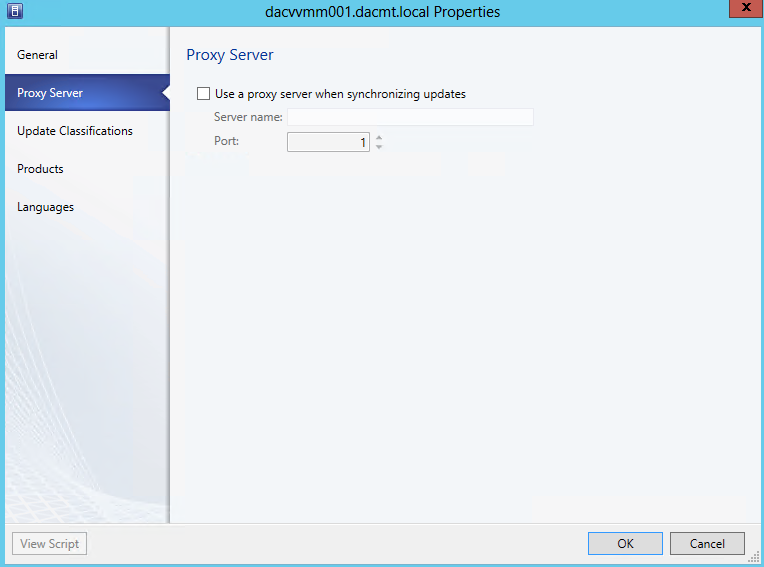
- Next you will see the Proxy Server
- Next you will see the Update Classification
- Products
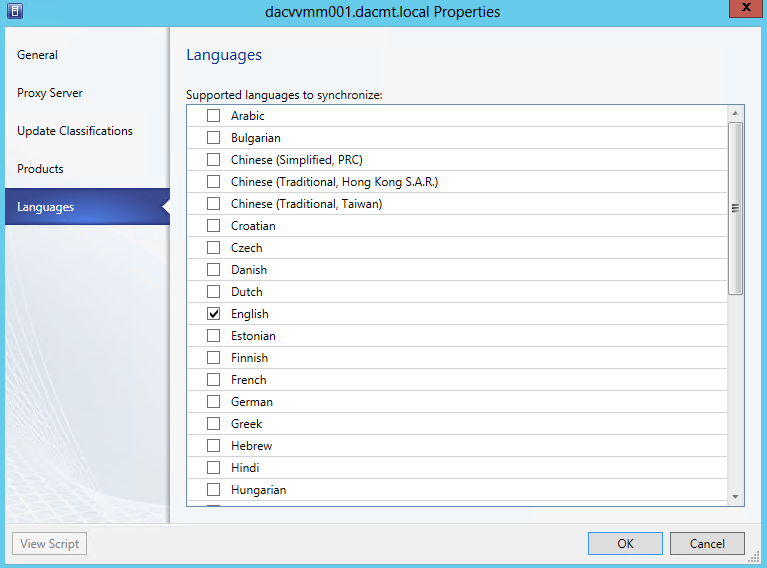
- Languages
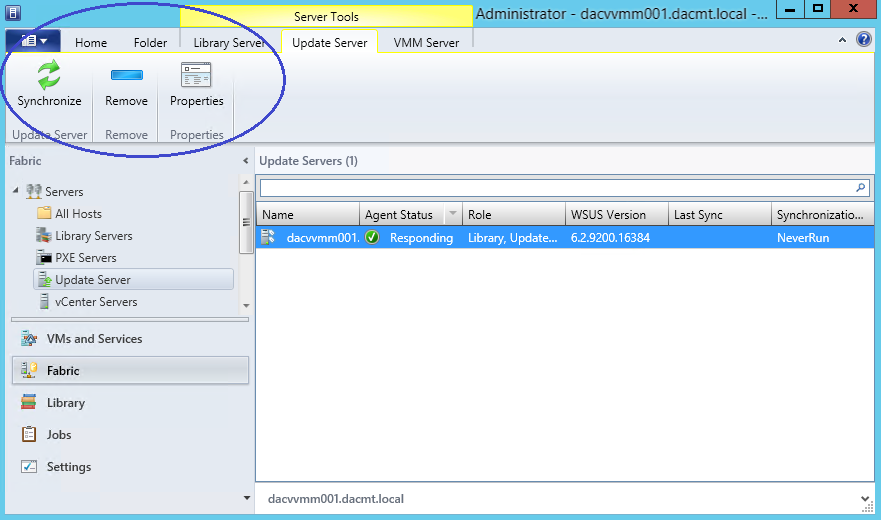
- To manually synchronise updates in VMM, in the Fabric workspace, on the Fabric pane, expand servers and then click Update Server. You can then Synchronise. See highlighted screenprint below
Microsoft TechNet Site for more information

