What is Microsoft App-V?
Microsoft Application Virtualization is an application virtualization and application streaming solution from Microsoft
- Allows applications to be deployed (“streamed”) in real-time to any client from a virtual application server
- Removes the need for traditional local installation of the applications, although a standalone deployment method is also supported
- The App-V stack sandboxes the execution environment so that an application does not make changes directly to the underlying operating system’s file system and/or Registry, but rather contained in an application-specific “bubble”
- App-V applications are also sandboxed from each other, so that different versions of the same application can be run under App-V concurrently, and so that mutually exclusive applications can co-exist on the same system.
- Supports policy based access control; administrators can define and restrict access to the applications by certain users by defining policies governing the usage.
App-V Deployment Options
Microsoft offers three deployment options. These three options are significantly different from an architectural standpoint: Dedicated App-V Management Server, Shared System Center Configuration Manager Architecture, and “Stand-alone” Mode wherein the application may be delivered manually.
Dedicated App-V management server
The App-V system architecture is composed of the following components:
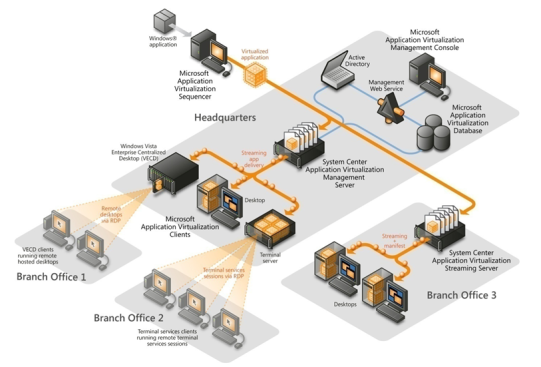
- ‘Microsoft Systems Center Virtual Application Server, also called App-V Application Server, which hosts virtualized application packages and streams them to the client computers for local execution. It also authorizes requesting clients and logs their application usage. Applications are converted to virtualized packages using the App-V Sequencer.
- Microsoft Application Virtualization Client for Windows Desktops of MDOP) or Microsoft Application Virtualization Client for Remote Session Hosts (i.e. Terminal Services), which are generally called the App-V client, is the client side runtime which requests the application server to stream some application, receives the streamed virtual application packages, sets up the runtime environment and executes the applications locally.
- App-V Management Console, the management tool to set up, administer and manage App-V servers. It can be used to define policies that govern the usage of the applications. It can also be used to create, manage, update and replicate virtualized application packages.
- App-V Sequencer, a tool for preparing applications for virtualization.
Shared System Center Configuration Manager
In 2009 Microsoft offered a new way to implement App-V with enhancements to System Center Configuration Manager. System Center Configuration Manager Architecture consists of the following components:
- System Center Configuration Manager Site Server, serving as the primary repository for holding system images, application packages created using traditional installers, and virtual applications.
- System Center Configuration Manager Distribution Server, used to cache and distribute the software on a more local level.
- Microsoft Application Virtualization Client for Windows Desktops of MDOP) or Microsoft Application Virtualization Client for Remote Session Hosts (i.e. Terminal Services), previously described.
- App-V Sequencer, previously described.
“Stand-alone” mode
The App-V clients may also be used in a “stand-alone” mode without either of the server infrastructures previously described. In this case, the sequenced packages are delivered using an external technique, such as an Electronic Software Delivery system or manual deployment
Architecture Overview
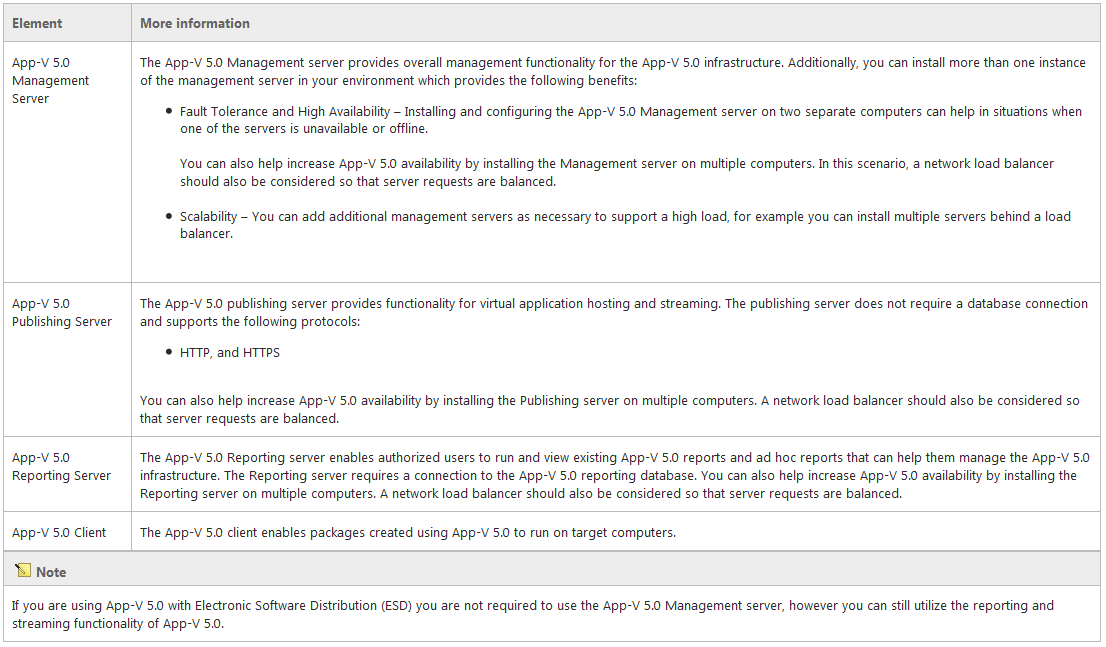
A typical App-V 5.0 implementation consists of the following elements.
General Diagram of App-V Infrastructure
Microsoft Application Virtualization 5 Administrator’s Guide
http://technet.microsoft.com/en-us/library/jj713487.aspx
Recommended Deployment Methods
The following list displays the recommended methods for installing the App-V 5.0 server infrastructure:
- Install the App-V 5.0 server.
- Install the database, reporting, and management features on separate computers. For more information
- Use Electronic Software Distribution (ESD).
- Install all server features on a single computer.
Installing the App-V 5.0 server
I am going to use my following test servers which are VMware Virtual Machines running on VMware vSphere 5.5.
- 1 x Windows 2012 Server with SQL 2012, IIS 7.5 (Web Server role), Application Server role and Silverlight pre-installed which will also be my App-V 5 Server
- 1 x Windows 2008 R2 AD server
IIS Settings
- Common HTTP Features > Static Content
- Common HTTP Features > Default Document
- Application Development > ASP.NET
- Application Development > .NET Extensibility
- Application Development > ISAPI Extensions
- Application Development > ISAPI Filters
- Security > Windows Authentication
- Security > Request Filtering
- Management Tools > IIS Management Console
Run the following 2 commands to register ASP.NET with .NET 4 Framework in IIS
- “C:\Windows\Microsoft.Net\Framework\v4.0.30319\aspnet_regiis.exe” –ir
- “C:\Windows\Microsoft.Net\Framework64\v4.0.30319\aspnet_regiis.exe” -ir
Instructions
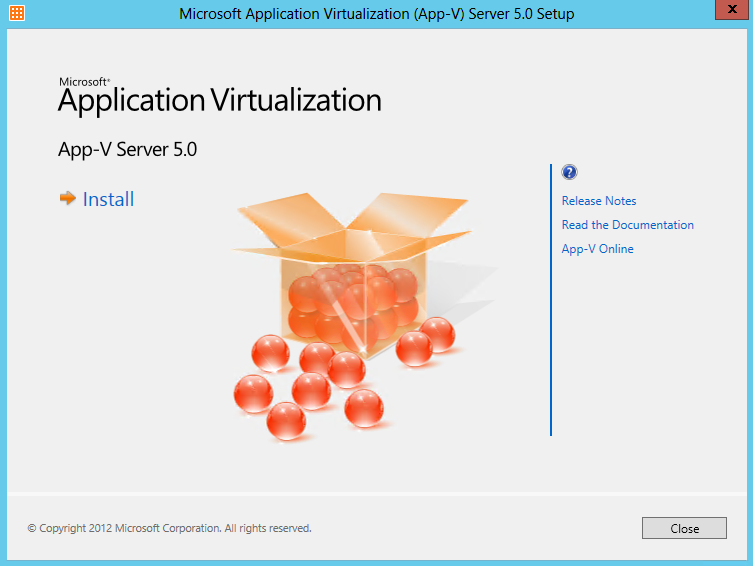
- Copy the App-V 5.0 server installation files to the computer on which you want to install it on. To start the App-V 5.0 server installation right-click and run appv_server_setup.exe as an administrator. Click Install.
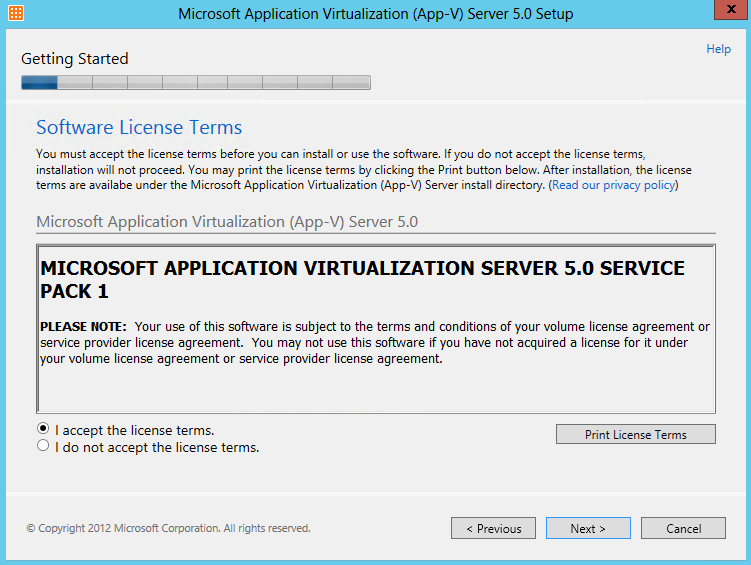
- On the Getting Started page, review the license terms. To accept the license terms select I accept the license terms. Click Next.
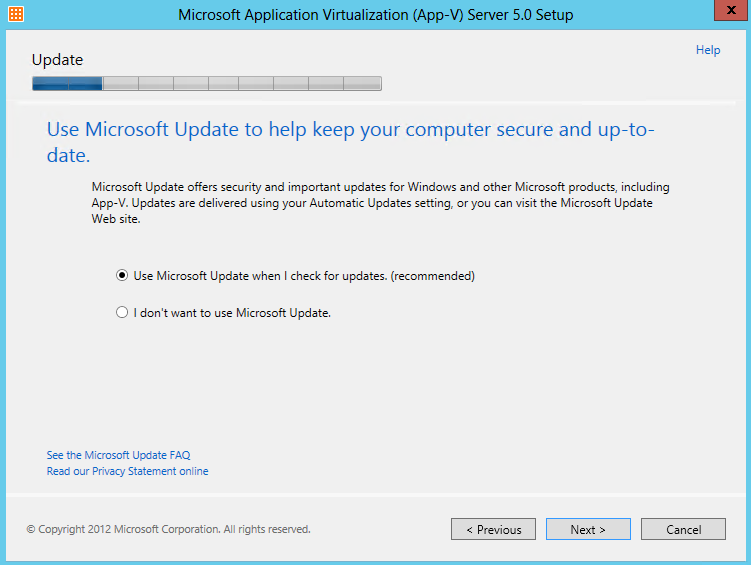
- On the Use Microsoft Update to help keep your computer secure and up-to-date page, to enable Microsoft updates, select Use Microsoft Update when I check for updates (recommended). To disable Microsoft updates, select I don’t want to use Microsoft Update. Click Next
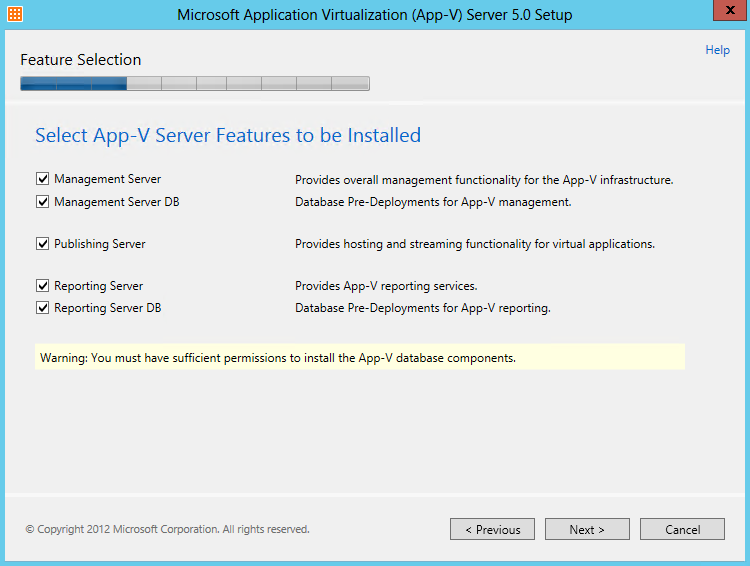
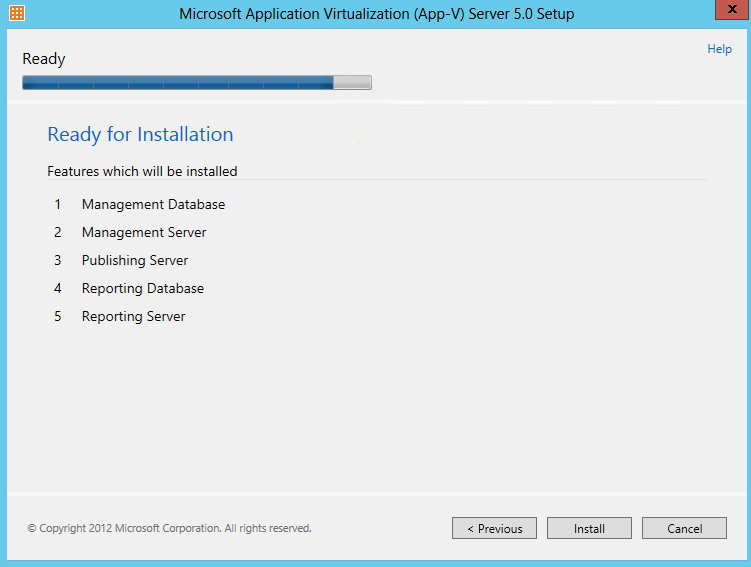
- On the Feature Selection page, select all five of the components
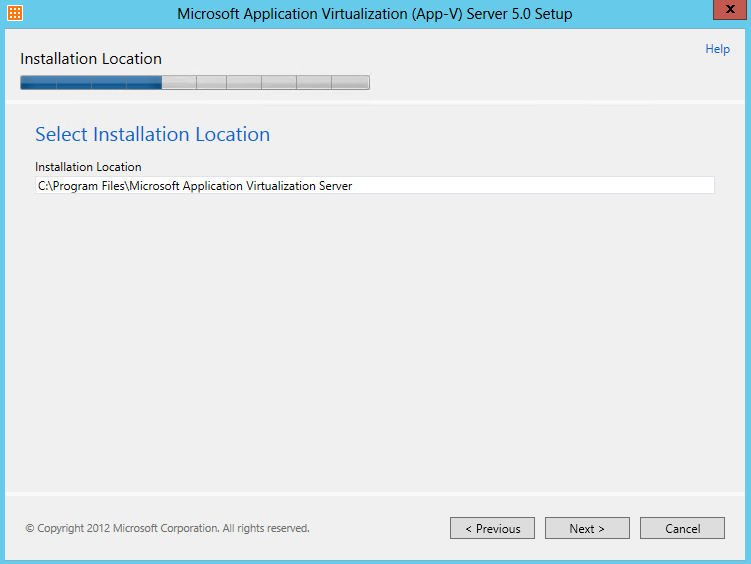
- On the Installation Location page confirm the location where the selected components will be installed. You should accept the default. To change the location, type a new path on the Installation Location line. Click Next.
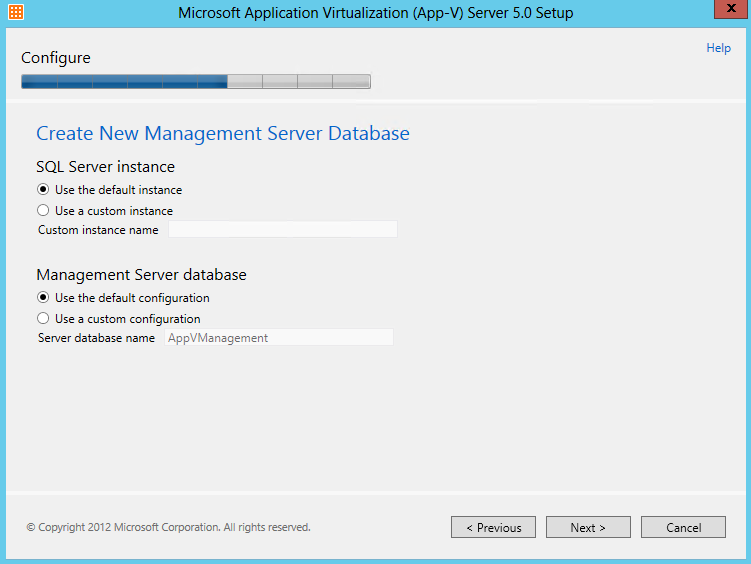
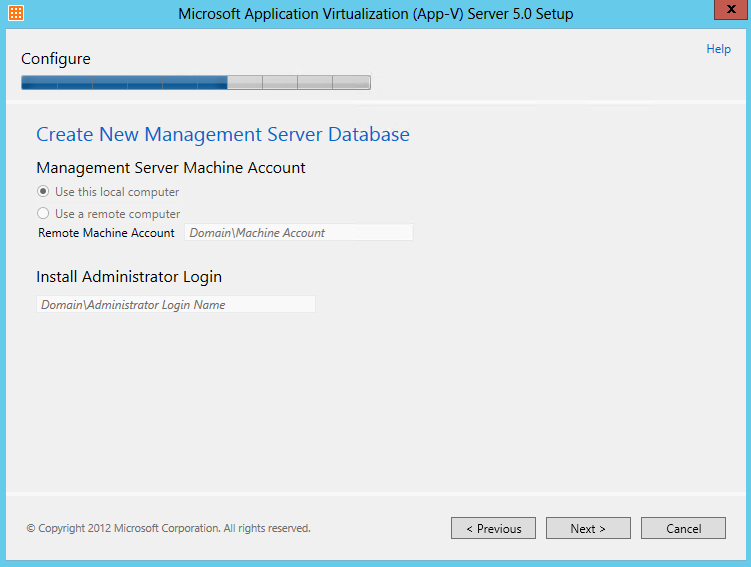
- On the initial Create New Management Database page configure the Microsoft SQL Server instance and Management Server database
- If you are using a custom Microsoft SQL Server instance, select Use the custom instance and type the name of the instance. For example, the format should be INSTANCENAME and the installation will assume it is on the local computer.
- Specifying the server name using the following format ServerName\INSTANCE is not supported.
- If you are using a custom database name, select Custom configuration. and type the database name.
- Note: The database name provided must be unique. If an existing database name is specified the installation will fail.
- On the Configure page, accept the default value: Use this local computer. Click Next.
- Note: If you are installing the management server and management database side-by-side, options on this page are not available. In this scenario the appropriate options are selected by default and cannot be changed.
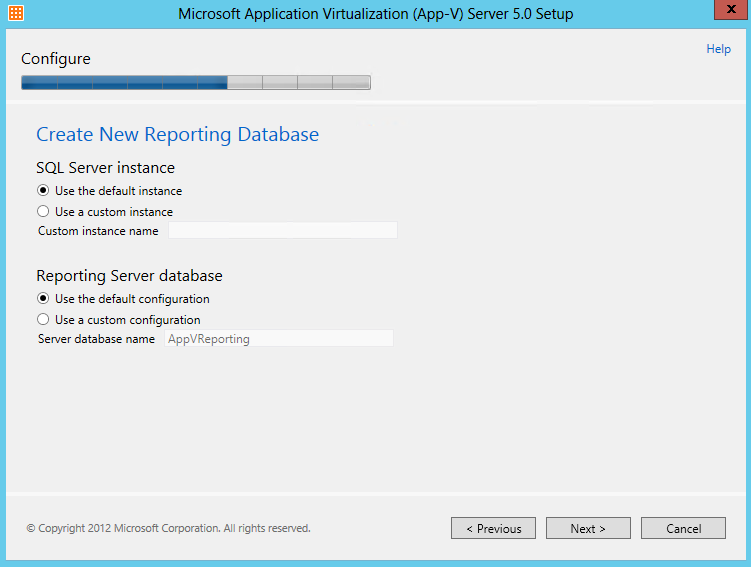
- On the initial Create New Reporting Database page configure the Microsoft SQL Server instance and Reporting Server database
- If you are using a custom Microsoft SQL Server instance, select Use the custom instance and type the name of the instance. For example, the format should be INSTANCENAME and the installation will assume it is on the local computer.
- Note: Specifying the server name using the following format ServerName\ INSTANCE is not supported
- If you are using a custom database name, select Custom configuration. and type the database name.
- Note: The database name provided must be unique. If an existing database name is specified the installation will fail.
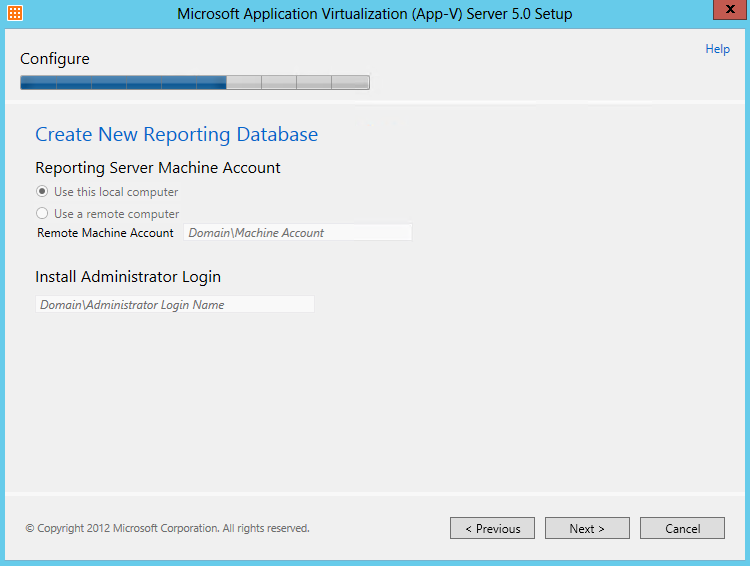
- On the Configure page, accept the default value: Use this local computer. Click Next
- Note: If you are installing the reporting server and reporting database side-by-side, options on this page are not available. In this scenario the appropriate options are selected by default and cannot be changed.
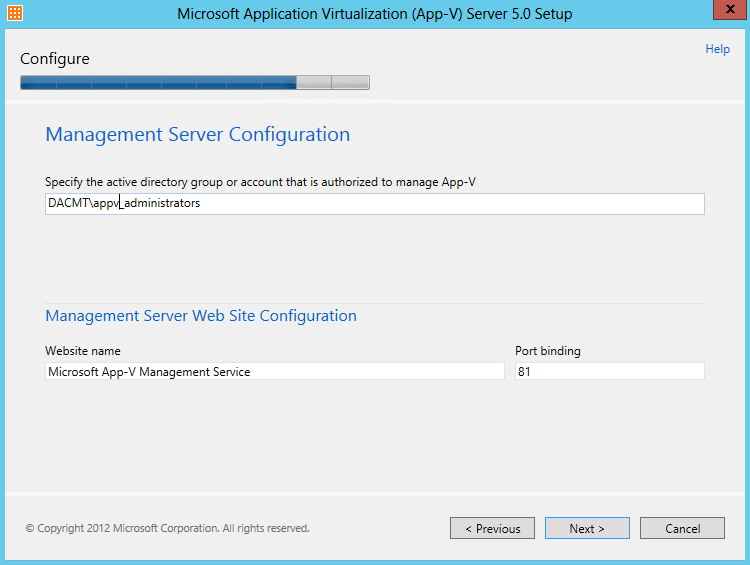
- On the Configure (Management Server Configuration) page, type the AD Universal Security group with sufficient permissions to manage the App-V 5.0 environment.
- Note: You can add additional users or groups using the management console after installation. However, global security groups and Active Directory Domain Services (AD DS) distribution groups are not supported. You must use Domain local or Universal groups are required to perform this action.
- On the Website name line specify the custom name that will be used to run the publishing service. If you do not have a custom name, do not make any changes.
- For the Port binding, specify a unique port number that will be used by App-V 5.0, for example 12345. You should also ensure that the port specified is not being used by another website like the default IIS website using 80
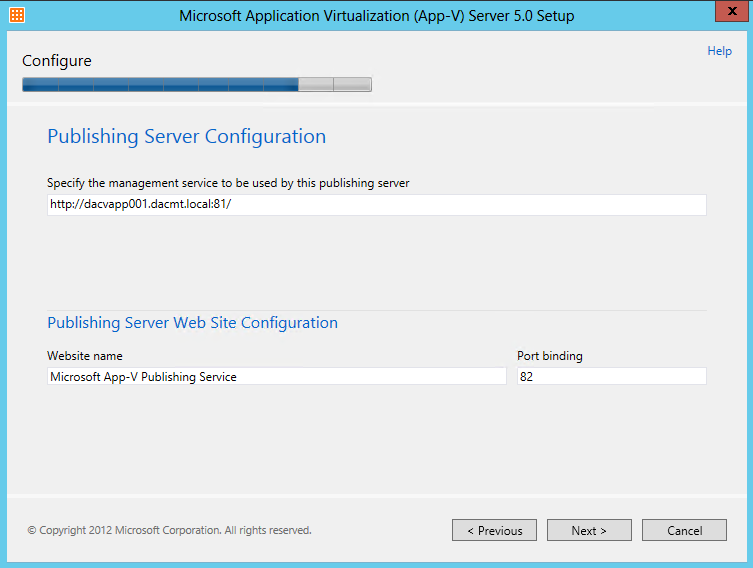
- On the Configure Publishing Server Configuration page, Specify the URL for the management service. This is the address the publishing server uses to connect to. For example, http://localhost:12345.
- Specify the Website Name that you want to use for the Publishing Service. Leave the default unchanged if you do not have a custom name.
- For the Port binding, specify a unique port number that will be used by App-V 5.0, for example 54321. You should also ensure that the port specified is not being used by another website.
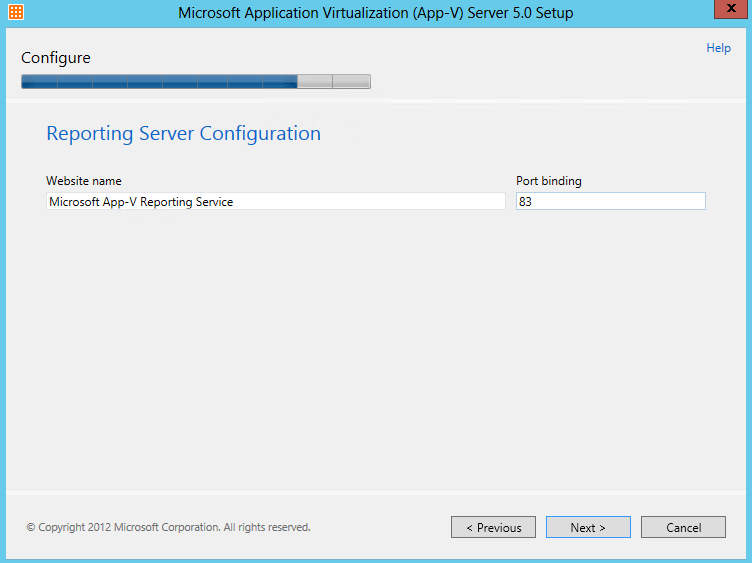
- On the Reporting Server page, Specify the Website Name that you want to use for the Reporting Service. Leave the default unchanged if you do not have a custom name
- For the Port binding, specify a unique port number that will be used by App-V 5.0, for example 55555. You should also ensure that the port specified is not being used by another website.
- On the Ready page, to start the installation, click Install.
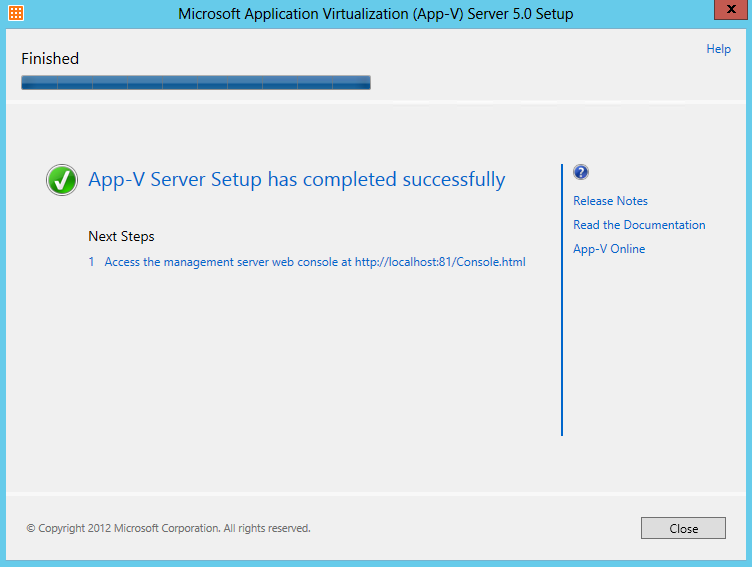
- On the Finished page, to close the wizard, click Close.
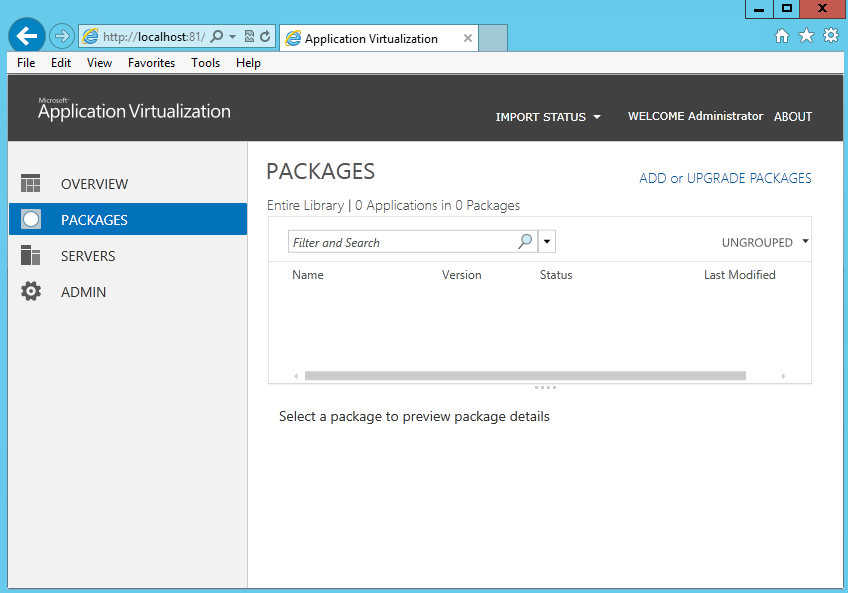
- To confirm that setup completed successfully, open a web browser, and type the following URL: http://<Management server machine name>:<Management service port number>/Console.html. For example, http://localhost:12345/console.html. If the installation succeeded the App-V 5.0 management console will be displayed without any errors
- And then you will see the following web console
The App-V Management Server has a Silverlight®-based management site, which enables administrator configuration of the App-V infrastructure from any computer. By using this site, administrators can add and remove applications, manipulate shortcuts, assign access permissions to users and groups, and create connection groups. The App-V Management Server is the communication conduit between the App-V Web Management Console and the SQL Server data store
Also in a test environment, you may want to change the following registry settings on your publishing server. By default the Publishing Server polls the App-V database for published applications every 10 minutes (600 seconds). This is called a publishing refresh. change the publishing refresh interval to 10 seconds to reduce wait times during publishing. Evaluation of the correct interval for a production environment is outside the scope of this blog.
HKEY_LOCAL_MACHINE\SOFTWARE\Microsoft\AppV\Server\PublishingService PUBLISHING_MGT_SERVER_REFRESH_INTERVAL = 600 (default setting in seconds) PUBLISHING_MGT_SERVER_REFRESH_INTERVAL = 10 (common value used for test environment)
Create and Share a Content folder
The content share is the central library of App-V packages. The content store contains the source files of the packages published by the App-V publishing server.
- Open Windows Explorer.
- Create a folder on the root of the C: drive named Content.
NOTE: In the production environment, the content folder should not be placed on the same drive as the operating system files as it can affect performance of the system. Ensure the use of a different drive in a production environment.
- Browse to C:\, right click the Content folder, go to Properties.
- Click the Sharing tab, click Advanced Sharing.
- Check Share this folder. Click Permissions
- Click Add. Click Object Types. Select Computers. Click OK.
- In the Enter the object names to select box, enter the name of the App-V management server. Select Full Control and Click OK.
- In the Enter the object names to select box, enter the name of the NETWORK SERVICE account. Click OK. Select Full Control and Click OK.
- In the Enter the object names to select box, enter the name of the App-V management server and the AppV Administrators group. Select Full Control and Click OK.
- Click OK, Click OK, Click Close
Configure Windows Firewall to Allow Incoming Connections
- Open Control Panel, open Windows Firewall
- Click Advanced Settings.
- Click Inbound Rules, in the actions pane click New Rule…
- Select Port, click Next
- Select TCP, in the Specific local ports: field, enter your 3 port numbers, click Next
- Click Next, Unselect Private, and Public, click Next
- In the Name field, enter AppV Server Connections, click Finish
Next
The next thing to do is to start installing and using the App-V 5 Sequencer and Microsoft Application Virtualization Desktop Client and/or the Microsoft Application Virtualization Remote Desktop Services (RDS) Client which I have covered in another blog. Please see below link
http://www.electricmonk.org.uk/2013/11/28/app-v-5-sequencing/



Leave a Reply