
Scale out File Server
Windows Server 2012 introduces a clustered Scale-Out File Server that provides more reliability by replicating file shares for application data. Scale-Out File Server varies from traditional file-server clustering technologies and isn’t recommended for scenarios with high-volume operations in which opening, closing, or renaming files occurs frequently.
In Windows Server 2012, the following clustered file servers are available:
- Scale-Out File Server for application data (Scale-Out File Server) This clustered file server is introduced in Windows Server 2012 and lets you store server application data, such as Hyper-V virtual machine files, on file shares, and obtain a similar level of reliability, availability, manageability, and high performance that you would expect from a storage area network. All file shares are online on all nodes simultaneously. File shares associated with this type of clustered file server are called scale-out file shares. This is sometimes referred to as active-active.
- File Server for general use This is the continuation of the clustered file server that has been supported in Windows Server since the introduction of Failover Clustering. This type of clustered file server, and thus all the shares associated with the clustered file server, is online on one node at a time. This is sometimes referred to as active-passive or dual-active. File shares associated with this type of clustered file server are called clustered file shares.
Key benefits provided by Scale-Out File Server in Windows Server 2012 include:
- Active-Active file shares All cluster nodes can accept and serve SMB client requests. By making the file share content accessible through all cluster nodes simultaneously, SMB 3.0 clusters and clients cooperate to provide transparent failover to alternative cluster nodes during planned maintenance and unplanned failures with service interruption.
- Increased bandwidth The maximum share bandwidth is the total bandwidth of all file server cluster nodes. Unlike previous versions of Windows Server, the total bandwidth is no longer constrained to the bandwidth of a single cluster node, but rather the capability of the backing storage system. You can increase the total bandwidth by adding nodes.
- CHKDSK with zero downtime CHKDSK in Windows Server 2012 is significantly enhanced to dramatically shorten the time a file system is offline for repair. Clustered shared volumes (CSVs) in Windows Server 2012 take this one step further and eliminates the offline phase. A CSV File System (CSVFS) can perform CHKDSK without impacting applications with open handles on the file system.
- Clustered Shared Volume cache CSVs in Windows Server 2012 introduces support for a read cache, which can significantly improve performance in certain scenarios, such as Virtual Desktop Infrastructure.
- Simpler management With Scale-Out File Servers, you create the Scale-Out File Server and then add the necessary CSVs and file shares. It is no longer necessary to create multiple clustered file servers, each with separate cluster disks, and then develop placement policies to ensure activity on each cluster node.
When to use Scale-Out File Server
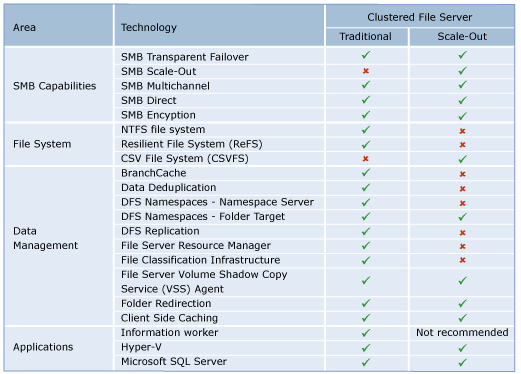
You should not use Scale-Out File Server if your workload generates a high number of metadata operations, such as opening files, closing files, creating new files, or renaming existing files. A typical information worker would generate a lot of metadata operations. You should use a Scale-Out File Server if you are interested in the scalability and simplicity that it offers and you only require technologies that are supported with Scale-Out File Server. The following table shows the new capabilities in SMB 3.0, common Windows file systems, file server data management and applications, and if they are supported with Scale-Out File Server, or will require a traditional clustered file server:
Review Failover Cluster Requirements
- Scale-Out File Server is built on top of Failover Clustering so any requirements for Failover Clustering apply to Scale-Out File Server. You should have an understanding of Failover Clustering before deploying Scale-Out File Server
- The storage configuration must be supported by Failover Clustering before you deploy Scale-Out File Server. You must successfully run the Cluster Validation Wizard before you add Scale-Out File Server.
- Scale-Out File Server requires the use of Clustered Shared Volumes (CSVs). Since CSVs are not supported with Resilient File System, Scale-Out File Server cannot use Resilient File System.
- Accessing a continuously available file share as a loopback share is not supported. For example, Microsoft SQL Server or Hyper-V storing their data files on SMB file shares must run on computers that are not a member of the file server cluster for the SMB file shares
Review Storage Requirements
- Fibre Channel Storage Area Network You can use an existing fibre channel Storage Area Network as the storage subsystem for Scale-Out File Server.
- iSCSI Storage Area Network You can use an existing iSCSI Storage Area Network as the storage subsystem for Scale-Out File Server.
- Storage Spaces Storage Spaces is new in Windows Server 2012 and can also be used as the storage subsystem for Scale-Out File Server.
- Clustered RAID controller A clustered RAID controller is new in Windows Server 2012 and can be used as the storage subsystem for Scale-Out File Server.
Review Networking Requirements
- Ensure that the network adapter configurations are consistent across all of your nodes in Scale-Out File Server
- Ensure that the network that includes the CSV redirection traffic has sufficient bandwidth
- Use DNS dynamic update protocol for the cluster node name and all of the cluster nodes. You should ensure that the cluster node name is registered by using DNS dynamic update protocol. This should include the name of the Scale-Out File Server and the IP addresses of all of the network adapters in every cluster node on the client network.
Deploy Scale Out File Server
To take full advantage of Scale-Out File Server, all servers running the server applications that are using scale-out file shares should be running Windows Server 2012. If the server application is running on Windows Server 2008 or Windows Server 2008 R2, the servers will be able to connect to the scale-out file shares but will not take advantage of any of the new features. If the server application is running Windows Server 2003, the server will get access-denied error when connecting to the scale-out file share.
Prerequisites
- First of all you will need 2 x Windows Server 2012 Servers built, updated and ready to work with for the Windows Failover Cluster
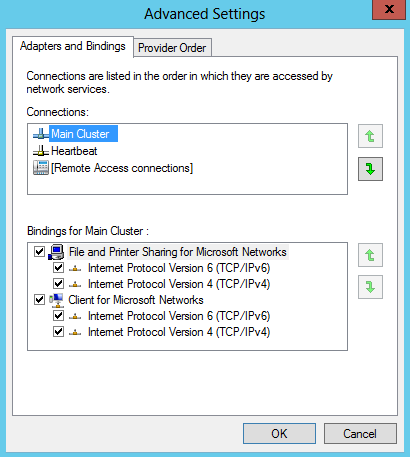
- You will need 2 virtual NICs on each Windows 2012 Server. One for the Main Network and one for a Heartbeat network. Modify the provider order so the Main Network always comes first. In Network Connections hold down Alt and F then select Advanced and move your Main Network to the top of the binding order
- I set up a iSCSI Target Disk from another server for my Scale Out File Server Share. Please see the previous blog for instructions on how to do this
- I also set up an iSCSI Target from another server for my Quorum Disk. Please see the previous blog for instructions on how to do this
- * Optional * You can also add 3 basic Virtual disks to your first server which are going to be set up as a Storage Space as detailed in the steps below and leave them as Online, Initialised and Unformatted in Disk Management on your Server. I wanted to see if these could be added into the Failover Cluster Pool as an experiment
- When you have a default build of your servers before adding any roles and features I would take a snapshot so at least you can go back to where you were when everything was a fresh build and worked!! (Setting this up didn’t work too well for me the first time round and I ended up rebuilding servers and getting cross!)
Procedure
- Log on to the first server as a member of the local Administrators group.
- In the QUICK START section, click Add roles and features
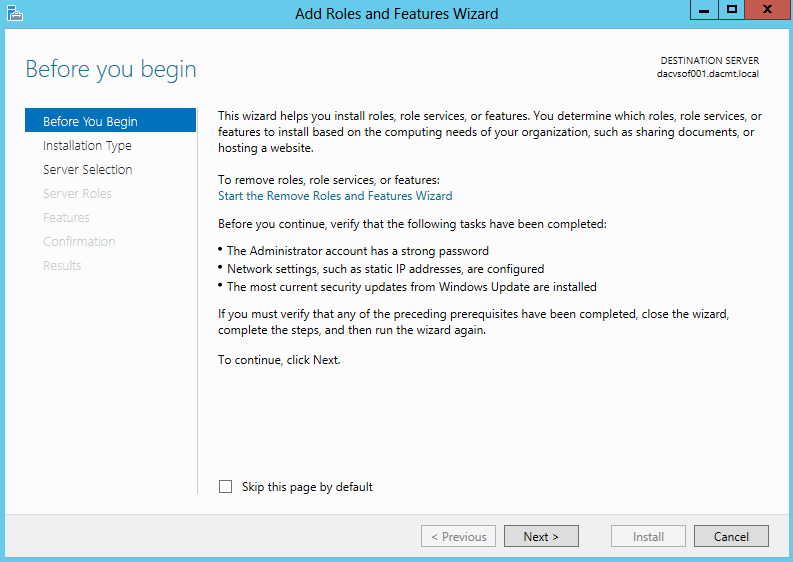
- On the Before you begin page of the Add Roles and Features Wizard, click Next.
- On the Select installation type page, click Role-based or feature-based installation, and then click Next.

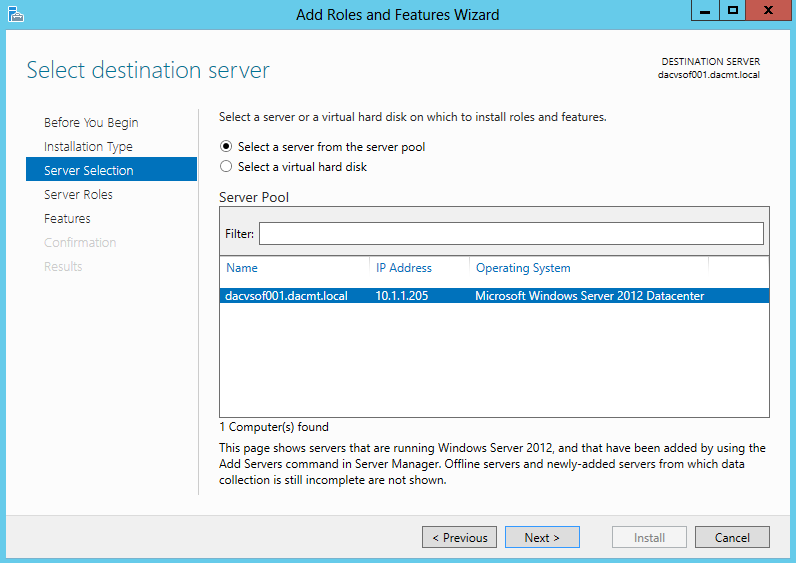
- On the Select destination server page, select the appropriate server, and then click Next. The local server is selected by default.
- On the Select server roles page, expand File and Storage Services, expand File Services, and then select the File Server check box. Click Next.

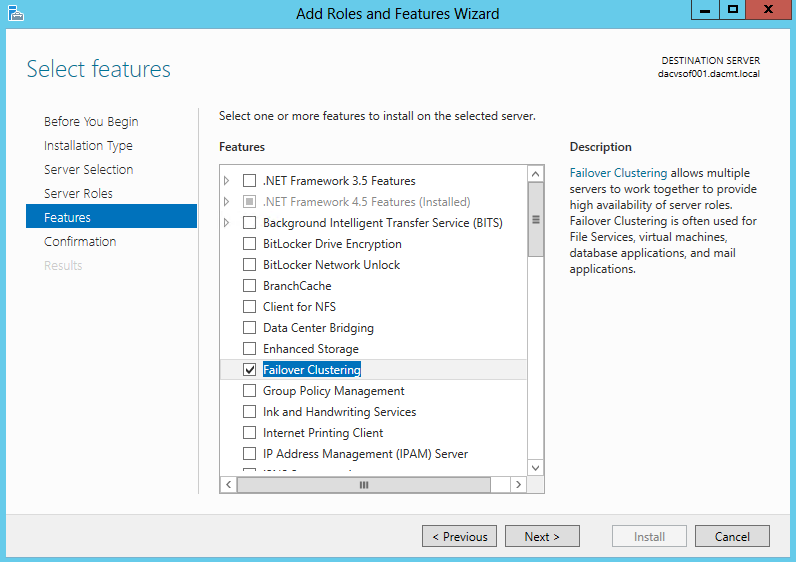
- On the Select features page, select the Failover Clustering check box, and then click Next.
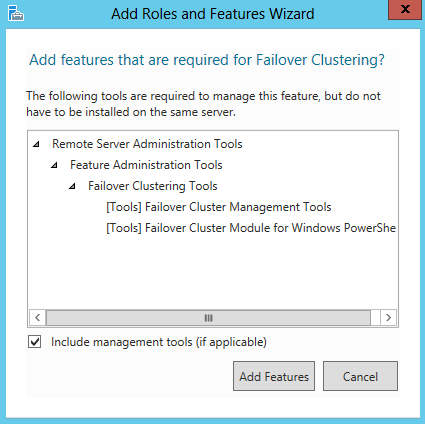
- Click OK to the pop up box
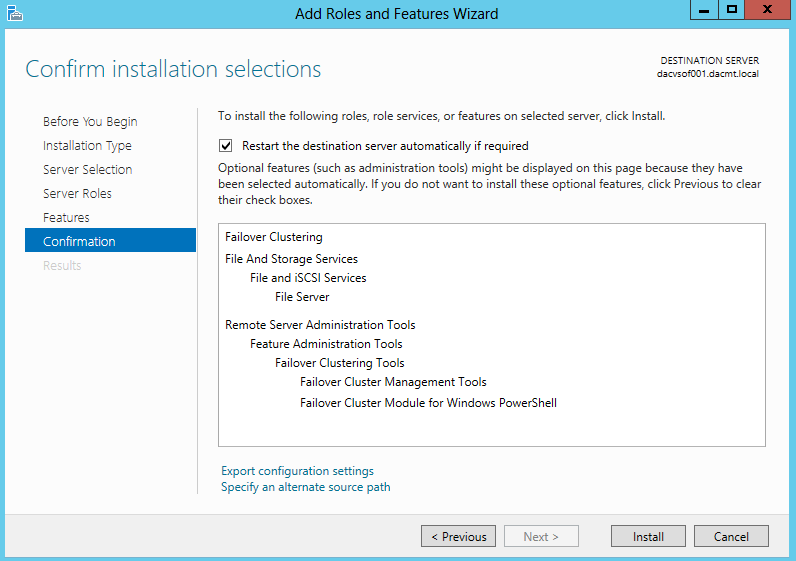
- On the Confirm installation selections page, click Install.
- Repeat the steps in this procedure for each server that will be added to the cluster
- Next Click Tools, and then click Failover Cluster Manager
- Under the Management heading, click Validate Configuration
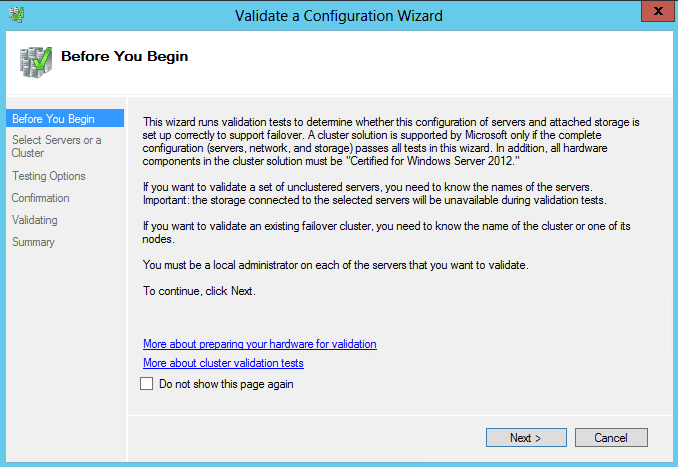
- On the Before You Begin page, click Next
- On the Select Servers or a Cluster page, in the Enter name box, type the FQDN of one of the servers that will be part of the cluster, and then click Add. Repeat this step for each server that will be in the cluster
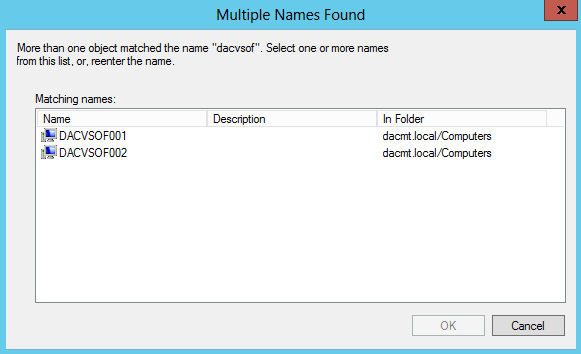
- Click OK to see the chosen servers

- On the Testing Options page, ensure that the Run all tests (recommended) option is selected, and then click Next.

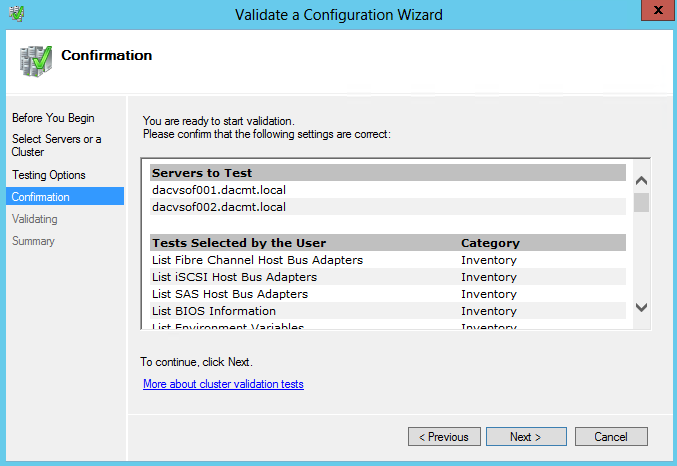
- On the Confirmation page, click Next.
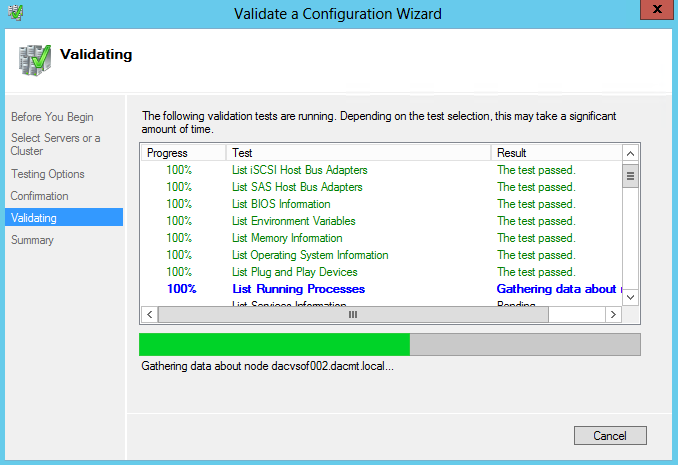
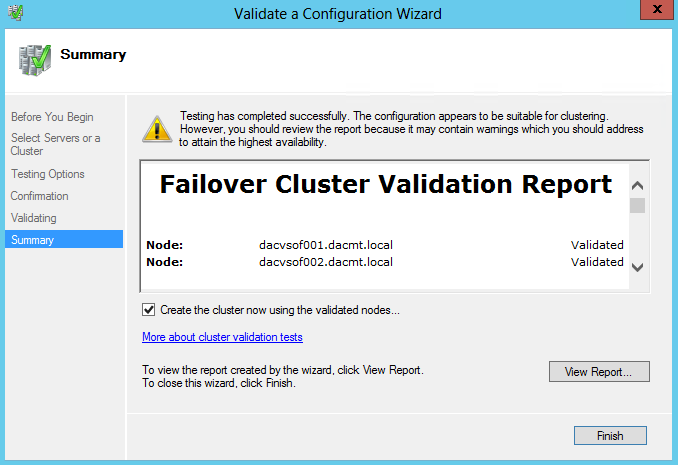
- The Validation tests will now run
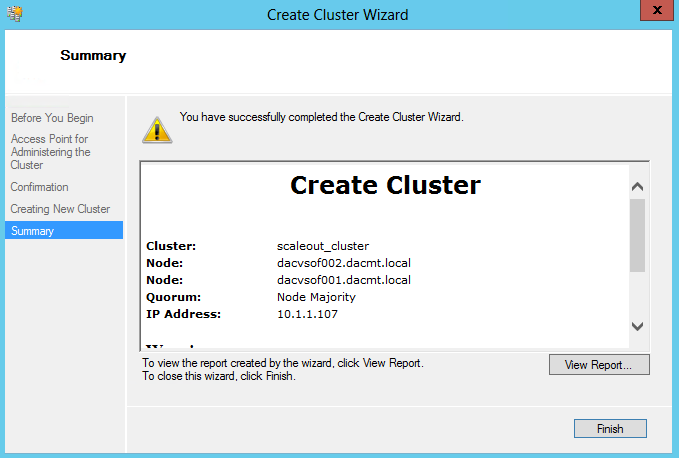
- On the Summary page, ensure that the Create the cluster now using the validated nodes check box is selected, and then click Finish. View the report to make sure you do not need to fix anything before proceeding. The Create Cluster Wizard appears.
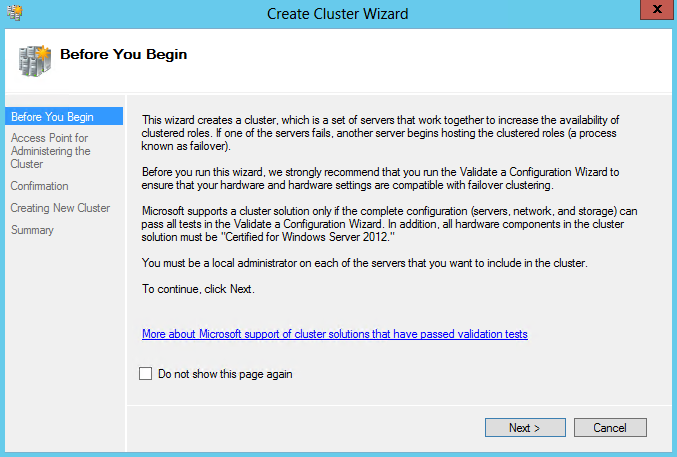
- On the Before You Begin page, click Next
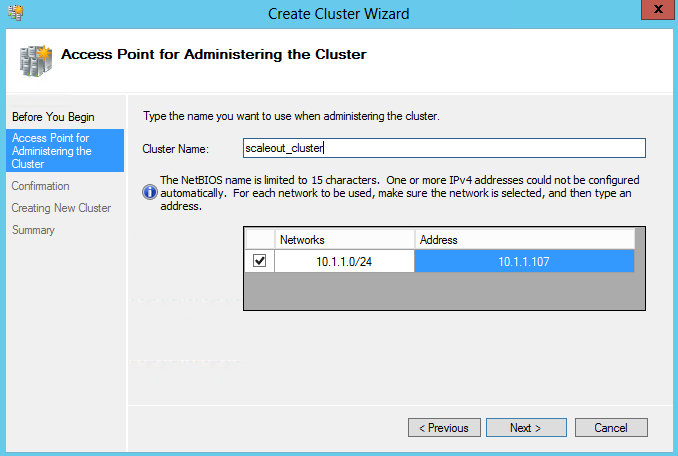
- On the Access Point for Administering the Cluster page, in the Cluster Name box, type a name for the cluster, and choose an IP Address then click Next.
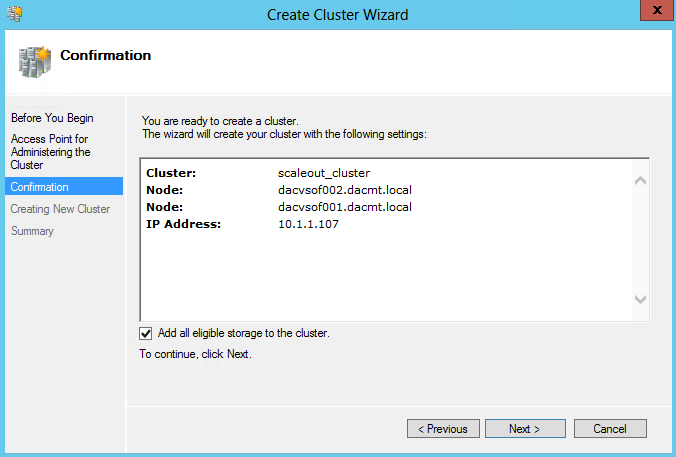
- On the Confirmation page, click Next.
- Untick Add all eligible storage to the cluster
- On the Summary page, click Finish.
- Right click on Disks in Failover Cluster Manager and select Add Disk
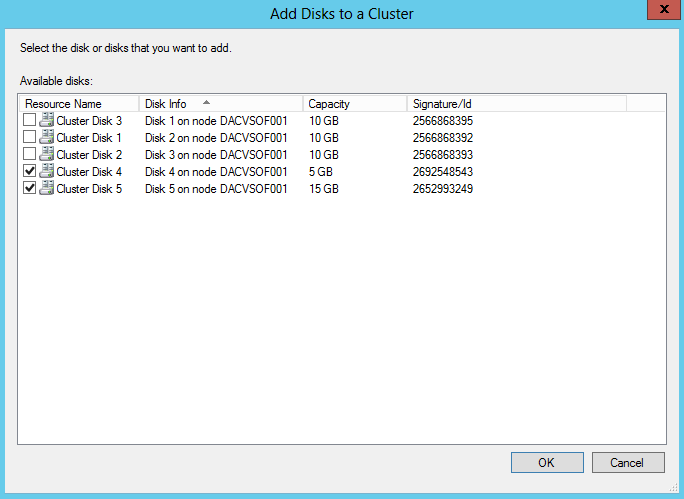
- The 5GB Disk is my Quorum iSCSI Target Disk
- The 15GB Disk is my Scale Out File Server iSCSI Target Disk
- The 3 x 10GB Disks are the 3 basic unformatted virtual disks I added at the start of this procedure to my first server in order to try setting up a storage pool from within the Failover Cluster. Keep these unticked for now
- You should now see the disks looking like the below

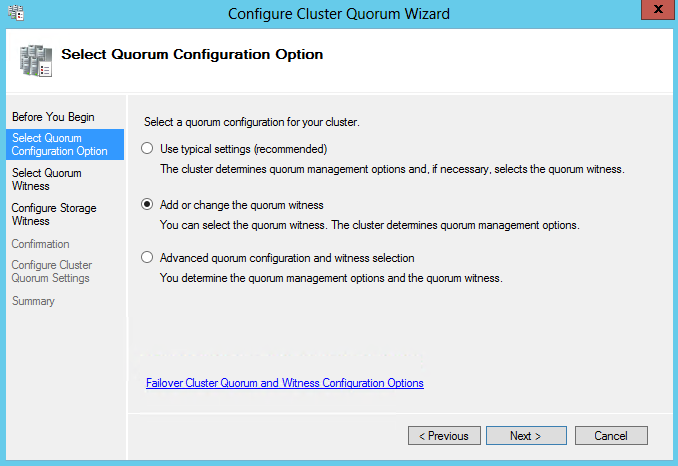
- You should be now be able to change the Quorum setting from Node Majority to Node and Disk Majority as per the instructions below which is the recommended configuraton for a 2 Node Failover Cluster Server
- Note the Quorum Disk cannot be a Cluster Shared Volume. Please click Quorum Disk to follow a link to mofe information
- Right click on the Cluster name in Failover Cluster Manager and select More Actions > Configure Cluster Quorum Settings

- Select Quorum Configuration Options
- Select Quorum Witness
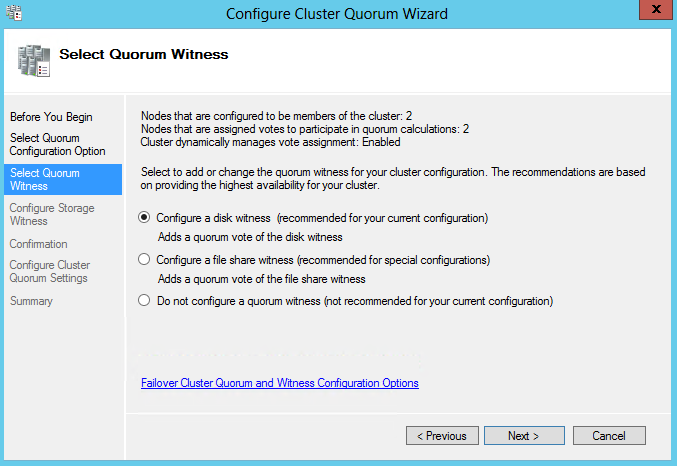
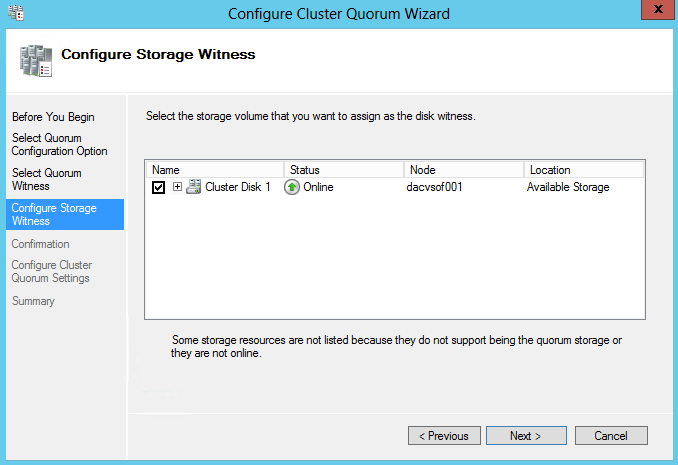
- Configure Storage Witness to be your 5GB Drive
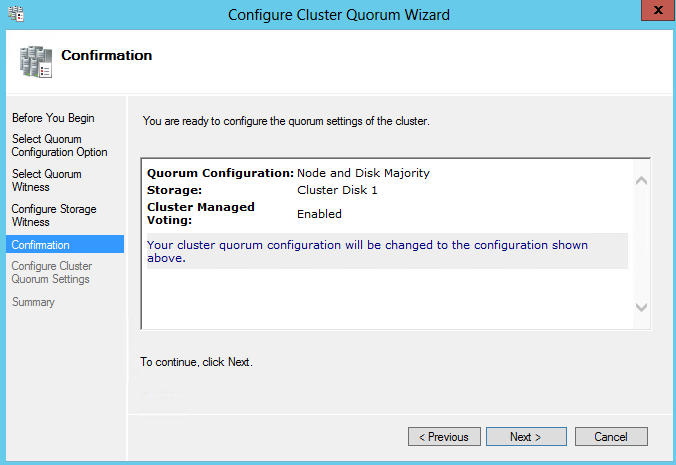
- Confirmation
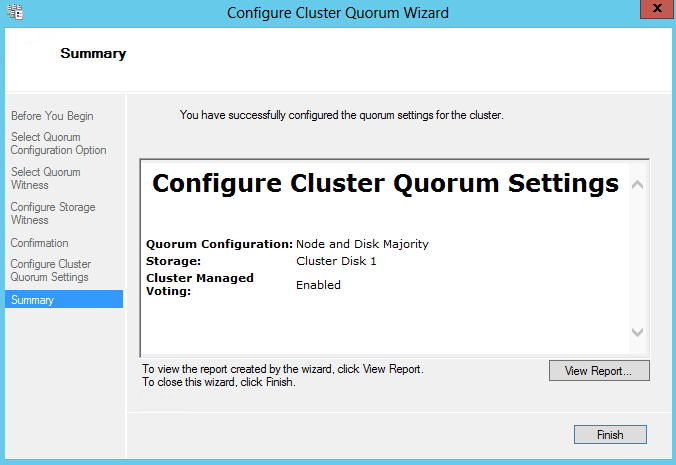
- Summary
- Next Go to Failover Cluster Manager > Storage > Pools and Select New Pool
- Note that once physical disks have been added to a pool, they are no longer directly usable by the rest of Windows – they have been virtualized, that is, dedicated to the pool in their entirety
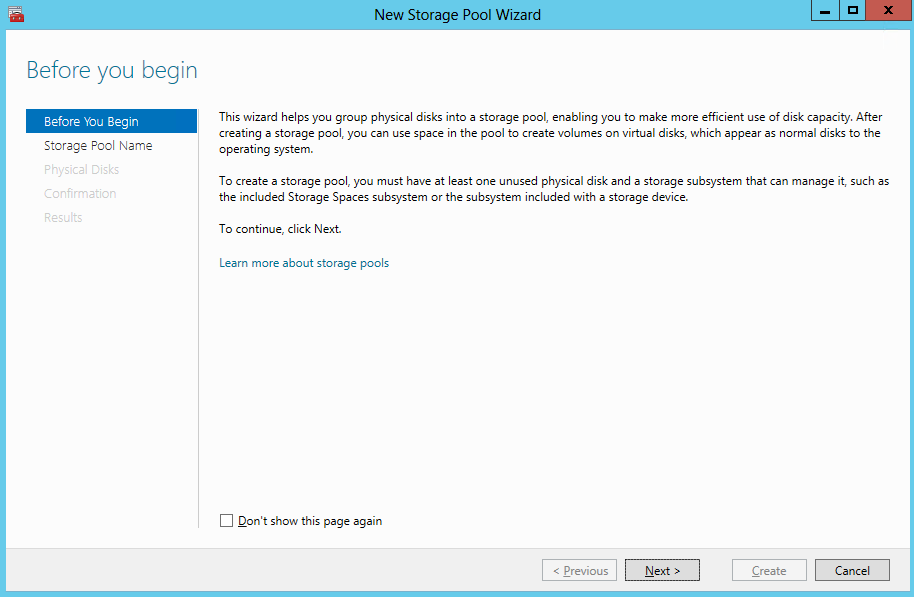
- Specify a Name for the Storage Pool and choose the Storage Subsystem that is available to the cluster and click Next
- Select the Physical Disks for the Storage Pool
- Note the disks should be Online, Initialised but unallocated. If you don’t see any disks, you need to go into Server Manager and delete the volumes

- Confirm Selections
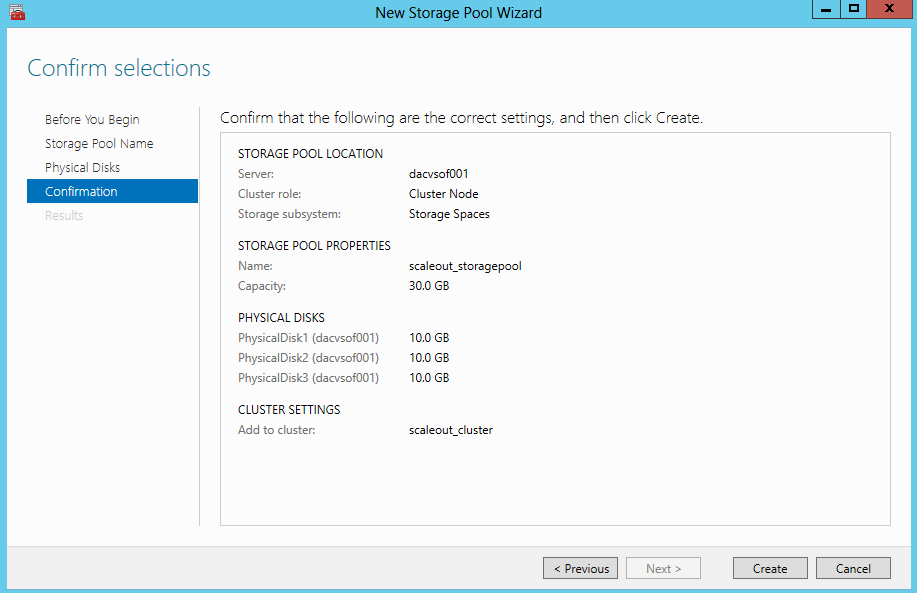
- Click Create and you will see the wizard running through the tasks

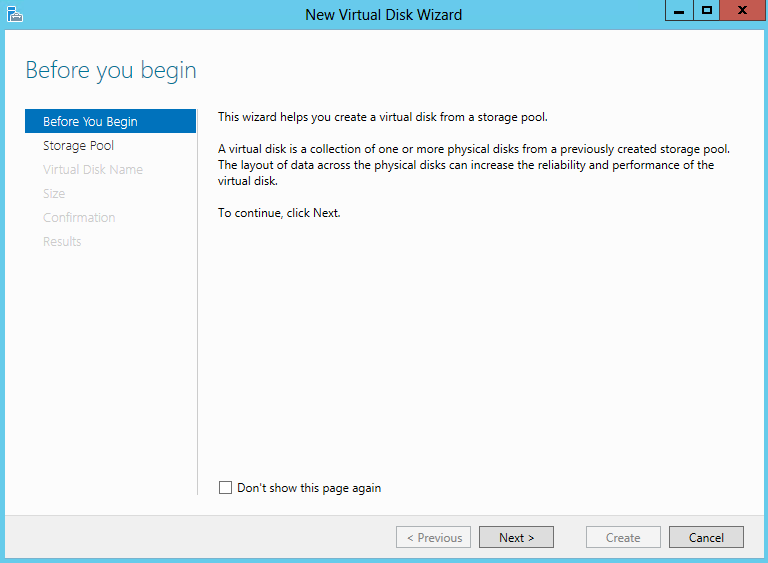
- The next step is to create a Virtual Disk (storage space) that will be associated with a storage pool. In the Failover Cluster Manager, select the storage pool that will be supporting the Virtual Disk. Right-click and choose New Virtual Disk
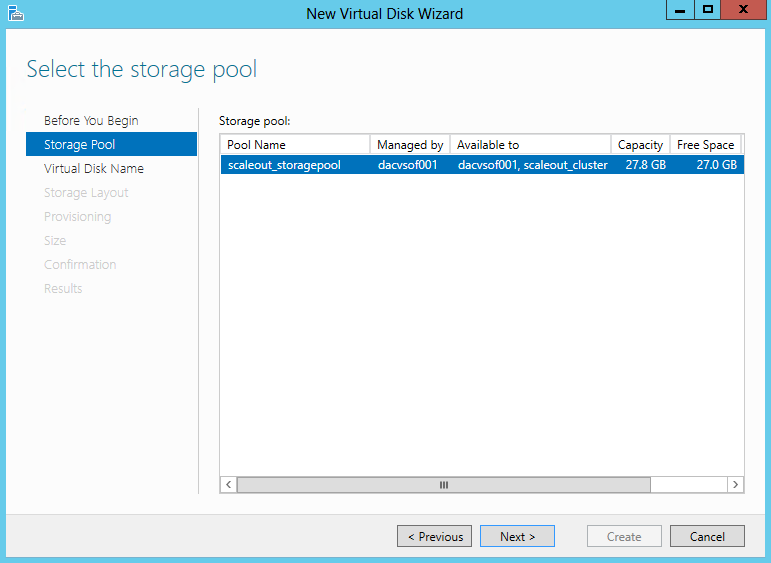
- Select the Storage Pool
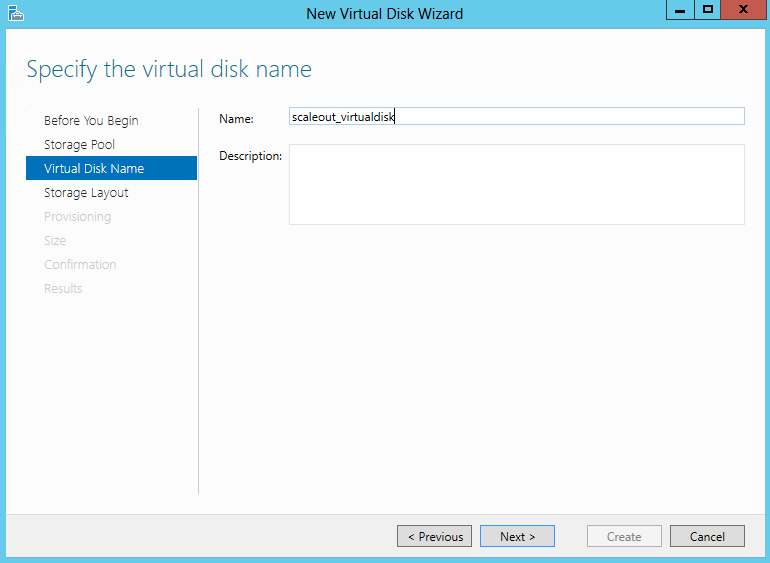
- Specifiy the Virtual Disk Name
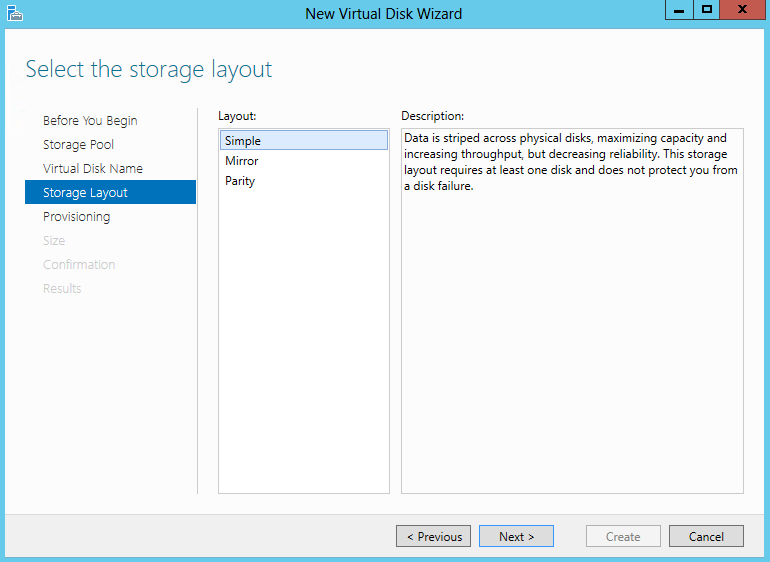
- Select the Storage Layout. (Simple or Mirror; Parity is not supported in a Failover Cluster) and click Next
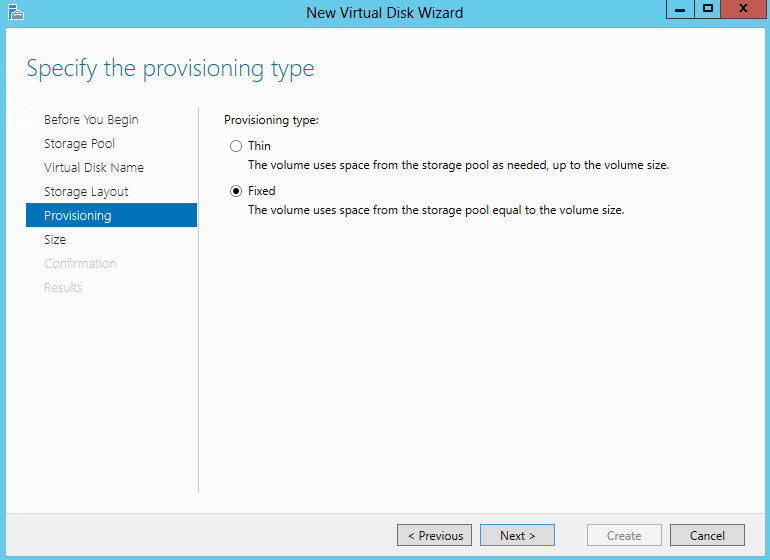
- Specifiy the Provisioning Type
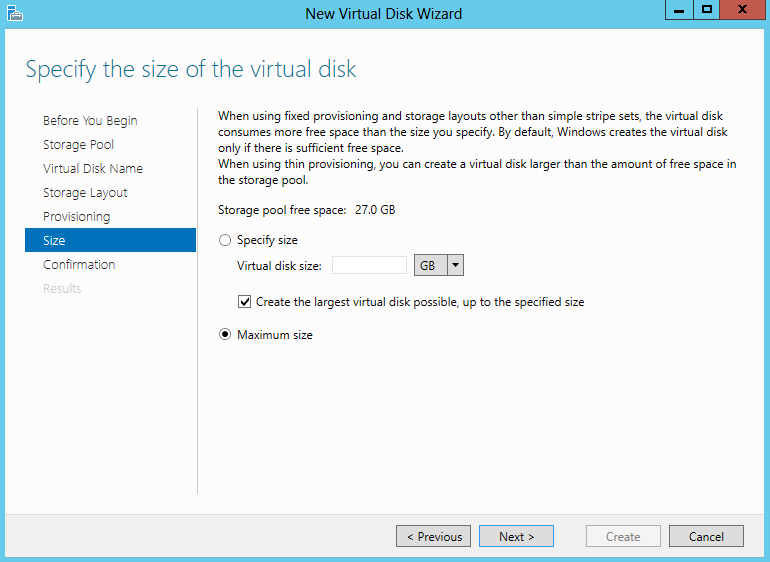
- Specify the size of your virtual disk – I chose Maximum
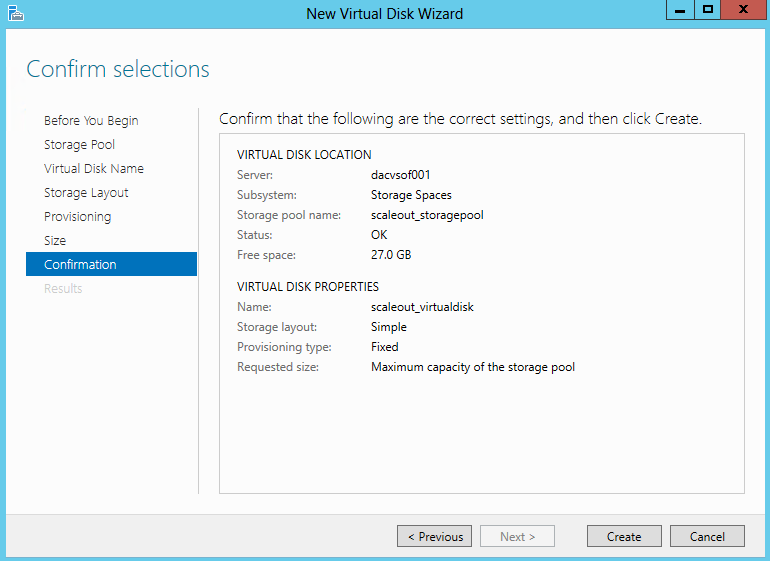
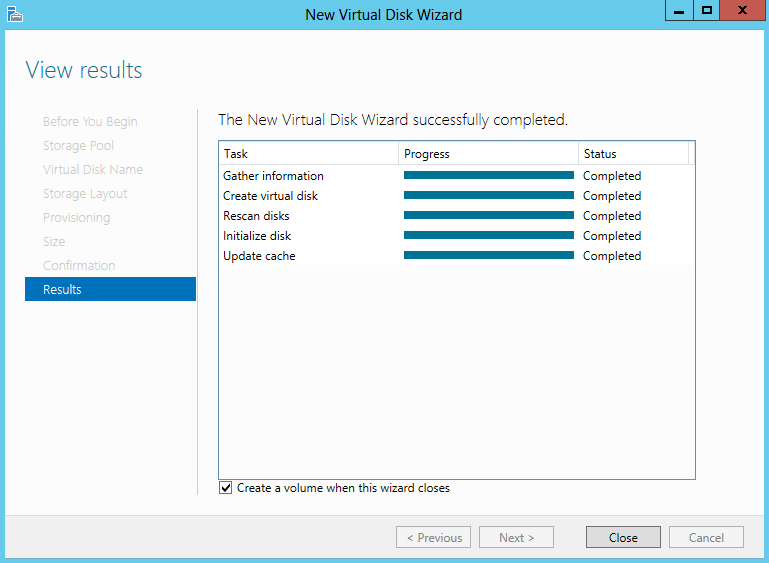
- Check and Confirm and click Create
- View Results and make sure Create a Volume when this wizard closes is ticked
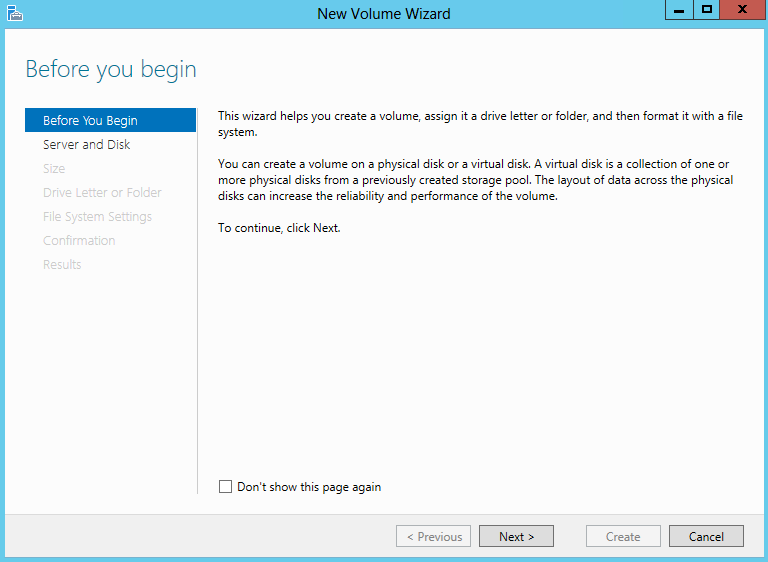
- The volume wizard opens
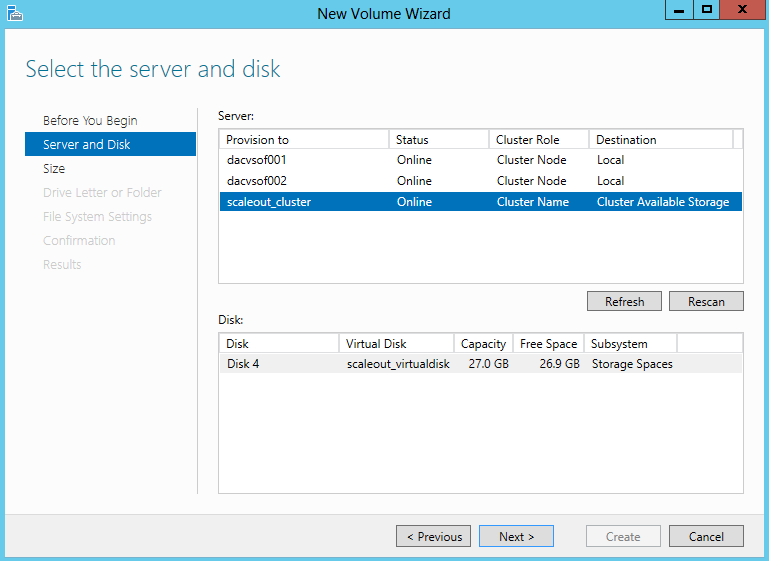
- Select the Cluster and your disk
- Specify the size of the volume

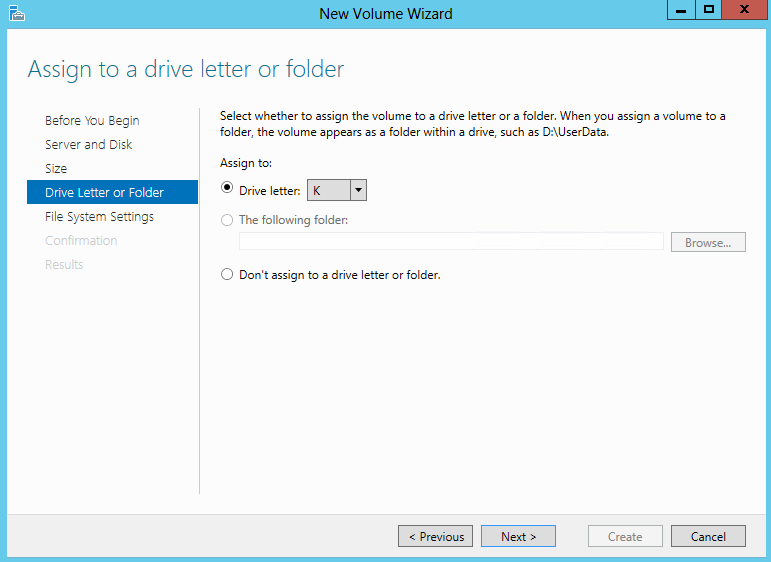
- Choose a drive letter
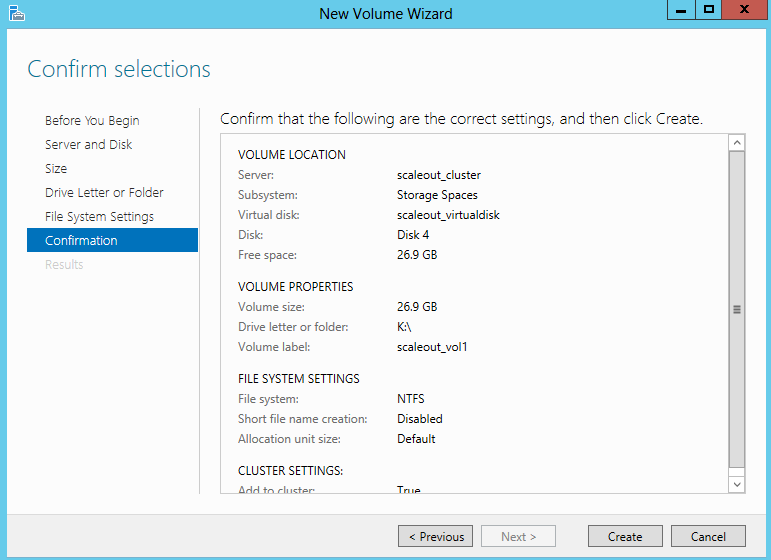
- Select File System Settings
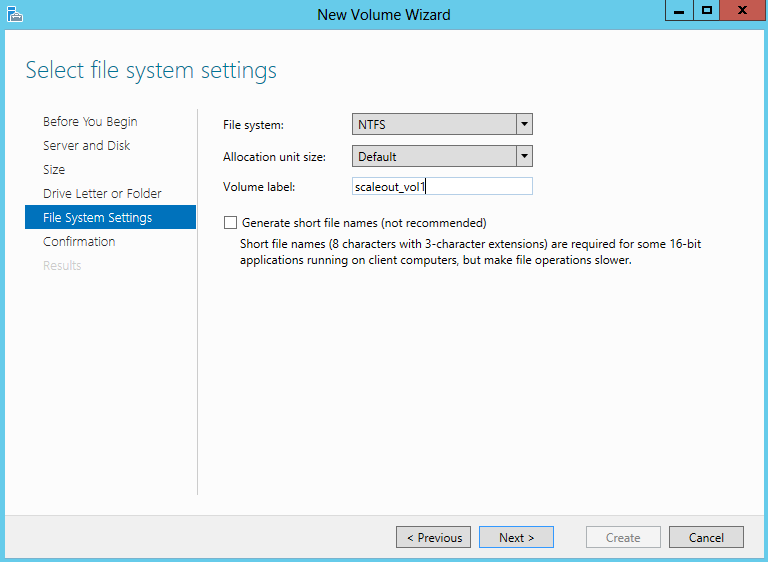
- Confirm and Create
- You should now see this Virtual Disk Storage space as a drive in Windows
- Open Failover Cluster Manager.
- Right-click the cluster, and then click Configure Role.
- On the Before You Begin page, click Next.
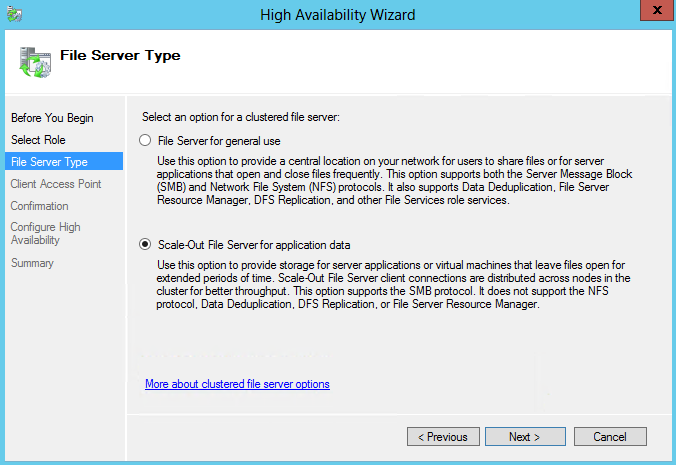
- On the Select Role page, click File Server, and then click Next.
- On the File Server Type page, select the Scale-Out File Server for application data option, and then click Next.
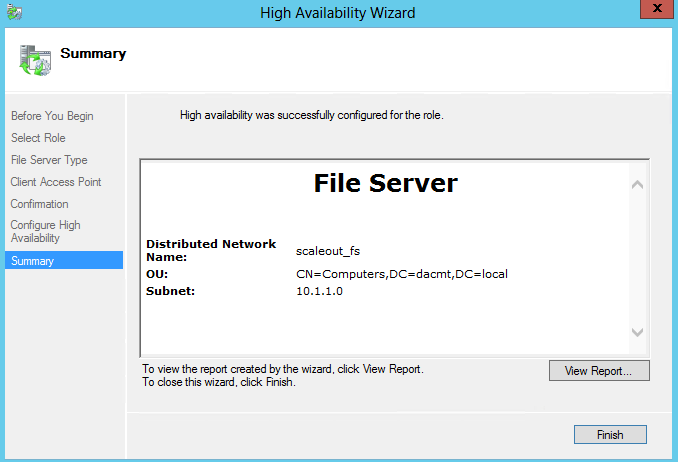
- On the Client Access Point page, in the Name box, type a NETBIOS name that will be used to access Scale-Out File Server, and then click Next
- On the Confirmation page, confirm your settings, and then click Next.
- On the Summary page, click Finish.
- Click Start, type Failover Cluster, and then click Failover Cluster Manager
- Expand the cluster, and then click Roles.
- Right-click the file server role, and then click Add File Share.
- On the Select the profile for this share page, click SMB Share – Applications, and then click Next.
- On the Select the server and path for this share page, click the cluster shared volume, and then click Next.
- On the Specify share name page, in the Share name box, type a name, and then click Next.
- On the Configure share settings page, ensure that the Enable continuous availability check box is selected, and then click Next.
- On the Specify permissions to control access page, click Customize permissions, grant the following permissions, and then click Next:
- If you are using this Scale-Out File Server file share for Hyper-V, all Hyper-V computer accounts, the SYSTEM account, and all Hyper-V administrators must be granted full control on the share and the file system.
- If you are using Scale-Out File Server on Microsoft SQL Server, the SQL Server service account must be granted full control on the share and the file system
- On the Confirm selections page, click Create.
- On the View results page, click Close
- Note: You should not use access-based enumeration on file shares for Scale-Out File Server because of the increased metadata traffic that is generated on the coordinator node.
Useful Links

