What are Cluster Shared Volumes?
Cluster Shared Volumes (CSVs) in a Windows Server 2012 failover cluster allow multiple nodes in the cluster to simultaneously have read-write access to the same LUN (disk) that is provisioned as an NTFS volume. With CSVs, clustered roles can fail over quickly from one node to another node without requiring a change in drive ownership, or dismounting and remounting a volume. CSVs also help simplify managing a potentially large number of LUNs in a failover cluster.
CSVs provide a general-purpose, clustered file system in Windows Server 2012, which is layered above NTFS. They are not restricted to specific clustered workloads. (In Windows Server 2008 R2, CSVs only supported the Hyper-V workload.) CSV applications include:
- Clustered virtual hard disk (VHD) files for clustered Hyper-V virtual machines
- Scale-out file shares to store application data for the Scale-Out File Server role. Examples of the application data for this role include Hyper-V virtual machine files and Microsoft SQL Server data
Other Details
- At this time, CSVs do not support the Microsoft SQL Server clustered workload.
- External authentication dependencies for CSVs have been removed
- CSVs support the functional improvements in chkdsk
- CSVs interoperate with antivirus and backup applications
- CSVs are also now integrated with general storage features such as Bitlocker and Storage Spaces
- Cluster Share Volumes (CSVs), system volumes, dynamic disks, and Resilient File System (ReFS) are not eligible for data deduplication
Benefits of using Cluster Shared Volumes in a failover cluster
Cluster Shared Volumes provides the following benefits in a failover cluster:
- The configuration of clustered virtual machines is much simpler than before.
- You can reduce the number of LUNs (disks) required for your virtual machines, instead of having to manage one LUN per virtual machine, which was previously the recommended configuration (because the LUN was the unit of failover). Many virtual machines can use a single LUN and can fail over without causing the other virtual machines on the same LUN to also fail over.
- You can make better use of disk space, because you do not need to place each Virtual Hard Disk (VHD) file on a separate disk with extra free space set aside just for that VHD file. Instead, the free space on a Cluster Shared Volume can be used by any VHD file on that volume.
- You can more easily track the paths to VHD files and other files used by virtual machines. You can specify the path names, instead of identifying disks by drive letters (limited to the number of letters in the alphabet) or identifiers called GUIDs (which are hard to use and remember). With Cluster Shared Volumes, the path appears to be on the system drive of the node, under the \ClusterStorage folder. However, this path is the same when viewed from any node in the cluster.
- If you use a few Cluster Shared Volumes to create a configuration that supports many clustered virtual machines, you can perform validation more quickly than you could with a configuration that uses many LUNs to support many clustered virtual machines. With fewer LUNs, validation runs more quickly. (You perform validation by running the Validate a Configuration Wizard in the snap-in for failover clusters.)
- There are no special hardware requirements beyond what is already required for storage in a failover cluster (although Cluster Shared Volumes require NTFS).
- Resiliency is increased, because the cluster can respond correctly even if connectivity between one node and the SAN is interrupted, or part of a network is down. The cluster will re-route the Cluster Shared Volumes communication through an intact part of the SAN or network.
How to Configure a Clustered Storage Space in Windows Server 2012
Prerequisites
- A minimum of three physical drives, with at least 4 gigabytes (GB) capacity each, are required to create a storage pool in a Failover Cluster.
- The clustered storage pool MUST be comprised of Serial Attached SCSI (SAS) connected physical disks. Layering any form of storage subsystem, whether an internal RAID card or an external RAID box, regardless of being directly connected or connected via a storage fabric, is not supported.
- All physical disks used to create a clustered pool must pass the Failover Cluster validation tests.
- To run cluster validation tests: Open the Failover Cluster Manager interface (cluadmin.msc) and select the Validate Cluster options
- Clustered storage spaces must use fixed provisioning.
- Simple and mirror storage spaces are supported for use in Failover Cluster. Parity Spaces are not supported.
- The physical disks used for a clustered pool must be dedicated to the pool. Boot disks should not be added to a clustered pool nor should a physical disk be shared among multiple clustered pools.
- Storage spaces formatted with ReFS cannot be added to the Cluster Shared Volume (CSV)
Procedure
- Go to Server Manager > File and Storage Services > Storage Pools and Select New Pool
- Note that once physical disks have been added to a pool, they are no longer directly usable by the rest of Windows – they have been virtualized, that is, dedicated to the pool in their entirety
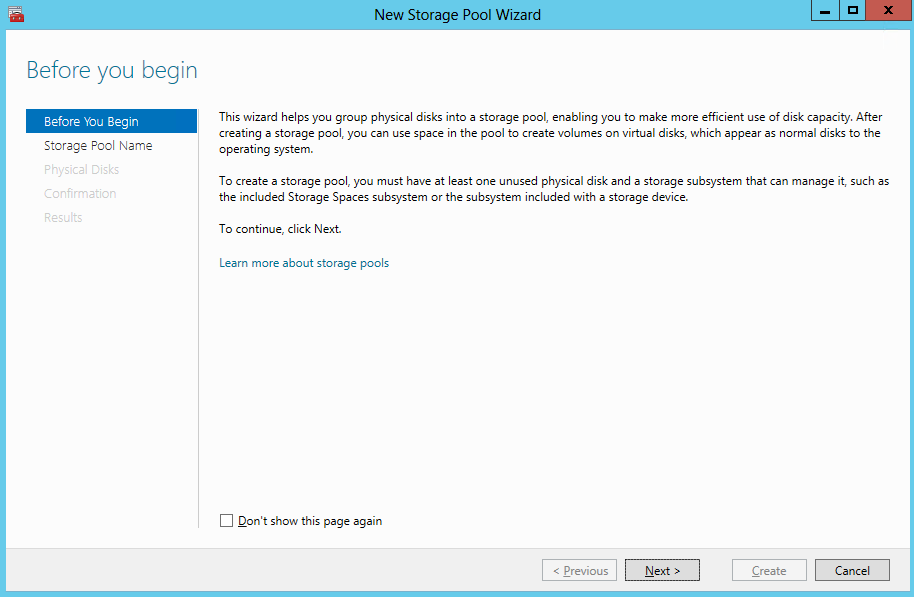
- Specify a Name for the Storage Pool and choose the Storage Subsystem that is available to the cluster and click Next
- Select the Physical Disks for the Storage Pool
- Note the disks should be Online, Initialised but unallocated. If you don’t see any disks, you need to go into Server Manager and delete the volumes

- Confirm Selections
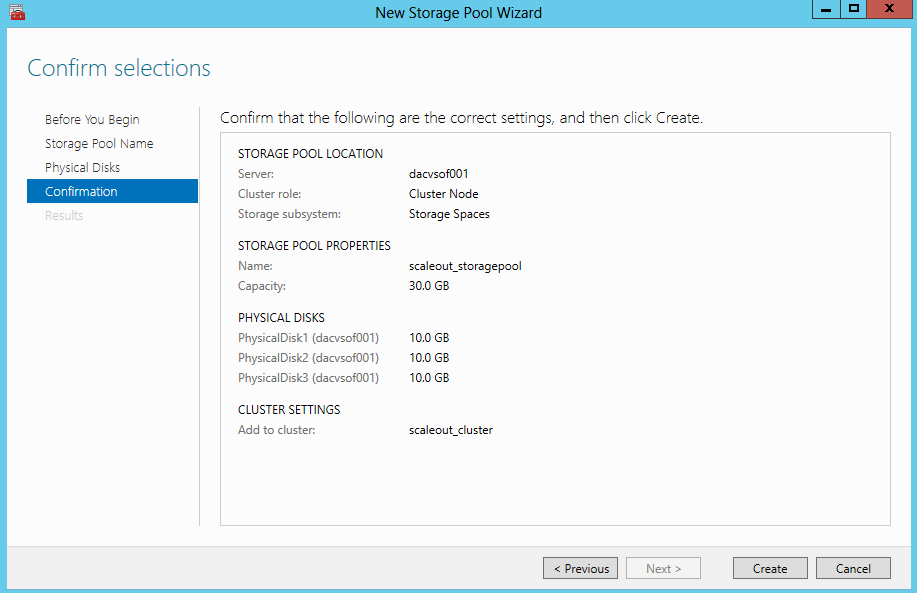
- Click Create and you will see the wizard running through the tasks

- The next step is to create a Virtual Disk (storage space) that will be associated with a storage pool. In the Failover Cluster Manager, select the storage pool that will be supporting the Virtual Disk. Right-click and choose New Virtual Disk
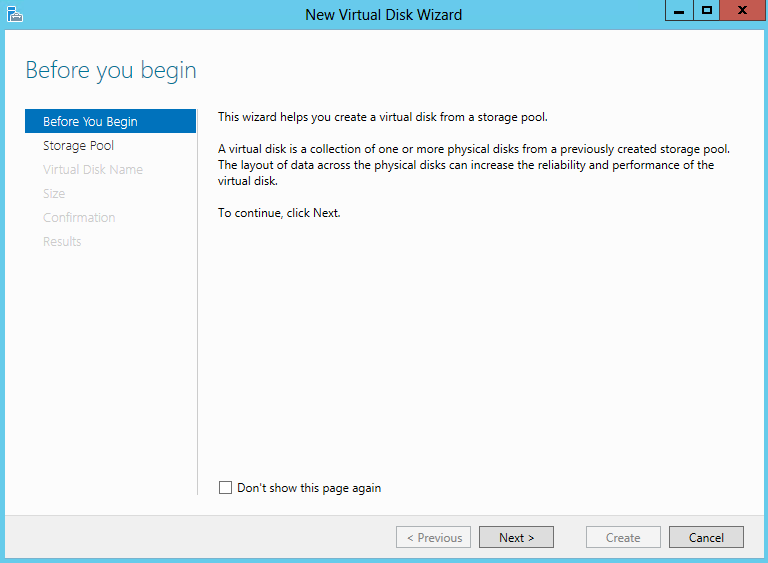
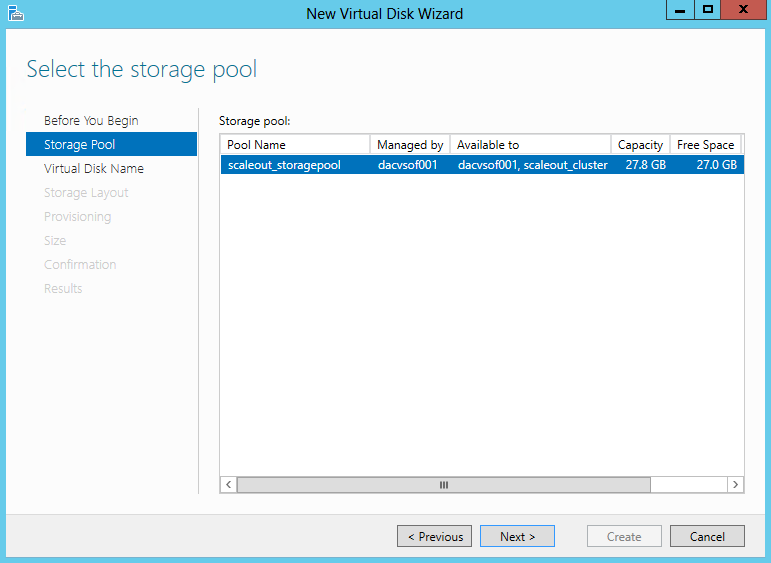
- Select the Storage Pool
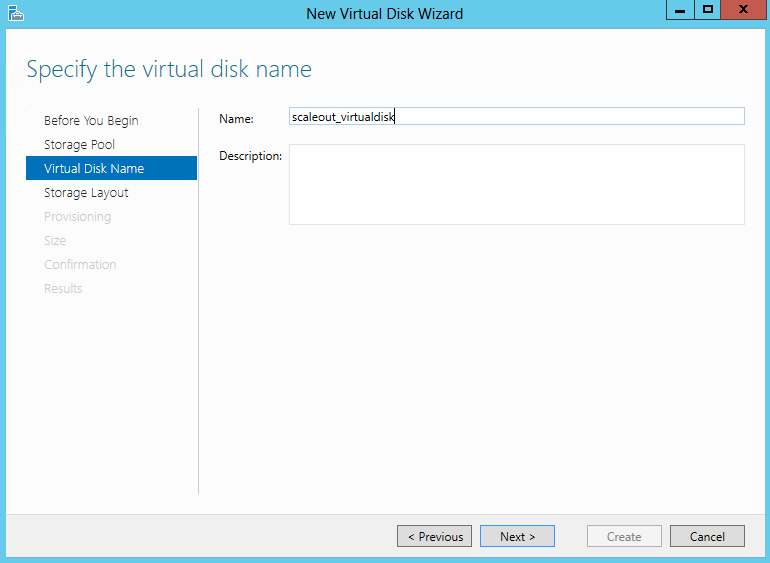
- Specifiy the Virtual Disk Name
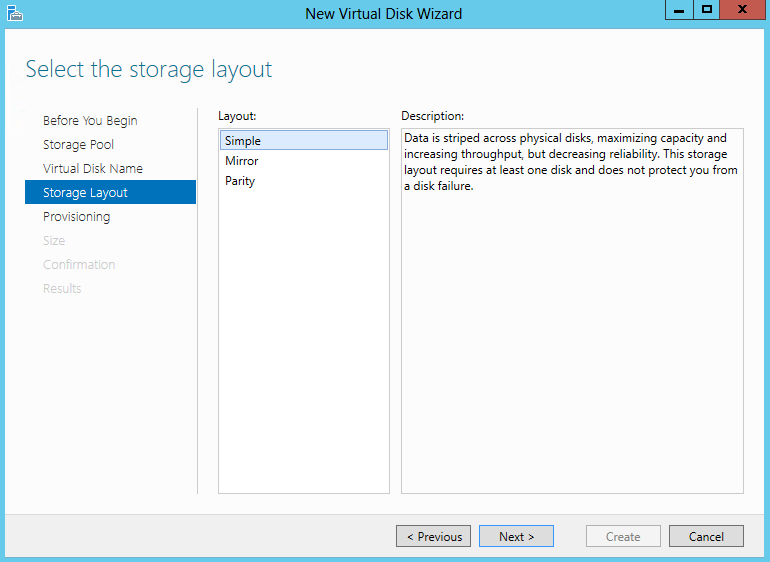
- Select the Storage Layout. (Simple or Mirror; Parity is not supported in a Failover Cluster) and click Next
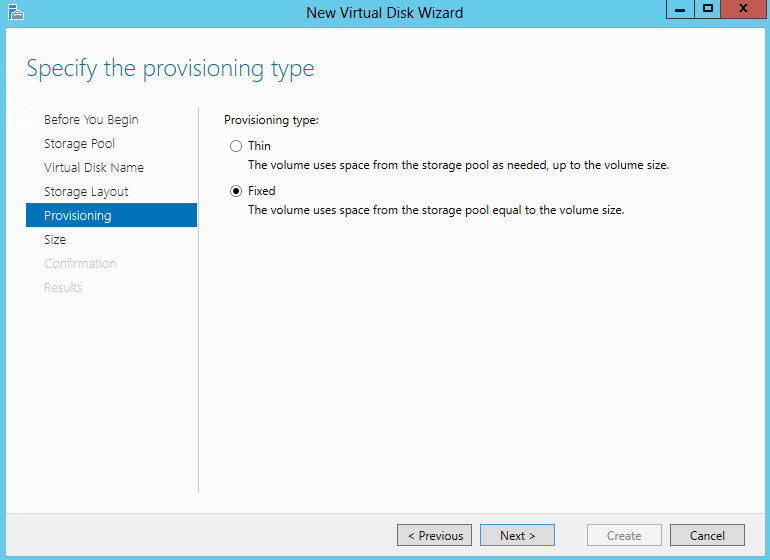
- Specifiy the Provisioning Type
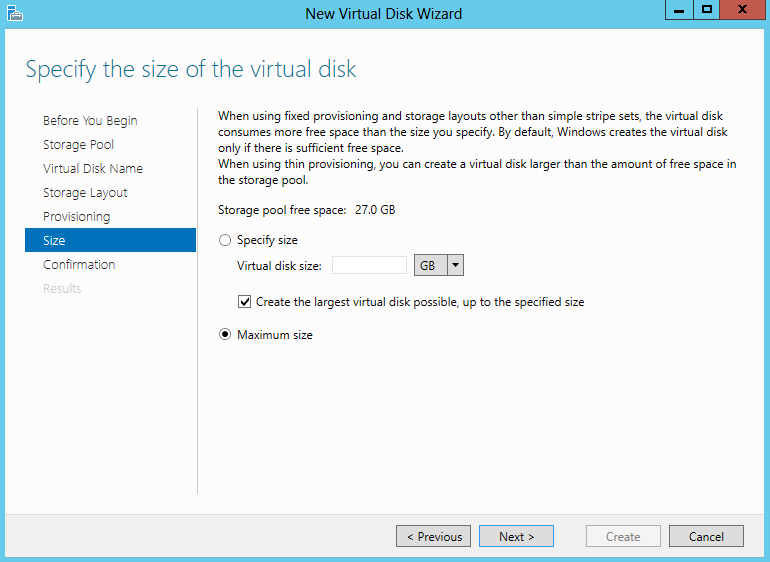
- Specify the size of your virtual disk – I chose Maximum
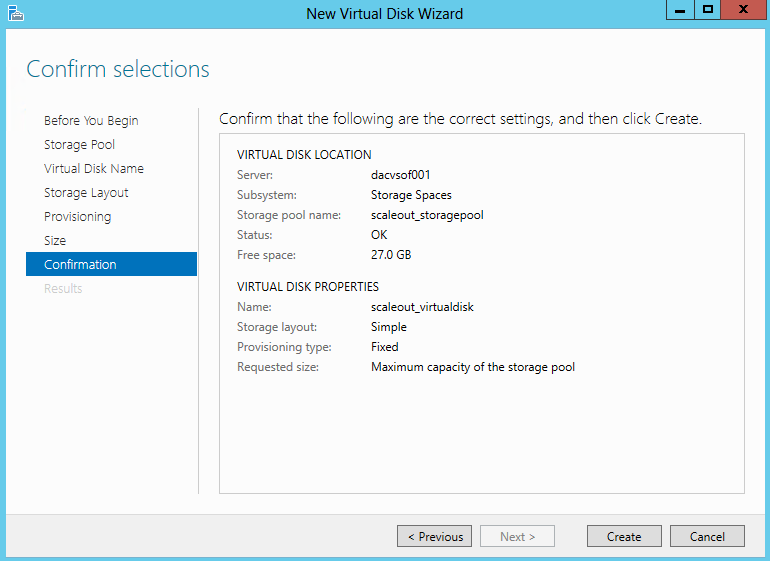
- Check and Confirm and click Create
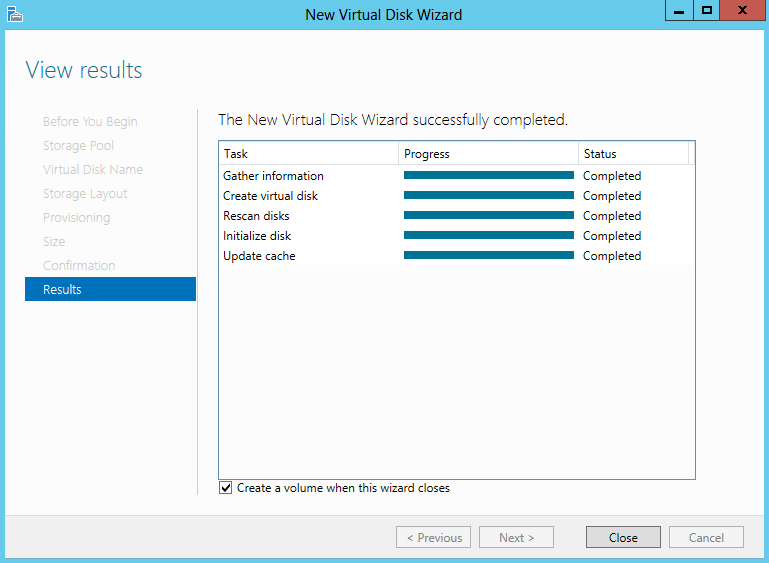
- View Results and make sure Create a Volume when this wizard closes is ticked
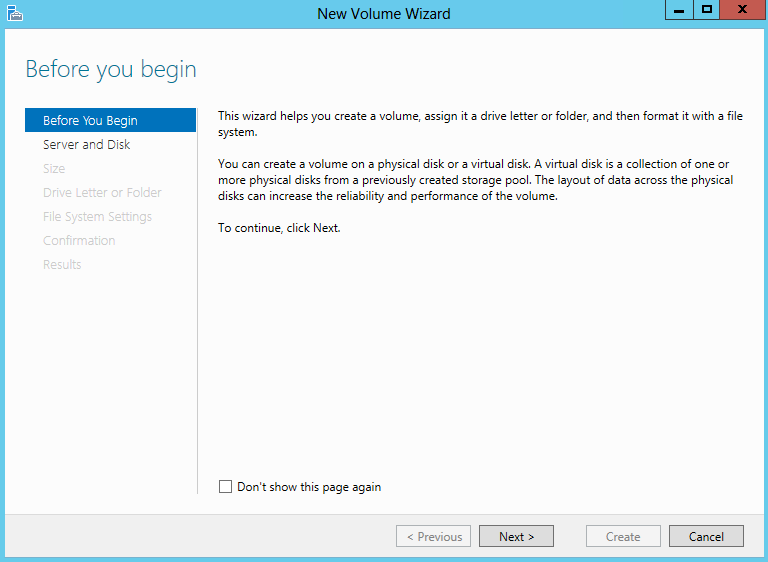
- The volume wizard opens
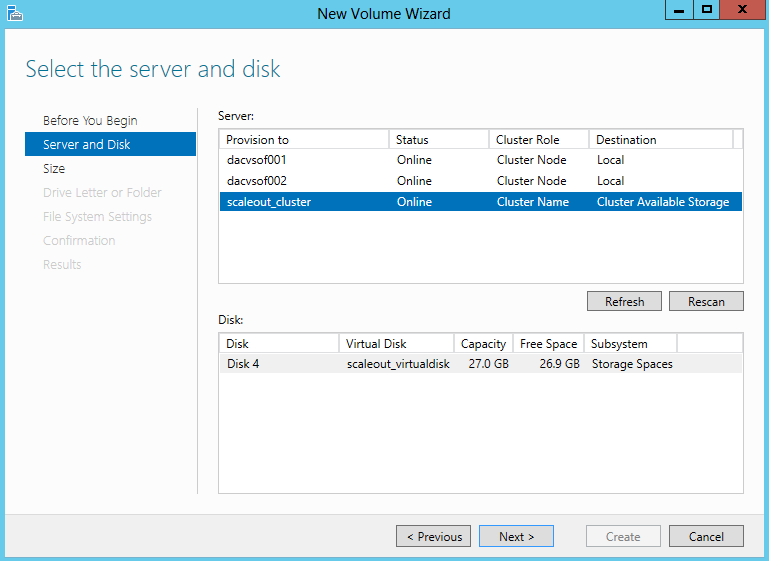
- Select the Cluster and your disk
- Specify the size of the volume

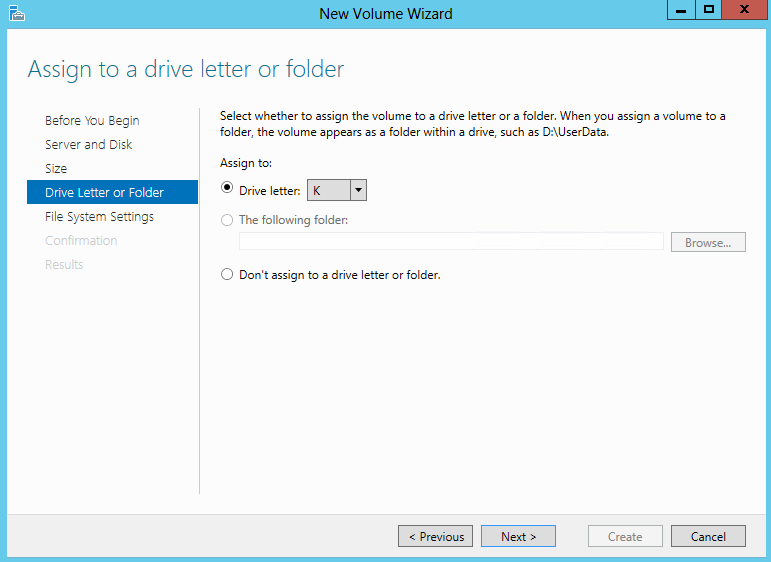
- Choose a drive letter
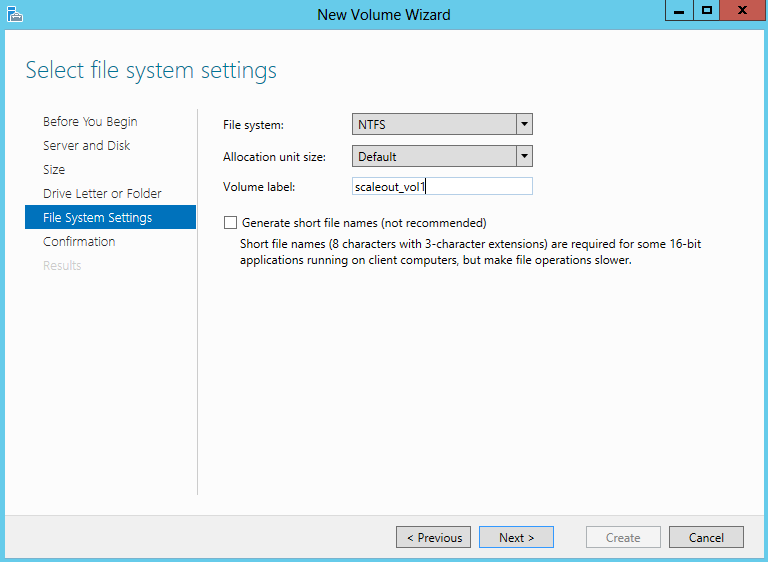
- Select File System Settings
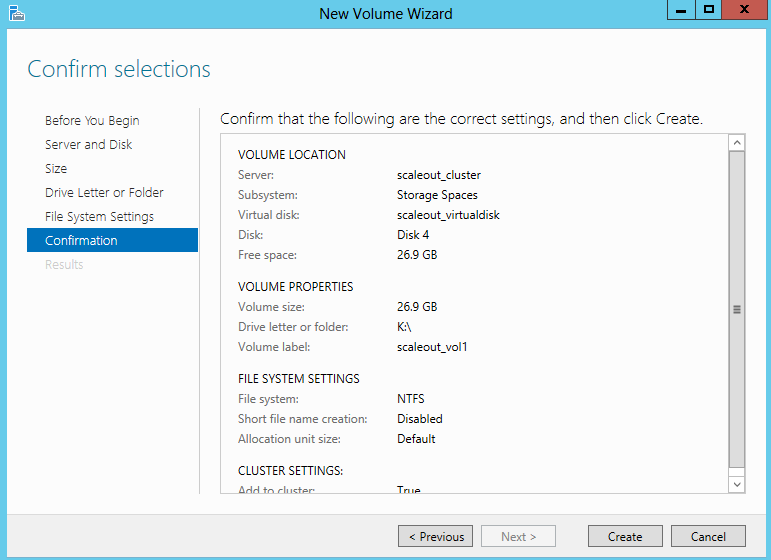
- Confirm and Create
- You should now see this Virtual Disk Storage space as a drive in Windows
- In Failover Cluster Manager, expand ClusterName, expand Storage, and then click Disks
- Right-click a cluster disk, and then click Add to Cluster Shared Volumes. The Assigned To column changes to Cluster Shared Volume.


Leave a Reply