SQL Modifications
I am using Microsoft SQL Server 2008 R2 running on Microsoft Windows Server 2008 R2. It is always worth having some knowledge about your Database software whether it be Oracle, SQL or DB2 etc and worth knowing how to optimise this software to work correctly for VMware vCenter whilst maintaining backups and maintenance plans for further minimization of issues and/or performance problems
Memory
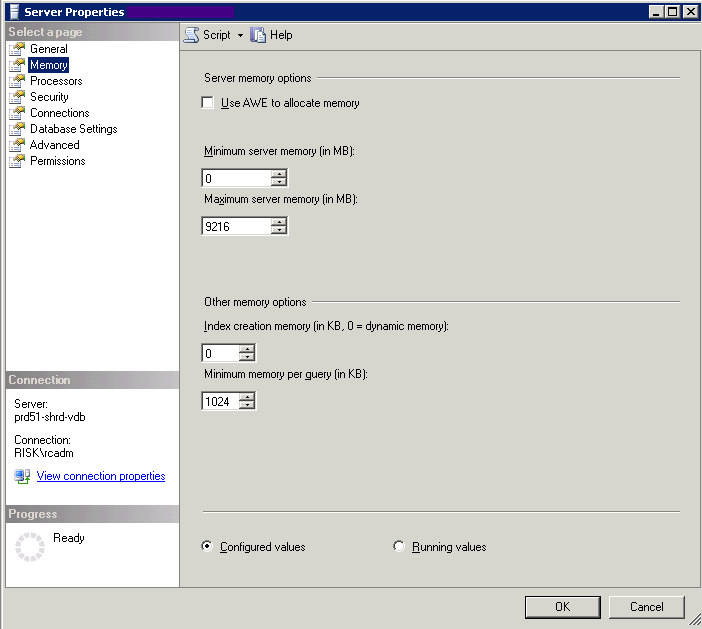
- Right-click the topmost SQL Server object, usually named with the machine name or local.
- Choose Properties.
- Choose the Memory page.
- Set “Maximum Server Memory (in MB)” to something useful for the server. Probably something like 25%-50% of the RAM on the host.
- The more memory you can give it the better, as the database will cache data in RAM, but you also want to leave room in RAM for the OS (2 GB) and some file cache.
Recovery Model
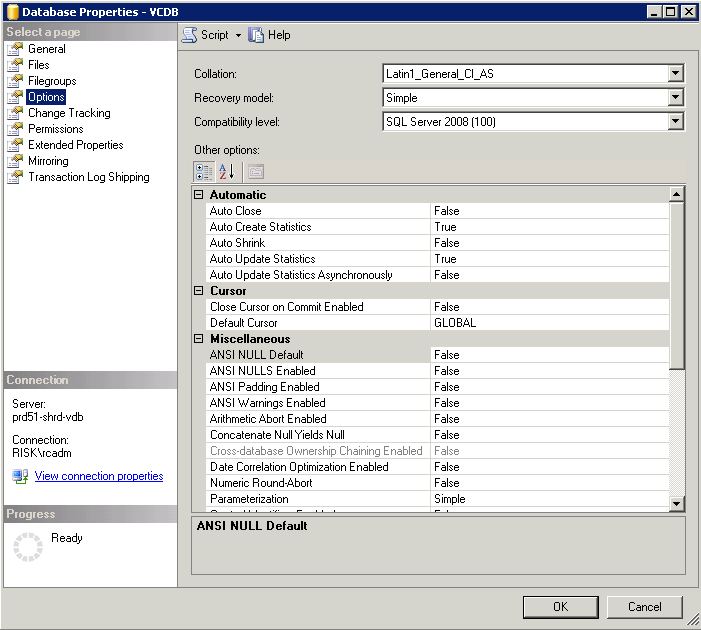
- Right-click the relevant Database in SQl Management Studio
- Click Properties
- Select Options
- Set the Recovery Model to “Simple.” Click OK.
Configure Microsoft SQL Server TCP/IP for JDBC
If the Microsoft SQL Server database has TCP/IP disabled and the dynamic ports are not set, the JDBC connection remains closed. The closed connection causes the vCenter Server statistics to malfunction. You can configure the server TCP/IP for JDBC.
This task applies to remote Microsoft SQL Server database servers. You can skip this task if your database is local.
- Select Start > All Programs > Microsoft SQL Server > Configuration Tool > SQL Server Configuration Manager
- Select SQL Server Network Configuration
- Protocols for Instance name
- Enable TCP/IP
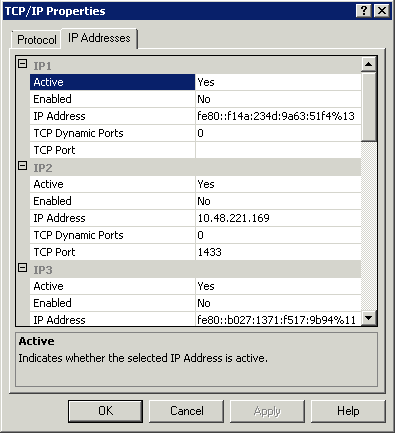
- Open TCP/IP Properties and set the entries as per the below screen print
- Click on the IP Addresses tab
- Restart the SQL Server service from SQL Server Configuration Manager > SQL Server Services.
- Start the SQL Server Browser service from SQL Server Configuration Manager > SQL Server Services.
Maintenance of your SQL Server Databases
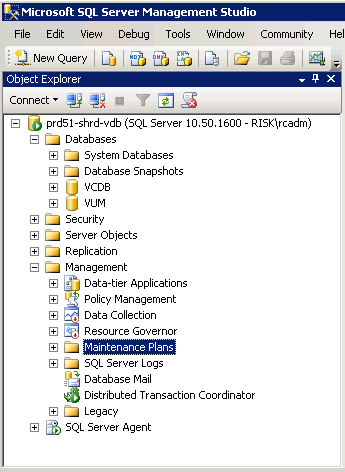
- Start the Microsoft SQL Server Management Studio again and log in as the sa user. Open the Management folder.
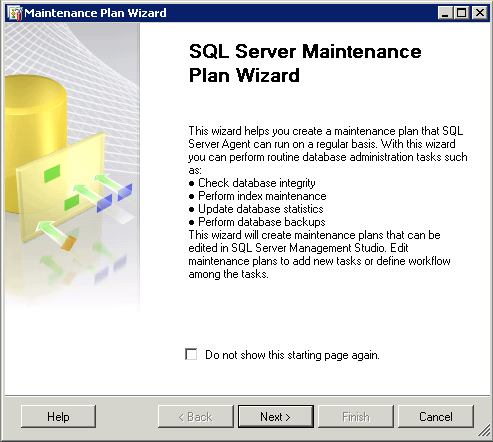
- Right-click Maintenance Plans. Select Maintenance Plan Wizard.
- Click Next
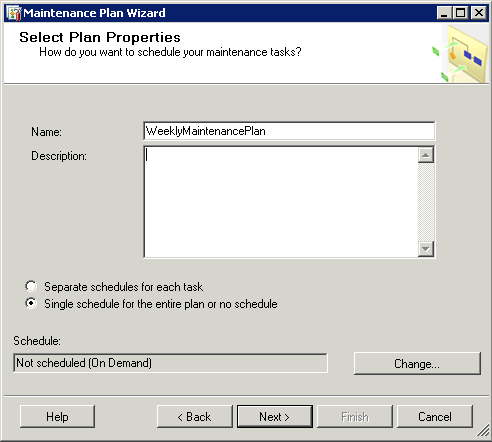
- On the Select Plan Properties page give it the name WeeklyMaintenancePlan. Select Single schedule for the entire plan or no schedule
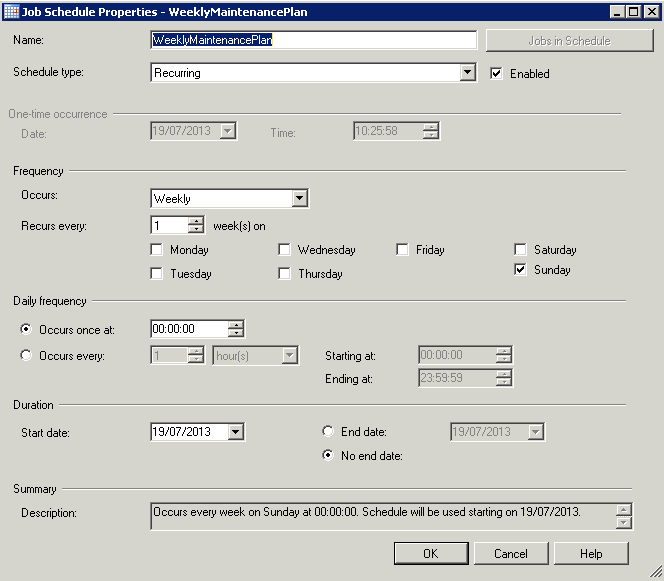
- Click the Change button to pick when you want it to run.
- Schedule the job to occur when there is little occurring on the system. E.g No backups or antivirus scanning
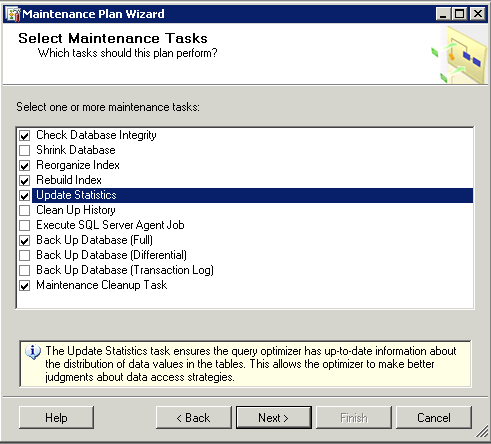
- Click Next and choose your Maintenance Tasks
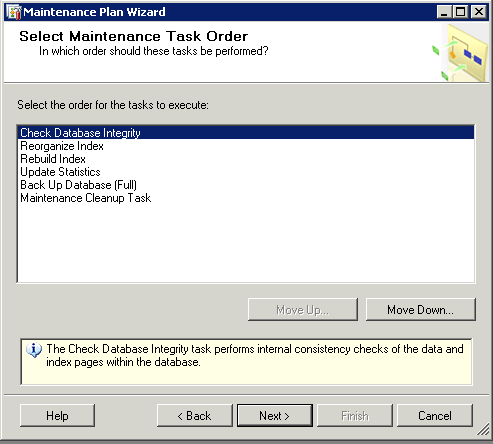
- Select the order for the Maintenance Tasks to run in
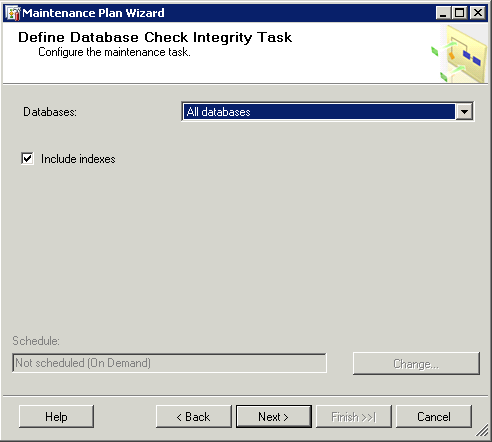
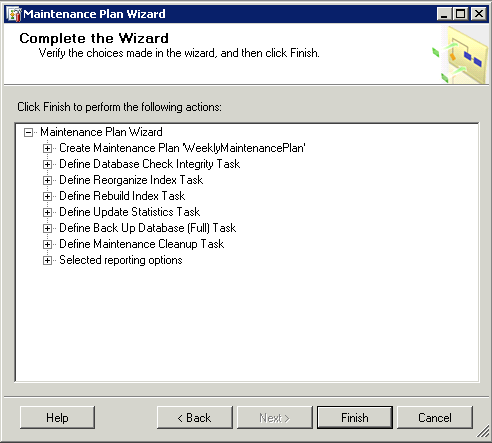
- For Define Database Integrity Check Select All databases, including indexes.
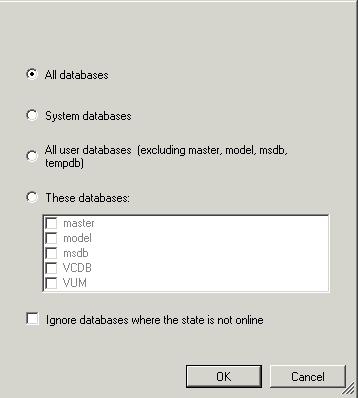
- You have the choices below
- Click OK and it will bring you back to the Define Database Integrity Check
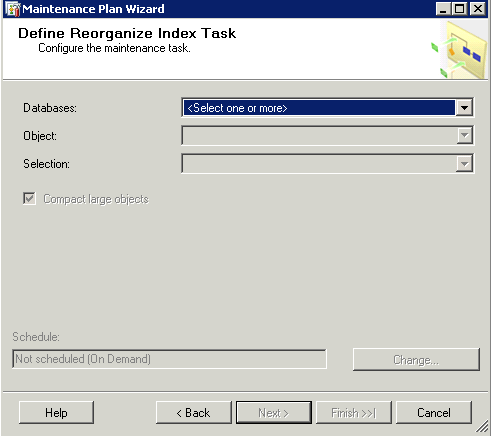
- For Define Reorganize Index select All databases, compact large objects.
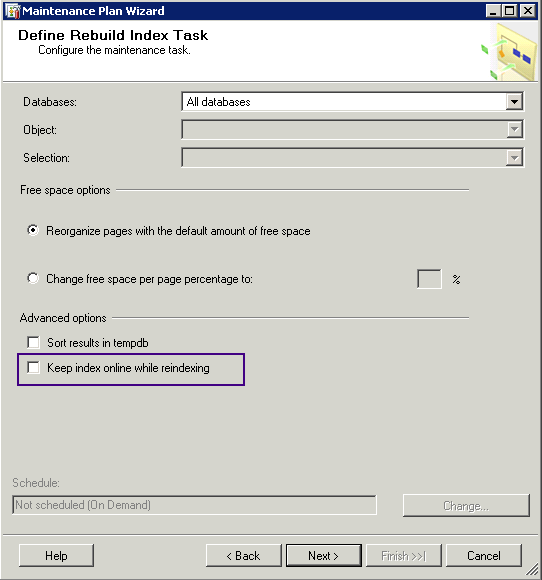
- For Define Rebuild Index select All Databases, reorganize pages with the default amount of free space. Also check Keep index online while reindexing. Note: The Keep index online option appears to be an Enterprise version feature, and you may see failures with it enabled on other SQL Server versions.
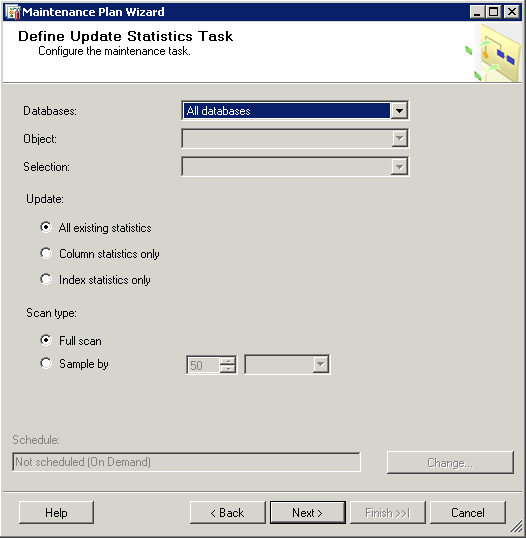
- For Define Update Statistics select All Databases, all existing statistics, full scan
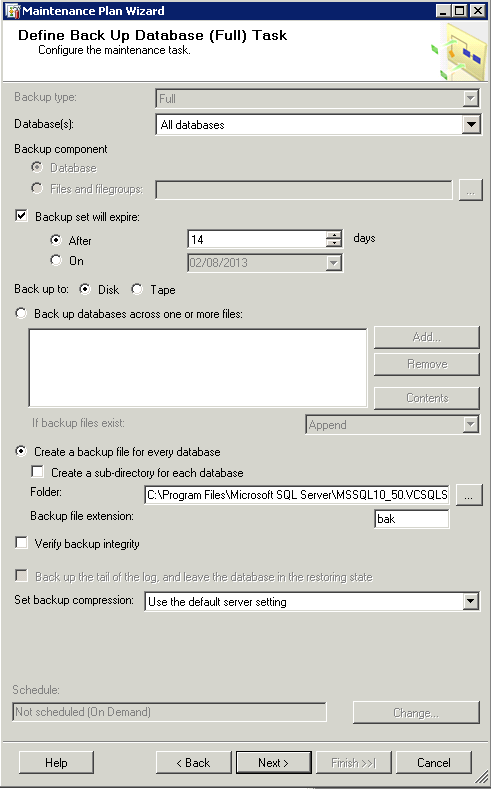
- Next on the Define Backup Database (Full) Task, enter the following
- Backup Type = Full
- Databases = All Databases
- Backup Set will expire after = 14 Days
- Backup to Disk = Selected
- Create a backup file for every Database = Selected
- Choose a folder according to where you want to back up
- Backup File Extension = bak
- Set backup compression = Use the default server settings. The Compress Backup option seems like a good one but it isn’t supported on 64-bit SQL Server. It’ll let you set it, then fail on execution
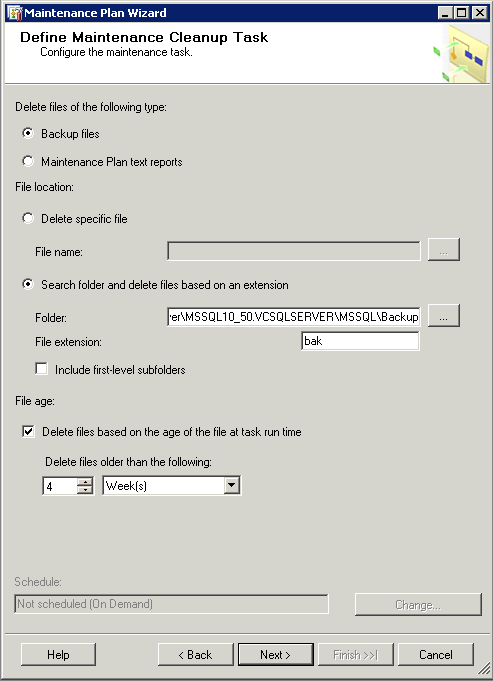
- Next Define Maintenance Cleanup Task
- Delete files of the following type = Backup Files
- Search Folder and delete files based on an extension = Choose your backup folder
- File extension = bak
- File age = 4 weeks or your choice
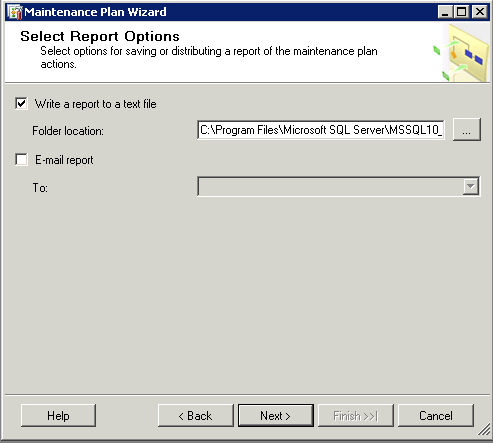
- Next you are on to the Report Options Page
- Check the Summaries and Click Finish
- Go into the Maintenance Plans folder now, right click on this job, and choose Execute to see if it runs. Check the logs if it doesn’t.
- Your location may be different but as a rough guide, the log location is c:\Program Files\Microsoft SQL Server\MSSQL10.MSSQLSERVER\MSSQL\Log
Defragmenting VirtualCenter performance data indexes on a Microsoft SQL database
For troubleshooting or maintenance purposes it may be necessary to defragment the indexes on your Microsoft SQL database server.
Fragmentation of indexes occurs when the logical order of pages is different from the physical order on the disk. In VirtualCenter fragmentation occurs most noticeably due to the statistics collection and consolidation.
When the indexes are excessively fragmented, performance of queries to the VirtualCenter database is slow.
Warning: If you do not have experienced DB administrators, shutdown the VMware VirtualCenter Server service and do a backup prior to performing any kind of database maintenance. If you have experienced DB administrators you can do the tasks online
Regular Reorganize Database Task
One of the performance suggestions buried in the VMware KB is to regularly reorganize the indexes, since the historical statistics tables get unwieldy. You can do this manually or schedule a job to do it by running the Maintenance Plan Wizard. Choose only Reorganize Indexes and set the schedule to recur every six hours, every day (or however often you want.This keeps the logical fragmentation of the indices down.
Click through the pages of the wizard until you get to “Define Reorganize Index Task.” Have it only reindex VCDB, choose “Tables and views” in the Object selection, and check “Compact large objects.” Click through until you’re done.



Leave a Reply