
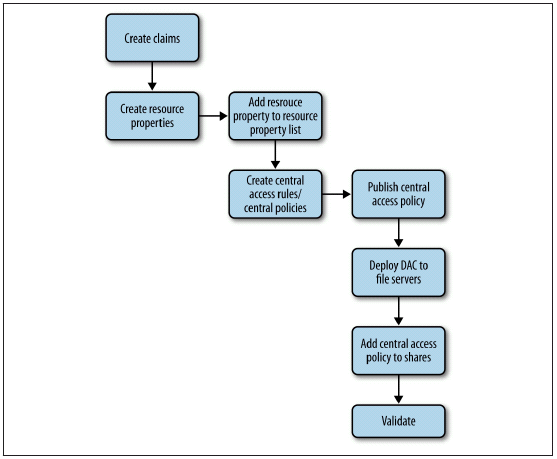
What is Dynamic Access Control?
Controlling access and ensuring compliance are essential components of IT systems in today’s business environment. Windows Server 2012 includes enhancements that provide improved authorization for file servers to control and audit who is able to access data on them. These enhancements are described under the umbrella name of Dynamic Access Control and enable automatic and manual classification of files, central access policies for controlling access to files, central audit policies for identifying who accessed files, and the application of Rights Management Services (RMS) protection to safeguard sensitive information.
Dynamic Access Control is enabled in Windows Server 2012 through the following new features:
- A new authorization and audit engine that supports central policies and can process conditional expressions
- A redesigned Advanced Security Settings Editor that simplifies configuration of auditing and determination of effective access.
- Kerberos authentication support for user and device claims
- Enhancements to the File Classification Infrastructure (FCI) introduced previously in Windows Server 2008 R2
- RMS extensibility to allow partners to provide solutions for applying Windows Server– based RMS to non-Microsoft file types
There is one good rule of thumb to remember when you’re deploying DAC into existing
Windows networks: NTFS permissions won’t give more access than a claims-based rule
allows, and a claims-based rule won’t give more permission than NTFS allows
Instructions
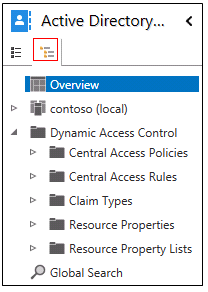
Step 1 – Open Active Directory Administrative Center
- Click Server Manager.
- Click Tools, and then click Active Directory Administrative Center.
- NOTE: Active Directory Administrative Center provides functionality that is separate from, but overlapping with Active Directory Users and Computers.
- Click the Tree View icon to simplify navigation
Step 2 – Configure claim types for users
In this step, you will add two existing Active Directory attributes to the list of attributes which can be used when evaluating Dynamic Access Control. The user’s country value and department value will be part of the calculation that determines if they have access to specific files.
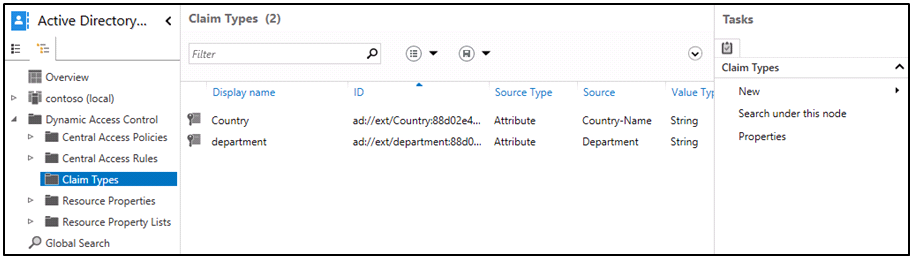
- In Active Directory Administrative Center, expand Dynamic Access Control, and then click Claim Types.
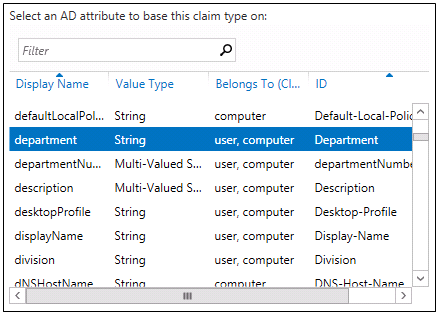
- Click New, and then click Claim Type.
- In the Source Attribute list, click Department, and then click OK.
- NOTE: This uses the existing Active Directory attribute.
- Click New, and then click Claim Type.
- In the Source Attribute list, click C, and then in Display name, type Country.
- NOTE: This uses the existing Active Directory attribute.
- Click OK.
Step 3 – Configure resource properties for files
In this step, you will configure the properties which will be downloaded by file servers and used to classify files. Future dynamic access control rules will compare user attribute values with resource properties. The list of resource properties is predefined by Microsoft as a starter set of properties that can be used by most organizations. You can enable existing properties or create new ones. You will add a resource property to match the country claim, and then enable the existing department property to match the department claim
- In Active Directory Administrative Center, click Resource Properties.
- Click New, and then click Resource Property.
- In Display name, type Country.
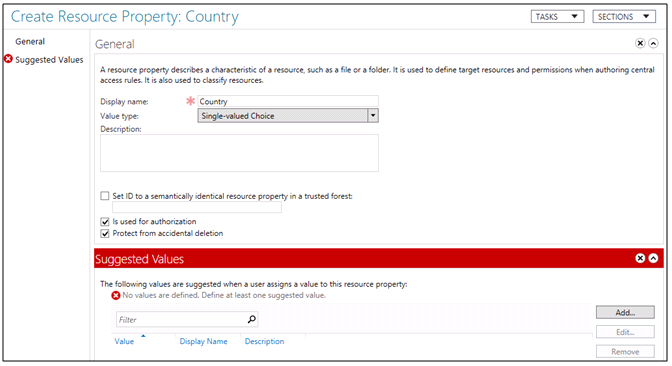
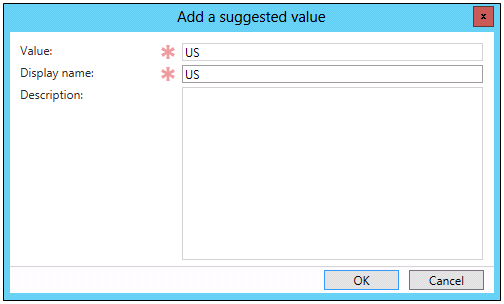
- Click Add.
- In Value and Display Name, type US, and then click OK.
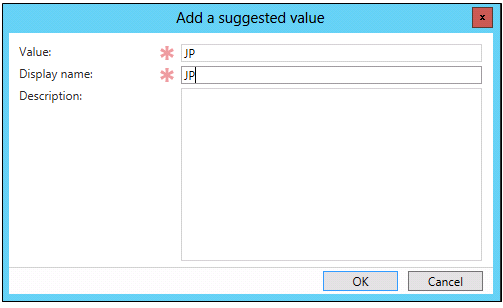
- Click Add.
- In Value and Display Name, type JP, and then click OK.
- Click OK
- NOTE: The Country property is now listed and is enabled.

- In the Resource Properties, under ID, locate the Department_MS property.
- Click Department_MS, and then click Enable
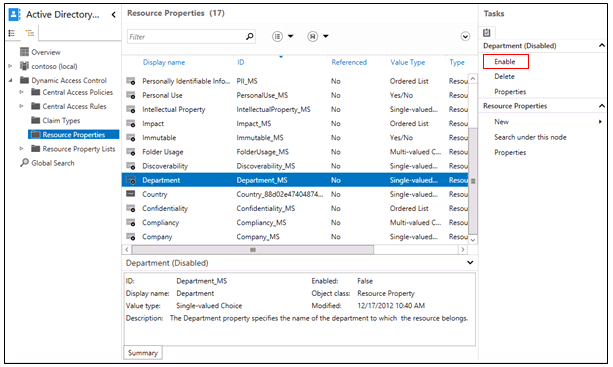
- NOTE: The Country property is now listed and is enabled.
Step 4 – Add resource properties to the global list
Each resource property must be added to at least one resource property list before it is downloaded by file servers. The global resource property list is downloaded by all file servers; however individual lists can be created and delivered to specific file servers using Group Policy.
- In Active Directory Administrative Center, click Resource Property Lists.
- Click Add resource properties.
- Select Country and Department, and then click the Add button (>>).
- Click OK.

Step 5 – Create a new central access rule
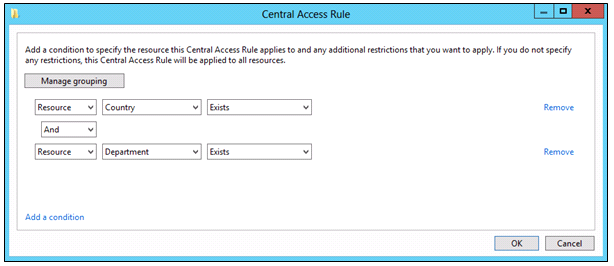
In this step, you will create a new central access rule. This is similar to an access control list (ACL) in that it describes which conditions must be met in order for file access to be granted. In this specific rule, you will require that the user accounts, department, and country attributes match the value of the file’s department and country attributes prior to access being granted
- In Active Directory Administrative Center, click Central Access Rules.
- Click New, and then click Central Access Rule.
- In Name, type Department-Country-Match-Required.
- Under Target Resources, click Edit.
- Click Add a condition.
- Add the condition Resource-Country-Exists.
- Click Add a condition.
- Add the condition Resource-Department-Exists.
- Click OK.
- In Permissions, select Use the following permissions as current permissions.
- NOTE: This setting enforces dynamic access control. The default setting will only create audit log entries and is used for impact analysis prior to implementation.
- In Permissions, click Edit.
- Click Add.
- Click Select a principal, and then type Authenticated.
- NOTE: This will automatically select Authenticated Users.
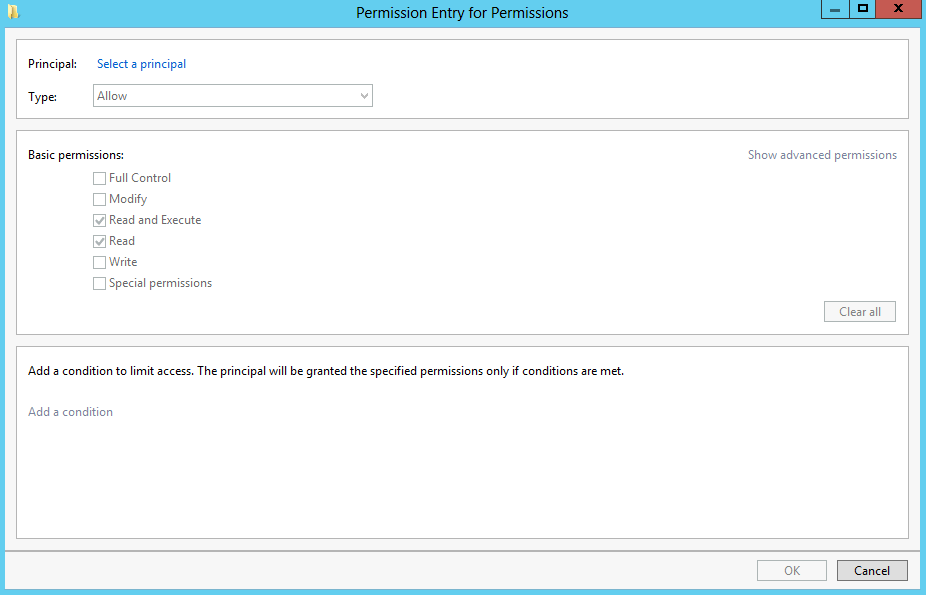
- Click OK.
- In Permissions, check the Full Control check box.
- Click Add a condition.
- Add the condition User-Country-Equals-Resource-Country.
- Click Add a condition.
- Add the condition User-Department-Equals-Resource-Department.
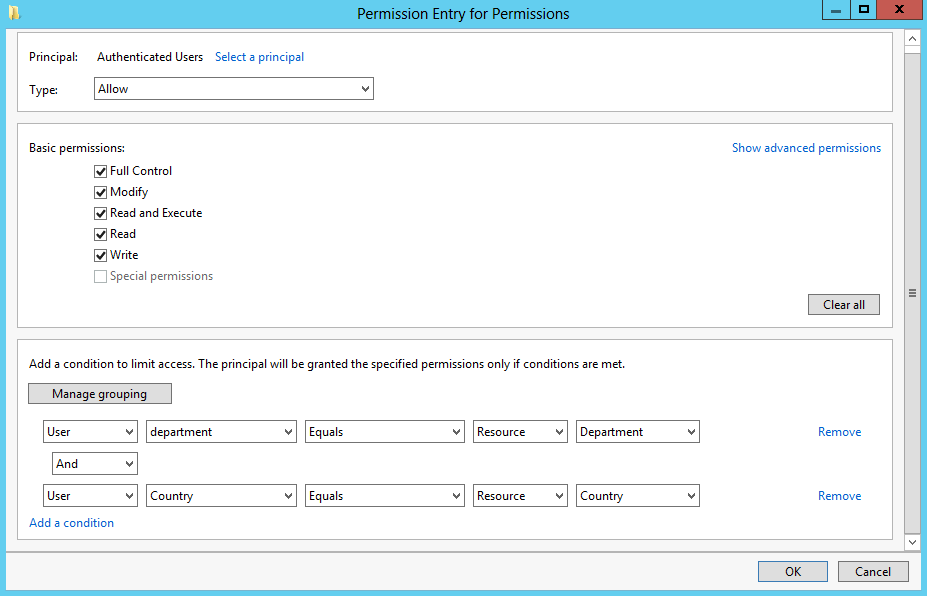
- IMPORTANT: In creating this rule, the list of attributes for the user is generated by the list of attributes used for claim types. The list of attributes for the resource is generated by the list of enabled resource properties.
- Click OK three times to return to Active Directory Administrative Center.
Step 6 – Create a central access policy
In this step, you will take the new rule and add it to a central access policy. A central access policy is a group of rules that are enforced as a unit. A file or folder can have only one central access policy applied to it.
- In Active Directory Administrative Center, click Central Access Policies.
- Click New, and then click Central Access Policy.
- In Name, type Contoso File Server Policy, and then click Add.
- Click Department-Company-Match-Required, and then click the Add button (>>)

- Click OK.
- Click OK.
Step 7 – Publish the central access policy with Group Policy
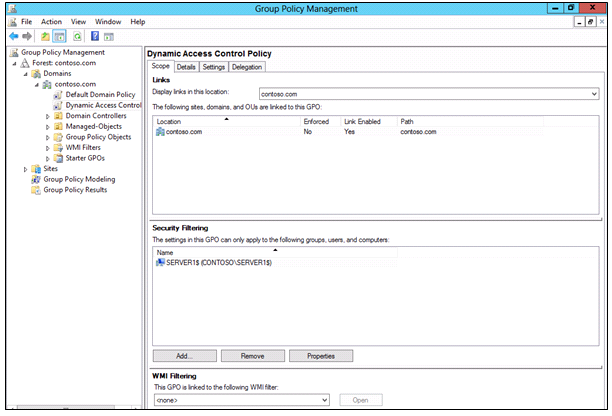
In this step, you will create a new Group Policy Object (GPO) to deliver the central access policy to your file servers. This will make the policy available, but will not enforce it on individual files or folders.
- Open Server Manager.
- On the Tools menu, click Group Policy Management.
- Under Domains, click Contoso.com.
- Click Action, and then click Create a GPO in this domain and link it here.
- Type Dynamic Access Control Policy, and then click OK.
- Expand Contoso.com, click Dynamic Access Control Policy, and then click OK.
- In Security Filtering, click Authenticated Users, click Remove, and then click OK.
- Click Add.
- Click Object Types, check Computers, and then click OK.
- Type Server1, and then click OK.
- NOTE: We are limiting this GPO to be applied only on Server1.
- Right-click Dynamic Access Control Policy, and then click Edit.
- Navigate to Computer Configuration/Policies/Windows Settings/Security Settings/File System, and then click Central Access Policy.
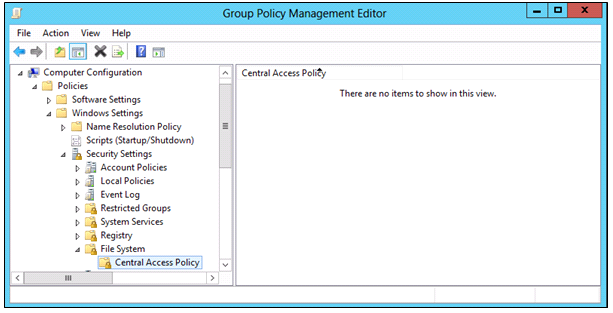
- On the Action menu, click Manage Central Access Policies.
- Click Contoso File Server Policy, and then click Add.

Step 8 – Enable Kerberos armoring for domain controllers
In this step, you will enable Kerberos armoring for domain controllers, which ensures that Kerberos tickets contain the required claims information which can then be evaluated by file servers.
- In Group Policy Management Console, navigate to Contoso.com, and then click Default Domain Policy.
- Click OK.
- On the Action menu, click Edit.
- Navigate to Computer Configuration/Policies/Administrative Templates/System/KDC.
- Click KDC Support for claims, compound authentication, and Kerberos armoring.
- NOTE: This setting must be applied to all domain controllers in your organization to extend the Kerberos protocol to support Dynamic Access Control. You can do this in any manner which is appropriate for your organization.
- Kerberos armoring addresses security concerns that dogged Kerberos authentication,
such as vulnerability to brute force attacks and spoofing. With Kerberos armoring, a
secured tunnel is created between a domain client and a domain controller

- On the Action menu, click Edit. Select Enabled
- Click OK.
- Navigate to Computer Configuration/Policies/Administrative Templates/System/Kerberos.
- Click Kerberos client support for claims, compound authentication, and Kerberos armoring.
- NOTE: This setting must be applied to all clients in your organization to extend the Kerberos protocol to support Dynamic Access Control. You can do this in any manner which is appropriate for your organization.
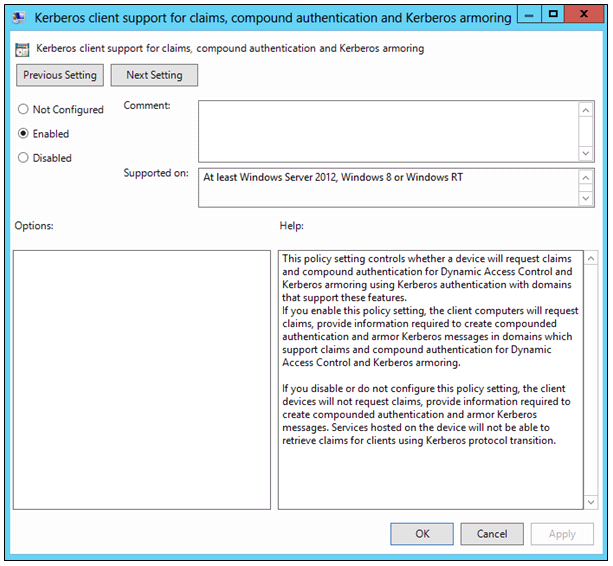
- On the Action menu, click Edit > Enabled
- Click OK.
- Close Group Policy Management Editor.
Step 9 – Deploying a File Server with Dynamic Access Control
In this exercise, you will install the required components for Dynamic Access Control on a file server, and then configure the resources properties of a folder.
Install the file server roles and role features
In this step, you will install the file server role and the file server resource manager role service.
- Open Server Manager.
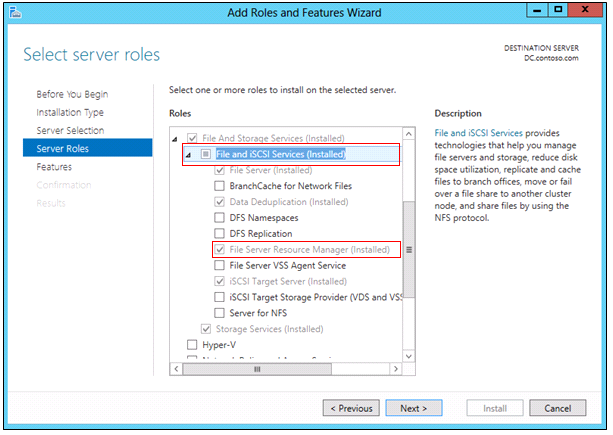
- In Server Manager, click Add Roles and Features.
- Click Next at each step of the wizard until you reach the Select server roles page.
- Expand File and Storage Services (Installed).
- Check File and iSCSI Services, and then expand File and iSCSI Services.
- NOTE: File Server Resource Manager is required to manage DAC properties locally
Step 10 – Add classification data to the file share
In this step, you will classify the files in the file share by adding and configuring the resource properties you defined in Step 1
- In Windows Explorer, navigate to C:\Shares on the File Server
- Right-click CorpData, and then click Properties.
- Click the Classification tab.
- NOTE: Note that the two defined resource properties are available.
- IMPORTANT: If you do not see Country and Department, run the Windows PowerShell command Update-FSRMClassificationPropertyDefinition, as this will force the update to occur. You will need to reopen the properties box after this command.
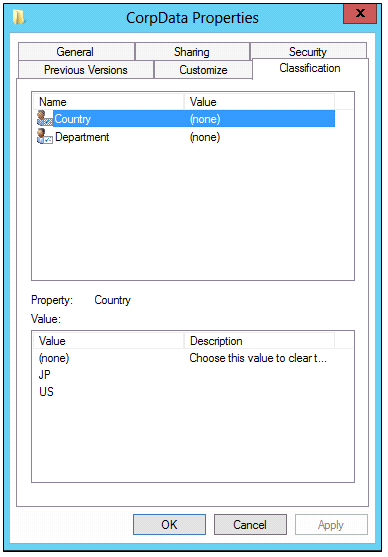
- In CorpData Properties, click Country, click JP, and then click Apply.
- Click Department, and then click Finance.
- NOTE: The department list is present because the resource property Department is predefined by Microsoft and contains this set of default department names.
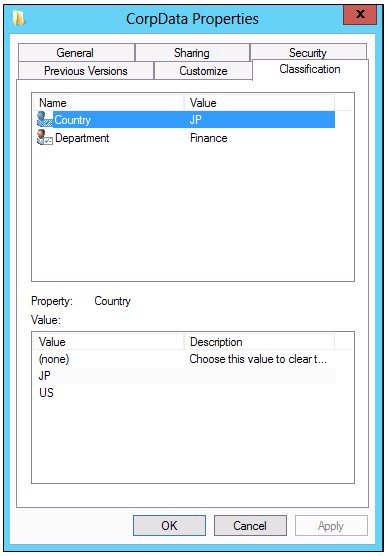
- Click Apply and leave the Properties window open
Step 11 – Add the central access policy to the CorpData folder
In this step, you will configure the CorpData folder to use the central policy you created in Step 1 as part of the access control evaluation process.
- Click Windows PowerShell.
- Type GPUpdate /Force, and then press ENTER. Wait for Group Policy to refresh.
- NOTE: This is required to ensure the central policy defined by the Dynamic Access Control Policy GPO is applied to this system. Under normal circumstances, the regular group policy refresh would perform this step.
- Switch to the CorpData Properties window.
- On the Security tab, click Advanced.
- Click Central Policy, and then click Change.
- Select Contoso File Server Policy, and then click Apply.
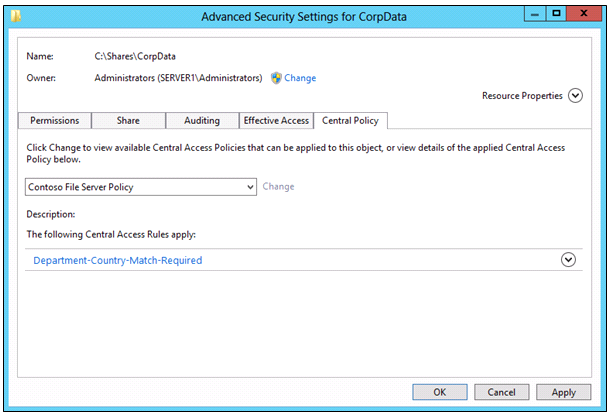
- NOTE: You can use this screen to review the policy rules and the conditions when selecting the policy.

