What is vSphere Authentication Proxy?
When you use the vSphere Authentication Proxy, you do not need to transmit Active Directory credentials to the host. Users supply the domain name of the Active Directory server and the IP address of the authentication proxy server when they add a host to a domain.
Step 1 – Installing the vSphere Authentication Proxy Service
To use the vSphere Authentication Proxy service (CAM service) for authentication, you must install the service on a host machine.
You can install the vSphere Authentication Proxy on
- The same machine as the associated vCenter Server
- Or on a different machine that has a network connection to the vCenter Server.
- The vSphere Authentication Proxy is not supported with vCenter Server versions earlier than version 5.0.
The vSphere Authentication Proxy service binds to an IPv4 address for communication with vCenter Server, and does not support IPv6. vCenter Server can be on an IPv4-only, IPv4/IPv6 mixed-mode, or IPv6-only host machine, but the machine that connects to vCenter Server through the vSphere Client must have an IPv4 address for the vSphere Authentication Proxy service to work.
Be Aware
At the start of the install, you will get this message if you want to install this on the same server as vCenter Server
Read this weblink
Prerequisites
- Verify that you have administrator privileges on the host machine where you install the vSphere Authentication Proxy service.
- Verify that the host machine has Windows Installer 3.0 or later.
- Verify that the host machine has a supported processor and operating system. The vSphere Authentication Proxy supports the same processors and operating systems as vCenter Server.
- Verify that the host machine has a valid IPv4 address. You can install vSphere Authentication Proxy on an IPv4-only or IPv4/IPv6 mixed-mode host machine, but you cannot install vSphere Authentication Proxy on an IPv6-only host machine.
- If you are installing vSphere Authentication Proxy on a Windows Server 2008 R2 host machine, download and install the Windows hotfix described in Windows KB Article 981506 on the support.microsoft.com Web site. If this hotfix is not installed, the Authentication Proxy Adapter fails to initialize. This problem is accompanied by error messages in camadapter.log similar to Failed to bind CAM website with CTL and Failed to initialize CAMAdapter.
Procedure
- On the host machine where you will install the vSphere Authentication Proxy service, install the .NET Framework 3.5.
- Install IIS
- Install vSphere Auto Deploy.
- You do not have to install Auto Deploy on the same host machine as the vSphere Authentication Proxy service.
- Add the host machine where you will install the authentication proxy service to the domain.
- Use the Domain Administrator account to log in to the host machine.
- In the software installer directory, double-click the autorun.exe file to start the installer.
- Select VMware vSphere Authentication Proxy and click Install.
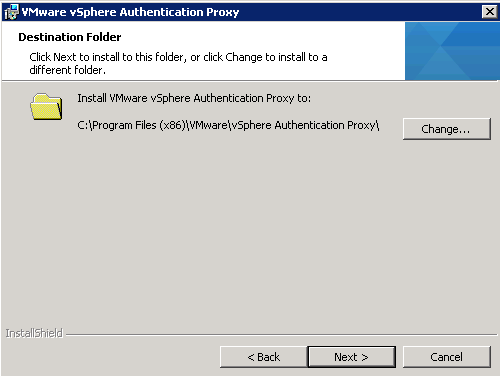
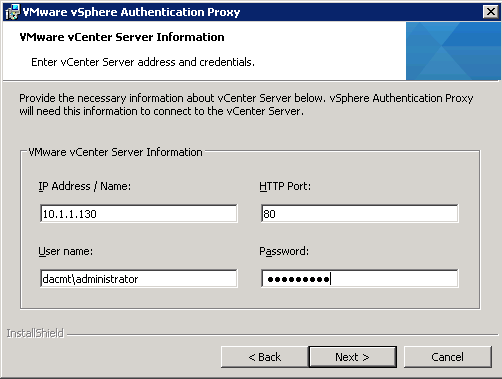
- Follow the wizard prompts to complete the installation.
- Click Next
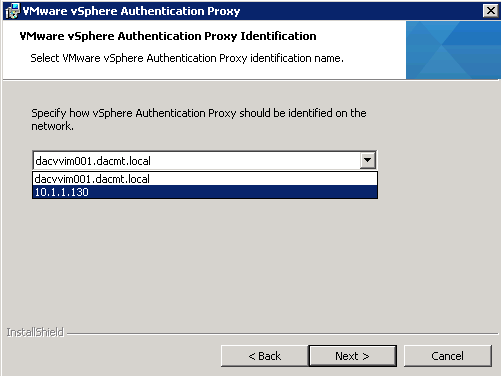
- Be careful on the next screen. There seems to be a bug where if you select the FQDN over the IP Address, it causes problems later on where something seems to truncate the FQDN which can be seen in the camadapter.log (as seen in the screenprint below so choose IP Address for now. This is what the hotfix is meant to fix but if you are up to date with Updates etc, it will say the update is not applicable. If you select the FQDN, you will find at the end of the procedure where you finally join a host to the domain that you will get this error message
- “The specified vSphere Authentication Proxy server is not reachable, or has
denied access to the service.”
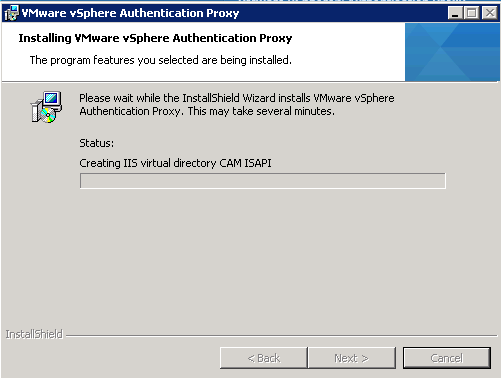
- Finish the Installation
- During installation, the authentication service registers with the vCenter Server instance where Auto Deploy is registered.
- The authentication proxy service is installed on the host machine.
- NOTE When you install the vSphere Authentication Proxy service, the installer creates a domain account with appropriate privileges to run the authentication proxy service. The account name begins with the prefix CAM and has a 32-character, randomly generated password associated with it. The password is set to never expire.
- Do not change the account settings.
Step 2 – Configure a Host to use the vSphere Authentication Proxy for Authentication
After you install the vSphere Authentication Proxy service (CAM service), you must configure the host to use the authentication proxy server to authenticate users.
Procedure for IIS6
- Use the IIS manager on the host to set up the DHCP range.
- Setting the range allows hosts that are using DHCP in the management network to use the authentication proxy service.
- Browse to Computer Account Management Website.
- Right-click the virtual directory CAM ISAPI.
- Select Properties > Directory Security > Edit IP Address and Domain
Name Restrictions > Add Group of Computers. - If a host is not provisioned by Auto Deploy, change the default SSL certificate to a self-signed certificate or to a certificate signed by a commercial certificate authority (CA).
Procedure for IIS7
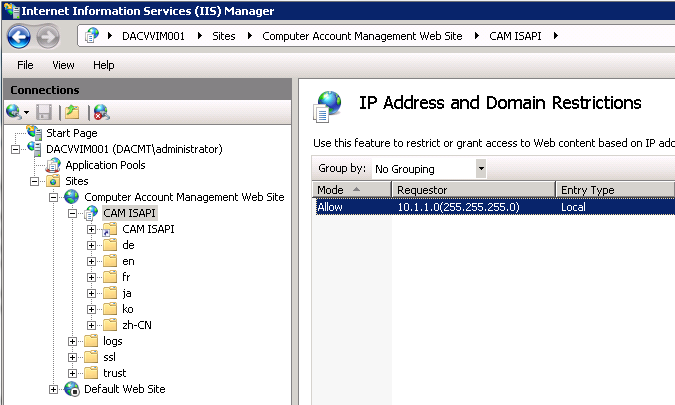
- Use the IIS manager on the host to set up the DHCP range.
- Setting the range allows hosts that are using DHCP in the management network to use the authentication proxy service.
- Browse to Computer Account Management Website.
- Click the CAM ISAPI virtual directory in the left pane and open IPv4
Address and Domain Restrictions. - Select Add Allow Entry > IPv4 Address Range.
- If a host is not provisioned by Auto Deploy, change the default SSL certificate to a self-signed certificate or to a certificate signed by a commercial certificate authority (CA).
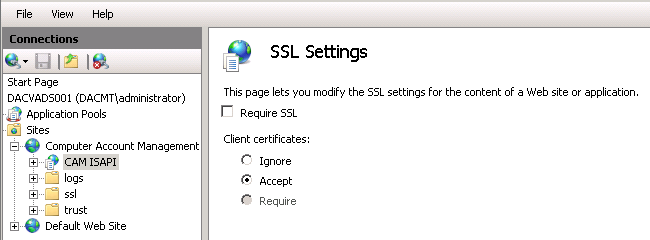
- Also set the following settings
Step 3 – Authenticating vSphere Authentication Proxy to ESXi
Before you use the vSphere Authentication Proxy to connect ESXi to a domain, you must authenticate the vSphere Authentication Proxy server to ESXi. If you use Host Profiles to connect a domain with the vSphere Authentication Proxy server, you do not need to authenticate the server. The host profile authenticates the proxy server to ESXi.
To authenticate ESXi to use the vSphere Authentication Proxy, export the server certificate from the vSphere Authentication Proxy system and import it to ESXi. You need only authenticate the server once.
NOTE By default, ESXi must authenticate the vSphere Authentication Proxy server when using it to join a domain. Make sure that this authentication functionality is enabled at all times. If you must disable authentication, you can use the Advanced Settings dialog box to set the
UserVars.ActiveDirectoryVerifyCAMCertifcate attribute to 0.
Procedure for IIS6
- On the authentication proxy server system, use the IIS Manager to export the certificate.
- Right-click Computer Account Management Website.
- Select Properties > Directory Security > View Certificate.
- Select Details > Copy to File.
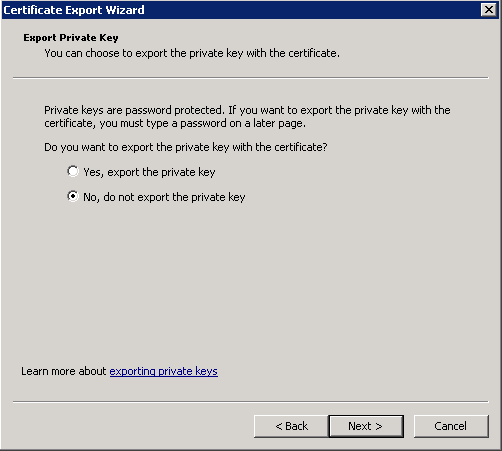
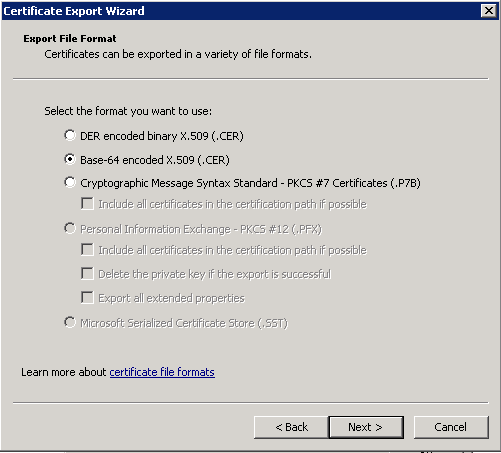
- Select the options Do Not Export the Private Key and Base-64 encoded X.509 (CER).
Procedure for IIS7
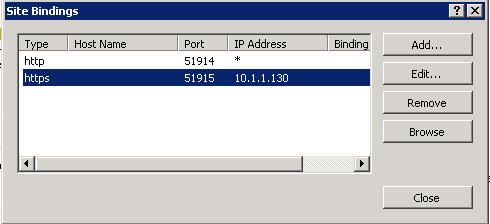
- On the authentication proxy server system, use the IIS Manager to export the certificate.
- Click Computer Account Management Web Site in the left pane.
- Select Bindings to open the Site Bindings dialog box.
- Select https binding.
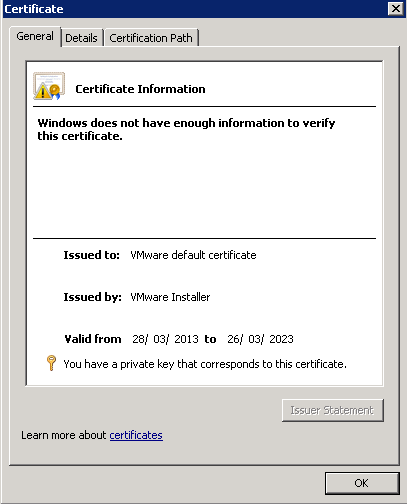
- Select Edit > View SSL Certificate.
- Select Details > Copy to File.
- Select the options Do Not Export the Private Key and Base-64 encoded X.509 (CER)
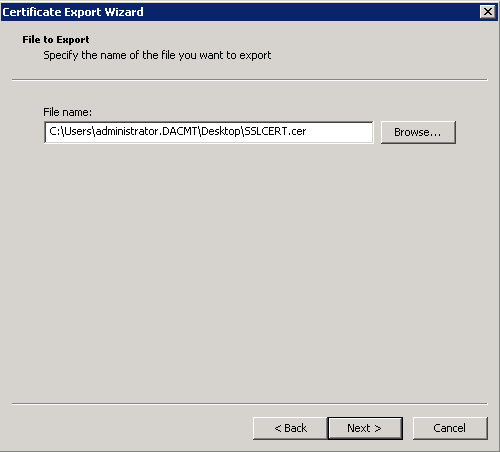
- Choose a name for the exported cert and a location to save it
- Finish
Step 4 – Import a vSphere Authentication Proxy Server Certificate to ESXi
To authenticate the vSphere Authentication Proxy server to ESXi, upload the proxy server certificate to ESXi.
You use the vSphere Client user interface to upload the vSphere Authentication Proxy server certificate to ESXi.
Procedure
- Select a host in the vSphere Client inventory and click the Summary tab.
- Upload the certificate for the authentication proxy server to a temporary location on ESXi.
- Under Resources, right-click a Datastore and select Browse Datastore.
- Select a location for the certificate and select the Upload File button.
- Browse to the certificate and select Open.
- Select the Configuration tab and click Authentication Services.
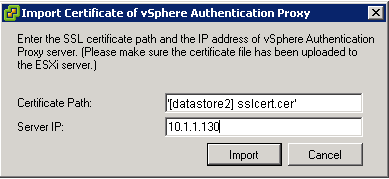
- Click Import Certificate.
- Enter the full path to the authentication proxy server certificate file on the host and the IP address of the authentication proxy server.
- Use the form [Datastore name] file path to enter the path to the proxy server.
- Click Import.
Step 5 – Use vSphere Authentication Proxy to Add a Host to a Domain
When you join a host to a directory service domain, you can use the vSphere Authentication Proxy server for authentication instead of transmitting user-supplied Active Directory credentials. You can enter the domain name in one of two ways:
- n name.tld (for example, domain.com): The account is created under the default container.
- n name.tld/container/path (for example, domain.com/OU1/OU2): The account is created under a particular organizational unit (OU).
Prerequisites
- Verify that the vSphere Client is connected to a vCenter Server system or to the host.
- If ESXi is configured with a static IP address, verify that its associated profile is configured to use the vSphere Authentication Proxy service to join a domain so that the authentication proxy server can trust the ESXi IP address.
- If ESXi is using a self-signed certificate, verify that the host has been added to vCenter Server. This allows the authentication proxy server to trust ESXi.
- If ESXi is using a CA-signed certificate and is not provisioned by Auto Deploy, verify that the CA certificate has been added to the local trust certificate store of the authentication proxy server as described in “Configure a Host to Use the vSphere Authentication Proxy for Authentication,” on page 64 of the vSphere 5 Security Guide
- Authenticate the vSphere Authentication Proxy server to the host as described in “Authenticating vSphere Authentication Proxy to ESXi,” on page 65 of the vSphere 5 Security Guide
Procedure
- In the vSphere Client inventory, select the host.
- Select the Configuration tab and click Authentication Services.
- Click Properties.
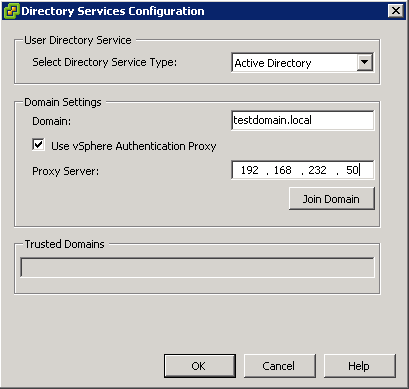
- In the Directory Services Configuration dialog box, select the directory server from the drop-down menu.
- Enter a domain.
- Use the form name.tld or name.tld/container/path.
- Select the Use vSphere Authentication Proxy check box.
- Enter the IP address of the authentication proxy server.
- Click Join Domain.
- Click OK.
View vSphere Authentication Proxy Settings
You can verify the IP address and the port where the proxy server listens.
After you set up a vSphere Authentication Proxy service on a host machine, you can view the host machine address and port information in the vSphere Client.
Procedure
- In the vSphere Client, select Inventory > Administration > vSphere Authentication Proxy.
- The VMware vSphere Authentication Proxy page is displayed.
Log Location
C:\ProgramData\VMware\vSphere Authentication Proxy\logs







Nice article , thank you for your time.