Archive for February 2013

Manually download updates to a repository

images

Import Patches Manually

Instead of using a shared repository or the Internet as a download source for patches and extensions, you can import patches and extensions manually by using an offline bundle.

You can import offline bundles only for hosts that are running ESX/ESXi 4.0 or later.

Prerequisites

  • The patches and extensions you import must be in ZIP format.
  • To import patches and extensions, you must have the Upload File privilege. For more information about managing users, groups, roles, and permissions, see vCenter Server and Host Management. For a list of Update Manager privileges and their descriptions, see Update Manager Privileges.
  • Connect the vSphere Client to a vCenter Server system with which Update Manager is registered, and on the Home page, click Update Manager under Solutions and Applications. If your vCenter Server system is part of a connected group in vCenter Linked Mode, you must specify the Update Manager instance to use, by selecting the name of the corresponding vCenter Server system in the navigation bar.

Procedure

  • On the Configuration tab, under Settings, click Download Settings.
  • Click Import Patches at the bottom of the Download Sources pane.
  • On the Select Patches File page of the Import Patches wizard, browse to and select the .zip file containing the patches you want to import.
  • Click Next and wait until the file upload completes successfully.
  • After a successful upload, the Confirm Import page appears.
  • In case of upload failure, check whether the structure of the .zip file is correct or whether the Update Manager network settings are set up correctly.
  • On the Confirm Import page of the Import Patches wizard, review the patches that you have selected to import into the Update Manager repository.
  • Click Finish.
  • You imported the patches into the Update Manager patch repository. You can view the imported patches on the Update Manager Patch Repository tab.

Configure Smart Rebooting and upgrade vApps

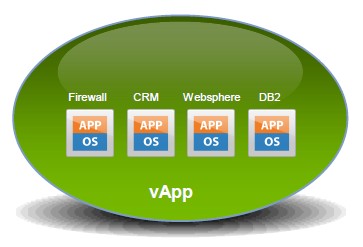
vapppic

Configure Smart Rebooting

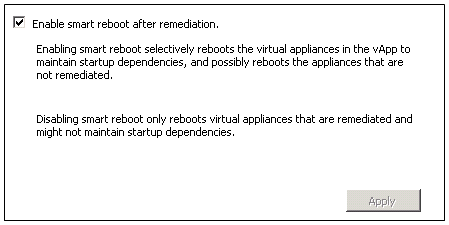
Smart rebooting selectively restarts the virtual appliances and virtual machines in the vApp to maintain start-up dependencies. You can enable and disable smart rebooting of virtual appliances and virtual machines in a vApp after remediation.

A vApp is a pre-built software solution, consisting of one or more virtual machines and applications, which are potentially operated, maintained, monitored, and updated as a unit.

Smart rebooting is enabled by default. If you disable smart rebooting, the virtual appliances and virtual machines are restarted according to their individual remediation requirements, disregarding existing startup dependencies.

Prerequisites

Connect the vSphere Client to a vCenter Server system with which Update Manager is registered, and on the Home page, click Update Manager under Solutions and Applications. If your vCenter Server system is part of a connected group in vCenter Linked Mode, you must specify the Update Manager instance to use, by selecting the name of the corresponding vCenter Server system in the navigation bar.

Procedure

  • On the Configuration tab, under Settings, click vApp Settings.
  • Deselect Enable smart reboot after remediation to disable smart rebooting.

vapp2

Remediating vApps

  1. Enter the VMs and Templates view (Ctrl + Shift + V)
  2. Highlight the vApp to upgrade
  3. Click on the Update Manager tab
  4. Right click within the frame, Attached Baseline Groups, and select Attach
  5. Select the Upgrade Baseline for your vApp, click Attach
  6. Click the Remediate button
  7. Select the Baseline to remediate against
  8. Select the appropriate virtual machines
  9. Click Next
  10. If necessary you may now adjust the schedule settings, task description, and task name. Optionally, if you are remediating against a single Upgrade VMware Tools to Match Host baseline, you may choose to Upgrade VMware Tools on power cycle. Click Next.
  11. At the Rollback Options screen, you may choose to snapshot the virtual machine before remediation. You may also choose to delete the snapshot after a successful remediation or keep the snapshot for a determined period of time. Enter the snapshot details and if you want to snapshot the memory. Click Next.
  12. At the Ready to Complete screen, review the scheduled remediation actions, and the click Finish

Link to vApp Information

http://www.electricmonk.org.uk/2012/05/15/vmware-vapps/

Configure a shared repository

images

Configure Update Manager to Use the Internet as a Download Source

If your deployment system is connected to the Internet, you can directly download ESX/ESXi patches and extensions, as well as virtual appliance upgrades.

Procedure

  • Connect the vSphere Client to a vCenter Server system with which Update Manager is registered, and on the Home page, click Update Manager under Solutions and Applications.
  • If your vCenter Server system is part of a connected group in vCenter Linked Mode, you must specify the Update Manager instance to use, by selecting the name of the corresponding vCenter Server system in the navigation bar.
  • On the Configuration tab, under Settings, click Download Settings.
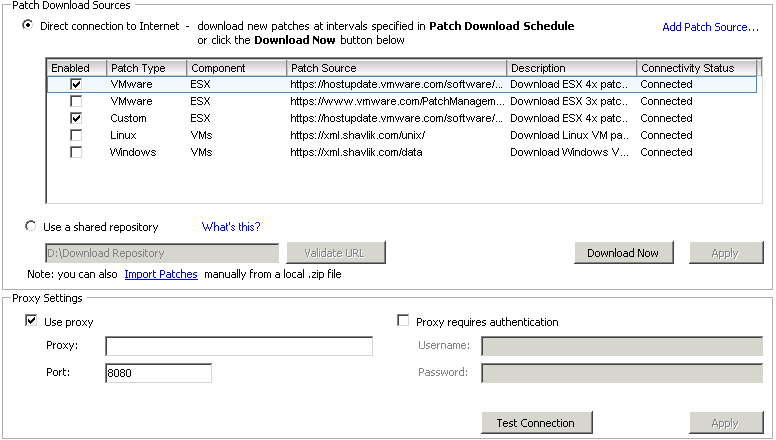
  • In the Download Sources pane, select Direct connection to Internet.
  • Choose the type of updates to download by selecting or deselecting the check box next to the type of update.
  • You can choose whether to download virtual appliance upgrades and host patches and extensions. You cannot edit the download source location of the default ESX/ESXi patches and extensions. You can only enable or disable downloading.
  • (Optional) Add an additional third-party download source for virtual appliances or hosts that are running ESX/ESXi 4.0 and later.
  • Click Apply.
  • Click Download Now to run the VMware vSphere Update Manager Update Download task
  • All notifications and updates are downloaded immediately even if the Enable scheduled download checkbox is not selected in Configuration > Notification Check Schedule or Configuration > Download Schedule, respectively
updatemanager

Add a new Download Source

If you use the Internet as a download source for updates, you can add a third-party URL address to download virtual appliance upgrades, as well as patches and extensions for hosts that are running ESX/ESXi 4.0 and later.

Prerequisites

Connect the vSphere Client to a vCenter Server system with which Update Manager is registered, and on the Home page, click Update Manager under Solutions and Applications. If your vCenter Server system is part of a connected group in vCenter Linked Mode, you must specify the Update Manager instance to use, by selecting the name of the corresponding vCenter Server system in the navigation bar.

Procedure

  • On the Configuration tab, under Settings, click Download Settings.
  • In the Download Sources pane, select Direct connection to Internet.
  • Click Add Download Source.
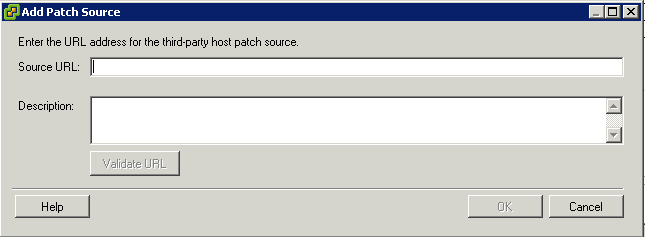
  • In the Add Download Source window, type the new download source URL.
updatemanager2

Update Manager supports both HTTP and HTTPS URL addresses. You should specify HTTPS URL
addresses, so that the data is downloaded securely. The URL addresses that you add must be complete and contain the index.xml file, which lists the vendor and the vendor index.
Note: The proxy settings for Update Manager are applicable to third-party URL addresses too. You can configure the proxy settings from the Proxy Settings pane.

  • (Optional) Type a URL description.
  • Click Validate URL to verify that the URL is accessible.
  • Click OK.
  • Click Apply.
  • Click Download Now to run the VMware vSphere Update Manager Update Download task.
  • All notifications and updates are downloaded immediately even if the Enable scheduled download checkbox is not selected in Configuration > Notification Check Schedule or Configuration > Download Schedule, respectively.
  • The location is added to the list of Internet download sources.

Use a Shared Repository as a Download Source 

You can configure Update Manager to use a shared repository as a source for downloading virtual appliance upgrades, as well as ESX/ESXi patches, extensions, and notifications.

A shared repository is a location within your firewall where UMDS downloads patches or VA upgrades from various vendors. When the patches or VA upgrades are required for remediation, the system retrieves them from the Shared Repository rather than from the internet. It lets you create secure environments and save time

Network Shares are not supported as Update Manager does not have access to Network shares. HTTP URLs and Local Disks only

Prerequisites

You must create the shared repository using UMDS and host it on a Web server or a local disk. The UMDS version you use must be of a version compatible with your Update Manager installation.

Once you have configured UMDS and downloaded updates to a certain folder on another server, you can run the following to export the updates from this server to the Update Manager server on vCenter Server by running the following command

  • vmware-umds -E –export-store \\vCenterserver\SharedFolder

where shared folder is a local disk folder on the vCenter Server

Procedure

  • On the Configuration tab, under Settings, click Download Settings.
  • In the Download Sources pane, select Use a shared repository.
  • Enter the path or the URL to the shared repository.
  • For example, C:\repository_path\, https://repository_path/, or http://repository_path/

In these examples, repository_path is the path to the folder to which you have exported the downloaded upgrades, patches, extensions, and notifications. In an environment where the Update Manager server does not have direct access to the Internet, but is connected to a machine that has Internet access, the folder can be on a Web server.

  • You can specify an HTTP or HTTPS address, or a location on the disk on which Update Manager is installed. HTTPS addresses are supported without any authentication.

IMPORTANT You cannot use folders located on a network drive as a shared repository. Update Manager does not download updates from folders on a network share either in the Microsoft Windows Uniform Naming Convention form (such as \\Computer_Name_or_Computer_IP\Shared), or on a mapped network drive (for example, Z:\).

  • Click Validate URL to validate the path.

IMPORTANT If the updates in the folder you specify are downloaded with a UMDS version that is not compatible with the Update Manager version you use, the validation fails and you receive an error message. You must make sure that the validation is successful. If the validation fails, Update Manager reports a reason for the failure. You can use the path to the shared repository only when the validation is successful.

  • Click Apply.
  • Click Download Now to run the VMware vSphere Update Manager Update Download task and to download the updates immediately.
  • The shared repository is used as a source for downloading upgrades, patches, and notifications.

um2

Install and Configure Update Manager Download Service

What is UMDS?

VMware vSphere Update Manager Download Service (UMDS) is an optional module of Update Manager. UMDS downloads upgrades for virtual appliances, patch metadata, patch binaries, and notifications that would not otherwise be available to the Update Manager server.

For security reasons and deployment restrictions, vSphere, including Update Manager, might be installed in a secured network that is disconnected from other local networks and the Internet. Update Manager requires access to patch information to function properly. In such an environment, you can install UMDS on a computer that has Internet access to download upgrades, patch binaries, and patch metadata, and then export the downloads to a portable media drive so that they become accessible to the Update Manager server.

In a deployment where the machine on which Update Manager is installed has no Internet access, but is connected to a server that has Internet access, you can automate the export process and transfer files from UMDS to the Update Manager server by using a Web server on the machine on which UMDS is installed.

UMDS 5.1 supports patch recalls and notifications. A patch is recalled if the released patch has problems or potential issues. After you download patch data and notifications with UMDS, and export the downloads so that they become available to the Update Manager server, Update Manager deletes the recalled patches and displays the notifications on the Update Manager Notifications tab.
Installing UMDS

Pre-Requisites

  • It will not install on a Windows 2008 R2 Server running as a DC
  • You cannot upgrade UMDS 4.x to UMDS 5.1, but under certain conditions you can perform a fresh installation of UMDS 5.1 and use an existing patch store from UMDS 4.x. You can install UMDS only on 64-bit machines.
  • Before installing UMDS, you must create a database instance and configure it to ensure that all tables are placed in it. You must configure a 32-bit DSN and test the DSN from ODBC. If you are using Microsoft SQL Server 2008 R2 Express, you can install and configure the database when you install UMDS
  • You should not install UMDS 5.1 with an existing UMDS 4.x download directory if your environment contains both Update Manager 4.x and Update Manager 5.x instances. In such a case, you need a UMDS 4.x and a UMDS 5.x installation on two separate machines, in order to export updates for the respective Update Manager versions.
  • UMDS and Update Manager must be installed on different machines
  • Ensure that the machine on which you install UMDS has Internet access

Procedure

  • Insert the VMware vSphere Update Manager installation DVD into the DVD drive of the Windows server that will host UMDS.
  • Browse to the umds folder on the DVD and run VMware-UMDS.exe. (One of the first folders you will see!)
  • Select the language for the installation and click OK
  • (Optional) If the wizard prompts you, install the required items such as Windows Installer 4.5. This step is required only if Windows Installer 4.5 is not present on your machine and you must perform it the first time you install a vSphere 5.x product. After the system restarts, the installer launches again.
  • Review the Welcome page and click Next.
  • Read the patent agreement and click Next.
  • Accept the terms in the license agreement and click Next.
  • Select the database options and click Next.
  • If you do not have an existing database, select Install a Microsoft SQL Server 2008 R2 Express instance (for small scale deployments).
  • If you want to use an existing database, select Use an existing supported database and select your database from the list of DSNs. If the DSN does not use Windows NT authentication, enter the user name and password for the DSN and click Next.
  • Enter the Update Manager Download Service proxy settings and click Next.
  • Select the Update Manager Download Service installation and patch download directories and click Next.
  • If you do not want to use the default locations, you can click Change to browse to a different directory. You can select the patch store to be an existing download directory from a previous UMDS 4.x installation and reuse the applicable downloaded updates in UMDS 5.1. After you associate an existing download directory with UMDS 5.1, you cannot use it with earlier UMDS versions.
  • (Optional) In the warning message about the disk free space, click OK.
  • Click Install to begin the installation.
  • Click OK in the Warning message notifying you that .NET Framework 3.5 SP1 is not installed.
  • The UMDS installer installs the prerequisite before the actual product installation.
  • Click Finish.
  • Reboot

Setting Up and Using UMDS

You can set up UMDS to download upgrades for virtual appliances, or patches and notifications for ESX/ESXi hosts. You can also set up UMDS to download ESX/ESXi 4.x and ESXi 5.x patch binaries, patch metadata, and notifications from third-party portals.

After you download the upgrades, patch binaries, patch metadata, and notifications, you can export the data to a Web server or a portable media drive and set up Update Manager to use a folder on the Web server or the media drive (mounted as a local disk) as a shared repository.

You can also set up UMDS to download ESX/ESXi 4.x and ESXi 5.x patches and notifications from third-party portals.

To use UMDS, the machine on which you install it must have Internet access. After you download the data you want, you can copy it to a local Web server or a portable storage device, such as a CD or USB flash drive.

The best practice is to create a script to download the patches manually and set it up as a Windows Scheduled Task that downloads the upgrades and patches automatically.

Set Up the Data to Download with UMDS

By default UMDS downloads patch binaries, patch metadata, and notifications for hosts. You can specify which patch binaries and patch metadata to download with UMDS.

  • Log in to the machine where UMDS is installed, and open a Command Prompt window.
  • Navigate to the directory where UMDS is installed.
  • The default location in 64-bit Windows is C:\Program Files (x86)\VMware\Infrastructure\Update Manager.
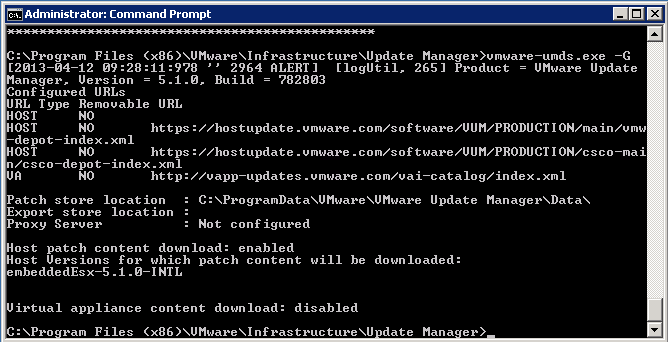
  • Check the setup by typing vmware-umds -G

umdsg

  • Specify the type of updates to download by using the commands below
  • vmware-umds.exe -s –enable-host –disable-va

UMDSEnable

  • Specify the updates to download by using the commands below to delete the versions you don’t want leaving version 5.1.0
  • vmware-umds.exe -s -d embeddedEsx-5.0.0
  • vmware-umds.exe -s -d embeddedEsx-4.1.0
  • vmware-umds.exe -s -d embeddedEsx-4.0.0
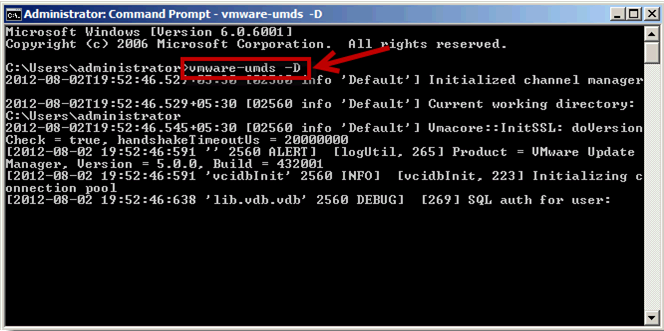
  • Next run vmware-umds.exe -D

umds1

  • Next we need to export the Downloaded Updates to a removable device which has been given the drive letter F:\
  • Type vmware-umds.exe -E –export-store F:\
  • Verify that all files are exported to the portable media drive, and then safely remove it and connect it to the machine on which the Update Manager server is installed.
  • Modify the Shared Repository Path in Update Manager to F:\
  • Note: The path can only contain one directory level, otherwise it will fail.  For example the path should be d:\repository, but it cannot be d:\repository\patches.  When it is finally exported you can then move the repository to a physical media or any portable storage device.

UMDS Commands

umds

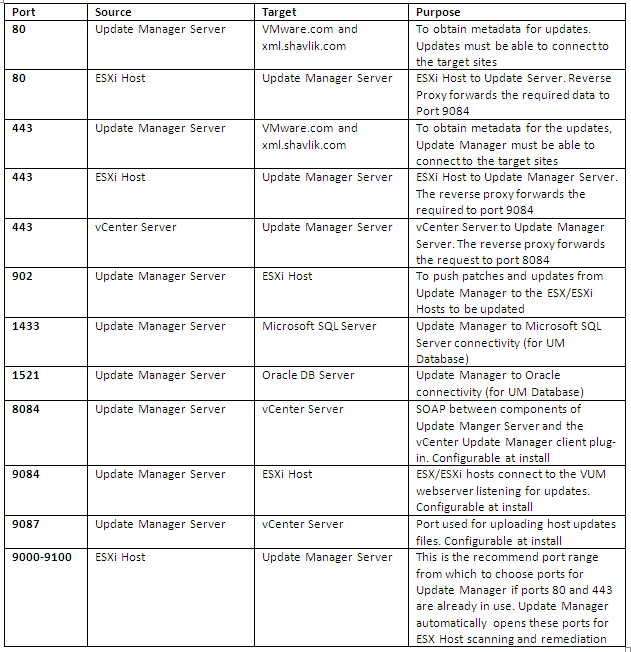
Identify Firewall Access Rules for Update Manager

images

Firewall Access Rules

If you access ESXi hosts through vCenter Server, you typically protect vCenter Server using a firewall. This firewall provides basic protection for your network.
A firewall might lie between the clients and vCenter Server. Alternatively, vCenter Server and the clients can be behind the firewall, depending on your deployment. The main point is to ensure that a firewall is present at what you consider to be an entry point for the system.

Update1

ESXi Security Guide

Please see Pages 23-25 for extra Port Information

ESXi Security Guide

Use Host Profiles to manage Answer Files

h2p

What is an Answer File?

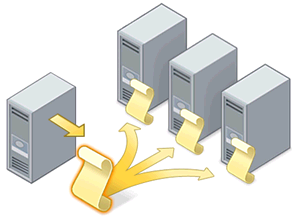
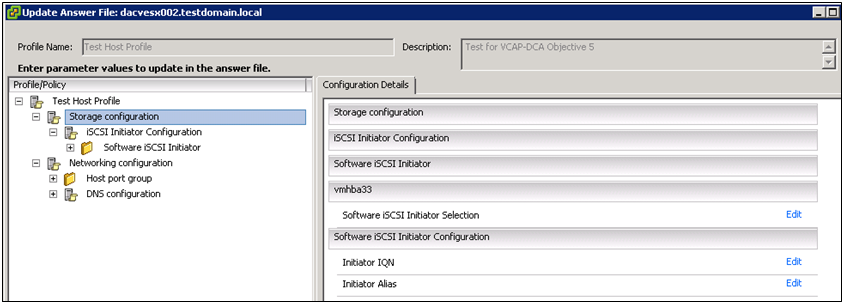
For hosts provisioned with Auto Deploy, the answer file contains the user input policies for a host profile. The file is created when the profile is initially applied to a particular host.
To apply a host profile to a host, the host must be placed into maintenance mode. During this process, the user is prompted to type answers for policies that are specified during host profile creation.
Placing the host into maintenance mode each time you apply a profile to the host can be costly and time consuming. A host provisioned with Auto Deploy can be rebooted while the host profile is attached to the host. After rebooting values stored in the answer file help the host provisioned with Auto Deploy to apply the profile. An answer file is created that contains a series of key value pairs for the user input options.

Check Answer File Status

The answer file status indicates the state of the answer file. The status of an answer file can be

  • Complete
  • Incomplete
  • Missing
  • Unknown

Prerequisites
The answer file status can only be checked when the host profile is attached to a host.

Procedure

  • In the host profiles view, click Check Answer File.

AnswerFileStatus

The Answer File Status for the host profile is updated. The status indicates one of the following states:

  • Incomplete The answer file is missing some of the required user input answers.
  • Complete The answer file has all of the user input answers needed.
  • Unknown The host and associated profile exist but the status

AnswerFile

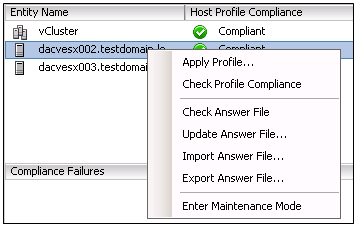
Update Answer File

  • Right click on a host or cluster and select Update Answer File

UpdateAnswerFile2

  • Adjust the Answer File

Use Host Profiles to deploy vDS and vStorage Policies

h2p

vDS Setup using Host Profiles

Host Profiles is the recommended method for deploying a vDS over a large population of similarly configured hosts.

vds

Considerations for using Host Profiles for Deploying vDS

  • Target hosts must be in Maintenance Mode. This means all VMs must be powered off or migrated to other hosts.
  • An ESX Host Profile can be applied to ESX and ESXi hosts. An ESXi Host Profile can only be applied to an ESXi Host. If you have a mix of ESX and ESXi hosts, then create the Host Profile from an ESX host. The Host Profile feature in vCenter Server is able to translate and apply the ESX Service Console definition to an ESXi VMkernel port for management access.

Process Overview

  • Create vDS (without any associated hosts)
  • Create Distributed Virtual Port Groups on vDS to match existing or required environment
  • Add host to vDS and migrate vmnics to dvUplinks and Virtual Ports to DV Port Groups
  • Delete Standard Switch from host
  • Create Host Profile of Reference Host
  • Place candidate host to have the profile applied in Maintenance Mode
  • Attach and apply host profile to candidate hosts
  • Migrate VM networking for VMs and take hosts out of Maintenance Mode.

Detailed Overview

For a more detailed description of the above steps read pages 24 to 28 of the document below from VMware

VMware vNetwork Distributed Switch: Migration and Configuration

http://www.vmware.com/files/pdf/techpaper/VMW-Host-Profiles-Tech-Overview.pdf

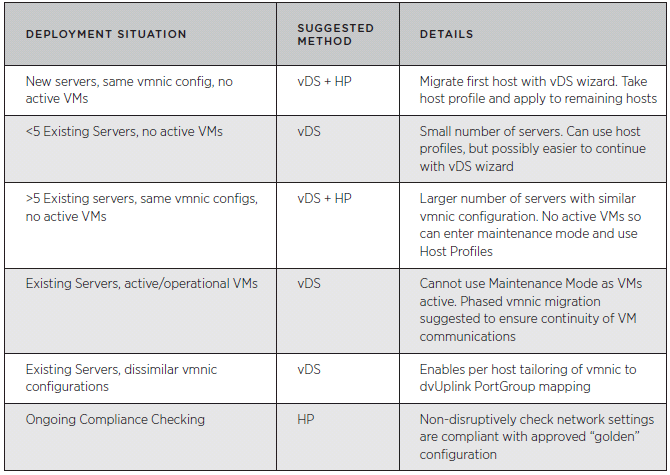
Summary of Migration Methods

The table below summarizes the deployment situations and suggested methods for deployment of the vNetwork Distributed Switch:

vds2

Use Host Profiles to deploy vStorage Policies

You can configure storage options, including

  • Native Multi-Pathing (NMP)
  • Pluggable Storage Architecture (PSA)
  • FCoE adapters
  • iSCSI adapters
  • NFS storage

Capture

Caveats

  • Use the vSphere CLI to configure or modify the NMP and PSA policies on a reference host first, and then extract the host profile from that host. If you use the Profile Editor to edit the policies, to avoid compliance failures, make sure that you thoroughly understand interrelationships between the NMP and PSA policies and the consequences of changing individual policies. For information on the NMP and PSA, see the vSphere Storage documentation.
  • Setting values for the Initiator IPv6 Address and Initiator IPv6 Prefix options in a host profile with independent hardware iSCSI adapters has no effect on the HBA because no independent iSCSi HBAs have IPv6 support.

Implement and Maintain Host Profiles

h2p

What are Host Profiles?

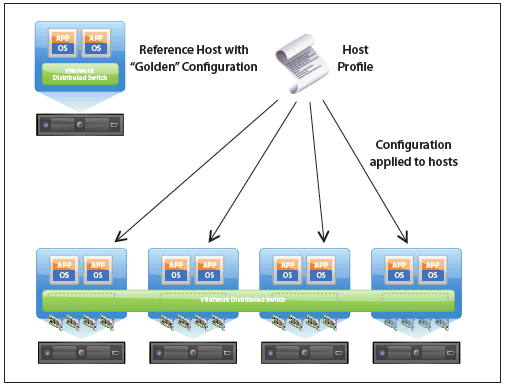
The host profiles feature creates a profile that encapsulates the host configuration and helps to manage the host configuration, especially in environments where an administrator manages more than one host or cluster in vCenter Server.
Host profiles eliminates per-host, manual, or UI-based host configuration and maintains configuration consistency and correctness across the datacenter by using host profile policies. These policies capture the blueprint of a known, validated reference host configuration and use this to configure networking, storage, security, and other settings on multiple hosts or clusters. You can then check a host or cluster against a profile’s configuration for any deviations.
Workflow
You perform host profiles tasks in a certain workflow order. You must have an existing vSphere installation with at least one properly configured host.

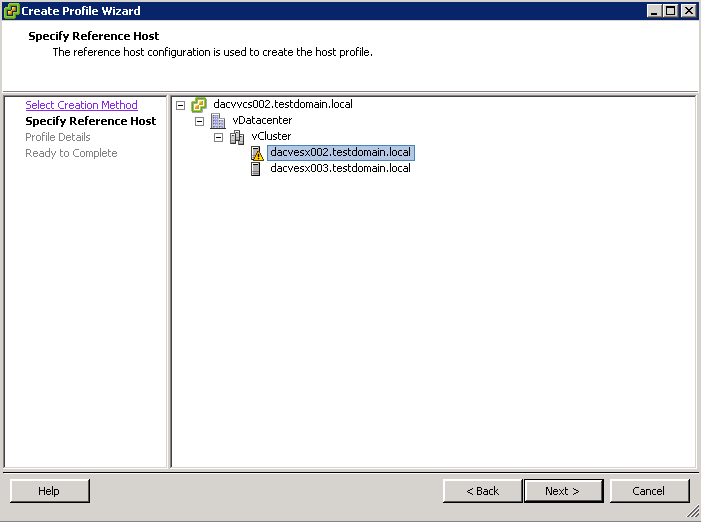
  • Set up and configure the host that will be used as the reference host. A reference host is the host from which the profile is created.
  • Create a profile using the designated reference host.
  • Attach a host or cluster to the profile.
  • Check the host’s compliance to the reference host’s profile. If all hosts are compliant with the reference host, they are correctly configured.
  • Apply the host profile of the reference host to other hosts or clusters of hosts.
Instructions for creating Host Profiles

  • Go to the Home Page in vClient and click on Host Profiles
  • Click Create a New Profile

Profile1

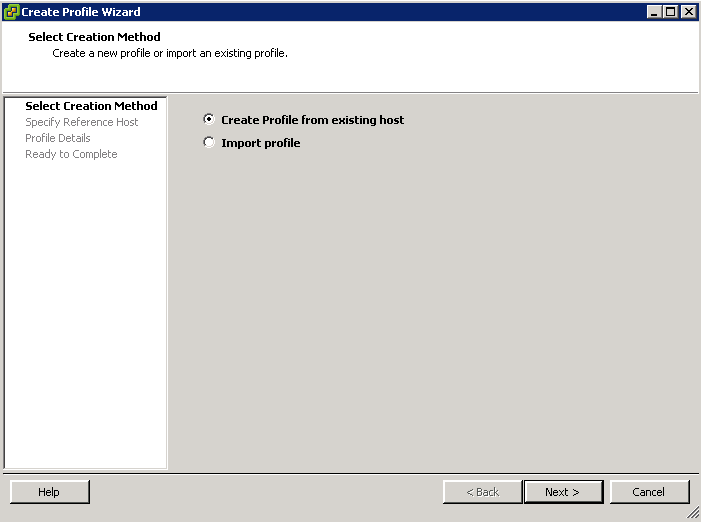
  • Create a new Profile or import a Profile

Profile2

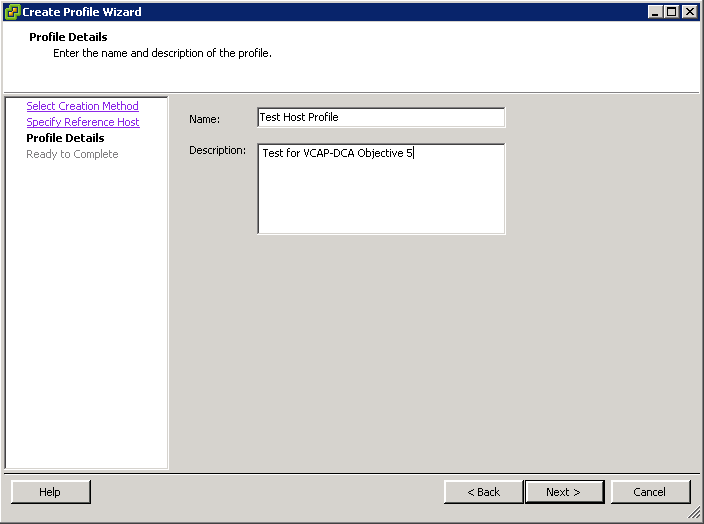
  • Put a name and description in

Profile3

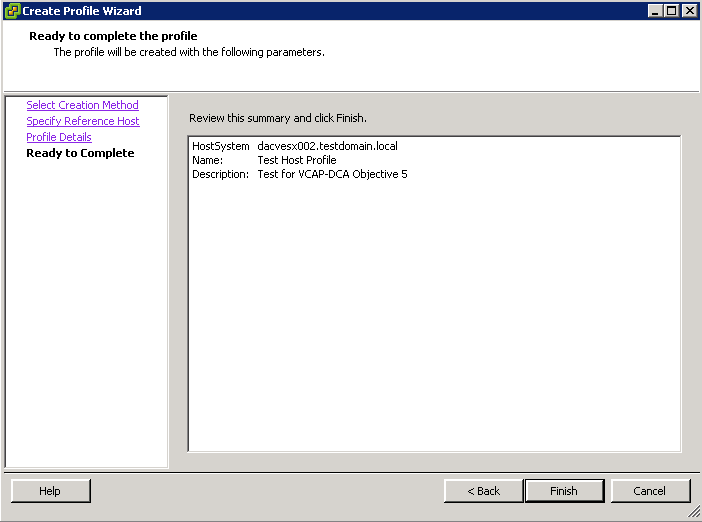
  • Click Next and Review the Summary > Finish

Profile4

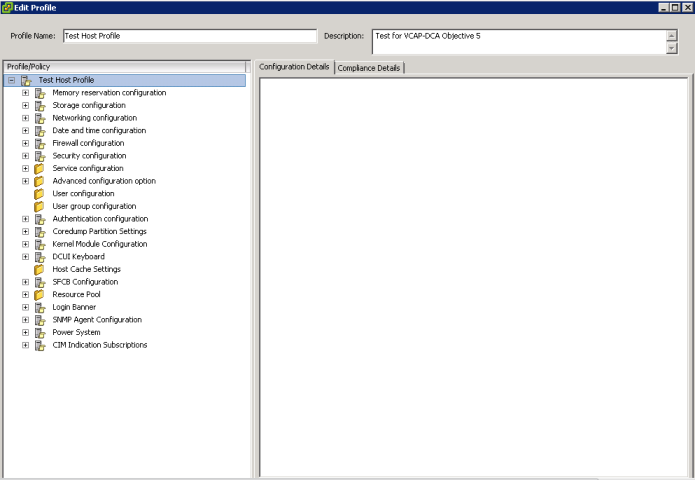
  •  Once it has created the profile click Edit to edit the profile

Profile5

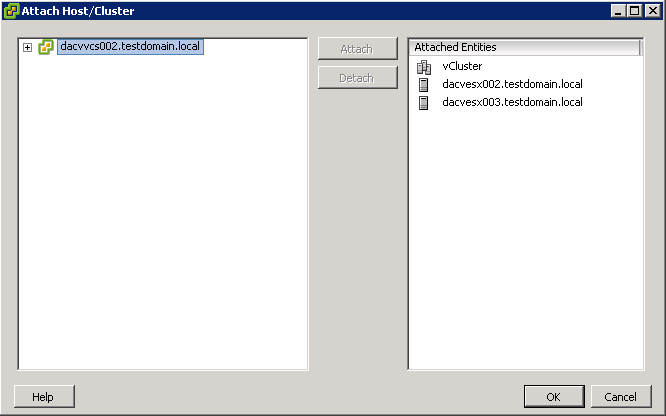
Attach a profile to one or more Hosts/Cluster

  • Click Attach Host/Cluster
  • Select Hosts or Cluster

attachhost

Check Compliance

When you have first added a host or cluster to your profile, it will look like this

ComplianceHost

  • Highlight a host or your cluster and click Check Compliance
  • I have made a deliberate error so it shows Non Compliant as per below

ComplianceFailure1

  • The Compliance Failure shows as per below screenprint

ComplianceFailure

  • After rectifying the DNS errors and turning off SSH in the Security Profile on my reference host, I now need to right click on my Host Profile and select Update Profile
  • Then Enter Maintenance Mode on my Non-Compliant Host
  • And re-apply the host profile
  • Check Compliance (Hurrah!)

Compliant2

  • Exit Maintenance Mode
  • it should now look like the below

Compliant4

Create Sub-Profiles

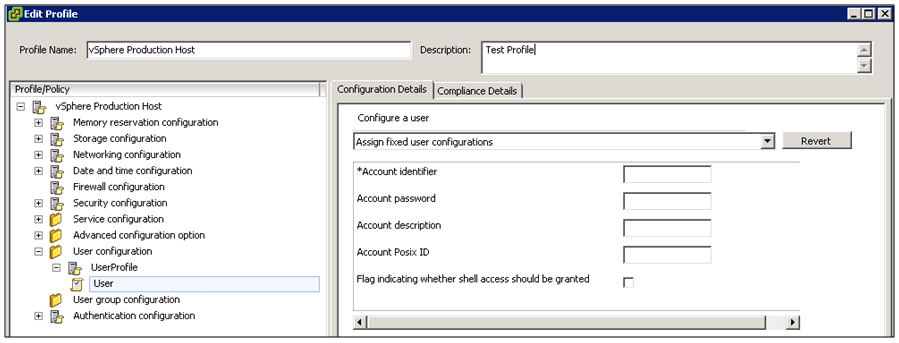
On the left side of the Profile Editor, you can expand the host profile. Each host profile is composed of several Sub-Profiles that are designated by functional group to represent configuration instances. Sub-Profiles are for e.g.
  • Storage configuration
  • Networking configuration
  • Date and time configuration
  • Firewall configuration
  • Security Configuration

Each Sub-Profile contains many policies and compliance checks that describe the configuration that is relevant to the profile. Each policy consists of one or more options that contains one or more parameters

  • Open the Profile Editor for the profile you wish to edit (as outlined above)
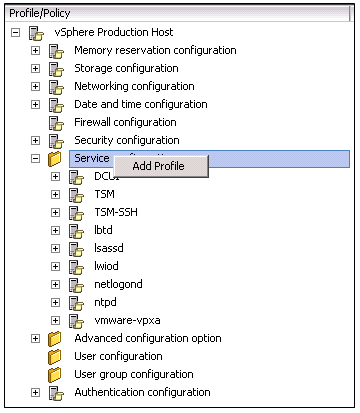
  • On the left side of the Profile Editor, expand a sub-profile until you reach the policy you want to edit (noted with a “folder” icon)
  • Right click the policy and select “Add Profile

HP

  • A new profile will be created under the given target
  • Highlight the new profile and expand the policy until you see Configuration details

HP3

  • Configure the policy options you want
  • Click OK and Save

Great Youtube Video

http://www.youtube.com/watch?v=tDDK97MR-HU&feature=channel_page

Test FT failover, secondary restart and app fault tolerance in a FT VM

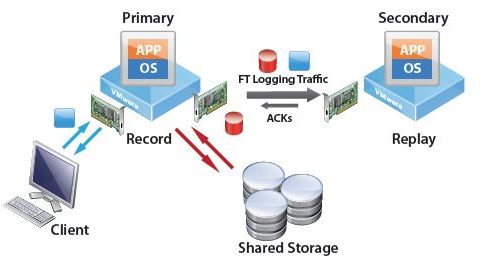
Fault Tolerance failure scenarios

Fault Tolerance failures are only triggered when there is no communication between the primary and secondary VMs.

vmware_fault_tolerance

Three scenarios may occur

Deterministic

This is where you can predict how a failover will occur

  • An ESXi host fails which causes complete host failover
  • The Primary VM process fails or becomes unresponsive on the ESXi host
  • A Fault Tolerance test is initiated from vCenter Server

Reactionary

This is where a failover may occur but you don’t know the expected outcome ahead of time. These events are not predicable as there is a race between the Primary and Secondary VMs to see which one should be the live one. The race prevents a split brain scenario that can cause data corruption

  • The Fault Tolerant NIC is interrupted or fails
  • The Fault Tolerant NIC communication is very slow

No action taken

This is where no failure can occur because Fault Tolerance does not monitor for this type of event

  • Management network interruption or failure
  • VM network interruption or failure
  • HBA Failures that do not affect the entire host
  • Any combination of the above

Testing Fault Tolerance

VMware provides a Test Failover function from the VM which is the best option for testing

3 Tests

  • Select the Test Failover Function from the Fault Tolerance menu on the Primary VM

This tests the Fault Tolerance functionality in a fully supported and non invasive way. In this scenario, the Virtual Machine fails over from Host A to Host B and a secondary VM is started back up again. VMware HA failure does not occur in this case

  • Host Failure

This can be accomplished by pulling the power cord of the host, rebooting the host or powering off the host from a remote KVM such as ILO, DRAC, IMM and RSA etc. The secondary VM on Host B takes over immediately and continues to process information for the VM. VMware HA occurs

  • Virtual Machine process on Host A fails

The scenario can be accomplished by terminating the active process for the VM by logging into Host A. The secondary VM takes over and no VMware HA failure occurs. VMware do not recommend testing in this way

Creating a Terminal Services Farm with 2 Servers

images

Requirements

  • 1 x Windows Server 2008 R2 Server
  • 1 x Windows Server 2008 R2 Server
  • 1 x Terminal Services Connection Broker Server (Can be combined with Licensing Server)
  • 1 x Terminal Services Licensing Server (Can be combined with Connection Broker Server)
  • A name for your RDS Farm (Goes in Settings and DNS)

Procedure

  • Go to your DNS Server and add 2 A record entries. One for the first servers IP Address to correspond to the Farm Name and one for the second servers IP Address to correspond to the same Farm Name
  • Next go to your Connection Broker Server
  • Click Start  > Administrative Tools > Remote Desktop Services > Remote Desktop Connection Manager
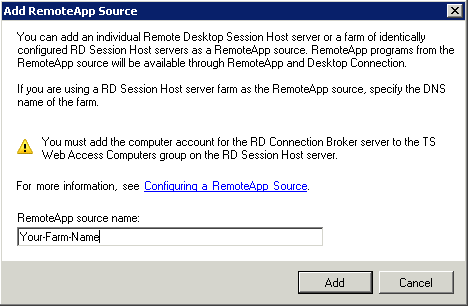
  • Select RemoteApp Sources
  • Click Add RemoteApp source

RDS20

  • Add your Farm anme
  • Click OK
  • Next Go to the first Terminal server and open Server Manager
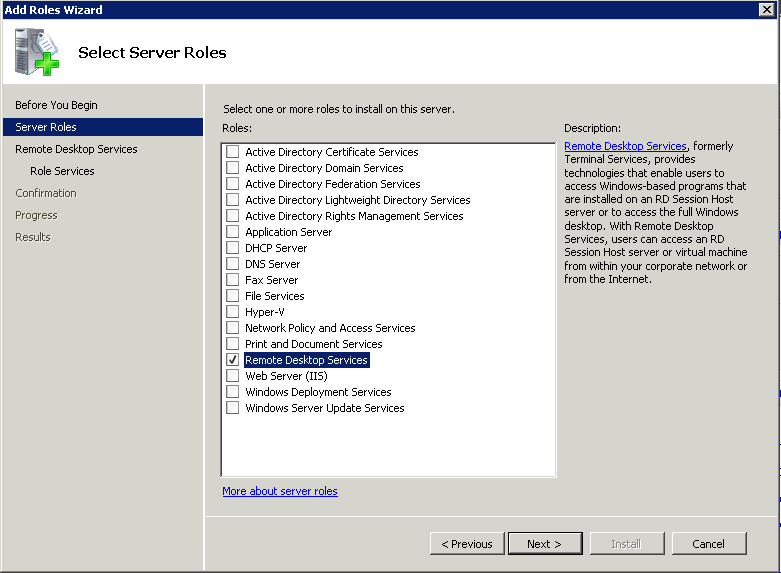
  • Click Roles > Add Roles
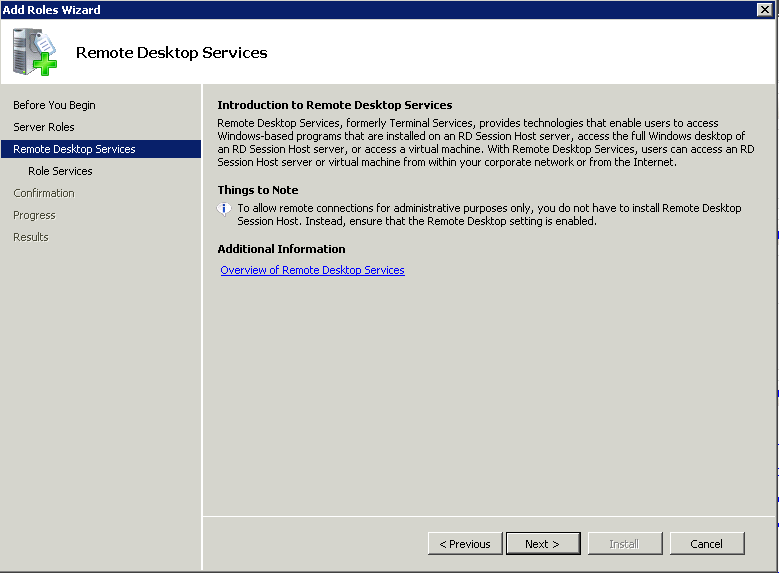
  • Select Remote Desktop Services

RDS1

  • Click Next

RDS2

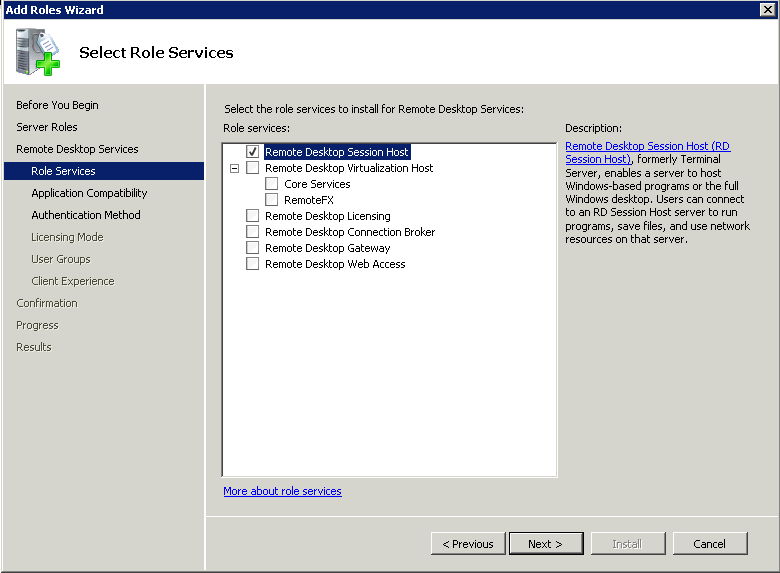
  • Click Next and choose Remote Desktop Session Host

RDS3

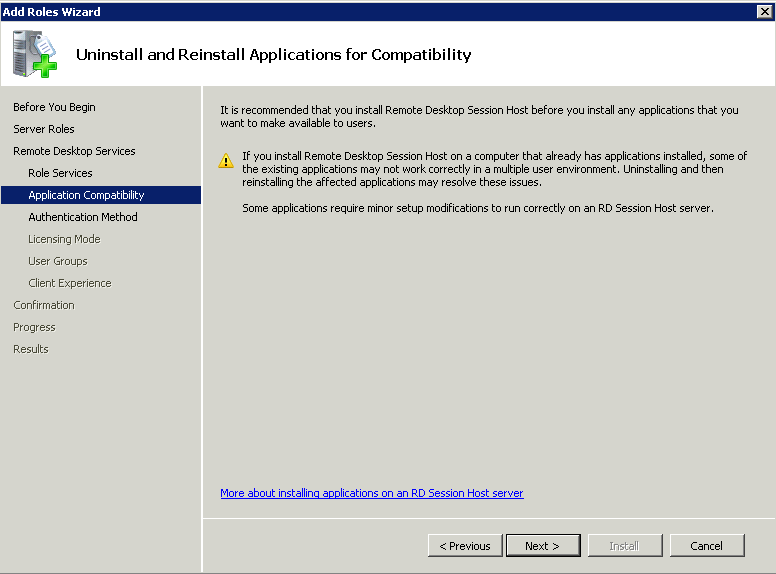
  •  Click Next

RDS4

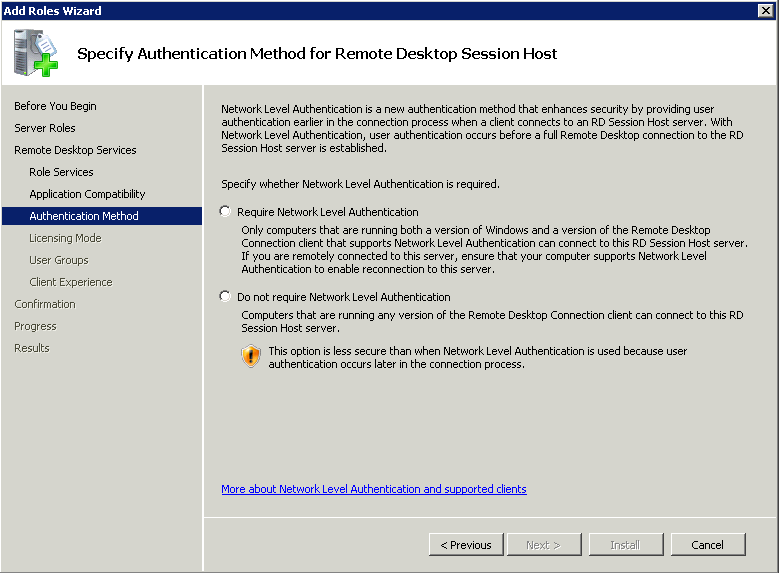
  • Click Next and choose your Authentication method for Remote Desktop Session Host.
  • I have chosen Do not require Network Level Authentication but this can be changed afterwards

RDS5

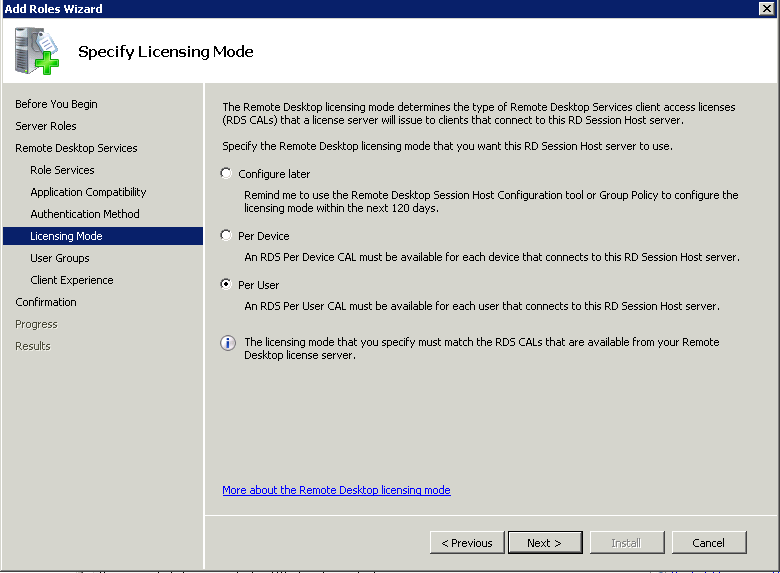
  • Click Next and choose your Licensing Mode
  • I selected Per User for now

RDS6

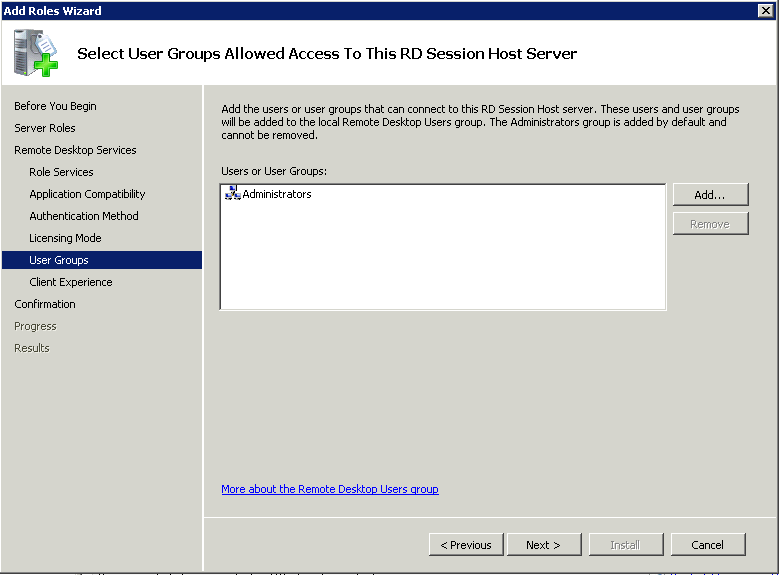
  • Click Next and add Authorised Users

RDS7

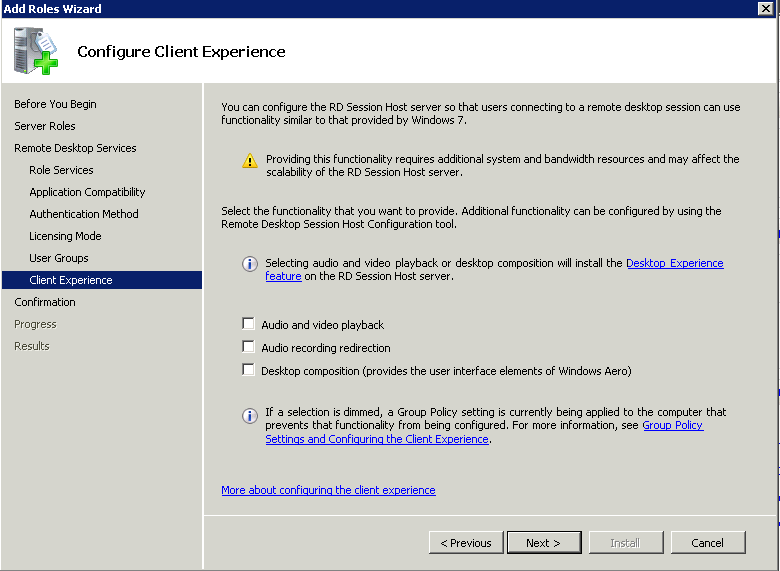
  • Click Next and Configure the Client Experience
  • I just left this blank

RDS8

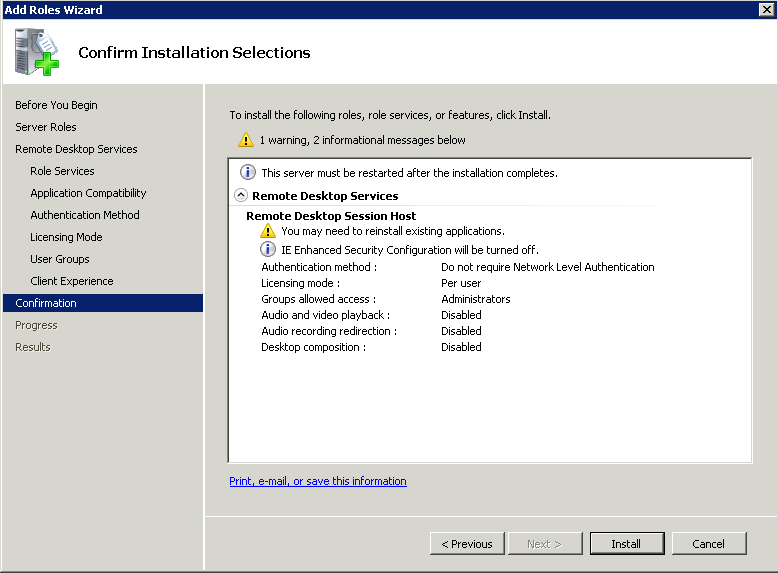
  • Click Next and Confirm Installation Services > Click Install

RDS9

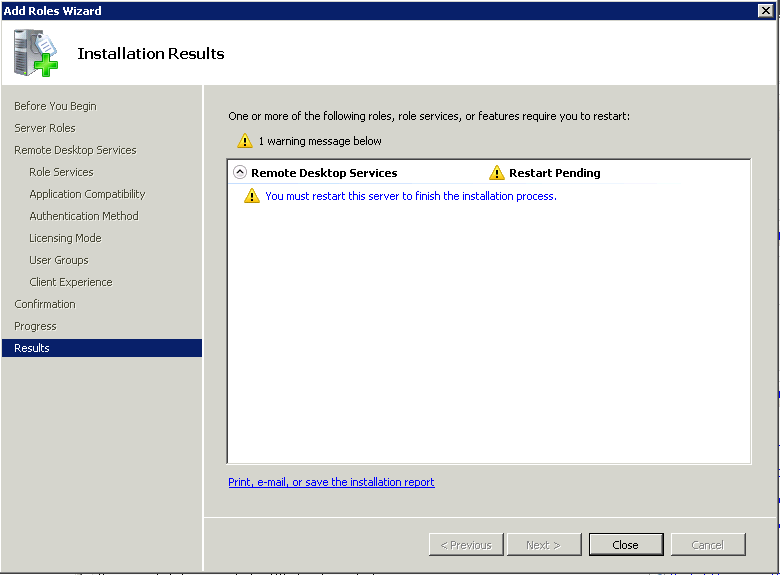
  • When the install has finished, you will be prompted to restart

RDS10

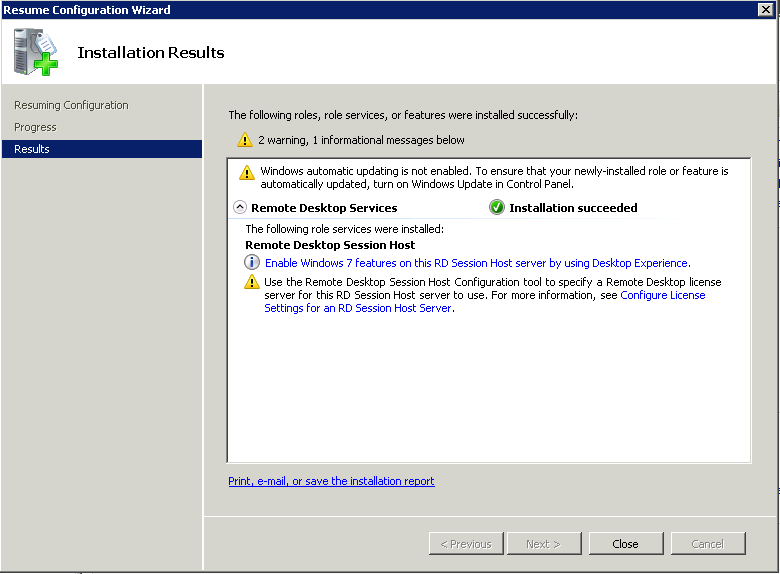
  • Following reboot, all the server to finish off the installation and then Use the Remote Desktop Session Host Configuration Tool to specify a Remote Desktop License Server

RDS11

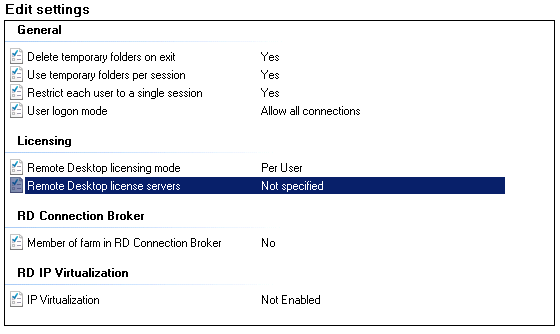
  • Click Start > Administrative Tools > Remote Desktop Services > Remote Desktop Session Host Configuration
  • In the Edit Settings under licensing, double click Remote Desktop Licensing Mode

RDS12

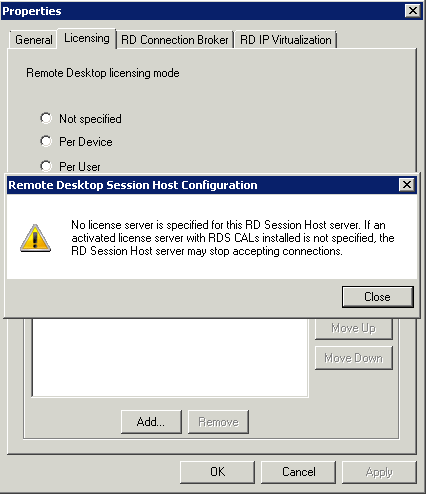
  • You will get this message

RDS13

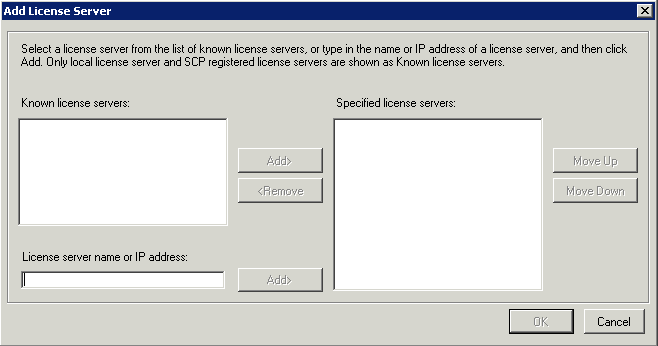
  • Click Close and add your license server

RDS14

  • Click OK
  • Next
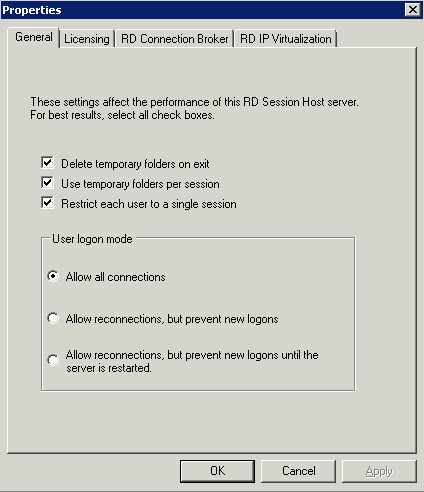
  • Click the General tab and check the settings

RDS15

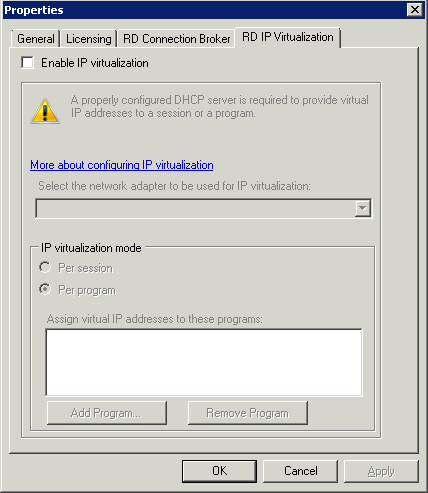
  • Click RD IP Virtualisation and just ignore this for now

RDS16

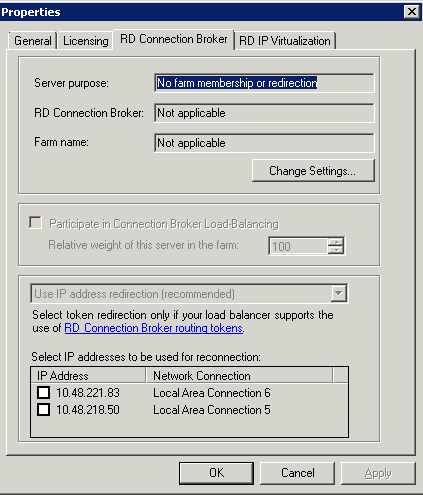
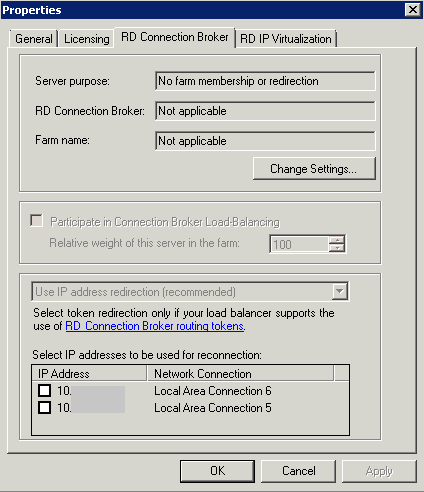
  • Next Click RD Connection Broker

RDS17

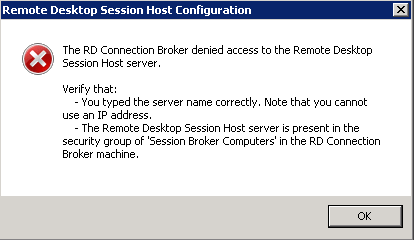
  • Before you change this setting, you must make sure that your Remote Desktop Servers are present in the Local Security Group called “Session Broker Computers” in the RD Connection Broker Server

WebAccess

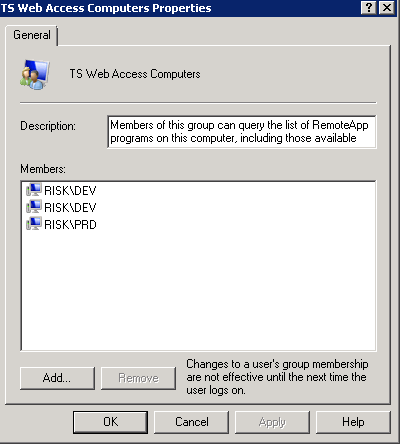
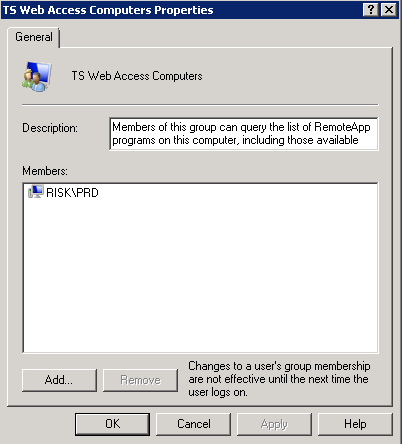
  • Before you change this setting, you must also make sure that the RD Connection Broker Server is added into the Local TS Web Access Computers group on the RDS Session Host Server

SessionHost

  • If you don’t change these, you will get an error like the below one when you try and add the Session Host to a Farm

RDS

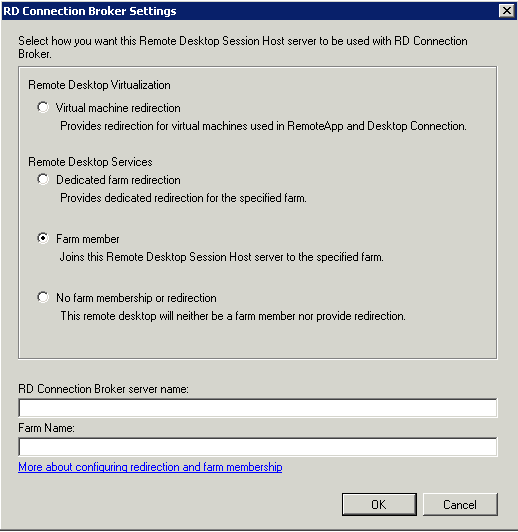
  • Click Change Settings and choose Farm Member
  • Enter the RD Connection Broker Name and the Farm Name

RDS18

  • Click OK then select an IP Address to be used for reconnection. This will be your LAN Connection
  • Tick Participate in Connection Broker Load Balancing

RDS19

  •  Now do everything bar the adding the RemoteApp source taskto your second Terminal Server

Other Settings

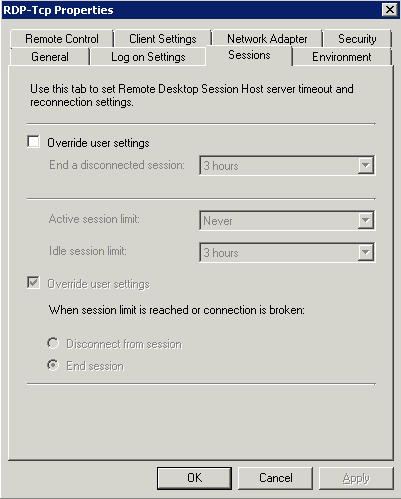
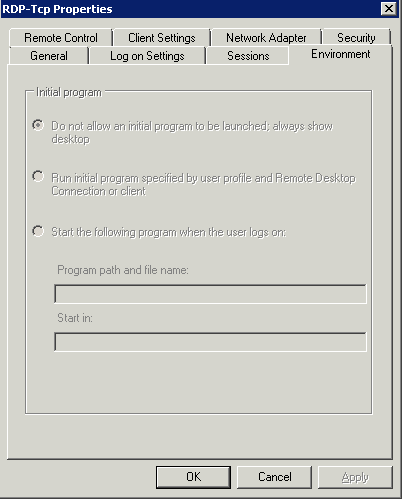
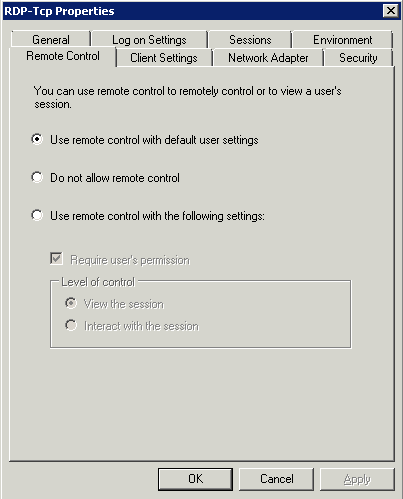
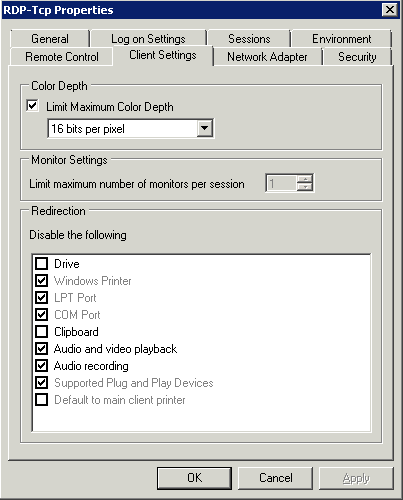
  • On each Terminal Server, go to the Remote Desktop Session Host Configuration
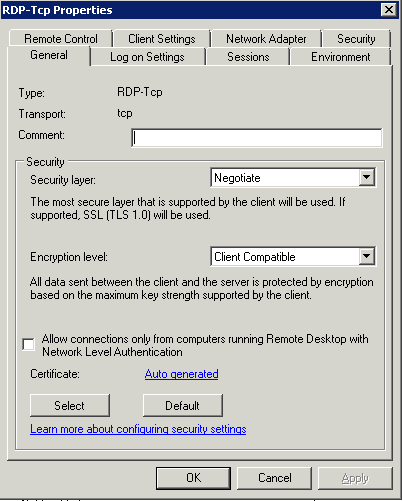
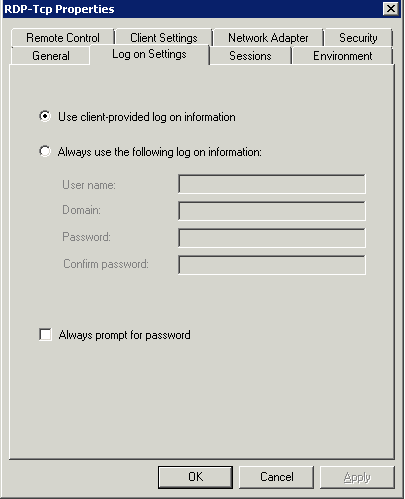
  • Right click on RDP-Tcp in the Connections Window and have a look through all the settings
  • General

RDS21

  • Log on Settings

RDS22

  • Sessions

RDS23

  • Environment

RDS24

  • Remote Control

RDS25

  • Client Settings

RDS26

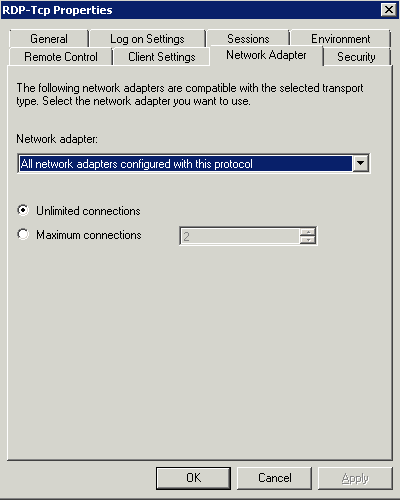
  • Network Adapters

RDS27

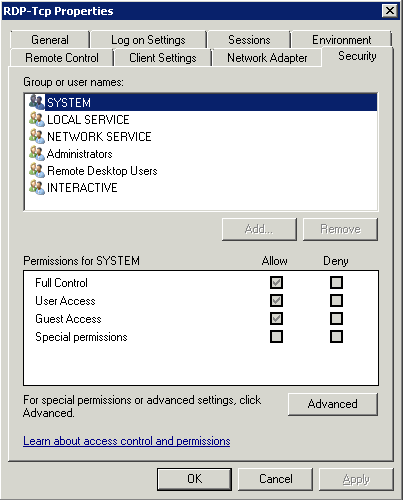
  • Security

RDS28