Archive for January 2013

vmkfstools

Monitoring

What can use vmkfstools for?

You use vmkfstools to

  • Create and manipulate virtual disks
  • Create and manipulate file system
  • Create and manipulate logical volumes
  • Create and manipulate physical storage devices on an ESX/ESXi host.
  • Create and manage a virtual machine file system (VMFS) on a physical partition of a disk and to manipulate files, such as virtual disks, stored on VMFS-3 and NFS.
  • You can also use vmkfstools to set up and manage raw device mappings (RDMs)

The long and single-letter forms of the options are equivalent. For example, the following commands are identical.

example 1

example2

Options

  • Type vmkfstools –help

vmkfs8

Great vmkfstools Link

http://vmetc.com/wp-content/uploads/2007/11/man-vmkfstools.txt


Upgrade VMware Storage Infrastructure

VMFS1

When upgrading from vSphere 4 to vSphere 5, it is not required to upgrade datastores from VMFS-3 to VMFS-5. This might be relevant if a subset of ESX/ESXi 4 hosts will remain in your environment. When the decision is made to upgrade datastores from version 3 to version 5 note that the upgrade process can be performed on active datastores, with no disruption to running VMs

Benefits

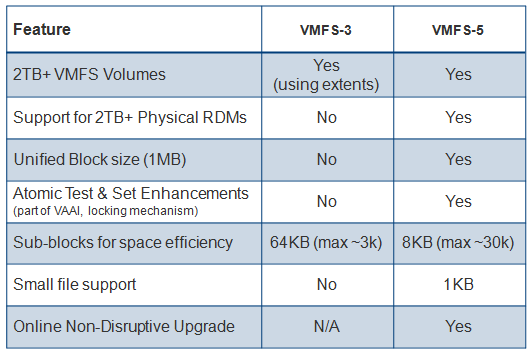
  • Unified 1MB File Block Size

Previous versions of VMFS used 1,2,4 or 8MB file blocks. These larger blocks were needed to create large files (>256GB). These large blocks are no longer needed for large files on VMFS-5. Very large files can now be created on VMFS-5 using 1MB file blocks.

  • Large Single Extent Volumes

In previous versions of VMFS, the largest single extent was 2TB. With VMFS-5, this limit is now 64TB.

  • Smaller Sub-Block

VMFS-5 introduces a smaller sub-block. This is now 8KB rather than the 64KB we had in previous versions. Now small files < 8KB (but > 1KB) in size will only consume 8KB rather than 64KB. This will reduce the amount of disk space being stranded by small files.

  • Small File Support

VMFS-5 introduces support for very small files. For files less than or equal to 1KB, VMFS-5 uses the file descriptor location in the metadata for storage rather than file blocks. When they grow above 1KB, these files will then start to use the new 8KB sub blocks. This will again reduce the amount of disk space being stranded by very small files.

  • Increased File Count

VMFS-5 introduces support for greater than 100,000 files, a three-fold increase on the number of files supported on VMFS-3, which was 30,000.

  • ATS Enhancement

This Hardware Acceleration primitive, Atomic Test & Set (ATS), is now used throughout VMFS-5 for file locking. ATS is part of the VAAI (vSphere Storage APIs for Array Integration) This enhancement improves the file locking performance over previous versions of VMFS.

Considerations for Upgrade

  • If your datastores were formatted with VMFS2 or VMFS3, you can upgrade the datastores to VMFS5.
  • To upgrade a VMFS2 datastore, you use a two-step process that involves upgrading VMFS2 to VMFS3 first. Because ESXi 5.0 hosts cannot access VMFS2 datastores, use a legacy host, ESX/ESXi 4.x or earlier, to access the VMFS2 datastore and perform the VMFS2 to VMFS3 upgrade.
  • After you upgrade your VMFS2 datastore to VMFS3, the datastore becomes available on the ESXi 5.0 host, where you complete the process of upgrading to VMFS5.
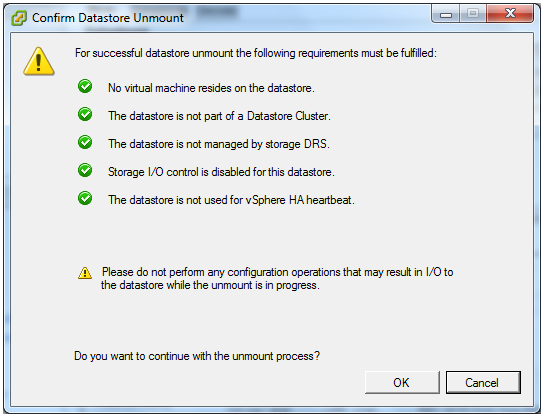
  • When you upgrade your datastore, the ESXi file-locking mechanism ensures that no remote host or local process is accessing the VMFS datastore being upgraded. Your host preserves all files on the datastore
  • The datastore upgrade is a one-way process. After upgrading your datastore, you cannot revert it back to its previous VMFS format.
  • Verify that the volume to be upgraded has at least 2MB of free blocks available and 1 free file descriptor.
  • All hosts accessing the datastore must support VMFS 5
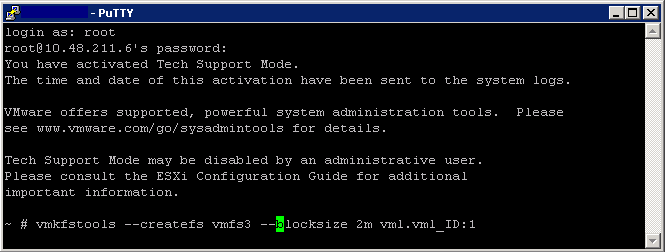
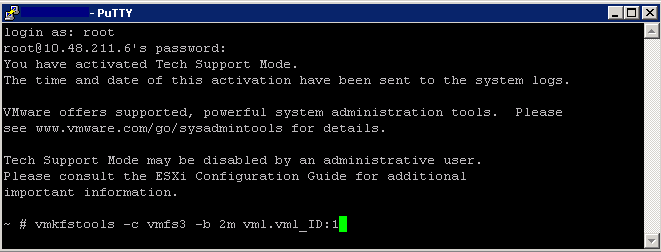
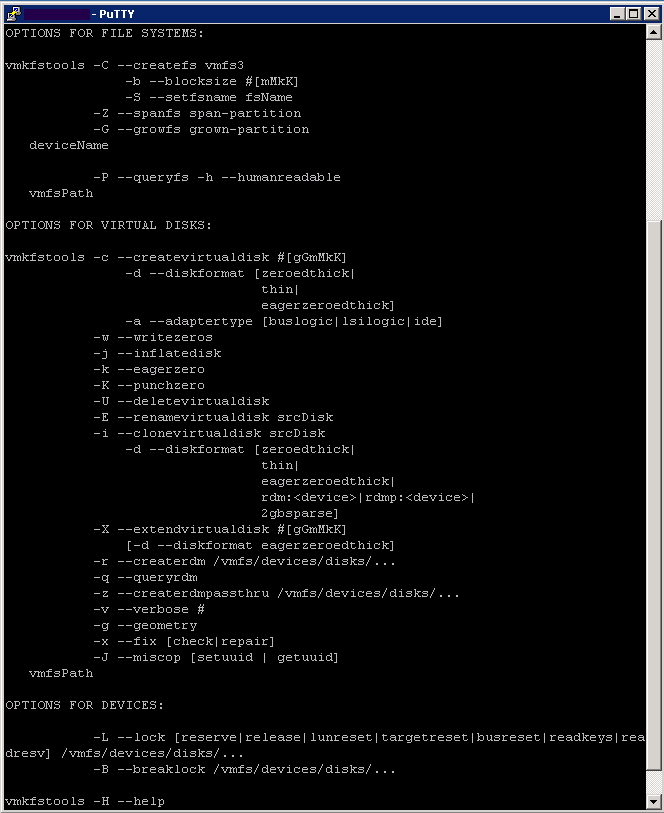
  • You cannot upgrade VMFS3 volumes to VMFS5 remotely with the vmkfstools command included in vSphere CLI.

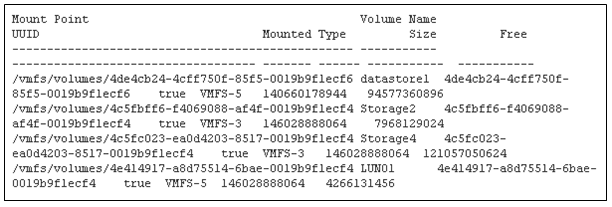
Comparing VMFS3 and VMFS5

VMFS5

Instructions for upgrading

  • Log in to the vSphere Client and select a host from the Inventory panel.
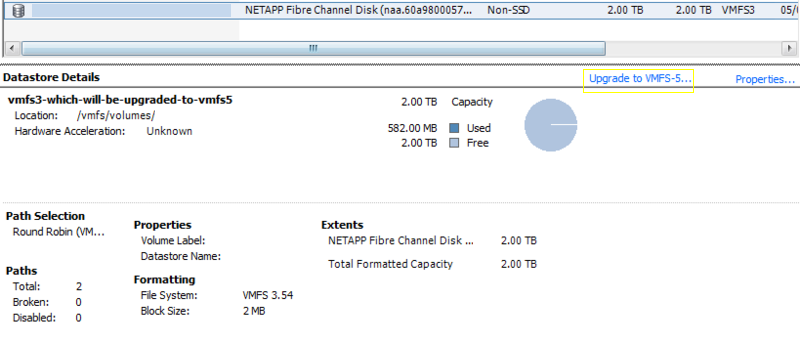
  • Click the Configuration tab and click Storage.
  • Select the VMFS3 datastore.
  • Click Upgrade to VMFS5.

vmfs4

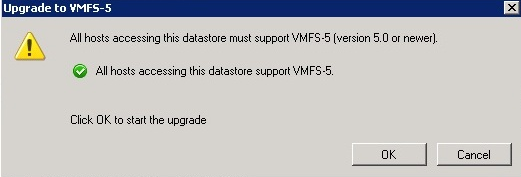
  • A warning message about host version support appears.
  • Click OK to start the upgrade.

vmfs6

  • The task Upgrade VMFS appears in the Recent Tasks list.
  • Perform a rescan on all hosts that are associated with the datastore.

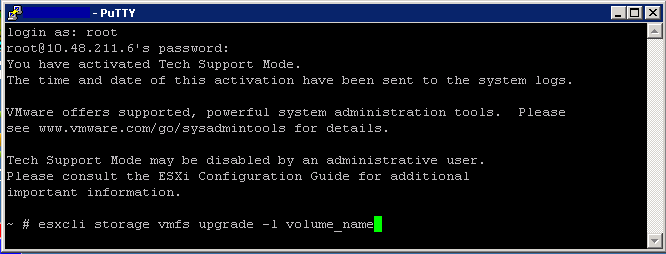
Upgrading via ESXCLI

  • esxcli storage vmfs upgrade -l volume_name

esxcli1

Other considerations

  • The maximum size of a VMDK on VMFS-5 is still 2TB -512 bytes.
  • The maximum size of a non-passthru (virtual) RDM on VMFS-5 is still 2TB -512 bytes.
  • The maximum number of LUNs that are supported on an ESXi 5.0 host is still 256
  • There is now support for passthru RDMs to be ~ 60TB in size.
  • Non-passthru RDMs are still limited to 2TB – 512 bytes.
  • Both upgraded VMFS-5 & newly created VMFS-5 support the larger passthru RDM.

Prepare storage for maintenance

under_maintenance

Sometimes you will need to perform maintenance on a Datastore which will require placing it in Maintenance Mode and unmounting/remounting it

When you unmount a datastore, it remains intact, but can no longer be seen from the hosts that you specify. The datastore continues to appear on other hosts, where it remains mounted

Instructions

  1. Click Hosts and Clusters View from Home
  2. Select the Host with the attached datastore
  3. Click the Configuration tab
  4. Click on Storage within the Hardware frame
  5. Locate the Datastore to unmount
  6. Right click the datastore and select Properties
  7. Uncheck Enabled under Storage I/O Control and then click Close
  8. Right click the datastore and select Enter SDRS Maintenance Mode
  9. Right Click the Datastore and select Unmount. You should be greeted by this screen warning

unmount

  • Note: The Detach function must be performed on a per-host basis and does not propagate to other hosts in vCenter Server. If a LUN is presented to an initiator group or storage group on the SAN, the Detach function must be performed on every host in that initiator group before unmapping the LUN from the group on the SAN. Failing to follow this step results in an all-paths-down (APD) state for those hosts in the storage group on which Detach was not performed for the LUN being unmapped

Unmounting a LUN from the command line

  • Type esxcli storage filesystem list
  • The output will look like the below

unmount2

  • Unmount the datastore by running the command:
  • esxcli storage filesystem unmount [-u UUID | -l label | -p path ]
  • For example, use one of these commands to unmount the LUN01 datastore:

esxcli storage filesystem unmount -l LUN01

esxcli storage filesystem unmount -u 4e414917-a8d75514-6bae-0019b9f1ecf4

esxcli storage filesystem unmount -p /vmfs/volumes/4e414917-a8d75514-6bae-0019b9f1ecf4

  • To verify that the datastore has been unmounted, run the command:
  • esxcli storage filesystem list
  • The output is similar to:

unmount4

  • Note that the Mounted field is set to false, the Type field is set to VMFS-unknown version, and that no Mount Point exists.
  • Note: The unmounted state of the VMFS datastore persists across reboots. This is the default behavior. However, it can be changed by appending the –no-persist flag.

VMware Link

http://kb.vmware.com/selfservice/microsites/search.do?language=en_US&cmd=displayKC&externalId=2004605


Configure and Administer Profile Driven Storage

What is Profile Driven Storage?

Profile Driven Storage enables the creation of Datastores that provide different levels of service. You can use Virtual Machine storage profiles and storage capabilities to ensure storage provides different levels of

  • Capacity
  • Performance
  • Availability
  • Redundancy

By doing this we create levels of compliance the Virtual Machines are linked to in order to maintain ongoing management and placed on storage that is suitable for its use.

storageprofile0

Profile driven storage is composed of 2 components where a user defined capability can be used alongside a Storage capability.

  • Storage capabilities which details the features that a storage system offers provided by a VASA Vendor provider
  • User defined capabilities which can be associated with multiple datastores

storageprofile

Instructions for creating Profile Driven Storage

A VM storage profile is attached to a Storage capability. In turn a Storage Capability profile is attached to a datastore.

  • View the System defined storage capabilities that your storage system defines

vasa

  • Create a user-defined storage capability for your Virtual Machines
  • Go to VM Storage Profiles in vCenter

Capture

  • Click Enable VM Storage Profiles

Capture2

  • View the box which appears and enable these for a host or a cluster and click Close

Capture3

  • Click Manage Storage Capabilities

Capture4

  • Click Add
  • Type a name for your storage capability. E.g Gold Storage, Silver Storage, Replicated Storage
  • Add a description if you want and click OK

Capture5

  • Next click Create VM Storage Profile
  • Type a name and a description

Capture6

  • Select the Storage capability you require from what we created at the start of these instructions. E.g Gold Storage, Silver Storage, Replicated Storage

Capture7

  • Click Next and Finish
  • Go to Datastores and Datastore Clusters
  • Right click a Datastore and select Assign User Defined Storage Capability

Capture8

  • Select the capability you created.
  • Now you can create a VM and within the setup wizard on the storage tab, you can select a storage profile to use which will immediately show you which Datastores are compatible and which ones are not
  • On a VM you can also see from the summary tab whether the profile is compliant or not as per below screenprint

compliant

  • And you can also right click on a VM and manage a profile or check profile compliance

Capture10

Resolving Non Compliant VMs

A non-compliant machine must storage migrate the virtual disks it owns:

  • Enter the Host and Clusters view
  • Select a non-compliant virtual machine
  • Right-Click the Virtual Machine and click Migrate
  • On the migration type screen, click Change Datastore, click Next
  • On the storage screen, optionally select the new disk format for post-migration
  • Select the VM Storage Profile to bring into compliance for the non-compliant VM.
  • If you are migrating an individual virtual disk within a VM, Click Advanced
  • Select the virtual disk you want to move to the new storage profile and then click the Browse under the Datastore column
  • Verify that the VM Storage Profile is correct, if not select the appropriate VM Storage Profile
  • Select a Compatible Datastore Cluster to place your non-compliant virtual disk
  • Optionally, you may disable SDRS for this virtual machine
  • Click OK
  • Click Next
  • Verify your settings at the completion screen and select show all storage recommendations
  • Verify that you agree with the migration recommendations and then click Apply Recommendations
  • Repeat the section above, Check Storage Profile Compliance