How many times have you walked up to a system in your office and needed to click through several diagnostic windows to remind yourself of important aspects of its configuration, such as its name, IP address, or operating system version? If you manage multiple computers you probably need BGInfo. It automatically displays relevant information about a Windows computer on the desktop’s background, such as the computer name, IP address, service pack version, and more. You can edit any field as well as the font and background colors, and can place it in your startup folder so that it runs every boot, or even configure it to display as the background for the logon screen.
Because BGInfo simply writes a new desktop bitmap and exits, you don’t have to worry about it consuming system resources or interfering with other applications.
Installation and Configuration
- Download BGInfo.exe It will appear as a zip file.
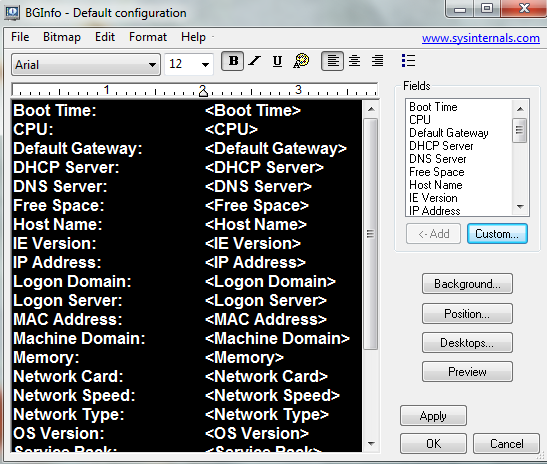
- When you execute BGInfo for the first time, it displays the Default configuration window.
- Note: The tool automatically applies this configuration after 10 seconds unless you click somewhere in this window. Selecting any button or menu item will disable the timer, allowing you to customize the layout and content of the background information.
- To uninstall, delete BGINFO.EXE and reset your system’s wallpaper using Windows’ Desktop Properties dialog.
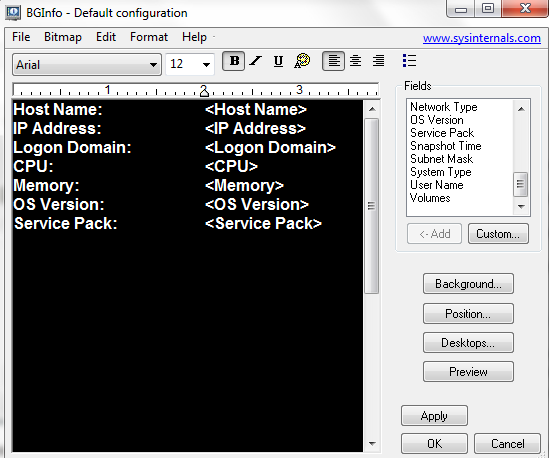
- You can simply delete the lines you don’t want and add the ones you do
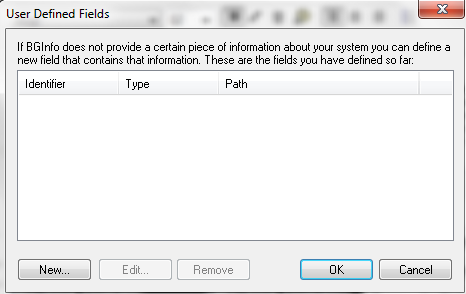
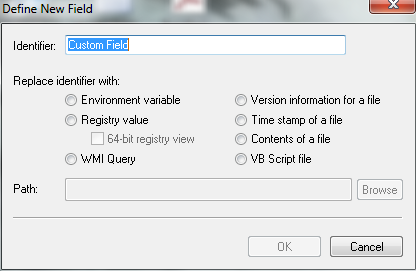
- Click Custom to add User Defined fields
- These can be any of the following
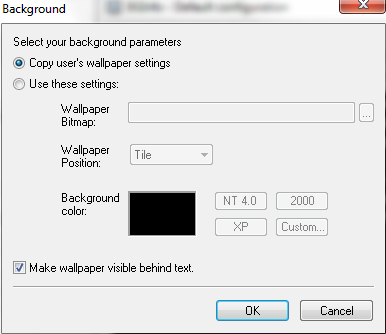
- Click Background
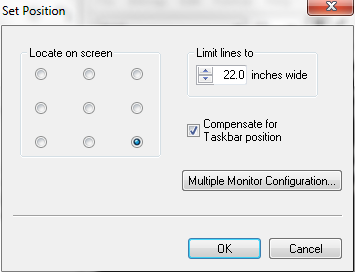
- Click Position and choose where you want to see the information on your screen
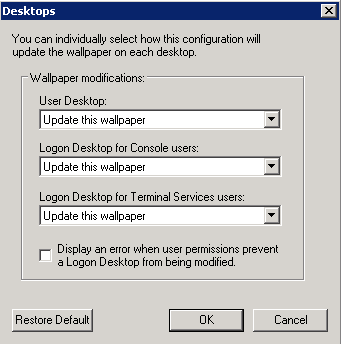
- Click on Desktops. Selects which desktops are updated when the configuration is applied. By default only the User Desktop wallpaper is changed. Enabling the Logon Desktop for Console users option specifies that the wallpaper should be displayed on the logon desktop that is presented before anyone has logged onto the system. On Windows 95/98/ME systems the same desktop is used for users and the login screen, so this option has no effect. Enabling the Logon Desktop for Terminal Services users option specifies that the wallpaper should be displayed on the Terminal Services login screen. This option is useful only on servers running Terminal Services.
- Clicking Preview will allow you to see what your configuration looks like so far. Clicking Preview again will exit the Preview Screen
- Using the icons on the top toolbar allow you to change the font, font colour, font size, boldness, underline and italic etc
- Clicking on File brings up the following options
- File | Open: Opens a BGInfo configuration file.
- File | Save As: Saves a copy of the current BGInfo configuration to a new file. Once created, you can have BGInfo use the file later by simply specifying it on the command line, or by using File|Open menu option.
- File | Reset Default Settings: Removes all configuration information and resets BGInfo to its default (install-time) state. Use this if you can’t determine how to undo a change, or if BGInfo becomes confused about the current state of the bitmap.
- File | Database: Specifies a .XLS, .MDB or .TXT file or a connection string to an SQL database that BGInfo should use to store the information it generates. Use this to collect a history of one or more systems on your network. You must ensure that all systems that access the file have the same version of MDAC and JET database support installed. It is recommended you use at least MDAC 2.5 and JET 4.0. If specifying an XLS file the file must already exist
- So now once you are happy with your configuration, you now need to save it for example as BGInfoCapture.bgi
Deploying to Client Machines
- Deployment to the respective client machines is pretty straightforward. No installation is required
- You just need to copy the BGInfo.exe and the BGInfoCapture.bgi to each machine and place them in the same directory.
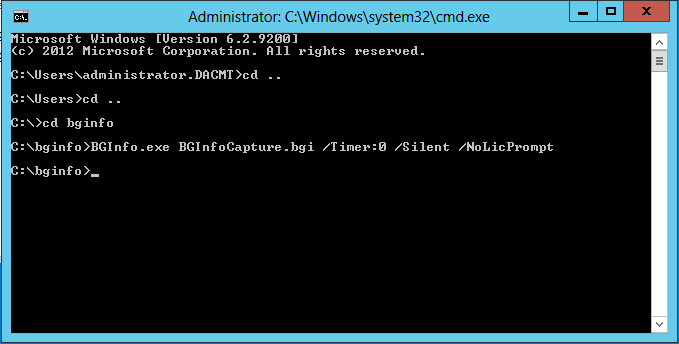
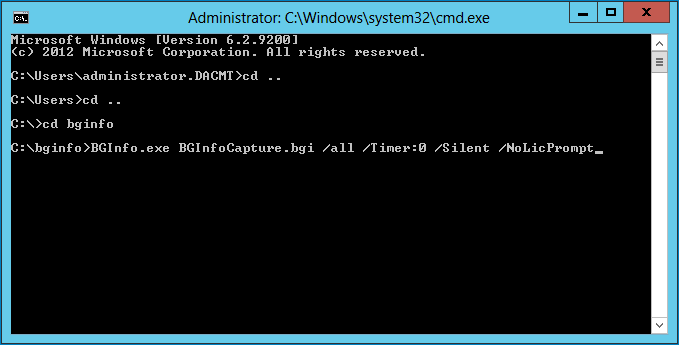
- Once in place, open cmd.exe and just run the command:
- The first part runs BGInfo, the second specifies the config file to use, and the final part tells it to run immediately and not display the configuration screen.
- And Voila, you now see what happens
- If you specify the /all switch, this specifies that BGInfo should change the wallpaper for any and all users currently logged in to the system. This option is useful within a Terminal Services session
Creating a scheduled Task
Of course, you probably want to schedule the capture process to run on a schedule. This command creates a Scheduled Task to run the capture process at 8 AM every morning and assumes you copied the required files to the root of your C drive
SCHTASKS /Create /SC DAILY /ST 08:00 /TN “System Info” /TR “C:\BGInfo.exe C:\BGInfoCapture.bgi /Timer:0 /Silent /NoLicPrompt”
How to Deploy BGInfo using a GPO
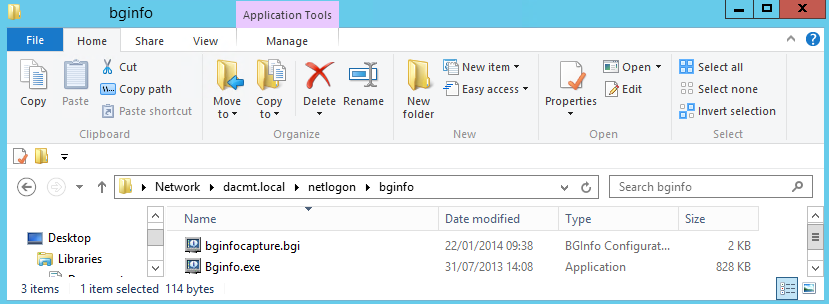
- First of all copy your bginfo.exe file and your bginfocapture.bgi configuration file into an accessible share. I am going to use my \\dacmt.local\netlogon share
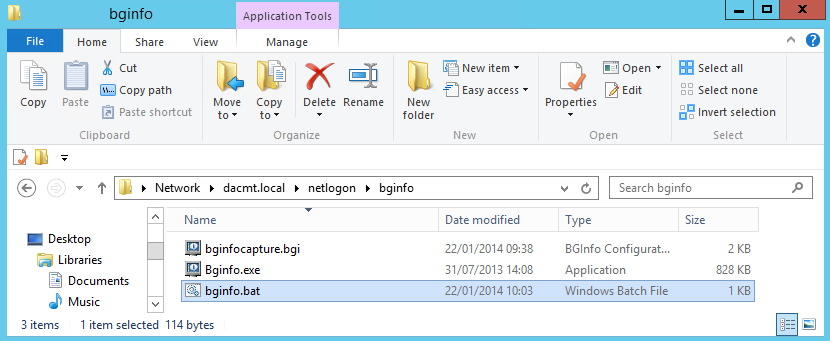
- Next we need to write a short bat file
- Save this bginfo.bat file into the same shared folder as your bginfo.exe and bginfocapture.bgi config file
- Log into your Active Directory VM
- Open Group Policy Management
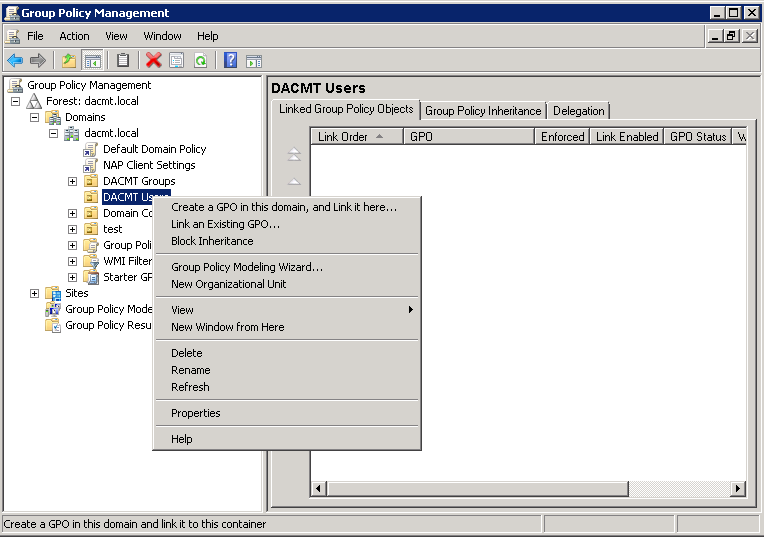
- Right click on your chosen OU and select Create a GPO in this domain and link it here
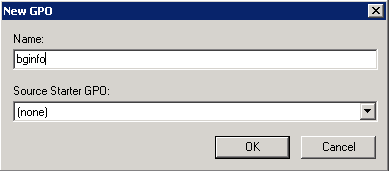
- Type a name for your GPO
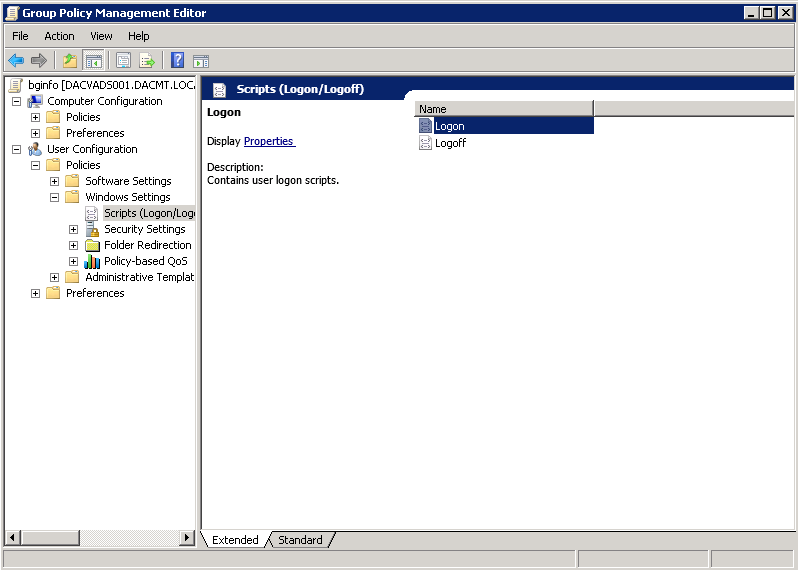
- Now right click on the bginfo GPO and click edit
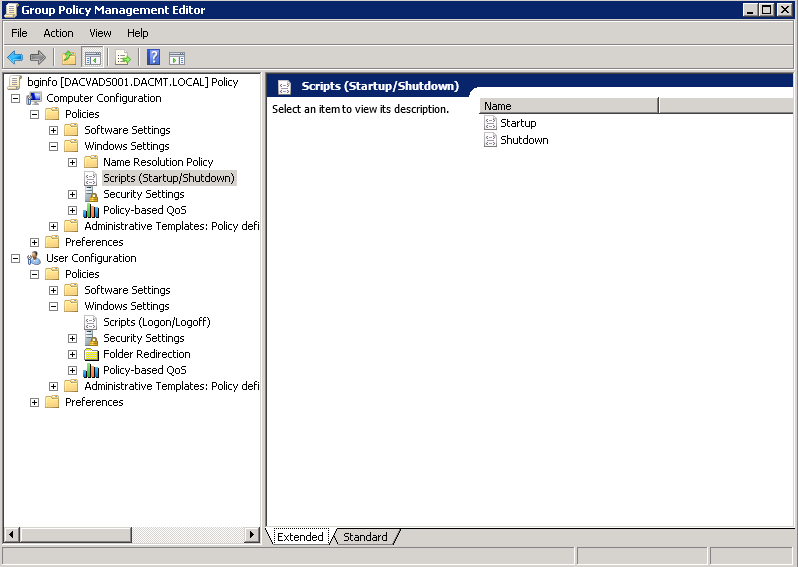
- Go to User Configuration > Policies > Windows Settings > Scripts (Logon/Logoff)
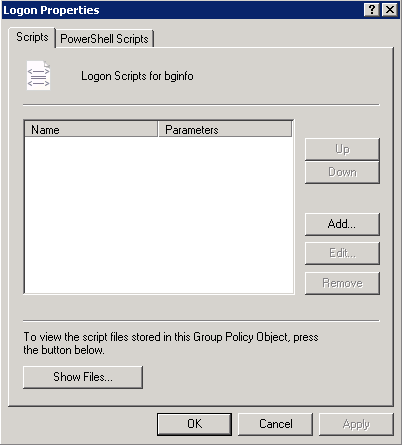
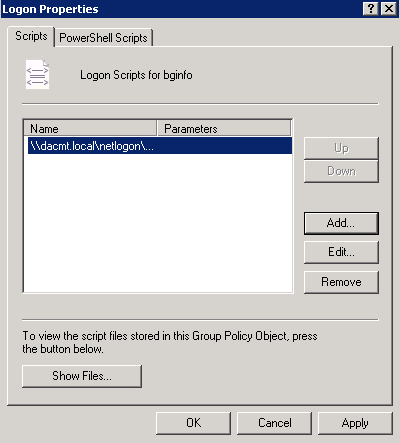
- Double click on Logon
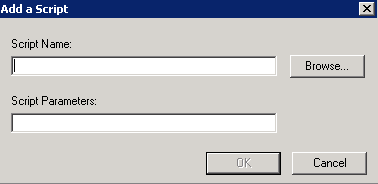
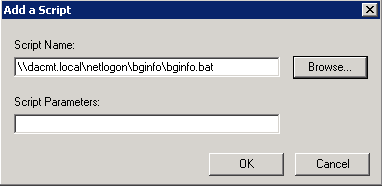
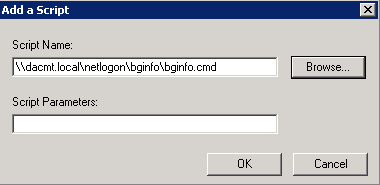
- Click Add
- Browse and find your script
- Click OK to get back to the scripts box and check everything looks OK
- Go to Computer Configuration > Policies > Windows Settings > Scripts (Startup/Shutdown)
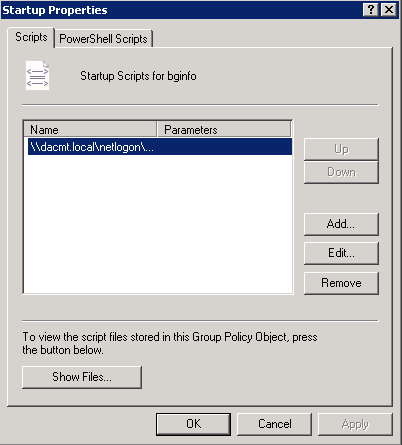
- Click Startup
- Click Add and navigate to \\dacmt.local\netlogon\bginfo\bginfo.cmd or bginfo.bat depending what you have set up
- Click OK
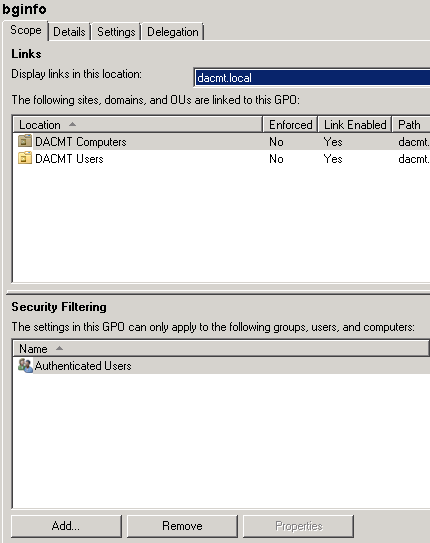
- You may need to link this to the OU where your Computers are that you want applying. See screenprint below
- You can also change the scope of the GPO to include the Users and Computers you want. See screenprint below
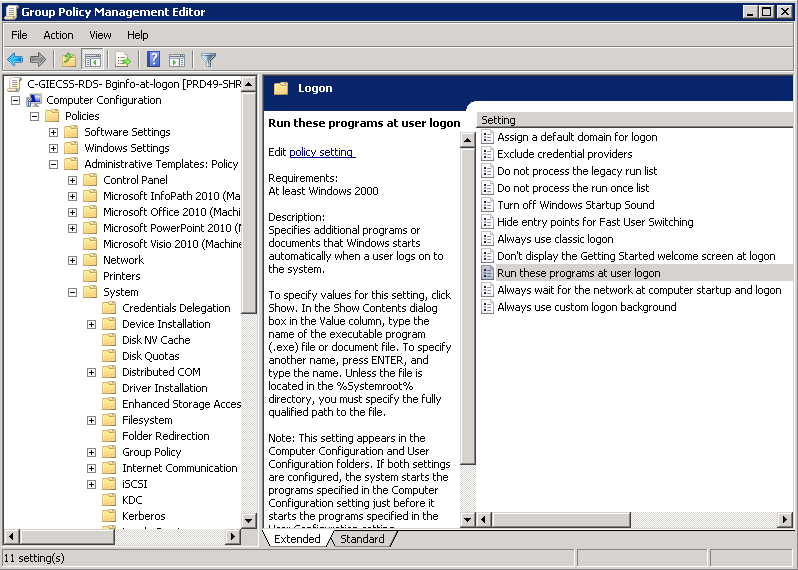
- You may also want to adjust the following policy
- Computer Configuration > Policies > Administrative Templates > System > Logon > Run these Programs at User Logon
- Click Enabled
- Click Show
- Type in \\dacmt.local\netlogon\bginfo\bginfo.cmd
- And now when you log on to a VM/Computer in the scope of the GPO, you should see the following
Other GPOs to consider
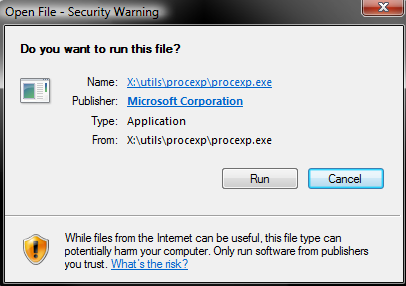
- Sometimes when you are using a network share for the path to your script, you may encounter an error as per below when the bginfo script runs
- There are 3 Group Polices which may fix this
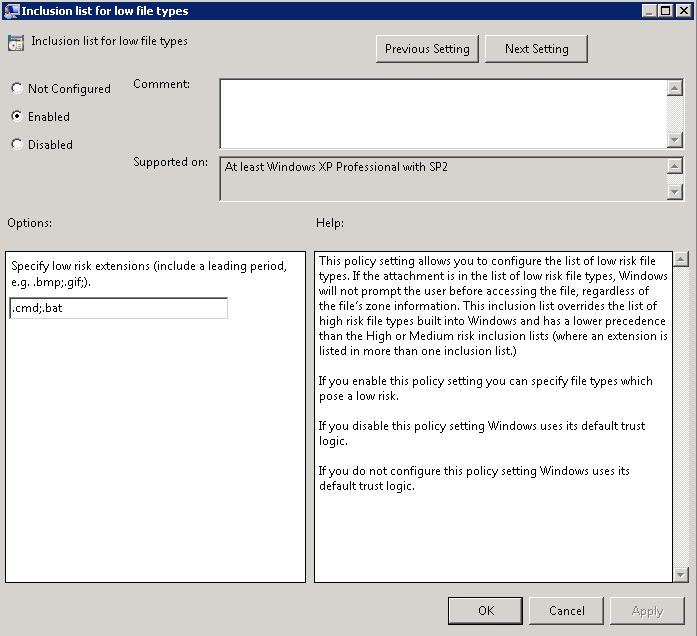
- The first is User Configuration > Policies > Windows Components > Attachment Manager > Inclusion list for low file types. Set to enabled and add the extensions you trust… In this case .bat and .cmd
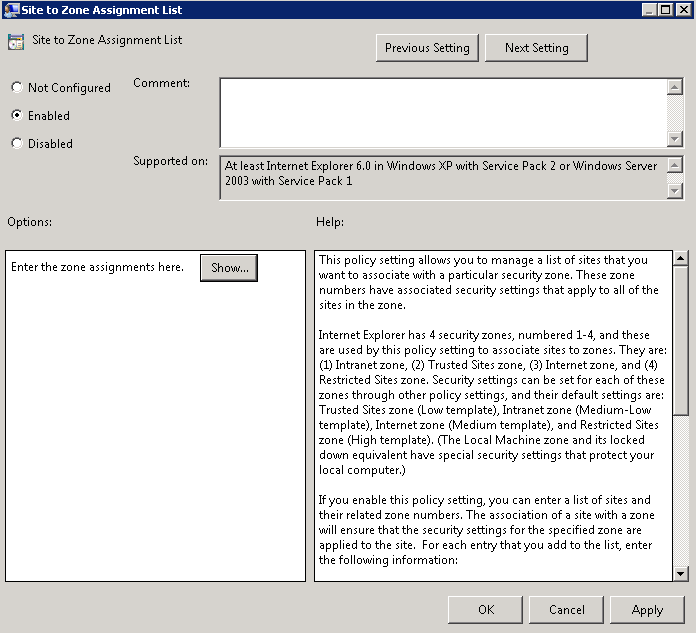
- The second policy is Computer Configuration > Policies > Administrative Templates > Internet Explorer > Internet Control Panel > Security Page > Site to Zone assignment list
- Select Enabled
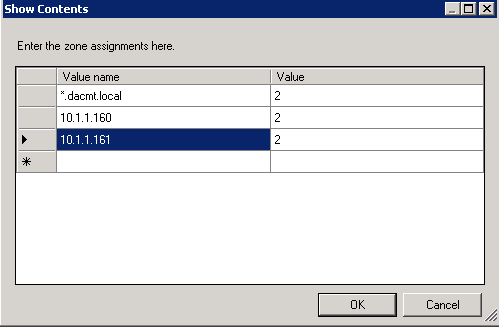
- Then click Show. Note I have entered the domain name and the 2 servers which hold my bginfo script by IP Address
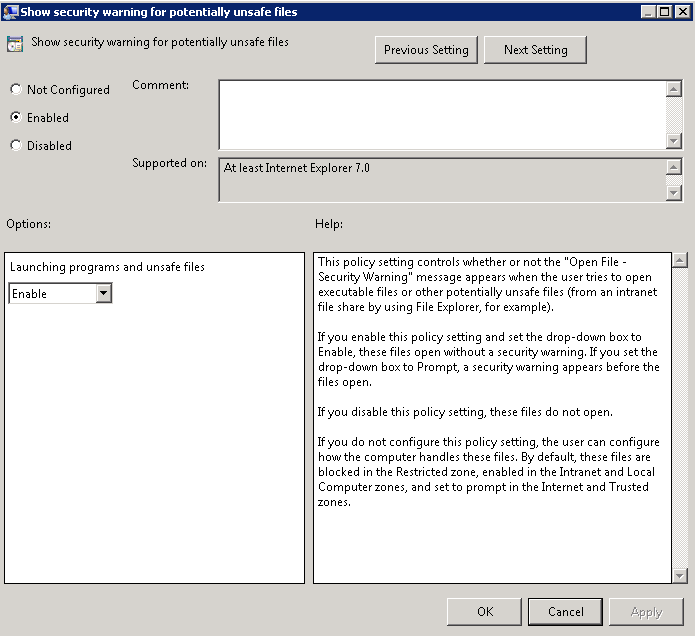
- The 3rd Policy is Computer Configuration > Policies > Administrative Templates > Internet Explorer > Internet Control Panel > Security Page > Trusted Site Zone > Show security warning for potentially unsafe files
- Select Enabled
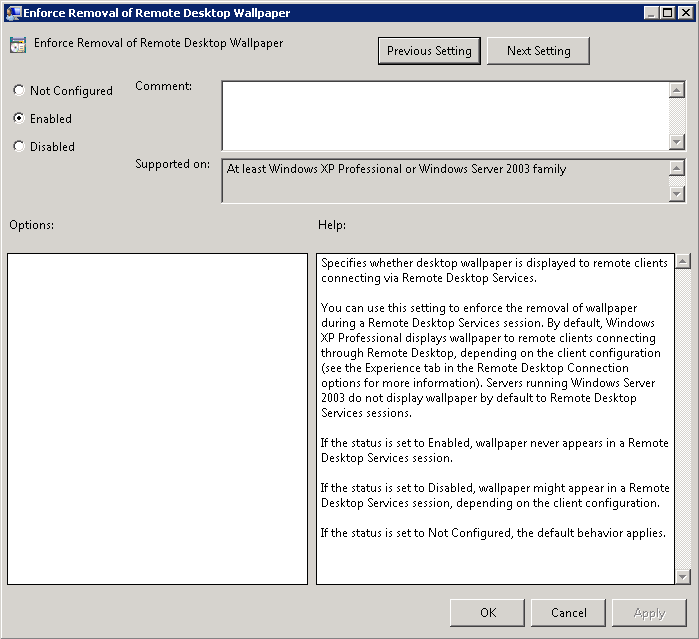
- There is also a GPO setting unrelated to the 3 GPOs we have just covered called Computer Configuration > Policies > Administrative Templates > Windows Components > Remote Desktop Services > Remote Desktop Session Host > Remote Session Environment > Enforce removal of Remote Desktop Wallpaper > Enabled
- Personally I don’t use this but it was mentioned somewhere else so may be relevant to someone!
Useful GPO Tutorial on Youtube
http://www.youtube.com/watch?v=Dq0jbRkvNDA
Keep Data in Sight
BGInfo’s customization and extensibility let you use it to display commonly accessed data on your own desktop or to perform thorough inventories of all the computers on your network. You can download the tool and get more information about its operation at
http://technet.microsoft.com/en-gb/sysinternals/bb897557.aspx
You can also do the following
http://www.redkitten.co.uk/windows-server/using-bginfo-on-windows-server-2008/









Leave a Reply